
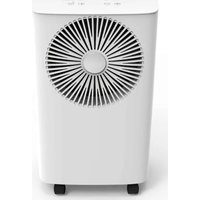
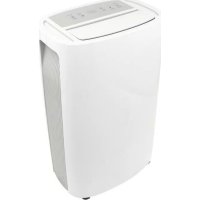
TD-2412 - Dehumidifier Toyotomi - Free user manual and instructions
Find the device manual for free TD-2412 Toyotomi in PDF.

| Product type | Dehumidifier |
| Brand | Toyotomi |
| Model | TD-2412 |
| Refrigerant | R290 (flammable) |
| Operating modes | Constant humidity, Automatic, Dry cloth, Ventilation, Continuous |
| Built-in WiFi | Yes (Smart Life app) |
| Ionizer | Yes |
| Child lock | Yes |
| Water tank | Yes (level window) |
| Continuous drainage | Yes (1.5 m hose included) |
| Filter | Washable, clean every 2 weeks |
| Automatic defrost | Yes |
| Automatic restart | Yes (after power outage) |
| Compressor protection | Yes (pause after 8h continuous operation) |
| Minimum room area | 4 m² |
| Operating temperature | 5 °C to 35 °C |
| Minimum distance from walls | 50 cm |
| Power supply | 220-240 V ~ 50 Hz (estimated) |
Frequently Asked Questions - TD-2412 Toyotomi
User questions about TD-2412 Toyotomi
0 question about this device. Answer the ones you know or ask your own.
Ask a new question about this device
Download the instructions for your Dehumidifier in PDF format for free! Find your manual TD-2412 - Toyotomi and take your electronic device back in hand. On this page are published all the documents necessary for the use of your device. TD-2412 by Toyotomi.
USER MANUAL TD-2412 Toyotomi
natural_image
Line drawing of a rectangular electronic device with ventilation grilles and a control panel (no text or symbols)AFFUGTER
LUFTENTFEUCHTER
DESHUMIDIFICADOR
DÉSHUMIDIFICATEUR D'AIR
DEHUMIDIFIER
DEUMIDIFICATORE
LUCHTONTVOCHTIGER
DESUMIDIFICADOR
TD-2412
BETJENINGSVEJLEDNING DANSK
OPERATING MANUAL ENGLISH
HVAD GARANTIEN DÆKKER
natural_image
Symbol of a waste bin with crossed lines indicating no waste, and a solid black rectangle below (no text or labels)natural_image
Line drawing of hands operating a refrigerant device with a handle (no text or symbols)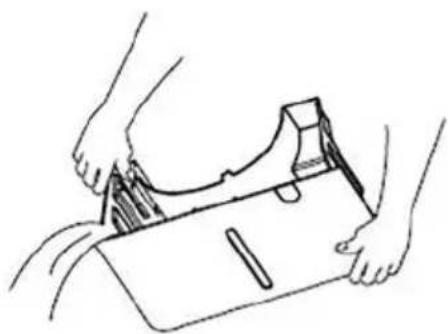
natural_image
Line drawing of hands holding a small object, possibly a tool or device, with no visible text or symbols.Kontinuerligt afløb
natural_image
Simple line drawing of a water dispenser with a coiled hose and control panel (no text or symbols)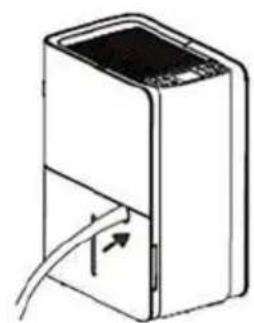
natural_image
Diagram of a device with a rectangular body and cable, showing internal wiring (no text or symbols)RENG∅RING OG VEDLIGEHOLDELSE
natural_image
Line drawing of a server rack unit with internal components (no text or symbols)OPBEVARING OG PLEJE
PROBLEM MED VANDLÆKAGE
WAS DIE GARANTIE ABDECKT
natural_image
Symbol of a recycling bin with crossed x- and y-axes, no text or labels presentnatural_image
Technical line drawing showing a device being processed with a tool, alongside its hands holding a package (no text or symbols present)natural_image
Two technical illustrations of household appliances: a water heater and a portable device with tubing (no text or symbols)natural_image
Line drawing of a computer tower case with ventilation slots and internal components (no text or symbols)LAGERUNG UND PFLEGE
natural_image
Symbol of a trash bin with crossed lines indicating no waste or restriction, and a solid black rectangle below (no text or labels)natural_image
Illustration showing two steps of a device: one with hand inserting a component into a box, the other with hands holding a package (no text or symbols present)Drenaje continuo
natural_image
Two technical line drawings of household appliances: a front-mounted water heater and a second-mounted device with cable (no text or symbols)LIMPIEZA Y MANTENIMIENTO
natural_image
Line drawing of a white electronic device with ventilation slots and a mesh grille (no text or symbols)natural_image
Symbol of a recycling bin with crossed x- and y-axes, no text or labels presentnatural_image
Illustration showing two steps of a device being inserted into a box, with hands adjusting the part (no text or symbols present)Drainage en continu
natural_image
Technical line drawings of a portable water heater and its internal structure with cable (no text or symbols)NETTOYAGE ET MAINTENANCE
natural_image
Line drawing of a white electronic device with a ventilation grille and internal components (no text or symbols)RANGEMENT ET ENTRETIEN
AUCUNE SOURCE D'INFLAMMATION
Thank you for choosing a TOYOTOMI Dehumidifier to provide you and your family with your home comfort needs. This owner's manual will provide you with valuable information necessary for the proper care and maintenance of your new dehumidifier. Please take a few moments to read the instructions thoroughly and familiarize yourself with all the operational aspects of this dehumidifier.
WARRANTY
This appliance has been manufactured to high quality standards and subjected to strict quality controls. It comes with a 2-year factory warranty from the date of purchase. In Spain and Portugal, the minimum legal warranty period is 3 years.
WHAT THE WARRANTY COVERS
This warranty covers material and manufacturing defects that occur under normal household use of the appliance, provided it is used in accordance with the instructions in this manual.
WHAT THE WARRANTY DOES NOT COVER
The warranty does not apply to:
- Damage caused by improper use or incorrect installation
- Normal wear and tear, such as on filters or seals
• Repairs carried out by unauthorized service centers - Damage resulting from accidents, drops, or overloading the appliance
- Commercial or industrial use, unless explicitly stated otherwise
WHAT TO DO IN CASE OF A DEFECT
If your appliance is defective, please contact the seller where you purchased it. They will assist you with your warranty claim. Keep your proof of purchase (receipt or invoice) as it may be required.
natural_image
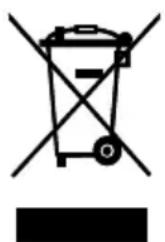
Symbol of a recycling bin with crossed lines and a blank rectangular base (no text or labels)This marking indicates that this product should not be disposed with other house hold wastes throughout the EU. To prevent possible harm to the environment or human health from uncontrolled waste disposal, recycle it responsibly to promote the sustainable reuse of material resources. To return your used device, please use the return and collection systems or contact the retailer where the product was purchased. They can take this product for environmental safe recycling.
Refrigerant R290: Global Warming Potential (GWP) 3
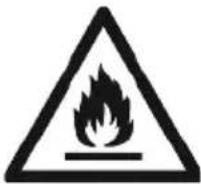
Appliance filled with flammable gas R290.
Before install and use the appliance, read the owner's manual first.

Before install the appliance, read the installation manual first.

Before repair the appliance, read the service manual first.

DANGER Indicates a hazardous situation that if not avoided will result in death or serious injury.

WARNING Indicates a hazardous situation that if not avoided will result in death or serious injury.

CAUTION Indicates a hazardous situation that if not avoided may result in minor or moderate injury.
NOTICE Indicates important but not hazard related information, used to indicate risk of property damage.
Reasons of exception
The manufacturer is not liable if personal injury or property damage is caused by the following causes:
- Destruction of the product due to misuse.
- Switch, stay or operate the unit in conjunction with another device without following the instructions in the manufacturer's manual.
-
When the defect is caused by direct exposure of the product to corrosive gas.
-
Due to poor transport of the product.
-
Due to operation, repair and stay of the product without following the instructions of the manual.
-
If the problem came from causes related to products from other manufacturers.
-
Damage is caused by natural disasters, misuse of the environment or force majeure. If the device needs maintenance, contact your dealer or local service center to have it repaired at the outset. The device must be serviced by an authorized technician. Otherwise, it may cause serious injury or death. When refrigerant leaks or requires evacuation during installation, maintenance or disassembly, should be done by certified professionals or otherwise comply with local laws and regulations.
THE REFRIGERANT
- To realize the function of the dehumidifier, a special refrigerant circulates in the system. The used refrigerant is the fluoride R290, which is specially cleaned. The refrigerant is flammable and inodorous. Furthermore, it can lead to explosion under certain conditions.
- Compared to common refrigerants, R290 is a nonpolluting refrigerant with no harm to the ozonosphere. The influence upon the greenhouse effect is also lower. R290 has got very good thermodynamic feature which leads to high energy efficiency. The unit therefore needs less filling.
- Please refer to the nameplate for the charging quantity of R290.
WARNING
• Appliance is filled with flammable gas R290.
- Appliance shall be installed, operated and stored in a room with a floor area larger than 4 m ^2 .
- The appliance should be stored in a room without continuously operating ignition sources e.g. open flames, an operating gas appliance or an operating electric heater.
- The appliance shall be stored in a well-ventilated area where the room size corresponds to the room area as specified for operation.
- The appliance shall be stored so as to prevent mechanical damage from occurring.
- DO NOT place any obstructions on the ventilation openings.
• DO NOT pierce or burn the appliance.
- Be aware that refrigerant is odorless.
- DO NOT use means to accelerate the defrosting process or to clean, other than those recommended by the manufacturer.
- Service of the appliances must be performed only by a qualified licensed technician according to the manufacturer's instructions.
- In case of necessary repair, kindly contact the authorized Service. Any repair carried out by unqualified personnel may be dangerous and in this case product warranty will be invalid.
• Compliance with national gas regulations shall be observed.
SAFETY PRECAUTIONS
- Please read these instructions carefully to prevent personal injury or property damage to users and others. Understand the contents and be sure to follow the recorded safety precautions.
- DO NOT operate the machine with wet hands, DO NOT rinse the dehumidifier with water, and DO NOT place it near a water source.
• DO NOT insert your hand into the air outlet or intake. - DO NOT place heavy objects on the air outlet or sit directly at the air outlet.
- DO NOT throw or place any items into the dehumidifier.
- DO NOT use the dehumidifier near flammable or explosive gases, and DO NOT place it near a heat source.
• DO NOT turn off the machine directly with the power switch; when
not in use for an extended period, please turn off the power switch.
- If there are any abnormal occurrences (such as a burning smell), stop operation immediately and disconnect the power supply.
- Disconnect the power supply during thunderstorms.
- DO NOT replace the power cord without authorization, connect the power cord halfway, or use it in parallel with other highpower electrical appliances.
- DO NOT disassemble, modify, repair, or clean internal components without authorization.
- When cleaning, be sure to stop the operation and turn off the power switch.
POINTS FOR ATTENTION
- Place the machine on a flat and solid surface.
- DO NOT immerse the machine in water or place it near a water source.
- If the power cord or other components are damaged, or if there is any abnormal situation, DO NOT operate the machine. Contact the manufacturer's after-sales service or the place of purchase.
- This machine is only for indoor dehumidification and should not be used for other purposes.
- Use this product under the specified power supply voltage.
• DO NOT place heavy objects on the machine.
• DO NOT tilt the machine to prevent damage to the compressor. - DO NOT insert any objects into the machine to avoid causing malfunctions.
- When the machine needs to be restarted after shutting down, please wait for 3 minutes before turning it on normally.
- If you use power strips or other bases to run the machine, ensure that they comply with national safety regulations.
- If the machine is accidentally tilted or tipped over, or after long-distance transportation, it needs to be placed upright for 4 hours before turning it on.
- DO NOT use the machine with a high-power appliance sharing the same socket.
-
Please use this machine in an environment with a room temperature range of 5°C to 35°C.
-
Please DO NOT discard packaging materials carelessly; recycling is more in line with environmental awareness.
- This equipment is not intended for use by persons with reduced physical, sensory, or mental capabilities, or persons (including children) who lack experience and knowledge, unless they are supervised or instructed by a person responsible for their safety. Children should not play with this device unsupervised.
- To ensure optimal efficiency, this dehumidifier must be used in a closed environment. Close all doors, windows, and other entrances to the room.
- Avoid poor heat dissipation by keeping the machine at least 50cm away from the wall.
- Recycling: This marking indicates that this product should not be disposed of with other household waste throughout the EU. To prevent possible harm to the environment or human health from uncontrolled waste disposal, recycle it responsibly to promote the sustainable reuse of material resources. To return your used device, please use the return and collection systems or contact the retailer where the product was purchased. They can take this product for environmentally safe recycling.
- Servicing should only be performed as recommended by the equipment manufacturer. Maintenance and repairs requiring the assistance of other skilled personnel should be carried out under the supervision of a person competent in the use of flammable refrigerants.
SETTING
1. Power

In the standby state, press the power button to turn on, the operation indicator lights up, the LED shows ambient humidity. In the power-on state, press the power button to turn off, the running indicator light goes off and the compressor stops immediately.
2. Mode Select

Constant Humidity Mode - Auto Mode - Cloth Dry Mode - Air Ventilation Mode - Continuous Mode; Press button once to switch the mode from one to an other.
2.1 Constant Humidity Mode

When the constant humidity icon lights up, the display will show the current set humidity. After 5 seconds without further operation, it will display the ambient humidity. Use the + or - buttons to select your desired humidity level; the initial setting is 30% . Each press of the + or - buttons adjusts the humidity by 5% (long pressing the + or - buttons can rapidly increase or decrease the humidity level). The adjustable range is between 30% and 90% . After setting the humidity, the display will revert to showing the real-time ambient humidity after 5 seconds. Fan speed can be adjusted under constant humidity mode.
2.2 Auto Mode A
When the auto mode icon lights up, the display will show the current ambient humidity. The humidity is automatically maintained between 45% and 55%. The default fan speed is low. Both the fan speed and target humidity level cannot be adjusted.
Note: The humidity sensor detects the current humidity of the surrounding environment. Due to the high sensitivity of the sensor, it is normal for the ambient humidity to vary by a few percentage points.
2.3 Cloth Dry Mode

When the cloth dry mode icon lights up, the display will show the current ambient humidity. The default fan speed is high. Both the fan speed and target humidity level cannot be adjusted. The machine will continue to run until the water tank is full and then it will shut down.
2.4 Air Ventilation Mode
When the air ventilation mode icon lights up, the display will show the current ambient humidity. In this mode, the compressor does not run; only the fan operates to ensure fresh air circulation. The ionizer automatically turns on. The fan speed can be adjusted, but the humidity level cannot be adjusted.
2.5 Continuous Mode
The display will show “CO” and switch to the ambient humidity after 5 seconds. The fan speed can be adjusted. When the ambient humidity is lower than 30%, the machine will continue to run until the water tank is full and then shut down.
3. Timer Setting

Press the timer button to set the 0-24 hour timer function, with 1-hour intervals.
3.1 Turn Off Timer
When the machine is in the power-on state, press the timer button, the display will show timer icon and the setting value "00", you can press or hold the "+" or "-" button to select the time off by 1 hour increments up to 24 hours. The selected time will be completed in 5 seconds and the system will automatically revert back to display the previous humidity setting.
3.2 Turn On Timer
When the machine is in the standby state, press any button to wake up the timer button to light up, press the timer button ☑ the display will show timer icon and the setting value "00", you can press or hold the "+" or "-" button to select the time on by 1 hour increments up to 24 hours. The selected time will be completed in 5 seconds without further operation.
NOTICE
- If you press the power button before the timer expires, the timer setting will be canceled.
- If the timer has been set, press the timer button again to reset the timer.
- To cancel any timer settings, press the timer button twice continuously, and the timer icon on the display will turn off.
4. WiFi Setting
Use your mobile phone to scan the QR code below to download the «Smart Life» app. You can also search for «smart life» in the APP store or Google Play to install the APP. Open the «Smart Life» app, click «register», use your phone number or email to register the «Smart Life» account, and then log in to the App.

In the power-on state, press and hold the Timer Button for about 5 seconds to enter the WiFi network configuration function. The display icon will flash and light up.
Slow flash: Compatible with the configuration mode, waiting for the configuration.
Quick flash: Waiting for networking.
Normally on: The distribution network connection is successful.
Normally off: The machine is in standby state, or the network is not connected, or WiFi module signal is not detected.
Note: In standby mode, the default WiFi indicator light is off.
ADD DEVICE
1.) Connect the mobile phone to the home wireless network, and turn on the mobile phone Bluetooth (please select 2.4GHz WiFi network).
2.) Open the «Smart Life» APP.
3.) Enter the homepage of the «Smart Life» APP. Click «+» to select to add a device, the APP will display manual addition and automatic discovery.
4.) Automatic discovery: When the corresponding authority is turned on, the device can be automatically discovered, and the device needs to be in the network configuration state and turned on.
5.) Manually add: select the name corresponding to the product, WiFi+Bluetooth mode.
1) Bluetooth configuration:
When confirming that the WiFi indicator of the device is flashing quickly, click OK, and then wait for the connection. (Recommended,) When «Successfully add 1 device» appears, it means the connection has been completed and your device will be listed in your APP list.
2) Hotspot configuration network:
Click on the WiFi quick connection in the upper right corner to select the hotspot distribution network (compatibility mode), Confirm that the WiFi indicator of the device flashes slowly, click OK, and enter your home WiFi and WiFi password. Next, click to connect to go to the WLAN setting interface of the phone, and then select the Wi-Fi network «SmartLife_XXXX» to connect it. Your device will be listed in your APP list. Now, you can control your smart device through the mobile APP anytime and anywhere (make sure your mobile phone and smart device are connected to the network, make sure your router name is changed to SmartLife_XXXX).
5. Ambient Light Button
Press this button to adjust the brightness of the entire display panel, which includes ambient lighting. The brightness adjustment is synchronized. If the display panel lights are turned off, the ambient lighting will also turn off. The ambient lighting adjusts automatically according to the environmental humidity and cannot be adjusted manually.
Press once to switch the light brightness from one to another as following cycle. Full Light (100% brightness) -Dim Light (50% brightness) - Light Off/ Dim Light for a few seconds when touching the control panel buttons.
Status Indicator - Ambient humidity status
BLUE: Humidity <45%
GREEN: 45% < Humidity <65%
ORANGE: Humidity >65%
RED: Water full
- When the ambient light is «orange», it indicates that the ambient humidity is high, with levels exceeding 65%.
- When the ambient light is «green», it signals that the ambient humidity is comfortable, ranging between 45% and 65%.
- When the ambient light is «blue», it signifies that the ambient humidity is low, measuring below 45%
- When the ambient light is «red», it signifies that the water tank is full.
6. Fan Speed & Child Lock Button
6.1 Press the button to light up the fan speed icon \~ or ≈ fan speed can be switched between low and high. In constant humidity mode, air ventilation mode and continuous mode, the fan speed can be adjusted. In other modes, the fan speed cannot be adjusted.
- Low Fan Speed \~
- High Fan Speed ≈
6.2 Long Press and hold the Fan Speed mode for around 3 seconds to turn on or off the child lock state, child lock icon will show or cancel on the display.
7. UP + and Down - Button
Press the key at constant humidity mode to increase/reduce the setting humidity. Press it at timing mode to adjust timing ON/OFF time.
8. Ionizer Setting
Press the button to turn on or off lonizer.
Water Tank Full or Removed Alarm
When the water tank is full or removed, the indicator light will turn red, and the compressor will stop working, but the fan will remain on for 3 minutes to ensure proper heat dissipation. After 3 minutes, the machine will completely stop working and emit three beeps. The display will show "P1". Except for the on/off button, there is no action when pressing other buttons. After the water tank is emptied and reset, the indicator light goes out, the machine will resume the state before the water is full or removed.
H5 Automatic Defrost
Due to the working principle of the compressor, frost may form on the internal coils of this product. When frost forms, the internal compressor shuts down, and the fan continues to run until the frost melts. Once the frost on the internal coils has been removed and dried, the compressor or fan will automatically restart, resuming normal operation.
More Safety
Auto Restart Function
This product is equipped with an automatic restart function. In the event of a power outage, the dehumidifier will automatically restore its previous settings once power is restored.
Compressor Protection Function
To extend the product's life, the compressor will rest for 8 minutes after continuous operation for 8 hours and then restart.
DRAINAGE INSTRUCTIONS
Water Tank Drainage
-
When the water is full of alarm, the ambient light will be red and the display shows «P1», and the water volume can be checked through the water level window of the water tank.
-
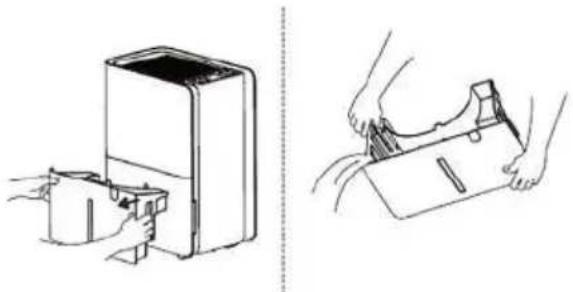
Pull out the water tank and carry the water tank to the drainage area.
natural_image
Line drawings showing a device being placed into a container and then to handle a small object (no text or symbols present)Continuous drainage
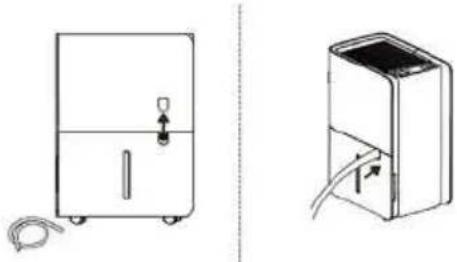
- Product is equipped with drainage socket.
- 1,5 m hose is provided.
- Remove the decorative cover from the tank and insert the hose into the drain.
natural_image
Two technical line drawings of a water heater device, one with a handle and cable, the other with a lid and plug (no text or symbols)CLEANING AND MAINTENANCE
-
Before cleaning and maintaining the machine, ensure the machine is turned off, and unplug the power plug to prevent electric shock.
-
Never immerse the machine in water or any liquid.
-
Avoid using chemical solvents such as benzene, alcohol, or gasoline, as they can cause damage or deformation to the machine shell.
-
Use a soft, damp cloth to clean the shell.
Cleaning of the filter
This machine is equipped with a washable filter, and it should be cleaned every two weeks. A blocked filter can reduce the machine's efficiency due to dust accumulation.
natural_image
Line drawing of a white industrial air conditioner unit with ventilation slots and a closed lid (no text or symbols)STORAGE AND CARE
If you do not use this product for an extended period:
- Turn off the product and unplug it.
- Empty the water tank and allow it to dry. If a continuous drain hose is connected, unplug the hose, let it dry, and cap the drain connection.
- Remove the filter, clean it with water, let it dry, and then reinstall it.
- Make sure all dehumidifier parts and accessories are dry before storing.
• Before storage, cover with a plastic bag to avoid dust accumulation on the surface or scratches the body.
• It is recommended to use a cable wrap to store the power cord to ensure that the cord does not kink.
• Store the product upright in a dry environment and avoid direct sunlight.
TROUBLESHOOTING
Note: Not all the following problems are malfunctions.
| PROBLEM POSSIBLE CAUSES | |
| Dehumidifier does not operate.Controls cannot be set. | Unit is operating in an area where temperature is higher than 32°C or lower than 5°C.Bucket is full. |
| Noise suddenly rises during operation. | Noise will rise if compressor has just started.Power supply problem.Unit is placed on uneven floor. |
| Humidity does not drop. | Area to be dehumidified is too large. The capacity of your dehumidifier may not be adequate.Doors are open.There might be some device producing vapor in the room |
| Little or no effect in dehumidifying. | Room temperature is too low.Humidity level may be improperly set.If unit is operating in a room where temperature is from 5 – 15°C, it will start to defrost automatically.Compressor will stop for a brief period of time (fan will operate in high fan speed). When unit finishes defrosting, it will be back to normal operation. |
| When first operated, the air emitted has musty-odor. | Due to temperature rising of heat exchanger, the air may have some strange smell at the beginning. |
| Unit makes noise. | There might be some noise if unit is operating on wooden or uneven floor. |
| Swooshing sound is heard. | This is normal. This is the sound of the flow of refrigerant. |
PROBLEM OF WATER LEAKAGE
| PROBLEM POSSIBLE CAUSE | POSSIBLE CAUSE | |
| When using drain hose, there is water in the bucket. | Check the drainage joint. | Connect the drainage joint properly. |
| Drainage hose is not properly installed. | Remove obstacle from the drain hose.Remove the drain hose and replace it. Be sure that the hose is properly installed. |
DEHUMIDIFIER DOES NOT START
| PROBLEM POSSIBLE CAUSE | SOLUTION | |
| Power indicator does not lit when power is connected. | • Power is not supplied for the dehumidifier or the power plug is not well inserted. | • Check if power is lost. If yes, wait for the power to be restored.• If not, check whether the power circuit or power socket has been damaged.• Check whether power plug is loosen.• Check whether power cord is damaged. |
| • Fuse is blown. • Replace the fuse. | ||
| Bucket full indicator is lit up. | • Bucket is not properly placed.• Water if full in the bucket.• Bucket has been removed. | • Empty the bucket and replace it properly. |
| Unit can function normally but it cannot start up. | • Humidity is set too high. | • If you want drier air, press humidity button to lower the figure from unit to dehumidify continuously. |
DEHUMIDIFIER DOES NOT DRY AIR AS INTENDED
| PROBLEM POSSIBLE CAUSE | SOLUTION | |
| Bad dehumidifying performance. | Check whether there is any obstacle around the unit. | Make sure there is no curtain, shutter or furniture that blocks the dehumidifier. |
| Air filter is dusty and blocked. | Clean the filter. | |
| Door and windows are opened. | Close all doors and windows and other openings to the outside. | |
| Room temperature is too low. | Warm temperature is good for dehumidification. Low temperature will reduce unit's working effect. This unit should be working in a place where temperature is above 5°C. |
ERROR CODE
| Error Code | Technical Code | Solution |
| Sensor failure | E1 | Cut off the power for half an hour and then restart the machine after it returns to normal operating temperature. |
| E2 | ||
| Overheat L3 | ||
| Too cold L4 | ||
| Initial Defects C8 Please contact our helpful service center. | ||
| Environmental Relative Humidity ≤30% | L0 | In this state, the machine works normally. The machine will resume operation after the relative humidity rises. |
| Environmental Relative Humidity ≥90% | HI | In this state, the machine works normally. After the relative humidity drops, the normal ambient humidity will be displayed. |
SPECIALIST'S MANUAL
The dehumidifier should only be repaired and serviced by an authorized licensed technician.
a. Any person who is involved with working on or braking into a refrigerant circuit should hold a current valid certificate from an industry-accredited assessment authority, which authorizes their competence to handle refrigerants safely in accordance with an industry recognized assessment specification.
b. Servicing shall only be performed as recommended by the equipment manufacturer. Maintenance and repair requiring the assistance of other skilled personnel shall be carried out under the supervision of the person competent and officially authorized in the use of flammable refrigerants.
SAFETY PREPARATION WORK BEFORE INSTALLATION
The maximum refrigerant charge amount is shown on the following table a.
Note: Please refer to the nameplate for the charging quantity of R290.
| Room area ( m^2 ) 4 11 15 | |||
| Maximum charge (kg) <0.152 0.2 | 25 0.304 |
Table a – Maximum charge (kg)
Prior to beginning work on systems containing flammable refrigerants, safety checks are necessary to ensure that the risk of ignition is minimized. For repair to the refrigerating system, the following precautions shall be complied with prior to conducting work on the system. Work procedure shall be undertaken under a controlled procedure so as to minimize the risk of a flammable gas or vapour being present while the work is being performed.
DETECTION OF FLAMMABLE REFRIGERANTS
Under no circumstances shall potential sources of ignition be used in the searching for or detection of refrigerant leaks. A halide torch (or any other detector using a naked flame) shall not be used.
ENVIRONMENT CHECKING
All maintenance staff and others working in the local area shall be instructed on the nature of work being carried out. Work in confined spaces shall be avoided. The area around the workspace shall be sectioned off. Ensure that the conditions within the area have been made safe by control of flammable material.
CHECKING FOR PRESENCE OF REFRIGERANT
The area shall be checked with an appropriate refrigerant detector prior to and during work, to ensure the technician is aware of potentially toxic or flammable atmospheres. Ensure that the leak detection equipment being used is suitable for use with all applicable refrigerants, i.e. non-sparking, adequately sealed or intrinsically safe.
NO IGNITION SOURCES
No person carrying out work in relation to a refrigeration system which involves exposing any pipe work shall use any sources of ignition in such a manner that it may lead to the risk of fire or explosion. All possible ignition sources, including cigarette smoking, should be kept sufficiently far away from the site of installation, repairing, removing and disposal, during which refrigerant can possibly be released to the surrounding space. Prior to work taking place, the area around the equipment is to be surveyed to make sure that there are no flammable hazards or ignition risks. “No Smoking” signs shall be displayed.
PRESENCE OF FIRE EXTINGUISHER
If any hot work is to be conducted on the refrigeration equipment or any associated parts, appropriate fire extinguishing equipment shall be available to hand. Have a dry powder or CO2 fire extinguisher adjacent to the charging area.
VENTILATED AREA
Ensure that the area is in the open or that it is adequately ventilated before breaking into the system or conducting any hot work. A degree of ventilation shall continue during the period that the work is carried out. The ventilation should safely disperse any released refrigerant and preferably expel it externally into the atmosphere.
CHECKS TO THE REFRIGERATION EQUIPMENT
Where electrical components are being changed, they shall be fit for the purpose and to the correct specification. At all times the manufacturer's maintenance and service guidelines shall be followed. If in doubt, consult the manufacturer's technical department for assistance. The following checks shall be applied to installations using flammable refrigerants:
- The actual refrigerant charge is in accordance with the room size within which the refrigerant containing parts are installed.
- The ventilation machinery and outlets are operating adequately and are not obstructed.
- If an indirect refrigerating circuit is being used, the secondary circuit shall be checked for the presence of refrigerant.
- Marking to the equipment continues to be visible and legible. Markings and signs that are illegible shall be corrected.
CHECKS TO ELECTRICAL DEVICES
Repair and maintenance to electrical components shall include initial safety checks and component inspection procedures. If a fault exists that could compromise safety, then no electrical supply shall be connected to the circuit until it is satisfactorily dealt with. If the fault cannot be corrected immediately but it is necessary to continue operation, an adequate temporary solution shall be used. This shall be reported to the owner of the equipment so all parties are advised. Initial safety checks shall include:
• That capacitors are discharged: this shall be done in a safe manner to avoid possibility of sparking.
- That no live electrical components and wiring are exposed while charging, recovering or purging the system.
- That there is continuity of earth bonding.
REPAIRS TO SEALED COMPONENTS
During repairs to sealed components, all electrical supplies shall be disconnected from the equipment being worked upon prior to any removal of sealed covers, etc. If it is absolutely necessary to have an electrical supply to equipment during servicing, then a permanently operating form of leak detection shall be located at the most critical point to warn of a potentially hazardous situation. Particular attention shall be paid to the following to ensure that by working on electrical components, the casing is not altered in such a way that the level of protection is affected. This shall include damage to cables, excessive number of connections, terminals not made to original specification, damage to seals, incorrect fitting of glands, etc.
- Ensure that the apparatus is mounted securely.
- Ensure that seals or sealing materials have not degraded to the point that they no longer serve the purpose of preventing the ingress of flammable atmospheres.
The parts should be replaced according to the manufacturer's instructions.
NOTE: The use of silicon sealant can inhibit the effectiveness of some types of leak detection equipment. Intrinsically safe components do not have to be isolated prior to working on them.
REPAIR TO INTRINSICALLY SAFE COMPONENTS
Do not apply any permanent inductive or capacitance loads to the circuit without ensuring that this will not exceed the permissible voltage and current permitted for the equipment in use. Intrinsically safe components are the only types that can be worked on while live in the presence of a flammable atmosphere. He test apparatus shall be at the correct rating. Replace components only with parts specified by the manufacturer. Other parts may result in the ignition of refrigerant in the atmosphere from a leak.
CABLING
Check that cabling will not be subject to wear, corrosion, excessive pressure, vibration, sharp edges or any other adverse environmental effects. The check shall also take into account the effects of aging or continual vibration from sources such as compressors or fans.
LEAK DETECTION METHODS
The following leak detection methods are deemed acceptable for all refrigerant systems.
Electronic leak detectors may be used to detect refrigerant leaks but, in the case of flammable refrigerants, the sensitivity may not be adequate, or may need re-calibration. (Detection equipment shall be calibrated in a refrigerantfree area.) Ensure that the detector is not a potential source of ignition and is suitable for the refrigerant used. Leak detection equipment shall be set at a percentage of the LFL of the refrigerant and shall be calibrated to the refrigerant employed, and the appropriate percentage of gas (25 % maximum) is confirmed. Leak detection fluids are suitable for use with most
refrigerants but the use of detergents containing chlorine shall be avoided as the chlorine may react with the refrigerant and corrode the copper pipe-work. If a leak is suspected, all naked flames shall be removed/extinguished. If a leakage of refrigerant is found which requires brazing, all of the refrigerant shall be recovered from the system, or isolated (by means of shut off valves) in a part of the system remote from the leak. For appliances containing flammable refrigerants, oxygen free nitrogen (OFN) shall then be purged through the system both before and during the brazing process.
REMOVAL AND EVACUATION
When breaking into the refrigerant circuit to make repairs – or for any other purpose – conventional procedures shall be used. However, for flammable refrigerants it is important that best practice is followed since flammability is a consideration. The following procedure shall be adhered to:
- Remove refrigerant.
- Purge the circuit with inert gas.
- Evacuate.
- Purge again with inert gas.
- Open the circuit by cutting or brazing.
The refrigerant charge shall be recovered into the correct recovery cylinders. For appliances containing flammable refrigerants, the system shall be “flushed” with OFN to render the unit safe. This process may need to be repeated several times. Compressed air or oxygen shall not be used for purging refrigerant systems. For appliances containing flammable refrigerants, flushing shall be achieved by breaking the vacuum in the system with OFN and continuing to fill until the working pressure is achieved, then venting to atmosphere, and finally pulling down to a vacuum. This process shall be repeated until no refrigerant is within the system. When the final OFN charge is used, the system shall be vented down to atmospheric pressure to enable work to take place. This operation is absolutely vital if brazing operations on the pipe-work are to take place. Ensure that the outlet for the vacuum pump is not close to any ignition sources and that ventilation is available.
CHARGING PROCEDURES
In addition to conventional charging procedures, the following requirements shall be followed.
- Ensure that contamination of different refrigerants does not occur when using charging equipment. Hoses or lines shall be as short as possible to minimise the amount of refrigerant contained in them.
• Cylinders shall be kept upright. - Ensure that the refrigeration system is earthed prior to charging the system with refrigerant.
- Label the system when charging is complete (if not already).
- Extreme care shall be taken not to overfill the refrigeration system. Prior to recharging the system, it shall be pressure-tested with the appropriate purging gas. The system shall be leak-tested on completion of charging but prior to commissioning. A follow up leak test shall be carried out prior to leaving the site.
DECOMMISSIONING
Before carrying out this procedure, it is essential that the technician is completely familiar with the equipment and all its detail. It is recommended good practice that all refrigerants are recovered safely. Prior to the task being carried out, an oil and refrigerant sample shall be taken in case analysis is required prior to re-use of reclaimed refrigerant.
It is essential that electrical power is available before the task is commenced.
a. Become familiar with the equipment and its operation.
b. Isolate system electrically.
c. Before attempting the procedure, ensure that:
- Mechanical handling equipment is available, if required, for handling refrigerant cylinders.
- All personal protective equipment is available and being used correctly.
- The recovery process is supervised at all times by a competent person.
- Recovery equipment and cylinders conform to the appropriate standards.
d. Pump down refrigerant system, if possible.
e. If a vacuum is not possible, make a manifold so that refrigerant can be removed from various parts of the system.
f. Make sure that cylinder is situated on the scales before recovery takes place.
g. Start the recovery machine and operate in accordance with manufacturer's instructions.
h. Do not overfill cylinders. (No more than 80 % volume liquid charge.)
i. Do not exceed the maximum working pressure of the cylinder, even temporarily.
j. When the cylinders have been filled correctly and the process completed, make sure that the cylinders and the equipment are removed from site promptly and all isolation valves on the equipment are closed off.
k. Recovered refrigerant shall not be charged into another refrigeration system unless it has been cleaned and checked.
LABELING
Equipment shall be labelled stating that it has been de-commissioned and emptied of refrigerant. The label shall be dated and signed. For appliances containing flammable refrigerants, ensure that there are labels on the equipment stating the equipment contains flammable refrigerant.
RECOVERY
When removing refrigerant from a system, either for servicing or decommissioning, it is recommended good practice that all refrigerants are removed safely. When transferring refrigerant into cylinders, ensure that only appropriate refrigerant recovery cylinders are employed. Ensure that the correct number of cylinders for holding the total system charge are available. All cylinders to be used are designated for the recovered refrigerant and labelled for that refrigerant (i.e. special cylinders for the recovery of refrigerant). Cylinders shall be complete with pressure-relief valve and associated shut-off valves in good working order. Empty recovery cylinders are evacuated and, if possible, cooled before recovery occurs. The recovery equipment shall be in good working order with a set of instructions concerning the equipment that is at hand and shall be suitable for the recovery of all appropriate refrigerants including, when applicable, flammable refrigerants. In addition, a set of calibrated weighing scales shall be available and in good working order. Hoses shall be complete with leak-free disconnect couplings and in good condition. Before using the recovery machine, check that it is in satisfactory working order, has been properly maintained and that any associated electrical components are sealed to prevent ignition in the event of a refrigerant release. Consult manufacturer if in doubt. The recovered refrigerant shall be returned to the refrigerant supplier in the correct recovery cylinder, and the relevant waste transfer note arranged. Do not mix refrigerants in recovery units and especially not in cylinders. If compressors or compressor oils are to be removed, ensure that they have been evacuated to an acceptable level to make certain that flammable refrigerant does not remain within the lubricant. The evacuation process shall be carried out prior to returning the compressor to the suppliers. Only electric heating to the compressor body shall be employed to accelerate this process. When oil is drained from a system, it shall be carried out safely.
natural_image
Symbol of a trash bin with crossed lines indicating no waste or restriction, and a solid black rectangle below (no text or labels)natural_image
Illustration showing two steps of a device being processed, with no visible text or symbols.Drenaggio continuo
natural_image
Technical line drawings of a two-port refrigerator with attached cable and ventilation system (no text or symbols)natural_image
Line drawing of a server rack unit with internal components (no text or symbols)natural_image
Symbol of a trash bin with crossed lines indicating no waste or restriction, and a solid black rectangle below (no text or labels)natural_image
Line drawings showing a device being inserted into a box and then being placed on a surface (no text or symbols present)Permanente waterafvoer
natural_image
Two line drawings of household appliances: a water heater with a handle and a portable air conditioner unit (no text or symbols)REINIGING EN ONDERHOUD
natural_image
Line drawing of a desktop computer tower with visible internal components (no text or symbols)OPSLAG EN VERZORGING
natural_image
Symbol of a waste bin with crossed lines indicating no waste, and a solid black rectangle below (no text or labels)natural_image
Illustration showing a device being processed into a container and then being handled with a tool (no text or symbols present)Drenagem contínua
natural_image
Technical line drawings of a water heater and its internal air vent (no text or symbols)natural_image
Line drawing of a server rack with internal components (no text or symbols)BINNENVELD 11, 5462 GK, VEGHEL
Tel: +31 (0)413 82 02 95
www.toyotomi.eu
OFFICIAL REPRESENTATIVE ITALY
TOYOTOMI EUROPE SALES ITALY S.R.L.
VIA T. EDISON, 11
20875 BURAGO DI MOLGORA (MB)
Tel: +39 039 6080392
Fax: +39 039 6080316
www.toyotomi.it

- AFFUGTER
- LUFTENTFEUCHTER
- DESHUMIDIFICADOR
- DÉSHUMIDIFICATEUR D'AIR
- DEHUMIDIFIER
- DEUMIDIFICATORE
- LUCHTONTVOCHTIGER
- DESUMIDIFICADOR
- HVAD GARANTIEN DÆKKER
- Kontinuerligt afløb
- RENG∅RING OG VEDLIGEHOLDELSE
- OPBEVARING OG PLEJE
- WAS DIE GARANTIE ABDECKT
- LAGERUNG UND PFLEGE
- Drenaje continuo
- LIMPIEZA Y MANTENIMIENTO
- Drainage en continu
- NETTOYAGE ET MAINTENANCE
- RANGEMENT ET ENTRETIEN
- AUCUNE SOURCE D'INFLAMMATION
- WARRANTY
- WHAT THE WARRANTY COVERS
- WHAT THE WARRANTY DOES NOT COVER
- WHAT TO DO IN CASE OF A DEFECT
- Reasons of exception
- THE REFRIGERANT
- WARNING
- SAFETY PRECAUTIONS
- POINTS FOR ATTENTION
- SETTING
- Power
- Mode Select
- Constant Humidity Mode
- Auto Mode A
- Cloth Dry Mode
- Air Ventilation Mode
- Continuous Mode
- Timer Setting
- Turn Off Timer
- Turn On Timer
- NOTICE
- WiFi Setting
- ADD DEVICE
- Ambient Light Button
- Status Indicator - Ambient humidity status
- Fan Speed & Child Lock Button
- UP + and Down - Button
- Ionizer Setting
- Water Tank Full or Removed Alarm
- H5 Automatic Defrost
- More Safety
- Auto Restart Function
- Compressor Protection Function
- DRAINAGE INSTRUCTIONS
- Water Tank Drainage
- Continuous drainage
- CLEANING AND MAINTENANCE
- Cleaning of the filter
- STORAGE AND CARE
- TROUBLESHOOTING
- SPECIALIST'S MANUAL
- SAFETY PREPARATION WORK BEFORE INSTALLATION
- Table a – Maximum charge (kg)
- DETECTION OF FLAMMABLE REFRIGERANTS
- ENVIRONMENT CHECKING
- CHECKING FOR PRESENCE OF REFRIGERANT
- NO IGNITION SOURCES
- PRESENCE OF FIRE EXTINGUISHER
- VENTILATED AREA
- CHECKS TO THE REFRIGERATION EQUIPMENT
- CHECKS TO ELECTRICAL DEVICES
- REPAIRS TO SEALED COMPONENTS
- REPAIR TO INTRINSICALLY SAFE COMPONENTS
- CABLING
- LEAK DETECTION METHODS
- REMOVAL AND EVACUATION
- CHARGING PROCEDURES
- DECOMMISSIONING
- LABELING
- RECOVERY
- Drenaggio continuo
- Permanente waterafvoer
- REINIGING EN ONDERHOUD
- OPSLAG EN VERZORGING
- Drenagem contínua
- OFFICIAL REPRESENTATIVE ITALY
Brand : Toyotomi
Model : TD-2412
Category : Dehumidifier