
GV Vesuvio - Steam cleaner Lavor - Free user manual and instructions
Find the device manual for free GV Vesuvio Lavor in PDF.

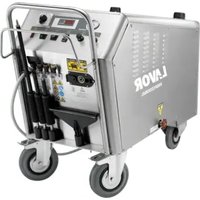
| Product type | Industrial steam cleaner |
| Brand | Lavor |
| Model | GV Vesuvio |
| Supply voltage | 400 V – 50 Hz (three-phase) |
| Installed power | 10 kW to 30 kW depending on version |
| Max steam pressure | 10 – 12 bar |
| Max temperature | 180 °C |
| Boiler capacity | 18 L |
| Water tank capacity | 25 L |
| Detergent tank capacity | 5 L |
| Max steam flow rate | 44.5 kg/h |
| Net weight | 112 kg |
| Dimensions (L x D x H) | 53 x 115 x 90 cm |
| Noise level | ≤ 72 dB(A) |
| Vibrations | ah ≤ 2.5 m/s² |
| Water supply | Continuous automatic pump |
| Thermoregulator | Electronic, adjustable from 3 to 10 bar |
| Built-in timer | Programmable 0 – 120 minutes |
| Electrical protection | Residual current circuit breaker 30 mA |
| Boiler maintenance | Daily draining, annual descaling by technician |
Frequently Asked Questions - GV Vesuvio Lavor
User questions about GV Vesuvio Lavor
0 question about this device. Answer the ones you know or ask your own.
Ask a new question about this device
Download the instructions for your Steam cleaner in PDF format for free! Find your manual GV Vesuvio - Lavor and take your electronic device back in hand. On this page are published all the documents necessary for the use of your device. GV Vesuvio by Lavor.
USER MANUAL GV Vesuvio Lavor
natural_image
Pure electrical circuit lines without any symbols
natural_image
Silhouette of a shopping cart with an arrow indicating direction (no text or symbols)AVVERTENZE
natural_image
Illustration of a hand holding a spray gun with a faucet, crossed out by a diagonal line (no text or symbols)
natural_image
Black-and-white illustration of scissors cutting through a crossed-out envelope (no text or symbols)AVVERTENZE
| TECHNICAL FEATURES OF THE STEAM GENERATOR . Technical features of the machine | |||||
| GV Vesuvio 10 15 18 21 30 | |||||
| Supply Voltage 400 V - 50Hz (Ph.3) | |||||
| Low voltage command buttons 12 V 12 V 12 V 12 V 12 V 12 V 12 V 12 V 12 V 12 V 12 V 12 V 12 V 12 V 12 V 12 V 12 V 12 V 12 V 12 V 12 V 12 V 12 V 12 V 12 V 12V 12 V | |||||
| Installed power | 10 kW | 15 kW 18 kW | 21 kW 30 kW | ||
| Boiler capacity 18 lt 18 lt 18 lt 18 lt 18 lt | |||||
| Water tank capacity. Boiler water supply system: continuous automatic pump | 25 lt 25 lt | 25 lt 25 lt 25 lt | |||
| Minimum supply water temperature | 0°C 0°C | 0°C 0°C 0°C | |||
| Detergent tank capacity 5 lt 5 lt 5 lt 5 lt 5 lt | |||||
| Steam pressure: | 10 - 12 bar max | ||||
| Steam Flow rate: | 14,8 Kg/h | 22,2 Kg/h 26 | .5 Kg/h 31 Kg/h 44.5 Kg/h | ||
| Steam temperature in boiler: max. | 180 °C max | ||||
| Gross weight.with accessories | 140 Kg | ||||
| Net weight. Empty weight: | 112 Kg | ||||
| Overall dimensions | L53 x P115 x H90 cm | ||||
| Packaging sizes | L77 x P130 x H112 cm | ||||
| High | 900 mm | ||||
| Arm vibrations | ah ≤ 2,5 m/s2 | ||||
| Resonant level. | LpA ≤ 72 dB(A) | ||||
| Values according to standard EN 60335-2-79. | |||||
| NOTE: The data label plate shows main technical data, CE markings and manufacturer name /address; the label is applied on machine cover. | |||||
SYMBOL

CAUTION! It is important to be careful of the following items.

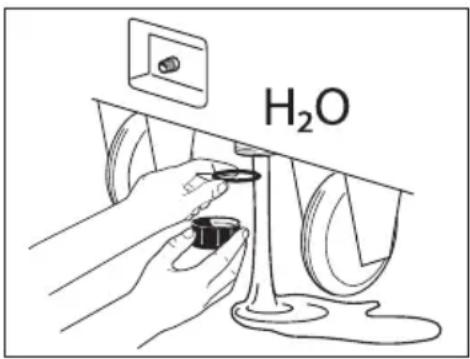
Water only

STEAM. Danger from hot steam.
WARNING: High pressure jets can be dangerous if subject to misuse. The jet
must not be directed at persons, animal, live electrical equipment or the machine itself.

Boiler drain

It is obligatory to wear protective gloves when using the machine.

Detergent tank

It is obligatory to wear protective goggles when using the machine.
MAIN WARNINGS

CAUTION! It is important to be careful of the following items.
- All the maintenance and adjustment activities described in this handbook must be carried out only after stopping the machine (main switch turned to off) and disconnecting the power cord, if not clearly indicated that the operation must be carried out when the machine is on. - All the adjustment and activities that are not described in this handbook must be carried out by qualified and skilled operators to avoid any accident or damage to the machine and to the operator.
Carefully read this operating handbook before use.
It provides important information about a safe installation, use and maintenance of the machine.
- The non-compliance with the safety measures may entail serious injuries to the operator and damages to the machine.
- Carefully keep this handbook for consultation purposes up to the machine final dismantling. The use and maintenance activities must be carried out correctly; otherwise, the builder cannot be held responsible for the damages to people, animals or things deriving from the non-compliance with the following instructions.
- Check that both the machine and its components are undamaged when unpacking them. Contact your reseller in case of doubts.
- The installation must be carried out by skilled operators, according to the builder's instructions. Make sure that the rating corresponds to the factory power line before energising the machine. The machine is electrically safe only when properly grounded. In case of doubts, contact highly skilled operators for a thorough inspection.
- De-energise the machine before any cleaning or maintenance activity.
- Never leave the machine energised if unused. Turn the main switch off.
- De-energise the machine in case of failure and / or troubles. Do not tamper with its controls and
equipment. Just contact the authorised after-sales service points for servicing purposes and always order original spare parts.
- The draining and loading pipes, the safety sheaths and the solenoid valves must not be cut and tampered with. De-energise the machine in case of damages
- Any use of the machine other than the one it has been built for represents an anomalous condition and can cause serious damages to the operating means and entail a serious risk for the operator using it.
- Never remove or hide the warning labels applied to the machine front and side parts.
- The same instructions are valid for various models; some details may differ according to the machine model.
09c Inadequate extension cords can be dangerous. If an extension cord is used, it must be suitable for outdoor use and the plug and socket must be of watertight construction, or connections must be dry, away from the ground and a cable reel must be used so that the socket is at a distance of at least 60 mm from the ground.
16i This appliance is not intended for use by persons (including children) with reduced physical, sensory or mental capabilities, or lack of experience and knowledge.
17i Children should be supervised to ensure that they do not play with the appliance.
17c The electric supply connection shall be made by a qualified electrician and comply with IEC 60364-1. It is recommended that the electric supply of this machine should include either a residual current device that can interrupt the supply if the leakage current to earth exceeds 30mA for 30~ms or a device which can test the earth circuit..
04i This appliance has been designed for use with the detergent provided or the detergent specified by the manufacturer, such as a neutral shampoo based on biodegradable anionic surface active detergents. The use of other detergents or chemicals may put the appliance's safety at risk.
23i Do not direct the jet against yourself or others in order to clean clothes or foot-wear.
21i Risk of explosion — Do not spray flammable liquids.
08i △ High pressure hoses, fittings and couplings are important for the safety of the machine. Use only hoses, fittings and couplings recommended by the manufacturer. (it is extremely important to protect these components against damage by avoiding their improper use and protecting them against bending, knocks and scratches).
22i To ensure machine safety, use only original spare parts from the manufacturer or approved by the manufacturer.
Furthermore:
A few fundamental rules common to any electrically powered machines must also be observed:
In particular:
- Never touch or start the machine with wet hands or bare feet;
- Remove the casings and the doors of the electric boards only once the machine has been stopped and de-energised;
- Never pull the power cable to disconnect the plug from the socket.
For fire-prevention purposes:
- Keep all inflammable or combustible products away from the equipment area.
- Obviously, the above-mentioned instructions are not sufficient to prevent all sorts of accidents; therefore, the user will have to be cautious.
- The machine must not be modified or changed in any way without the builder's written authorisation.
SAFETY DEVICE
⚠ WARNING: the gun is fitted with a safety catch. Whenever use of the machine is interrupted it is important to operate the safety catch to prevent accidental activation of the jet.

- Safety valve
- Safety pressure switch
- Thermostat
The steam hose connections are equipped with a double safety block.
MACHINE DESCRIPTION
This type of generator produces dry and oversaturated steam at a pressure of 10 bar at a temperature of 180^ C.
Intended and unplanned use
The electric steam generator for industrial cleaning is used for the cleaning and disinfecting of any object in an easy and ecological way, also in the most difficult points with or without detergents.
Any use of the machine other than the one it has been built for represents an anomalous condition, can cause serious damages to the operating means and entail a serious risk for the operator using it.
- The machine has not been built to work in a place with deflagration risks. It is therefore absolutely forbidden to use the machine in an atmosphere with explosion risks.
- For any forbidden use of the machine, the User must contact the Builder about any possible counterindications or dangers deriving from the machine misuse.
- For any modification to be made to the machine once it has left its building site, the User must contact the Builder about any risks the modifications could entail and about their compliance with the Legislation in force.
Machine handling and transport
The machine is usually packed in cartons on pallets when delivered.
While unpacking it, check that the machine is undamaged and that it corresponds to the ordered one.
Make sure that this operating handbook is included, that no loosen parts have been forgotten in the packing and check that the machine has not been damaged during transportation.
In case of damages, immediately contact both the forwarding agent and the Builder.
Never leave the packing components (cardboard, wood, staples, plastic bags, polyethylene sheets, etc.) in the environment. They must be collected and delivered to competent organs.
The packed machine can be lifted by means of a forklift truck or a crane.
This entails the presence of two skilled operators, one checking that the way is free from obstacles.
To move the machine inside the industrial area, always use the special handle; never use the power supply cable or the gun cable to move it.
natural_image
Pure electrical circuit lines without any symbols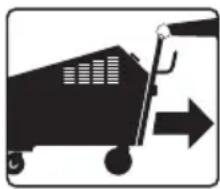
natural_image
Silhouette of a shopping cart with arrows indicating direction (no text or symbols)⚠️ WARNINGS
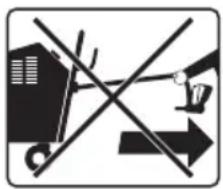
- Only use a forklift truck or a crane to lift the machine, since it is not perfectly balanced.
- Lift the machine only by means of steel cables or bands duly dimensioned according to the machine weight.
- Lift the machine by means of the safety hooks.
- No foreign operator must stay or pass in the handling area while the operators responsible for the machine transport will have to keep at a suitable distance to avoid being intercepted by the machine.
- Never make sudden manoeuvres while lifting and handling the machine so that it cannot intercept any people or object present in the handling area.
- An operator staying outside the handling area will have to follow all the handling activities and signal any possible obstacle the crane operator cannot see.
- In case of sea transport, it is advisable to protect the various machine parts by covering them with antirust lubricating agents and to add some bags containing hygroscopic salts to the packaging.
- Once positioned on the truck (or any transport mean) the machine must be braced by ropes, steel cables or wooden wedged duly dimensioned according to the machine weight.
MACHINE INSTALLATION
⚠️ WARNINGS
- The machine must be installed in a place where the best hygrothermometrical conditions are observed for the safety of the operator in order to reduce the possibility of fatigue to the minimum and to allow the operator to work in the maximum safety conditions.
- The machine installation area will have to be well-ventilated and free from explosive gases.
- The temperature of the machine installation area will have to range between 10^ C and 35^ C.
View with the machine main references
fig. pag. 2
| DESCRIPTION OF THE MACHINE | |
| 1 | Main switch ON/OFF |
| 2 | LINE orange pilot light |
| 3 | Thermoregulator 3+ 3- |
| 4 | Display |
| 5 | BOILER START push-button: |
| 6 | GUN START push-button: |
| 7 | Detergent adjustment |
| 8 | Steam adjustment |
| 9 | Pressure gauge |
| 10 | Control panel |
| 11 | Gun connection plug |
| 12 | Steam gun |
| 13 | Boiler drain tap |
| 14 | Water tank |
| 15 | Detergent tank |
| 16 | Water inlet |
| 17 | Water inlet filter |
| 18 | Steam supply lever (gun) |
| 19 | Detergent spray switch (gun) |
| 20 | Gun connection plug/ socket |
| 21 | Water tank drain plug |
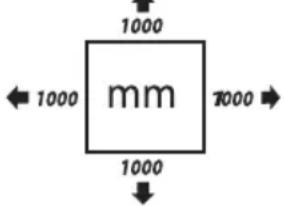
Free spaces to be observed
For a safe and correct use and an easy maintenance of the machine, it is advisable to install it in such a position that observes the minimum distances, expressed in millimetres, from the walls or big obstacles shown in the picture.
ASSEMBLY AND PREPARATION OF THE MACHINE
Preparation of the machine for its use
Upon receipt of the machine in the User's factory, follow the instructions described below for its correct positioning:
- unpack the machine and remove its protection wrapping.
- lift the machine according to the instructions and warnings described in Chapter "Handling and transport of the machine".
- Install the machine in the desired place..
Preventive checks and controls
Upon receipt of the machine, it is advisable to:
- check if all the parts composing the machine have been delivered to the User's factory,
- check overall condition of the complete device, in particular:
- check that the electric panel board is undamaged;
- check that the main switch is undamaged.
Carefully check if the protective wrapping is visibly torn.
Cleaning and lubrication of the machine
The power cord supplied with the machine is plugged by the Builder. It must be connected to the main supply line after checking that the voltage and the power supply frequency of the motors and electric components correspond to the voltage and power supply frequency available in the User's factory.
WARNINGS
- Check that the User's power supply voltage corresponds to the one indicated on the machine rating. On the contrary, contact the Builder.
- In compliance with the regulations in force, the User will have to provide the machine with safety devices, to avoid short-circuits and overloads, in order to protect the machine power supply line.
- Only qualified engineers can connect the machine to the power sources.
Adjust the temperature
Adjust the temperature by means of the thermoregulator situated on the control panel.
This machine is equipped with an electronic thermoregulator to check and adjust the boiler temperature (=pressure) from min. 3 BAR to max. 10 BAR.
Then press ③+ to increase the temperature or press ③- to decrease it to modify the temperature.
- When turning on the unit, the display shows the total working hours (10 hours for 1 number).
- After few seconds, the display shows the working temperature.
- It is possible to set the temperature in Celsius °C or Fahrenheit °F pushing together buttons ③+ and ③-
until the new mode; after few seconds it will be recorded.
- Pushing for the first time one of the two buttons ③+ or ③-
allows to set the temperature, the display lights start flashing, showing the last recorded temperature; pushing again ③+ button increase the temperature (one degree per time), pushing again ③- button decrease the temperature (one degree per time)
- After 4 seconds the temperature is recorded, then, the display stop its flashing, returning to show the working temperature.
In order to work at 10 BAR, if the temperature on the thermoregulator has been varied, it is necessary to set the thermoregulator at 180^ C.
| °C BAR | COMPARATIVE TABLE OF DEGREES |
| 133,91 3 | CENTIGRADE AND STEAM PRESSURE |
| 144,00 4 | EXPRESSED IN BAR |
| 152,22 5 | |
| 159,22 6 | |
| 165,34 7 | |
| 170,81 8 | |
| 175,77 9 | |
| 180,31 10 |
⚠️ WARNINGS
- The machine is pre-set at the max temperature of 180^ C.
- For any adjustment, timing or replacement intervention not described in this handbook, contact the Builder or the Reseller qualified personnel.
- It is possible to make various adjustments to adapt the machine to the various production needs.
Timer set
- Keep the two keys ③ “+” and ③ “-” pressed at the same time for 10" seconds
- After that press ③ "+" or ③"- " to set a time from 0' to 120' minutes
- Press the gun lever and release it, the steam will come out and the countdown will start
- Steam will stop coming out when the countdown will reach 0'
To stop the timer, at any time, just press and release the gun lever.
Note: the factory setting is on 0', Timer not working
If the Timer remains set to 0' (factory setting) the steam generator operates continuously.
Adjustment of the quantity of steam and detergent
Adjust the quantity of steam and detergent by means of the two knobs situated on the machine left side:
⑧ The left knob varies the quantity of steam by turning it clockwise or counter-clockwise.
⑦ The right knob varies the quantity of detergent by turning it clockwise or counter-clockwise
MACHINE START
Electric controls
The machine is equipped with an electric control panel-board situated in the machine front side.
The various devices present on the panel-board are described below:
Reference - Description
① - MAIN SWITCH: It is a 2-position selector that energises the machine if turned to ON.
Vice versa, the machine is de-energised if turned to OFF.
② - LINE orange pilot light: it turns on when the machine electric system is energised.
③ - THERMOREGULATOR: refer to paragraph "Temperature adjustment".
④- Display:
- Hour meter
- Thermometer
- H2O - TANK WATER LEVEL sound allarm: it turns on to signal a lack of water in the tank.
⑤ - BOILER START push-button: it starts the boiler.
⑥ - GUN START push-button: it starts the gun.
Steam gun
Use of the steam gun
⑳ Put the gun plug in the special socket then block it by means of the two levers;
⑥Press the GUN STAR orange luminous push-button situated on the control panel;
⑱ Supply the steam by means of the gun lever;
⑲Supply the detergent product by pressing the red push button situated on the gun left side together with the steam supply lever: no effect will be produced by pressing just the push-button.
natural_image
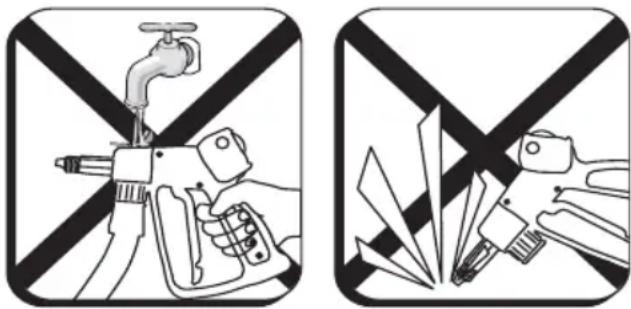
Two black-and-white illustrations showing a hand holding a spray gun and another with scissors cutting through the spray (no text or symbols)⚠️ WARNINGS
- For any eventual regulation, setting or parts replacement not foreseen in this manual, please contact the Manufacturer or Seller's personnel.
- Before carrying out any replacement make sure that:
① the main switch is "OFF".
Filling the tanks with water and detergent
Fill the tanks with water and detergent in the following way:
① Stop the machine by turning the main switch to OFF
⑭⑮ Fill the tanks
⚠️ WARNINGS
- Never use distilled water! The machine may not run correctly.
Water pipe supply from the water main.
- Fit filter ⑰ at water inlet ⑯.
- Connect a supply flexible hose ⑯ (not included in the supply) to the device water inlet
- Open water supply tap.
Note: The tank is provided with a float that prevent water infeed when the tank is full.
Water tank drain
- Close water supply tap
- Disconnect water supply hose from filter.
- Loosen drain plug (located under the tank). Note: pay attention not to lose the plug seal.
- Empty the tank
- Screw the plug with its seal.
Boiler steam blow-off
Follow the instructions below:
⑤ A few minutes before the end of the work shift, turn off the boiler by pressing the BOILER START luminous green push-button.
⑨ Keep on using the steam gun until the pressure gauge indicates a value of 0-1 BAR;
⑬ Carefully open the boiler drain tap situated on the machine right side and drain all the water from the boiler into a suitable container;
⑬ Once the water has been drained up completely, close the tap;
MACHINE USE
Description of the start sequence
After carrying out all the connections and the preventive inspections described in the previous chapters, start the machine according to the following instructions:
1) ⑤ Before starting the generator, fill the tanks up to the level with water and detergent.
2) ⑨ Turn the main switch situated on the control panel to ON.
3) Press the BOILER START push-button on the control panel board.
4) Press the GUN START push-button on the
control panel board.
5) ⑬ If the water level in the boiler is already correct, the thermoregulator will indicate the temperature value previously set by the operator after approx. 7-10 minutes. At this point, the steam gun can be used.
6) ⑬ If the display show H2O and it flashes and an acoustic alarm is heard, it means that there is no water in the tank. Fill the tank (see "Filling the tanks with water and detergent").
Machine stop
At the end of the work shift, stop the machine in the following way:
1) ⑤ Switch off: BOILER START push-button
2)⑥ Switch off:GUN START push-button.
3) ① Turn the main switch on the control panel board to OFF.
4) Unplug the machine.
⚠️ WARNINGS
- In order to suddenly stop the machine at any time, turn the main switch on the control panel to OFF.
- During the machine functioning, it is strictly forbidden to remove the safety devices assembled by the Builder on the machine in order to protect the operator while performing his tasks.
- Only skilled and qualified operators must use the machine.
- To move the machine inside the industrial area, always use the special handle.
Never use the power cable or the gun cable to move it.
- Never direct the steam gun towards people and objects made of plastic, crystal or other delicate materials that may melt or deteriorate at 180°C.
- Never leave the machine unattended.
- Always de-energise the machine before filling the tanks.
- The machine cannot work if distilled water is used to fill the tank
MAINTENANCE AND
SERVICING
Precautions for the machine maintenance
Before any maintenance activity, it is necessary to:
- De-energise the machine - Apply a panel warning that the machine maintenance is underway.
Maintenance interventions
see: "ROUTINE MAINTENANCE TABLE"
⚠️ WARNINGS
A good maintenance is a determining factor for a longer life of the machine in the best functioning and performance conditions in order to assure the safety conditions provided by the Builder.
- Before any maintenance or replacement activity, remember to:
- stop the machine (MAIN SWITCH turned to OFF)
- unplug it.
- Only skilled operators, familiar with the technology used on the machine must carry out all the maintenance, replacement or servicing activities described in this handbook.
Machine visual inspection
In order to assure a correct functioning and prevent troubles, periodical visual inspections of the machine and its moving parts are recommended.
Such inspections must be carried out after de-energising the machine.
Particularly make sure that there are no anomalous contacts between the elements and that the fixing systems are not loosened.
Machine general cleaning
Once a week, remove all the dust from the machine using compressed air.
Clean the machine body externally with suitable detergents.
⚠️ WARNINGS
Always wear protective gloves when cleaning the machine.
Machine restart after a prolonged shutdown
Before restarting the machine after a prolonged shutdown:
- check the level of water and detergent; fill the tank, if necessary;
- let the machine idle for a while and make sure that it runs correctly.
Interventions to be carried out by the builder operators
Please find below a list of the maintenance operations to be performed with a precise technical skill and therefore by the builder qualified operators.
The User must never carry out:
- any intervention on the electric system
- any intervention on the machine mechanic parts
- any replacement of the electric components
⚠️ WARNINGS
- For any adjustment, timing or replacement interventions that are not described in this handbook and that turn out to be necessary, please contact the technical staff of the machine Reseller or Builder.
Troubleshooting
see TROUBLESHOOTING TABLE
Please find below a list of all the possible troubles that may occur on the machine.
WARRANTY CONDITIONS
All our machines are subjected to strict tests and are covered against manufacturing defects in accordance with applicable regulations. The warranty is effective from the date of purchase.
The following are not included in the warranty: -
Parts subject to normal wear. - Rubber parts, charcoal,
filters and the accessories and optional accessories. - Accidental damage, caused by transport, neglect or inadequate treatment, incorrect or improper use and installation failing - The warranty shall not cover any cleaning operations to which the operative components may be subjected, such as clogged nozzles and filter blocked due to limestones.
DISPOSAL (WEEE)
As the owner of electrical or electronic equipment, the law (in accordance with the EU Directive 2012/19/EU on waste from electrical and electronic equipment and the national laws of the EU Member States that have implemented this Directive) prohibits you from disposing of this product or its electrical / electronic accessories as municipal solid waste and obliges you to make use of the appropriate waste collection facilities.
Disposing of the product in the environment can cause great harm to the environment itself and human health.
The symbol in the figure indicates the urban waste containers and it is strictly prohibited to dispose of the equipment in these containers. Non-compliance with the regulationis spulated in the Directive 2012/19/EU and the decrees implemented in the various EU Member States is administratively punishable.
| ROUTINE MAINTENANCE TABLE | |||
| OPERATION MACHINE | PART PERIODICITY | ||
| Boiler steam blow-off - | Every day | The user | |
| Visual control Machinery | + gun | Every week | The user |
| Electric parts | |||
| Sealing of the water and steam conductor + gun | Every mont | The user | |
| General cleaning - Every week | The user | ||

WARNING: Supplementary maintenance should only be carried out by a QUALIFIED TECHNICIAN, following the table below (guideline only):
| SUPPLEMENTARY MAINTENANCE TABLE | |||
| OPERATION MACHINE PART PERIODICITY | |||
| Boiler cleaning (disassemble the resistors and remove the limestone) | Every year | QUALIFIED TECHNICIAN | |
TROUBLESHOOTING TABL
| TROUBLES CAUSES SOLUTIONS | |||
| 1 | THE GENERATOR PRESSURE DOES NOT INCREASE | - Resistance contactor- Pressure switch- Resistance- Thermal resistance- PT100 Thermal resistance | - Check the resistance contactor- Check the pressure switch- Check the resistance- Check that the temperature is at least 133°C- Check |
| 2 | THE PUMP CANNOT RUN2.1 It loads no water2.2 Sound allarm2.3 It does not run | - The water tank is empty- Pump- Check the electronic level- Lack of water in the tank- water solenoid valve- Pump- Water level probe | - Fill the tank- Replace the pump- Replace the solenoid valve- Fill the tank- Replace the pump- Check and eventually replace it- Clean the probe |
| 3 | THE SAFETY VALVE OPENS REPEATEDLY3.1 It keeps on loading water | - Boiler water level probe- Check the electronic level- Pressure switch- Resistance contactor- Safety valve | - Clean the probe- Replace it- Replace the pressure switch and check that the connection copper tube is free from incrustations.- Replace the resistance contactor- Replace the safety valve |
natural_image
Illustration of a hand using a spray gun with a faucet, crossed out by a diagonal line (no text or symbols)
natural_image
Black-and-white illustration of scissors cutting through a X-shaped tool, no text or symbols presentATTENTION!
TABLEAU PROBLÈMES/ SOLUTIONS
natural_image
Symbolic illustration of a crossed-out road with buildings and a vehicle, no text or symbols present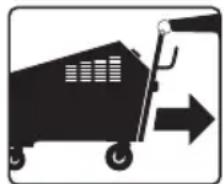
natural_image
Silhouette of a shopping cart with an arrow indicating direction (no text or symbols)natural_image
Illustration of a hand using a spray gun to prevent a water leak, crossed out by a black diagonal stripe (no text or symbols)
natural_image
Black-and-white illustration of a crossed-out envelope with scissors and a pen, no text or symbols present.ACHTUNG!
natural_image
Pure electrical circuit lines without any symbols
natural_image
Silhouette of a shopping cart with an arrow indicating direction (no text or symbols)natural_image
Pure electrical circuit lines without any symbols
natural_image
Silhouette of a shopping cart with arrows indicating direction (no text or symbols)¡ATENCIÓN!
natural_image
Illustration of a hand using a spray gun with a faucet, crossed out by a diagonal line (no text or symbols)
natural_image
Black-and-white illustration of a crossed-out envelope with paper cutouts and a pen, no text or symbols present.¡ATENCIÓN!
natural_image
Pure electrical circuit lines without any symbols
natural_image
Silhouette of a shopping cart with an arrow indicating direction (no text or symbols)Transport in premik aparata
natural_image
Pure electrical circuit lines without any symbols
natural_image
Silhouette of a shopping cart with arrows indicating direction (no text or symbols)PRIPRAVA APARATA
OPOZORILA
natural_image
Illustration of a hand holding a spray gun with a faucet, crossed out by a diagonal line (no text or symbols)
natural_image
Abstract black-and-white graphic with geometric shapes and a crossed-out X (no text or symbols)△Opozorila
- Za kakršno koli predelavo ali popravilo pištole ki ni v teh navodilih se obnite na servis
① Za kakršno koli intervencijo na pištoli se prepričajte da je glavno stikalo na poziciji OFF
Poljenje rezervoarja vode in detergenta
natural_image
Symbolic illustration of a construction site with crossed lines and buildings (no text or labels)
natural_image
Silhouette of a shopping cart with arrows indicating direction (no text or symbols)⚠️ ВНИМАНИЕ:
natural_image
Illustration of a hand holding a spray gun with a faucet, crossed out by a black cross-shaped background (no text or symbols)
natural_image
Illustration of scissors cutting through a crossed-out X-shaped metal frame (no text or symbols)Описание:
natural_image
Symbolic illustration of a construction or safety crossing with no text or symbols
natural_image
Silhouette of a shopping cart with an arrow indicating direction (no text or symbols)natural_image
Symbolic illustration of a construction or crossing with diagonal lines and arrows, no text present.
natural_image
Silhouette of a shopping cart with an arrow indicating direction (no text or symbols)ADVERTÊNCIAS
natural_image
Illustration of a hand using a spray gun with a faucet, crossed out by a diagonal line (no text or symbols)
natural_image
Black-and-white illustration of a crossed-out envelope with paper cutouts and a pen, no text or symbols present.ADVERTÊNCIAS
natural_image
Silhouette of a shopping cart with an arrow indicating direction (no text or symbols)OSTRZEŻENIA
natural_image
Two black-and-white illustrations showing a hand holding a spray gun and another with scissors cutting through the spray (no text or symbols)
OSTRZEŻENIA
KONSERWACJA I NAPRAWA
natural_image
Pure electrical circuit lines without any symbols
natural_image
Silhouette of a shopping cart with arrows indicating direction (no text or symbols)FIGYELMEZTETÉSEK
natural_image
Illustration of a hand holding a spray gun with a faucet, crossed out by a diagonal line (no text or symbols)
natural_image
Illustration of a crossed-out envelope with scissors and a pen, no text or symbols present⚠ FIGYELMEZTETÉSEK
EN EC/EU DECLARATION OF CONFORMITY
according to Directive (and following amendments):
FR DECLARATION CE/UE DE CONFORMITÉ
EN serial number starting from:
(Legal Representative
Lavorwash S.p.A.)
SL Izjava ES/EU o skladnosti
v skladu z direktivami (in sledecimi spremembami):
(Legal Representative
Lavorwash S.p.A.)
| cod. 7.400.0130 Rev. 07 11/2021 |


- AVVERTENZE
- SYMBOL
- Water only
- MAIN WARNINGS
- Furthermore:
- SAFETY DEVICE
- MACHINE DESCRIPTION
- Intended and unplanned use
- Machine handling and transport
- ⚠️ WARNINGS
- MACHINE INSTALLATION
- Free spaces to be observed
- ASSEMBLY AND PREPARATION OF THE MACHINE
- Preparation of the machine for its use
- Preventive checks and controls
- Cleaning and lubrication of the machine
- WARNINGS
- Adjust the temperature
- Timer set
- Adjustment of the quantity of steam and detergent
- MACHINE START
- Electric controls
- Reference - Description
- Steam gun
- Use of the steam gun
- Filling the tanks with water and detergent
- Water pipe supply from the water main.
- Water tank drain
- Boiler steam blow-off
- MACHINE USE
- Description of the start sequence
- Machine stop
- MAINTENANCE AND
- SERVICING
- Machine visual inspection
- Machine general cleaning
- Machine restart after a prolonged shutdown
- Interventions to be carried out by the builder operators
- Troubleshooting
- see TROUBLESHOOTING TABLE
- WARRANTY CONDITIONS
- The following are not included in the warranty: -
- DISPOSAL (WEEE)
- ATTENTION!
- ACHTUNG!
- ¡ATENCIÓN!
- Transport in premik aparata
- PRIPRAVA APARATA
- OPOZORILA
- △Opozorila
- Poljenje rezervoarja vode in detergenta
- ⚠️ ВНИМАНИЕ:
- Описание:
- ADVERTÊNCIAS
- OSTRZEŻENIA
- KONSERWACJA I NAPRAWA
- FIGYELMEZTETÉSEK
- ⚠ FIGYELMEZTETÉSEK
Brand : Lavor
Model : GV Vesuvio
Category : Steam cleaner