
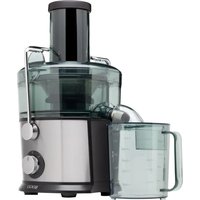
SS-5125 - Blender Sogo - Free user manual and instructions
Find the device manual for free SS-5125 Sogo in PDF.

| Product type | Slow juicer (masticating juicer) |
| Brand | Sogo |
| Model | SS-5125 |
| Power supply | 220-240 V ~, 50/60 Hz |
| Power | 200 W |
| Rotation speed | 50-55 rpm |
| Juice jug capacity | 1 L |
| Pulp jug capacity | 0.8 L |
| Material | BPA-free plastic and stainless steel (filters) |
| Main functions | 9 programs: Hard, Medium, Soft, Mixed juice, Vegetables, Jam, Sorbet, Pomegranate, Wash |
| Continuous working time | Up to 20 minutes (recommended 10-minute break) |
| Noise level | Lower than 60 dB |
| Safety | Auto shut-off, overload protection, reverse function, safety lock |
| Maintenance and cleaning | Removable parts washable with water; self-cleaning function; cleaning brush included |
| Included accessories | 3 filters (main, smoothie, sorbet), pulp filter, cleaning brush, pusher, outlet plugs |
| Warranty | 2 years |
| Dimensions (approx.) | 30 x 25 x 35 cm |
| Weight (approx.) | 4.5 kg |
| After-sales service | www.sogosat.com / sogosat@sogosat.com / 0034 902 222 161 |
Frequently Asked Questions - SS-5125 Sogo
User questions about SS-5125 Sogo
0 question about this device. Answer the ones you know or ask your own.
Ask a new question about this device
Download the instructions for your Blender in PDF format for free! Find your manual SS-5125 - Sogo and take your electronic device back in hand. On this page are published all the documents necessary for the use of your device. SS-5125 by Sogo.
USER MANUAL SS-5125 Sogo
natural_image
Black SOGO SOGO vacuum cleaner with digital display and control buttons (no visible text or symbols on device body)
EXPRIMIDOR LENTO DE PRENSADO FRÍO COLD PRESS SLOW JUICER
PRESSE-AGRUMES LENTE À FROID ESPREMEDOR LENTO DE PRENSAGEM A FRIO LANGSAMER ENTSAFTER MIT KALTPRESSUNG SPREMIAGRUMI LENTO CON SPREMITURA A FREDDO
Caution: please read and preserve these important instructions
IMPORTANTE:
natural_image
Two line drawings of hand-painted objects, one on a surface and the other on a cylindrical object (no text or symbols)natural_image
Two identical line drawings of mechanical clamps mounted on a base, shown from different angles (no text or symbols)ENSAMBLAJE DEL EXPRIMIDOR
flowchart
graph TD
    A["Raw Material Mix"] --> B["Reactor"]
    B --> C["Chamber"]
    C --> D["Condenser"]
    D --> E["Recycle"]
    E --> F["Output"]

    subgraph Paso 1
        G["▲"] --> H["▲"]
    end

    subgraph Paso 2
        I["■"] --> J["■"]
    end

    subgraph Paso 3
        K["▲"] --> L["▲"]
    end

    subgraph Paso 4
        M["▼"] --> N["▼"]
    end

    subgraph Paso 5
        O["■"] --> P["■"]
    end

    subgraph Paso 6
        Q["■"] --> R["■"]
    end
natural_image
Line drawing of a helmet with a side mount and frontrest (no text or symbols)natural_image
Line drawing of a mechanical device with handle and mounting bracket (no text or symbols)natural_image
Line drawing of a toilet with a bulb inserted into the cup (no text or symbols)natural_image
Line drawing of a small kitchen blender with handle and side arm (no text or symbols)
natural_image
Technical line drawing of a mechanical component with concentric rings and a central circular feature (no text or symbols)natural_image
Line drawings of a kitchen appliance with three views showing different designs (no text or symbols)LIMPIEZA Y MANTENIMIENTO
natural_image
Two identical line drawings of a mechanical device with clamps, shown from different angles (no text or symbols)natural_image
Line drawings of various household appliances including a blender, filter, sink, and faucet (no text or labels)Nota: agregue 2 filtros + filtro de pulpa
natural_image
Line drawing of a cylindrical device with a hand cleaning it, no text or symbols present- Always read the instruction book carefully before use.
- This manual can be downloaded from our website, www.sogo.com
- Keep these instructions for future reference.
SAFETY INSTRUCTIONS FOR THE USER
- Please read the instructions carefully before using the appliance.
- This product is designed for indoor household, non-industrial and non-commercial use. Do not use the item outdoors or for any other purpose. Misuse or improper handling can cause problems with the appliance and can cause injury to the user.
- Make sure that the voltage indicated on the rating plate matches the main wall outlet voltage before plugging in the appliance.
- The appliance has been incorporated with a grounded plug. Please ensure the wall outlet in your house is well earthed.
• Always remove the plug from the outlet when the appliance is not in use. Do not leave the appliance unattended when it is switched on. - Always disconnect the appliance from the supply if it is left unattended and before assembling, disassembling or cleaning.
- Before cleaning or storing your appliance, always unplug the appliance from the power source and allow it to cool.
- The appliances are not intended to be operated
by means of an external timer or separate remote-control system.
- Do not place or operate the appliance near sources of water.
- Never immerse the appliance or the plug-in water or any other liquid. In the event of the appliance being dropped into water, immediately disconnect it from the main supply and take it to an authorized service agent for repair before using it again.
- To protect against electric shock do not immerse cord, plugs, or appliance in water or any other liquid.
- Do not place or use the appliance and its power cord on or near hot surfaces (for example, cooktops) or open flames.
- Do not leave the power cord hanging by sharp edges and keep it away from hot objects and flames. Do not wrap the cord around the appliance and do not bend it.
- Do not use the appliance if the cord or plug is damaged. In the event that the cord is damaged, it should only be replaced by the manufacturer, its service agent, or similarly qualified persons, to avoid hazards.
- In the event of need repair do not try to dismount or repair to avoid any type of damage or personal injury.
- In the event of a malfunction of the appliance or if it has been damaged in any way, return the appliance to the nearest authorized service center for examination, repair or adjustment.
- When you want to remove the plug from the wall socket, do so by pulling the plug and not
by the cord or the appliance itself.
- Make sure your hands are dry before plugging or unplugging.
- This appliance is not to be used by the persons (including children) with reduced physical, sensory or mental capabilities or lack of experience and knowledge, unless they have been given supervision or instruction.
- This appliance can be used by children aged from 8 years and above, and persons with reduced physical, sensory or mental capabilities or lack of experience and knowledge if they have been given supervision or instruction concerning, use of the appliance in a safe way and understand the hazards involved.
• Children must be supervised to ensure that they do not play with the appliance. - Cleaning and user maintenance shall not be made by children without supervision.
- This appliance shall not be used by children. Keep the appliance and its cord out of reach of children.
- Close supervision is necessary when your appliance being used by or near children.
- Do not use the appliance for any other purpose than described in this manual.
- Do not let the appliance operate unattended.
- Never use accessories that are not recommended by the manufacturer.
- The use of accessories not recommended or sold by the appliance manufacturer may result in fire, electric shock or injury to persons.
- Always place the appliance on to the flat and even surface.
Safety instructions to be follow while using Slow juicer
- Do not use the appliance if the rotating sieve or the protecting cover is damaged or has visible cracks.
- Before plugging in to the wall outlet, please make sure that the removable parts are fully installed, such as the juicing body, auger, fine strainer, juicing body cover, etc.
- During operation, it is strictly prohibited to put fingers or sharp objects into the material inlet to avoid contacting the rotating parts such as the auger, etc. Also, it is strictly prohibited to use any object to replace pusher rods and keep eyes very close to the material inlet to avoid any harm or personal injury.
- The ingredients should be cut into small pieces, so that they can be put into the inlet of the slow juicer. If there are fruits and vegetables with kernel, hard seed, thick skin or hard shell it is recommended to remove them before processing.
- It is prohibited to use hard ingredients such as ice, sugarcane and coconut as these fruits can get stuck easily into the inlets and cause the damage of components affecting the service life of the product.
- It is normal for the fine strainer, juicing body cover, auger and other parts to be stained after making juice of certain fruits and vegetables. It will not affect the quality of the food in any manner and will not does any harm for consumer's health.
- The product is designed in such a way while processing hard ingredients, the motor will be locked-rotor and the current gets increased, then machine makes a tick sound and then motor stops working. This process makes assure the long service life of appliance.
- If the motor stops due to current limiting protection or locked-rotor and the motor cannot be automatically reversed during the operation process, press the “Reverse” key of the power switch. It is essential to take the ingredients out, and then press the “Forward” key of the power switch for normal use of the machine. In case of still locked-rotor, to protect the motor it is recommended to clean up the ingredients in the auger and continue to use it.
• After every single use, please wait until the motor and auger stop rotating and make sure that the power is disconnected before disassembling the detachable parts of appliance.
- All the detachable parts of this product should not be disinfected with hot water over 80°C and not used in microwave ovens to avoid thermal deformation damage.
- Do not use metallic wool or abrasive cleaners or corrosive liquids in order to clean the product.
- Switch off the appliance and disconnect from supply before changing accessories or approaching parts that move in use.
- Do not plug the appliance into the same wall outlet, sharing with other high-power electrical appliances, and the appliance should be used with a 30A leakage breaker installed.
TECHNICAL SPECIFICATIONS
| Model No. SS-5125 (Slow juicer) | |
| Input Voltage 220-240V~ | |
| Power 200W | |
| Frequency 50/60Hz | |
| Continuous working period ≤ 20 Min | |
| Spacing ≥ 10 Min |
Note: The plastic and stainless steel parts of this juicer are completely safe and made of food grade material.
PRODUCT FEATURES
- This appliance worked with non-grinding juicing method featured by slow squeezing of the ingredients, so the natural flavour and nutrient elements of all type of fruits and vegetables kept retained. This juicer has multiple functions, including making all type of vegetable juice and fruit juice including jam, Ice-cream and pomegranate juice.
- The detachable parts of the juicer makes it quite convenient for user to clean and store.
- Safety-switch design makes the product safer (make the squeezing cup installed onto the mainframe; apply the front cover of squeezing body, and then turn on the switch to make the juicer run).
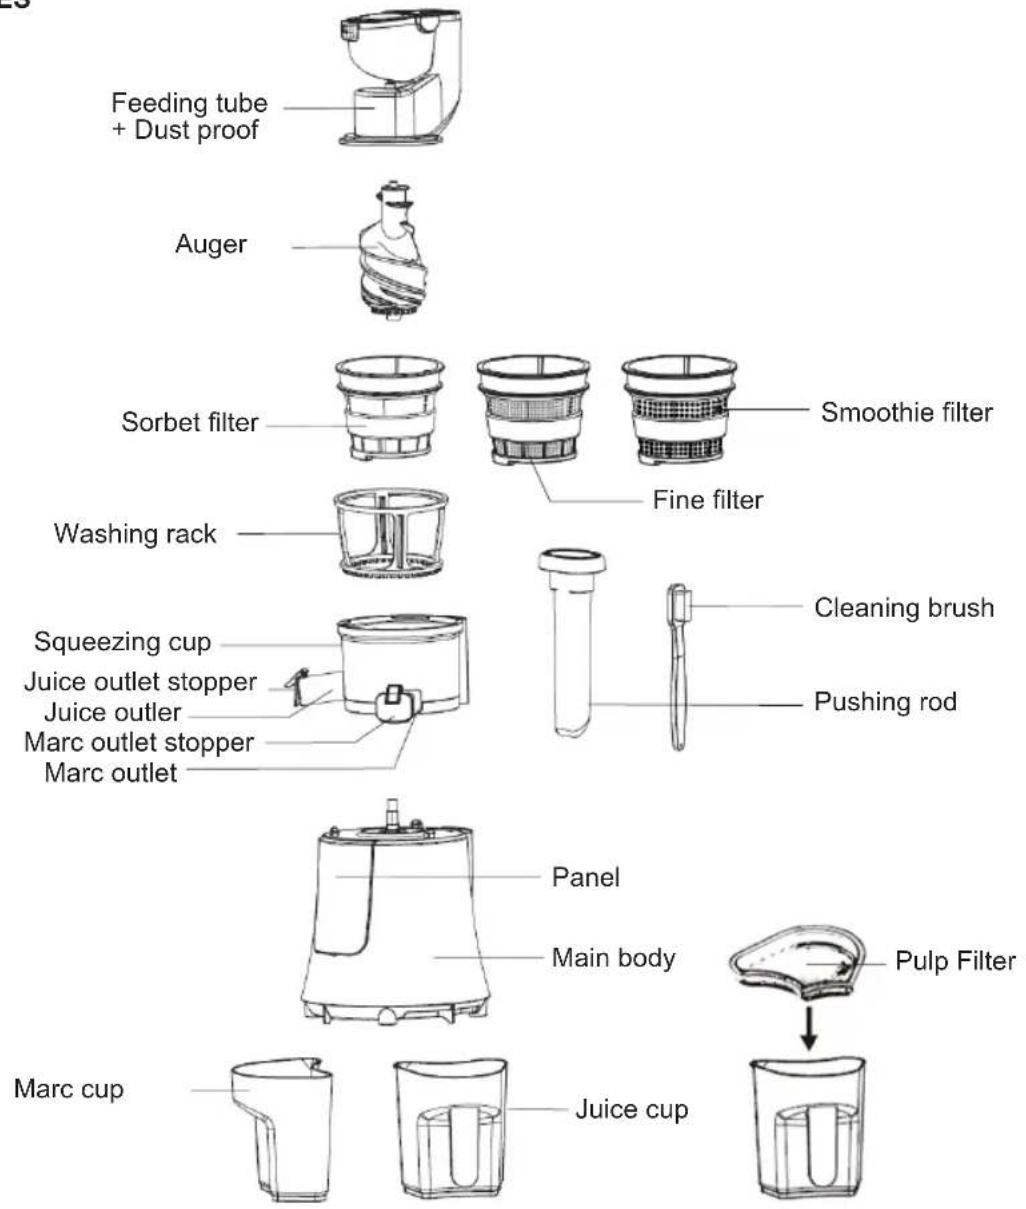
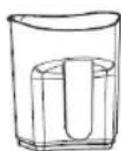
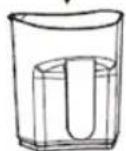
MAIN PARTS OF JUICER
| N° Part Name Description | ||
| 1 Feeding Tube + Dust proof | This is the main component of the juicer and fit on the top part of it. It is to introduce the fruits and vegetables. There is a lid available on it to prevent the dust entering. | |
| 2 Auger This component helps to squeezes the fruits and vegetables to extract the juice | ||
| 3 Filters This unit is provided | 3 different working filters | |
| Main filter (fine) (small holes) | ||
| Smoothie filter (Large holes) | ||
| Sorbet or fruit ice-cream filter (Without holes) | ||
| 4 Washing rack This is the part in between squeezing cup and filter, which normally used to make the self-cleaning process | ||
| 5 Squeezing cup This is the main part which is directly connected to the motor and used for squeezing the fruits and extract the juice and pulp | ||
| 6 Juice outlet stopper It is like the lid on to the juice outlet part, in order to prevent the splashing of juice | ||
| 7 Juice outlet Juice can be through this part | ||
| 8 Pulp outlet stopper Closing part of pulp outlet to prevent the pulp splashing | ||
| 9 Pulp outlet The pulp comes out from this part | ||
| 10 Digital touch control panel | This unit is provided with digital touch control panel to select the working function and juice type function | |
| 11 Main body This is the main motor part of the juicer | ||
| 12 Pulp jar Comes with the juicer, fits below pulp outlet to collect the pulp | ||
| 13 Juice jar Provide with the juicer, fits below the juice outlet and collect the juice | ||
| 14 Pusher Use to push the fruits and vegetable to insert into the feeding tube | ||
| 15 Cleaning brush Provided to clean the filters and juicer detachable parts. | ||
| 16 Pulp Filter Fits on to the Juice jar, which helps to prevent the pulp entering into the juice in order to provide the perfect juice without any pulp | ||
ACCESSORIES
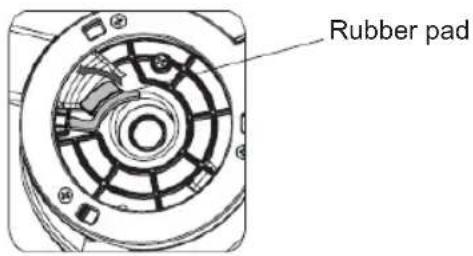
RUBBER PAD INSTALLATION
Installing the juice cup, make sure whether the rubber pad of the pulp outlet, at the bottom of the juice cup is installed properly.
Make sure the rubber pad of pulp outlet well inserted into the rectangular slot.
Notes: The rubber pad must be properly installed, otherwise leakage phenomenon might happen.
natural_image
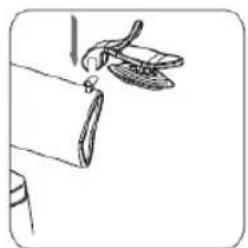
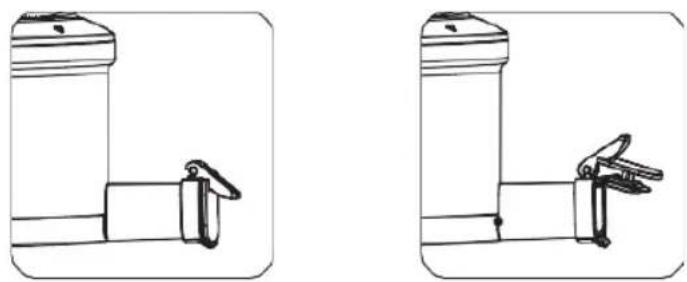
Circular mechanical component with internal grid structure (no visible text or symbols)INSTALLATION IF JUICE OUTLET STOPPER:
The stopper is separately packed during the packaging process.
Before use, make the juice outlet stopper align with the fixed column on the top of juice outlet and fix it well as the picture given below.
natural_image
Simple line drawing of a hand holding a propeller (no text or symbols)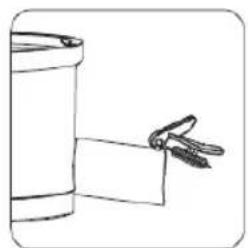
natural_image
Simple line drawing of a container with two scissors inserted, no text or symbols presentINSTALLATION OF PULP OUTLET STOPPER
The stopper is separately packed during the packaging process.
Before use, align the pulp outlet stopper with the pulp outlet and insert it well as given in the picture below.

natural_image
Simple line drawing of a mechanical device with no text or symbols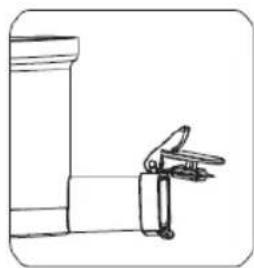
natural_image
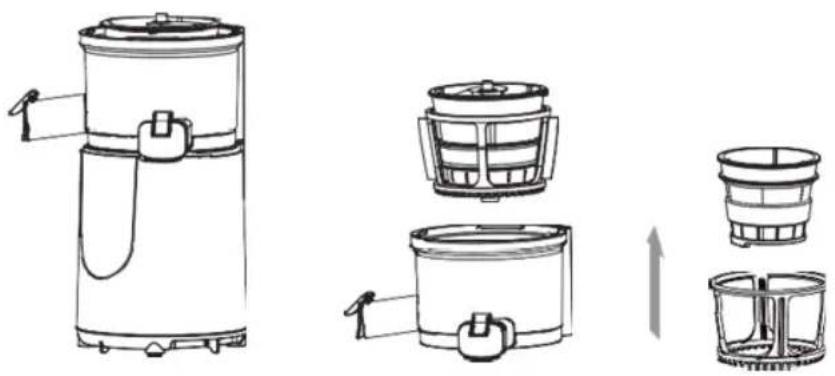
Simple line drawing of a mechanical clamp or bracket assembly (no text or symbols)JUICER ASSEMBLING

flowchart
graph TD
    A["Feeder"] --> B["Addener"]
    B --> C["Adder to Brew"]
    C --> D["Adder to Cover"]
    D --> E["Adder to Cover"]
    E --> F["Adder to Basket"]
    F --> G["Adder to Basket"]
    G --> H["Adder to Final Product"]

    subgraph Steps 1
        I["Step 1: Top Box"]
        J["Step 2: Top Box"]
        K["Step 3: Top Box"]
        L["Step 4: Top Box"]
        M["Step 5: Top Box"]
        N["Step 6: Top Box"]
    end

    subgraph Steps 2
        O["Step 2: Top Box"]
        P["Step 3: Top Box"]
    end
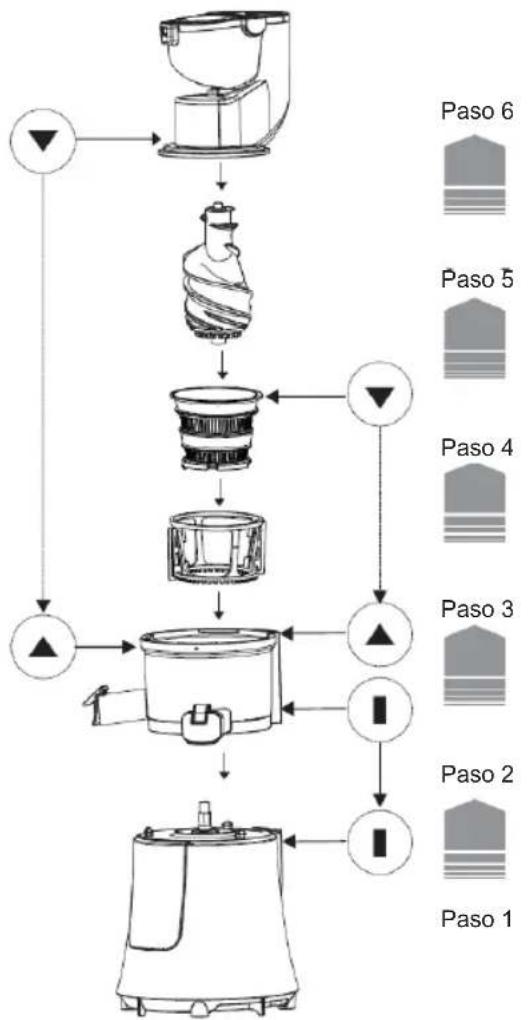
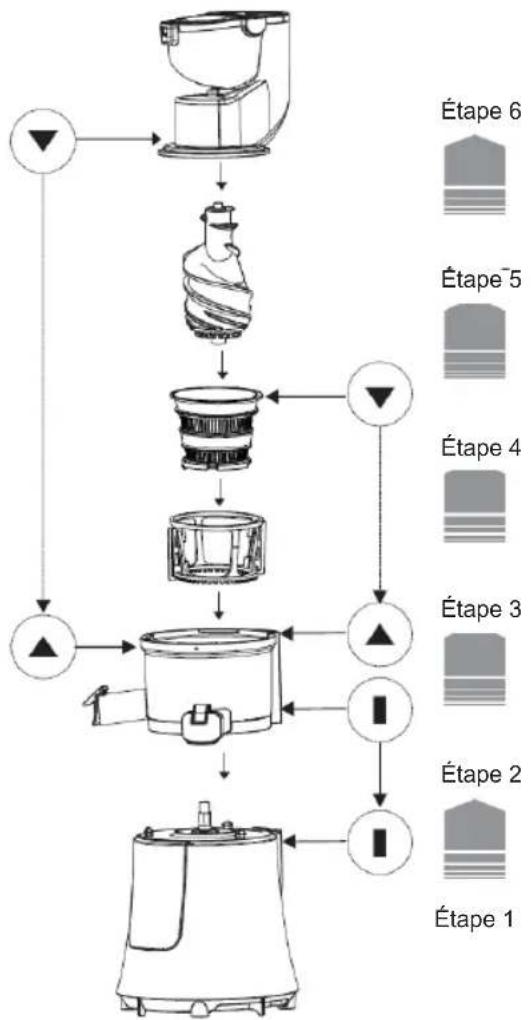
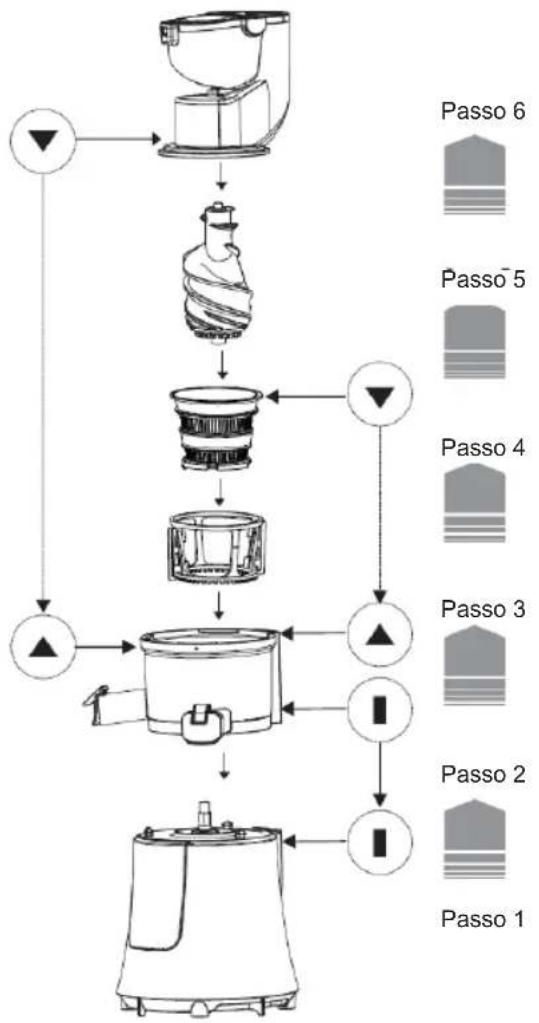
Step 1
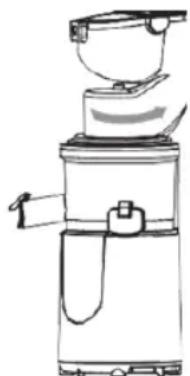
Install the squeezing cup with the main body. (As shown in the picture) Place the squeezing cup on the top of motor of main body, and then rotate it in clockwise direction to fix it properly.
Step 2
Installation of the washing rack: Place the washing rack in between squeezing cup as shown in the picture below.
Step 3
Installation of filter: This units is supplied with 3 types of filters to perform different type of functions, choose the correct filter according to the function and place it in between the washing rack and make sure the "Triangle" sign marked onto the filter must align with the "triangle" sign of to the squeezing cup and install it.
Step 4
Installation of the auger: Make the hexagonal axis of the auger align with the outer hexagonal axis of the motor, press it downwards and mount it on to the motor.
Step 5
Installation of the feeding tube on the squeezing cup: Make sure the "Triangle" sign of the feeding tube aligns with the "triangle" sign of squeezing body place it and rotate it in clockwise direction to fix it properly.
Step 6
Installation of Juice jar and pulp jar: Place the juice jar and pulp jar under the juice outlet and pulp outlet.
TOUCH CONTROL PANEL
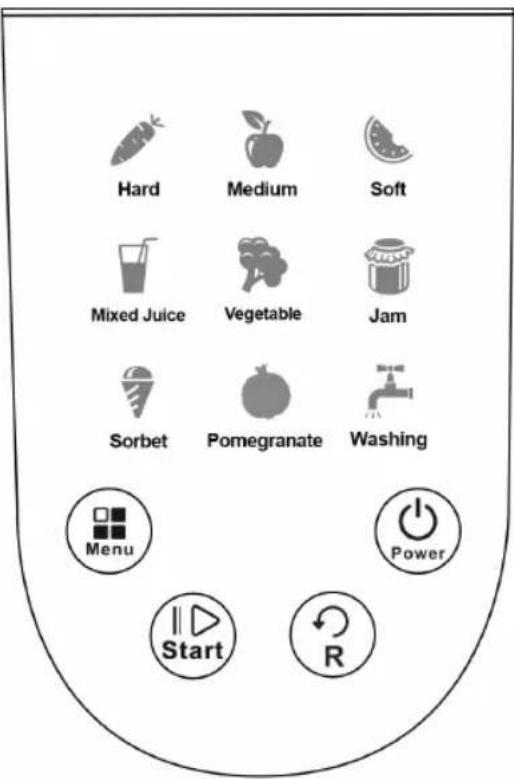
VARIOUS MENU KEYS FUNCTION
| N° Program Food Recommendation | ||
| 1 Hard | For hard vegetable and fruit like Carrot, Beet etc.;Cut the fruit into 1.5-2cm block or Length;Insert the fruit or vegetables pieces in to juicer through the feeding pipe slowly and ensure pulp can go out smoothlyTouch button “ R” if unit is blocked during working; | |
| 2 | Medium | This function is for not too hard fruit, such as Apple, Pear etc.; |
| 3 Soft | This function is for soft fruit, such as Watermelon, grapes etc.;Insert the fruits pieces to juicer slowly and ensure pulp can go out smoothly;The soft fruit cannot be squeezed completely, in the pulp there will always remain little juice; | |
| 4 Mixed Juice | This function is for making the soft and hard fruits mixed juiceDuring the performance, Juicer stop for few seconds for the second fruit; | |
| 5 Vegetable | This menu function is suitable for vegetable juice;Please use some less hard and less fiber contained vegetable for juice;For celery and other high fiber vegetables, please cut it in size of 2cm length;Insert vegetables to juicer slowly and ensure pulp can go out smoothly. | |
| 6 Jam | This menu function is suitable for to make soft fruits cocktails such as:tomato, Strawberry;Stem the Juice outlet by stopper;Insert fruits to juicer and squeeze it about 3 mins, ensure juice quantity is less than squeezing cup max scale mark;Add some yogurt or honey according to tasteNote: To use this function need to change the filter, change the standard filter with the smoothie filter or normal holes filter | |
| 7 Sorbet | This menu function is to make the fruits sorbet.Firstly, replace the juice filter with the sorbet filter.Cut the fruits in small pieces and freeze it for 6-12 hrs.Take it out from freezer just 10-15 minutes prior to the making of sorbet.Once the fruits pieces are smooth enough to put in the juicer, insert the fruits pieces through the fruits inlets pipes and in the matter of the minutes enjoy the homemade sorbet.Note: To use this function need to replace the filter, so change the Sorbet or Ice-cream filter (without holes) with the standard filter and enjoy the home made fruit sorbet or ice-cream. | |
| 8 Pomegranate | This menu function is to make pomegranate juicePeel off the pericarpInsert the pomegranate fruit gradually into the juicer and make sure that pulp will come out easily and smoothly. | |
| 9 Washing | This juicer has an extra special function, which is cleaning function of the juicer. With the help of this function this juicer can be cleaned very easily and just with the use of normal and clean water.Before using this function, close the juice and pulp outlet stopper;Pour some clean water to squeezing cup and touch “washing” button;Once this function finishes, open juice and pulp outlet stopper and throughout the water and continue making juice; | |
Note: The maximum fruits or vegetable juice functions can be execute with the help of standard(Fine small holes) filter.
1. Power Key:

This is Power and stop key, once the juicer has mounted very well, before plugging in make sure the wall outlet power is same as rated power of the slow juicer. Once the appliance is plugged in to the wall outlet, a beep buzzer sound will come and the power light start flashing and unit will enter into standby mode and the menu functions light will turn on and the rest of lights will remain turned off. To bring the appliance in working mode press the power key and the unit will be in functional mode. By pressing the power key, the first menu function “HARD” starts flashing which is the default menu function.
Note: This appliance has a unique feature of entering into the standby mode automatically. Once pressing the power key, the appliance enters into the functional mode, but in case if it does not enter into the juicing function, in matter of few seconds, it will enter again into the standby mode.
2. Menu Key:

This key is to select the desired function and the default menu function key is hard which start flashing once the power key is on. To change the menu function, keep pressing the Menu key, until you get your desired menu function, which starts blinking and the rest of the menu key light will turn off.
3. Start and pause key:

This key is to start the juicing function, once achieve the desired menu function press this button and the appliance will start juicing. In case if you need to stop any operation in between, press this key to pause the menu function and to restart the function press the same key.
4. Key:

This appliance has a reverse function which helps you to work the appliance smoothly in case pulp get stuck. So, to avoid this situation, press the reverse key and the auger starts moving in opposite direction (Clockwise) of its working direction (Anticlockwise). So, to start this function press this key and auger starts moving in opposite side and after 10s the appliance will enter into the pause mode, to restart the juicing function press the start key again.
Note: the "R" function key can be used in Juicing mode as well as in pause mode.
Note: if you want to switch over the menu function in between juicing mode, firstly press the power key and all the menu functions icons will turn on again, press the menu key to switch the menu function and keep pressing until you get your desired menu function which will start blinking and the rest of menu functions icon light will turn off.
USE METHOD
1. Use method of cover:

natural_image
Technical line drawing of a helmet with measurement markings (no text or symbols)To open the juice and pulp Outlet, Lift the juice outlet stopper Lid with the help of moving Flap.
natural_image
Line drawing of a mechanical device with no visible text or symbolsTo close the same outlets, just Push down the lid with the help of same flap.
Juicing method:
There are 2 feeding port mouth has been attached with this slow juicer, small port mouth is for small pieces of the fruits and big port mouth is for whole fruits like orange, pears etc.
Whole fruit piece method:
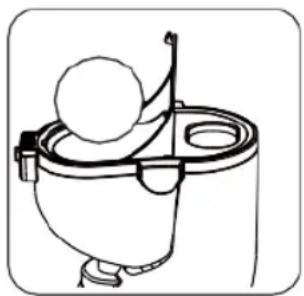
To insert the full fruit pieces, push the cover opening button towards left side as given in the picture below and the swivelling cover will bounce automatically and the food port will open to insert any type of whole fruit.
You can insert the whole fruit piece into the feed port and close the swivelling cover, the auger will start rotating to crush it and the fruit will enter into the squeezing chamber.
The pushing rod can be used to for assistance during the squeezing process.
natural_image
Line drawing of a toilet with a bulb and handle (no text or symbols)Note: the fruits and vegetables with the diameter more than 75mm must be chopped into the small pieces and then insert into the mouth port, in order to make sure the smooth feeding.
Note: The High fibre fruits must be cut into the 2 cm length
Small fruits pieces method:
In order to use this mouth port, keep it locked the big mouth port and use the small mouth port as shown in the picture.
Wash thoroughly the fruits and vegetables and cut into the equal and proper sizes and introduce into the mouth port. To push the ingredients, use the pushing rod
The thing to be remember at the time of juicing:
Please read carefully before use.
-
The fruits or vegetables pieces must put into the machine slowly and one by one, once the squeezing chamber gets full, wait until all the fruits get squeezed the chamber get vacant and then add rest of the fruits and vegetables. Then you can keep adding the fruits until the machine works till 20 minutes.
-
Fruits and vegetables with large fiber content (such as celery) shall be put into the juicer after being cut into the blocks of appropriate size (10-20mm). (Note: The fruits and vegetables with particularly strong fiber content always be insert slowly and in very small pieces
-
When the fruits like carrot that have been stored at low temperature for over 1 week is used for squeezing, it is better to squeeze it together with large water containing fruits (such as pear or orange), as it helps the machine to squeeze maximum and properly all the fruits.
Note: the juice quantity will be larger if firstly let the juicer squeeze the fruits available in the chamber and add the rest later once whole chamber get vacant.
Note: The juice quantity will be larger when the hard and less water containing fruits squeezed with the large water containing fruits.
-
The juice quantity will be little if the fruits or vegetables are not fresh. In order to juicing the dry fruits of vegetables stored in refrigerator, firstly soak them in the fresh water for few hours, so that it can absorb sufficient water and then use, the effect will be better and juice quantity also will be more
-
Do not use the hard-shelled fruits (such as kudzu, sugarcane, etc).
-
There will be certain friction noise, when carrot (hard flesh) or apple (hard peel) is used for squeezing, but it will not have any impact on the juicer functioning and its life
-
Juice can be splash from the feed inlet, when such materials as cherries tomatoes and grapes are used for squeezing.
How to make Sorbet (fruit icecream)
-
Select those fruits which are soft and low fibered to make ice cream like banana, kiwi fruit, cherry potato, papaya, strawberry, blueberry, mango etc.
-
Wash the fruit thoroughly in to the fresh water, remove the skin and the kernel.
Cut them into the small pieces of 4 x 2 cm.
-
Spread the chopped fruits pieces into a plate and put them in the freezer for 4-6 hours and make sure that each block of fruit doesn't touch each other.
-
If need to use the milk, always use the frozen.
-
Before juicing process, take out the frozen fruits and let them to come into room temperature for 10-15 minutes.
-
Check the unfrozen fruits with the help of fork or any wooden skewer, if the fork pass through to the center, then it is perfect to make ice cream. If the unfrozen fruit is too hard, then it will damage sorbet filter or motor.
-
Clean the machine, replace the juice filter by ice cream filter (the filter without anyhole) and assemble it.
-
Put all the fruits into the inlet slowly and one by one, place the juice cup under the pulp outlet to collect the fine ice cream.
Note: Make sure that the frozen fruits are not too hard, or it will break the filter and damage the motor. Freezing time should be less than 4 hours for the fruits containing high moisture
How to disassemble the juicer:
Press the power key to switch off the machine and pull out the plug, make sure to pull it by plug itself and not pulling by the cord.
Grip the feeding tube by the hand and rotate it in to the clockwise direction and pull out upwards side. (shown in the figure as given below)
natural_image
Line drawing of a small manual blender with handle and spout (no text or symbols)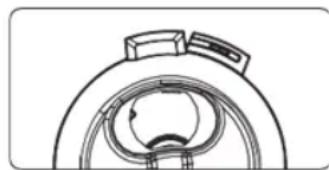
natural_image
Technical line drawing of a mechanical component with concentric rings and mounting brackets (no text or symbols)Unplug the juicer plug from the wall outlet and make sure to unplug by pulling the plug itself and not by pulling the wire.
Grip the juice outlet and pull out the squeezing cup into the upwards direction.
Separate the filter from the squeezing cup+ auger + washing rack as shown in the figure
Disassemble Auger, filter and washing rack as shown into the figure
natural_image
Line drawings of a kitchen appliance showing step-by-step assembly from fan to sink (no text or symbols)CLEANING AND MAINTENANCE
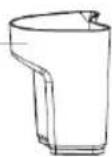
Make sure to clean the juicer before and after every single use.
Cleaning before use:
- Assemble the juicer as instructions given above, make sure the juice and pulp outlet stopper are installed properly on to the juice and pulp outlet and also it must be in closed position.
- Connect the appliance plug into the wall outlet, add the 500ml clean water into the juice cup through the feeding ports.
- Press the washing / cleaning function key displayed into the menu option and the juicer will perform cleaning automatically.
- In matter of few minutes the machine will stop, it means that the cleaning process has been Finished.
natural_image
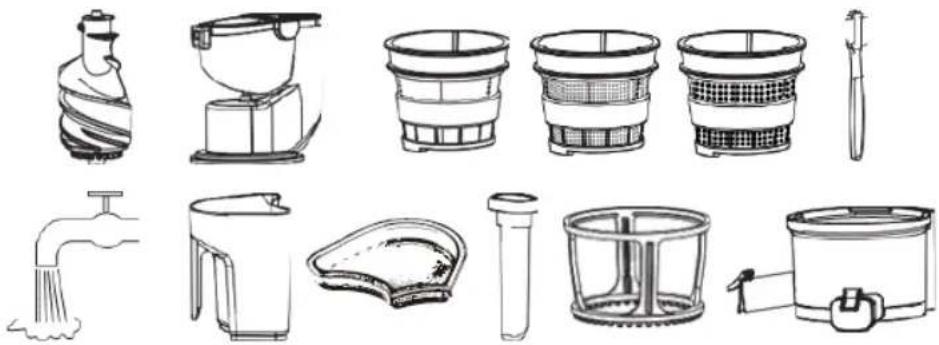
Two technical line drawings of a mechanical device with clamps, shown from different angles (no text or symbols)Cleaning after use:
Disassemble the juicer, and wash them with the clean water, if you find the meshes are blocked by the pulp, then clean it with the help of brush.
Note: Do not immerse or wash the motor part in the water, otherwise it will damage the motor.
Note: Do not use the iron brush, abradant or sharp cleaning tools for cleaning.
Cleaning method:
Wash the disassembled parts separately in the flowing water, if the meshes are blocked up by the pulp, then use the cleaning brush for the cleaning (provided with the accessories)
Note: Do not use the iron brush, abradant or sharp cleaning tools for cleaning.
natural_image
Line drawings of various household appliances including a blender, filter, sink, and faucet (no text or labels)Note: Add 2 filter + pulp filter
Note: Do not immerse or wash the motor part in the water, otherwise it will damage the motor. Clean the motor part with the damp and soft cloth
After cleaning, please dry the cleaned parts and store them in a clean and ventilated place
Note:
Please wash the machines washable parts in time after use, otherwise the rests of the fruits will attach to the container and it will not only affect the assembly and cleaning but also the performance of the unit.
The rubber pad at the bottom of the squeezing cup must be washed.
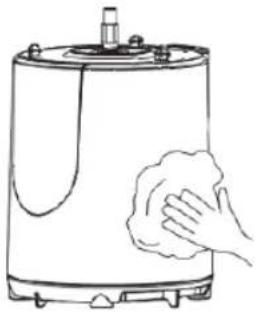
natural_image
Line drawing of a hand cleaning a cylindrical container with a cloth (no text or symbols)TROUBLESHOOTING
| Phenome-non | Cause Troubleshooting method | |
| The Juicer stops suddenly | Whether the power plug is inserted properly.The quantity of materials introduced into the machine is too muchHard fruits and vegetables are not cut.Continues working time more than 20 Mins. | Make the plug inserted into the socket.First, press “R” for 2-3s to make the fruits return upwards; then choose function button and start again (repeat the process for about 3 times). If the juicer still does not work, clean the machine and then use it.Hard fruits and vegetables (such as carrot) shall be squeezed after being cut into strips.Let cool the juicer about 10 Mins and restart it if need. |
| The juice amount is small | Fruits stored for long time in refrigerator, before squeezing. | The juice amount will be increased if the fruits are squeezed after being immersed in clear water for sufficient water absorption. Use fresh fruit. |
| Juice flows out of the mainframe | The rubber pad at the bottom of squeezing cup is not installed properly. | Please reinstall the squeezing rubber pad the installation method. |
| There is abnormal noise | Accessories are not properly installed.The juicer has not been placed on the even surface.Parts cause extrusion sound during squeezing. | Inspect whether the accessories are properly installed after the juicer stops.Please place the juicer on an even and stable surface.The sound caused by extrusion of fruits and vegetables, and please do not worry about it. |
Cold Press Slow Juicer main features
• Digital touch control panel
- With 9 pre-set functions
- Low RPM of 50-55 / min, then any traditional juicer
• High performing motor with low energy consumption of just 200W
- Can work 20min continuously to extract the maximum juice out of fruits and vegetables
- Noise level of <60db lesser than any conventional juicers
- Reverse function to avoid pulp getting stuck
- Slow speed helps extracts more juice than any other traditional juicer, maintains the nutrition of juice and reduce oxidation
- Completely detachable parts for easy cleaning and storage
- Juicer plastic part made of BPA free material
• Auto protection system, in order to prevent personal or product damage
- Juice and pulp stoppers to prevent the splashing of the juice and pulp
- Cleaning function to clean with normal water without any need of detergent and abrasive agent
- Included Juice jar of 1L and pulp jar of 0.8 L capacity
- Accessories included: Fine filter, Smoothie filter, Ice-cream filter, Pulp filter, cleaning brush, Juice stopper and Pulp stopper
Warranty Period:
SOGO provides you 2 years warranty from the date of purchase against any defect due to defective material or workmanship of the product. If the product poses any defect or become defective during this period, SOGO will repair it free of cost (change in certain cases) in any of their own or authorized after-sales service centre.
The warranty does not cover if the product has been used in a wrong way or being used other than its intended use. Failing to follow the SOGO manual guidelines in order to ensure the product and user safety will lead to warranty extinction. Also the warrantee will be invalid, if the product servicing or repair has been done by any service centre other than SOGO'S its own service centres or officially authorized centres.
In order to get the complete info about the after sales issues and complete list of our authorized service centres information, kindly visit to the SOGO customer service website given at the end of this manual. There also you can find the contact details of our main service centre.
Welcome to the SOGO family and hope the correct use and maintenance of the product gives you long service life.
IMPORTANT:
CARACTÉRISTIQUES DU PRODUIT
natural_image
Technical line drawing of a mechanical component with no visible text or symbolsPanneau
Corps principal

Filtre à pulpe
Tasse de pulpe
Tasse de jus
INSTALLATION DE TAMPON EN CAOUTCHOUC
natural_image
Two line drawings of handbags and a container, no text or symbols presentINSTALLATION DU BOUCHON DE SORTIE DE PULPE
natural_image
Two identical line drawings of mechanical clamps mounted on a base, shown from different angles (no text or symbols)ASSEMBLAGE DE PRESSE-AGRUMES
flowchart
graph TD
    A["Raw Material"] --> B["Coating"]
    B --> C["Reactor"]
    C --> D["Condenser"]
    D --> E["Boxing"]
    E --> F["Recirculator"]
    F --> G["Product Output"]

    subgraph Étape 1
        A --> B
        B --> C
        C --> D
        D --> E
        E --> F
    end

    subgraph Étape 2
        F --> G
        G --> H["Product Output"]
    end

    subgraph Étape 3
        F --> G
        G --> H
        H --> I["Product Output"]
    end

    subgraph Étape 4
        I --> J["Product Output"]
    end

    subgraph Étape 5
        J --> K["Product Output"]
    end

    style Étape 1 fill:#f9f,stroke:#333
    style Étape 2 fill:#f9f,stroke:#333
    style Étape 3 fill:#f9f,stroke:#333
    style Étape 4 fill:#f9f,stroke:#333
    style Étape 5 fill:#f9f,stroke:#333
natural_image
Line drawing of a helmet with measurement markings (no text or symbols)natural_image
Line drawing of a mechanical device with no visible text or symbolsnatural_image
Line drawing of a toilet with a bulb and handle (no text or symbols)natural_image
Line drawing of a kitchen grater with a side arm and handle (no text or symbols)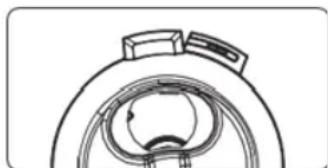
natural_image
Technical line drawing of a mechanical component with concentric rings and a central circular feature (no text or symbols)natural_image
Simple line drawing of a cylindrical container with a handle and a separate rectangular object (no text or symbols)
natural_image
Simple line drawing of a mechanical device with a handle and base (no text or symbols)natural_image
Line drawings of various household appliances including a blender, filter, sink, drain, and faucet (no text or labels)natural_image
Line drawing of a hand cleaning a cylindrical object with a cloth (no text or symbols)DÉPANNAGE
natural_image
Line drawing of a helmet with measurement markings (no text or symbols)natural_image
Line drawing of a mechanical device with handle and mounting bracket (no text or symbols)natural_image
Line drawing of a toilet with a bulb and handle (no text or symbols)natural_image
Line drawing of a modern kitchen blender with handle and side arm (no text or symbols)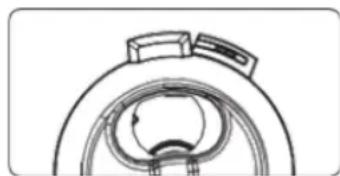
natural_image
Technical line drawing of a mechanical component with concentric rings and mounting brackets (no text or symbols)natural_image
Line drawings of a kitchen appliance with three different designs, showing front, side, and top views (no text or symbols)LIMPEZA E MANUTENÇÃO:
natural_image
Two identical line drawings of a mechanical device with clamps, shown from different angles (no text or symbols)Limpeza após o uso:
natural_image
Line drawings of various household appliances including a blender, filter, sink, and faucet (no text or labels)Nota: Adicionar 2 filtro + filtro de polpa
natural_image
Line drawing of a cylindrical device with a hand cleaning it, no text or symbols presentnatural_image
Line drawing of a mechanical device with a dome-shaped top and side brackets (no text or symbols)natural_image
Line drawing of a mechanical device with no visible text or symbolsSaftherstellungsmethode:
natural_image
Simple line drawing of a toilet with a bulb and handle (no text or symbols)natural_image
Line drawing of a hand mixer with handle and control panel (no text or symbols)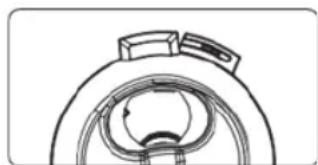
natural_image
Technical line drawing of a mechanical component with concentric rings and mounting flanges (no text or symbols)natural_image
Line drawings of a portable kitchen fan with internal components and a side view showing the interiormost frame (no text or symbols)natural_image
Two identical line drawings of a mechanical device with lever arms, shown from different angles (no text or symbols)natural_image
Line drawings of various household appliances including a blender, filter, sink, faucet, and washing machine (no text or labels)natural_image
Line drawing of a hand cleaning a cylindrical object with a cloth (no text or symbols)FEHLERBEHEBUNG
INSTALLAZIONE DEL TAPPO DI USCITA DEL SUCCO
natural_image
Two line drawings showing a hand holding a small object, next to a cylindrical container with scissors inserted (no text or symbols)INSTALLAZIONE DEL TAPPO DI USCITA DELLA POLPA
natural_image
Two technical line drawings of mechanical clamps or brackets, shown in side-by-side views (no text or symbols)ASSEMBLAGGIO SPREMIAGRUMI
flowchart
graph TD
    A["Raw Material Input"] --> B["Reactor"]
    B --> C["Intermediate Process"]
    C --> D["Recirculator"]
    D --> E["Final Output"]
    style A fill:#f9f,stroke:#333
    style B fill:#ccf,stroke:#333
    style C fill:#cfc,stroke:#333
    style D fill:#fcc,stroke:#333
    style E fill:#cff,stroke:#333
Passo 1
natural_image
Line drawing of a helmet with a side-mounted device (no text or symbols)natural_image
Line drawing of a mechanical device with handle and mounting bracket (no text or symbols)natural_image
Line drawing of a toilet with a bulb and handle (no text or symbols)natural_image
Line drawing of a stainless steel steamer with handle and side arm (no text or symbols)
natural_image
Technical line drawing of a mechanical component with concentric rings and a central circular feature (no text or symbols)natural_image
Line drawings of a kitchen appliance with three different designs, showing front, side, and top views (no text or symbols)natural_image
Two identical line drawings of a mechanical device with lever arms, shown from different angles (no text or symbols)Pulizia dopo l'uso:
natural_image
Line drawings of various household appliances including a blender, filter, sink, and faucet (no text or labels)natural_image
Line drawing of a hand cleaning a cylindrical container with a cloth (no text or symbols)DECLARATION OF CONFORMITY
This device complies with Low Voltage Directive 2014/35/EC, Electromagnetic Compatibility Directive 2014/30/EU, Directive 2015/863/EU on the restriction of the use of certain hazardous substances in electrical and electronic equipment and Directive 2009/125/EC on the eco-design requirements applicable to energy-related products.


DÉCLARATION DE CONFORMITÉ
This symbol means that in case you wish to dispose of the product once its working life has ended, take it to an authorised waste agent for the selective collection of waste electrical and electronic equipment (WEEE).

Imported by:
Sanysan Appliances S.L, NIF: B98753056, C/ Barcas 2, 2
46002 Valencia, Spain
Product made in P.R.C. – Designed by SOGO based on the European Quality Standards
Customer Service: www.sogosat.com / sogosat@sogosat.com / 0034 902 222 161


- IMPORTANTE:
- ENSAMBLAJE DEL EXPRIMIDOR
- LIMPIEZA Y MANTENIMIENTO
- SAFETY INSTRUCTIONS FOR THE USER
- Safety instructions to be follow while using Slow juicer
- PRODUCT FEATURES
- RUBBER PAD INSTALLATION
- INSTALLATION IF JUICE OUTLET STOPPER:
- INSTALLATION OF PULP OUTLET STOPPER
- JUICER ASSEMBLING
- Step 1
- Step 2
- Step 3
- Step 4
- Step 5
- Step 6
- TOUCH CONTROL PANEL
- VARIOUS MENU KEYS FUNCTION
- Power Key:
- Menu Key:
- Start and pause key:
- Key:
- USE METHOD
- Use method of cover:
- Juicing method:
- Whole fruit piece method:
- Small fruits pieces method:
- The thing to be remember at the time of juicing:
- Please read carefully before use.
- How to make Sorbet (fruit icecream)
- How to disassemble the juicer:
- CLEANING AND MAINTENANCE
- Cleaning before use:
- Cleaning after use:
- Cleaning method:
- Note:
- Cold Press Slow Juicer main features
- Warranty Period:
- IMPORTANT:
- CARACTÉRISTIQUES DU PRODUIT
- INSTALLATION DE TAMPON EN CAOUTCHOUC
- INSTALLATION DU BOUCHON DE SORTIE DE PULPE
- ASSEMBLAGE DE PRESSE-AGRUMES
- LIMPEZA E MANUTENÇÃO:
- Saftherstellungsmethode:
- INSTALLAZIONE DEL TAPPO DI USCITA DEL SUCCO
- INSTALLAZIONE DEL TAPPO DI USCITA DELLA POLPA
- ASSEMBLAGGIO SPREMIAGRUMI
- Passo 1
- DECLARATION OF CONFORMITY
- DÉCLARATION DE CONFORMITÉ
- Imported by:
Brand : Sogo
Model : SS-5125
Category : Blender