
Powerflex Compact - Camera ROLLEI - Free user manual and instructions
Find the device manual for free Powerflex Compact ROLLEI in PDF.

User questions about Powerflex Compact ROLLEI
0 question about this device. Answer the ones you know or ask your own.
Ask a new question about this device
Download the instructions for your Camera in PDF format for free! Find your manual Powerflex Compact - ROLLEI and take your electronic device back in hand. On this page are published all the documents necessary for the use of your device. Powerflex Compact by ROLLEI.
USER MANUAL Powerflex Compact ROLLEI
MANUAL in German, English, French, Spanish, Italian, Dutch, Czech and Slovak
www.rollei.de
Inhalt
Explanation of Symbols 30
Safety Instructions 31
Battery Warning 34
What's in the box....35
Product Overview....36
Using the Battery 38
Getting Started 40
Modes 43
Operation....47
Technical Data 52
Disposal 54
EU Conformity 55
French ..... 56
Spanish.....82
Italian ..... 108
Dutch..... 134
Czech..... 160
Slovak..... 186
natural_image
Isometric line drawing of a rectangular electronic device with three small circular symbols on top and a triangular pointer on the side (no text or labels)
Produktübersicht
natural_image
Diagram of a device with a switch and connector, showing no text or symbols
natural_image
Solid orange rectangular background with no text, symbols, or patternsBedienung
Lademodus
Before the First Use
Read the operating instructions and the safety instructions carefully before using the device for the first time.
Keep the operating instructions together with the device for future use. If you pass on the device to a third party, this manual is part of the device and must be supplied with the device.
Explanation of Symbols
The following symbols are used in this manual or on the packaging.

Products marked with this symbol comply with all relevant Community regulations of the European Economic Area.

Products marked with this symbol are operated with direct current.
ENGLISH
Safety Instructions
Danger to children and persons with reduced physical, sensory or mental capabilities (for example, partially disabled persons, elderly persons with reduced physical and mental capabilities) or lack of experience and knowledge (for example, older children).
- This product can be used by children 14 years and above. Cleaning and user maintenance must not be carried out by children without supervision.
- The packaging material is not a toy. Do not allow children to play with the packaging film. They may get caught in it while playing and suffocate.
- Supervise children to ensure that they do not play with small parts (memory card). If you suspect that a small part has been swallowed, consult a doctor immediately.
- Store small parts so that they are inaccessible to children and animals.
CAUTION! Risk of injury!
Improper handling of the product can lead to injuries.
- Immediately remove the battery and, if necessary, the charging cable in case of unusual noises or smells as well as smoke from the housing.
Safety Instructions
NOTICE! Risk of property damage!
Improper handling of the product may result in damage.
- Never place the device on or near hot surfaces (e.g. stove tops, etc.) or open flames. Never expose the device to high temperatures (heating, etc.).
– Never pour liquid into the device. - Do not use a steam cleaner for cleaning.
- Do not use the device if the plastic or metal components of the device are cracked or deformed.
- Handle the device with care. Impacts, dropping or shocks may damage the device.
- Remove the battery if you do not use the product for a long time to prevent damage from a leaking battery.
- Do not modify the device.
ENGLISH
Safety Instructions
- Never open the housing, but leave the repair to specialists. Contact a specialist workshop for this purpose. Liability and warranty claims are excluded in the event of repairs carried out independently, improper connection or incorrect operation.
- Do not operate the device if it shows visible damage or defects.
- If you do not use the device, clean it or if a malfunction occurs, always switch off the device and remove the battery and disconnect all connections.
- In case of problems of the product due to static discharges, switch off the device and switch it on again after about 10 seconds.
Battery Warning
- Do not disassemble, hit or puncture the battery, be careful not to short-circuit the battery. Do not expose the battery to places with high temperatures. Do not continue to use the battery if it leaks or expands.
- Always charge through the system. If the battery is replaced with an incorrect type, there is a risk of explosion.
- Keep the battery away from children.
- Rechargeable batteries can explode if exposed to an open fire. Never throw rechargeable batteries into a fire.
– Follow local regulations for the disposal of used batteries. - Before disposing of the device, remove the rechargeable battery and dispose of it separately.
ENGLISH
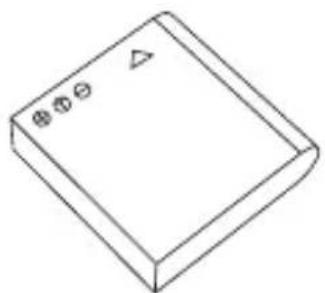
What's in the box
- Powerflex Compact
- Battery
- USB-C cable
- Hand strap
- Storage bag
- User manual
natural_image
Isometric line drawing of a rectangular electronic component with three small holes and a triangular symbol on top (no text or labels)
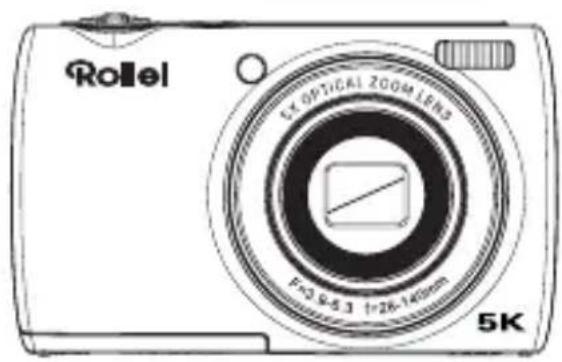
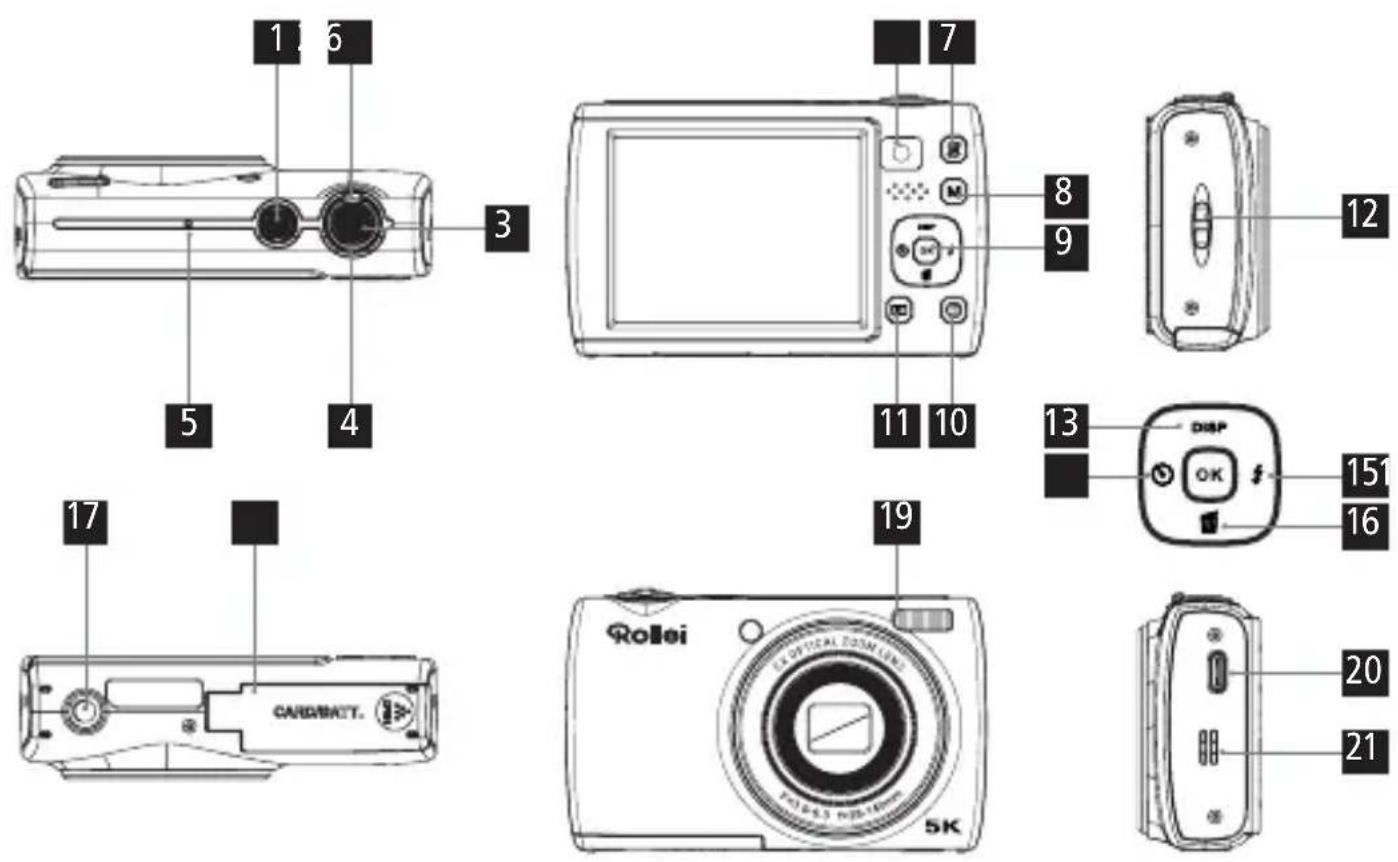
Product Overview
1 On / off button
2 Zoom control
3 Shutter button / record button
4 Charge/work indicator
5 Microphone
6 Selfie camera
7 Camera switch button
8 Mode button
9 OK button
10. Menu button
11 Playback button
Eyelet for wrist strap
Up / display button
Left / self-timer button
Right / flash setting button
Down / delete button
1/4" thread
Battery / memory card compartment
Flash
20 USB-C port
Loudspeaker
ENGLISH
Product Overview
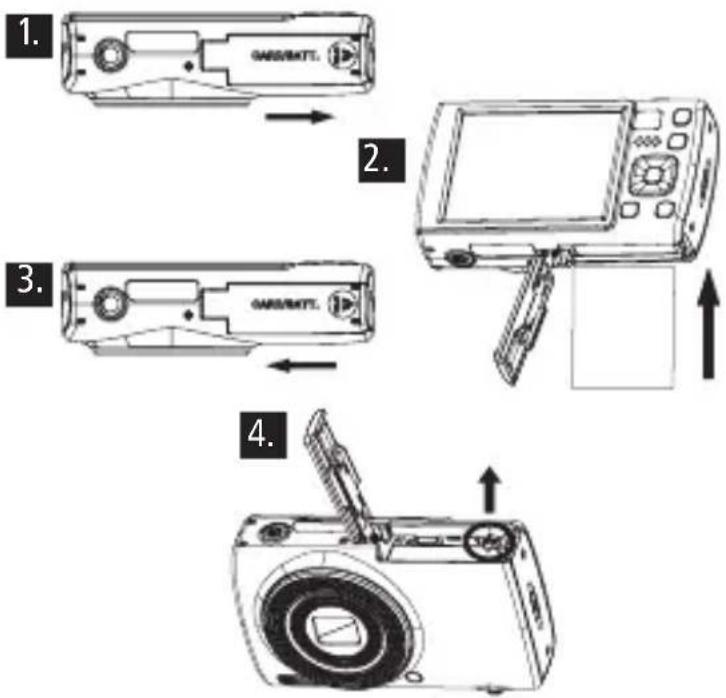
Using the Battery
- Open the battery compartment cover.
- Insert the battery with the electrical contacts facing until the battery locks into place.
- Close the battery compartment cover.
- To remove the battery, open the battery compartment cover, push the battery lock lever to the side and remove the battery.
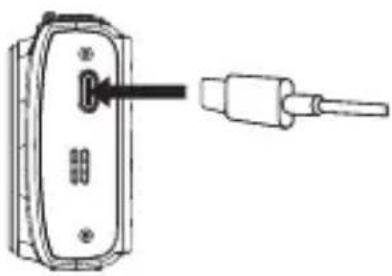
Charging the battery
- Use the supplied USB-C cable to charge your camera either via an adapter (5.0 V 1.0 A) or connect the camera directly to the PC.
- The charging indicator turns red when the battery is charging.
- The charging indicator automatically turns off when the battery is fully charged.
natural_image
Diagram of a device with a connector and cable, showing no text or symbolsNote: If the charging lamp flickers slightly, it means that the battery is not inserted or is inserted incorrectly. Check that the battery is inserted correctly.
Getting Started
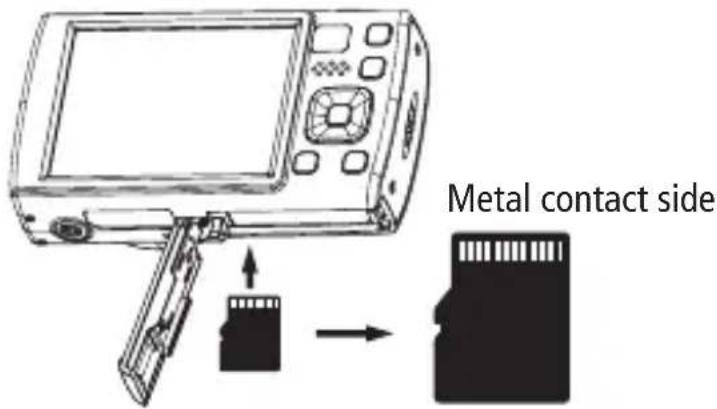
Inserting and formatting the memory card
For normal use, a microSD memory card with a maximum of 64 GB and a speed class of U1 or higher is recommended.
- Open the battery/memory card cover on the bottom and push the memory card in until you hear a 'click'.
- To remove the memory card, open the cover and push the memory card in, and the card will automatically come out.
ENGLISH
Getting Started
Switching on/off
- Press and hold the on/off switch to switch the camera on or off.
- Switch on the automatic shut-down function. If no operation is performed, the camera will automatically switch off to save energy.
Video / photo mode
- The camera automatically starts in photo mode when it is switched on.
- Press the mode button to switch to video mode.
- Press the shutter button to start recording a video and press it again to stop recording.
- Press the mode button to switch modes.
Getting Started
Autofocus
- In photo mode, press the shutter button halfway down and keep the camera still. The camera will now focus automatically.
- When you see the green focus frame on the screen, this means that the camera has focused on the subject. Now press the shutter button fully to take a photo.
Setting the Date and Time
- Press the Menu button in Photo mode to select the System Menu setting.
- Press the right button to select the 'Date & Time' setting and set the current date and time.
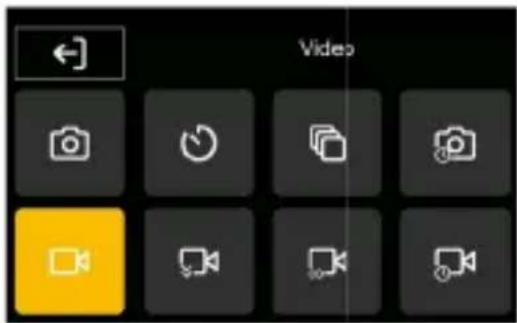
Changing Modes
- Press the Mode button to switch between the following eight modes: Photo, Self-timer, Burst, Time-lapse Photo, Video, Slow & Quick Motion, Loop Record, Time-lapse Video.
ENGLISH
Modes
Photo mode
- Press the shutter button to take a simple photo.
Self-timer
- Set the self-timer and choose between 2/5 or 10 seconds.
- When you press the shutter button, a countdown with the selected time will run before the photo is taken.
Continuous shooting
- Select this mode to take continuous shots.
- You can choose between 3, 5 or 10 continuous shots.
- When you press the shutter button, the selected number of photos will be taken in quick succession.
Modes
Interval shooting
- In interval mode, set the interval and duration.
- For the interval, you can choose from 3/5/10/30 or 60 seconds.
- For the duration, you can choose from 5/10/15/20/30/60 minutes or infinity.
- After pressing the shutter button, the camera starts interval shooting according to your settings.
- To stop the mode, press the shutter button again.
Video mode
- In video mode, press the shutter button to start recording and again to stop.
ENGLISH
Modes
Slow motion
- In slow motion mode, press the shutter button to start recording in slow motion.
- The camera records at a higher frame rate, resulting in slower motion playback.
Loop recording
- In loop mode, set the length of the video file to 1 / 3 / 5 / 10 minutes.
- Press the shutter button to start recording a video segment of the specified length.
- When the time is up, the camera stops recording and automatically starts a new video segment.
- To stop loop recording, press the shutter button again.
Modes
Time-lapse mode
- In time-lapse video mode, you can select the interval between 1 / 3 / 5 / 10 / 30 or 60 seconds and the duration between unlimited 5 / 10 / 15 / 20 / 30 or 60 minutes.
- Press the shutter button to start recording a time-lapse video with the preset parameters.
- Time-lapse videos compress time to record shorter videos with faster motion. To exit time-lapse video mode, press the shutter button again.
Selfie mode
- Press the camera switch to switch between the main and selfie cameras.
- Press the shutter button to take photos or record videos in selfie mode.
ENGLISH
Operation
Flash mode
- The flash is set to 'Off' by default. Press the right/flash button to switch between the different flash modes:
Automatic The flash will automatically fire when the surroundings are too dark.
On The flash will fire with every shot.
Off The flash will not be used.
Always on The flash will remain on.
Operation
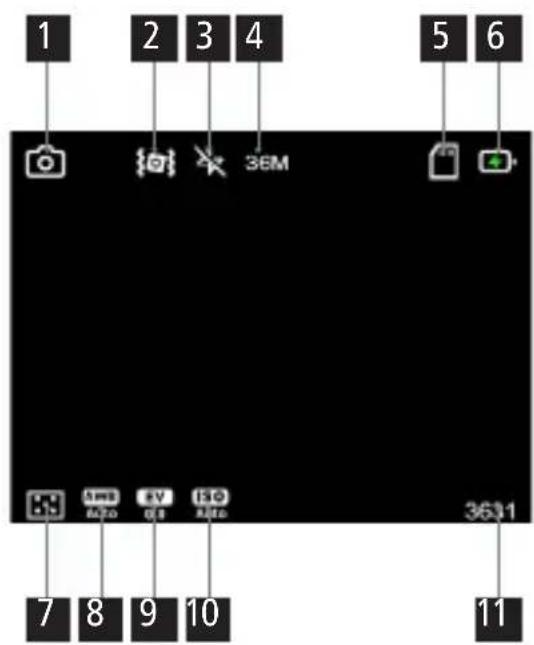
Display
1 Current mode
2 Indicates whether stabilisation is switched on
3 Displays the selected flash setting.
4 Indicates the resolution at which pictures/videos are taken.
5 Indicates whether a microSD card is inserted or write-protected.
6 Displays the battery status.
7 Indicates which metering method is set.
8 Displays the white balance setting.
9 Displays the exposure value selected. The exposure value can be set between +2.0 and -2.0..
10 Displays the ISO value set.
11 Available storage capacity on the microSD card. The number of photos or minutes of video that can still be stored is displayed.
Operation
System / photo / video settings
- Press the menu button in photo or video mode.
- Now navigate through the menus using the left/right/up and down buttons.
- Press the OK button to confirm your selection. Press the menu button to return.
Playback mode
- Press the playback button to enter playback mode. Here you can view, delete, protect, rotate or play your photos/videos as a slideshow.
Operation
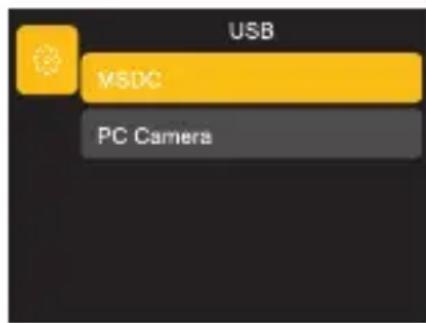
Connecting to a computer
When you connect the camera to a computer, you can transfer images directly to the computer, charge the camera only, or use the camera as a webcam.
- Connect the USB-C port of the camera and the USB port of the computer using the supplied USB cable.
- The camera will automatically turn on and the screen will display the available options.
- Press the Up/Down button to select the desired option and then press the OK button to confirm the option.
ENGLISH


natural_image
Solid orange rectangular background with no text, symbols, or patternsOperation
Charging mode
- If you do not select MSDC or PC Camera, the camera will automatically only be charged.
Mass Storage mode
- Select 'MSDC' to recognise the camera as a drive on the computer and to transfer data.
Note: Data can only be copied from the memory card to the computer.
PC Camera
- Select the 'PC Camera' mode. The camera can be used as a webcam, for live streaming, etc.
| Image sensor Sony IMX206 1/2.3' (crop factor 5.6) | |
| Chip Icatch V39AX | |
| Photo resolution 64 MP* (9,248 x 6,936) | 56 MP* (8,640 x 6,480) | 48 MP* (8,000 x 6,000) | 36 MP* (6,880 x 5,160) | 24 MP* (5,600 x 4,200) | 20 MP* (5,120 x 3,840) | 16 MP (4,640 x 3,480) | 12 MP (4,032 x 3,024) | 8 MP (3,264 x 2,448) | 5 MP (2,592 x 1,944) | |
| Video resolution 5K* (5,120 x 2,880) at 30 fps | 4K* (3,840 x 2,160) at 30 fps | 2.7K* (2688 x 1512) at 30 fps 1080p (1920 x 1080) at 120 fps / 60 fps / 30 fps 720p (1,280 x 720) at 120 fps / 60 fps / 30 fps | |
| Modes Photo, Self-timer, Continuous Shooting, Time-lapse Photo, Loop, Video, Slow & Quick Motion | |
| Lens 5x Optical Zoom | 2x Digital Zoom | 35 mm equivalents: 28–140 mm | F/3.9–6.3 | |
| White balance Auto / daylight / cloudy / incandescent / fluorescent | |
| Exposure compensation | -2.0 EV to +2.0 EV in 1 steps |
ENGLISH
Technical Data
| Metering Centre, Multi, Spot |
| Flash Yes |
| Self-timer 2 / 5 / 10 seconds |
| Display 2.8' rear IPS display with touch function |
| Storage Micro SD cards up to 64 GB, Class U1 or higher (not included) |
| Data format Photo: JPG | Video: MP4 H.264 |
| Connectors USB-C |
| Material Plastic, aluminium, glass |
| Power supply Lithium-ion battery (3.7 V / 800 mAh / 2.96 Wh) |
| Input DC 5.0 V / 1.0 A |
| Dimensions | Weight 10 x 6 x 2.98 cm (L x W x H) | 157 g |
| Whats's in the box Powerflex Compact, battery, USB-C cable, hand strap, storage bag, user manual |
Technical details are subject to change without notice. Subject to typographical errors and errors. *interpolated
Disposal

Dispose of the packaging according to its type. Use the local possibilities for collecting paper, cardboard and other materials (applicable in the European Union and other European countries with systems for the separate collection of recyclable materials).

Devices that are marked with this symbol must not be disposed of with household waste! You are legally obliged to dispose of old devices separately from to dispose of household waste. Information on collection points that accept old appliances free of charge can be obtained from your local authority or town council.
Batteries and rechargeable accumulators must not be dis posed of in household waste! As a consumer you are legally obliged to dispose of all batteries and accumulators, whether they contain harmful substances* or not, to be disposed of in an environmentally sound manner. Accumulators and batteries are therefore marked with the symbol shown opposite. For more information, contact your dealer or contact return and collection points in your community.
*marked with: Cd = Cadmium, Hg = Mercury, Pb = Lead.
ENGLISH
EU Conformity
Rollei GmbH & Co. KG hereby declares that the digital camera 'Rollei Powerflex Compact' complies with the following directives.
2011/65/EU RoHs directive
2014/30/EU EMC directive

The full text of the EU declaration of conformity is available at the following Internet address: www.rollei.com/egk/powerflexcompact
natural_image
Isometric line drawing of a rectangular electronic device with three small circular symbols on top and a triangular pointer on the side (no text or labels)
natural_image
Diagram of a device with a connector and cable, showing no text or symbolsFRANÇAIS


natural_image
Solid orange rectangular background with no text, symbols, or patternsFonctionnement
Mode de chargement
natural_image
Isometric line drawing of a rectangular electronic device with three small circular symbols on top and a triangular pointer on the side (no text or labels)
natural_image
Diagram of a device with a connector and cable, showing no text or symbols
natural_image
Solid orange rectangular background with no text, symbols, or patternsFuncionamiento
Modo de carga
natural_image
Isometric line drawing of a rectangular electronic component with three small holes and a triangular symbol on top (no text or labels)
natural_image
Diagram of a device with a connector and cable, showing no text or symbols
natural_image
Solid orange rectangular background with no text, symbols, or patternsFuncionamiento
natural_image
Simple line drawing of a rectangular electronic component with three small holes and a triangular symbol on top (no text or labels)

natural_image
Simple line drawing of a coiled cable or rope with no text or symbols
natural_image
Simple line drawing of a rectangular object with two handles and a dotted line at the top (no text or symbols)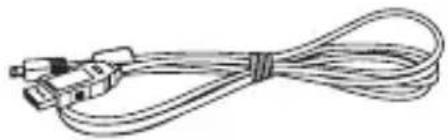
natural_image
Coiled cable with connectors and connectors (no text or symbols visible)Productoverzicht
natural_image
Diagram of a device with a connector and cable, showing no text or symbols
natural_image
Solid orange rectangular background with no text, symbols, or patternsBediening
Oplaadmodus
natural_image
Simple line drawing of a rectangular electronic component with three small holes and a triangular symbol on top (no text or labels)
Přehled produktů
natural_image
Diagram of a device with a connector and cable, showing no text or symbolsČESKY


natural_image
Solid orange rectangular background with no text, symbols, or patternsProvoz
Režim nabíjení
natural_image
Simple line drawing of a rectangular electronic component with three small holes and a triangular symbol on top (no text or labels)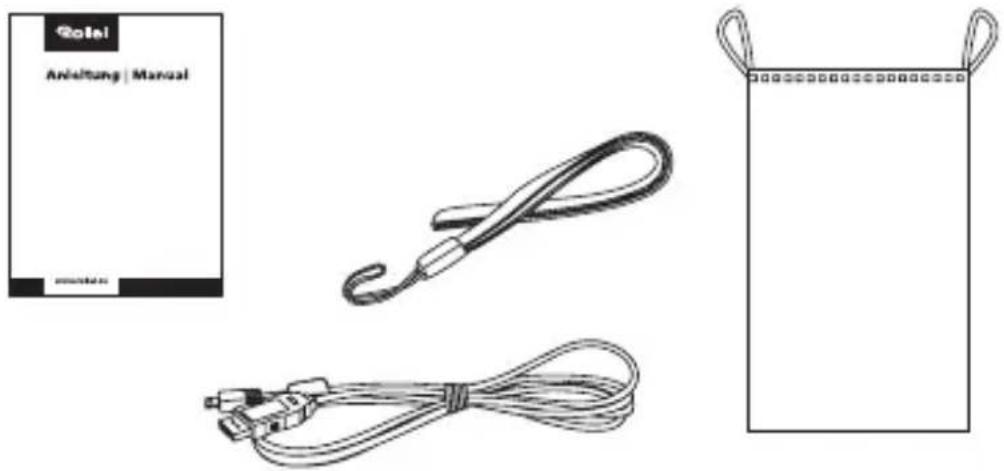
Prehl'ad produktov
natural_image
Diagram of a device with a connector and cable, showing no text or symbolsSLOVENSKÁ