
d23 com - Camera ROLLEI - Free user manual and instructions
Find the device manual for free d23 com ROLLEI in PDF.


| Product Type | Digital camera with LCD screen and built-in flash |
| Model | Rollei d23 com |
| Image Sensor | 1/1.75-inch interline CCD, 2.31 million pixels, with primary color filter |
| Lens | 8-24mm (equivalent to 38-114mm in 35mm photography); f/3.4 - f/3.6; 9 elements in 6 groups, 3 aspherical surfaces |
| Focusing Range | 40 cm to infinity (macro mode: 4 cm to 40 cm) |
| Digital Zoom | 2.5x |
| Image Resolution | Full: 1792 x 1200 pixels; Half: 896 x 600 pixels |
| Storage Medium | CompactFlash™ Card Type I |
| File Format | Exif 2.1 JPEG (DCF standard), DPOF 1.0 |
| Shutter Speed | 1/500 s to 1 s |
| Exposure Compensation | ±2 EV in 0.5 EV increments |
| White Balance | Auto, daylight, fluorescent, tungsten |
| Flash Modes | Autoflash, fill flash, flash off, autoflash with red-eye reduction, fill flash with red-eye reduction |
| Flash Range | 0.4 m - 3 m |
| LCD Screen | 1.8-inch TFT, approx. 60,000 pixels, 9 brightness levels |
| Viewfinder | Real-image zoom viewfinder; coverage approx. 80% at 3 m |
| Shooting Modes | Single-frame, continuous (approx. 1 fps), self-timer (10 s delay) |
| Power Source | 4 x AA alkaline or NiMH batteries; optional AC adapter |
| Dimensions (W x H x D) | 116 x 73 x 62 mm (4.57 x 2.87 x 2.44 in) |
| Weight | Approx. 280 g (9.88 oz) without batteries and CF card |
| Interfaces | USB (Mini-B), video out (NTSC/PAL) |
| Operating Temperature | 0°C to 40°C, max. 85% relative humidity |
| Included Accessories | 4 x AA batteries, video cable, wrist strap, camera case, USB cable, software CD-ROM, warranty card |
Frequently Asked Questions - d23 com ROLLEI
User questions about d23 com ROLLEI
0 question about this device. Answer the ones you know or ask your own.
Ask a new question about this device
Download the instructions for your Camera in PDF format for free! Find your manual d23 com - ROLLEI and take your electronic device back in hand. On this page are published all the documents necessary for the use of your device. d23 com by ROLLEI.
USER MANUAL d23 com ROLLEI
Instructions for use

Thank you for buying this digital camera.
Please read these instructions carefully to fully understand the different features of your camera.

This symbol confirms conformity of the camera with European Union regulations governing electrical equipment. CE stands for Conformité Européenne (European Conformity).
Carefully read all notes and warnings before using your camera.

WARNINGS
If the camera is used improperly, the batteries may get hot and even explode.
- Use exclusively batteries of the type specified in this manual.
- Be sure not to invert the polarity of batteries when inserting them.
- Do not expose the batteries to fire or high temperatures.
- Never try to recharge dry cells, short-circuit or open them.
- Never use batteries of different make or age in a set.
- Follow normal rules for the use of batteries.
Be very careful when using the camera near small children to avoid unexpected accidents.
Keep batteries and other objects that might be swallowed away from small children. Immediately call a doctor should such an object be swallowed.
Immediately remove the batteries and turn off the camera if...
- the camera has been dropped or subject to impact so that its interior components might be damaged;
- the camera emits smoke, smell or heat.
- Do not walk or run while looking at the camera's screen.
NEVER try to dismantle the camera! Touching its circuits involves the risk of electric shocks! Should repair or maintenance become necessary, consult your dealer.
CAUTION
The temperature of the camera rises during prolonged use. Take care when using the camera and changing batteries or the memory card.

Check whether the contents of your package is complete. Should this not be the case, consult your camera dealer or contact an authorized Customer Service Center.
- Camera
• Size AA alkaline batteries (4x) - Video cable
- Wrist strap
- Camera case
- USB cable
- Software on CD-ROM:
USB drivers for Windows®98/Windows®98 Second Edition/Windows 2000 Prof/Me USB drivers for Mac OS 8.6/9/9.0.2/9.0.4
Windows®/Macintosh (PDF) Manual
Adobe PhotoDeluxe 4.0 Family Edition, CD-ROM for Windows®
Adobe PhotoDeluxe 2.0 CD-ROM for Macintosh
- Documentation (hard copy)
Warranty Card
Proper and safe use 4
Before you start 5
Contents 6
Description of parts 10
Camera body 10
Terminals 12
Bottom plate 12
LCD monitor 13
Viewfinder 14
Brief instructions .... 16
Setting up the camera 16
Taking pictures 16
Playback 18
Deleting images 19
Setting up the camera
Attaching the wrist strap 23
Loading the batteries 24
Checking battery power 26
Automatic cutoff 27
Using the optional AC adapter 27
Inserting and removing the CF memory card.... 28
Inserting the CompactFlash™ card 28
Removing the CompactFlash™ card 29
Taking pictures
Basic modes
Display of LCD screen in Record mode 34
Camera settings 35
Focusing 36
Focus lamp 36
Focusing range in autofocus mode (shortest focusing distance) 36
Special focusing conditions 37
Focus lock (for off-center subjects) 38
Manual focusing 39
Built-in flash 41
Flash range.... 41
Choosing a flash mode.... 42
Flash ready lamp 43
Additional features
Continuous shooting 45
Self-timer 48
Digital zoom.... 51
Macro mode....53
Exposure compensation 55
Playback mode
Record-mode settings 58
Record-mode display (LCD screen) 58
Record-mode settings.... 58
Choosing image quality 60
Choosing image size.... 63
White-balance settings 65
Sharpness settings 68
Playback mode
Single-frame playback 71
Screen display in playback mode 72
Image-data display on screen 73
Index playback....74
Zoom playback 77
Slide show 79
Starting the slide show 79
Stopping the slide show 81
Settings in slide-show menu 82
Deleting images
Deleting an image 86
Deleting all images 90
Playback settings
The playback menu 94
The playback menu (LCD screen) 94
Playback options and settings 94
DPOF print settings 96
Selecting the image and the number of prints 96
Index-print settings.... 100
Canceling DPOF print settings 102
Folder name 104
Notes on the DCF format (Design Rule for Camera File System) 106
Setup
Setup menu
Setup-menu display on LCD screen 108
Setup-menu settings 108
Adjusting the brightness of the LCD screen 110
Automatic cutoff 112
Formatting a CompactFlash card 114
Setting date and hour 116
Activating the beeper 120
Video out
Switching video out 122
Choosing the screen language.... 124
Resetting to factory defaults 126
Connecting your camera to a computer
Connecting your camera to a computer.... 129
Installing the driver software.... 129
Installing Adobe PhotoDeluxe.... 139
Annex
Watching your images on a TV screen 142
Troubleshooting.... 143
Hints on working with the camera 147
Care and storage 151
Specifications 152
System requirements 155
KAMERAGEHÄUSE
* Do not touch!
Shutter release


DESCRIPTION OF PARTS
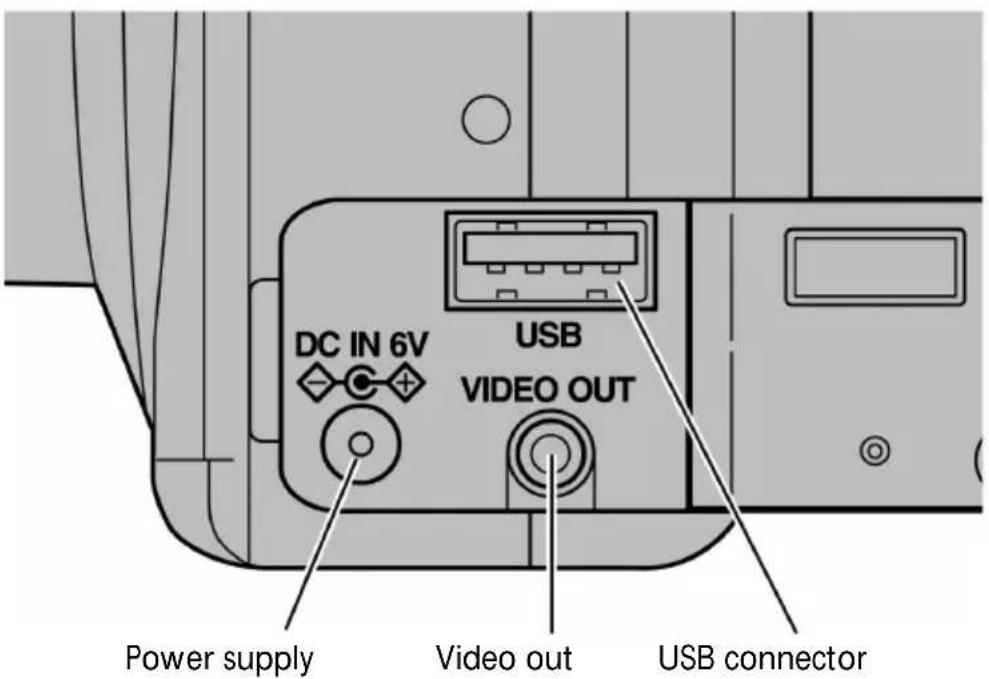
TERMINALS
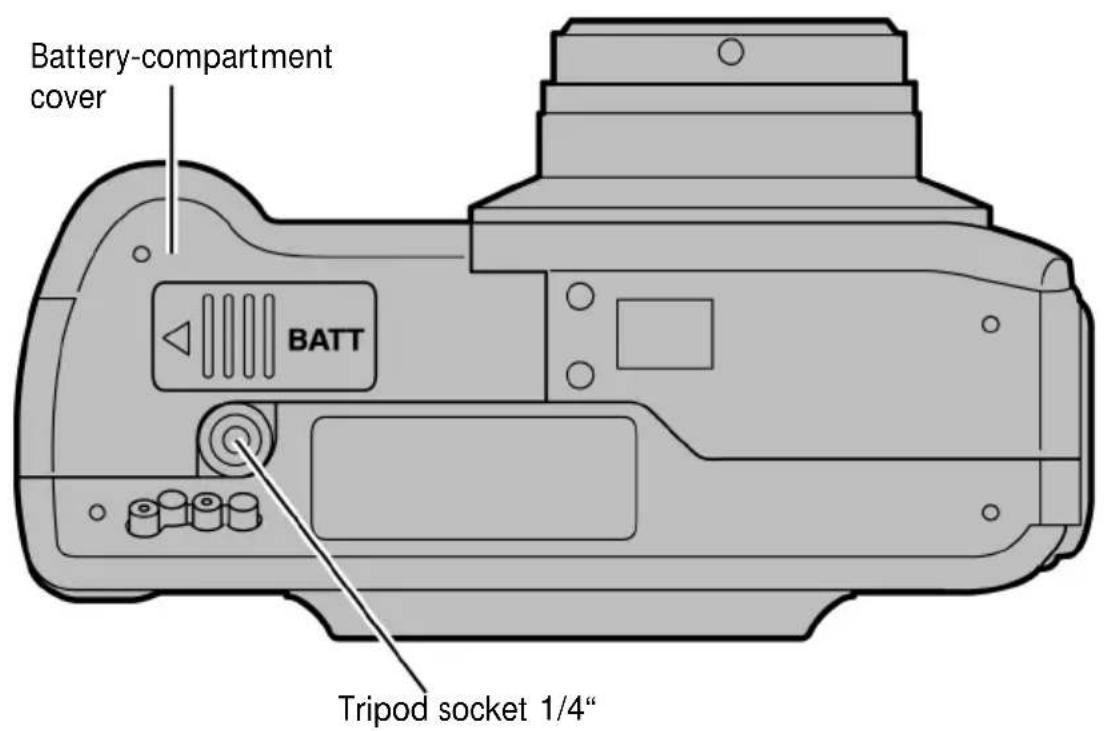
BOTTOM PLATE
DATA MONITOR
The diagram below shows all the data that can be displayed on the data monitor.

* The number of images remaining can only be approximate because it varies with JPEG compression which is a function of subject characteristics.
Viewfinder
Focus lamp (green)
Close-up parallax marks


natural_image
Simple black-and-white diagram of a blank rectangular frame with diagonal lines above it (no text or symbols)
Flash ready lamp (orange)
Close-up parallax marks
If you sight a subject closer than 1 m through the optical viewfinder, you will have to make allowance for parallax. In this case, only the portion below the parallax marks will be captured. It is therefore advisable to use the LCD screen for close-up shots, which is parallax-free.
Focus lamp (green)
| Lit Subject in focus. | |
| Blinking rapidly (approx. 8 times per second) | Focusing impossible.(Contrast too low, subject too dark or too close. Or – in macro mode – subject too far away.) |
| Blinking slowly (approx. twice per second) | Image being written to CompactFlash card or loaded from CompactFlash card. |
Focusing area

natural_image
Simple diagram with a rectangle, two circles on the left, and a gray square centered within it (no text or symbols)In autofocus mode, the camera will focus on the shaded area.
Flash ready lamp (orange)
| Lit Flash ready to fire. | |
| Blinking rapidly (approx. 8 times per second) when shutter release is pressed fully. | Flash recharging, shutter remains locked. |
| Blinking slowly (approx. twice per second), with flash OFF. | Slow shutter speed will be used.(Use tripod to avoid camera shake.) |
SETTING UP THE CAMERA
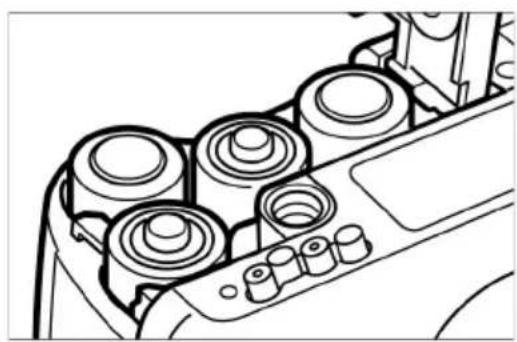
natural_image
Line drawing of a mechanical component with multiple circular components and a handle (no text or symbols)1 Load batteries (see page 24).
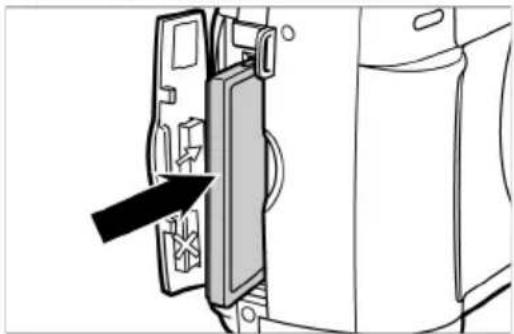
natural_image
Diagram of a door panel with an arrow pointing to a component, showing no text or symbols.2 Insert CompactFlash' card (see page 28).
TAKING PICTURES
For details, see page 32.
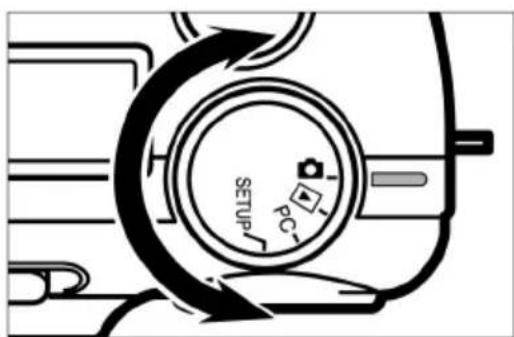
3 Turn control dial to 📷.

4 Switch camera on pushing ON/OFF switch.

natural_image
Black-and-white photo of four people sitting on grass, no visible text or symbols5 Compose your picture using the optical viewfinder or the LCD screen.
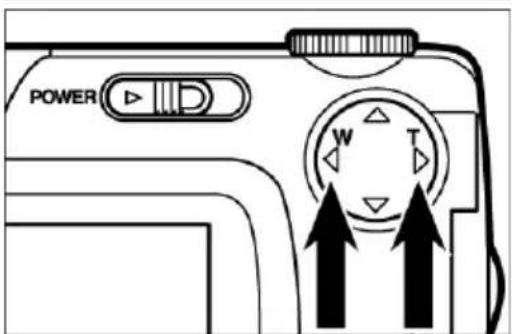
6 Use the four-way toggle to zoom in or out, if necessary. ▶/★
- Press ▶ to zoom in (telephoto).
- Press ◀ to zoom out (wide-angle).

natural_image
Illustration showing a hand pressing down on a mechanical component with a magnified inset (no text or symbols)7 Press the shutter release halfway.
- The green focus lamp lights when the camera has completed focusing.

natural_image
Illustration showing a hand pressing down on a mechanical component with a magnified inset (no text or symbols)8 Press the shutter release down fully to take your picture.
- Your picture appears on the LCD screen.
- The green focus lamp blinks slowly while the picture is being saved on your CompactFlash card (approx twice per second).
PLAYBACK
For details, see page 71.

1 Turn the control dial to ▶

2 Switch the camera on pushing the ON/OFF switch.
- The last picture captured appears on the LCD screen.

3 Pressing the ▶ or ◀ toggle lets you display the preceding or the following image.
DELETING IMAGES
For details, see page 86.
1 Display the image to be deleted proceeding as described under [1] to [3] under PLAYBACK on the preceding page.
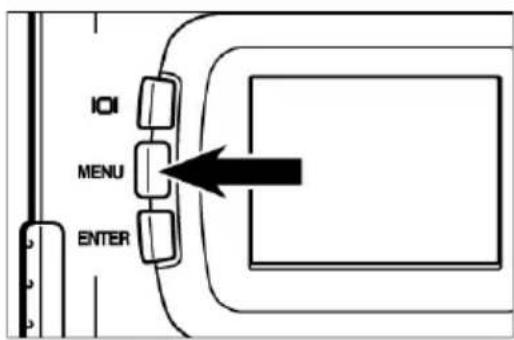
2 Press the MENU button. The playback menu appears on the LCD screen.

3 Once [DELETE] is highlighted, press the ▶ toggle.

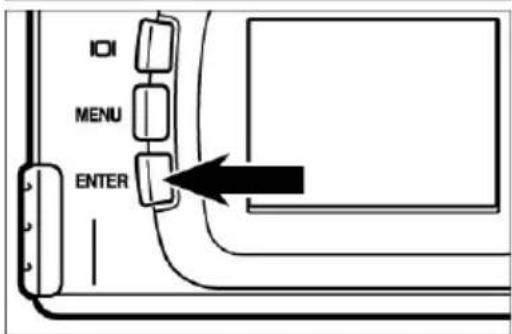
4 Once [SELECT] is highlighted, press the ENTER button.

- The image to be deleted appears on the LCD screen. The display shown at left lets you choose whether or not you wish to delete the image.
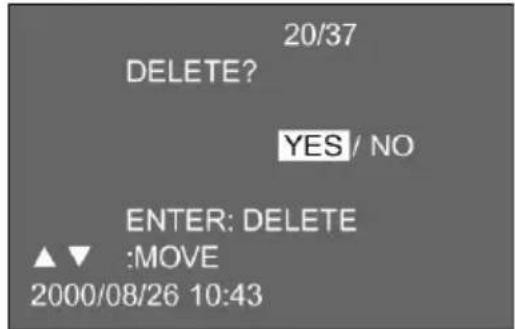

Press the ◀ toggle so that [YES] is highlighted, then press the ENTER button.
- The image displayed under [1] is deleted.

To cancel deletion, select [NO] and press the ENTER button.
- The LCD screen returns to playback mode.


Press the MENU button.
• The LCD screen resets to playback menu.
SETTING UP THE CAMERA

natural_image
Technical illustration showing two mechanical assembly steps with arrows indicating motion direction (no text or symbols)1 Thread the loop of the wrist strap through the strap eyelet.
2 Thread the other end of the wrist strap through the loop and tighten.
The camera is powered by four size AA alkaline or NiMH batteries.
- If you use rechargeable (NiMH) batteries, make sure they have been fully loaded with the aid of a suitable charger.

Always switch the camera off before changing batteries!
- You may skip this step when you load batteries for the first time after buying your camera.
Open the battery compartment pushing its cover as illustrated (1), then flip the cover open (2).
Load the batteries with correct polarity, following the +/- marks.

Close the battery compartment as shown (1) and push the cover shut so that it clicks into place (2).
• After changing batteries, check whether the built-in clock shows the right date and time (see page 116).
If the camera is neither loaded with batteries nor connected to AC, the clock may be slow or reset entirely. Should this be the case, reset the date and time as described on page 116.
- Never put the camera down with its battery compartment open to avoid damage to the compartment cover.
- Be careful when changing batteries: The spent cells may be hot!


natural_image
Empty rectangular frame with rounded corners (no text or symbols)
natural_image
Pure electrical circuit symbol for a battery, without any text or labels
natural_image
Empty rectangular frame with rounded corners (no text or symbols)CHECKING BATTERY POWER
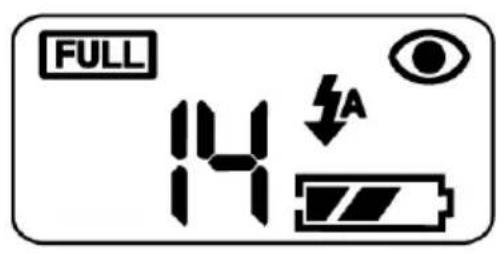
With batteries loaded, the camera automatically checks their condition and displays the result on the data monitor.
lit - Full power
lit - Less than full power, but camera remains fully operative
The display goes dead, followed by five-second blinking of ☐, whereupon it goes dead again.
- Battery power insufficient for operation of camera.
- Replace all batteries by fresh ones.
- Remove all batteries and use the optional AC adapter (see page 27).
- If the data monitor remains blank, replace the batteries or check whether they have been loaded with correct polarity (+/-).
AUTOMATIC CUTOFF
To save energy, the camera will automatically cut off three minutes after its last use. To restore it to operating condition, switch it on again using the ON/OFF switch.
- With batteries, the cutoff interval may be extended to 5 minutes, 10 minutes or 30 minutes (see page 112).
- When powered by the optional AC adapter, the camera will automatically cut off 30 minutes after its last use. This interval cannot be varied.
USING THE OPTIONAL AC ADAPTER
Using the optional AC adapter, the camera can be connected to a wall outlet. This is advisable for prolonged shooting sessions, above all when the camera is linked up to a PC.
Make sure the camera is turned off before changing from battery to AC power or vice versa. NEVER change the power supply with the camera switched on!

Plug the AC adapter into the camera terminal.
- The shape of the plug depends on the type of AC adapter used.
2 Connect the AC adapter to a wall outlet.
Be sure to turn the camera off before inserting or changing the CompactFlash' card. The data on the card may be lost or the card itself damaged if it is inserted or changed with the camera switched on. Format the card after loading down your pictures to your computer.
Inserting the CompactFlash' card
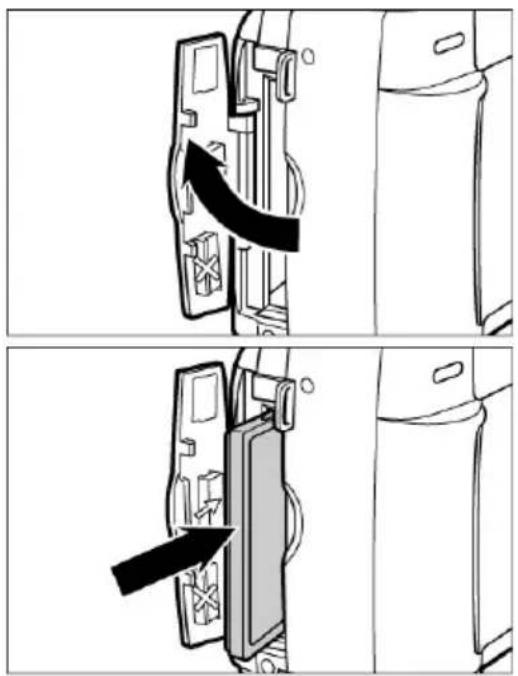
1 Open the card slot as shown.
2 • Insert the card with its flat side facing camera lens and the signal end facin
camera lens and the signal end racing down, pushing it as far as it will go.
• Take care not to jam the card, insert it straight.
- Should the card jam, make sure you are inserting it the right way round. Never use force, or you may damage the card and/or your camera!
natural_image
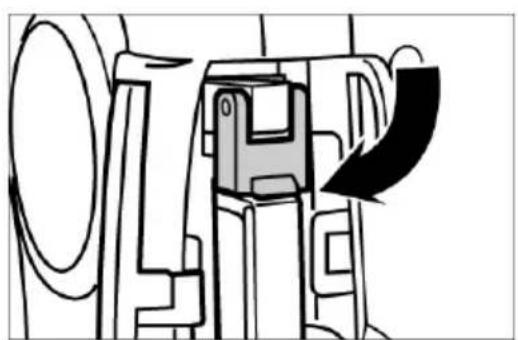
Technical line drawing of a mechanical assembly with no visible text or symbols3 Swing the ejector lever down as shown.
- Make sure the lever is swung down, or the card slot cannot be closed.
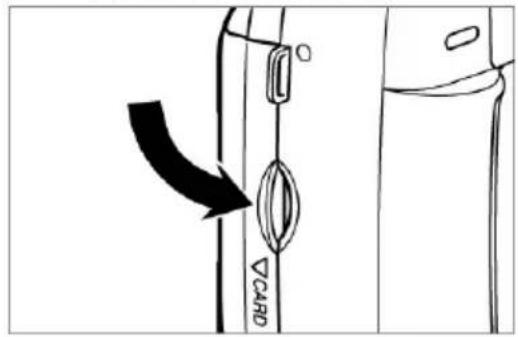
4 Close the card slot to that it clicks shut.
REMOVING THE CF CARD

1 Switch the camera off.
Open the card slot as shown.

natural_image
Diagram of a mechanical device with a curved arrow indicating motion or force direction (no text or symbols)2 Swing the ejector lever up as shown.

natural_image
Mechanical component diagram showing a lever mechanism with an arrow indicating direction (no text or symbols present)4 Press the ejector lever straight in.
- The card will be ejected part of the way so that it can easily be gripped and removed.
• Proceed with care: The card might be hot! - Keep the card in its case.

5 Close the card slot so that it clicks shut.
TAKING PICTURES

natural_image
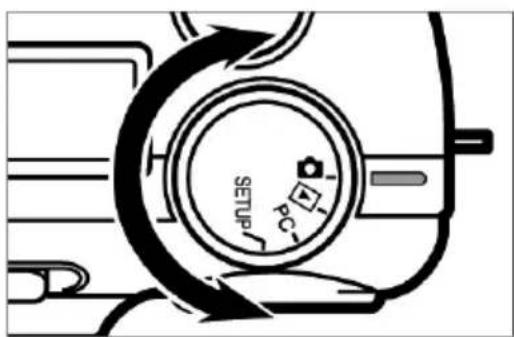
Black-and-white photo of a family of four sitting on grass, no visible text or symbols1 Turn the control dial to
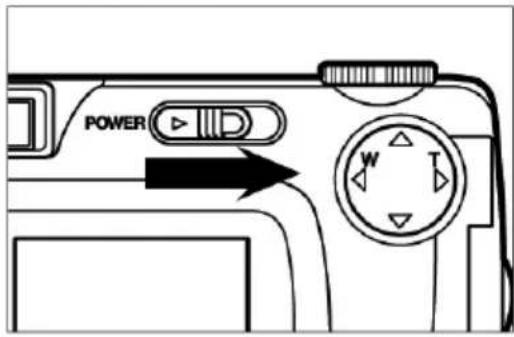
2 Switch the camera on using the ON/OFF SWITCH.
- The ON/OFF switch is spring-loaded and returns to its normal position.
3 Compose your shot, using either the optical viewfinder or the LCD screen.
Compose your shot, using either the optical viewfinder or the LCD screen.
- Be sure not to obstruct the lens with your fingers, hair, etc.
- Should automatic focusing be impossible with your particular subject, use focus lock (see page 38).

4 Zoom in or out with the ▶ /◀ toggles, if necessary.
- Use the ▶oggle to zoom in (telephoto).
- Use the ◀ toggle to zoom out (wide-angle).

natural_image
Illustration showing a hand pressing down on a button labeled 'down' (no text or symbols present)Pressing the shutter release you will note a slight resistance in the halfway position. This is stage one of this button, referred to here as "pressed halfway".

Press the shutter release halfway.
- The camera will focus automatically. The focus lamp comes on green as soon as this has happened.
- Should the focus lamp blink, repeat step [1].
- The orange flash ready lamp lights when the flash is charged and ready to fire.
- Should the orange flash ready lamp blink slowly (about twice per second), the camera will use a relatively slow shutter speed that may give rise to camera shake. It is therefore advisable to mount the camera on a tripod.

natural_image
Diagram showing a hand pressing down on a mechanical component with a magnified inset (no text or symbols)
Press the shutter release down fully to take your picture.
- Should the orange flash ready lamp blink as you press the shutter release down fully, the flash is still recharging. In this case, keep the release down until the flash has recycled.
- You picture will appear on the LCD screen, and it will be saved to your CF card. During saving the green focus lamp will blink slowly (about twice per second), and RECORDING will blink on the LCD screen.
Be sure to keep the battery compartment closed, not to interrupt the power supply nor remove the CF card while the data are being saved (i.e. until the green focus lamp and RECORDING stop blinking). Otherwise, your data on the CF card might be damaged or lost entirely.
DISPLAY OF LCD SCREEN IN RECORD MODE

The display of the LCD screen will change with every depression of the display button.

LCD screen switched off

Live image
(no camera settings)
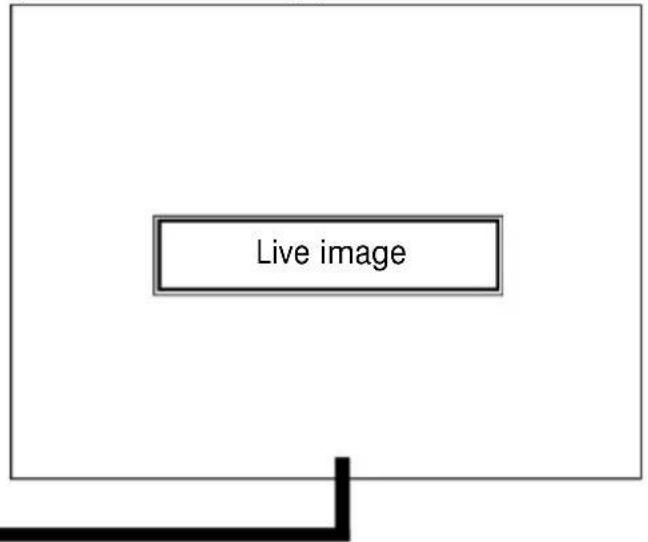
Camera settings

FOCUS LAMP
In the autofocus mode, the camera focuses as soon as the shutter release is pressed halfway.

natural_image
Simple diagram with sun icon, circle, and rectangular frame (no text or symbols)If the green focus lamp blinks, check the following:
- Is the camera in the autofocus mode and are you trying to focus on a subject that is difficult to focus automatically? (See page 37)
- Is your subject closer than the minimum focusing distance (or farther away than 40 cm in the macro mode)?
| Focus lamp lit | Focus set and locked in |
| Focus lamp blinks rapidly (approx. 8 times per second) | Focus detection impossible, but shutter can be released |
FOCUSING RANGE IN AUTOFOCUS MODE (shortest focusing distance)
The minimum focusing distance in autofocus mode is listed below. If your subject is closer than 0,4 m or farther away than 40 cm in macro mode, autofocusing is impossible, and the green focus lamp will blink.
| Standard mode 0.4 m - ∞ (infinity) | |
| Macro mode (see page 53) 4 cm – | 40 cm |
SPECIAL FOCUSING CONDITIONS
In the autofocus mode, the camera uses the image contrast (the difference between bright and dark components) on the CCD (charge-coupled device) for focus detection. This is why there are certain types of subject that are unsuitable for autofocusing. In such a case use focus lock (see page 38): Sight a subject detail at the same distance as your main subject and lock focus. Alternatively, you may switch to manual focusing (see page 39).
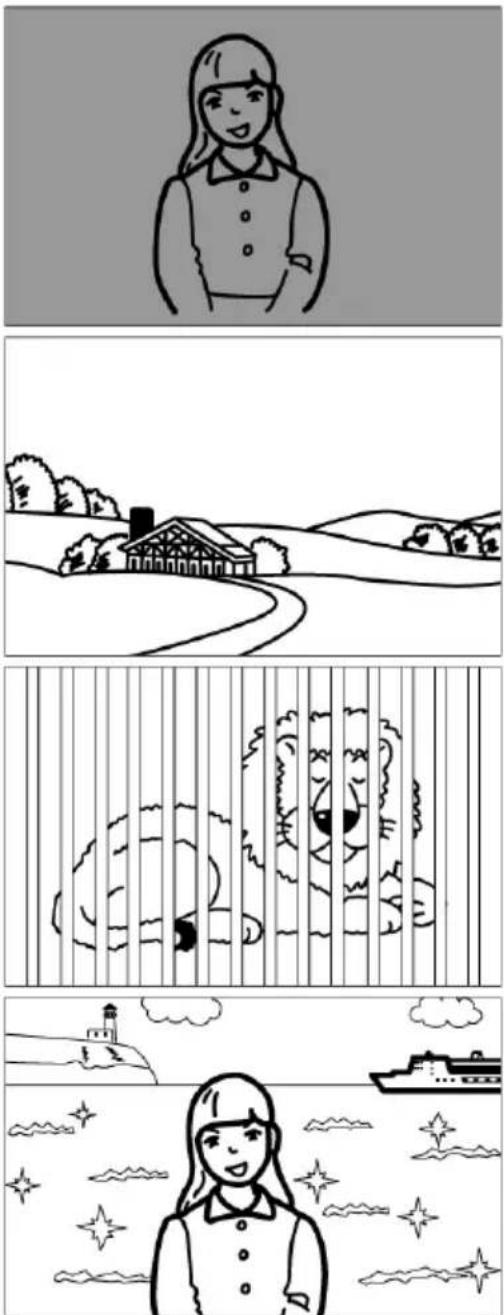
natural_image
Four-panel comic strip showing a girl in profile, rural landscape with houses, and scenic views of a ship (no text or symbols)Subject too dark.
Subject contrast too low (e.g. blue sky or white wall).
Autofocus area captures detail at different distances.
Subject too bright (e.g. highly reflecting car paint or glittering water surface).
FOCUS LOCK
(for off-center subjects)
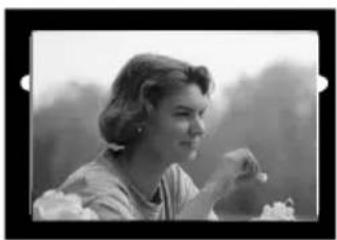
If your main subject is off center, the camera will focus on the background in the center of the field. In this case, use focus lock.

natural_image
Black-and-white portrait of a woman with styled hair, holding flowers, against a blurred natural background (no text or symbols visible)1 Place the autofocus area over your main subject in the center of the viewfinder or center your subject on the LCD screen and press the shutter release halfway.
- The camera focuses automatically and locks in the focus setting for as long as you keep the shutter release depressed halfway. The green focus lamp lights.


natural_image
Black-and-white photo of two people eating together at a table with food in the background (no visible text or symbols)2 Recompose without letting go of the shutter release, then press the release fully down to take your picture.
MANUAL FOCUSING
Focus using the ▲ or ▼ toggle while watching your subject on the LCD screen.
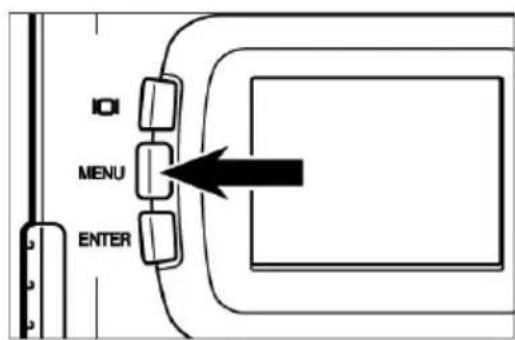
1 Turn the control dial to 📷 and press the MENU button.
- The record menu is displayed on the LCD screen.

2 Press the ▲ or toggle until [FOCUS] is highlighted, then press the ▶ toggle.
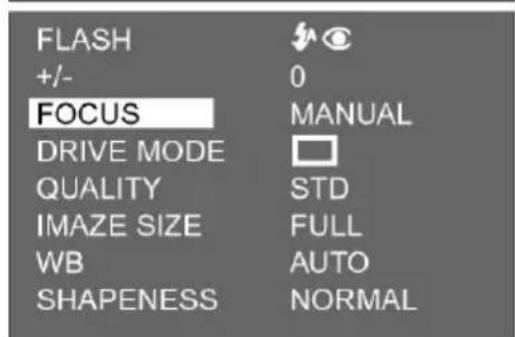
3 Press the ▲ or ▼ toggle until [MANUAL] is highlighted, then press the ◀ toggle.

4 Press the MENU button.
- MANUAL appears in the upper right-hand corner of the LCD screen, confirming that you are in the manual focusing mode.

5 Now focus with the aid of the ▲ and ▼ toggles while watching your subject on the LCD screen.
- Adjust focus until your subject appears sharply defined on the screen.
- Pressing the ↑ toggle will shift focus towards the background.
- Pressing the toggle will shift focus towards the foreground.

natural_image
Diagram of a camera lens assembly with a downward arrow indicating the component (no text or symbols present)6 Press the shutter release down fully to take your picture.
- Manual focus will be maintained for as long as the camera remains switched on. If you switch it off and on again, the camera will reset to autofocus.
There are five flash modes to accommodate different lighting conditions and subjects.
 | AUTOFLASH In this mode, the flash will fire automatically in low light or backlight. | |
 | FILL FLASH In this mode, the flash will fire regardless of available light. It can thus be used to avoid harsh foreground shadows in daylight shots. | |
 | FLASH OFF Disable the flash if your subject is out of flash range or flash is not allowed. | |
 | AUTOFLASH WITH RED-EYE REDUCTION | Use these modes to avoid red-eye in flash shots of people or animals. In these modes, the main flash is preceded by a number of weak preflashes. It is advisable to mount the camera on a tripod. |
 | FILL FLASH WITH RED-EYE REDUCTION |
Flash range
To avoid underexposure, make sure that your subject is within flash range.
| 0,4m-3mFlash range |
CHOOSING A FLASH MODE


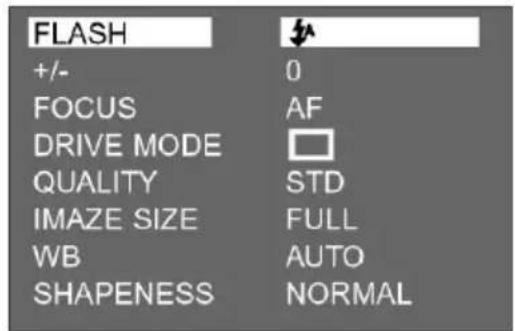
1 Turn the control dial to 📋nd press the MENU button.
• The LCD screen displays the record menu.
2 Once [FLASH] is highlighted, press the toggle.
3 Press the ▲ or ▼ toggle until the desired flash mode is highlighted.
- The flash modes change in the following order:

flowchart
graph TD
    A["AUTOFLASH"] --> B["FILL FLASH"]
    B --> C["FLASH OFF"]
    C --> D["AUTOFLASH WITH RED-EYE REDUCTION"]
    D --> E["FILL FLASH WITH RED-EYE REDUCTION"]
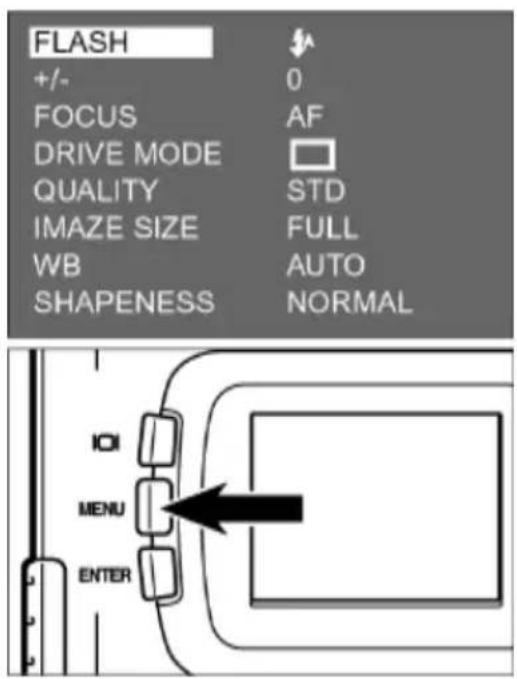
4 Once the desired flash mode is highlighted, press the ◀ toggle.
Press the MENU button.
- The icon of the flash mode selected is displayed in the upper right-hand corner of the LCD screen (see page 35). No icon will be displayed on the screen in the case of AUTOFLASH. Only the X symbol will appear in the case of AUTOFLASH WITH RED-EYE REDUCTION.
- When it is switched on, the camera is always in the default mode AUTOFLASH WITH RED-EYE REDUCTION.
FLASH READY LAMP
The orange flash ready lamp indicates the flash status.

natural_image
Simple line drawing of a sun icon next to a rectangular frame (no text or symbols)| Lit Flash charged and ready to fire. | |
| Blinks rapidly when shutter release is depressed fully (approx. 8 times per second). | Flash being charged, shutter stays locked. |
| Blinks slowly (with Flash OFF; approx. twice per second) | Camera will use slow shutter speed involving risk of camera shake. The flash is disabled in the CONTINUOUS-SHOOTING MODE, the MACRO MODE and the FLASH-OFF MODE. |
ADDITIONAL FEATURES
Keeping the shutter release depressed will switch the camera to continuous shooting. The maximum number of pictures that can be taken in this mode is listed below (for an 8MB memory card).
Maximum number of continuous shots (approximate)
| Image quality | FULL size (full resolution) | HALF size (half resolution) |
| FINE | approx. 2 images | approx. 6 images |
| STD. (Standard) | approx. 4 images | approx. 12 images |
| ECON. (Economy) | approx. 8 imagesv | approx. 12 images |
• See page 60 (image quality) and page 63 (image size: FULL or HALF size.
- The number of images may vary as a function of subject and surroundings.

1 Turn the control dial to 📷 and press the MENU button.
- The record menu is displayed on the LCD screen.
2 Press the ▲ or ▼ toggle until [DRIVE MODE] is highlighted, then press the ▶ toggle.


3 Press the ▲ or toggle until the icon is highlighted.
- Settings in this mode change as follows:
![ROLLEI d23 com - Press the ▲ or ▼ toggle until [DRIVE MODE] is highlighted, then press the ▶ toggle. - 3](/content/2026/05/1109812/images/b8971a0a6e7b312553a19db6d89f34d43d629de1e09da8a747cf72e9f3efec03.jpg)
flowchart
graph TD
    A["Single-frame shooting"] --> B["▲▼"]
    C["Continuous shooting"] --> D["▲▼"]
    E["Self-timer"] --> F["●"]

4 Press the ◀ toggle.

5 Press the MENU button.
- The icon is displayed in the upper right-hand corner of the LCD screen (see page 35).
- Flash is automatically switched to FLASH OFF and disabled.
- If you select single-frame shooting or self-timer, the flash will automatically be reset to AUTOFLASH WITH RED-EYE REDUCTION.
![ROLLEI d23 com - Press the ▲ or ▼ toggle until [DRIVE MODE] is highlighted, then press the ▶ toggle. - 6](/content/2026/05/1109812/images/66e4ac460cc62913bdefe94e0edb9d9d61b8c2e50c08afe5d23b86bd438cd752.jpg)
natural_image
Black-and-white photo of three people outdoors, no visible text or symbols6 Compose your subject either through the optical viewfinder or on the LCD screen, and vary your coverage – if necessary – using the ▶ and ◀oggles.
- Press the ▶ toggle to zoom in (telephoto).
- Press the ◀ toggle to zoom out (wide-angle).

7 Press the shutter release halfway.
- The focus and exposure settings for the picture series will be locked in if you keep the shutter release briefly half-pressed before continuous shooting.
8 Press the shutter release down fully and keep it in this position.
- The camera will keep shooting until you let go of the shutter release or the maximum number of shots has been exposed.
- The camera will remain in the continuous-shooting mode until you select another mode or switch it off.
Your picture will be taken about 10 seconds after you press the shutter release.

1 Mount the camera on a tripod, turn the control dial to 📷 and press the MENU button.
• The LCD screen displays the Record menu.
2 Press the ▲ or ▼ toggle until [DRIVE MODE] is highlighted, then press the ▶ toggle.
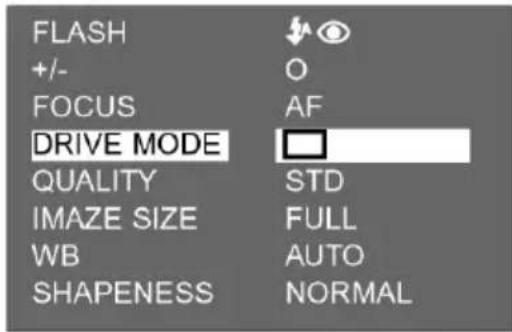
3 Press the ▲ or ▼ toggle until the is on is highlighted.
- Settings in this mode change as follows:

![ROLLEI d23 com - Press the ▲ or ▼ toggle until [DRIVE MODE] is highlighted, then press the ▶ toggle. - 11](/content/2026/05/1109812/images/a2ac1c2429c5b2fbdfc139f0da6ae6a9c2903e4c260dd63198989a2911fa8152.jpg)
flowchart
graph TD
    A["Single-frame shooting"] --> B["▲▼"]
    C["Continuous shooting"] --> D["▲▼"]
    E["Self-timer"] --> F["●"]

4 Press the ◀ toggle.
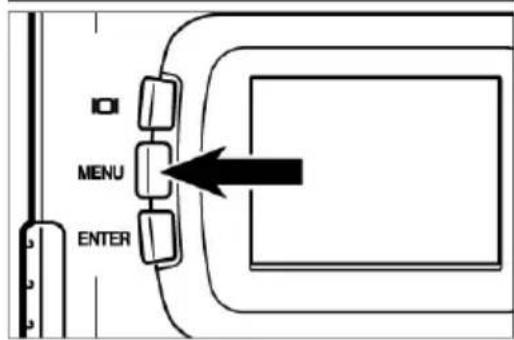
5 Press the MENU button.
- The self-timer icon 🔒 appears in the upper right-hand corner of the LCD screen.
![ROLLEI d23 com - Press the ▲ or ▼ toggle until [DRIVE MODE] is highlighted, then press the ▶ toggle. - 14](/content/2026/05/1109812/images/185ec822f540153d9304457cfb913053a9c54e972ceaa456663d2d4bed4a6a3b.jpg)
natural_image
Black-and-white photo of three people outdoors, two seated and one standing, surrounded by trees (no text or symbols visible)6 Compose your subject either through the optical viewfinder or on the LCD screen, and vary your coverage – if necessary – using the ▶ and ◀oggles.
- Press the ▶ toggle to zoom in (telephoto).
- Press the ◀ toggle to zoom out (wide-angle).
![ROLLEI d23 com - Press the ▲ or ▼ toggle until [DRIVE MODE] is highlighted, then press the ▶ toggle. - 15](/content/2026/05/1109812/images/027efd84154898c9a740e1dd9d4ac424064785868ecd250e131d2b2746d5a5da.jpg)
natural_image
Illustration showing a hand pressing down on a mechanical component with a magnified inset (no text or symbols)7 Press the shutter release halfway.
![ROLLEI d23 com - Press the ▲ or ▼ toggle until [DRIVE MODE] is highlighted, then press the ▶ toggle. - 16](/content/2026/05/1109812/images/cf7b210017c6b25111a8fbf084427e927a42e00e89b87bc5d5f5a84da6c55b1d.jpg)
natural_image
Illustration showing a hand pressing down on a mechanical component with a magnified inset (no text or symbols)8 Activate the self-timer by pressing the shutter release down fully.
- Once the self-timer is activated, the self-timer lamp at the front of the camera will blink, increasing its frequency as exposure draws closer. Immediately before exposure the lamp stays lit.
- At the same time, beeps will be heard that can be disabled via the SETUP menu.
- If your main subject is off center, use focus lock (see page 38).
- After the exposure, the camera resets to single-frame shooting.
- Do not press the shutter release from in front of the camera! You would block the camera's view and make focusing impossible.
- To deactivate the self-timer, turn the control dial to ▶, PC or SETUP.
The digital zoom increases the maximum magnification of the zoom lens 2.5 times (at approx. 24 – equivalent to approx. 114 mm in 35mm photography).
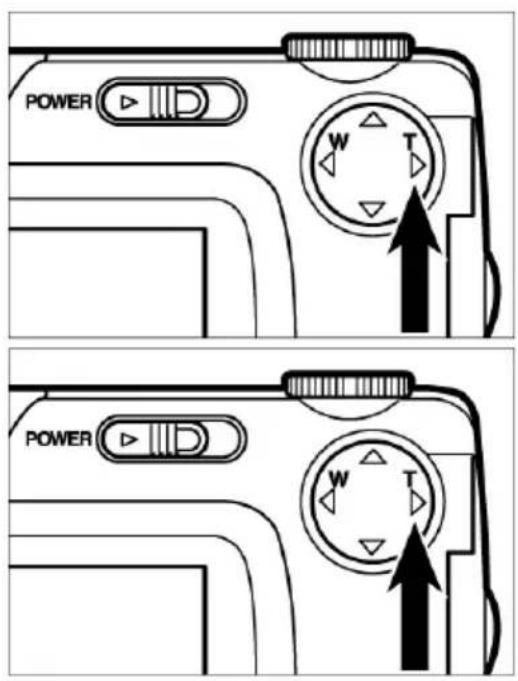
1 Press the ▶ toggle in the Record mode until maximum magnification has been reached.
2 Hold the ▶ toggle down for over two seconds.
• The digital-zoom mode has been set.
- A frame on the screen marks the area of the scene that will be captured with digital zoom. As soon as the frame appears, you may let go of the ▶ toggle.
- The digital-zoom mode can not be activated with the LCD screen switched off.
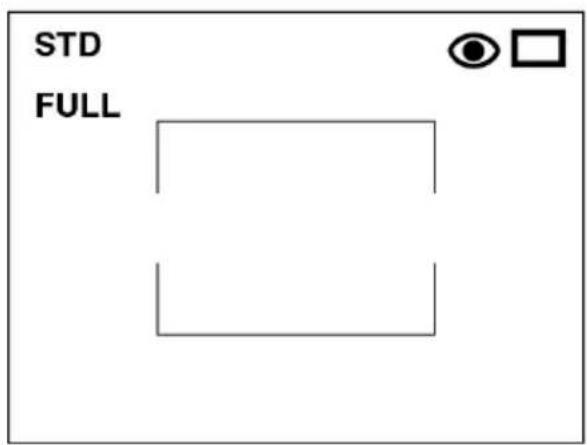
3 Duly frame your subject on the screen.
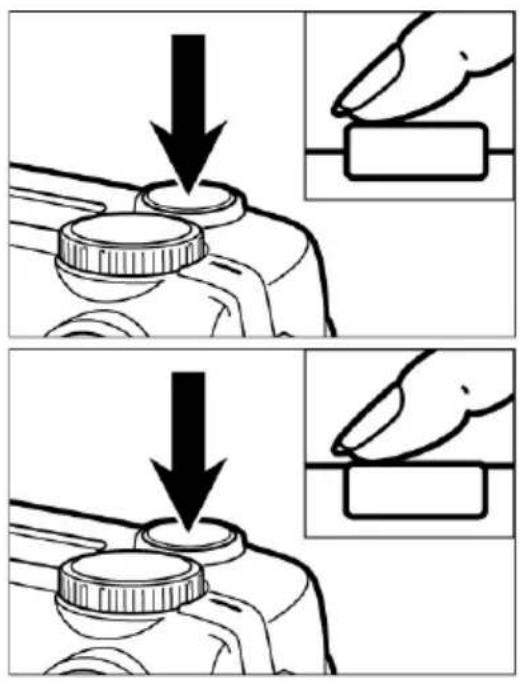
4 Press the shutter release halfway.
5 Press the shutter release down fully to take your picture.
- You are free to use focus lock (see page 38). - The digital zoom remains active after your shot. To deactivate it, hold the ◀ toggle down until the frame disappears from the screen. Then turn the camera off and on again to complete deactivation.
Images captured with digital zoom have a resolution of 640 x 480 pixel. This is why these shots appear smaller on your computer screen or when you print them out with appropriate resolution.
In the macro mode you can fill the frame with subjects measuring 6 cm x 4 cm from a distance of 4 cm.
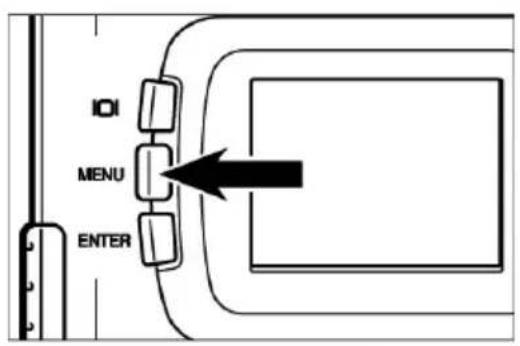
1 Turn the control dial to 📷 and press the MENU button.
• The LCD screen displays the Record menu.

2 Press the ▲ or toggle until [FOCUS] is highlighted, then press the ◀ toggle.
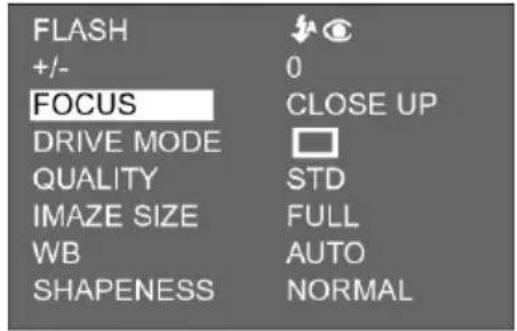
3 Press the ▲ or toggle until [CLOSE UP] is highlighted, then press the ◀ toggle.

4 Press the MENU button.
- CLOSE UP appears in the upper right-hand corner of the LCD screen, confirming that you are in macro mode.
- In the macro mode. the flash is automatically set to FLASH CANCEL Ⓐ to prevent it from firing.
5 Compose your shot on the LCD screen.
- At close range, the viewfinder image does not show the precise area actually captured. We therefore recommend use of the LCD screen in the macro mode.
- It is advisable to mount the camera on a tripod.
- The LCD screen cannot be switched off in the macro mode.

natural_image
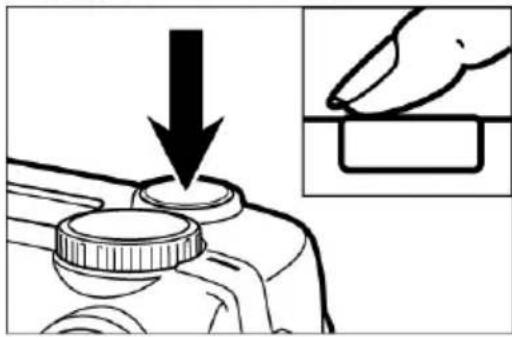
Illustration showing a hand pressing down on a mechanical component with a magnified inset (no text or symbols)6 Press the shutter release halfway.
- Should the green focus lamp blink, check your shooting distance (which in macro mode should be between 4 cm and 40 cm).
natural_image
Illustration showing a hand pressing down on a cylindrical component with a magnified inset (no text or symbols)7 Press the shutter release down fully to take your picture.
- The camera will stay in macro mode until you switch it off and on again. It will then default to autofocus.
- Once the camera is reset to autofocus, flash is automatically set to AUTOFLASH WITH RED-EYE REDUCTION.
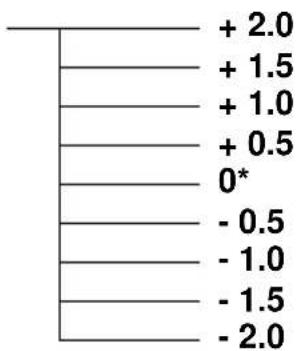
Exposure compensation serves to reproduce your pictures brighter or darker. The higher the compensation value, the brighter the picture will be. Conversely, the smaller the compensation, the darker the image.
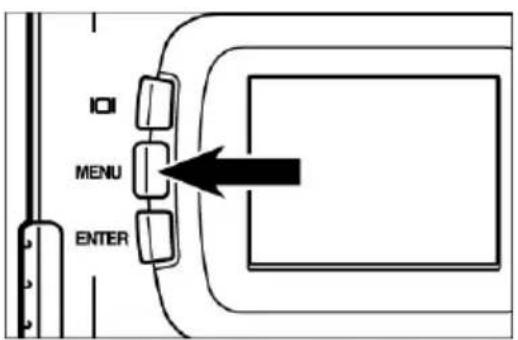
1 Turn the control dial to 📷 and press the MENU button.
• The LCD screen displays the Record menu.

2 Press the ▲ or ▼ toggle until [+/-] is highlighted, then press the ▶ toggle.
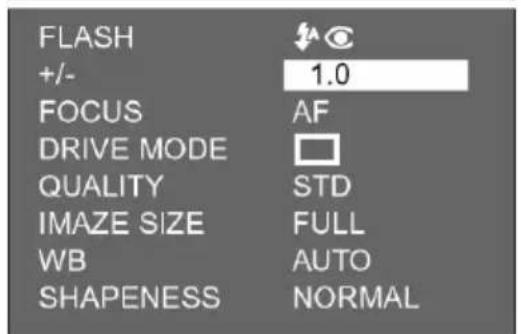
3 Press the ▲ or ▼ toggle until the desired compensation value is highlighted.
- Compensation values from +2.0 to -2.0 can be set in half f-stops.

4 Press the ◀ toggle.
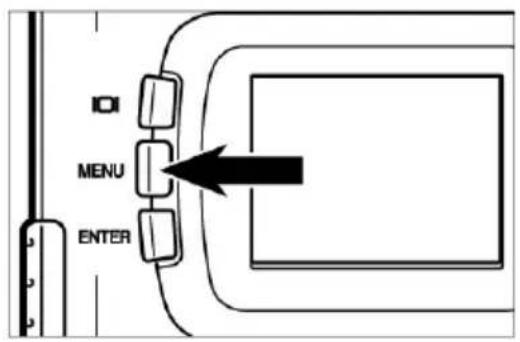
5 Press the MENU button.
- The compensation value selected will be displayed in the upper right-hand corner of the LCD screen (see page 35).

natural_image
Illustration showing a hand pressing down on a mechanical component with a magnified inset (no text or symbols)6 Press the shutter release down fully to take your picture.
- To deactivate exposure compensation, follow the steps previously described and reset compensation to zero. Alternatively, you might turn the camera off and on again.
- For a bright subject, you should introduce a plus compensation so that bright areas will be properly rendered. For a dark subject, enter a minus compensation to ensure proper rendering of the dark areas.
RECORDING OPTIONS
RECORD-MODE DISPLAY (LCD screen)

RECORD-MODE SETTINGS
FLASH
(for flash modes, see page 41)

Autoflash
Fill flash
Flash OFF
Autoflash with Red-Eye
Reduction
Fill flash with Red-Eye Reduction
+/-
FOCUSING
(for focusing modes, see page 36)

CONTINUOUS SHOOTING
(see page 45)


Single-frame shooting*
Continuous shooting
Self-timer
IMAGE QUALITY
(see page 60)
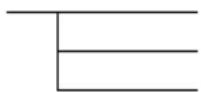
FINE (Fine mode)
STD. (Standard mode)
ECON. (Economy mode)
IMAGE SIZE
(siehe Seite 63)
FULL (Volle Größe)
HALF (Halbe Größe)
WEISSLICHT-ABGLEICH
(see page 65)
AUTO (Auto white balance)*
Daylight
Fluorescent light
Tungsten light
SHARPNESS
(see page 68)
HARD
NORMAL*
SOFT
- The settings marked * will take effect once you have switched the camera off and on again or changed batteries. The last settings made under IMAGE QUALITY and IMAGE SIZE will be preserved after turning the camera off or changing batteries.
- For FLASH MODES, see page 41.
For EXPOSURE COMPENSATION, see page 55.
For MANUAL FOCUSING, see page 39.
For MACRO MODE, see page 53.
For RECORDING MODE (continuous shooting), see page 45.
For RECORDING MODE (self-timer), see page 48.
The settings for IMAGE QUALITY, IMAGE SIZE, WHITE BALANCE and SHARPNESS will be described on the following pages.
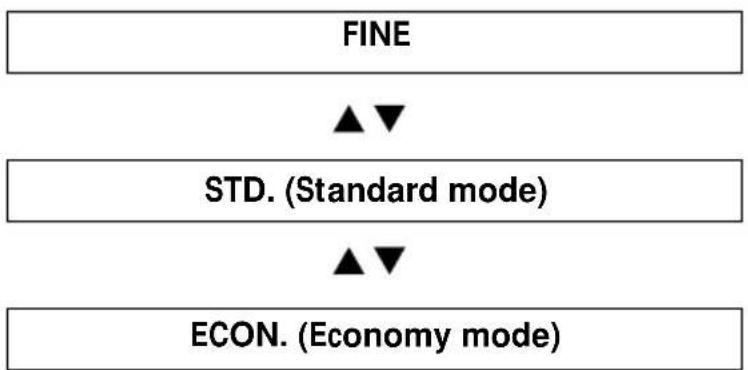
The camera has three image-quality modes: FINE, STD. (Standard) and ECON. (Economy).
Image quality is a function of compression rate. This changes in the following order: FINE /E STD. /E ECON. The higher the compression rate, the lower image quality. For maximum quality choose FINE. The lower the compression rate (the higher image quality), the lower the number of images that can be saved on a CF card.
The following table lists the compression rates, capture format, file sizes and the number of images that can be stored on an 8MB CF card in FINE, STD. and ECON. mode, respectively.
| Compression rate FINE STD. (Standard) ECON. (Economy) approx. 1/6STD. approx. 1/12 approx. 1/25 | |||
| Capture format Exif2.1 –JPEG (DCF standard) | |||
| File size approx. 910 kB approx. 560 kB approx. 230 kB | |||
| Max. number of images on an 8MB CF card | approx. 8 (approx. 28) | approx. 13 (approx. 43) | 33 (approx. 99) |
* File sizes and maximum number of images are only approximate and may vary with different subjects.
The numbers in brackets refer to images captured in HALF mode.

1 Turn the control dial to and press the MENU button.
• The LCD screen displays the Record menu.
2 Press the ▲ or ▼ toggle until [QUALITY] is highlighted, then press the ▶ toggle.
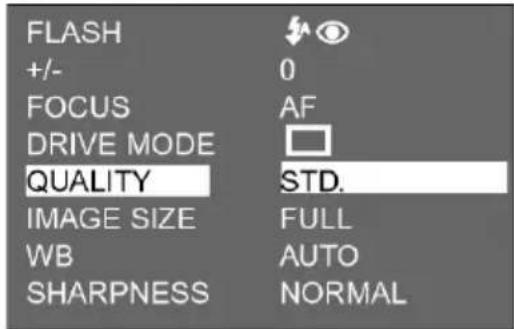
3 Press the ▲ or ▼ toggle until the desired image quality is highlighted.
• Image-quality settings change in the following order:

flowchart
graph TD
    A["ECON. (Economy mode)"] --> B["STD. (Standard mode)"]
    B --> C["FINE"]
    C --> A

4 Press the ◀ toggle.

5 Press the MENU button.
- The image quality selected is displayed in the upper right-hand corner of the LCD screen (see page 35).
* You are free to save images of different quality on one and the same CF card.
* Image-quality settings are retained even when the camera is switched off.
* Changing the image-quality setting affects the number of pictures remaining per CF card. This is reduced, above all, by FINE mode. We therefore suggest that you watch the number of remaining images very closely.
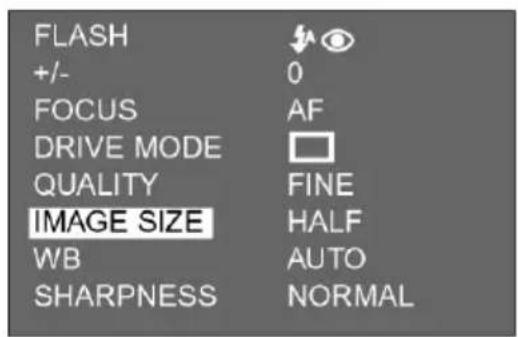
Before taking a picture, choose image size. This setting affects the number of pictures remaining per CF card. You may choose between FULL and HALF.
Image size Number of pixels (w x h)
FULL 1792 x 1200
HALF 896 x 600

1 Turn the control dial to 📷 and press the MENU button.
• The LCD screen displays the Record menu.

2 Press the ▲ or ▼ toggle until [IMAGE SIZE] is highlighted, then press the ▶ toggle.

3 Press the ▲ or ▼ toggle until the desired image size is highlighted.
• Image size changes in the following order:

flowchart
graph TD
    A["FULL"] --> B["▲▼"]
    B --> C["HALF"]
4 Press the ◀ toggle.
5 Press the MENU button.
- The image size selected is displayed in the upper right-hand corner of the LCD screen (see page 35).
- Image-size settings are retained even if the camera is switched off.
- Changing the image size affects the number of images remaining per CF card. This is reduced, above all, by the FINE mode. We therefore suggest that you watch the number of remaining images very closely.
The camera has four white-balance settings:
| AUTO | Automatic white balanceWhite balance is here obtained automatically to suit the predominant light source. |
 | DaylightSelect this setting for sunlit subjects. |
 | Fluorescent lightThis setting is intended for subjects illuminated by the light of fluorescent tubes. |
 | Tungsten lightThis is intended for subjects illuminated by ordinary light bulbs. |
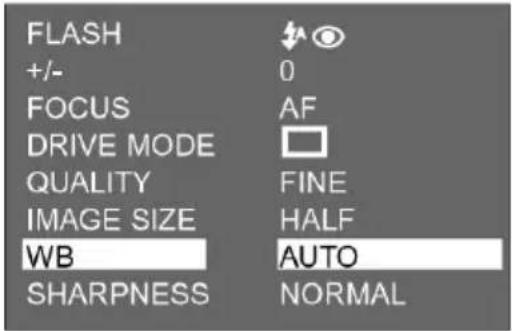
1 Turn the control dial to 📷 and press the MENU button.
• The LCD screen displays the Record menu.
2 Press the ▲ or ▼ toggle until [WB] is highlighted, then press the ▶ toggle.

3 Press the ▲ or toggle until the desired white-balance setting is highlighted.
- The white-balance settings change in the following order:
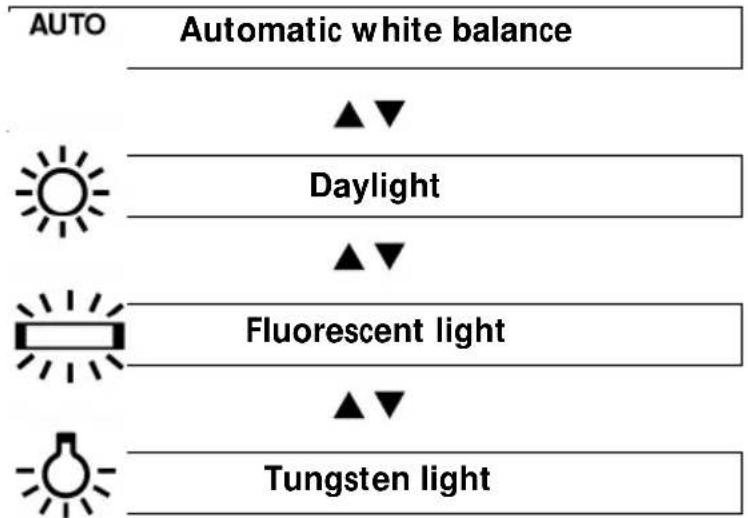
flowchart
graph TD
    A["Automatic white balance"] --> B["Daylight"]
    B --> C["Fluorescent light"]
    C --> D["Tungsten light"]

4 Press the ◀ toggle.

5 Press the MENU button.
- The white balance selected is displayed in the upper left-hand corner of the LCD screen (see page 35). In AUTO, no icon will appear on the screen.
Switching the camera off will automatically reset it to AUTO.
The camera has three sharpness settings:
HARD
Enhances the apparent sharpness of the image.
NORMAL Does not affect the sharpness of the image.
SOFT Softens up the image.

1 Turn the control dial to 📷 and press the MENU button.
• The LCD screen displays the Record menu.

2 Press the ▲ or toggle until [SHARPNESS] is highlighted, then press the ▶ toggle.

3 Press the ▲ or ▼oggle until the desired sharpness setting is highlighted.
- The sharpness settings change in the following order:
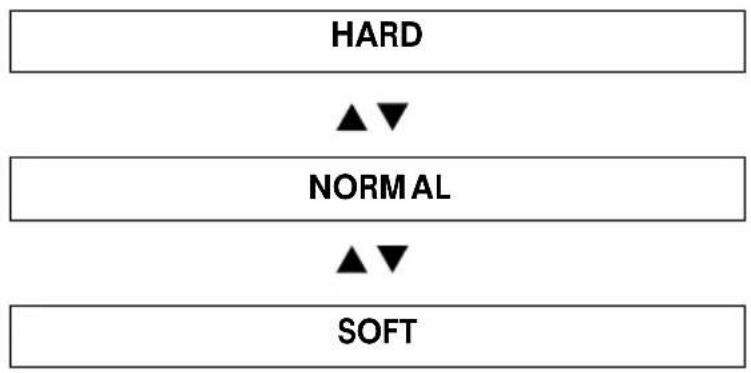
flowchart
graph TD
    A["HARD"] --> B["NORMAL"]
    B --> C["SOFT"]
    style A fill:#f9f,stroke:#333
    style B fill:#ccf,stroke:#333
    style C fill:#cfc,stroke:#333


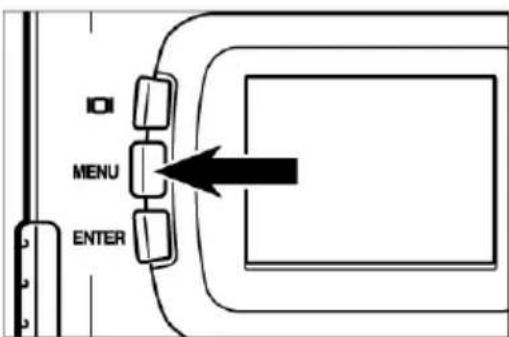
5 Press the MENU button.
- The sharpness setting selected is displayed in the upper right corner of the LCD screen (see page 35). In NORMAL, there will be no icon on the screen.
PLAYBACK MODE
The images stored on the CF card can be played back on the LCD screen one by one.


1 Turn the control dial to ▶.
- You may also turn the dial with the camera switched on.
2 If the camera is still turned off, switch it on.
- The ON/OFF switch is spring-loaded and will return to its normal position.
- Shortly thereafter, your last picture will appear on the LCD screen.
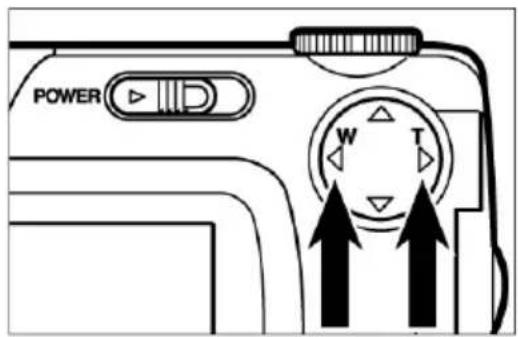
3 Press the ▶ or ◀ toggle to display the desired image.
- Pressing the ▶ toggle will display the next following image. Pressing the ◀ toggle will display the preceding image.
- When you have reached the last image on the card and press the ▶ toggle, the first of your images will be displayed.
- If you press the 🔊ggle while the first of your images is on the screen, your last picture will be displayed.
IMAGE DATA DISPLAY ON SCREEN

Every depression of the DISPLAY button will change the screen display in the following order:
Single-frame playback
(with image data)
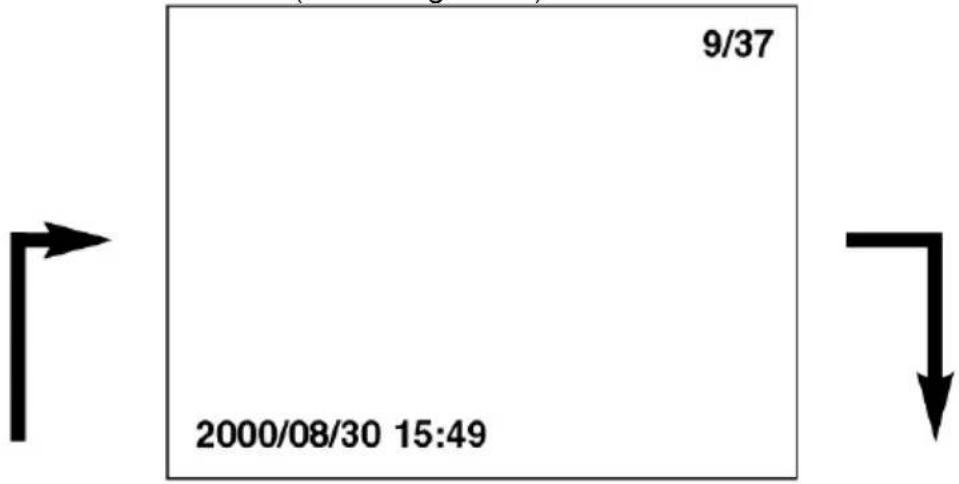
Index playback
Single-frame playback
(without image data)
(9 thumbnails)


natural_image
Blank white image with a thin black border (no text, symbols, or markings)
natural_image
Simple black arrow pointing upward on white background (no text or symbols)IMAGE DATA DISPLAY ON SCREEN

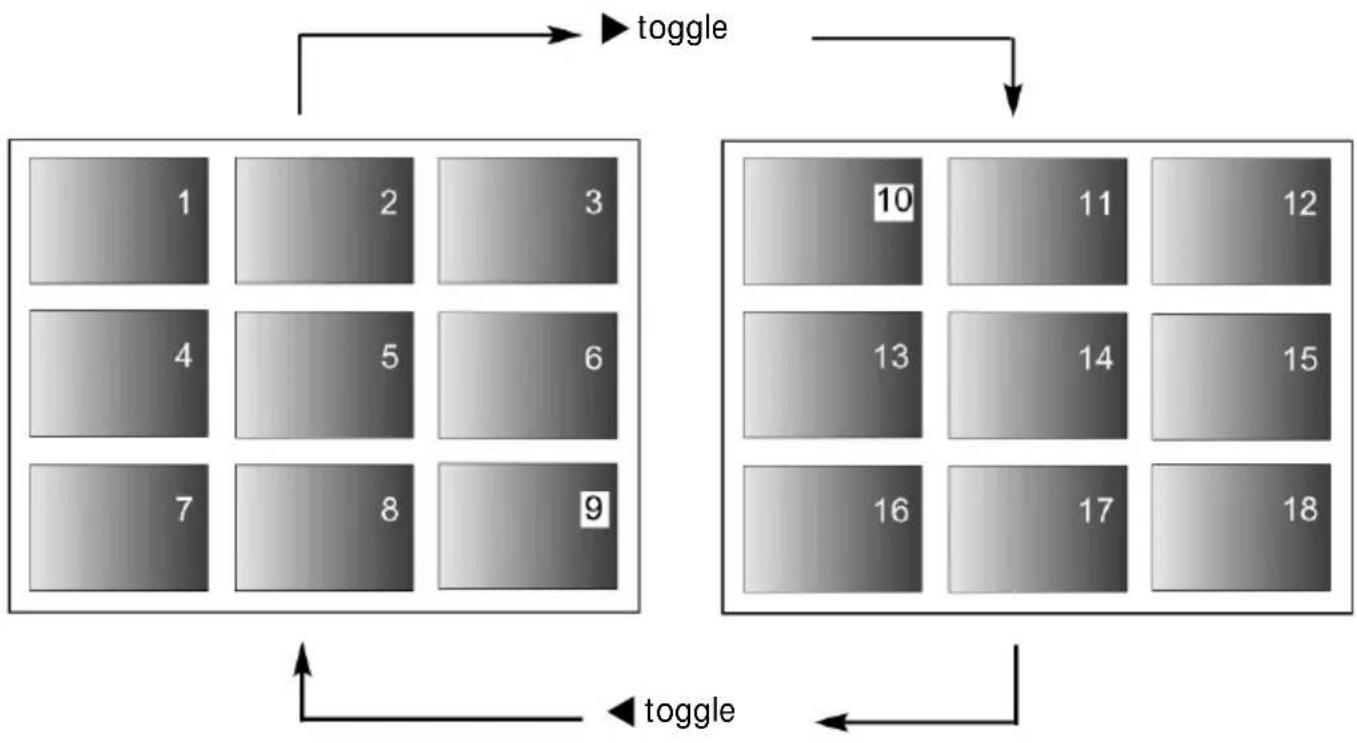
In this mode, nine images can be displayed simultaneously in the form of thumbnails to facilitate your search.

1 With single-frame playback selected, press the DISPLAY button once or twice (see page 72).
- If image data are displayed in playback mode, press the DISPLAY button twice. If no image data are displayed, press it once.
- The number of the last image displayed in playback mode appears highlighted, the remaining numbers in white.


Press the ▶ or toggle to select the desired image.
- Pressing the ▶ toggle will select the next following image with its frame number highlighted. Pressing the ◀ toggle will select the preceding image with its frame number highlighted.
- With image 9 selected (and 9 highlighted), the following nine images will be displayed if you press the ▶ toggle.
- With image 10 selected (and 10 highlighted), the preceding nine images will be displayed if you press the ◀ toggle.
flowchart
graph TD
    A["1"] --> B["2"]
    B --> C["3"]
    D["4"] --> E["5"]
    E --> F["6"]
    G["7"] --> H["8"]
    H --> I["9"]
    J["10"] --> K["11"]
    K --> L["12"]
    M["13"] --> N["14"]
    N --> O["15"]
    P["16"] --> Q["17"]
    Q --> R["18"]
    S["toggle"] --> T["toggle"]
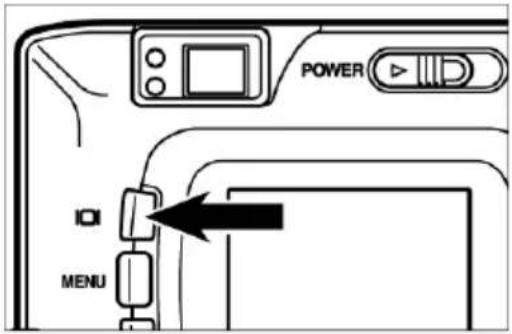

Press the DISPLAY button once (see page 72).
- The screen display changes from index playback to single-frame playback (with image data).
- The selected index image (with its number highlighted) is displayed in image-playback mode.

heatmap
| Value | |---| | 10 | | 11 | | 12 | | 13 | | 14 | | 15 | | 16 | | 17 | | 18 |

This mode enlarges your screen image 2.5x, which makes it easier to check image detail.
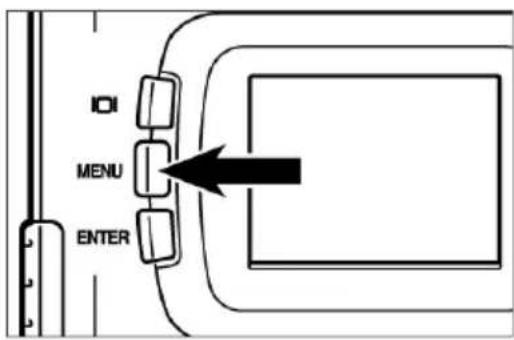
1 Turn the control dial to ▶.
• The LCD screen displays the playback menu.

2 Press the ▲ or ▼oggle until [ZOOM] is highlighted.
- ENTER TO SET is displayed at the bottom of the screen.

3 Press the ENTER button.
- In the playback or index playback mode, the center of the image is enlarged 2.5x.

4 Press the ▲, ▼ to ggle to scroll through the enlarged image.
- The image will shift in the direction of the toggle pressed.
- The image will keep shifting for as long as you keep one of the toggles depressed.


To cancel zoom playback, press the DISPLAY button.
- This will return you from zoom playback to normal playback (with image data). If you were in index playback mode, you will return to single-frame playback (without image data). Pressing the DISPLAY button again will take you to index playback.
- You may also cancel zoom playback by pressing the MENU button. This will take you to the playback menu. Pressing the button again will take you to single-frame playback.
* In zoom playback, the image in the center of the screen is displayed with a resolution of 640 x 400 pixels.
* Images captured with digital zoom (see page 51) cannot be played back in the zoom mode. Should you try to display such an image as described under [1] to [3] on the preceding page, the camera will revert to single-frame playback.
The images can be displayed on the screen in succession, similar to a slide show.


1 Turn the control dial to
• The LCD screen displays the playback menu.
2 Press the ▲ or ▼oggle until [SLIDE SHOW] is highlighted.
- ENTER TO SET is displayed at the bottom of the screen.
3 Press the ENTER button.
- The slide show menu is to be seen on the LCD screen.
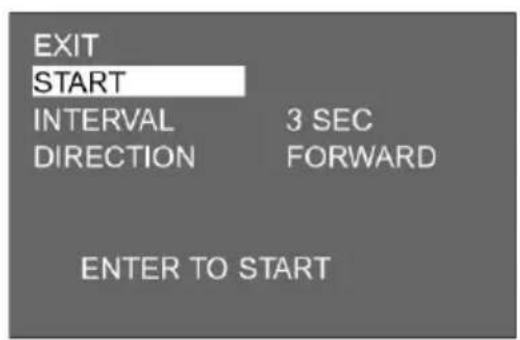
4 Press the ▲ or toggle until [START] is highlighted.
- ENTER TO START is displayed at the bottom of the screen.

5 Press the ENTER button.
- The slide show starts with the settings chosen in the slide-show menu (INTERVAL and DIRECTION).
1 To stop the slide show, press one of the following buttons:
- Shutter release
- One of the toggles ▲, ▼ or ◀
- DISPLAY button
- MENU button
- ENTER button
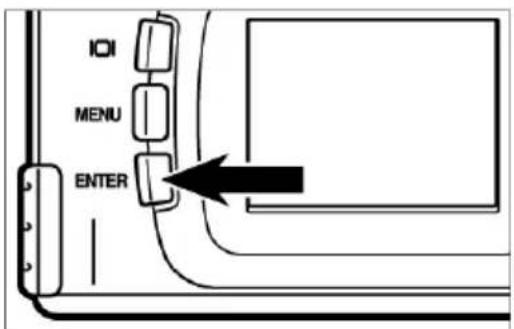

• To continue the slide show, press the ENTER button.
- If you press the MENU button during the show, the screen will display the playback menu.
SETTINGS IN SLIDE-SHOW MENU
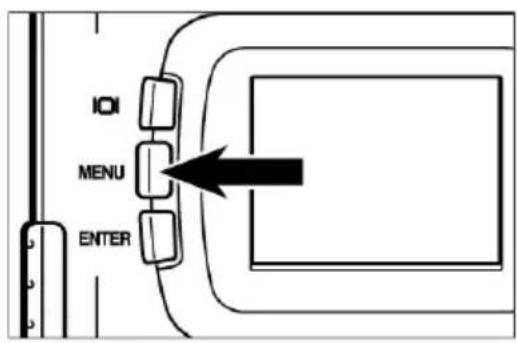


1 Turn the control dial to ▶.
• The LCD screen displays the playback menu.
2 Press the ▲ or toggle until [SLIDE SHOW] is highlighted.
- ENTER TO SET will be displayed at the bottom of the screen.
3 Press the ENTER button.
- The screen displays the slide-show menu as shown.
4 Press the ▲ or ▼ toggle until [INTERVAL] is highlighted, then press the ▶ toggle.
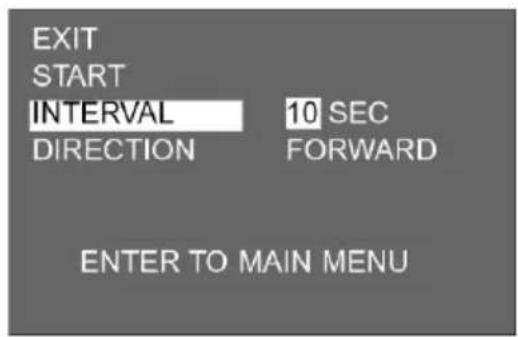
5 Press the ▲ or ▼oggle until the desired interval is highlighted.
- Pressing the ▲ toggle will set a longer interval.
- Pressing the ▼ toggle will set a shorter interval.
- The interval can be varied in increments of one second from 3 to 60 seconds.
- The interval governs the screen time of each image.
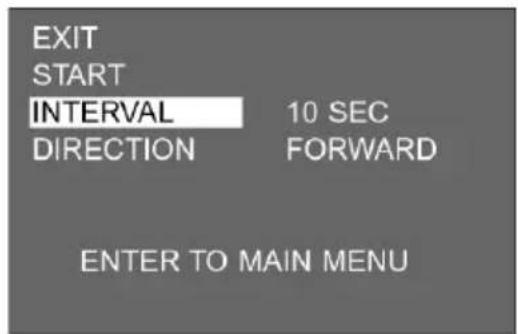
6 Press the ◀ toggle.
7 Press the ▲ or ▼ toggle until [DIRECTION] is highlighted, then press the ▶ toggle.


8 Press the ▲ or ▼ toggle until the desired direction is highlighted. • The direction changes in the following order:
![ROLLEI d23 com - Press the ▲ or ▼ toggle until [DIRECTION] is highlighted, then press the ▶ toggle. - 3](/content/2026/05/1109812/images/4c7f3d79a2177fb3f14b814d52a76781496a2897e1d1ecac6b72bd078c51816f.jpg)
flowchart
graph TD
    A["FORWARD"] --> B["▲▼"]
    B --> C["BACKWARD"]
    C --> D["▲▼"]
    D --> E["RANDOM"]
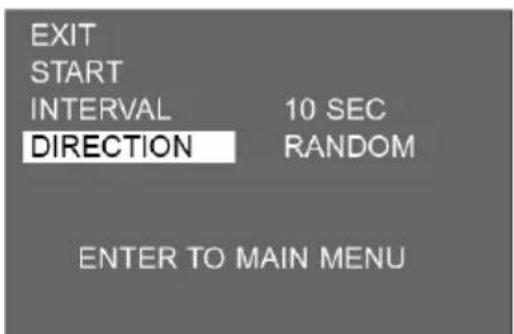
9 Press the ◀ toggle.
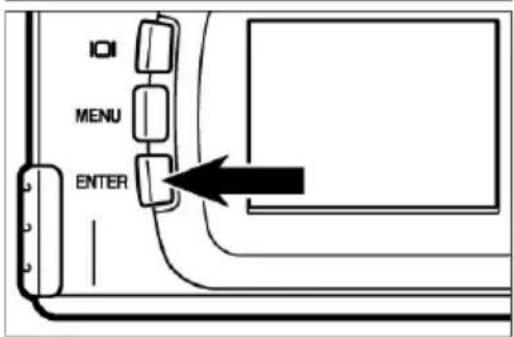
10 Press the ENTER button.
• The screen displays the playback menu.
DELETING IMAGES
The images saved on your CF card can be deleted under visual control on the LCD screen.
CAUTION!
Proceed with care, since deleted images cannot be restored!

1 Turn the control dial to ▶.
- You may also turn the dial with the camera switched on.

2 If the camera is still turned off, switch it on.
- The ON/OFF switch is spring-loaded and will return to its normal position.
- Shortly thereafter, your last picture will appear on the LCD screen.

3 Press the ◀ or ▶ toggle to display the desired image.
- Pressing the ▶ toggle will display the next following image. Pressing the ◀ toggle will display the preceding image.
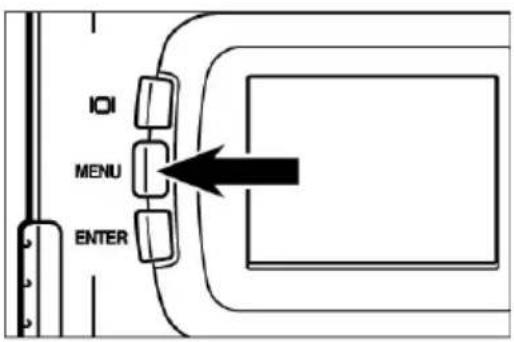
4 Press the MENU button.
• The LCD screen displays the playback menu.
5 Once [DELETE] is highlighted, press the toggle.
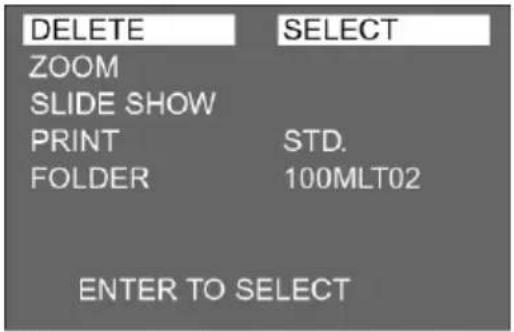
6 Once [SELECT] is highlighted, press the ENTER button.
- The image to be deleted will now appear on the screen. The option to delete the image is displayed as shown below.


* For greater clarity, the display is here shown on a shaded gray background. In your camera, the display is superimposed on the image to be deleted.

7 Press the ◀ toggle until [YES] is highlighted, then press the ENTER button.
• The image has been deleted.
- After an image has been deleted, the next following one will appear on the screen (PLAYBACK will blink until the frame number is shown). This is followed by the option to delete this image as shown opposite.
- While this display is on the screen, you may select the image to be deleted with the aid of the ▲ and ▼ toggles. Press the taggle to display the preceding image, ▼ for the next following one.
8 Repeat step [7] if you wish to delete further images.

9 To complete the process, make sure that [NO] is highlighted and confirm by pressing the ENTER button.
• The LCD screen will revert to playback.

![ROLLEI d23 com - To complete the process, make sure that [NO] is highlighted and confirm by pressing the ENTER button. - 2](/content/2026/05/1109812/images/2115b9be3b8a8d138615685aecd6918404766474e418e1dccbac19437ae9cb53.jpg)
Press the MENU button.
• The LCD screen will revert to playback.
You may also delete all the images stored on your CF card.
CAUTION!
Proceed with care, since deleted images cannot be restored!
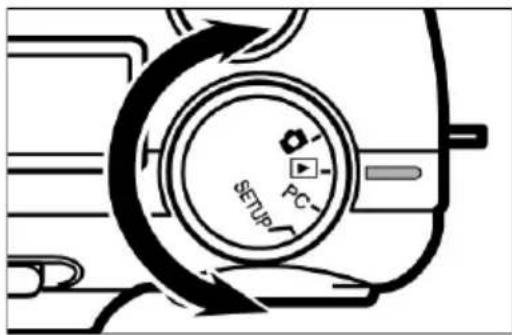
1 Turn the control dial to ▶.
- You may also turn the dial with the camera switched on.

2 If the camera is still turned off, switch it on.
- The ON/OFF switch is spring-loaded and will return to its normal position.
- Shortly thereafter, your last picture will appear on the LCD screen.

3 Press the MENU button.
- The LCD screen will again display the playback menu.
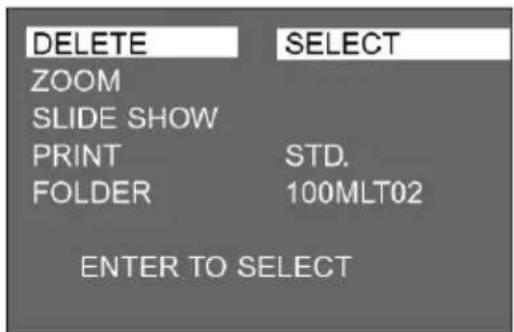
4 When [DELETE] is highlighted, press the toggle.
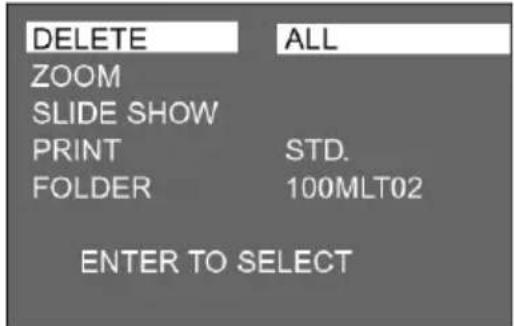
5 Press the ▼ toggle until [ALL] is highlighted, then press the ENTER button.
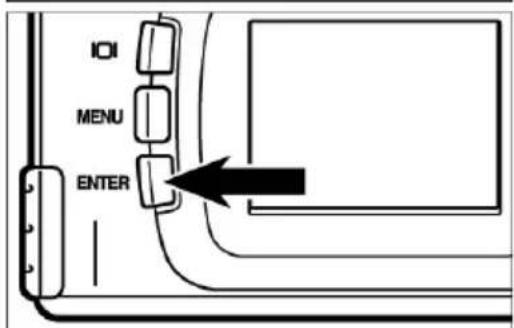
- As shown opposite, you will be asked whether or not you wish to delete all images.
- Deleting all the images on the CF card is possible only if these were captured with the same camera.

6 Press the ◀ toggle to highlight [YES].
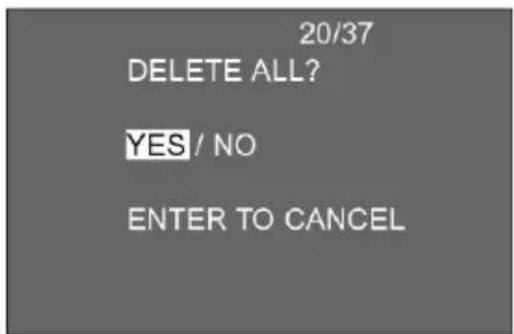

NO IMAGE ENTER TO MAIN MENU
Press the ENTER button.
- All the images saved on your CF card are deleted.
- While the images are being deleted, the green focus lamp will blink slowly (approx. twice per second).
- Once all the images on the card have been deleted, [NO IMAGE] and [ENTER TO MAIN MENU] appear on the screen.
PLAYBACK SETTINGS
THE PLAYBACK MENU (LCD screen)

PLAYBACK OPTIONS AND SETTINGS
DELETE
(for deleting all
images,
seepage 86)

Zoom
(for zoom playback,
see page 77)
SLIDE SHOW
(for slide show,
START
see page 79)


flowchart
graph TD
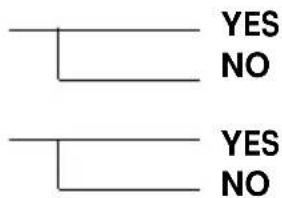
    A["PRINT (for DPOF print options, see page 96)"] --> B["STD."]
    A --> C["INDEX"]
    A --> D["CANCEL"]
    C --> E["YES"]
    C --> F["NO"]
    D --> G["YES"]
    D --> H["NO"]

flowchart
graph TD
    A["FOLDER\n(for file/folder name,\nsee page 104)"] --> B["100MLT"]
    B --> C["(additional folder name)"]
    B --> D["(additional folder name)"]
    B --> E["(additional folder name)"]
    B --> F["(additional folder name)"]
For DELETE, see page 86. For ZOOM, see page 77. For SLIDE SHOW, see page 79.
The PRINT (DPOF print settings) and FOLDER (folder name) options will be described on the following pages.
Your digital camera supports DPOF ^4 (Digital Print Order Format), version 1.00. This lets you select the type and number of prints. In other words, you may turn over your CompactFlash or SmartMedia card on which you have saved your images together with DPOF data directly to your processing laboratory to obtain the preselected number of prints. Neither need you assign file names nor a password to the DPOF files. Alternatively, you may insert your memory card directly in your printer (which should support DPOF) for automatic printout of the preset number of copies.
* The DPOF format was developed jointly by the Eastman Kodak Company, Canon Inc., Fuji Photo Film Co., Ltd., and Matsushita Electric Industrial Co., Ltd., with the purpose of permitting print settings to be made directly in digital cameras.
* Your Rollei 23 com does not support the DPOF version 1.10 introduced in July 2000.
SELECTING THE IMAGE AND THE NUMBER OF PRINTS DESIRED

1 Turn the control dial to ▶ and press the MENU button.
• The LCD screen displays the playback menu.
2 Press the ▲ or ▼ toggle until [PRINT] is highlighted, then press the ▶ toggle.
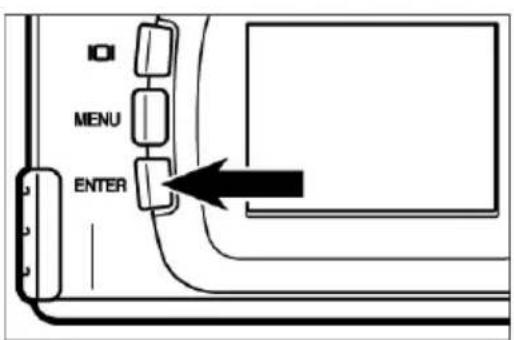
3 With [STD.] highlighted press the ENTER button.
- The screen display lets you choose the number of prints per image.
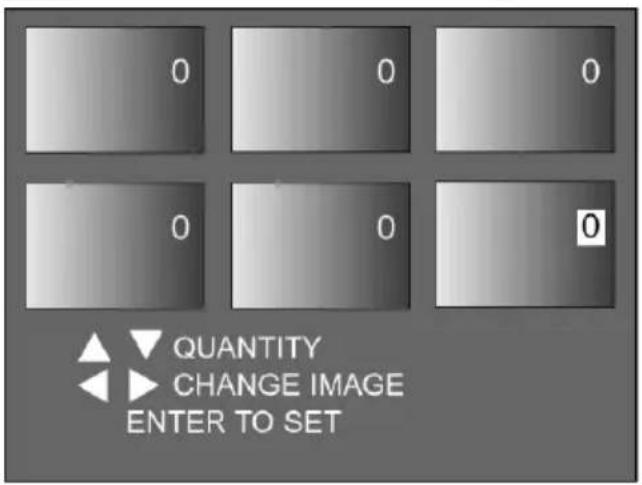

4 Press the ◀ or ▶ toggle to select the image to be printed.
- Selected images are marked by their highlighted frame number.
- If frame 6 has been selected (frame number 6 highlighted) and you press the ▶ toggle, the following six images will be displayed.
- If frame 7 has been selected (frame number 7 highlighted) and you press the ◀ toggle, the preceding six images will be displayed.

5 Press the ▲ or toggle to select the number of the frame to be printed.
- Pressing the ▲ tennis will advance the frame number, pressing ▼ will reduce it.

6 Repeat steps [4] and [5] to select the number of prints desired for the remaining images.
- Choose "0" for images you do not wish to be printed.
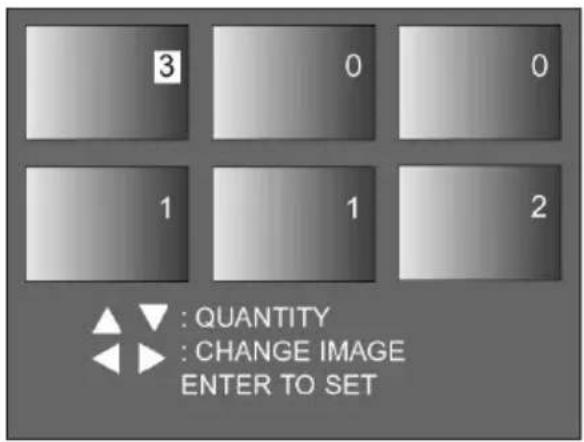


Press the ENTER button to confirm.
- The DPOF file with image data and number of prints is saved to your CF card.
• After saving, the screen display will return to playback menu.


Press the MENU button.
- The screen display will revert to playback mode.
INDEX-PRINT SETTINGS
This setting serves to print all the images contained on your CF card as thumbnails in the form of an index print.
Example of an index print


1 Turn the control dial to ▶ and press the MENU button.
• The LCD screen displays the playback menu.
2 Press the ▲ or toggle to highlight [PRINT], then press the ▶ toggle.
3 Press the ▼ toggle to highlight [INDEX], then press the ENTER button.

4 Press the ◀ toggle to highlight [YES].

5 Press the ENTER button.
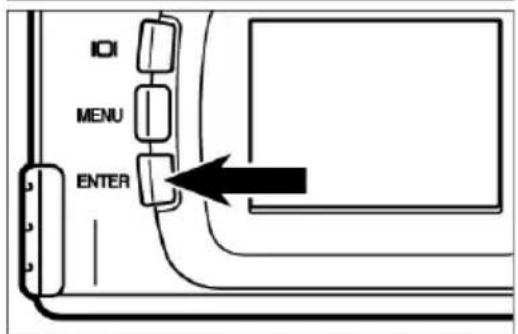
6 Press the MENU button.

- The screen display will revert to playback.
CANCELING DPOF PRINT SETTINGS
You may cancel all DPOF print settings described on pages 96 to 99. This also applies to the index-print settings (see page 100).


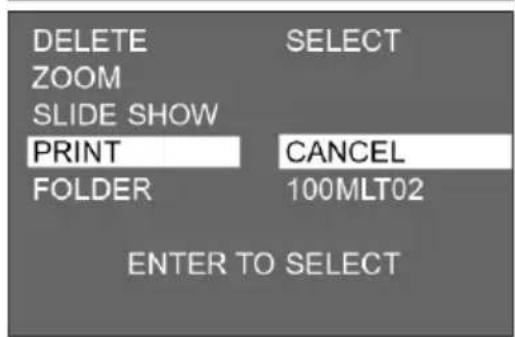
1 Turn the control dial to ▶ and press the MENU button.
• The LCD screen displays the playback menu.
2 Press the ▲ or ▼ toggle to highlight [PRINT], then press the ▶ toggle.
3 Press the ▼ toggle twice to highlight [CANCEL], then press the ENTER button.
- As shown opposite, you will be asked whether or not you wish to cancel the print settings.
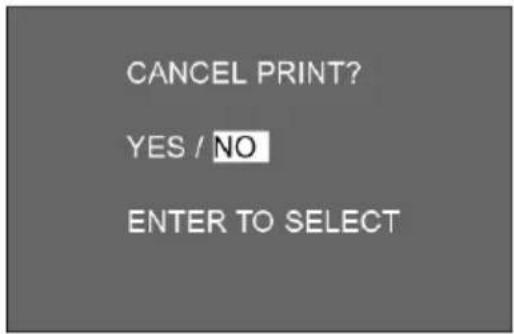
4 Press the ◀ toggle to highlight [YES].
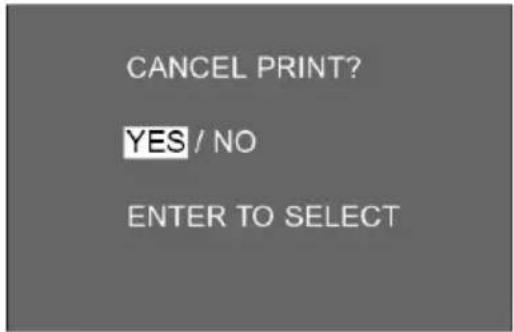
5 Press the ENTER button.
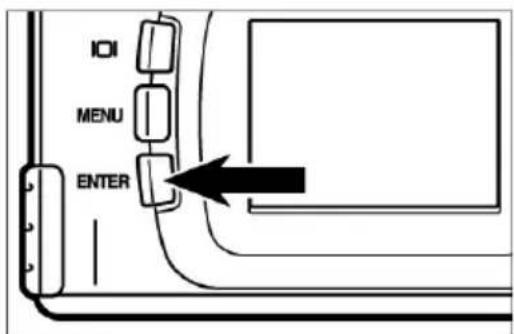
6 Press the MENU button.

- The screen display will revert to playback mode..
The folder on your CF card conforms to the DCF format (Design Rule for Camera File System).
The pictures taken with this camera will be filed under “Dcim” on your CF card. The first of the pictures will be named “Pict0001.jpg” and saved in the sub-file “100mlt02”. All further pictures will be filed under “100mlt02”. The name of the file holding the pictures is displayed in the playback menu.

flowchart
graph LR
    A["CF card"] --> B["Dcim"]
    B --> C["100mlt02"]
    C --> D["File name Pictures captured"]
    D --> E["Pict0001.jpg"]
    D --> F["Pict0002.jpg"]
    D --> G["Pict0003.jpg"]
The file name of the image to be saved consists of “Pict”, a four-digit number and “.jpg”. Up to 9999 files are saved in the folder “100mlt02” (last file name “Pict9999.jpg”). Starting with frame number 10,000, a new file “01mlt02” is created in the “Dcim” file. Consequently, frame No. 10,000 will be saved in folder “101mlt02” under the name “pict0001.jpg”. If you take over 10,000 pictures, there will be two folders on your CF card. You can select the folder containing the image to be played back by the folder names displayed in the playback menu.
You can even play back pictures taken with another digital camera supporting the DCF format by simply selecting the proper folder in the playback menu.


1 Turn the control dial to ▶ and press the MENU button.
- The playback menu is displayed on the LCD screen.
2 Press the ▲ or toggle until [FOLDER] is highlighted, then press the ▶ toggle.
3 Press the ▼ toggle until the desired file name is highlighted, then press the ENTER button.
- If there is only one folder, namely "100mlt02", nothing will change as you press the ▲ or ▼ toggle.
Notes on the DCF format (Design Rule for Camera File System)
DCF (Design Rule for Camera File System) is the format developed by JEIDA as a digital-camera standard.
This format makes it possible to exchange image files between digital equipment conforming to DCF.
The following options are available with equipment conforming to DCF:
- Images can be played back on the LCD screen of another digital camera.
- The image files recorded with certain other digital cameras can be printed out.
- Recording media, such as CF or SmartMedia' cards, are interchangeable between digital cameras.
- When using a DCF-compatible computer, even the image data of some other digital cameras are available.
SETUP
SETUP-MENU DISPLAY ON LCD SCREEN
| LCD BRIGHT | 5 |
| POWER SAVE | 10 MIN. |
| FORMAT | |
| DATE | 2000/08/30 |
| TIME | 17:33 |
| BEEP | ON |
| VIDEO OUT | NTSC |
| LANGUAGE | ENGLISH |
| DEFAULT |
SETUP-MENU SETTINGS
| LCD BRIGHT(for brightness adjustment of LCD screen, see page 110) | 9 (bright) |
| 8 | |
| 7 | |
| 6 | |
| 5 | |
| 4 | |
| 3 | |
| 2 | |
| 1 (dark) |
| POWER SAVE(for automatic cutoff intervals, see page 112) | 30 MIN. |
| 10 MIN. | |
| 5 MIN. | |
| 3 MIN. | |
| 1 MIN. |

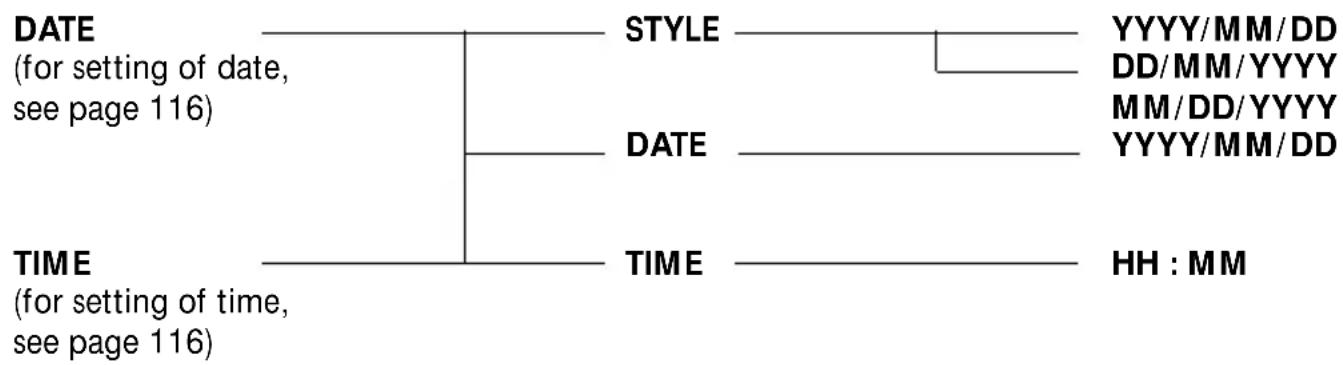
flowchart
graph TD
    A["DATE\n(for setting of date,\nsee page 116)"] --> B["STYLE"]
    B --> C["YYYY/MM/DD\nDD/MM/YYYY\MM/DD/YYYY\YYYY/MM/DD"]
    A --> D["DATE"]
    D --> E["TIME"]
    E --> F["HH : MM"]
    G["TIME\n(for setting of time,\nsee page 116)"] --> H["TIME"]
    H --> I["HH : MM"]



Using this option, you can adjust the brightness of the LCD screen to suit your personal preference and existing lighting conditions.

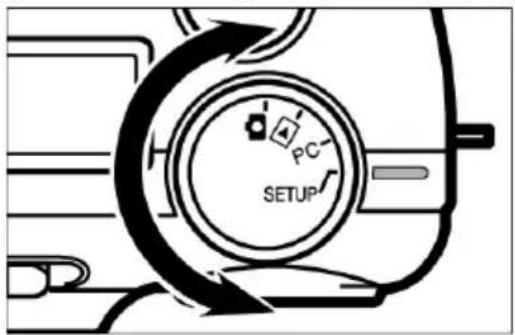
1 Turn the control dial to 📋 and turn the camera on.
- The ON/OFF switch is spring-loaded and will return to its normal position.
2 Turn the control dial to SETUP.
- The setup menu appears on the screen as shown below.

3 With [LCD BRIGHT] highlighted, press the toggle.
- If the screen is off, this will turn it on. At the same time, the live image and the menu appear for adjustment.

4 Press the ▲ or toggle until the desired brightness figure appears.
- Brightness is adjustable from 1 to 9. The higher the number, the brighter the screen.
* The illustration opposite shows a gray background. In practice, the menu is superimposed on your live image.
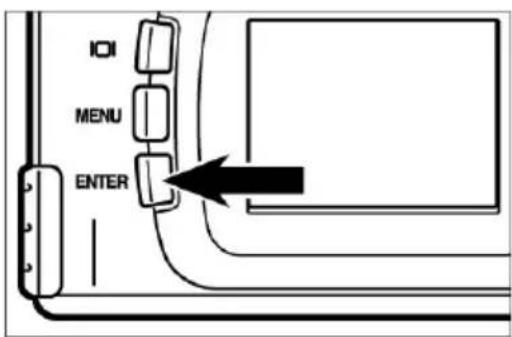
5 Press the ENTER button.
- The brightness of your screen is adjusted to the desired level.
- The screen display then returns to the setup menu.

To save power, the camera will automatically cut off after three minutes of nonuse. The cutoff interval can be varied.
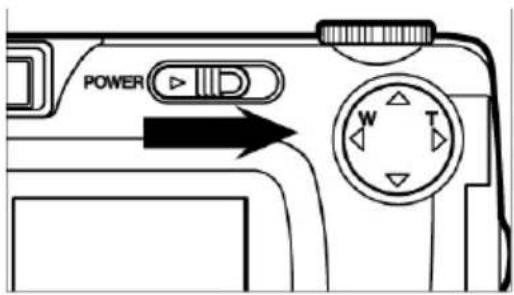
1 Turn the control dial to 📷 and switch the camera on.
- The ON/OFF switch is spring-loaded and will automatically return to its normal position.
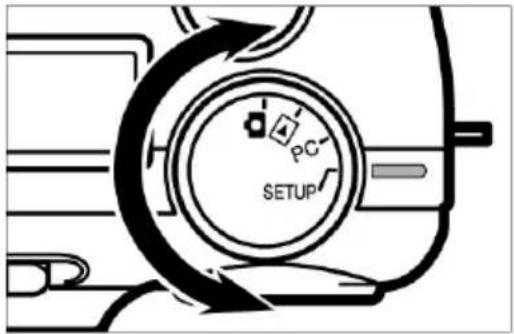
2 Turn the control dial to SETUP.
- The setup menu appears on the screen as shown below.
| LCD BRIGHT | 5 |
| POWER SAVE | 3 MIN. |
| FORMAT | |
| DATE | 2000/08/30 |
| TIME | 17:33 |
| BEEP | ON |
| VIDEO OUT | NTSC |
| LANGUAGE | ENGLISH |
| DEFAULT |
3 Press the ▲ or ▼ toggle until [POWER SAVE] is highlighted, then press the ▶ toggle.
| LCD BRIGHT | 5 |
| POWER SAVE | 3 MIN. |
| FORMAT | |
| DATE | 2000/08/30 |
| TIME | 17:33 |
| BEEP | ON |
| VIDEO OUT | NTSC |
| LANGUAGE | ENGLISH |
| DEFAULT |
4 Press the ▲ or ▼oggle until the desired cutoff interval is highlighted.
- The intervals will change in the following order:

flowchart
graph TD
    A["1 minute"] --> B["3 minutes"]
    B --> C["5 minutes"]
    C --> D["10 minutes"]
    D --> E["30 minutes"]
    E --> F["▲▼"]
| LCD BRIGHT | 5 |
| POWER SAVE | 10 MIN. |
| FORMAT | |
| DATE | 2000/08/30 |
| TIME | 17:33 |
| BEEP | ON |
| VIDEO OUT | NTSC |
| LANGUAGE | ENGLISH |
| DEFAULT |
5 Press the ◀ toggle.
* The cutoff interval can only be varied if you use batteries. With an AC adapter, the interval is fixed at 30 minutes.
* With the camera connected to a computer (see pages 132, 142), the interval is 30 minutes, regardless of whether you are using an AC adapter or batteries or have set another interval.
Formatting your CF card
CAUTION!
Formatting will delete all data from your CF card! Decide very carefully whether you really wish to delete all these data.
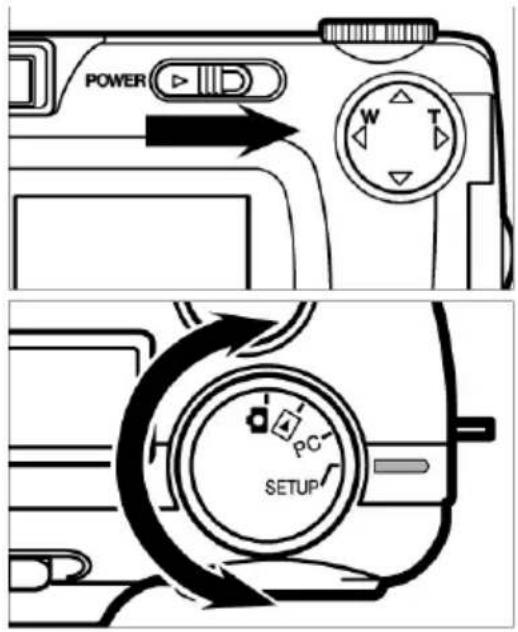
1 Turn the control dial to 📷 and switch the camera on.
- The ON/OFF switch is spring-loaded and will automatically return to its normal position.
2 Turn the control dial to SETUP.
- The setup menu is displayed on the LCD screen as shown below.
| LCD BRIGHT | 7 |
| POWER SAVE | 10 MIN. |
| FORMAT | |
| DATE | 2000/08/30 |
| TIME | 17:33 |
| BEEP | ON |
| VIDEO OUT | NTSC |
| LANGUAGE | ENGLISH |
| DEFAULT |

3 Press the ▲ or toggle until [FORMAT] is highlighted, then press the ENTER button.
- You will be asked whether or not you want to format your CF card.
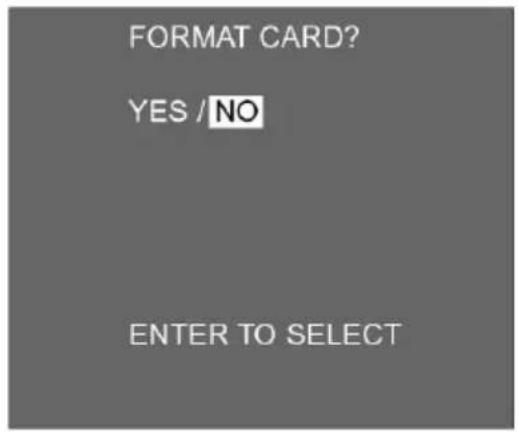

4 Press the ◀ toggle to highlight [YES], then press the ENTER button.
- Formatting of your CF card starts.
• After the card has been formatted, the screen display will return to the setup menu.
The camera automatically records the date and hour with every shot – provided you have properly set its clock.
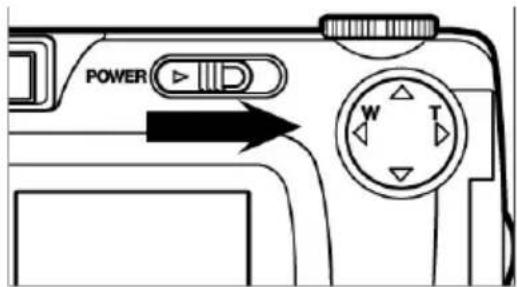
1 Turn the control dial to 📷 and switch the camera on.
- The ON/OFF switch is spring-loaded and will automatically return to its normal position.

2 Turn the control dial to SETUP.
- The setup menu will appear on the LCD screen as shown below.
| LCD BRIGHT | 7 |
| POWER SAVE | 10 MIN. |
| FORMAT | |
| DATE | 2000/08/30 |
| TIME | 17:33 |
| BEEP | ON |
| VIDEO OUT | NTSC |
| LANGUAGE | ENGLISH |
| DEFAULT |

3 Press the ▲ or toggle until [DATE] is highlighted, then press the ENTER button.
- The date and hour will be displayed as shown opposite.
- If you wish to set only the hour, press the ▲r ▼ toggle until [TIME] is highlighted, then press the ENTER button. Thereafter start with step [7].

4 If you wish to change the order of year, month and day, press the ◀ toggle once to highlight [YYYY/MM/DD].
- If you do not wish to change the date format, start with step [7].


5 Press the ▲ or toggle until the desired sequence of year, month and day is highlighted.
- The sequence of year, month and day changes as follows:
YYYY/MM/DD (year/month/day)
![ROLLEI d23 com - If you wish to change the order of year, month and day, press the ◀ toggle once to highlight [YYYY/MM/DD]. - 3](/content/2026/05/1109812/images/6a9cb6a3f2393af9b48b6ca0909ec4719ff411cda897f2d8aaa353911529d80e.jpg)
DD/MM/YYYY (day/month/year)
![ROLLEI d23 com - If you wish to change the order of year, month and day, press the ◀ toggle once to highlight [YYYY/MM/DD]. - 4](/content/2026/05/1109812/images/d5bea96c40d558b34ca1c9f86179ee31b175aae00d8c324e12734f3b80e3ed15.jpg)
MM/DD/YYYY (month/day/year)
- If you change this sequence, the new format will also be reflected in the date/hour display on the LCD screen.
- If you do not wish to change this sequence, proceed with step [7].

6 Press the ▶ toggle once.
• The last two year digits are highlighted.
- Every time you press the ▶ toggle, the highlighted portion will shift in the following order: year AE month AE day AE hour AE minute. If you press the ◀ toggle, the sequence will shift in the opposite direction.

7 Press the ▲ or ▼ toggle to set the date and hour. If you keep either of these toggles depressed, the setting will advance rapidly either forward or backward.
• The year can be set from 2000 to 2099.
• To change other digits, repeat steps [6] and [7].
- If [TIME] is highlighted and the ENTER button pressed as described under [3], the display lets you set the date and hour. To set the hour, repeat steps [6] and [7].

8 Once you have set the date and hour, press the ENTER button.
- The built-in clock starts running, and the LCD screen displays the setup menu.
* After changing batteries, check whether date and hour are still correct. If you don't use an AC adapter and leave the cover of the battery compartment open longer than five minutes, the built-in clock may either be slow, or it may have been reset entirely. In this case, you will have to reset both the date and the hour.
A beep will sound whenever you press one of the buttons or turn the control dial. If you wish, these beeps can be turned off.
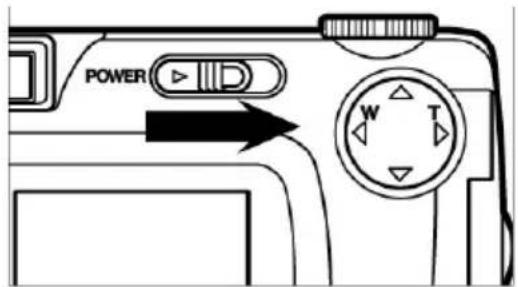

1 Turn the control dial to 📷 and switch the camera on.
- The ON/OFF switch is spring-loaded and will automatically return to its normal position.
2 Turn the control dial to SETUP.
- The LCD screen will display the setup menu as shown below.
| LCD BRIGHT | 7 |
| POWER SAVE | 10 MIN. |
| FORMAT | |
| DATE | 2000/09/30 |
| TIME | 17:33 |
| BEEP | ON |
| VIDEO OUT | NTSC |
| LANGUAGE | ENGLISH |
| DEFAULT |

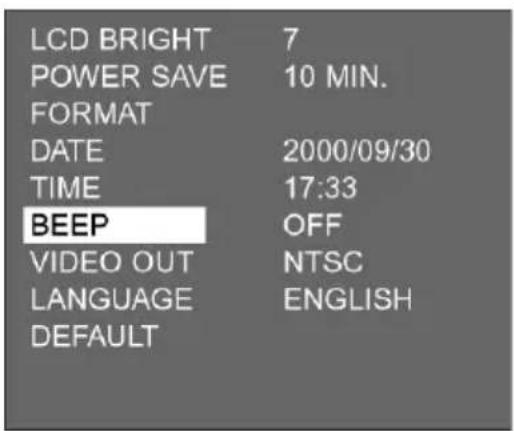
3 Press the ▲ or ▶ toggle until [BEEP] is highlighted, then press the ▶ toggle.

4 Select either [ON] or [OFF] using the ▲ or ▼ toggle.
- The beeper settings will change as follows:.
![ROLLEI d23 com - If you wish to change the order of year, month and day, press the ◀ toggle once to highlight [YYYY/MM/DD]. - 12](/content/2026/05/1109812/images/ef8f362b83345aad0642d5b458e9fae3f0ddf0f9c8e62eac9a435c0d50764b13.jpg)
flowchart
graph TD
    A["ON"] --> B["▲▼"]
    B --> C["OFF"]
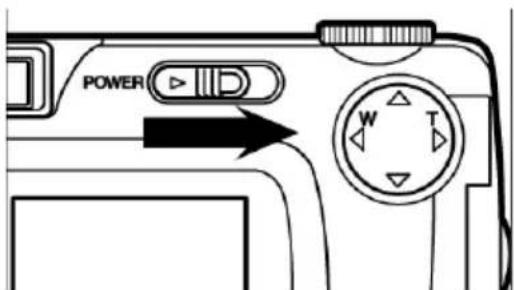
5 Press the ◀ toggle.
- With [OFF] selected, no beep will be heard, regardless of which button you press.
• The volume of the beep cannot be varied.
You may view the pictures captured with your camera on a TV screen. The camera has a video output terminal via which it can be connected to a TV set using the video cable. This terminal can be switched to either NTSC or PAL.
What is NTSC, and what is PAL?
The two are color TV standards. NTSC is mainly used in the United States, in Japan, Canada, Mexico, the Philippines, Korea, etc. The PAL standard is primarily used in Western Europe (except France), in Australia, Singapore, Thailand, China, etc. The two systems are NOT compatible. Your Rollei d 23 com, however, allows the video output to be switched to either NTSC or PAL so that you can easily view your pictures on a TV set wherever you are.

1 Turn the control dial to 📷 and switch the camera on.
- The ON/OFF switch is spring-loaded and will automatically return to its normal position.

2 Turn the control dial to SETUP.
- The LCD screen will display the setup menu.
| LCD BRIGHT POWER SAVE FORMAT DATE TIME BEEP VIDEO OUT LANGUAGE DEFAULT | 7 10 MIN. 2000/09/30 17:33 ON NTSC ENGLISH |
| LCD BRIGHT POWER SAVE FORMAT DATE TIME BEEP VIDEO OUT LANGUAGE DEFAULT | 7 10 MIN. 2000/09/30 17:33 ON PAL ENGLISH |
Press the ▲ or toggle to highlight [VIDEO OUT], then press the ▶ toggle.
Press the ▲ or toggle to select either [NTSC] or [PAL].
• The setting will change as follows:
| NTSC |
| ▲▼ |
| PAL |
| LCD BRIGHT | 7 |
| POWER SAVE | 10 MIN. |
| FORMAT | |
| DATE | 2000/09/30 |
| TIME | 17:33 |
| BEEP | ON |
| VIDEO OUT | PAL |
| LANGUAGE | ENGLISH |
| DEFAULT |
Press the ◀ toggle.
- The standard selected will be activated.
The screen menus can be displayed in either Japanese or English.
1 Turn the control dial to 📷 and switch the camera on.
- The ON/OFF switch is spring-loaded and will automatically return to its normal position.

2 Turn the control dial to SETUP.
- The setup menu is displayed on the LCD screen as shown below.
| LCD BRIGHT | 7 |
| POWER SAVE | 10 MIN. |
| FORMAT | |
| DATE | 2000/09/30 |
| TIME | 17:33 |
| BEEP | ON |
| VIDEO OUT | NTSC |
| LANGUAGE | ENGLISH |
| DEFAULT |
3 Press the ▲ or ▼ toggle until [LANGUAGE] is highlighted, then press the ▶ toggle.
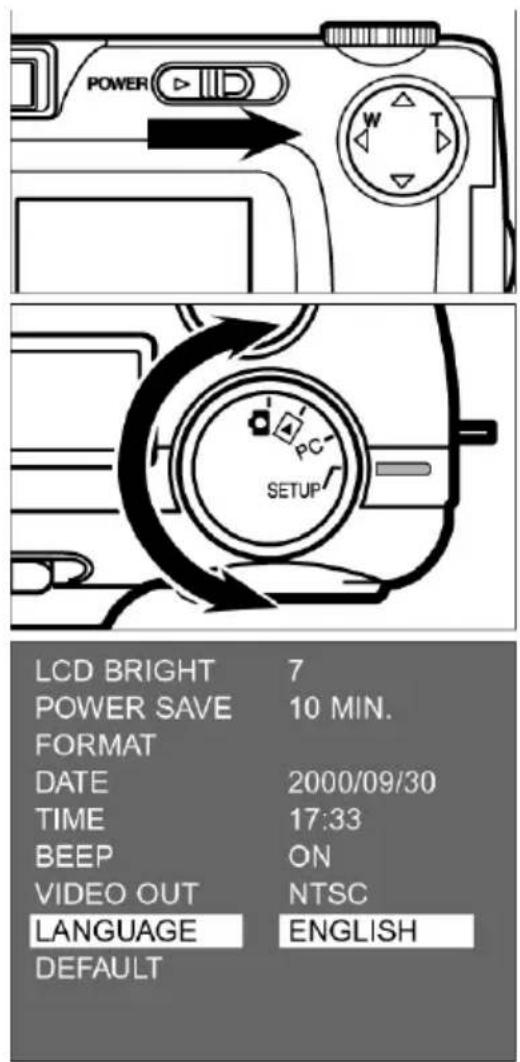
4 Press the ▲ or ▼oggle to select either [JAPANESE] or [ENGLISH].
• The language setting changes as follows:
ENGLISH

JAPANESE
5 Press the ◀ toggle.
- The language selected will appear on the LCD screen.
To return to English:
- Repeat steps [1] - [2] on the preceding page.
- Press the ▲ or ▼oggle until LANGUAGE is highlighted, then press the ▶oggle.
- Press the ▲ or ▼ toggle to select [ ]. エイゴ
- Press the ◀oggle.
The camera can be reset to the following factory defaults:
Camera mode Default
| Flash (see page 41) Autoflash with red-eye reduction | |
| Exposure compensation (see page 55) Zero | |
| Focusing (see page 36) AF (autofocus) | |
| Recording (see page 45) Single-frame | |
| White balance (see page 65) AUTO | |
| Image quality (see page 60) STD. (Standard) | |
| Image size (see page 63) FULL | |
| Sharpness (see page 68) NORMAL | |
| Slide-show interval (see pages 82, 83) 3 seconds | |
| Slide-show sequence (see pages 82, 83) FORWARD | |
| LCD screen brightness (see page 110) 5 | |
| Auto cutoff interval (see 112) 3 minutes | |
| Beeper (see page 120) ON |
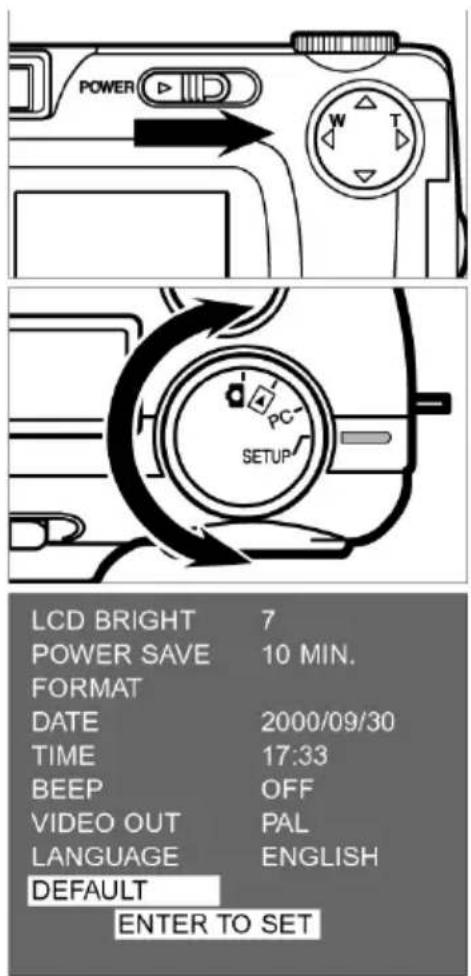
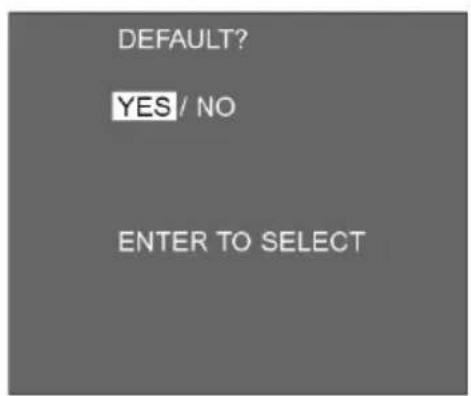

1 Turn the control dial to and switch the camera on.
- The ON/OFF switch is spring-loaded and will automatically return to its normal position.
2 Turn the control dial to SETUP.
- The LCD screen will display the setup menu as shown below.
3 Press the ▲ or ▼oggle to highlight [DEFAULT], then press the ENTER button.
- You will be asked whether or not you wish to reset the camera.
4 Press the ◀ toggle until [YES] is highlighted, then press the ENTER button.
- The camera is reset to its factory defaults
• The LCD screen displays the setup menu.
CONNECTING YOUR CAMERA TO A COMPUTER
Installing the driver software
To install the drivers for Windows 98 / Windows 98 SE / Windows 2000 Prof. / Windows, proceed as follows:

1 Insert the installation CD-ROM into your CD-ROM drive.
2 Double-click on the Setup icon.
3 The Setup dialog box appears. Please wait.

4 When the "Welcome" dialog appears, click [Next].

5 When the Software License Agreement box appears, read it carefully and decide what to do:
[Back] to preceding box.
[Yes] to accept.
[No] to reject and exit.

6 When the Start Copying Files box appears, select:
[[Next] to start installation.
[Back] to go back to the previous dialog box.
[Cancel] to exit.
CONNECTING YOUR CAMERA TO A COMPUTER
4 When the Setup Complete box appears, click [Finish] to complete installation.
The following steps apply equally to OS 8.6 and OS.9.

1 Choose the appropriate driver for your system.
2 Start the installation.
Rollei
Welcome
Rollei d23 com digital camera driver for MAC

3 When the Welcome box appears, click [Continue].
CONNECTING YOUR CAMERA TO A COMPUTER
1 To start installation, click [Install].
2 Read the warnings, then click on [Continue].
If necessary, you may quit the program by clicking [Cancel].

Installation has been completed successfully.

To initial the newly installed software, restart your computer (suggested) or click [Continue] if you wish to continue installing.
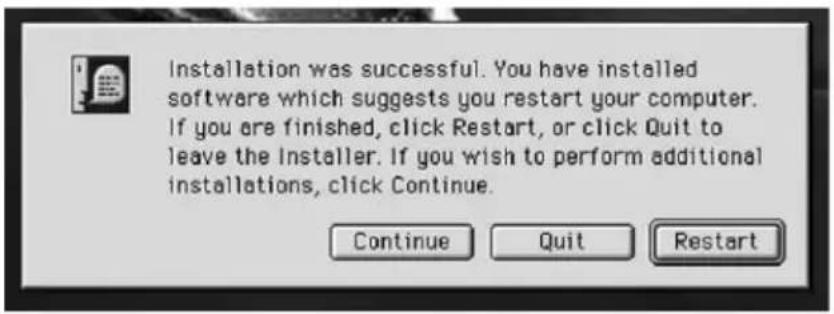
While the camera is connected to the computer or data are being exchanged between camera and computer, DO NOT:
- Switch the camera off;
- Pull the USB cable;
- Turn the control dial;
- Insert or remove a CF card.
Otherwise the camera or the computer may malfunction, and the data on your CF card may be damaged or erased.
In the case of Windows 2000 Professional, writing takes longer than is signaled on the computer. In other words, even after the copying message has disappeared from the computer screen, data transfer will continue. During this period, DO NOT switch the camera off, pull the USB plug or turn the control dial to avoid malfunctions.
- When the camera is connected to a computer, automatic cutoff is set to 30 minutes, regardless of the interval set in the SETUP menu (see page 113).
WHEN WORKING WITH THE CAMERA CONNECTED TO A COMPUTER, NOTE THE FOLLOWING:
- If you connect a battery-powered camera to your computer, use only fresh batteries. With partly discharged batteries, the camera may turn off during data transfer. An error message will be generated in this case, and both the camera and the computer may malfunction, or the data on your CF card may be damaged or even erased.
- To avoid power problems, it is recommended that an AC adapter (not supplied with the camera) be used whenever the camera is connected to a computer.
The following minimum system requirements have to be met for use of the Adobe PhotoDeluxe Home Edition 4.0 (for Windows) or Adobe PhotoDeluxe 2.0 (Macintosh version) image-processing software:
For IBM-PC/AT and compatibles
Processor Intel Pentium II with 233 MHz or more or fully compatible processor
Operating system Windows 95, Windows 98, Windows 2000, Windows NT 4.0 (Service Pack 5)
Working memory 16 MB or more (at least 32 MB for Windows NT)
Hard-disk memory 110 MB or more available
Monitor Color monitor with 800x600 video-signal resolution
CD-ROM drive
Required for installation and use of software
For Apple Macintosh
Processor 68040 or higher, or Power Macintosh
Operating system Mac OS 8.6, OS 9
Working memory 32 MB or more
Hard-disk memory 110 MB or more available
Monitor Color monitor with at least 256 colors
CD-ROM drive
Required for installation and use of software
Installation on IBM or compatible PC
- Switch computer on and start Windows.
- Insert CD-ROM with Adobe PhotoDeluxe 4.0 software into your CD-ROM drive.
- When the setup programm starts up automatically displayed on the screen.
- If installation does not start up automatically, select „Start“ → „Run“ and input D\ENGLISH\INSTALL\SETUP.EXE in the box “Open” (when your CD-Rom drive is the D drive) and click [OK].
- Switch computer on and start the operating system.
- Insert CD-ROM with Adobe PhotoDeluxe 2.0 software into your CD-ROM drive.
- Double-click on the CD-ROM icon with Adobe PhotoDeluxe 2.0 software.
- Open the "English" directory with a double-click.
- Double-click on the "PhotoDeluxe' Installer" icon. Then follow the on-screen installation instructions.
APPENDIX
Connecting your camera with the video cable supplied, you can watch your pictures on a TV screen.
1 Make sure the video output signal is set to suit the country of use (NTSC or PAL), (see page 122).
2 Turn off both the TV set and your camera.
3 Plug the mini-jack of the video cable into the video output of your camera.
• The LCD screen is disabled.
4 Plug the other end of the video cable into the video input of your TV set.
5 Switch your TV set on.
6 Turn the control dial of your camera to▶.
7 Switch your camera on.
8 Set your TV set for the proper AV channel.
- The TV screen will show the same display as the LCD screen of your camera during playback.
9 You may play back your images in any of the modes described on pages 71 to 78.
- Slide-show playback is also possible (see page 79).
If you have any trouble with your camera, try to solve the problem with the aid of the following table. Should this be unsuccessful, please consult your dealer.
| Problem Cause Remedy | Page | ||
| Automatic focusing Are impossible (green subject focus lamp blinking AF? rapidly - approx. 8x per second) when shutter release is depressed halfway. | you trying to focus on a Use focus lock or focus that is unsuitable for manually. | 3839 | |
| Are you trying to shoot Step back to maintain a 36 a subject that is less distance of, at least, 40 cm. than 40 cm away or Use macro mode for - in macro mode - subjects that are between over 40 cm away? 4 cm and 40 cm away. | |||
| Shutter does not Is camera release. | Turn control dial to 📄 and switch camera on. | ||
| Is camera set to Record? | |||
| Does green focus lamp blink slowly (approx. twice per second) and does “Recording” blink on LCD screen? | Your image is being saved on CF card. Wait until saving is completed and neither the focus lamp nor “Recording” blink. | 33 | |
| release. | CF card is full.Shutter does not | Delete images you donicht not wish to keep or load pictures down to PC. Alternatively, insert another CF card with sufficient free memory. | 8690 |
| No live image on screen. | Is camera switched on? Turn control dial to and switch camera on. | 32 | |
| Are batteries spent? Replace all four batteries or use the AC adapter (sold separately). | 2427 | ||
| Have batteries been inserted with wrong polarity? | Reload them with proper polarity. | 24 | |
| Is LCD screen switched off? | Press DISPLAY button to switch it on. | 34 | |
| Camera has turned off automatically to save power. | Turn it on again. | 34 | |
| Shutter does not release. | Is there a CF card in the camera? | If NO CARD appears on the LCD screen and CF on the data monitor, there is no CF card loaded. Insert a card. | 28 |
| Green focus lamp blinks slowly (about twice per second), and PLAYBACK blinks on screen. | Camera is reading data from CF card. Wait until it has finished and the focus lamp as well as PLAY- BACK stop blinking. | 15 | |
| Flash picture comes out underexposed. | Was your subject within flash range? | Make sure your subject is within range of the built-in flash unit: 0.4 – 3 m. | 41 |
| Zoom playback does not work. | Was the picture taken with digital zoom? | Pictures taken with digital zoom cannot be played back in zoom mode. | 5178 |
| All images are over or underexposed. | Did you use exposure compensation? | Reset exposure compensation to zero. | 55 |
| Lens moves out, but data monitor remains blank, and camera does not work. | Does the battery icon blink? | (Display goes dead after five seconds.) If the battery icon blinks, the display will go dead after five seconds, while the lens moves out. Replace the batteries. | 26 |
| Image file damaged. Did you remove your CF card while it was accessed by the camera? | Never remove your CF card while the green focus lamp is blinking slowly after exposure (about twice per second). | 33 | |
| Camera does not work properly. | Remove the batteries and replace them. If the camera malfunctioned while it was powered by AC, pull the plug from the camera and reinsert it. Then switch the camera on again.If the camera cannot be switched off, a defective CF card is the likely cause. In this case, format your CF card externally in a PC after loading down its data onto the computer. | ||
Batteries
- Battery power drops at low temperature. When shooting in a cold environment, always keep spare batteries ready, preferably in a warm inside pocket of your clothing.
- We recommend the use of NiMH batteries because of their stable performance. They will recover their normal performance even after a drop due to low temperature.
- Remove the batteries if you do not plan to use the camera for a prolonged period. Leaking battery acid might damage your camera.
- When using alkaline batteries, low power may occasionally be displayed although the batteries still have sufficient power. Keep using the camera, the display will disappear.
- Caution! Batteries may heat up considerably in use. Proceed with care when removing or changing batteries. Switch the camera off and allow the batteries to cool down.
Operating temperature and conditions
- The camera has been designed for use at temperatures from 0°C to 40°C.
- Never leave the camera in places where it might be exposed to high temperatures, such as in the glove compartment of a car.
- Do not expose the camera to extreme humidity.
- To avoid condensation, place the camera in an airtight plastic bag before taking it from a cold environment into a warm room. Then leave it to adapt to the warm environment before opening the bag.
Safety and handling of CompactFlash' cards
Carefully read and follow the instructions for use of your CompactFlash' card.
You risk losing data or damaging your card if:
- You use your card improperly;
- You are near electrostatic discharges or fields;
- You remove the card or cut off power while it is being accessed by the camera (reading, writing, etc.);
- You do not use your card over a prolonged period. The data stored on the card will deteriorate with time. It may become impossible to restore the data from a card that has not been used in a long time.
- Normal wear is likewise a risk factor.
• Normal wear is likewise a risk factor.
- The storage capacity of CompactFlash' cards diminishes with extended use. In this case, buy a new card.
- Keep your CF card away from strong electric fields or static discharges.
- Keep your CF card away from strong electric fields or static discharges.
- Do not touch the card's electrical contacts with your fingers or a metallic object.
- Keep the card away from humidity, heat and direct sunlight.
- Keep the card out of reach of small children.
- When not in use, return the card to its protective case.
Care of LCD screen
- The LCD screen of your camera is a high-precision component with a failure rate of less than 0.02% .
- Do not exert pressure on the screen surface to avoid permanent damage.
- Do not exert pressure on the screen surface to avoid permanent damage.
- To clean the screen surface, first blow off dust and sand, then wipe it carefully with a soft, dry and clean cloth.
- Should the screen flicker permanently or fail, have it replaced.
Copyright
- TV programs, movies, videos, etc., are copyrighted material. Unauthorized recording of such material my violate their authors' copyright. At some events or exhibitions, etc., photography may not be allowed. Copyrighted images may be used only within the scope of the copyright.
DPOF
- DPOF data recorded on your CF card by another camera will not be accepted by your Rollei d 23 com, even if the two cameras support the DCF format.
General remarks
- General remarks
- Switch the camera off and remove its batteries before shipping it.
- The camera is neither watertight nor splashwater-proof.
- Inserting and removing batteries or memory cards with wet hands may damage your camera.
- Improper use of your camera at the beach or near water may give rise to damage and malfunctions.
- Do not expose the camera to direct sunlight for any extended period. Never point the lens directly at the sun to avoid damage to the CCD sensor.
Cleaning
- To clean the camera or its lens, use a soft, clean and dry cloth. Be careful first to blow off loose particles, such as sand or dust. Never try to remove solid particles by wiping which might scratch the surface.
- To clean the front lens, first use a blower brush to remove dust or sand, then carefully wipe it with a cloth moistened with lens-cleaning fluid.
- Never use organic solvents to clean your camera.
- Never touch the front lens with your fingers.
Storage
- Keep the camera in a cool, dry and well-ventilated place, free from dust or chemicals (such as moth balls). If you will not use the camera for any prolonged period, preferably keep it in an air-tight container with a desiccant, such as silica gel.
- Remove the batteries if you are planning not the use the camera for an extended period. Leaking battery acid might damage the camera and its components.
- Do not leave the camera in a closet together with moth balls.
- Check the workings of the camera after prolonged storage.
Before important events
- Carefully check all camera functions. If necessary, take test pictures.
- Rollei will not be responsible for damage caused by malfunctioning of the equipment.
Questions and service
- If you have any questions and before mailing the camera for repairs, please contact your dealer.
Camera type Digital camera with LCD screen, interchangeable storage medium and built-in flash unit
CCD
Sensor: 1/1.75-inch interline CCD, 2.31 million pixels, with basis color filter
System: Single
Sensitivity: Equivalent to ISO 100/21°
A/D converter: 10 bit
Lens
Focal-length range: 8-24mm (equivalent to 38-114mm in 35mm photography)
Relative aperture: f/3.4 - f/3.6
Optical construction: Nine elements in six components, with three aspheric surfaces
Focusing range: 40 cm to infinity (macro mode: 4 cm to 40 cm)
Digital zoom: Telephoto zoom 2.5x
Image storage
Storage medium: CompactFlash' card, type I
File format: Exif 2.1 (JPEG), DU standard, DPOF 1.0
Number of pixels
(w x h): 1,792 x 1,200 (full size)
896 x 600 (half size)
Storage capacity (with 8MB CF card):
Full size Half size
FINE approx. 8 images approx. 28 images
STD. (Standard) approx. 13 images approx. 43 images
ECON.(Economy) approx. 33 images approx. 99 images
The number of images may vary and is affected
by subject characteristics.
among other things: Miscellaneous Delete mode (single frames, all frames)
Formatting of CF card
Autofocus
System: CCD-based autofocus system
Focus lock with shutter release half depressed
Focus mode: Single-frame AF
Manual focusing: Possible by pressing

Automatic exposure control (AE)
Type: Programmed AE
AE lock with shutter release half depressed
Exposure metering: Center-weighted TTL metering
Shutter: Electrical CCD shutter (and one mechanical shutter)
Shutter speeds: 1/500 s to 1 s
Exposure compensation: ±2 EV in 0.5EV increments
White balance: Automatic; manual for daylight, tungsten light, fluorescent light
LCD screen
Type: 46mm (1.8-inch) TFT LCD module
Pixels: approx. 60,000
Brightness steps: 9
Screen language: English or Japanese
Display Single frames, index (9 frames), slide show, magnification (2.5x zoom playback)
Viewfinder
Type: Real-image zoom viewfinder
Coverage (at 3 m): approx. 80%
Eye relief: 14 mm
Magnification: 0.35x to 1.0x
Recording
Modes: Single-frame, continuous shooting (approx. 1 fps), self-timer
Number of images per series:
Full size Half size
FINE approx. 2 images approx. 6 images
STD. (Standard) approx. 4 images approx. 12 images
ECON. (Economy) approx. 8 images approx. 12 images
Self-timer: approx. 10-second delay
Built-in flash unit
Recycling time: approx. 8 s (fill flash)
Flash modes: Autoflash, fill flash, flash OFF, autoflash with red-eye reduction, fill flash with red-eye reduction; (no flash in macro mode)
Output control: Balanced for available light
Interface
Video out: Composite video signal, NTSC or PAL
PC interface: USB terminal (Universal Serial Bus)
Power source
Batteries: Four size AA alkaline batteries (or size AA Nicad or NiMH batteries)
External power: supply AC adapter (DC input on camera)
Operating temperature: 0°C to 40°C, max. 85% relative humidity (noncondensing)
Dimensions and weight
Dimensions
W x h x d/mm (inches): 116 x 73 x 62 (4.57 x 2.87 x 2.44) [without protruding parts]
Weight: approx. 280 g (9.88 oz.) [without batteries and CF card]
All data based on conditions when going to press, subject to change without notice.
System requirements for Windows
• For USB Windows 98/98SE/2000Prof./Me
• 16MB RAM, preferably 32MB
• 110 MB free disk space
- VGA color monitor
- CD-ROM drive
- 3.5" diskette drive
• USB and Video-out terminals
System requirements for iMac, iBook, G3 blue&white series, G4 series
• Mac OS 8.6 / 9 / 9.0.2 / preferably 9.0.4
- 32MB RAM or more
• 110 MB free disk space
- VGA color monitor
- CD-ROM drive
• USB and Video-out terminals
- Instructions for use
- WARNINGS
- CAUTION
- Additional features
- Playback mode
- Deleting images
- Playback settings
- Setup
- Annex
- KAMERAGEHÄUSE
- DESCRIPTION OF PARTS
- TERMINALS
- BOTTOM PLATE
- DATA MONITOR
- Viewfinder
- Close-up parallax marks
- TAKING PICTURES
- PLAYBACK
- SETTING UP THE CAMERA
- Always switch the camera off before changing batteries!
- CHECKING BATTERY POWER
- AUTOMATIC CUTOFF
- USING THE OPTIONAL AC ADAPTER
- Plug the AC adapter into the camera terminal.
- Inserting the CompactFlash' card
- Swing the ejector lever down as shown.
- REMOVING THE CF CARD
- Press the ejector lever straight in.
- Close the card slot so that it clicks shut.
- Turn the control dial to
- Switch the camera on using the ON/OFF SWITCH.
- Compose your shot, using either the optical viewfinder or the LCD screen.
- Zoom in or out with the ▶ /◀ toggles, if necessary.
- Press the shutter release halfway.
- Press the shutter release down fully to take your picture.
- Camera settings
- FOCUS LAMP
- If the green focus lamp blinks, check the following:
- FOCUSING RANGE IN AUTOFOCUS MODE (shortest focusing distance)
- SPECIAL FOCUSING CONDITIONS
- FOCUS LOCK
- (for off-center subjects)
- MANUAL FOCUSING
- Flash range
- Press the MENU button.
- FLASH READY LAMP
- Turn the control dial to 📷 and press the MENU button.
- Press the ▲ or ▼ toggle until [DRIVE MODE] is highlighted, then press the ▶ toggle.
- Activate the self-timer by pressing the shutter release down fully.
- Press the ▲ or toggle until [FOCUS] is highlighted, then press the ◀ toggle.
- Press the ▲ or toggle until [CLOSE UP] is highlighted, then press the ◀ toggle.
- Press the MENU button.
- Compose your shot on the LCD screen.
- Press the shutter release halfway.
- Press the shutter release down fully to take your picture.
- RECORDING OPTIONS
- RECORD-MODE SETTINGS
- FLASH
- Autoflash
- FOCUSING
- CONTINUOUS SHOOTING
- IMAGE QUALITY
- IMAGE SIZE
- WEISSLICHT-ABGLEICH
- SHARPNESS
- Press the ▲ or ▼ toggle until the desired image size is highlighted.
- Press the ◀ toggle.
- Press the MENU button.
- Press the ▲ or toggle until the desired white-balance setting is highlighted.
- Press the ▲ or ▼oggle until the desired sharpness setting is highlighted.
- Turn the control dial to ▶.
- If the camera is still turned off, switch it on.
- Press the ▶ or ◀ toggle to display the desired image.
- With single-frame playback selected, press the DISPLAY button once or twice (see page 72).
- Press the ▶ or toggle to select the desired image.
- Press the DISPLAY button once (see page 72).
- Press the ▲ or ▼oggle until [ZOOM] is highlighted.
- Press the ENTER button.
- Press the ▲, ▼ to ggle to scroll through the enlarged image.
- Press the ▲ or ▼oggle until [SLIDE SHOW] is highlighted.
- Press the ▲ or toggle until [START] is highlighted.
- Press the ENTER button.
- To stop the slide show, press one of the following buttons:
- SETTINGS IN SLIDE-SHOW MENU
- Press the ▲ or toggle until [SLIDE SHOW] is highlighted.
- Press the ▲ or ▼ toggle until [INTERVAL] is highlighted, then press the ▶ toggle.
- Press the ▲ or ▼oggle until the desired interval is highlighted.
- Press the ◀ toggle.
- Press the ▲ or ▼ toggle until [DIRECTION] is highlighted, then press the ▶ toggle.
- CAUTION!
- Press the ◀ or ▶ toggle to display the desired image.
- Once [DELETE] is highlighted, press the toggle.
- Once [SELECT] is highlighted, press the ENTER button.
- Press the ◀ toggle until [YES] is highlighted, then press the ENTER button.
- Repeat step [7] if you wish to delete further images.
- To complete the process, make sure that [NO] is highlighted and confirm by pressing the ENTER button.
- Press the MENU button.
- Press the ENTER button.
- PLAYBACK OPTIONS AND SETTINGS
- DELETE
- Zoom
- SLIDE SHOW
- SELECTING THE IMAGE AND THE NUMBER OF PRINTS DESIRED
- With [STD.] highlighted press the ENTER button.
- Press the ◀ or ▶ toggle to select the image to be printed.
- Press the ENTER button to confirm.
- INDEX-PRINT SETTINGS
- CANCELING DPOF PRINT SETTINGS
- Notes on the DCF format (Design Rule for Camera File System)
- SETUP-MENU DISPLAY ON LCD SCREEN
- SETUP-MENU SETTINGS
- Press the ▲ or toggle until the desired brightness figure appears.
- Press the ▲ or ▼oggle until the desired cutoff interval is highlighted.
- Press the ◀ toggle.
- Press the ▲ or toggle until [FORMAT] is highlighted, then press the ENTER button.
- Press the ◀ toggle to highlight [YES], then press the ENTER button.
- Turn the control dial to 📷 and switch the camera on.
- Turn the control dial to SETUP.
- Press the ▲ or toggle until [DATE] is highlighted, then press the ENTER button.
- If you wish to change the order of year, month and day, press the ◀ toggle once to highlight [YYYY/MM/DD].
- What is NTSC, and what is PAL?
- To return to English:
- Turn the control dial to and switch the camera on.
- Press the ▲ or ▼oggle to highlight [DEFAULT], then press the ENTER button.
- Press the ◀ toggle until [YES] is highlighted, then press the ENTER button.
- CONNECTING YOUR CAMERA TO A COMPUTER
- Welcome
- WHEN WORKING WITH THE CAMERA CONNECTED TO A COMPUTER, NOTE THE FOLLOWING:
- For IBM-PC/AT and compatibles
- For Apple Macintosh
- Installation on IBM or compatible PC
- APPENDIX
- Batteries
- Operating temperature and conditions
- Safety and handling of CompactFlash' cards
- Care of LCD screen
- Copyright
- DPOF
- General remarks
- Cleaning
- Storage
- Before important events
- Questions and service
- CCD
- Lens
- Image storage
- Autofocus
- Automatic exposure control (AE)
- LCD screen
- Recording
- Built-in flash unit
- Interface
- Power source
- Dimensions and weight
- System requirements for Windows
- System requirements for iMac, iBook, G3 blue&white series, G4 series
Brand : ROLLEI
Model : d23 com
Category : Camera