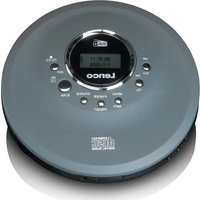
CD-500 - Cd player/recorder LENCO - Free user manual and instructions
Find the device manual for free CD-500 LENCO in PDF.

| Brand | Lenco |
| Model | CD-500 |
| Product type | CD player/recorder |
| Dimensions (W x D x H) | 143 x 143 x 30 mm |
| Weight | 0.24 kg |
| Power supply | Rechargeable lithium-polymer battery 3.7 V 1000 mAh; charging via USB-C 5 V 1000 mA (adapter not included) |
| Display | 2-inch TFT color LCD |
| Playable formats | Audio CD, CD-R/RW, MP3 (WMA not supported) |
| Radio | DAB+ (174.928 - 239.2 MHz) and FM (87.5 - 108 MHz) |
| Bluetooth | Version 5.2, audio transmission (TX) to Bluetooth speakers/headphones, range ~10 m |
| Anti-shock protection | 45 seconds (CDDA) / 120 seconds (CD-MP3) |
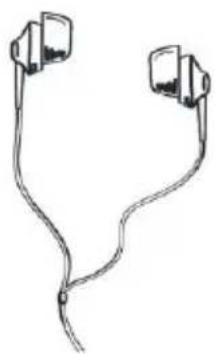
| Audio output | 3.5 mm stereo jack (earphones included) |
| Playback functions | Play/pause, stop, skip, fast search, repeat (track/folder/all), random, program (24 tracks CD / 99 tracks MP3), resume |
| Additional functions | BBS (bass boost), key lock, sleep timer (15/30/45/60/90 min), time and date setting |
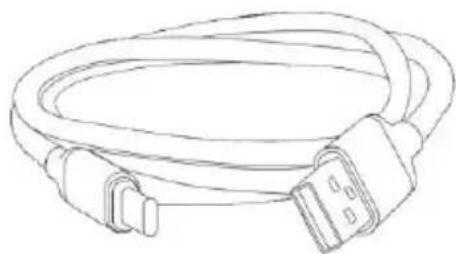
| Included accessories | Earphones, USB-C cable, user manual |
| Maintenance | Clean with a soft dry cloth; do not use solvents |
| Safety | Class 1 laser product; do not open the device; do not expose to moisture; keep out of reach of children |
| Operating temperature | 0 °C to 40 °C |
| Warranty | According to European legislation; contact your retailer for repairs |
Frequently Asked Questions - CD-500 LENCO
User questions about CD-500 LENCO
0 question about this device. Answer the ones you know or ask your own.
Ask a new question about this device
Download the instructions for your Cd player/recorder in PDF format for free! Find your manual CD-500 - LENCO and take your electronic device back in hand. On this page are published all the documents necessary for the use of your device. CD-500 by LENCO.
USER MANUAL CD-500 LENCO
Usage of controls or adjustments or performance of procedures other than those specied herein may result in hazardous radiaon exposure.
KEEP THESE INSTRUCTIONS IN MIND:
- Do not cover or block any venlaon openings. When placing the device on a shelf, leave 5 cm (2") free space around the whole device.
- Install in accordance with the supplied user manual.
- Keep the device away from heat sources such as radiators, heaters, stoves, candles and other heat-generang products or naked ame. The device can only be used in moderate climates. Extremely cold or warm environments should be avoided. Working temperature between 0^ and 35^ C.
- Avoid using the device near strong magnec elds.
- Electrostac discharge can disturb normal usage of this device. If so, simply reset and restart the device following the instrucon manual. During le transmission, please handle with care and operate in a stac-free environment.
- Warning! Never insert an object into the product through the vents or openings. High voltage ows through the product and inserng an object can cause electric shock and/or short circuit internal parts. For the same reason, do not spill water or liquid on the product.
- Do not use in wet or moist areas such as bathrooms, steamy kitchens or near swimming pools.
- The device shall not be exposed to dripping or splashing and make sure that no objects lled with liquids, such as vases, are placed on or near the apparatus.
- Do not use this device when condensaon may occur. When the unit is used in a warm wet room with damp, water droplets or condensaon may occur inside the unit and the unit may not funcon properly; let the unit stand in power OFF for 1 or 2 hours before turning on the power: the unit should be dry before geng any power.
- Although this device is manufactured with the utmost care and checked several mes before leaving the factory, it is sill possible that problems may occur, as with all electrical appliances. If you noce smoke, an excessive build-up of heat or any other unexpected phenomena, you should disconnect the plug from the main power socket immediately.
- This device must operate on a power source as specified on the specicaon label. If you are not sure of the type of power supply used in your home, consult your dealer or local power company.
- Keep away from animals. Some animals enjoy bing on power cords.
- To clean the device, use a so dry cloth. Do not use solvents or petrol based uids. To remove severe stains, you may use a damp cloth with dilute detergent.
- The supplier is not responsible for damage or lost data caused by malfuncon, misuse, modicaon of the device or baery replacement.
- Do not interrupt the conncon when the device is formang or transferring les. Otherwise, data may be corrupted or lost.
- If the unit has USB playback funcon, the USB memory sick should be plugged into the unit directly. Don't use an USB extension cable because it can cause interference resulting in failing of data.
- The rang label has been marked on the boom or back panel of the device.
- This device is not intended for use by people (including children) with physical, sensory or mental disabilities, or a lack of experience and knowledge, unless they're under supervision or have received instrucons about the correct use of the device by the person who is responsible for their safety.
-
This product is intended for non professional use only and not for commercial or industrial use.
-
Make sure the unit is adjusted to a stable posion. Damage caused by using this product in an unstable posion vibraons or shocks or by failure to follow any other warning or precaution contained within this user manual will not be covered by warranty.
-
Never remove the casing of this device.
-
Never place this device on other electrical equipment.
-
Do not allow children access to plasc bags.
-
Only use aachments/accessories specied by the manufacturer.
-
Refer all servicing to qualified service personnel. Servicing is required when the device has been damaged in any way, such as the power supply cord or the plug, when liquid has been spilled or objects have fallen into the device, when the device has been exposed to rain or moisture, does not operate normally, or has been dropped.
-
Long exposure to loud sounds from personal music players may lead to temporary or permanent hearing loss.
-
If the product is delivered with power cable or AC power adaptor:
-
If any trouble occur, disconnect the AC power cord and refer servicing to qualified personnel.
- Don't step on or pinch the power adaptor. Be very careful, particularly near the plugs and the cable's exit point. Do not place heavy items on the power adaptor, which may damage it. Keep the enre device out of children's reach! When playing with the power cable, they can seriously injure themselves.
- Unplug this device during lightning storms or when unused for a long period.
- The socket outlet must be installed near the equipment and must be easily accessible.
- Do not overload ac outlets or extension cords. Overloading can cause re or electric shock.
● Devices with class 1 construcon should be connected to a main socket outlet with a protective earthed conncon.
● Devices with class 2 construcon do not require a earthed conncon. - Always hold the plug when pulling it out of the main supply socket. Do not pull the power cord. This can cause a short circuit.
-
Do not use a damaged power cord or plug or a loose outlet. Doing so may result in re or electric shock.
-
If the product contains or is delivered with a remote control containing coin/cell baeries:
Warning:
- “Do not ingest baery, Chemical Burn Hazard” or equivalent working.
- [The remote control supplied with] This product contains a coin/buon cell baery. If the baery is swallowed, it can cause severe internal burns in just 2 hours and can lead to death.
- Keep new and used baeries away from children.
- If the baery compartment does not close securely, stop using the product and keep it away from children.
-
If you think baeries might have been swallowed or placed inside any part of the body, seek immediate medical aenon.
-
Cauon about the use of Baeries:
-
Danger of explosion if baery is incorrectly replaced. Replace only with the same or equivalent type.
- Baery cannot be subjected to high or low extreme temperatures, low air pressure at high altitude during use, storage or transportaon.
- Replacement of a baery with an incorrect type that can result in an explosion or the leakage of ammable liquid or gas.
- Disposal of a baery into re or a hot oven, or mechanically crushing or cung of a baery, that can result in an explosion.
- Leaving a baery in an extremely high temperature surrounding environment that can result in an explosion or that leakage of ammable liquid or gas.
- A baery subjected to extremely low air pressure that may result in an explosion or the leakage of ammable liquid or gas.
- Aenon should be drawn to the environmental aspects of baery disposal.
INSTALLATION
- Unpack all parts and remove protective material.
- Do not connect the unit to the mains before checking the mains voltage and before all other connexons have been made.
WARNING
Class 1 Laser Product
CLASS 1 LASER PRODUCT APPAREIL Á LASER DE CLASSE 1 PRODUTO LASER DE CLASE 1
This product conatins a low power laser device.
CAUTION INVISIBLE LASER RADIATION WHEN OPEN AND INTERLOCKS DEFEATED. AVOID EXPOSURE TO BEAM

Warning: Do not touch the lens.

WARNING: When parcipang in the trac listening to a personal music player can make the listener less aware of potenal dangers such as approaching cars.
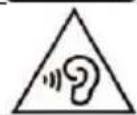
WARNING: To prevent possible hearing damage, do not listen at high volume levels for long periods.
ACCESSORIES
- Earphone
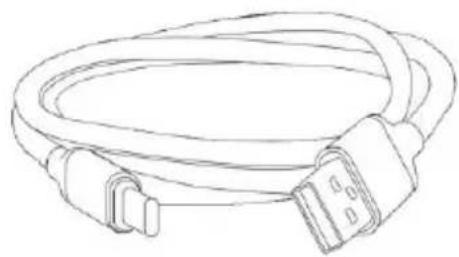
USB-C charging cable
Instrucon manual
natural_image
Line drawing of two earbuds tied together (no text or symbols)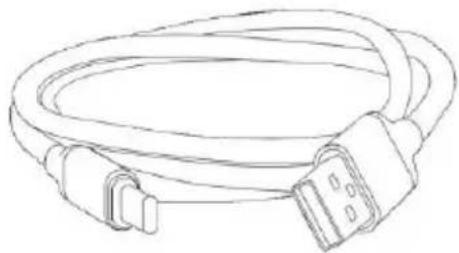
natural_image
Line drawing of a cable with two connectors and a terminal connector (no text or symbols)
natural_image
Simple line drawing of an open book with no text or symbols visibleTOP and SIDE

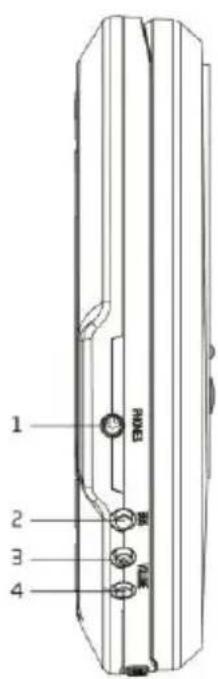
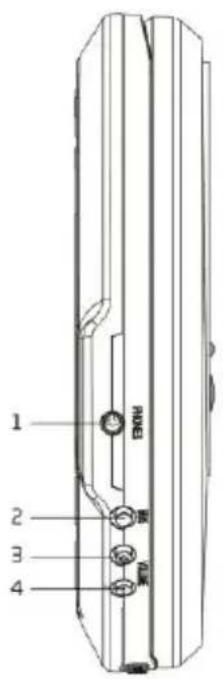
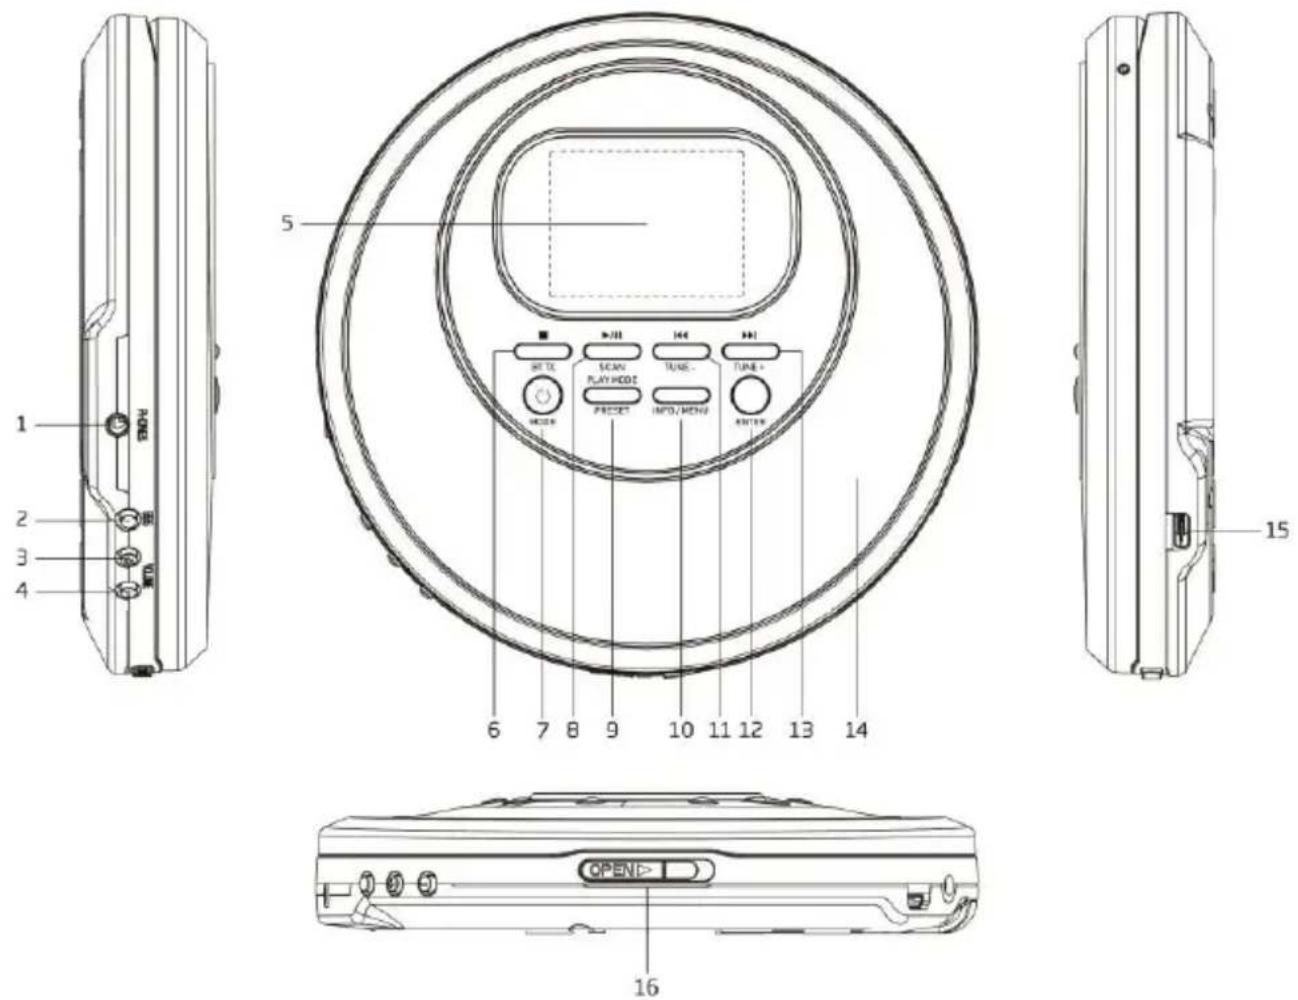
- EARPHONE OUT
Connect to the external earphone - BBS ON / OFF
Bass boost ON / OFF switch - VOLUME +
Increase the volume level - VOLUME -
Decrease the volume level - Colour LCD DISPLAY
Display the unit operaon status and informaon
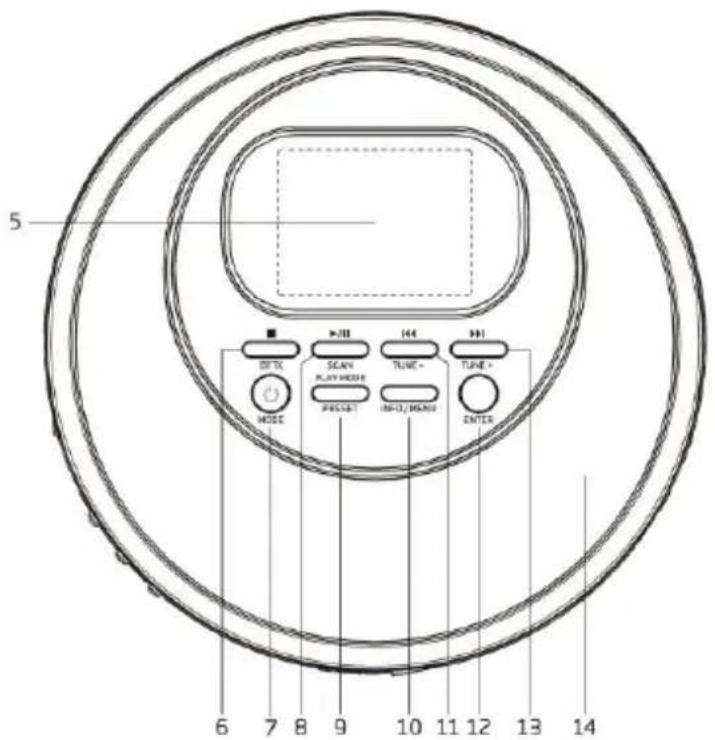
6. STOP /BT TX
CD: Press to stop the playback
DAB / FM / CD: Press and hold to start BT TX. Press and hold again will turn o BT TX
7. STANDBY /MODE
Standby or OFF mode: Press to turn on the unit
On mode: Press and hold to turn the unit into standby mode (with display of me and date). This funcon only works when the device is not in charging mode.
On mode: Press it to choose dierent modes: DAB / FM / CD
8. PLAY/PAUSE /SCAN
DAB / FM: Press and hold to start auto-scanning all the available stations
CD: Press to toggle between pause and resume playback
9. PLAY MODE / PRESET
DAB / FM: Press to enter the recall preset staon list. Press and hold to enter the store preset staon list
CD: Press to select dierent play modes
10. INFO / MENU
DAB / FM: Press to display staon informaon. Press and hold to enter the Menu for seing change
11. /TUNE -
DAB: Press to display the previous staon informaon
FM: Short press to change the frequency, step down 0.05MHz. Press and hold to scan a lower frequency available staon
CD: Press to the previous track
12. ENTER
DAB / FM: Press to select the change seng in the menu operaon
13. TUNE +
DAB: Press to display the next staon informaon
FM: Short press to change the frequency, step up 0.05MHz. Press and hold to scan a higher frequency available staon
CD: Press to the next track
14. CD DISC COMPARTMENT DOOR
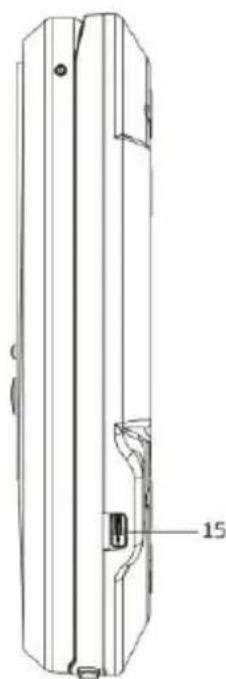
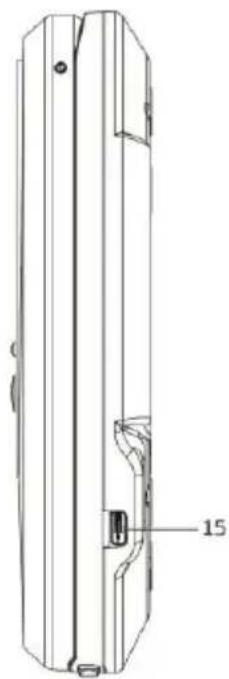
15. USB-C 5V IN
Connect to an external USB-C AC/DC adaptor (not supplied), DC 5V 1000mA
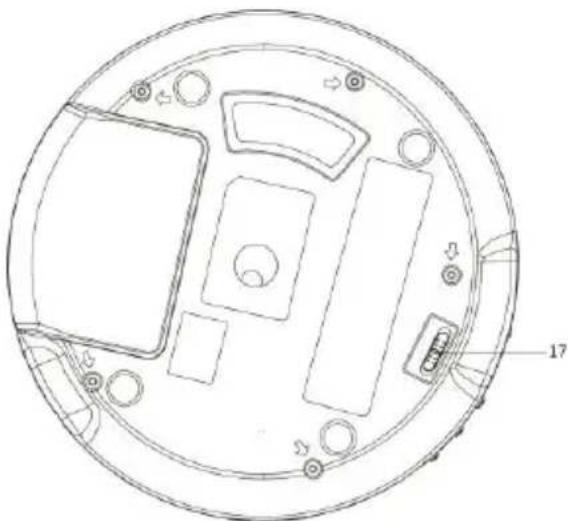
16. CD DOOR OPEN SLIDE SWITCH
Slide to eject the CD disc compartment door
BOTTOM
natural_image
Technical line drawing of a circular mechanical or electronic component with internal compartments and mounting holes (no text or symbols)17. HOLD ON / OFF SLIDE SWITCH
To avoid any accidental buon press during opeaon, the unit has a funcon of buon hold. Set the HOLD SWITCH to ON posion. To release the buon lock, slide it to OFF posion
CHARGING THE UNIT
Before using, it is recommended to charge unit for at least 2 hours.
BASIC OPERATION
Connect the earphone (included) into the EARPHONE OUT on the side of the unit.
AC/DC Adaptor (Not Supplied) Operation
Press the STANDBY buon to turn on the unit. To turn o to the Standby mode (with display of me and date), press and hold the STANDBY buon.
Built-in Battery Operation (AC/DC Adaptor NOT Connected)
Press the STANDBY ☐ buon to turn on the unit. To turn o to the Standby mode (with display of me and date), press and hold the STANDBY ☐ buon. To turn the unit to OFF mode for power saving (without display), press and hold the STANDBY ☐ buon again.
DAB / FM / CD
Press the MODE buon to select between dierent sources.
Volume Control
Press the VOLUME + / - buon to change the volume level. The CD player has a hearing protecon to limit the volume level and give you a warning when it is too high. When prompted, you have to press the ENTER buon to conrm that you want to increase the volume, then press the VOLUME + buon can further increase the volume level.
Adjusting the DAB / FM Reception
The earphone wire serves as the antenna. Therefore fully extend the earphone wire and place the unit to a locaon to ensure a good DAB / FM recepon.
DAB OPERATION
The rst me in the DAB mode, it will automacally scan for available DAB staons. Wait unl the scanning has finished. The display will show the scanning progress.
Auto Scan
Press and hold the SCAN buon to start auto-scanning the available staons.
Manual Scan
By using the manual scan operaon, it can help you to adjust the unit position or search staon that is missed while auto scanning.
- Press and hold the MENU buon to access the menu control.
- Press the ◀◀ or ▶▶|buon unl "Manual tune" is highlighted and then press the ENTER buon.
- Press the ◀ or ▶▶buon to select the desired channel (5A-13F).
- Press the ENTER buon to conrm. Adjust the unit posion for the best recepon if necessary.
- To select another channel (5A-13F), press the ◀◀ or ▶▶buon and then press the ENTER buon to conrm.
- When the staon is found, press the ENTER buon to select.
- To quit manual scan, press the MENU buon repeatedly.
Tuning
Aer scanning all the available DAB stations, press the ◄◀r ▶▶buon to display and navigate the staon list. Then press the ENTER buon to tune to this staon within a few seconds.
Storing DAB Presets (You can save up to 30 DAB stations)
Press and hold the PRESET buon, "Preset Store" will be displayed. Press the ◄ur ▶Buon to select the desired preset number to store. Press the ENTER buon to store.
Recall Stored DAB Presets
Press the PRESET buon, "Preset Recall" will be displayed. Press the ▶or ▶buon to select the desired preset number to recall. Press the ENTER buon to recall.
Displaying DAB Station Information
There are several types of informaon provided by the radio staon. To display the informaon, press the INFO / MENU repeatedly.
DAB SlideShow
When receiving the staon with slideshow (if available), the picture will be shown on the le hand side of the display. Press the ENTER buon will enlarge the picture to fully t the screen. Press the ENTER buon again will quit and back to the normal operaon.
Dynamic Range Control (DRC, see note below) and Prune (this function removes inactive staons) can be set under the menu
operaon. Press and hold the MENU buon to access the menu control. Then press the the or ▶ on ▶ different opons and nally press ENTER to conrm.
Note:
- DRC can make quieter sounds easier to hear when the unit is used in a noisy environment.
- Not all DAB+ broadcasts are able to use DRC funcon. If the broadcast does not support DRC then the DRC seng in the unit will have no eect.
- Changing the DRC value on your unit enables you to apply a scaling factor to this level.
- Aer you have adjusted the DRC level the sound may be louder.
There are three levels of compression:
DRC high: Maximum compression as sent with the transmied service
DRC low: Set to 1/2 that of the sent transmied service
DRC o: No compression
FM RADIO OPERATION
Auto Scan
Press and hold the SCAN buon to start auto-scanning and saving the available staons (max. 30 storage).
Manual Scan
Press the ◄ or ▶◆◆◆◆◆◆◆◆◆◆◆◆◆◆◆◆◆◆◆◆◆◆◆◆◆◆◆◆◆◆◆◆◆◆◆◆◆◆◆◆◆◆◆◆◆◆◆◆◆◆◆◆◆◆◆◆◆◆◆◆◆◆◆◆◆◆◆◆◆◆◆◆◆◆◆◆◆◆◆◆◆◆◆◆◆◆◆◆◆◆◆◆◆◆◆◆◆◆◆◆ ◄◆◆◆◆◆◆◆◆◆◆◆◆◆◆◆◆◆◆◆◆◆◆◆◆◆◆◆◆◆◆◆◆◆◆◆◆◆◆◆◆◆◆◆◆◆◆◆◆◆◆◆◆◆◆◆◆◆◆◆◆◆◆◆◆◆◆◆◆◆◆◆◆◆◆◆◆◆◆◆◆◆◆◆◆◆◆◆◆◆◆◆◆◆◆◆◆◆◆◆◇

Storing FM Presets (You can save up to 30 FM stations)
Press and hold the PRESET buon, "Preset Store" will be displayed. Press the ◄or ▶buon to select the desired preset number to store. Press the ENTER buon to store.
Recall Stored FM Presets
Press the PRESET buon, "Preset Recall" will be displayed. Press the ◄or ▶buon to select the desired preset number to recall. Press the ENTER buon to recall.
Stereo / Force Mono Selection
When receiving a Stereo FM radio channel, pressing the PLAY/PAUSE ▶/Ⅱ buon to toggle between stereo audio and force mono audio.
Displaying FM Station Information
There are several types of informaon provided by the radio staon. To display the informaon, press the INFO / MENU repeatedly.
FM MENU OPERATION
Press and hold the MENU buon to access the menu control. Then press the ▶ or ▶ buon for dierent opons.
Scan Setting
Press and hold the MENU buon to access the menu control. Press the ▶or ▶buon to highlight the "Scan seng" and then press the ENTER buon. Press the ▶or ▶buon to highlight "Strong staons only" or "All staons". Press the ENTER
buon to conrm. When the “Strong staons only” is selected, scanning will ignore the noisy staons and only capture the strong staons. When “All staons” is selected, all possible staons will be captured during scanning even if it is a bit noisy. The next me doing the scanning the unit will search for the staons based on this scan seng.
CD OPERATION
Play/Pause/Stop Control
To pause playback press the PLAY/PAUSE ▶/Ⅱ buon. Press the buon again to resume playback. To stop playback press the STOP ■ buon.
Skip Track/ High-Speed Music Search
During playback press the ◄ or ▶▶buon to skip to the previous or next track. During playback press & hold the ◄ or ▶▶buon to start high-speed searching. When you release the ◄ or ▶▶duon normal speed playback will resume.
Repeat Play / Random Play
During playback, press the PLAY MODE buon repeatedly for dierent repeat playback mode: Current track, all tracks in the current MP3 folder, all tracks, random and normal.
Programmed Playback
The unit can be programmed to play a sequence of tracks selected.
- In stop mode press the PLAY MODE buon, the display shows the program number “★01” near the boom of the screen display.
- Press the ◀◀ or ▶▶|buon to select the desired track. Press the PLAY MODE buon to save the desired track.
- Repeat steps 2 to program up to 24 programmed tracks in CD disc (or 99 programmed tracks in MP3 disc).
- Press the PLAY/PAUSE ▶ buon to start playing the programmed tracks. To clear the program play, press the STOP buon twice or change to another mode.
- During program play you can also do the "Repeat One" or "Repeat All" operaon, however random play will not be supported.
Note:
- Besides playing CDDA audio disc, the unit can also play MP3 le. However, WMA le and others are not support.
- Folders or les number on the disc that exceed the supported limit of this product cannot be played.
Resume Playback
During playback, change mode or standby on/o and back to CD mode will connue playback from where you have stopped. To clear the resume playback, press the STOP ■ buon or open the CD disc compartment door.
During programming playback, there is no resume playback.
Anti-shock Protection
The unit has an electronic an-shock protecon funcon to prevent any interrupon of the sound output when the unit is subjecng to shock or vibraon during disc playback. The unit's internal buer can provide a typically 45 seconds when playing a CDDA disc and typically 120 seconds when playing a CD-MP3 disc of protecon against interrupon of sound output. If the player is subjected to shock or vibraon for a longer me that the buer is full, some interrupon of sound output will occur. This is normal. The sound will resume once the unit is stabilized from the shock or vibraon.
Note:
- The an-skip funcon provides for connues sound output when the unit is subjected to shock or vibraon. It will not compensate for errors arising from the use of defecve, scratched or dirty discs.
The Bluetooth transmit funcon allows the unit's sound (DAB, FM or CD) wireless transmit to the Bluetooth wireless device for example wireless speaker.
- During the DAB or FM or CD mode, press and hold the BT TX buon to start searching the closest available Bluetooth device. "BT:TX" will be shown on the screen display boom area in which the poron "TX" is ashing to indicate searching the Bluetooth speaker in progress. They will be automatically connected and the sound will transmit to the Bluetooth speaker.
- Press and hold the BT TX buon again will turn o the Bluetooth transmit funcon.
Note:
- Please note that it needs a longer me when connecng the device for the rst me.
- Except the Bluetooth device that you want to pair, it is recommended not to turn on other Bluetooth devices within 10 meters during pairing. If the pairing is not succeeded, please check if there is other Bluetooth devices nearby. Or you can locate the discman closer (for example within 3 meters and no blocking between them) to the Bluetooth device and try to do pairing again.
- If you move out of Bluetooth range (10 meters) between the unit and the Bluetooth device, the "TX" indicator on the display will begin ashing. Move the unit or your Bluetooth device back within range and reconnect the Bluetooth device if necessary.
- If there is no Bluetooth device searched within 2 minutes, the Bluetooth transmit funcon will be turned o automacally.
BBS
You can enhance the bass eect of the music. Press the BBS buon will toggle the bass boost between ON and OFF.
Sleep, Time, Backlight, Language, Factory Reset and SW version can be set under the menu operaon.
Press and hold the MENU buon to access the menu control. Press the ◄or ▶buon unl "System" is highlighted and then press the ENTER buon. System menu will be shown as below. Press the ◄or ▶buon for dierent selecons as shown below. Then press the ENTER buon to setup. To quit the menu control, press the MENU buon repeatedly.
Sleep Function
You can set the sleep mer funcon among o, 15, 30, 45, 60 and 90 minutes. During the sleep mer count down, there is a moon icon shown on the screen display bottom area. When the sleep mer is zero, the unit will be turned o automacally. To cancel the sleep funcon, press and hold the STANDBY buon or set the sleep mer to o.
Time Setup
This setup allows you to setup 4 dierent display modes. They are:
- Set Time/Date
- Auto update
- Set 12/24 hour
- Set date format
Set Time/Date
- Turn on the unit in DAB mode or FM mode.
- Press and hold the MENU buon to access the menu control.
- Press the ◀◀ or ▶▶buon unl "System" is highlighted and then press the ENTER buon.
- Press the ◀◀ or ▶▶buon unl "Time" is highlighted and then press the ENTER buon.
-
Press the ◀◀ or ▶▶buon unl "Set Time/Date" is highlighted and then press the ENTER buon.
-
Hour digits will be ashed. Press the ◀or ▶buon to change to hour value and then press the ENTER buon.
- Minute digits will be ashed. Press the ◄or ▶buon to change to minute value and then press the ENTER buon.
- If 12 hour display is set before, "AM or "PM" will be ashed. Press the ◄ or ▶buon to set AM or PM and then press the ENTER buon to conrm.
- Then the unit will request to set the date. Follow the similar procedures as listed above to complete the setup of day, month and year.
- Press the MENU buon repeatedly to exit the menu control.
Auto Update
- Turn on the unit in DAB mode or FM mode.
- Press and hold the MENU buon to access the menu control.
- Press the ◀◀ or ▶▶buon unl "System" is highlighted and then press the ENTER buon.
- Press the ◀ or ▶buon unl "Time" is highlighted and then press the ENTER buon.
- Press the ◀◀ or ▶▶buon unl "Auto update" is highlighted and then press the ENTER buon.
-
Press the ◀ or ▶▶▶buon to change between
-
Update from Any: Time and Date will be updated by either DAB or FM broadcast
- Update from DAB: Time and Date will be updated by DAB broadcast only
- Update from FM: Time and Date will be updated by FM broadcast only
-
No Update: Time and Date will never be updated by broadcast
-
Select your desired and then press the ENTER buon to conrm.
-
Press the MENU buon repeatedly to exit the menu control.
Set 12/24 Hour Display
- Turn on the unit in DAB mode or FM mode.
- Press and hold the MENU buon to access the menu control.
- Press the ◀◀ or ▶▶buon unl "System" is highlighted and then press the ENTER buon.
- Press the ◀◀ or ▶▶buon unl "Time" is highlighted and then press the ENTER buon.
- Press the ◀◀ or ▶▶buon unl "Set 12/24 hour" is highlighted and then press the ENTER buon.
- Press the ◄◀ or ▶▶buon to toggle between 12 or 24 hour display. Select your desired and then press the ENTER buon to conrm.
- Press the MENU buon repeatedly to exit the menu control.
Set Date Format
- Turn on the unit in DAB mode or FM mode.
- Press and hold the MENU buon to access the menu control.
- Press the ◀ or ▶▶buon unl "System" is highlighted and then press the ENTER buon.
- Press the ◀ or ▶buon unl "Time" is highlighted and then press the ENTER buon.
- Press the ◀◀ or ▶▶buon unl "Set date format" is highlighted and then press the ENTER buon.
- Press the ▶ or ▶ buon to toggle between "DD-MM-YYYY" or "MM-DD-YYYY" date display. Select your desired and then press the ENTER buon to conrm.
- Press the MENU buon repeatedly to exit the menu control.
BATTERY LEVEL SAVING
In order to save the baery consumpon, the unit in CD mode pause or without playback for around 15 minute will automatically turn o to the power o mode.
TECHNICAL SPECIFICATIONS
| DAB radio frequency range | 174.928 - 239.2 MHz |
| FM radio frequency range | 87.5 - 108 MHz |
| Bluetooth frequency range | 2.402-2.480 GHz |
| Transmier output power | Less than 10mW |
| Bluetooth version | 5.2 |
| USB-C DC power input for charging | 5V DC, 1000mA |
| An-Shock protecon | 45 sec typical for CDDA, 120 sec typical for CD-MP3 |
| Baery | Built-in Lithium-polymer rechargeable baery 3.7V 1000mAh |
| Earphone out | 3.5mm stereo jack |
| LCD display | TFT display, 2 inches |
| Operational temperature | 0^ - +40^ |
| Unit dimension (L x D x H) | 143 x 143 x 30 mm |
| Total weight | 0.24 kg |
- The specicaon presents only as a reference. The value of weight and size are approximaon.
• Our product is improved ceaselessly and the specicaon and funcon may be changed without prior noce.
GUARANTEE
Commaxx B.V. oers service and warranty in accordance to European law, which means that in case of repairs (both during and aer the warranty period) you should contact your local dealer.
Important note: It is not possible to send products that need repairs to Commaxx B.V. directly.
Important note: If this unit is opened or accessed by a non-social service center in any way, the warranty expires.
This device is not suitable for professional use. In case of professional use, all warranty obligaons of the manufacturer will be voided.
DISCLAIMER
Updates to Firmware and/or hardware components are made regularly. Therefore some of the instrucon, specications and pictures in this documentaon may dier slightly from your parcular situaon. All items described in this guide for illustraon purposes only and may not apply to parcular situaon. No legal right or entlements may be obtained from the descripon made in this manual.
DISPOSAL OF THE OLD DEVICE
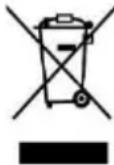
This symbol indicates that the relevant electrical product or baery should not be disposed of as general household waste in Europe. To ensure the correct waste treatment of the product and baery, please dispose them in accordance to any applicable local laws of requirement for disposal of electrical equipment or baeries. In so doing, you will help to conserve natural resources and improve standards of environmental protecon in treatment and disposal of electrical waste (Waste Electrical and Electronic Equipment Directive).
DECLARATION OF CONFORMITY
Hereby, Commaxx declares that the radio equipment type [Lenco CD-500] is in compliance with direcve 2014/53/EU. The full text of the EU declaraon of conformity is available at the following internet address: hps://commaxx-cercates.com/doc/cd-500_doc.pdf
| Type RF | Frequency range (MHz) | Power (dBm) |
| Bluetooth | 2402-2480 | < 6 |
| DAB | 174-240 | - |
| FM | 87.5-108 | - |
SERVICE
For more informaon and helpdesk support, please visit www.lenco.com
Commaxx B.V. Wiebachstraat 37, 6466 NG Kerkrade, The Netherlands
VOORZICHTIG:
natural_image
Line drawing of two earbuds tied together (no text or symbols)USB C-oplaadkabel

natural_image
Line drawing of a coiled electrical plug with connectors (no text or symbols)Gebruiksaanwijzing

natural_image
Simple line drawing of an open book with no text or symbols visibleBOVEN- en ZIJKANT

natural_image
Technical line drawing of a mechanical component with a labeled part (15), no readable text or symbols present.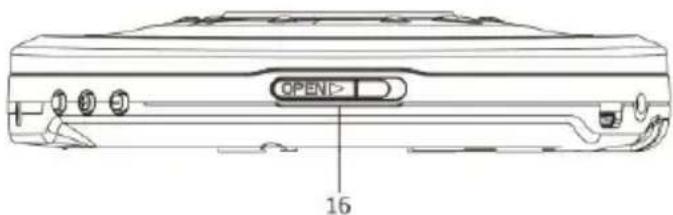
- OORTELEFOONUITGANG
natural_image
Technical line drawing of a circular electronic device with internal components and mounting holes (no text or symbols)17. SCHUIFSCHAKELAAR TOETSVERGRENDELING AAN / UIT
HET APPARAAT OPLADEN
AFVOER VAN HET OUDE APPARAAT

natural_image
Line drawing of two earbuds tied together (no text or symbols)USB-C-Ladekabel

natural_image
Line drawing of a cable with two connectors (no text or symbols)Bedienungsanleitung

natural_image
Simple line drawing of an open book with no text or symbols visiblenatural_image
Technical line drawing of a mechanical component with labeled part '15' (no text or symbols beyond label)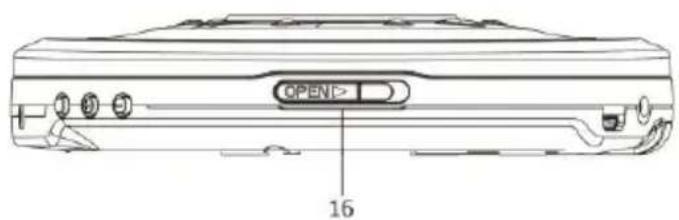
- KOPFHÖRERAUSGANG
natural_image
Technical line drawing of a circular electronic device with internal components and mounting holes (no text or symbols)natural_image
Line drawing of two earbuds tied together (no text or symbols)natural_image
Line drawing of a coiled electrical plug with connectors (no text or symbols)Mode d'emploi

natural_image
Simple line drawing of an open book with no text or symbols visibleHAUT et CÔTÉ
natural_image
Technical line drawing of a mechanical component with a labeled part (15), no readable text or symbols present.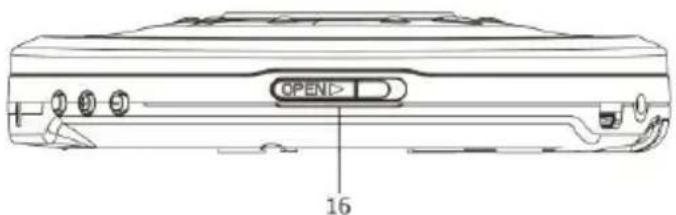
- SORTIE ÉCOUTEURS
natural_image
Technical line drawing of a circular mechanical or electronic component with internal compartments and mounting holes (no text or symbols)17. BOUTON DE VERROUILLAGE/DÉVERROUILLAGE
DÉCLARATION DE CONFORMITÉ
natural_image
Line drawing of two earbuds tied together (no text or symbols)natural_image
Line drawing of a coiled electrical plug with connectors (no text or symbols)natural_image
Simple line drawing of an open book with no text or symbols visiblenatural_image
Technical line drawing of a mechanical component with a labeled part (15), showing internal structure and mounting holes (no text or symbols beyond the label)
natural_image
Technical line drawing of a circular electronic device with internal components and mounting holes (no text or symbols)17. INTERRUPTOR DESLIZANTE DE BLOQUEO ENCENDIDO/APAGADO
natural_image
Line drawing of two earbuds tied together (no text or symbols)natural_image
Line drawing of a cable with two connectors and a connector pin (no text or symbols)natural_image
Simple line drawing of an open book with no text or symbols visiblenatural_image
Technical line drawing of a mechanical component with a labeled part (15), showing internal structure and mounting holes (no text or symbols beyond the label)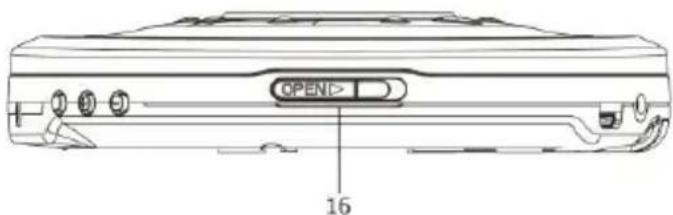
- USCITA CUFFIE
natural_image
Technical line drawing of a circular mechanical or electronic component with internal compartments and mounting holes (no text or symbols)17. CURSORE BLOCCO/SBLOCCO
natural_image
Line drawing of two earbuds tied together (no text or symbols)USB-C-opladerkabel
natural_image
Line drawing of a cable with two connectors and a terminal connector (no text or symbols)Brugervejledning

natural_image
Simple line drawing of an open book with no text or symbols visibleTOP og SIDE
- UDGANG TIL ∅RETELEFONER Tilslut I den eksterne øretelefon
- BBS ON/OFF Knap for bas-boost ON/OFF
- LYDSTYRKE + Forøg lydstyrken
- LYDSTYRKE - Sænk lydstyrken
- LCD-SKÆRM i farver Viser enhedens drisstatus og oplysninger
- STOP /B: TX CD: Tryk for at aryde afspilningen
natural_image
Technical line drawing of a circular mechanical or electronic component with internal compartments and mounting holes (no text or symbols)17. HOLD ON/OFF SLIDE SWITCH
natural_image
Line drawing of two earbuds tied together (no text or symbols)natural_image
Line drawing of a cable with connectors and a connector pin (no text or symbols)Bruksanvisning

natural_image
Simple line drawing of an open book with no text or symbols visibleOVANIFRÅN OCH FRÅN SIDAN

- HÖRLURAR UT
natural_image
Technical line drawing of a circular mechanical or electronic component with internal compartments and mounting holes (no text or symbols)Visa DAB Stationsinformation
Visa FM Stationsinformation
natural_image
Line drawing of two earbuds tied with a string, no text or symbols presentUSB-C-latausjohto
natural_image
Line drawing of a cable with two connectors and a terminal connector (no text or symbols)Käyöohje