
BCTACHC4 - Air Conditioning Be Cool - Free user manual and instructions
Find the device manual for free BCTACHC4 Be Cool in PDF.

| Product type | Air cooler with heater (tower fan) |
| Brand | Be Cool |
| Model | BCTACHC4 |
| Dimensions (W × D × H) | 285 × 308 × 1060 mm |
| Net weight | 7.35 kg |
| Power supply | 220-240 V ~ 50/60 Hz |
| Cooling power | 50 W |
| Heating power | 3000 W (max) |
| Water tank capacity | 4.5 L |
| Speed levels | 3 |
| Ventilation modes | Normal, Natural, Sleep |
| Special functions | Evaporative cooling (with cooling packs), Heating (low/high), Oscillation, Timer (1-12 h), Weekly timer (5 programs), Window open detection, Anion generator, Remote control |
| Safety | Overheat protection (51 °C), Protection class II, Automatic shut-off in case of tipping (not specified but recommended), Safety distance 1 m from flammable objects |
| Maintenance | Monthly air filter cleaning, Regular water tank cleaning, External cleaning with soft cloth |
| Included accessories | Remote control (CR2025 battery included), 2 cooling blocks, User manual |
| Warranty | 2 years (valid in Austria) |
Frequently Asked Questions - BCTACHC4 Be Cool
User questions about BCTACHC4 Be Cool
0 question about this device. Answer the ones you know or ask your own.
Ask a new question about this device
Download the instructions for your Air Conditioning in PDF format for free! Find your manual BCTACHC4 - Be Cool and take your electronic device back in hand. On this page are published all the documents necessary for the use of your device. BCTACHC4 by Be Cool.
USER MANUAL BCTACHC4 Be Cool
natural_image
Line drawing of a vertical cylindrical device with internal grid structure (no text or symbols)HERZLICHEN GLÜCKWUNSCH!
natural_image
Line drawing of a tall cylindrical electric fan with internal blades (no text or symbols)FÉLICITATIONS !
MERCI D'AVOIR CHOISI UN PRODUIT DE BE COOL ON A DÉCIDÉ.

VEUILLEZ LIRE ATTENTIVEMENT LE MODE D'EMPLOI AVANT DE COMMENCER L'INSTALLATION, L'UTILISATION OU L'ENTRETIEN. PROTÉGEZ-VOUS ET PROTÉGEZ LES AUTRES EN RESPECTANT LES CONSIGNES DE SÉCURITÉ. LE NON-RESPECT DES INSTRUCTIONS PEUT ENTRAÎNER DES BLESSURES ET/OU DES DOMMAGES MATÉRIELS ET/OU ANNULER LA GARANTIE !
INFORMATIONS IMPORTANTES SUR LA SÉCURITÉ, L'EMPLACEMENT ET LE RACCORDEMENT ÉLECTRIQUE
BE COOL
natural_image
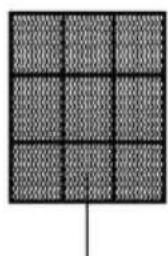
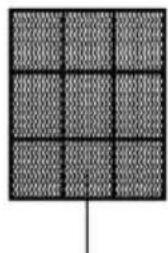
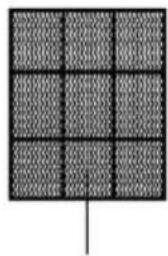
Simple grid pattern with a vertical line at the bottom (no text or symbols)Filtre à air
natural_image
Grid pattern with uniform dark squares and a vertical line at the bottom (no text or symbols)
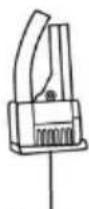
Elément chauffant
PTC
BE COOL
natural_image
Pure mechanical part diagram with no text, numbers, or symbols
natural_image
Line drawing of two hands adjusting a mechanical component, labeled 'Figure 3' (no text or symbols on the diagram itself)natural_image
Line drawing of a tall industrial tower with vertical cooling fins and a flat base (no text or symbols)CONGRATULAZIONI!
GRAZIE PER AVER SCELTO UN PRODOTTO BE COOL HANNO DECISO.

LEGGERE ATTENTAMENTE LE ISTRUZIONI PER L'USO PRIMA DI INIZIARE L'INSTALLAZIONE, IL FUNZIONAMENTO O LA MANUTENZIONE. PROTEGGERE SE STESSI E GLI ALTRI SEGUENDO LE ISTRUZIONI DI SICUREZZA. LA MANCATA OSSERVANZA DELLE ISTRUZIONI PUÒ CAUSARE LESIONI PERSONALI E/O DANNI MATERIALI E/O INVALIDARE LA GARANZIA!
INFORMAZIONI IMPORTANTI SULLA SICUREZZA, L'UBICAZIONE E IL COLLEGAMENTO ELETTRICO

natural_image
Simple line drawing of a device with two rectangular panels and a screw base, no text or symbols present
natural_image
Pure mechanical part diagram with no text, numbers, or symbols
flowchart
graph TD
    A["Viti Fori"] --> B["Top Left"]
    A --> C["Top Right"]
    A --> D["Bottom Left"]
    A --> E["Bottom Right"]
    A --> F["Bottom Left"]
    style A fill:#f9f,stroke:#333
    style B fill:#ccf,stroke:#333
    style C fill:#ccf,stroke:#333
    style D fill:#ccf,stroke:#333
    style E fill:#ccf,stroke:#333
    style F fill:#ccf,stroke:#333

natural_image
Line drawing of hands holding a device with a circular component, labeled 'Figura 3' (no text or symbols on the diagram itself)natural_image
Line drawing of a tall cylindrical air conditioner unit with cooling fins and ventilation slots (no text or symbols)GEFELICITEERD!
BEDANKT VOOR HET KIEZEN VAN EEN PRODUCT VAN BE COOL HEBBEN BESLOTEN.

LEES DE BEDIENINGSINSTRUCTIES ZORGVULDIG DOOR VOORDAT U BEGINT MET DE INSTALLATIE, HET GEBRUIK OF HET ONDERHOUD. BESCHERM UZELF EN ANDEREN DOOR DE VEILIGHEIDSINSTRUCTIES OP TE VOLGEN. HET NIET OPVOLGEN VAN DE INSTRUCTIES KAN LEIDEN TOT PERSOONLIJK LETSEL EN/OF MATERIËLE SCHADE EN/OF HET VERVALLEN VAN DE GARANTIE!
BELANGRIJKE INFORMATIE OVER VEILIGHEID, LOCATIE EN ELEKTRISCHE AANSLUITING

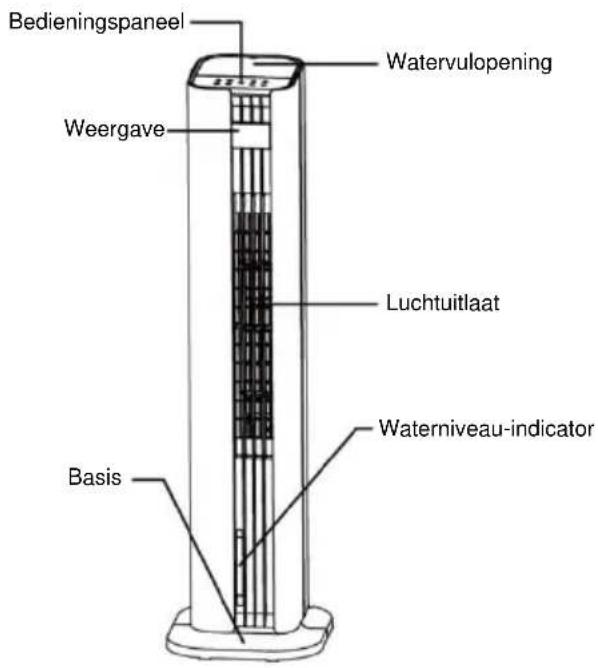
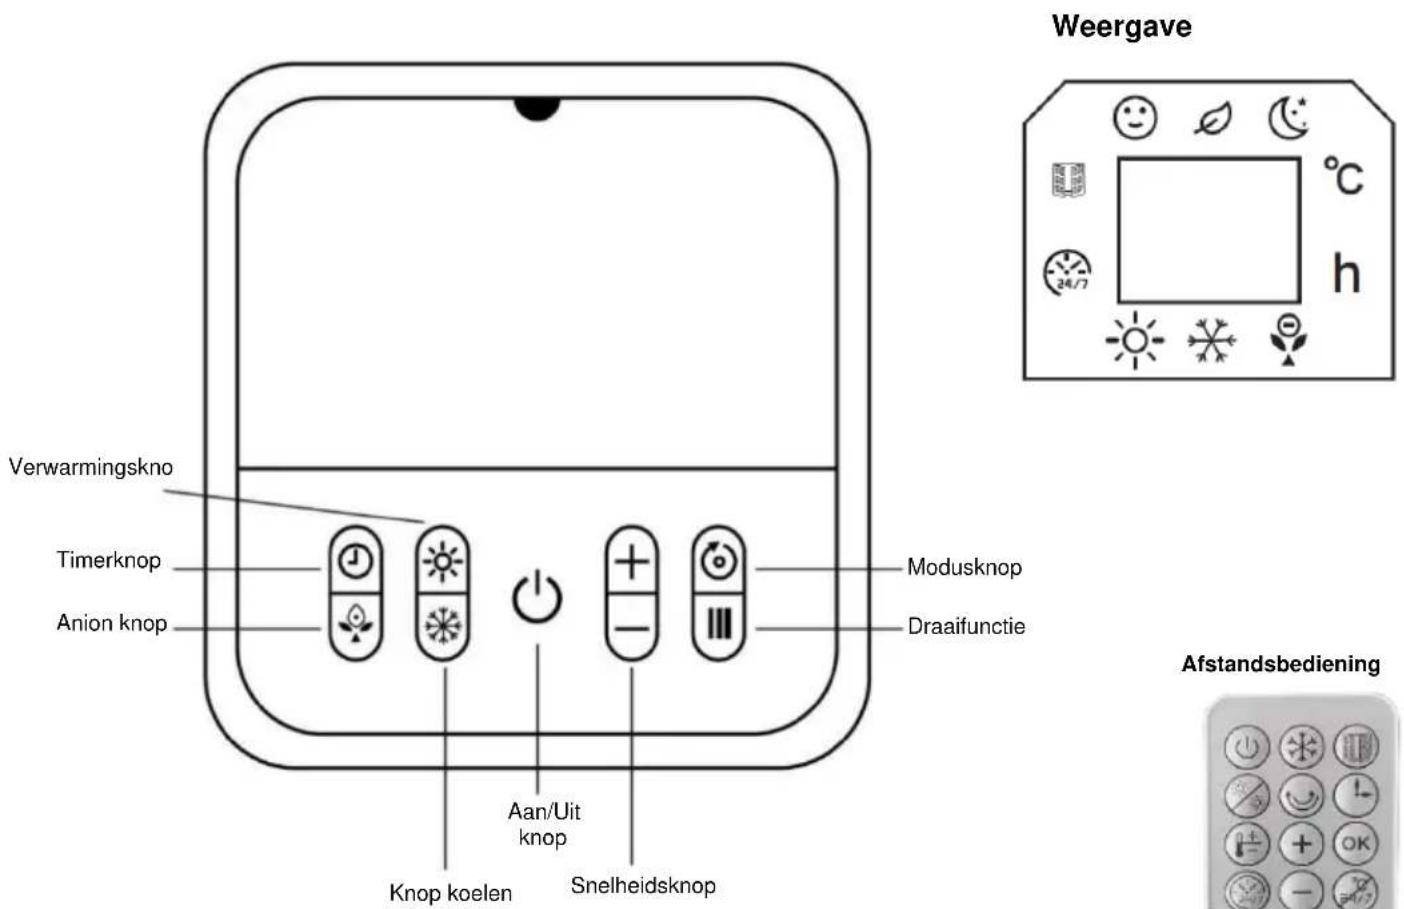
BESCHRIJVING VAN HET APPARAAT

BE COOL
Bedieningselementen en display
natural_image
Pure mechanical part diagram with no text, numbers, or symbols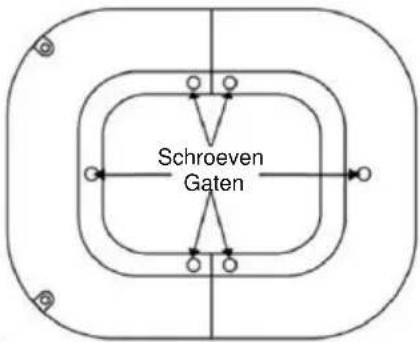

natural_image
Line drawing of two hands assembling a mechanical component (no text or symbols)natural_image
Line drawing of a tall cylindrical air conditioner unit with cooling fins and ventilation slots (no text or symbols)¡ENHORABUENA!
GRACIAS POR ELEGIR UN PRODUCTO DE BE COOL HAN DECIDIDO.

natural_image
Simple grid pattern with a vertical line at the bottom (no text or symbols)Filtro de aire
natural_image
Grid pattern with uniform dark squares and a vertical line at the bottom (no text or symbols)natural_image
Pure mechanical part diagram with no text, numbers, or symbols
natural_image
Line drawing of hands performing a medical or surgical procedure on a device, labeled 'Figura 3' (no text or symbols on the diagram itself)natural_image
Line drawing of a tall industrial fan or tower with vertical blades and a flat base (no text or symbols)GRATULUJEME!
DĚKUJEME, ŽE JSTE SI VYBRALI PRODUKT OD SPOLEČNOSTI BE COOL
ROZHODLI JSME SE.
PŘED ZAHÁJENÍM INSTALACE, PROVOZU NEBO ÚDRŽBY SI POZORNĚ PŘEČTĚTE NÁVOD K OBSLUZE. DODRŽOVÁNÍM BEZPEČNOSTNÍCH POKYNŮ CHRAŇTE SEBE I OSTATNÍ. NEDODRŽENÍ POKYNŮ MŮŽE MÍT ZA NÁSLEDEK ZRANĚNÍ OSOB A/NEBO POŠKOZENÍ MAJETKU A/NEBO ZTRÁTU ZÁRUKY!
DŮLEŽITÉ INFORMACE O BEZPEČNOSTI, UMÍSTĚNÍ A ELEKTRICKÉM PŘIPOJENÍ

natural_image
Pure mechanical part diagram with no text, numbers, or symbols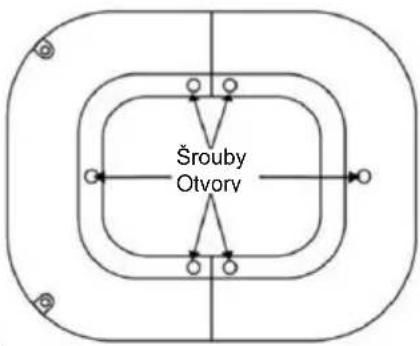
natural_image
Line drawing of a tall industrial fan or tower with vertical blades and a flat base (no text or symbols)GRATULUJEME!
ĎAKUJEME, ŽE STE SI VYBRALI PRODUKT OD SPOLOČNOSTI BE COOL
ROZHODLI SA.

PRED ZAČATÍM INŠTALÁCIE, PREVÁDZKY ALEBO ÚDRŽBY SI POZORNE PREČÍTAJTE NÁVOD NA OBSLUHU. DODRŽIAVANÍM BEZPEČNOSTNÝCH POKYNOV CHRÁNTE SEBA AJ OSTATNÝCH. NEDODRŽANIE POKYNOV MÔŽE MAŤ ZA NÁSLEDOK ZRANENIE OSÔB A/ALEBO POŠKODENIE MAJETKU A/ALEBO STRATU ZÁRUKY!
DÔLEŽITÉ INFORMÁCIE O
BEZPEČNOSTI, UMIESTNENÍ A ELEKTRICKOM PRIPOJENÍ


BE COOL
natural_image
Pure mechanical part diagram with no text, numbers, or symbols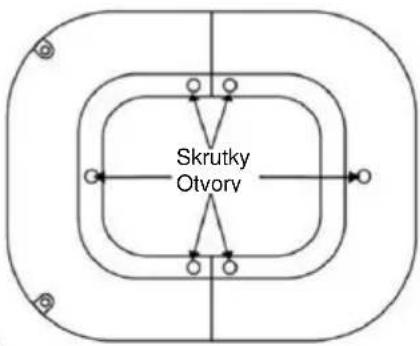
flowchart
graph TD
    A["Otvory"] --> B["Skrutky"]
    B --> C["Outer Ring"]
    B --> D["Inner Ring"]
    B --> E["Outer Ring"]
    B --> F["Inner Ring"]
    style A fill:#f9f,stroke:#333
    style B fill:#ccf,stroke:#333
    style C fill:#cfc,stroke:#333
    style D fill:#fcc,stroke:#333
    style E fill:#cff,stroke:#333
    style F fill:#ffc,stroke:#333

natural_image
Line drawing of a tall cylindrical electric fan with internal blades (no text or symbols)FELICITĂRI!
VĂ MULȚUMIM PENTRU CĂ AȚI ALES UN PRODUS DE LA BE COOL AU DECIS.

VĂ RUGĂM SĂ CITIȚI CU ATENȚIE INSTRUCTIUNILE DE UTILIZARE ÎNAINTE DE A ÎNCEPE INSTALAREA, FUNCTIONAREA SAU ÎNTRETINEREA. PROTEJAȚI-VĂ PE DVS. ȘI PE CEILALȚI PRIN RESPECTAREA INSTRUCTIUNILOR DE SIGURANȚĂ. NERESPECTAREA INSTRUCTIUNILOR POATE DUCE LA VĂTĂMĂRI CORPORALE ȘI/SAU DAUNE MATERIALE ȘI/SAU ANULAREA GARANȚIEI!
INFORMATII IMPORTANTE PRIVIND SIGURANTA,
AMPLASAREA ŞI CONEXIUNEA ELECTRICĂ

natural_image
Simple grid pattern with a vertical line at the bottom (no text or symbols)Filtru de aer

natural_image
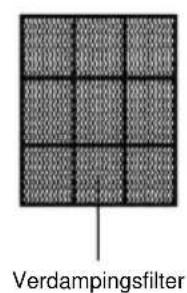
Grid pattern with uniform dark squares and a vertical line at the bottom (no text or symbols)Filtru de evaporare
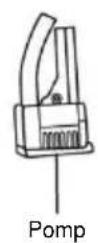
Pompă
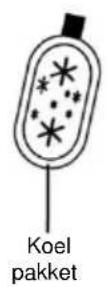
Pachet
rece
natural_image
Pure mechanical part diagram with no text, numbers, or symbols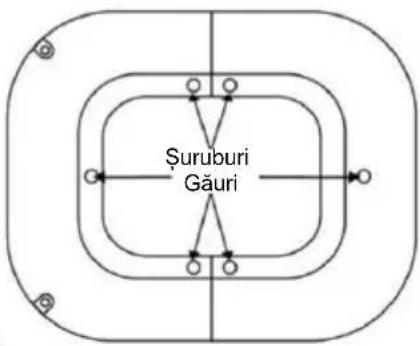

natural_image
Line drawing of two hands assembling a mechanical component, labeled 'Figura 3' (no text or symbols on the diagram itself)natural_image
Line drawing of a tall cylindrical electric fan with internal blades (no text or symbols)GRATULACJE!
DZIEKUJEMY ZA WYBRANIE PRODUKTU OD BE COOL PODJELI DECYZJE.

PRZED ROZPOCZEĘCIEM INSTALACJI, OBSŁUGI LUB KONSERWACJI NALEŻY UWAŻNIE PRZECZYTAĆ INSTRUKCJĘ OBSŁUGI. NALEŻY CHRONIĆ SIEBIE I INNYCH POPRZEZ PRZESTRZEGANIE INSTRUKCJI BEZPIECZEŃSTWA. NIEPRZESTRZEGANIE INSTRUKCJI MOŻE SPOWODOWAĆ OBRAŻENIA CIAŁA I/LUB USZKODZENIE MIENIA I/LUB UNIEWAŻNIENIE GWARANCJI!
WAŻNE INFORMACJE
DOTYCZĄCE
BEZPIECZEŃSTWA,
LOKALIZACJI I PODŁĄCZENIA
ELEKTRYCZNEGO
BE COOL
natural_image
Simple line drawing of a device with two rectangular panels and a screw base, no text or symbols present.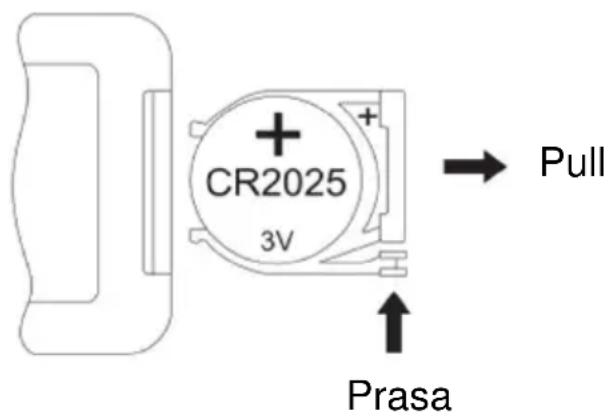
natural_image
Pure mechanical component diagram with no text, numbers, or symbols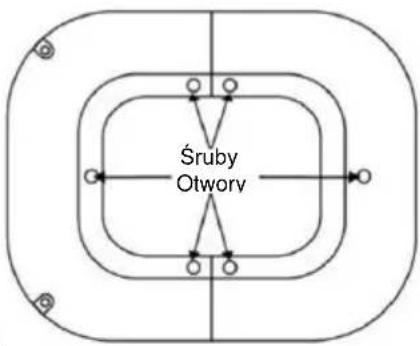
flowchart
graph TD
    A["Śruby Otworv"] --> B["Top Layer"]
    A --> C["Bottom Layer"]
    B --> D["Left Side"]
    B --> E["Right Side"]
    C --> F["Left Side"]
    C --> G["Right Side"]
    D --> H["Center"]
    E --> I["Center"]
    F --> J["Center"]
    G --> K["Center"]
natural_image
Line drawing of a tall cylindrical air conditioner unit with cooling fins and ventilation slots (no text or symbols)ČESTITAMO!
HVALA, KER STE IZBRALI IZDELEK BE COOL SE JE ODLOČILO.

PRED ZAČETKOM NAMESTITVE, DELOVANJA ALI VZDRŽEVANJA NATANČNO PREBERITE NAVODILA ZA UPORABO. Z UPOŠTEVANJEM VARNOSTNIH NAVODIL ZAŠČITITE SEBE IN DRUGE. NEUPOŠTEVANJE NAVODIL LAHKO POVZROČI TELESNE POŠKODBE IN/ALI MATERIALNO ŠKODO IN/ALI IZGUBO GARANCIJE!
POMEMBNE INFORMACIJE O VARNOSTI, LOKACIJI IN ELEKTRIČNEM PRIKLJUČKU


natural_image
Simple grid pattern with a vertical line at the bottom (no text or symbols)Zračni filter
natural_image
Grid pattern with uniform dark squares and a vertical line at the bottom (no text or symbols)Izparilni filter
Črpalka

Hladno pakiranje
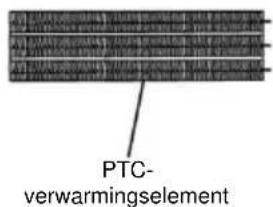
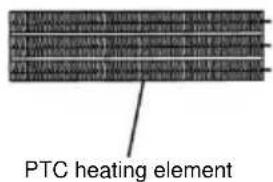
grelni element PTC
BE COOL
Nadzorni elementi in prikaz
Daljinski upravljalnik

Gumb za vklop/izklop

natural_image
Pure mechanical part diagram with no text, numbers, or symbols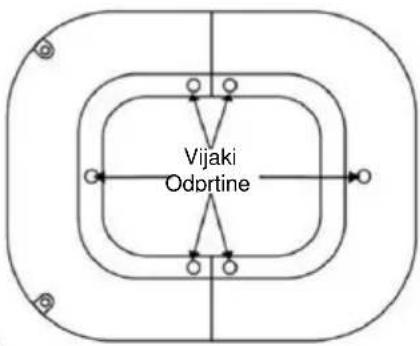
flowchart
graph TD
    A["Vijaki Odprtine"] --> B["Top Layer"]
    A --> C["Mid Layer"]
    A --> D["Bottom Layer"]
    B --> E["Left Side"]
    C --> F["Right Side"]
    D --> G["Left Side"]
    D --> H["Right Side"]

natural_image
Line drawing of hands assembling a mechanical component (no text or symbols)-
luknje za pritrdilne vijake
-
položaje stebrov in zaklepne točke, označene s puščico, je treba poravnati in nato pokriti.
BE COOL
Korak 1:
Kot je prikazano na sliki 1, odstranite oba dela podstavka iz embalaže.
Izravnajte položaje stebrov in zaskočnih ključavnic obeh delov osnove ter ju povežite z vtičenjem delov, da tvorita popolno osnovo.
Korak 2:
natural_image
Line drawing of a tall cylindrical air conditioner unit with cooling fins and ventilation slots (no text or symbols)ČESTITAMO!
HVALA VAM ŠTO STE ODABRALI PROIZVOD IZ BE COOL -a ODLUČILI SU.

Ovaj proizvod je samo prikladan za dobro izolirane sobe ili za povremeno koristiti.
BE COOL
Aktualne upute za uporabu i drugi jezici
Preuzmite najnoviji operativni upute u raznim jezika putem poveznice www.becool.at/downloads ili skenirati prikazani QR kod. Slijedite upute o web stranica.

MOLIMO VAS, PAŽLJIVO PROČITAJTE UPUTE ZA UPOTREBU PRIJE POČETKA INSTALACIJE, RADA ILI ODRŽAVANJA. ZAŠTITITE SEBE I DRUGE PRIDRŽAVANJEM SIGURNOSNIH UPUTA. NEPRIDRŽAVANJE UPUTA MOŽE DOVESTI DO OSOBNIH OZLJEDA I/ILI ŠTETE IMOVINE I/ILI PONIŠTENJE JAMSTVA!
VAŽNE INFORMACIJE O SIGURNOSTI, LOKACIJI I ELEKTRIČNOM POVEZIVANJU


natural_image
Simple grid pattern with a vertical line at the bottom (no text or symbols)Zračni filtar
natural_image
Grid pattern with uniform dark squares and a vertical line at the bottom (no text or symbols)Filter za isparavanje

Crpka

Cool
paket
BE COOL
natural_image
Pure mechanical part diagram with no text, numbers, or symbols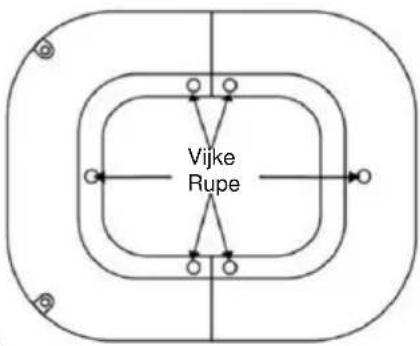
natural_image
Line drawing of hands assembling a mechanical component (no text or symbols)-
fiksiranje vijak rupe
-
ono stupac položaja i zaključavanja bodova naznačeno po the strelica morati biti poravnati i zatim pokriveno
BE COOL
Korak 1:
Kao što je prikazano na slici 1 , uklonite oba dijelovi od the baza iz the pakiranje . Poravnajte the stupac pozicije i puknuti brave od the dva baza dijelove i spojite ih po začepljivanje the dijelovi zajedno formirati potpunu baza.
Korak 2:
Kao što je prikazano na slici 2 , poravnajte the završio baza s the dno od the kućište , izrada Naravno the šest vijak rupe linija gore . Zatim siguran the baza do the kućište s the vijci do potpuna the montaža .
Korak 3:
Kao što je prikazano na slici 3, kada uklanjanje the baza, prva popustiti the vijci do ukloniti the baza iz the stanovanje.
Upotreba the cool paketi :
natural_image
Line drawing of a tall vertical electric fan with internal blades (no text or symbols)CONGRATULATIONS!
THANK YOU FOR CHOOSING A PRODUCT FROM BE COOL HAVE DECIDED.
This product is only suitable for well-insulated rooms or for occasional use.
BE COOL

Current operating instructions and other languages
Download the latest operating instructions in various languages via the linkwww.becool.at/downloads or scan the QR code shown. Follow the instructions on the website.

PLEASE READ THE OPERATING INSTRUCTIONS CAREFULLY BEFORE STARTING INSTALLATION, OPERATION OR MAINTENANCE. PROTECT YOURSELF AND OTHERS BY FOLLOWING THE SAFETY INSTRUCTIONS. FAILURE TO FOLLOW INSTRUCTIONS COULD RESULT IN PERSONAL INJURY AND/OR PROPERTY DAMAGE AND/OR VOID THE WARRANTY!
IMPORTANT INFORMATION ON SAFETY, LOCATION AND ELECTRICAL CONNECTION

To avoid the risk of operating errors and to make better use of the appliance, please read the operating instructions before use.
BE COOL
General safety instructions
- Only use the appliance in accordance with the instructions in the operating instructions. Any other use may result in damage, fire or injury.
- Only operate the device in dry indoor areas. Moisture or water can cause electric shocks or damage.
- Children under the age of 3 must be kept away from the appliance. Children between the ages of 3 and 8 may only operate the appliance under supervision.
- Switch off the appliance and disconnect the mains plug before cleaning, maintaining or moving it. Always pull the plug, never the cable.
- Do not modify or repair the device yourself. In the event of damage, contact the manufacturer or a qualified specialist.
- Never cover the appliance during operation to avoid overheating.
- Keep the appliance away from flammable materials. A minimum distance of 1 meter from curtains, furniture or other flammable objects is required.
BE COOL
- Do not use damaged cables, plugs or sockets. These can cause fires or electric shocks.
- Do not leave the appliance unattended during operation.
- Only use original parts and accessories recommended by the manufacturer. Other parts could impair safety.
Electrical safety
- Only connect the appliance to earthed sockets that meet the requirements.
- Do not use extension cables or adapters, as these can overheat and cause fires.
- Never touch the mains plug with wet hands. Risk of electric shock!
- Check the mains voltage before connecting the appliance. It must match the specifications on the rating plate.
- If the mains cable is damaged, it must be replaced immediately by the manufacturer or a qualified specialist.
• Always de-energize the appliance before maintenance or cleaning.
BE COOL
- Do not operate the appliance on unstable or wet surfaces.
Specific instructions for the heating function
- Ensure that the appliance is placed on a stable, level surface. Tipping over can lead to damage or injury.
- Do not operate the appliance in the vicinity of petrol, alcohol or other flammable substances.
- Do not use the heater with a timer or other automatic switches. This could pose a fire risk.
- Never cover the appliance during operation. Risk of overheating!
- Before switching off the appliance, set the temperature control to the lowest level to allow a cooling phase.
- Maintain a minimum distance of 65 cm between the device and other objects.
- Keep the appliance free of dust and lint to avoid overheating.
- Allow the appliance to cool down completely after use before storing or transporting it.
Specific instructions for the cooling function
- Only fill the water tank up to the maximum mark. Overfilling can lead to leakage.
BE COOL
- Do not use water sources with a high mineral content or dirty water sources. These could impair operation.
- Empty and clean the water tank regularly. Do not leave water in the tank for long periods of time.
- Avoid sucking objects such as curtains or paper into the air outlets. This could block the air flow.
- Do not operate the appliance with an empty water tank in cooling mode. This can cause damage to the system.
- Avoid using the device in high humidity (>80 %). Condensation can lead to electrical damage.
Additional notes on operation
- Monitor the appliance during operation, especially when using the heating function.
- Switch off the appliance if unusual noises or odors occur and contact customer service.
- Only transport the appliance when it is switched off and has cooled down completely.
- Store the device in a dry, well-ventilated place, away from direct sunlight, moisture and frost.
BE COOL
- Do not use the appliance in potentially explosive atmospheres or in the vicinity of highly flammable substances.
- Switch off the appliance before adding or removing accessories such as ice crystal boxes.
- Avoid moving the appliance during operation.
Additional information on electromagnetic compatibility
- Avoid operating the device in the vicinity of other electronic devices to prevent interference.
- The device fulfills the requirements of electromagnetic compatibility, but must not be operated in areas with high electromagnetic exposure.
BE COOL
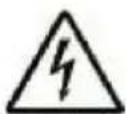
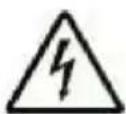
ATTENTION | RISK OF INJURYThe appliance becomes hot during operation!Never touch the appliance during operation→ this could lead to serious BURNS. |
ATTENTION | FIRE HAZARDThe appliance must not be covered during operation! |
ATTENTION | SAFETY DISTANCEKeep a safe distance of at least one meter from easily flammable objects such as furniture, curtains, paper, etc.!LOCATIONAlways position the appliance so that the air can flow in and out unhindered.RISK OF BURNSThe appliance becomes very hot during use and can cause burns. Special care must be taken when children and vulnerable persons are present.RISK OF OVERHEATINGDo not heat rooms with a volume of less than 4m3 |
BE COOL
Symbols on the device
Symbol:
Significance:
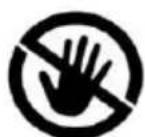
Caution! Do not cover
The symbol on the appliance indicates that it is not permitted to hang objects (e.g. towels, clothing, etc.) above the appliance or directly in front of it. The heater must not be covered in order to avoid overheating and the risk of fire!
Symbol:
Significance:
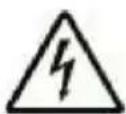
Protection class 2
The symbol indicates that the appliance is assigned to protection class 2. Protection class 2 devices are not connected to the protective conductor. Instead, they have reinforced or double insulation at the level of the rated insulation voltage between active and touchable parts. Electrically conductive surfaces or conductive touchable parts are thus separated from live parts by reinforced or double insulation.
BE COOL
Recycling, disposal, declaration of conformity
 | RECYCLINGThe packaging materials can be recycled. It is therefore recommended to dispose of them in sorted waste |
 | DISPOSALThe "crossed-out dustbin" symbol requires the separate disposal of waste electrical and electronic equipment (WEEE). Electrical and electronic equipment may contain hazardous and environmentally harmful substances. Therefore, do not dispose of them in unsorted residual waste, but at a designated collection point for waste electrical and electronic equipment. This will help to protect resources and the environment. For further information, please contact your dealer or the local authorities. Directive 2012/19/EU |
 | BATTERY DISPOSALIn accordance with current legislation on batteries, accumulators and related waste, the crossed-out wheeled garbage can symbol on the battery indicates that it is prohibited to dispose of used batteries in household waste. Batteries and accumulators contain highly polluting substances. The user is obliged to dispose of used batteries at the collection points in the municipality or in the appropriate containers. The service is free of charge. In this way, the legal requirements are complied with and the environment is protected.This model is equipped with batteries of type: CR2025. |
 | DECLARATION OF CONFORMITYWe hereby confirm that this product complies with the essential requirements, regulations and directives of the EU. You can view the detailed declaration of conformity at any time under the following link:https://www.schuss-home.at/downloads |
Errors and technical changes excepted.
BE COOL
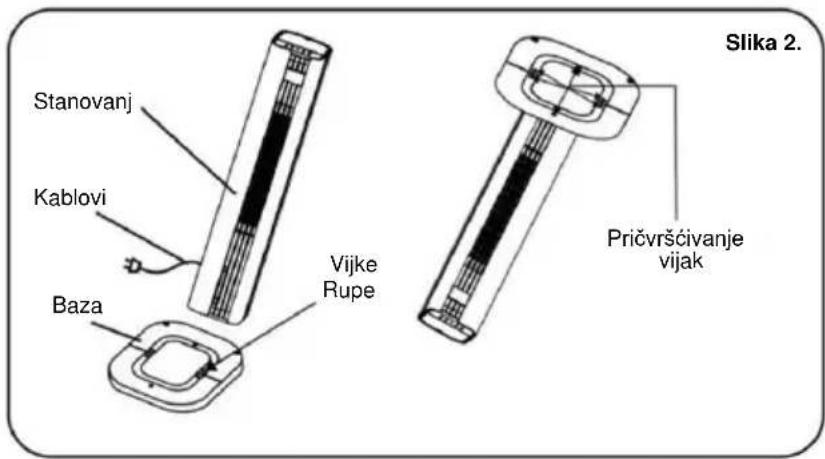
SCOPE OF DELIVERY
The BE COOL cooler is supplied with:
- 1 × Air cooler
- 1× Remote control
- 1× Operating instructions
- 2x Cool packs
DESCRIPTION OF THE DEVICE
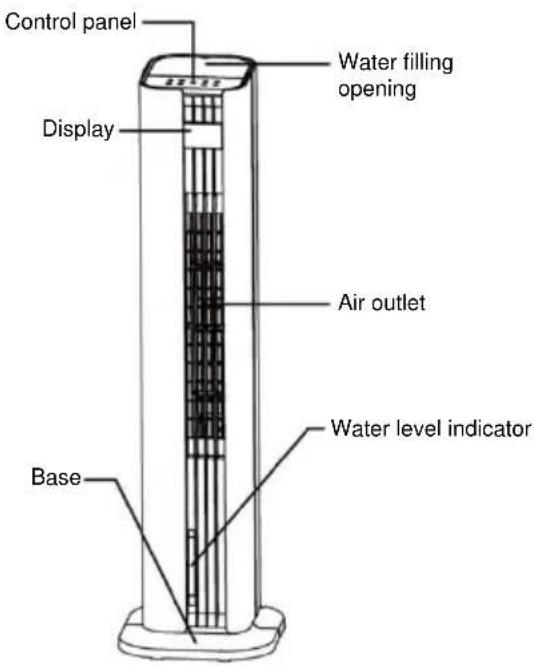
BE COOL
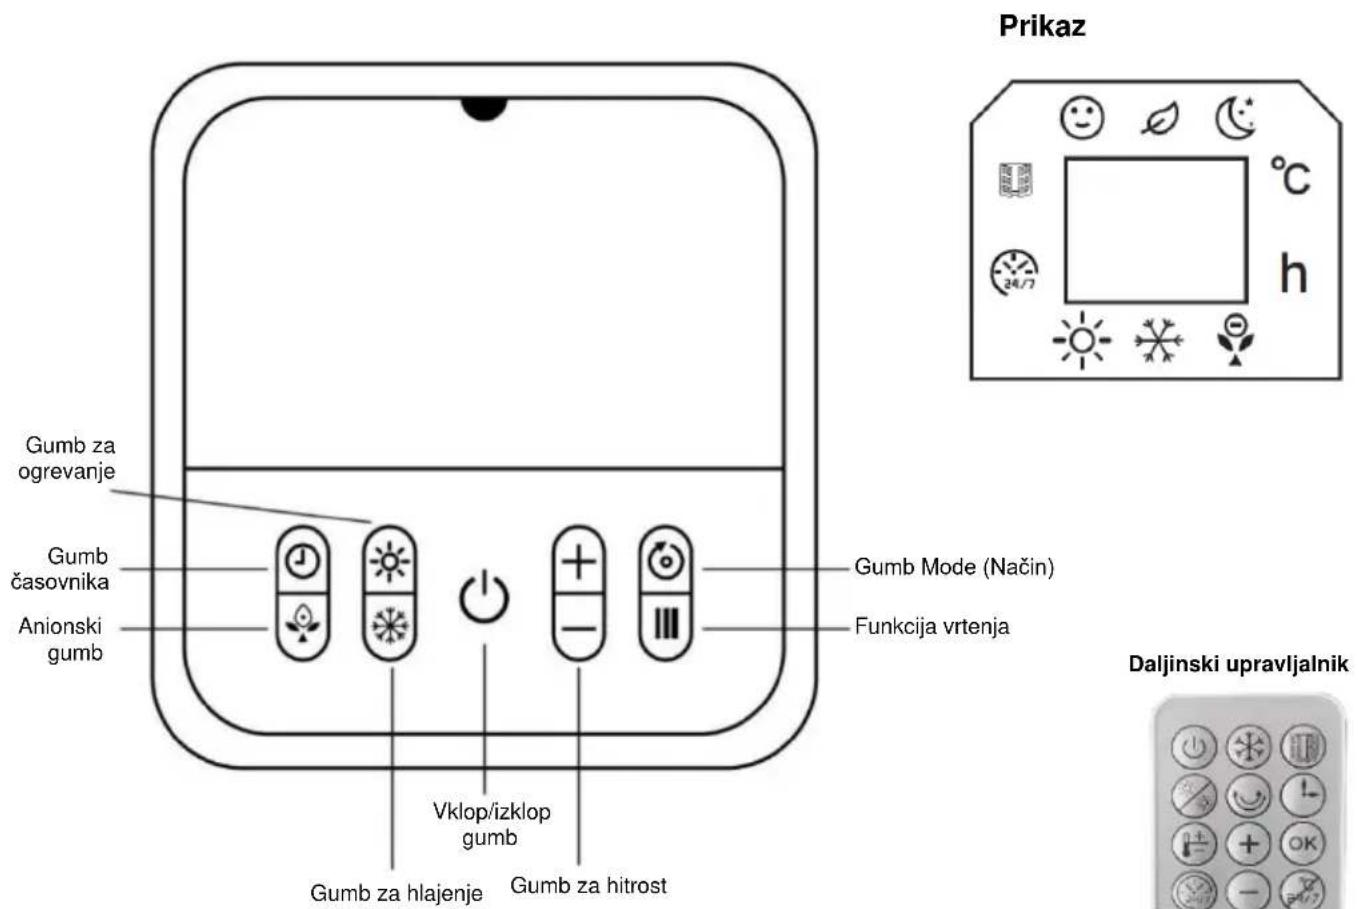
Control elements and display
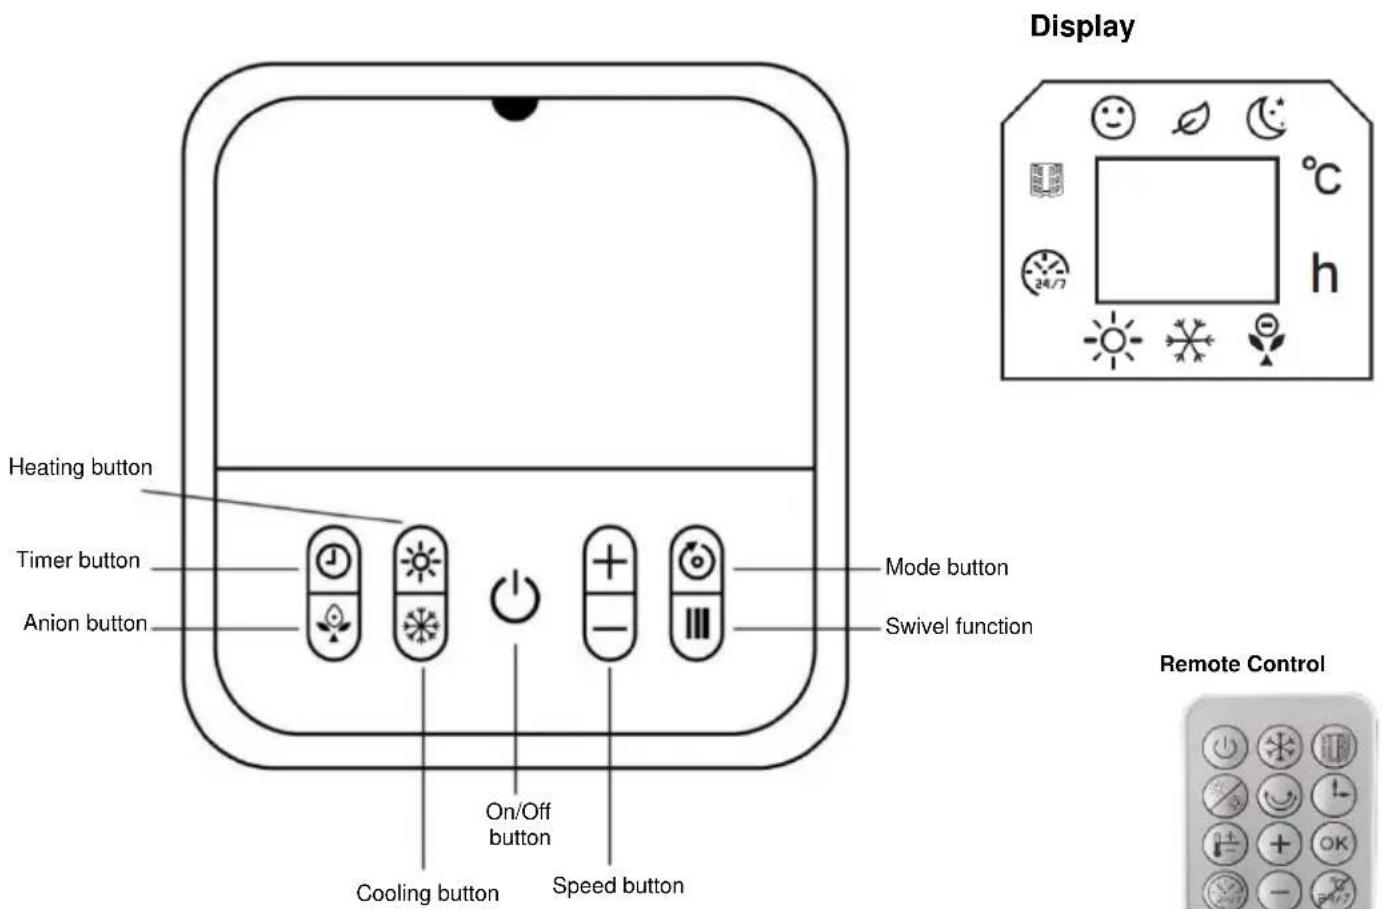
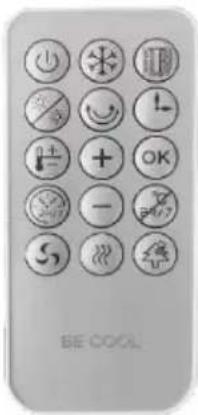
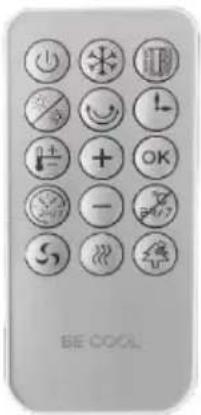
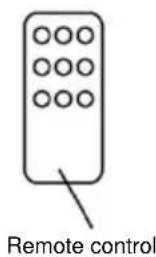
Remote control

On/off button

Window opening button

Swivel function

Temperature setting button

OK button

Weekly timer button

Wind mode button

Cooling button

Heating button

Timer button

Up and down button

Cancel button

Speed button

Anion function button
BE COOL
Preparing the remote control - Inserting or replacing the battery
Please note the following instructions:
Initial operation:
To use the remote control for the first time, pull the plastic cover out of the battery compartment on the back of the remote control.
Change the battery:
- Use a screwdriver to loosen the screws. Pull out the battery holder on the back of the remote control and remove the old battery from the holder:
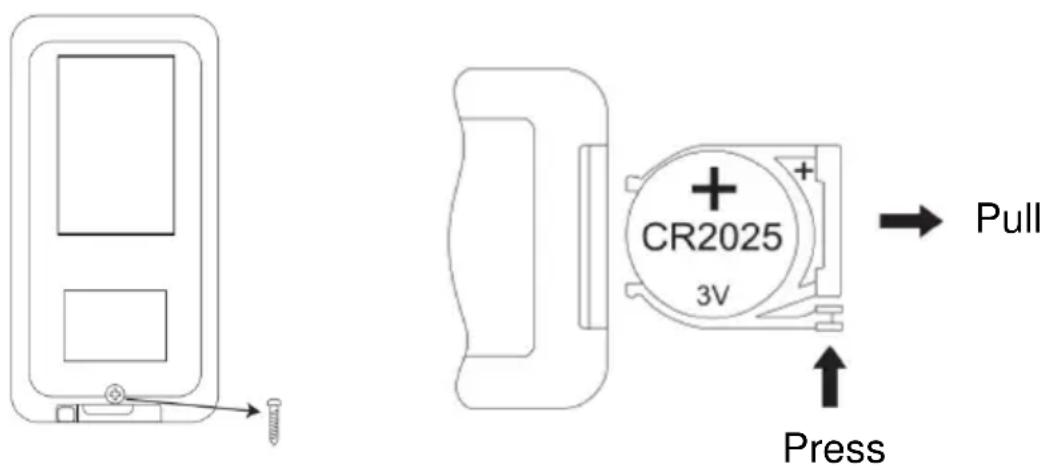
- Now insert a new CR2025 battery, always paying attention to the polarity markings (+/-) on the battery and the battery holder.
- Then push the battery holder all the way back into the remote control, and tighten the screw.
Correct use of the remote control
Point the remote control directly at the front of the appliance and make sure that there are no obstacles between the remote control and the appliance
BE COOL
Commissioning
Before initial commissioning
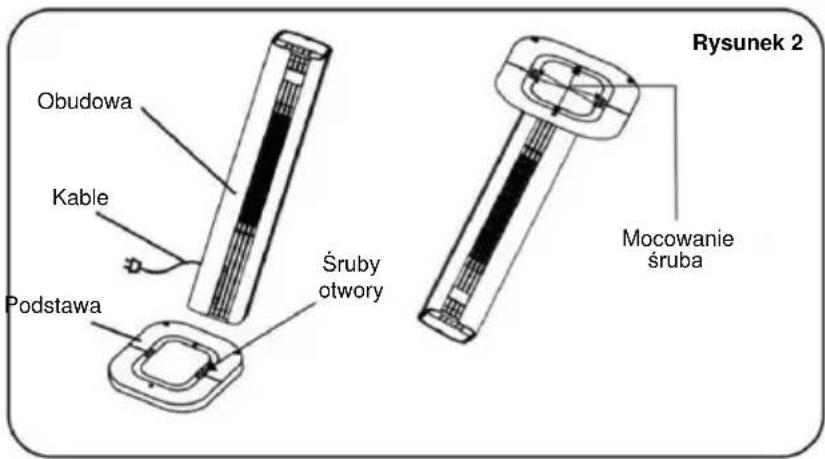
Unpacking the device
- Open the box and remove the appliance.
- Remove the packaging completely from the device.
- Unwind the power cable completely, taking care not to damage it.
Installation
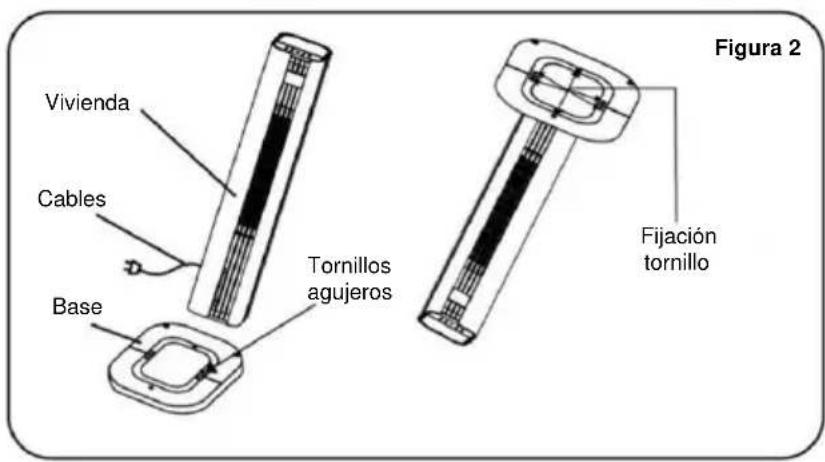
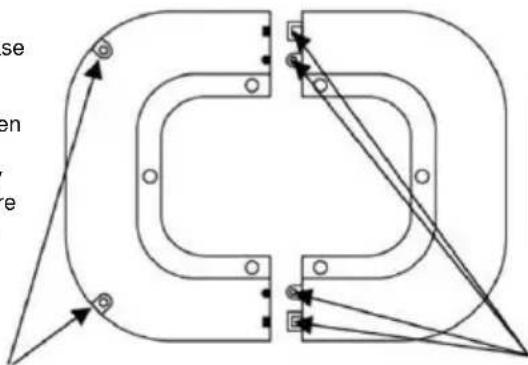
Figure 1
Fixed Installation: Once the base has been installed, use the existing holes in the floor that match the holes in the base. Then insert the expansion plugs included in the scope of delivery into the existing holes and secure the base with the fixing screws.
natural_image
Pure mechanical part diagram with no text, numbers, or symbols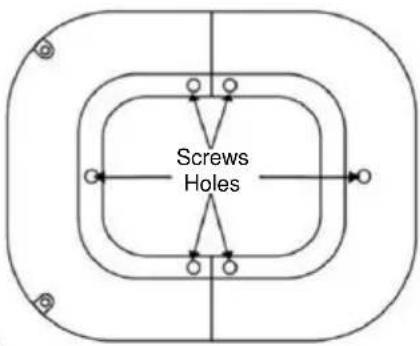

natural_image
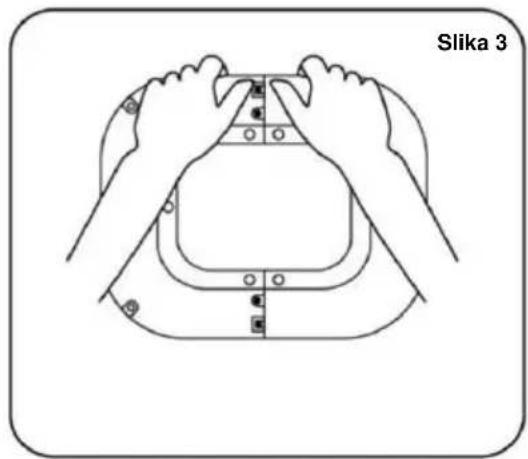
Line drawing of two hands assembling a mechanical component, labeled 'Figure 3' (no text or symbols on the diagram itself)-
fixing screw holes
-
the column positions and locking points indicated by the arrow must be aligned and then covered
BE COOL
Step 1:
As shown in Figure 1, remove both parts of the base from the packaging. Align the column positions and the snap locks of the two base parts and connect them by plugging the parts together to form a complete base.
Step 2:
As shown in Figure 2, align the finished base with the bottom of the enclosure, making sure the six screw holes line up. Then secure the base to the housing with the screws to complete the assembly.
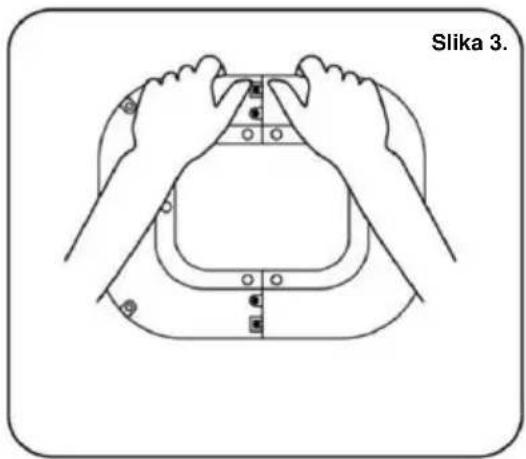
Step 3:
As shown in Figure 3, when removing the base, first loosen the screws to remove the base from the housing.
Use of the cool packs:
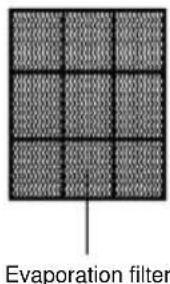
Cooling packs have cold and heat storage properties that can absorb the heat in the water, keeping the water temperature in the water tank lower than the ambient temperature for several hours and making the air flow of the cooling fan cooler.
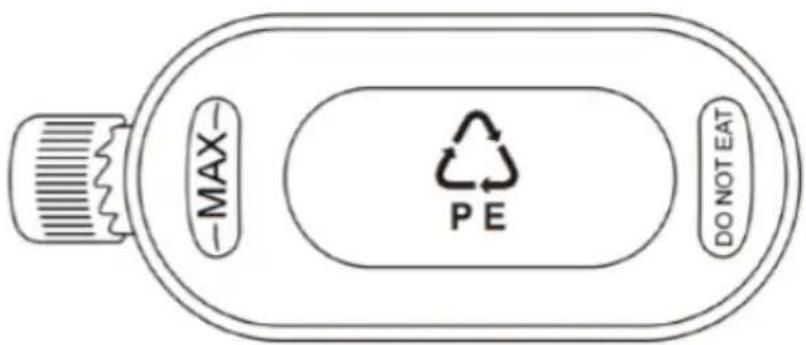
- Fill the gel cool pack with water up to the MAX mark.
- Place the cool pack in the freezer until it is completely frozen.
- Place the frozen cool pack in the water tank. After about 10 minutes, the water temperature in the tank will be lower than the ambient temperature.
- Do not open the lid of the ice container and do not swallow its contents.
BE COOL
Operation
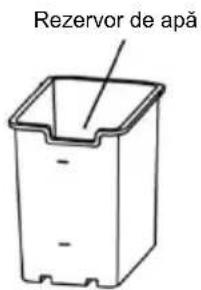
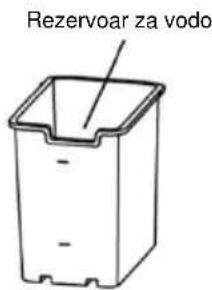
Water filling
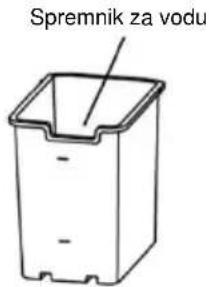
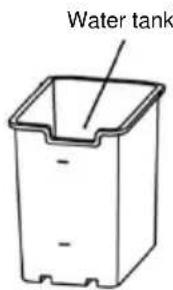
Open the lid of the water tank at the top of the appliance and slowly pour in purified water. Check the water level via the visible water level indicator window. Observe the following points:
- To protect your health and that of your family, please only use pure tap water.
- Only refill the water when the appliance is disconnected from the power supply.
- To avoid electrical accidents, do not allow water to splash onto the control panel or surrounding parts.
- Only fill water up to the maximum mark, otherwise it will overflow. When operating with cold air humidification, the water level must not fall below the "MIN" mark.
- To increase the cooling effect, ice, ice cubes or the cool pack can be placed in the water tank or the upper water tank.
Caution: Once ice or the cool pack has been added, the water level must not exceed the maximum "MAX" mark.
On/off button:
Press the button to switch the device on or off.
Speed button:
Use the "SPEED" button to set the speed of the fan.
Press the "-" button to reduce the wind speed by one level and the "+" button to increase it by one level. This device has 3 wind speed levels, which are shown on the display.
Timer button:
Use the "TIMER" button to switch the appliance off on a timed basis. Each time you press the button, the operating time is gradually extended by one hour (from 1 to 12 hours). To switch the appliance off automatically, proceed as follows: While the tower fan is in operation, press the button repeatedly until the desired number of hours lights up. The setting is accepted when the display stops flashing.
Mode button:
Use this button to select the airflow mode of the device. Press the button repeatedly and the mode changes in the order Normal - Natural - Sleep -
BE COOL
Normal.
- Normal wind : The device runs according to the wind speed level set by the user, which is divided into three levels: high, medium and low. The fan runs at a fixed speed.
- Natural wind : The appliance runs according to the wind speed set by the user and automatically switches between the high, medium and low levels according to the rules set in the program. This mode imitates the natural breeze, making the air flow softer and more pleasant.
- Sleep wind : The device automatically reduces the set wind speed to the lowest level, based on the set level and a pre-programmed time sequence.
Swivel function:
Press this button to start the swivel function of the heating and cooling fan. Press the button again to stop the swivel function.
Cooling button:
Press this button to activate the cooling function. Add the ice crystal box or ice cubes to the water tank or the upper water tank. The temperature at the air outlet is lowered by approx. 3 °C after a few minutes.
Anion button:
Use the anion button to activate the anion function.
Note: Negative ions are tiny charged particles that are released into the air. They can help remove dust, allergens and other harmful particles from the air by attracting them and causing them to fall to the floor. In addition, negative ions help to reduce unpleasant odors and provide fresher and healthier indoor air. This improves the air quality and creates a more pleasant indoor climate.
Heating button:
Press this button to start the heating function. Press once for low heat (1d, the button on the display flashes white light), press twice for high heat (2d,
BE COOL
the button on the display flashes red light) and press again to switch the heating off.
Note:
- After starting the heating function, there is a 30-second delay when switching off.
- As soon as the heating function is activated, the "SPEED", "Fan mode" and "Cooling" button are locked.
Temperature control:
When the appliance is in heating mode, press the button to set the temperature. The setting range is between 15-45°C.
Note: If the room temperature is higher than the set temperature, the heating function will not start. In operating mode, the screen switches off after 3 minutes without operation. Press any button to reactivate the display.
Remote control:
The above functions can also be controlled via the remote control. Operation is as described. Press the "SPEED" button on the remote control to adjust the wind speed.
Note: The heating and cooling fan can only emit air when the on/off button is pressed.
Remote control

On/off button
Press as follows: ON (fan runs during cooling mode), OFF (fan continues to run for approx. 30 seconds after the appliance is switched off, after heating mode has ended).

Cooling button
Press as follows to activate or deactivate the cooling function on or off.
BE COOL

Window opening detection
- Check that the window opening detection can only be activated if the appliance is in heating mode or is in the preset temperature mode, cannot be activated if the appliance is only running in fan mode.
- Press. The relevant symbol and ^ C appear on the display.
- Then the room temperature is detected. If the temperature drops more than 8 degrees at any time within 30 minutes, the heating is turned off. The window opening detection function is turned off and the device is in standby state.
- You can then switch the appliance back on with the ON/OFF button.
- To deactivate open window detection, press the button again. The symbol disappears from the display and the appliance resumes the previously set operation.
- If you activate open window detection while the appliance is operating in a preset week programme, the open window detection will only function during the operating times that are set in the programme.
Notes on window detection:
1) When the appliance stops heating, a 5-second alarm sounds, the fan continues to run for 30 seconds and then goes into standby mode. The display for the preset temperature mode flashes and the LED display switches off and flashes.
1.1) Press to restore the same operating mode as before the device was stopped. After the restart, the window opening detection starts a new cycle.
1.2) Press to switch the appliance off. The LED display shows the ambient temperature and the device goes into standby mode.

Heating mode
Press as follows: Low heating level, High heating level, Fan mode.
Low heating level (1d, the button on the display flashes white light), High
BE COOL
heating level (2d, the button on the display flashes red light), Fan mode.
The temperature setting is cycled.

Swivel mode
Press to switch the swivel mode on or off.

Timer
Press Ⓛ to set the timer as follows: 1 hour, 2 hours, 3 hours ... 12 h. If the weekly timer is activated, this timer function cannot be set.

Temperature setting
Press to switch the "Temperature setting" modeas follows: 15°C, 16°C, 17°C ... 45°C. The temperature setting is cycled.
Temperature range: 15-45°C.
Switch off temperature setting mode:
1) During the setting, press to cancel the process.
2) After completing the temperature setting, first press and then to cancel the process.
3) If the set temperature mode is set to low heat, the appliance returns to low heating mode after canceling. If the set temperature mode is set to high heat, the appliance returns to high heating mode after canceling.
4) Press to switch off the set temperature mode.
BE COOL

Weekly timer
The weekly timer can only be activated if the appliance is in heating mode or in preset temperature mode, cannot be activated if the appliance is only running in fan mode.
Initial start-up (or after a power failure)
You must set the current time the first time you use the device.
Time setting:
• Day of the week:
The LED display shows "01", which means Monday.
Press "+" or "-" to set the current day.
01-07 correspond to Monday to Sunday.
Press OK to complete the setting.
- Set hours
The LED display shows "00", which means 0 o'clock.
Press "+" or "-" to set the current hour.
00 to 23 correspond to 0 a.m. to 11 p.m.
Press OK to complete the setting.
- Set minutes
The LED display shows "00", which means 0 minutes.
Press "+" or "-" to set the current minutes.
00 to 59 correspond to 0 minutes to 59 minutes.
Press OK to complete the setting.
Notes:
If OK is not pressed within 10 seconds after the adjustment, the time setting has failed.
First disconnect the power supply and then set the current time again.
BE COOL
Preset programs:
| P1-P5 | Factory setting | After the time is set successfully, P1 is displayed.Press  3 LED display shows P1. Press OK to select P1 mode.(If OK is not pressed within 10 seconds, the weekly timer setting has failed). 3 LED display shows P1. Press OK to select P1 mode.(If OK is not pressed within 10 seconds, the weekly timer setting has failed). |
| The procedure of P1-P5 is similar. Please see details in the mode table. |
Weekly timer modes table:
| Mode | Mo | Tue | Mi | Do | Fri | Sat | So |
| P1 | 8:00-17:00 | 8:00-17:00 | 8:00-17:00 | 8:00-17:00 | 8:00-17:00 | 8:00-17:00 | 8:00-17:00 |
| P2 | 18:00-7:00a | 18:00-7:00a | 18:00-7:00a | 18:00-7:00a | 18:00-7:00a | 18:00-7:00a | 18:00-7:00a |
| P3 | 8:00-17:00 | 8:00-17:00 | 8:00-17:00 | 8:00-17:00 | 8:00-17:00 | OFF | OFF |
| P4 | 18:00-7:00a | 18:00-7:00a | 18:00-7:00a | 18:00-7:00a | 18:00-7:00a | OFF | OFF |
| P5 | OFF | OFF | OFF | OFF | OFF | 00:00-23:59 | 00:00-23:59 |
| Note | The 'a' after the times means that in P2/P4 mode the stop time is after midnight, i.e. the next day.For example: if the time is set from 18:00 to 7:00a, the appliance starts at 18:00 and stops at 7:00 the next day. | ||||||
| Switch off weekly timer | The weekly timer is switched off after the sixth press of the button. |
| Display description | 1) After setting, the LED display shows the ambient temperature, the weekly timer indicator light and the corresponding function indicator light illuminate.2) In heating mode (low or high heating level, not in set temperature mode), the LED display lights up the ambient temperature, the weekly timer indicator light and |
BE COOL
| the light for low or high heat flashes. In set temperature mode, the set temperature indicator light lights up when the weekly timer is set.3) Swivel mode, low heating level, high heating level, temperature setting and window opening detection can be operated both in weekly timer mode and in normal operating mode.The indicator light illuminates when the corresponding function is active. |
Cancel weekly timer:
1) During the setting, press to cancel the process.
2) After completing the weekly timer setting, you must first press and then to cancel the process.
3.1) If the weekly timer is canceled in set temperature mode, the appliance remains at a high heating level.
3.2) If the heating mode (not in set temperature mode) is set to low heat, the appliance returns to low heating mode after the weekly timer is canceled. If the heating mode (not in set temperature mode) is set to high heat, the appliance remains on high heat. If the heating mode (not in set temperature mode) is set to high heat, the appliance returns to high heat mode after the weekly timer is canceled.

Speed button
Press to set the fan speed.
Press the "-" button to reduce the wind speed by one level and the "+" button to increase the wind speed by one level.
BE COOL

Wind mode
Press to select the wind mode of the device. Press the button repeatedly and the wind mode will change in the following order: normal - natural - sleep - normal.

Anion function
Press to activate the anion function.
Explanation:
The anion mode releases negatively charged ions (anions) into the air to improve air quality. This can help to neutralize dust and allergens and create a fresh, clean indoor climate.
Protective shutdown in the event of overheating
Activated by default:
The maximum detection temperature is 51^ C. The device switches off automatically when the measured temperature reaches 51^ C.
Cleaning instructions

Do not use any chemicals when cleaning.
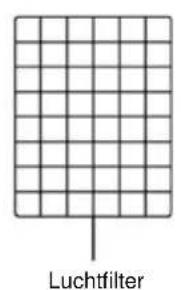
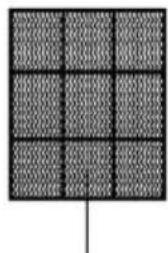
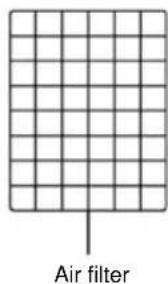
Cleaning the air filter unit
If too many foreign objects accumulate on the air filter, this can impair the air outlet performance. You should therefore clean it at least once a month.
Switch off the power supply and disconnect the mains plug.

Please ensure that the power cable is disconnected from the mains are cleaning, otherwise there is a risk of electric shock.
BE COOL
Clean the outer surface:
- If the surface is dusty, wipe it with a soft cloth. If it is very dirty, use lukewarm water (below 50 °C) and a mild detergent. Then wipe dry with a soft cloth.
- Do not use aggressive cleaning agents such as benzine or thinner, as these can damage the surface.
Clean the water tank:
- Pull out the mains plug and turn the locking knob to remove the water tank.
- Clean the tank with a cloth and some detergent, rinse it with water and pour away the waste water.
Clean the housing surface:
- Wipe the housing with a damp cloth, but never rinse it directly with water.
- Do not use any aggressive cleaning agents or solvents.
- Make sure that the mains plug is disconnected before cleaning the appliance to avoid electric shock.
After cleaning:
- Reassemble all parts, such as the water tank and the cooling mats, correctly.
- Connect the device and check that it is working properly.
Maintenance:
- If you will not be using the device for a longer period of time, unplug the mains plug, pack it away and protect it from dust.
Make sure that all parts, especially the cooling mat and the water tank, are dry before storing the appliance.
Troubleshooting
Do not attempt to repair or disassemble the appliance yourself. Unauthorized repair attempts will invalidate the warranty and may result in injury
| Problem | Possible reason | Solution |
| No power | 1. The power cable is not connected. | 1. Connect the mains cable. |
| 2. There is no power at the socket. | 2. Check whether the socket is supplying power. | |
| 3. The mains switch is not switched on. | 3. Switch on the device. |
BE COOL
| Odor development | New appliance. When using for the first time, the motor give off an odor that fades after about a week. | No action required. |
| Strong vibrations and noises | 1. The appliance is not standing on a level surface. | 1. Place the appliance on a level surface. If necessary, use an anti-vibration mat. |
| 2. The device may be damaged. | 2. Stop using the device and contact customer service. |
BE COOL
Technical data
| Technical information | |
| Nominal voltage 220 V- 240 V~ | |
| Frequency 50-60 Hz | |
| Max. Power consumption (cooling) 50 W | |
| Max. Power consumption (heating) 3000 W | |
| Water tank capacity 4,5 L | |
| Speed levels 3 | |
| Product dimensions 285×308×1060 mm | |
| Net weight 7,35 kg | |
| Contact addresses for further information and service line: | Schuss Home Electronic GmbH Scheringgasse 3, A-1140 Vienna Tel: +43 (1) 97 0 21 - 0 www.becool.at FB-No.: 23697 4 t / FB-Court: Vienna |
BE COOL
Required information on electric individual room heaters
| Item number BCTACHC4 | ||||||
| Specification | Icon | Value | Unit | Specification | Unit | |
| Heat output | Type of heat output/room temperature | |||||
| Nominal heat output | P_(nom | 3,0 | kW | Single-stage heat output without room temperature control | No | |
| Minimum heat output (guide value) | P_(min | 1,356 | kW | Two or more manual levels, no room temperature control | No | |
| Maximum continuous heat output | P_(max,c | 2,879 | kW | With mechanical thermostat control of the room temperature | No | |
| Auxiliary power consumption | Electronic room temperature control | No | ||||
| With Nominal heat output | eI_max | 2,879 | kW | Electronic room temperature control with day timer | Yes | |
| With Minimum heat output | eI_min | 1,356 | kW | Electronic room temperature control with weekly timer | No | |
| In the Ready state | eI_sB | 0,4× 10^-3 | kW | |||
| Other control options | ||||||
| Room temperature control with presence detection | Yes | |||||
| Room temperature control with open window detection | No | |||||
| With remote control option | Yes | |||||
| With adaptive start control | No | |||||
| With operating time limit | Yes | |||||
| With black ball sensor | No | |||||
| Contact details: | Schuss Home Electronic GmbH Scheringgasse 3 - 1140 Vienna - Austria https://www.schuss-home.at/ | |||||
BE COOL
WARRANTY
With this quality product from BE COOL, you have made a decision for innovation, durability and reliability.
For this BE COOL appliance we grant a warranty period of 2 years from the date of purchase valid in Austria! If, contrary to expectations, service work is required on your appliance during this period, we hereby guarantee to repair it free of charge (spare parts and labor) or (at Schuss's discretion) to replace the product. If neither repair nor replacement is possible for economic reasons, we reserve the right to issue a current value credit note.
In the case of air conditioners, please always contact the customer hotline as a first step (see sticker on the appliance or front page of the operating instructions); in the case of fans, please contact your specialist dealer or us directly. We would like to point out that any repair work not carried out by an authorized workshop in Austria will immediately invalidate this guarantee.
This guarantee does not cover
• We do not accept any liability for consequential damage in the event of improper use
• Repair or replacement of parts due to normal wear and tear
• Damage due to non-compliance with the operating instructions
• Devices that are used - even partially - for commercial purposes
• devices mechanically damaged by external influences (fall, impact, breakage, improper use, etc.) as well as signs of wear and tear of an aesthetic nature.
• Devices that have been handled improperly
• Devices that have not been opened by our authorized service workshop.
- Damage caused by improperly closed condensation drain valves on air conditioning units or incorrectly inserted water tanks.
• Unfulfilled consumer expectations.
• Damage caused by force majeure, water, lightning, overvoltage.
• Devices where the type designation and/or serial number on the device has been changed, deleted, made illegible or removed.
• services outside our authorized workshops, the transport costs to an authorized workshop or to us and back, as well as the associated risks.
We would like to emphasize that within the warranty period, a lump sum of € 60,- (indexed based on CPI 2010, June 2015) will be charged for operating errors or if no error was detected.
The provision of a warranty service (repair or replacement of the device) does not extend the absolute warranty period of 2 years from the date of purchase.
The 2-year guarantee is only valid on presentation of the proof of purchase (must include the name and address of the dealer and the full name of the appliance) and the corresponding guarantee certificate, on which the appliance type and the serial number (visible on the box and on the back or underside of the appliance) must be noted! Without the warranty certificate, only the statutory warranty applies!
We expressly point out that the statutory warranty rights are not affected by this guarantee and remain unaffected. Schuss Home Electronic GmbH and its vicarious agents are only liable for damages in the event of gross negligence or intent. Liability for loss of profit, expected but unrealized savings, consequential damages and damages from third party claims is excluded. Damage to or for recorded data is always excluded from the liability for damages.
Congratulations on your choice. We hope you enjoy using your BE COOL appliance!
ADDRESS
Schuss Home Electronic GmbH
A-1140 Vienna, Scheringgasse 3
Tel.: +43 (0)1/ 970 21
Type designation: ....
Serial number: ....
This warranty certificate must be handed over to the authorized service workshop together with the appliance in the event of a warranty claim.
- HERZLICHEN GLÜCKWUNSCH!
- BE COOL
- CONGRATULAZIONI!
- BESCHRIJVING VAN HET APPARAAT
- GRATULUJEME!
- Daljinski upravljalnik
- Korak 1:
- Korak 2:
- Aktualne upute za uporabu i drugi jezici
- Korak 3:
- Upotreba the cool paketi :
- CONGRATULATIONS!
- Current operating instructions and other languages
- General safety instructions
- Electrical safety
- Specific instructions for the heating function
- Specific instructions for the cooling function
- Additional notes on operation
- Additional information on electromagnetic compatibility
- Caution! Do not cover
- Symbol:
- Protection class 2
- SCOPE OF DELIVERY
- DESCRIPTION OF THE DEVICE
- Remote control
- Preparing the remote control - Inserting or replacing the battery
- Initial operation:
- Change the battery:
- Correct use of the remote control
- Commissioning
- Before initial commissioning
- Unpacking the device
- Installation
- Step 1:
- Step 2:
- Step 3:
- Use of the cool packs:
- Operation
- Water filling
- On/off button:
- Speed button:
- Timer button:
- Mode button:
- Swivel function:
- Cooling button:
- Anion button:
- Heating button:
- Note:
- Temperature control:
- Remote control:
- On/off button
- Cooling button
- Window opening detection
- Notes on window detection:
- Heating mode
- Swivel mode
- Timer
- Temperature setting
- Switch off temperature setting mode:
- Weekly timer
- Initial start-up (or after a power failure)
- Time setting:
- • Day of the week:
- - Set hours
- - Set minutes
- Notes:
- Cancel weekly timer:
- Speed button
- Wind mode
- Anion function
- Explanation:
- Protective shutdown in the event of overheating
- Activated by default:
- Cleaning instructions
- Cleaning the air filter unit
- Clean the outer surface:
- Clean the water tank:
- Clean the housing surface:
- After cleaning:
- Maintenance:
- Troubleshooting
- Technical data
- Required information on electric individual room heaters
- WARRANTY
- This guarantee does not cover
Brand : Be Cool
Model : BCTACHC4
Category : Air Conditioning