
Aura 2 - Projector XGIMI - Free user manual and instructions
Find the device manual for free Aura 2 XGIMI in PDF.

| Brand | XGIMI |
| Model | Aura 2 (WM03B) |
| Product Type | Laser Projector |
| Light Source | Laser (blue 449-461 nm, red 635-647 nm) |
| Operating System | Android TV |
| Connectivity | Wi-Fi 802.11 a/b/g/n/ac/ax (2.4/5 GHz), Bluetooth (2402-2480 MHz) |
| Audio | Harman Kardon speakers, DTS Studio Sound, Dolby Atmos |
| Smart Functions | Google Assistant, built-in Chromecast, eco mode with presence detection |
| Image Correction | Automatic keystone correction, screen alignment, wall flatness adaptation, wall color adaptation |
| Image Modes | Standard, TV, Movies, Sports, Vivid, Custom, High Power, Games |
| Power Supply | 100-240 V AC, 50/60 Hz, 3.25 A |
| Operating Temperature | 0 to 40 °C |
| Projected Image Size | 90 to 150 inches (diagonal) |
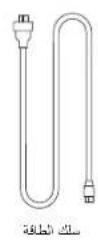
| Included Accessories | Remote control, 2 AAA batteries, power cable, instruction manual, warranty card |
| Laser Class | RG2 (IEC 62471-5:2015) |
| Certifications | CE, FCC, ISED, EAC, UKCA |
| Maintenance | Clean the lens by blowing air. Clean the casing with a soft brush or vacuum cleaner. Do not use chemicals. |
| Safety | Do not look directly into the beam. Do not block the air intakes. Use in a dry and ventilated environment. Keep out of reach of children. |
| Repairability | Do not disassemble. Contact XGIMI customer service. Spare parts available via after-sales service. |
Frequently Asked Questions - Aura 2 XGIMI
User questions about Aura 2 XGIMI
0 question about this device. Answer the ones you know or ask your own.
Ask a new question about this device
Download the instructions for your Projector in PDF format for free! Find your manual Aura 2 - XGIMI and take your electronic device back in hand. On this page are published all the documents necessary for the use of your device. Aura 2 by XGIMI.
USER MANUAL Aura 2 XGIMI
Please read the Product Instructions carefully before using the product.
Thank you for buying and using the products of XGIMI Technology Co., Ltd. (hereinafter referred to as 'XGIMI Technology' or 'XGIMI'). You should read the Product Instructions carefully before using this product for both your safety and interests.
XOMI Technology will assume no responsibility for any personal injury, damage to property or other loss caused because due to failure to operate this product according to the Product Instructions or precautions.
About the Product Instructions (hereinafter referred to as "the Instructions")
Copyright of the Instructions belongs to XGIM Technology;
Trademarks and names mentioned in the instructions belong to their respective right owners; In the case of inconformity between the content of the instructions and the actual product, the actual product shall prevail.
Google, Android TV, and Chromecast built-in are trademarks of Google LLC
Google Assistant is not available in certain languages and countries. Availability of services varies by country and language.

HDMI High Definition Multimedia Interface, and the HDMI Logo are trademarks of registered trademarks of HDMI Licensing Administrator, Inc.

Manufactured under license from IMAX Corporation. IMAX® is a registered trademark of IMAX Corporation in the United States and/or other countries. For DTS patents, see http://patents.dts.com. Manufactured under license from DTS Licensing Limited. DTS, the Symbol. DTS and the Symbol together are registered trademarks or trademarks of DTS, Inc. in the United States and/or other countries. © DTS, Inc. All Rights Reserved.

For DTS patents, see http://patents.dts.com. Manufactured under a license from DTS Licensing Limited. DTS, DTS-HD, DTS Studio Sound, and the DTS-HD logo are registered trademarks or trademarks of DTS, Inc. in the United States and other countries. © 2020 DTS, Inc. ALL RIGHTS RESERVED.

Dolby, Dolby Vision, Dolby Audio, Dolby Atmos, and the double-D symbol are registered trademarks of Dolby Laboratories Licensing Corporation. Manufactured under license from Dolby Laboratories. Confidential unpublished works, Copyright © 2012-2024 Dolby Laboratories. All right reserved.
* Model: WM058
* XGIMI Technology reserves the right to interpret and amend the Product instructions.
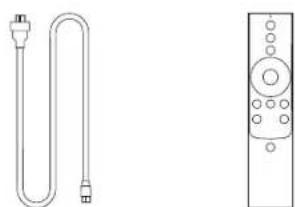
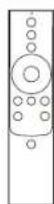
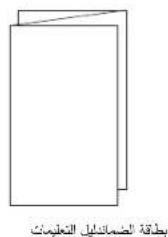
WHAT'S INCLUDED
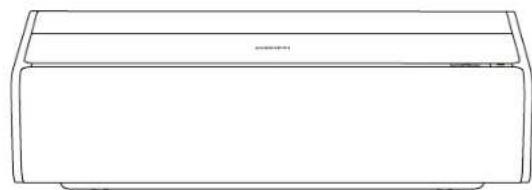
natural_image
Line drawing of a rectangular air conditioner unit (no text or symbols)XGIMI AURA 2
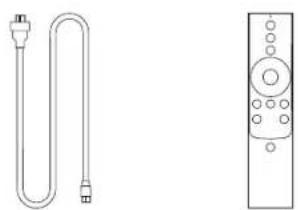
natural_image
Line drawing of a U-shaped tube connected to a remote control (no text or symbols)Power Cord Remote Control
natural_image
Two simple line drawings of folded paper sheets, no text or symbols presentInstruction Manual Warranty Card
Note:
Please keep the original package in case of needed transportation in the future.
To protect the product, please wrap it how it was received.
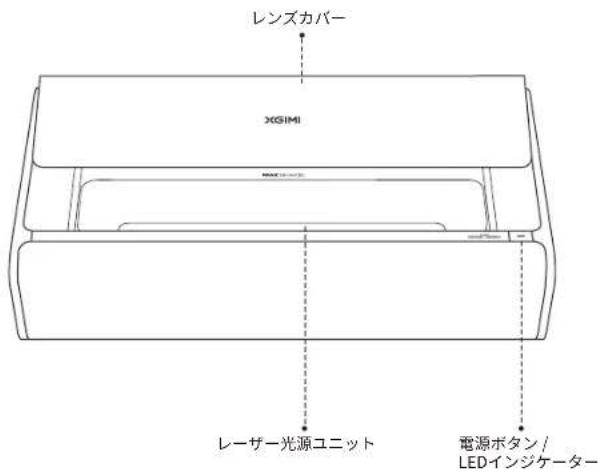
OVERVIEW
Front & Top View Rear View
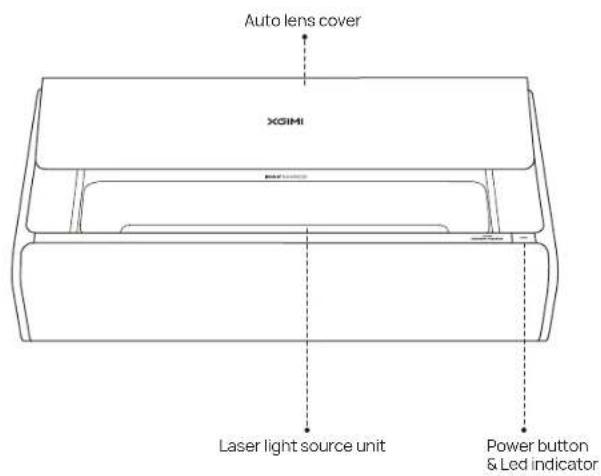
Description of the LED indicator status
| LED indicator status | Description | |
| 1 | Steady on | 1. The device is being powered on after the power cord is plugged in.2. The device is being powered on/off.3. The device is restarting. |
| 2 | Slow pulsing, as if breathing | 1. The device enters eco mode.2. The device is powered on and "Display Off" is pressed. |
| 3 | Fast flashing | The auto lens cover cannot be opened/closed properly. |
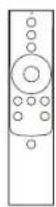
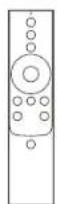
Remote Control
GETTING STARTED
1 Placement
GETTING STARTED
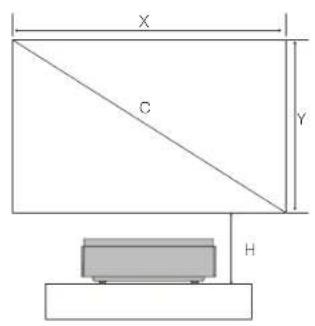
Unit: cm (inches)
The screen sizes for each projection distance may differ depending on the installation environment.
| CXYDH | ||||
| 90° | 199.3cm(78.4°) | 112.1cm(44.1") | 13.6cm(5.35") | 34.14cm(13.4") |
| 100° | 221.4cm(87.2°) | 124.5cm(49.0") | 17.82cm(7.02") | 36.84cm(14.54") |
| 110° | 243.5cm(95.9°) | 137.0cm(53.9") | 22.02cm(8.66") | 39.44cm(15.49") |
| 120° | 265.7cm(104.6°) | 149.4cm(58.8°) | 26.23cm(10.33") | 42.04cm(16.55") |
| 130° | 287.8cm(113.5°) | 161.9cm(63.7°) | 30.43cm(12.00") | 44.64cm(17.57") |
| 150° | 332.1cm(130.7°) | 186.8cm(73.5°) | 38.85cm(15.32") | 49.84cm(19.62") |


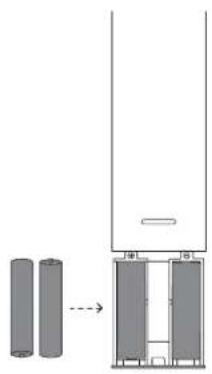
② Using the Remote Control
①
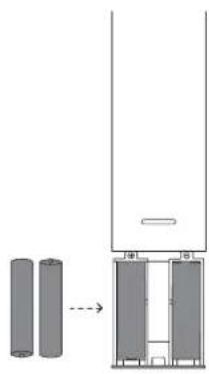
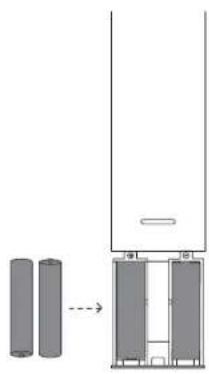
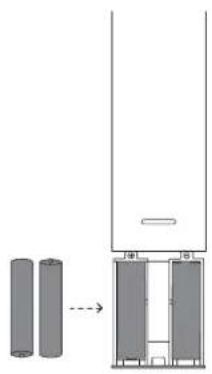
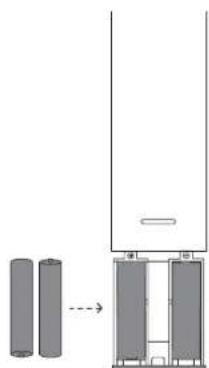
Upon the first use, press the battery compartment release button on the back of the remote control to remove the battery compartment. Then, insert two AAA batteries.


natural_image
Diagram showing two cylindrical objects connected by a dashed line to a vertical panel (no text or symbols)②
When you insert the batteries, make sure that the + and - symbols on the batteries match the + and - symbols inside the battery compartment, and then press the battery compartment back onto the remote control. If you need to replace the batteries later, repeat the directions above.
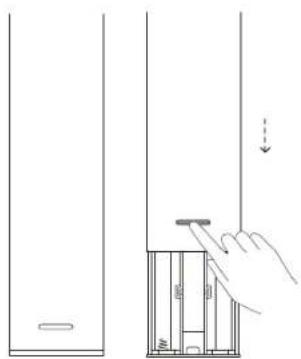
3 Powering on the Device

① Connect the power cord to the XCIMI AURA 2.
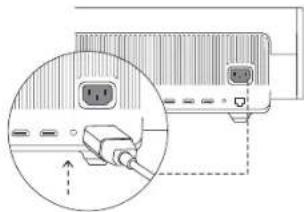
natural_image
Diagram showing a hand inserting a plug into a device panel, with no visible text or symbols.
② Connect the power cord into a power socket.
③ Press the power button. The device will start, and the auto lens cover will slowly open.
4 Pairing the Remote Control
Ensure the remote control is within 10 cm of the device, press and simultaneously until the indicator light begins flashing. This means that the remote control has entered pairing mode. When you hear a "Ding", the connection is successful.
If pairing fails, the remote control will exit pairing mode after 30 seconds. Repeat the above steps after exiting.
natural_image
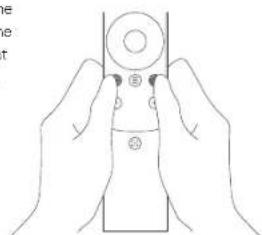
Line drawing of two hands holding a remote control panel (no text or symbols)Adjusting the Focus
Press the button to trigger auto focus.
You can hold the button for
manual focus. Manually adjust
the focus by pressing the
or buttons. After completing
the adjustment, you can press
any button to exit focusing.
Setting Up Android TV
After the remote control is paired, follow the onscreen instructions to complete the Android TV setup.
1 Quick Setup (Android)
Android users can follow the onscreen instructions to quickly set up Android TV with their smartphones.
2 Set up XGIMI AURA 2 (iOS)
For iOS users, follow the instructions below to complete the setup:
-
Skip the quick setup process.
-
Connect XGIMI AURA 2 to your network.
-
Log in with your Google account.
Your XGIMI AURA 2 will be powered by Android TV after the setup process is complete.
Adjusting the Projection Picture
Auto Keystone Correction
After the feature is enabled, the device will automatically adjust the image to be square and clear.
Enabling method 1:
In the system settings, select
[Projection Settings] → [Auto
Keystone Correction].
Enabling method 2:
In the system settings, select
[Projection Settings] → [More
Image Correction Settings] →
[Keystone Correction Settings] →
[Displacement Auto Keystone
Correction]. When the system
detects device movement after
enabling, it will trigger the "Auto
Keystone Correction" feature.
Screen Alignment Assist
The device will automatically identify the screen within the projected image and adjust the four sides of the projected image to align with the edges of the screen.
Enabling method:
In the system settings, select [Projection Settings] → [Screen Alignment Assist], move the device according to the prompt on the page, and make the four sides of the projected image exceed the edges of the screen. Press the OK button to align the image with the screen.
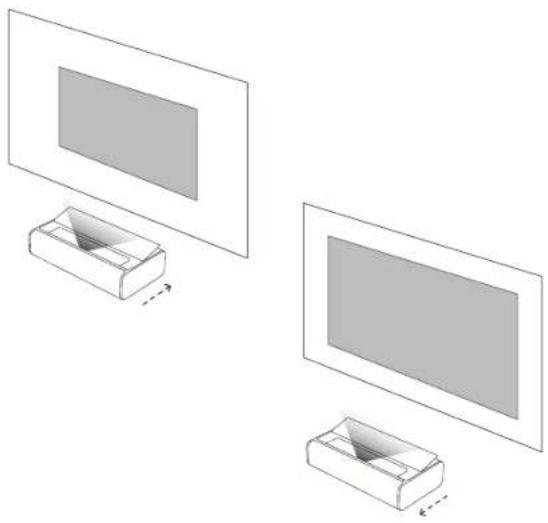
Wall Flatness Adaption
When the projection wall is not flat, the device can perform smart adoption to project with optimal image quality.
Enabling method:
In the system settings, select [Projection Settings] → [More Image Correction Settings] → [Wall Flatness Adaption] and follow the following steps to complete the adaption:
-
Use your mobile phone to scan the QR code on the page to open the photo upload page.
-
Take a photo of the projected image and upload it.
-
Select the display option after adaptation.
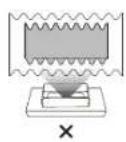
natural_image
Simple line drawing of a monitor with a base, no text or symbols present
Wall Color Adaption
The wall color adaptation feature can improve the color of the image projected by the device on a colored wall so that, the image appears as if it were projected on a while wall.
Enabling method:
In the system settings, select [Projection Settings] → [More Image Correction Settings] → [Wall Color Adaption].
*If you switch the device brightness or image mode or use the brightness adaption feature when the wall color adaption feature is enabled, the wall adaption feature will be disabled.
*The results of the wall color adaption feature may vary depending on the operating environment and wall color
*The Wall Color Adaption feature needs to be enabled in the system settings to take effect. Once activated, it can calibrate the picture based on wall colors with a color temperature ranging from 3000K to 15000K. However, the calibration effect may vary depending on the wall color. For optimal results, we recommend using it in dimly lit environments.
Using XGIMI AURA 2
1 Android TV Features
After the projector is connected to a wireless network, you can access Android TV online services and enjoy movies, music, and pictures. In addition to the pre-installed apps, you can also install other apps from the Google Play store and ask Google Assistant to help via various voice commands.
Press the Google Assistant button on your remote to search for movies and shows, get recommendations and answers, control smart home devices, and more
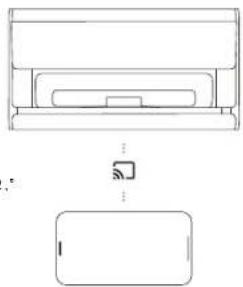
You can project photos, videos, and music from your smartphone or PC directly to your projector.
① Play a video clip with a smartphone or PC app that supports Chromecast built-in™, and then select 📋 on the screen.
② Select the target device, "XGIMI AURA 2," to begin projecting your smartphone content.
Note: Make sure the projector and your smartphone or PC are connected to the same network.
natural_image
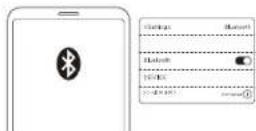
Simple line drawing of a device with top and front views, no text or symbols present② Bluetooth
Connect to a Bluetooth Speaker
① Open [System Settings] and choose [Remotes & Accessories] → [Add New Device].
② Search for and pair a Bluetooth speaker.
To switch back to the projector speaker while the Bluetooth speaker is connected, press and then choose [Sound Output] → [Internal Speaker].
Play Music via Bluetooth
Use smartphone Bluetooth settings to search for "XGIM1AURA 2" to pair with the device and play songs.
3 XGIMI Apps
XMusic Player
XMusic Player is a built-in music player for XGIMI AURA 2 and can play local music or music via Bluetooth. In the XMusic Player app, you can select different playback wallpapers to achieve an immersive listening experience.
If you need to turn off the projection frame during music playback, you can press the button and select "Display Off."
Bluetooth music
When your smartphone Bluetooth is connected to XGIMI AURA 2, the XMusic Player app will open automatically. You can also select 📊 on the homepage to go to the app list and open the app.
Local music
You can access an internal or external storage device using the built-in app File Manager. Open a music file, and it will play on the XMusic Player app by default.
Note: Some wallpapers may contain flashing lights and spectrums that may trigger epiceotic seizures. If you experience dizziness convulsions, or vision charges switch the wallpaper to "Classic CD" and seek medical attention.
File Manager
Use the File Manager app to view files on the device storage or external storage
① On the home page, click Apps to open the app list. Select File Manager, and then select the device storage or external storage device.
② Press and hold on to the "Settings" button to manage files. Press the "Menu" button for more actions.
Note. According to Android TV security requirements, you can only read files from external storage devices but cannot copy and paste these files.
4 System Upgrade
Check for the latest version and upgrade the system by selecting [Settings] → [Device Preferences] → [About] → [System Update].
5 Settings
At any interface, you can press the Ⓞ button on the remote control to quickly adjust settings on your device. To configure more settings, go to the [All Settings] page.
The main settings include:
Brightness
In the brightness settings, you can press the 📄 button to switch between levels 1 to 10 of the brightness mode. If you need higher brightness, you can enable level 10+ to enter Boost mode.
Image Mode
When watching content or movies through HDMI, you can choose different image modes for different content (such as movies, sports, TV, games) to enjoy the optimal watching experience.
Standard: For most daily usage scenarios
TV: For watching TV series
Movie: For watching movies
Sport: For watching sports events
Brilliant. For more vivid colors
Custom: Customize image parameters such as contrast, saturation, clarity, noise reduction and motion compensation levels
High Power: For higher brightness
Game: For playing video games with low latency
Sound Effect
XGMI AURA 2 offers you professional sound quality with DTS Studio Sound and Harman Kardon. Select different sound effects for different scenarios, such as movie, music, and sport, to enjoy the optimal sound experience.
6 Eco Mode
The device will automatically reduce the brightness when it does not detect any person. After some time, the screen turns off automatically. The screen turns back on automatically when someone is detected.
The default waiting duration before the screen is turned off is 15 minutes, and it can be adjusted according to personal preferences.
Correct use of the device: The device meets provisions of part 15 of FCC rule.
- Do not face lens into eyes because the strong projector light may cause injury to the eyes.
- Do not block the air inlet/outlet of the device in order to avoid damage to internal electronic devices arising from normal heat dissipation failure of the device.
- Do not wipe the lens directly with cleaning tools including paper and cloth in order to avoid damage to the lens. Please clean up the dust on the lens surface through clean air blowing.
- Do not wash the device with chemicals, detergents, or any liquid in order to prevent the circuit board from being corroded by rainwater, moisture, and mineral-containing liquids.
- Keep the device and its components and accessories out of reach of children.
- Make sure that the device is used in a dry and ventilated environment.
- Do not store the device in overheated or overcooled places, because extreme temperatures will shorten the life of electronic devices. Place and use the device in an environment of 0°C-40°C.
- Do not put the device into any heating equipment (such as dryer and microwave oven) for drying.
- Do not firmly extrude the device or place barriers on it or its back to avoid damage to the device.
- Do not throw, strike, or sharply vibrate the device to avoid damage to the internal circuit board.
- Do not try to disassemble and assemble the device yourself. If any issue occurs, please contact the after-sales service of XGIMI.
- Do not repair any product on your own. If the device or any component cannot work properly, consult the after-sales service of XGIMI in a timely manner or return it to the factory for repair.
- When dust accumulates on the chassis fabric, use a small brush or a miniature vacuum cleaner to remove it.
- During the movement of the auto lens cover, ensure that there are no obstacles so that the auto lens cover can be opened/closed properly.
- Do not place your hands around the lens cover during the movement of the auto lens cover or you may be pinched.
- If the auto lens cover cannot be opened/closed properly, check for obstructions around the lens cover and the slide rail. Remove the obstructions and try again.
- Do not forcibly push or pull the auto lens cover as it may be damaged.
CAUTION
Risk of fire or explosion if the battery is replaced by an incorrect type.
Replacement of a battery with an incorrect type that can defeat a
sal eguard (for example, in the case of some lithium battery types);
Disposal of a battery into hire of a hot oven, or mechanically crushing or cutting of a battery. that can result in an explosion;
Leaving a battery in an extremely high temperature surrounding
environment that can result in an explosion or the leakage of flammable liquid or gas;
A battery subjected to extremely low air pressure that may result in an
explosion or the leakage of flammable liquid or gas.
FCC Warning Important Precautions
Operation meets the following 2 conditions:
(1) The device will not cause harmful interference, and
(2) The device must accept any interference received, including interference that may result in accidental operations. User manual or operating instructions shall remind users that intentional or unintentional modification and replacement of radiators without explicit approval from the responsible compliance party may prevent the user from operating the device. If the manual is provided in a form other than paper, such as, provided in computer disk through the internet, then the information required in the section can be included in the manual in the alternative form under the premise that users can have access to the form information.
Note: The device has been tested to meet restrictions of part 15 of PCC rule on B-class digital device. These restrictions are aimed at providing the effective prevention of harmful interference in a residential installation. If installation and use are not made according to the instructions, the device will generate and radiate radio frequency energy, and may cause harmful interference to radio communication. However, there is no guarantee that interference will not occur in a particular installation. If the device does cause harmful interference to radio or television reception (determined by stopping and starting the device), it is suggested that users should attempt to correct the interference by use or more of the following measures:
– Reposition direction of receiving antenna.
— Increase the distance between the device and the receiver.
- Connect the device into an outlet on a circuit different from that to which the receiver is connected.
— Consult distributors or experienced radio/television technicians to seek help
- This device is acting as a slave and operating in the 2.4 GHz (2402-2480 MHz, 2412-2462 MHz) band or 5 GHz (5.180 GHz-5.240 GHz, 5.260 GHz-5.320 GHz, 5.500 GHz-5.700 GHz, 5.745 GHz-5.825 GHz) band.
WARNING
Please refer the information on exterior bottom enclosure for electrical and safety information before installing or operating the apparatus. The apparatus should be connected to a mains socket outlet with a protective earthing connection.
The mains plug or appliance coupler is used as disconnect device. The socket-outlet shall be installed near the equipment and shall be easily accessible.
CE Maintenance
- Use careful with the earphone maybe excessive sound pressure from earphones and headphones can cause hearing loss.
- The product shall only be connected to a USB interface of version USB2.0 (5VDC, 0.5A).
- EUT Operating temperature range: 0°C -40°C
- Power supply and ADP (rating): AC 100 V-240 V, 50/60 Hz 3.25 A
- To prevent possible damage to hearing, do not listen at high volume levels for long periods.
- The device complies with RF specifications when the device is used at a distance of 20 cm away from your body.

Declaration of Conformity
XGIMl Technology Co., Ltd. hereby declares that the radio equipment type WMD3B is in compliance with Directive 2014/53/EU. The full text of the EU declaration of conformity is available at the following internet address: https://global.xgimi.com/pages/product-support
This product is allowed to be used in some of EU member states. For example, the device can be used in the following Member States:
Operations in the 5.15-5.35 GHz band are restricted to indoor usage only.
This Frequency applies to the following Member States or the geographical area within a Member State where restrictions on putting into service or requirements for authorisation of use exist.
The appliance coupler is used as disconnect device, the disconnect device shall remain readily operable.
| BE | EL | LT | PT |
| BO | ES | LU | RO |
| CZ | FR | HU | SI |
| DK | HR | MT | SK |
| DE | IT | NL | FI |
| EE | CY | AT | SE |
| IE | IV | PL | UX |
ISED Warning
This device contains licence-exempt transmitter(s)/receiver(s) that comply with Innovation, Science and Economic Development (ISED) Canada's licence-exempt RSS(s). Operation is subject to the following two conditions:
(1) This device may not cause interference, and
(2) This device must accept any interference, including interference that may cause undesired operation of the device.
The device has been evaluated to meet general RF exposure requirement.
EAC RoHS CE UK CA
Radiation Exposure Statement
For remote control, this device complies with FCC and IC radiation exposure limits set forth for an uncontrolled environment.
The transmitter shall not be placed or operated in conjunction with any other antenna or transmitter.
For the laser projector, the device meets FCC and IC radiation exposure limits specified for uncontrolled environments. In the installation and operation of the device, the distance between radiator and body should be at least 20 cm.
Notes: 5150-5250 MHz frequency range is only for indoor use.
This Frequency applies to the following Member States or the geographical area within a Member State where restrictions on putting into service or requirements for authorisation of use exist.
| # | ||
| BE | HR | AT |
| BG | IT | PL |
| CZ | CY | PT |
| DK | LV | RO |
| DE | LT | SI |
| EE | LU | SK |
| IE | HU | FI |
| EL | MT | SE |
| ES | NL | UK |
| FR | ||
Disposal instructions for used products:

The product is designed and manufactured with high quality materials and components that are recyclable.

This symbol on the product indicates that it is protected under the Directive 2012/19/EU.

WARNING
- Do not open to avoid the risk of electric shock.
- All of internal check, please contact authorized customer service center.
- Possibly hazardous optical radiation emitted from this product. Do not stare at operating beam. May be harmful to the eye.
As with any bright source, do not stare into the direct beam, RG2 IEC 62471-5:2015
Complies with 21 CFR 1040.10 and 1040.11 except for conformance as a Risk Group 2 LIP as defined in IEC 62471-5:Ed. 1.0.
For more information see Laser Notice No. 57, dated May 8, 2019.
The Maximum Output Of Laser Radiation:0.39mw
wavelength1449-461nm, 635-647nm

RG2

IEC 60825-1:2014
CONSUMER LASER PRODUCT EN 30269.2021
* Only use attachments/accessories specified or provided by the manufacturer * Beware that this product may emit harmful light radiation
Wireless Specification
- Bluetooth transmitter frequency range: 2402 MHz -2480 MHz
- Bluetooth transmitter power: <10 dBm(EIRP)
• Wi-Fi network: IEEE 802.11 a/b/g/n/ac/ax(2.4GHz/5GHz)
* 2.4G Wi-Fi transmitter frequency range:2412 - 2472 MHz
• 2.4G Wi-Fi transmitter power: <20 dBm (EIRP)
• 5G Wi-Fi transmitter frequency range:5.15-5.35GHz,5.470-5.725GHz,5.725-5.850GHz - 5G Wi-Fi transmitter power: 5.15-5.25GHz < 23dBm (EIRP), 5.25-5.35GHz < 20dBm (EIRP), 5.470-5.725GHz < 20dBm (EIRP), 5.725-5.825GHz < 13.98dBm (EIRP)
• This product 24G millimeter-wave radar operates in the frequency range of
24.00GHz-24.25GHz and has a maximum transmit power of 100mW(EIRP)
Note: This power is for EU only.
natural_image
Line drawing of an Air Conditioner 2 air conditioner unit (no text or symbols on the diagram itself)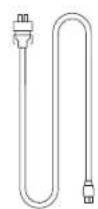
natural_image
Simple line drawing of a monitor and a box, no text or symbols present
natural_image
Simple line drawing of a monitor and a box, no text or symbols present

natural_image
Diagram showing two cylindrical objects connected by a dashed arrow, next to a vertical panel with labeled sections (no text or symbols present)②
natural_image
Diagram showing a device with a hand pressing a button on a surface, enclosed in an inset circle (no text or symbols present)
natural_image
Line drawing of a wall-mounted air conditioner unit with a power outlet (no text or symbols)natural_image
Line drawing of two hands holding a cylindrical object with a circular top and two small circular symbols on the side (no text or labels)natural_image
Empty rectangular frame with dashed border (no text or symbols)
https://global.xgimi.com/pages/product-support
natural_image
Line drawing of an air conditioner unit (XCIMI AURA 2) with no text or symbols on the diagram itself

natural_image
Diagram showing two cylindrical objects connected by a dashed arrow, next to a vertical panel with a horizontal bar (no text or symbols)natural_image
Diagram showing a hand inserting a plug into a device panel with an LCD display (no text or symbols present)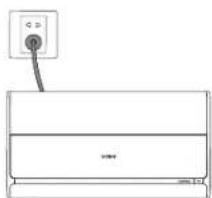
natural_image
Simple line drawing of a rectangular container with a vertical outlet and a horizontal line, no text or symbols present.natural_image
Line drawing of two hands holding a cylindrical object with a circular button and a small circle on the handle (no text or symbols)5 Ajuste del enfoque
natural_image
Line drawing of a hand pressing a button on a device (no text or symbols)natural_image
Empty rectangular frame with dashed border (no text or symbols)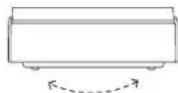
natural_image
Illustration of hands holding a small electronic device with a monitor and a laptop above (no text or symbols)Uso del XGIMI AURA 2
natural_image
Technical line drawing of a device with top and side views, no text or symbols present② Bluetooth
natural_image
Line drawing of an air conditioner unit labeled XCIMI AURA 2 (no other text or symbols)
Cordon électrique
Télécommande
natural_image
Simple line drawing of a monitor and a box, no text or symbols present
natural_image
Simple line drawing of a mechanical device with a triangular tip and base, no text or symbols present.natural_image
Simple line drawing of a monitor and a box, no text or symbols present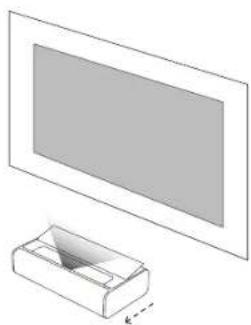
natural_image
Simple line drawing of a rectangular box with a flat panel on top, no text or symbols present.
natural_image
Empty rectangular frame with dashed border (no text or symbols)
natural_image
Illustration of hands holding a small electronic device with a monitor and a tray, above a computer monitor (no text or symbols visible)natural_image
Line drawing of a device with top and front views, showing a small inset image (no text or symbols)② Bluetooth
natural_image
Line drawing of a rectangular air conditioner unit (no text or symbols)XGIMI AURA 2
natural_image
Line drawing of a U-shaped tube connected to a remote control (no text or symbols)natural_image
Two simple line drawings of folded paper sheets, no text or symbols presentnatural_image
Empty rectangular frame with dashed border (no text or symbols)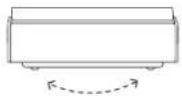
natural_image
Illustration of hands holding a small electronic device with a monitor and a laptop above it (no text or symbols)natural_image
Technical line drawing of a device with top and side views, no text or symbols present② Bluetooth
natural_image
Line drawing of an air conditioner unit (XCIMI AURA 2) with no text or symbols on the diagram itself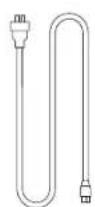
電源コード リモコン
取扱説明書 保証書
各部分の名称
前面 / 上面
natural_image
Simple line drawing of a monitor and a box, no text or symbols present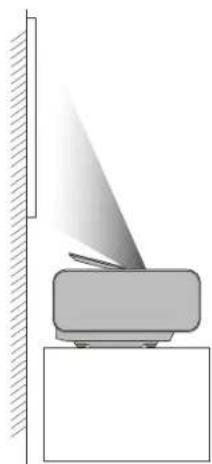
natural_image
Diagram of a mechanical device with a beam and angled tip, no text or symbols presentnatural_image
Simple line drawing of a monitor and a box, no text or symbols present
natural_image
Diagram showing a rectangular panel with a cutout into a box, no text or symbols present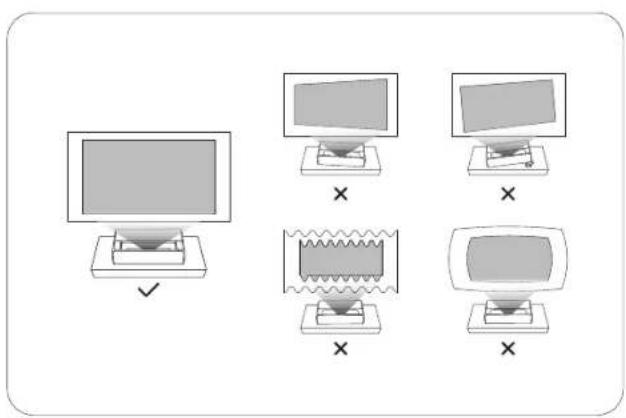
② リモコンの使用
①
初めて使用する場合は、電池ケ
一スを下にスライドして開き、
单4形电池を2本入れます。
②
natural_image
Line drawing of two hands holding a cylindrical object with a handle, no text or symbols present⑤ 画像のフォーカス調整
⑥ Android TVの設定
natural_image
Empty rectangular frame with dashed border (no text or symbols)
画面配置補佐
natural_image
Simple line drawing of a container with a funnel, no text or symbols present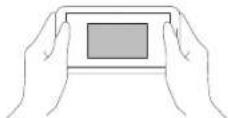
壁色自動適応
natural_image
Line drawing of an air conditioner unit (XCIMI AURA 2) with no text or symbols on the diagram itself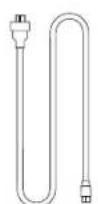
전원 코드 원격 제어
사용 설명서 보증 카드
참고:
natural_image
Diagram showing two cylindrical objects connected by a dashed line to a vertical panel (no text or symbols)②
natural_image
Diagram showing a device with a switch and control panel, no text or symbols present
natural_image
Simple line drawing of a rectangular box with a cable and a small circular component above it (no text or symbols)natural_image
Line drawing of two hands holding a remote control panel (no text or symbols)5 초점 조절하기
natural_image
Line drawing of a hand pressing a button on a remote control panel (no text or symbols)6 Android TV 설정하기
natural_image
Simple line drawing of a rectangular box with dashed outline and a separate rectangular box below showing a curved arrow (no text or symbols)화면 정렬 지원
natural_image
Illustration of hands holding a small electronic device with a monitor above it (no text or symbols visible)XGIMI AURA 2 사용
1 안드로이드 TV 기능
natural_image
Technical line drawing of a device with two views: top view showing internal components, bottom view showing a blank rectangular area (no text or symbols)② 블루투스
블루두스 스피커에 연결하기
https://global.xgimi.com/pages/product-support
Google. Android TV I Chromecast built-in to znaid towarowe Google LLC.
natural_image
Line drawing of an air conditioner unit (no text or symbols on the diagram itself)
natural_image
Pure diagram of a U-shaped tube with two connectors, labeled 'Przewód zasilający Pilot' below (no other text or symbols)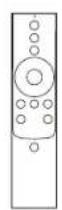
natural_image
Simple line drawing of a monitor and a box, no text or symbols present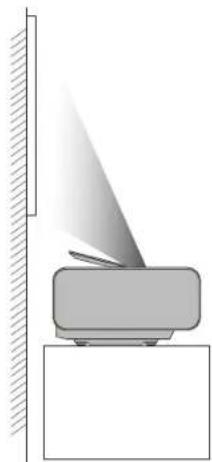
natural_image
Simple line drawing of a mechanical device with a triangular tip and base, no text or symbols present.natural_image
Simple line drawing of a monitor and a box, no text or symbols present
natural_image
Simple line drawing of a rectangular box with a flat panel on top, no text or symbols present.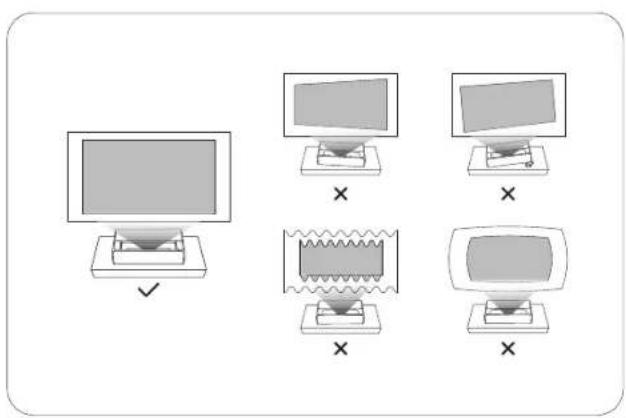
② Obsługa pilota
natural_image
Diagram showing a device with a switch connected to a panel, highlighting a pin and control buttons (no text or symbols present)
natural_image
Simple line drawing of a wall-mounted air conditioner unit with a cable inserted (no text or symbols)natural_image
Line drawing of two hands holding a cylindrical object with a circular end, no text or symbols presentnatural_image
Empty rectangular frame with dashed border (no text or symbols)
natural_image
Illustration of two hands holding a small electronic device with a monitor and a laptop above (no text or symbols)natural_image
Line drawing of an air conditioner unit (XCIMI AURA 2) with no text or symbols on the diagram itself

natural_image
Diagram showing two cylindrical objects connected by a dashed arrow, next to a vertical panel with a small rectangular object (no text or symbols)natural_image
Diagram showing a hand inserting a plug into a device panel with an icon, no text or symbols present
natural_image
Simple line drawing of a rectangular box with a cable and a small circular component above it (no text or symbols)natural_image
Line drawing of two hands holding a remote control panel (no text or symbols)⑤ Ajustar a focagem
natural_image
Hand pointing at a button on a remote control panel (no text or symbols visible)6 Configurar a Android TV
natural_image
Empty rectangular frame with dashed border (no text or symbols)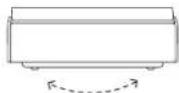
natural_image
Illustration of hands holding a small electronic device with a monitor and a laptop above it (no text or symbols)Utilizar o XGIMI AURA 2
natural_image
Technical line drawing of a device with top and side views, no text or symbols present② Bluetooth
natural_image
Line drawing of an air conditioner unit (XCIMI AURA 2) with no text or symbols on the diagram itself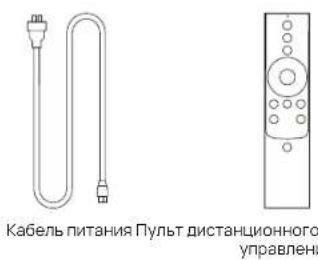
natural_image
Simple line drawing of a monitor and a box, no text or symbols present
natural_image
Simple line drawing of a mechanical device with a triangular tip and base, no text or symbols present.natural_image
Simple line drawing of a monitor and a box, no text or symbols present
natural_image
Simple line drawing of a monitor and a box with a small inset showing a folded paper (no text or symbols)

natural_image
Diagram showing two cylindrical objects connected by a dashed line to a vertical panel (no text or symbols)natural_image
Line drawing of two hands holding a cylindrical object with a circular top and base (no text or symbols)natural_image
Simple geometric diagram with a rectangle and dashed lines, no text or symbols present.
natural_image
Illustration of two hands holding a small electronic device with a monitor and a screen above it (no text or symbols)natural_image
Line drawing of an air conditioner unit labeled XCIMI AURA 2 (no other text or symbols)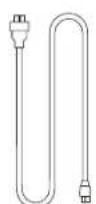
电源線 遥控器
指導手冊 保図卡
在招:
natural_image
Diagram showing two views of a rectangular object with internal shading, no text or symbols present

② 使用遥控器
①
natural_image
Diagram showing two cylindrical objects connected by a dashed arrow, next to a vertical panel with a handle (no text or symbols)natural_image
Diagram showing a hand pressing a button on a device panel, with no visible text or symbols.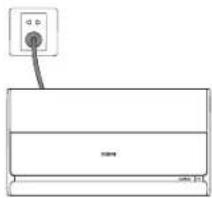
natural_image
Simple line drawing of a rectangular panel with a small electrical outlet above it (no text or symbols)② 將电源線插入電源插座。
natural_image
Line drawing of two hands holding a remote control panel (no text or symbols)5 調整對焦
natural_image
Line drawing of a hand pressing a button on a mobile phone (no text or symbols)6 設定 Android TV
natural_image
Empty rectangular frame with dashed border (no text or symbols)
畫面對齊輔助
natural_image
Simple line drawing of a monitor with a base, no text or symbols present
墙面颜色这愿
natural_image
Technical line drawing of a device with two views: top shows internal structure, bottom shows empty space (no text or symbols)② 蓝牙
連線至藍牙揚聲器
https://global.xgimi.com/pages/product-support
本產品允許在一些 EU 成員國使用。
例如,装置可在以下成员国使用:
.HDMI Licensing Administrator, Inc.
HDMI®
natural_image
Line drawing of an air conditioner unit (no text or symbols on the diagram itself)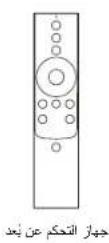
natural_image
Simple line drawing of a monitor and a box, no text or symbols presentnatural_image
Diagram of a mechanical device with a beam and angled tip, no text or symbols presentnatural_image
Line drawing of a hand pressing a button on a remote control panel (no text or symbols)لإستعمال في زر
.
natural_image
Diagram showing a cable inserted into an electronic device with a magnified inset highlighting the cable's connector (no text or symbols present)
natural_image
Line drawing of two hands holding a remote control device (no text or symbols)natural_image
Empty rectangular frame with dashed border (no text or symbols)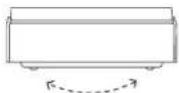
طريقة التمكين 1:
XGIMI AURA 2 : ي Simple thinking surveying XMusic Player
https://global.xgimi.com/pages/product-support

- Please read the Product Instructions carefully before using the product.
- About the Product Instructions (hereinafter referred to as "the Instructions")
- OVERVIEW
- GETTING STARTED
- ② Using the Remote Control
- Powering on the Device
- Pairing the Remote Control
- Adjusting the Focus
- Setting Up Android TV
- Adjusting the Projection Picture
- Auto Keystone Correction
- Screen Alignment Assist
- Wall Flatness Adaption
- Enabling method:
- Wall Color Adaption
- Using XGIMI AURA 2
- Android TV Features
- ② Bluetooth
- Connect to a Bluetooth Speaker
- Play Music via Bluetooth
- XGIMI Apps
- XMusic Player
- Bluetooth music
- Local music
- File Manager
- System Upgrade
- Settings
- Brightness
- Image Mode
- Sound Effect
- Eco Mode
- Correct use of the device: The device meets provisions of part 15 of FCC rule.
- CAUTION
- FCC Warning Important Precautions
- Operation meets the following 2 conditions:
- WARNING
- CE Maintenance
- Declaration of Conformity
- ISED Warning
- Radiation Exposure Statement
- Wireless Specification
- Ajuste del enfoque
- Uso del XGIMI AURA 2
- ② リモコンの使用
- ⑤ 画像のフォーカス調整
- ⑥ Android TVの設定
- 画面配置補佐
- 壁色自動適応
- 초점 조절하기
- Android TV 설정하기
- XGIMI AURA 2 사용
- 안드로이드 TV 기능
- ② 블루투스
- 블루두스 스피커에 연결하기
- ② Obsługa pilota
- ⑤ Ajustar a focagem
- Configurar a Android TV
- Utilizar o XGIMI AURA 2
- ② 使用遥控器
- 調整對焦
- 設定 Android TV
- 墙面颜色这愿
- ② 蓝牙
- 連線至藍牙揚聲器
Brand : XGIMI
Model : Aura 2
Category : Projector