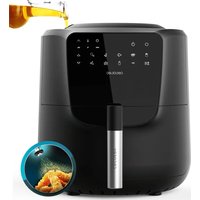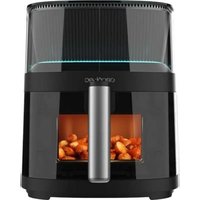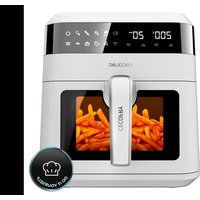
CleanFry 3000 ProFilter - Deep fryer CECOTEC - Free user manual and instructions
Find the device manual for free CleanFry 3000 ProFilter CECOTEC in PDF.


User questions about CleanFry 3000 ProFilter CECOTEC
0 question about this device. Answer the ones you know or ask your own.
Ask a new question about this device
Download the instructions for your Deep fryer in PDF format for free! Find your manual CleanFry 3000 ProFilter - CECOTEC and take your electronic device back in hand. On this page are published all the documents necessary for the use of your device. CleanFry 3000 ProFilter by CECOTEC.
USER MANUAL CleanFry 3000 ProFilter CECOTEC
natural_image
Exterior view of a modern stainless steel food grater with control panel and warning symbol (no readable text or symbols on main body)Safety instructions 6
-
Parts and components 37
-
Before use 37
-
Operation 38
-
Cleaning and maintenance 42
-
Technical specifications 43
-
Disposal of old electrical and electronic appliances 44
-
Technical support and warranty 44
-
Copyright 44
SOMMAIRE
Read these instructions thoroughly before using the device. Keep this instruction manual for future reference or new users.
- Ensure that the mains voltage matches the voltage specified on the device rating label and that the plug is earthed.
- Check the power cable regularly for visible damage. If the
power cable is damaged, it must be replaced by the Technical Support Service of Cecotec or similar qualified personnel to avoid risks.
- Always operate and store the appliance on a flat, stable surface.
- Make sure the product's handles are properly assembled and locked in place before use.
- The device is not intended to be operated by means of an external timer or separate remote-control system.
- Always make sure the product's inner pot is correctly installed before operating the device.
- This symbol means "Caution, Hot Surface". The

surfaces of the appliance become hot during and after operation. Do not touch while in use.
- Allow the appliance to cool at least 30 minutes before handling and use only heat-resistant tools. Do not use metal tools as they may become hot.
- Always unplug the appliance while not in use before cleaning and before carrying out maintenance tasks.
- The use of accessories or parts not provided or recommended by Cecotec may result in fire, electric shock, or injuries to persons and to the product.
- Do not let the cable hang over the edge of the working surface or worktop and prevent it from touching hot surfaces.
- Do not use outdoors, near a gas or electric hob, in heated ovens, or near open flames.
- Extreme caution must be used when moving a fryer containing hot oil or other hot liquids. Do not move the appliance during use.
- Remove excess surface moisture from foods prior to cooking to prevent heated oil from foaming out when food is added.
- Never leave the device unattended during use.
- A fire may occur if the appliance is covered or touches flammable material, including curtains, walls, and similar objects, when in operation. do not place anything on top of the appliance.
- Never pull on the power cord to disconnect the appliance from the wall outlet; instead, pull on the plug.
- Ensure the oil is within the maximum and minimum marks in the oil inner pot when in use.
- Never plug in the fryer before adding oil or fat, this could cause damage to the product and cut power off.
- This device must be placed in a stable surface/position with the handles placed to avoid any hot liquid spill.
- This device is designed for domestic use only and is not intended for bars, restaurants, farmhouses, hotels, motels, and offices. Do not use it for commercial or industrial purposes.
- Do not expose or immerse the cable, plug, electrical elements, or any other non-removable part of the appliance in water or any other liquid. Make sure your hands are dry before handling the plug or switching on the device.
- The appliance is not intended to be used by children under the age of 8. The appliance can be used by children over the age of 8, as long as they are given continuous supervision. This appliance can be used by people with reduced physical, sensory, or mental capabilities or lack of experience and knowledge, as long as they have been given supervision or instruction concerning the use of the appliance in a safe way and understand the hazards involved. Keep this appliance and its power cable out of reach of children under the age of 8. Cleaning and maintenance tasks should not be carried out by children.
- Supervise children to prevent them from playing with the appliance.
INSTRUCTIONS DE SÉCURITÉ
- Lid handle
- Viewing window
- Lid
- Reset button
- Safety switch
- Frying basket
- Basket handle
- Basket hook
- Oil tank
- Oil MIN/MAX indicator light
- Oil filter cover
- Oil valve
- Housing
- Oil filtration knob
- Clean-oil container
- Cap
- Power cable and plug
- Non-slip feet
- Side handles
- Heating element
- Control panel unit
- Silicon rubber sealing plate
- Temperature knob
- Ready indicator light (green)
- Power indicator light (blue)
- Grease filter (white)
- Charcoal odour filter
- Filter cover
Please note
The graphics in this manual are schematic representations and may not exactly match the appliance.
2. BEFORE USE
- This appliance is packaged in a way as to protect it during transport. Take the device out of its box and remove all packaging materials. You can keep the original box and other
ENGLISH
packaging elements in a safe place. This will help you prevent damage to the device when transporting it in the future. In case the original packaging is disposed of, make sure all packaging materials are recycled accordingly.
- Make sure all parts and components are included and in good conditions. If there is any piece missing or in bad conditions, contact the Official Cecotec Technical Support Service immediately.
- Always keep plastic bags, foils, and foam parts away from babies and children. Packaging material could block the airways.
- Clean the appliance thoroughly before using for the first time (see "Cleaning and maintenance" section).
- Make sure that the appliance is switched off and unplugged from the mains before cleaning.
- To clean it, open the lid and remove the basket. Wipe the inside of the lid, basket, and oil container with a damp cloth and dry thoroughly.
Warning:
- The appliance may produce an odour and emit smoke when switched on for the first time, as residues from the production process are eliminated. This is normal and does not indicate a defect or hazard. Ensure good ventilation.
- Place the appliance on a clean, flat, and heat-resistant surface.
- Make sure the basket handle (7) is locked in place in the frying basket (6). To lock the basket handle (7) in place, press the bars together and slide them between the slots. Once the ends of the bars are inserted in the bracket on the frying basket (6), push the handle (7) backwards. Do not assemble any other way.
- Make sure the oil tank (9) is secured in the correct position with the oil filter cover (11) and oil valve (12) on the same side than the oil filtration knob (14) (il. d).
- Ensure the oil filter cover (11) is in place inside the oil tank (9).
- Make sure the control panel unit (21) is placed on the connecting plate on the back of the housing (13). Ensure the grooves of the connecting plate are in the guides of the control panel unit (il. e).
3. OPERATION
Warning:
Your appliance is equipped with a safety switch (5) located on the control panel unit (21). The appliance will only operate when the control panel unit (21) is correctly installed.
Note:
- Before plugging it into the wall outlet, ensure that the electrical circuit is not overloaded with other appliances.
ENGLISH
- This appliance can be used for frying food such as French fries, chicken, or fish pieces (see "Recommended frying times and temperatures").
- Place the appliance on a clean, flat, and heat-resistant surface. When using the appliance on wooden surfaces, use a heat-resistant mat to protect wood from damages.
- Ensure a minimum distance around the appliance of at least 11 cm to other objects, cupboards, and walls.
- Ensure the clean-oil container (15) is assembled, empty and in place inside the appliance, the oil filtration knob (14) is on the lock position and the oil filter cover (11) is in place inside the oil tank (9).
- Pour suitable cooking oil into the oil tank (9) (il. f).
Warning:
Never refill the oil tank (9) during use or while hot. Always allow the appliance to cool down completely. Do not mix new oil with old oil.
- Spread a little oil on the inside of the view window (2) to prevent condensation.
- Place the lid (3) on the appliance.
- Turn the temperature knob to the 0 position.
- Insert the plug (17) into a wall outlet.
- Turn the temperature knob (23) to the required temperature (see Recommended frying times and temperatures). The power indicator light (25) will turn on to indicate the appliance is heating. Once the set temperature has been reached, the ready indicator light (24) will turn on.
- After oil has been preheated, remove the lid (3).
- Place the basket (6) on a clean, flat, and heat-resistant surface.
- Introduce the food to fry (6) in the frying basket (il. k). Do not overfill the basket (6) (il. l).
- Carefully lower the frying basket (6) into the oil tank (9) (ill. n). After immersing the frying basket (6), immediately place the lid (3) on the appliance to avoid hot oil from splashing.
- After the frying time has elapsed, remove the lid (3).
- Use the handle (7) to lift out the basket (6) and hang it onto the basket hook (8) onto the rim of the oil tank.
- Let the food drain in the basket (6) for a few seconds to remove excess oil and retain crispness.
- Use the handle (7) to carefully lift the basket (6) and pour the food onto a heat resistant dish that has been covered with a paper towel to collect remaining oil.
- Place the basket (6) on a clean, flat, and heat-resistant surface.
- After the cooking process is finished, turn the temperature knob (23) to the 0 position and remove the plug (17) from the wall outlet.
Warning:
- Never let the power cord (17) come in contact with the lid (3) or appliance housing (13)
ENGLISH
during use.
- Do not fill the frying basket (6) over halfway. Too much food can cause smoke and could cause the oil to overflow during operation.
- Food added to the appliance must be dry. If frying frozen foods such as French fries or chicken wings, remove all ice particles from the frozen foods prior to frying to prevent oil from overflowing.
- Ensure the lid (3) fits properly over the basket handle (6) and silicon rubber sealing plate (22).
Approximate time durations until set temperature is reached
| Temperature setting (°C/°F) Time (minutes) | |
| 130/265 7 | |
| 150/300 8 | |
| 170/340 10 | |
| 190/375 13 |
Recommended frying times and temperatures
Warning:
The frying times in the chart below are approximate and should be adjusted to suit your own tastes, different food quantities and food manufacturer's instructions.
| Food Temperature setting (°C/°F) Time (minutes) | ||
| Frozen chips 190/375 8-12 | ||
| Chips 190/375 8-10 | ||
| Meat strips 190/375 10-14 | ||
| Chicken wings 190/375 10-14 | ||
| Battered fish | 170/340 | 3-5 |
Cooking with oil
- Cooking with oil can enhance the flavour of food or spoil its taste. As with any other food component, freshness and correct handling of oil is the key to successful deep-frying results. The quality of oil decreases with use at high temperatures.
- Do not mix different cooking oils.
- Only use fresh and clean cooking oils.
- Suitable: pure corn oil, vegetable oils, soybean oil, sunflower oil, grape-seed oil, and peanut oil.
-
Not suitable: olive oil, walnut oil lard.
-
Regularly remove burnt food particles while frying. Always use utensils that are safe to immerse into hot oils and always wear oven mitts when removing any burnt food particles.
- After use and before storage, filter oil with the integrated filtration system (see Oil Filtration).
- Do not reuse oil that has been used to fry fish or other strongly flavoured food.
- Some meats, such as chicken wings, will release large amounts of liquids when frying, thus watering down the oil. Do not reuse this oil.
Avoiding burns
- Do not touch the lid (3) or appliance housing (13) during or after use (il. i). Only use the handles (1, 7, 19) provided.
- Always pay special attention when adding or removing accessories and food from the appliance.
- Never touch the lid (3) or appliance housing (13) when the appliance is plugged in and switched on or immediately after use. It is recommended to always use oven mitts.
Oil filtration
- Filter oil after each use. Store filtered oil properly (see Storing oil).
- Discard oils that have been used to cook certain food (see Cooking with oil).
- After switching off the appliance, wait at least 3 hours for oil to cool down. Hotter oil will take longer to reach a cool temperature.
- Filtering oil after each use will help prolong the life of the cooking oil, but it should still be discarded if the oil is deteriorated after multiple use. It is recommended to change oil, in normal use, every 10 uses.
- Ensure the clean-oil container (15) is assembled, empty and in place inside the appliance.
- Once oil has cooled down to room temperature, turn the oil filtration control knob (14) to the filter oil position (il. r). Oil will start dripping inside the clean-oil container (15). The oil filter will keep food residues from being transferred to the clean-oil container.
- When all oil has been filtered, turn the oil filtration knob (14) to the lock position if the container will remain inside the appliance.
- turn the oil filtration control knob (14) to unlock position if the container is to be removed from the appliance.
Emptying the clean-oil container
Filtered oil can be stored in a suitable container (see Storing oil) or re-used for frying a new batch of food (see Cooking with oil).
- Unscrew the cap (16) on top of the clean-oil container (15) (il. s).
- Slowly pour the clean-oil container (15) content into a suitable container or the oil tank (9), if required. Ensure the oil filtration control knob (14) is on unlock position before pouring oil into the oil tank (9).
- Tilt the clean-oil container (15) upwards (vertical position) gradually to avoid leaks from
ENGLISH
the side of the container.
- Screw the cap (16) back on top of the clean-oil container (15) (il. s).
- Insert the clean-oil container (15) back into the appliance and turn the oil filtration knob (14) to the lock position to secure the clean-oil container (15) in place.
Storing oil
- Do not store used cooking oil in the refrigerator.
- Choose a cool place that is not subject to sunlight.
- Generally, oil may be stored for a period of 3 months once the bottle is opened.
- Please observe the oil manufacturer's storage directions as well.
Tips
- Smaller quantities of food normally require a slightly shorter cooking time than larger quantities of food.
- To reduce cooking time, defrost food prior to cooking. It is recommended that some foods should not be thawed/defrosted prior to cooking, such as frozen fish or frozen French fries.
- It is recommended to use a meat thermometer to check the cooking progress.
- In the event of food flare-ups, do not remove the lid (3), do not remove the frying basket (6); turn the temperature knob (23) to the 0 position and unplug the appliance.
- When the food you are cooking requires shaking, it is recommended to use a timer set for half of the suggested cooking time. This way a bell will ring and remind you to shake the frying basket (6).
- It is recommended to only use nylon, heat-proof plastic, or wooden cooking utensils. Metal utensils may become hot and damage the non-stick surface. Always remove utensils from the appliance. Do not leave the appliance unattended while it is operating.
4. CLEANING AND MAINTENANCE
- A proper cleaning of the device after each use will lengthen its service life. The appliance contains no user serviceable parts and requires little maintenance.
- Always turn the temperature knob (23) to the 0 position before cleaning.
- Make sure no water enters the appliance housing (13) during cleaning.
- Do not attempt to remove the silicon rubber sealing plate (22).
- Ensure the clean-oil container (15) is in place, then turn the oil filtration knob (14) to filter oil position to empty the oil tank (9) (see Oil filtration).
- Place the basket (6) on a clean, flat, and heat-resistant surface.
- Remove the basket handle (7) from the frying basket (6).
- Remove the control panel unit (21) from the oil tank (9). Carefully clean the control panel unit (21) and heating element (21) with a damp cloth.
- Pull the oil filter cover (11) from the oil tank (9) and then remove the oil tank (9) from the
housing (13).
- Open the filter cover (28) and remove both charcoal and grease filters (26, 27) (il. u).
- Clean the housing (13) of the appliance with a wet cloth.
- Wash the lid (3), frying basket (6), basket handle (7), oil tank (9) and oil filter cover (11) with hot soapy water or in a dishwasher. Rinse and dry carefully.
- Dry all parts thoroughly after cleaning and before using the appliance again.
- If the clean-oil container (15) needs to be cleaned, ensure it is empty before attempting to clean. Wash with hot soapy water or in a dishwasher. Rinse and dry carefully.
- Clean the filters (26, 27) every 3 months or after every 12 uses with hot soapy water. Do not wash them in a dishwasher.
- Dry all parts and surfaces thoroughly before use. Make sure that all parts and surfaces are completely dry before connecting the appliance to a wall outlet. Even a small amount of water can cause severe splattering of hot oil.
Storage
- Before storage, always make sure the appliance is completely cool, clean, and dry.
- It is recommended to store the appliance in a dry place.
- Store the appliance on a stable shelf or in a cupboard. To avoid accidents, ensure that both the appliance and its power cord are beyond reach of children or pets.
5. TECHNICAL SPECIFICATIONS
Model: CleanFry 3000 ProFilter
Product reference: 03077
2000 W, 220-240 V\~50/60 Hz
The appliance power consumption when off is 0.4 W, following the guidelines of EN 50564:2011 and the European regulations 1275/2008/EC and 801/2013/EC. The appliance doesn't perform any function when connected to the mains. The switch/controller of the appliance was set to the Off position.
Technical specifications may change without prior notification to improve product quality.
Made in China | Designed in Spain
6. DISPOSAL OF OLD ELECTRICAL AND ELECTRONIC APPLIANCES
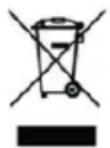
This symbol indicates that, according to the applicable regulations, the product and/or battery must be disposed of separately from household waste. When this product reaches the end of its shelf life, you should dispose of the cells/batteries/accumulators and take them to a collection point designated by the local authorities.
Consumers must contact their local authorities or retailer for information
concerning the correct disposal of old appliances and/or their batteries.
Compliance with the above guidelines will help protecting the environment.
7. TECHNICAL SUPPORT AND WARRANTY
Cecotec shall be liable to the end user or consumer for any lack of conformity that exists at the time of delivery of the product under the terms, conditions, and deadlines established by the applicable regulations.
It is recommended that repairs be carried out by qualified personnel.
If at any moment you detect any problem with your product or have any doubt, do not hesitate to contact the official Cecotec Technical Support Service at +34 963 210 728.
8. COPYRIGHT
The intellectual property rights over the texts in this manual belong to CECOTEC INNOVACIONES, S.L. All rights reserved. The contents of this publication may not, in whole or in part, be reproduced, stored in a retrieval system, transmitted, or distributed by any means (electronic, mechanical, photocopying, recording or similar) without the prior authorization of CECOTEC INNOVACIONES, S.L.
1. PIÈCES ET COMPOSANTS
Img. 1
Model: CleanFry 3000 ProFilter
Model: CleanFry 3000 ProFilter
Model: CleanFry 3000 ProFilter
Reference produktu: 03077
2000 W, 220-240 V\~50/60 Hz
text_image
Exploded view diagram of a microwave oven with numbered parts for identificationFig./Img./Abb./Afb./Rys.1
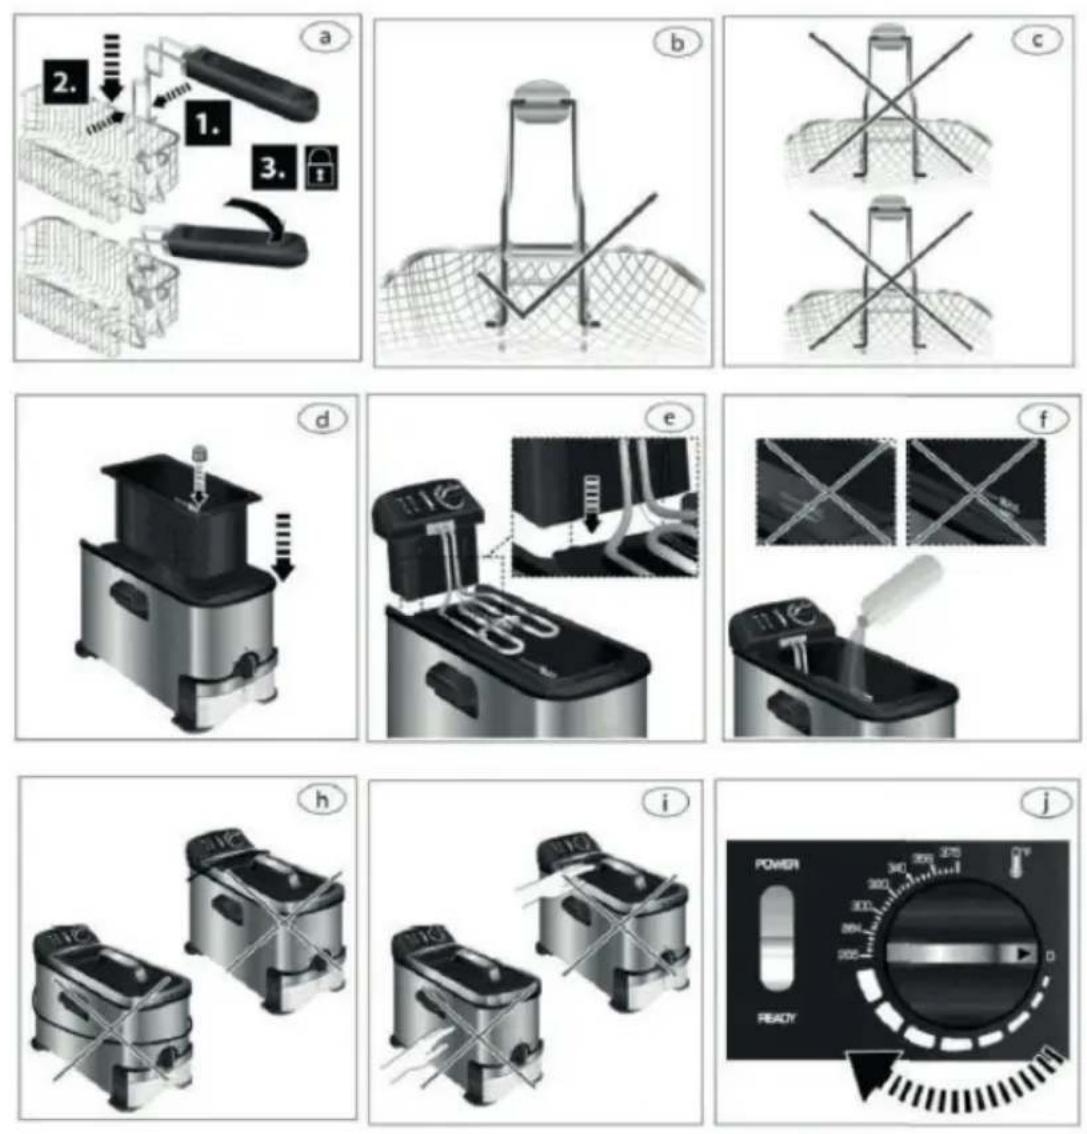
Fig./Img./Abb./Afb./Rys.2
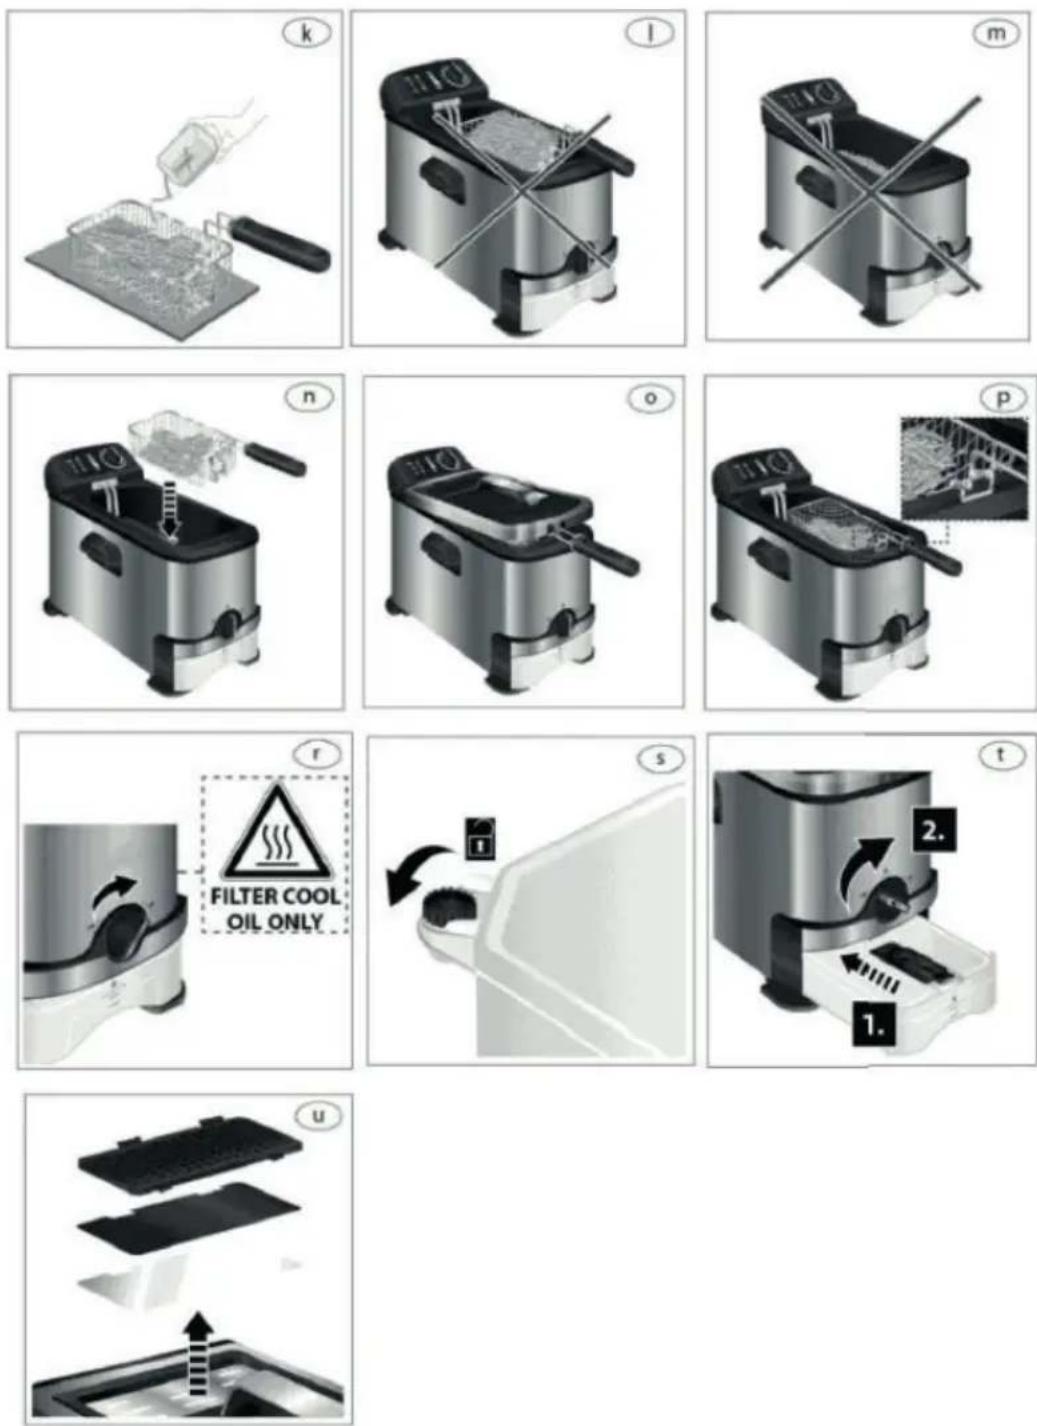
Fig./Img./Abb./Afb./Rys. 3
www.cecotec.es