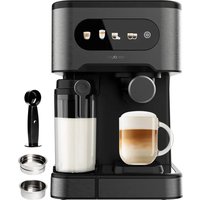
Power Espresso 20 Professionale - Coffee machine CECOTEC - Free user manual and instructions
Find the device manual for free Power Espresso 20 Professionale CECOTEC in PDF.


User questions about Power Espresso 20 Professionale CECOTEC
0 question about this device. Answer the ones you know or ask your own.
Ask a new question about this device
Download the instructions for your Coffee machine in PDF format for free! Find your manual Power Espresso 20 Professionale - CECOTEC and take your electronic device back in hand. On this page are published all the documents necessary for the use of your device. Power Espresso 20 Professionale by CECOTEC.
USER MANUAL Power Espresso 20 Professionale CECOTEC
Cafetera Express / Espresso coffee maker
natural_image
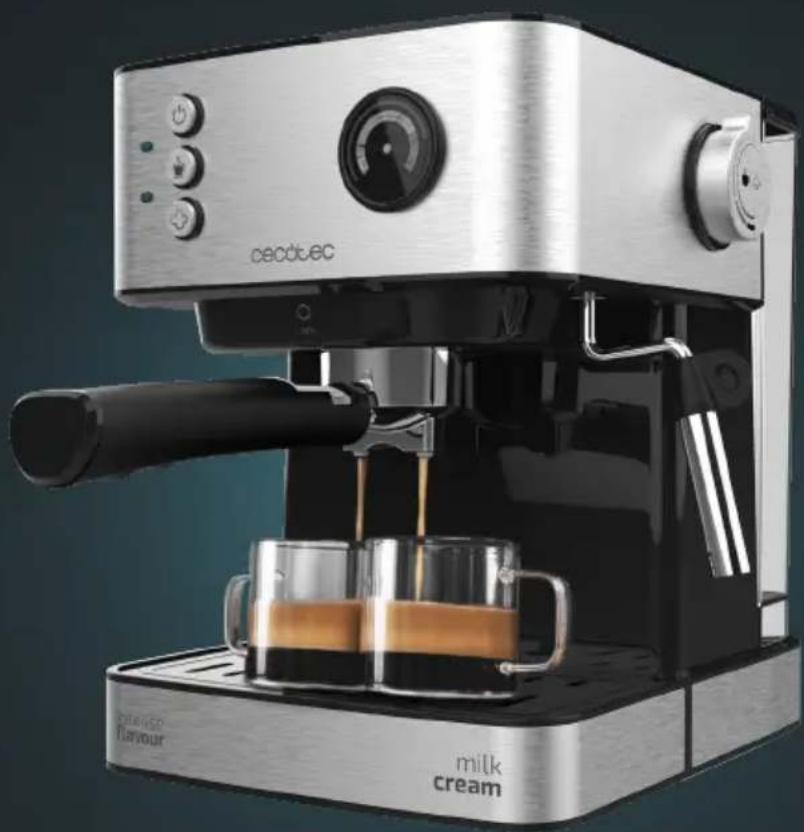
Exterior view of a modern espresso machine with a milk cream cup and control panel (no visible text or symbols on the device itself)Safety instructions 6
- Parts and components 35
- Before use 35
- Operation 36
- Cleaning and maintenance 38
- Troubleshooting 39
- Technical specifications 41
- Disposal of old electrical and electronic appliances 41
- Technical support and warranty 41
- Copyright 42
SOMMAIRE
Read these instructions thoroughly before using the device. Keep this instruction manual for future reference or new users.
- All safety instructions must be closely followed when using the appliance.
- This appliance can be used by children aged 8 years and above and persons with reduced physical, sensory, or mental capabilities or lack of experience and knowledge if they have been given supervision or instruction concerning use of the appliance in a safe way and understand the hazards involved. Children must not play with the appliance. Cleaning and user maintenance should not be carried out by children unless they are over 8 years old and are under supervision. Keep this appliance and its power cable out of
reach of children under the age of 8.
- Check the power cable regularly for visible damage. If the power cable is damaged, it must be replaced by the Technical Support Service of Cecotec or similar qualified personnel to avoid risks.
- This symbol means "Caution, Hot Surface". Accessible surfaces are likely to heat up during use.
- This appliance is designed for domestic use only and is not intended for bars, restaurants, farmhouses, hotels, motels, and offices.
- WARNING: the filling opening must not be opened during operation.
- WARNING: take precautions to avoid spillage of liquids on the cable.
- WARNING: incorrect or improper use can be dangerous for the user and damage the appliance. Use the appliance only for the purposes described in this manual. The surface of the heating element is subject to residual heat after use.
- Ensure that the mains voltage matches the voltage specified on the appliance rating label and that the plug is earthed.
- Do not immerse the cable, plug, or any other non-removable part of the device in water or any other liquid or expose electrical connections to water. Make sure your hands are dry before handling the plug or switching on the device.
- Do not twist, bend, pull, or damage the power cable. Protect it from sharp edges and heat sources. Do not allow the cable to touch hot surfaces. Do not let the cable hang over the edge of the working surface or worktop.
- Turn off and unplug the appliance from the mains supply when not in use and before cleaning it. Pull from the plug, not the cable, to disconnect it from the outlet.
- Place the appliance on a dry, stable, flat, heat-
resistant surface.
- Do not use the appliance under the following circumstances:
- On or near a gas or electric hob, in heated ovens, or near open flames.
- On soft surfaces (such as carpets) or where it may tip over during use.
- Outdoors or in areas with high humidity levels.
- Do not wash the appliance in dishwashers.
- Maintain a minimum safety distance of 20 cm to the sides and 30 cm on top of the appliance when in operation.
- Do not place the appliance under cabinets or kitchen furniture, as the steam emitted may damage them.
- Do not overfill the portafilter.
- Do not operate the appliance without water.
- Never use the appliance without a suitable container below the coffee spout and milk tank spout.
- Supervise children to prevent them from playing with the appliance. Close supervision is necessary when the appliance is being used by or near children.
- Note: this appliance has undergone a quality control previous to its commercialisation with the aim of ensuring its correct operation. After the quality control testing, the appliance is cleaned thoroughly, therefore, although it is unlikely to occur, there may still be some water inside.
INSTRUCTIONS DE SÉCURITÉ
- Power button
- Coffee button
- Steam button
- Red indicator light
- Green indicator light
- Steam knob
- Water tank cover
- Water tank
- Cup-warming tray
- Pressure gauge
- Steamer
- Milk frother tube
- Main body
- Cup/mug tray
- Detachable drip tray
- Bottom cover
- Metal filter holder
- Portafilter
-
Fixing tab
-
Stainless-steel mesh filter for 1 coffee
-
Measuring spoon with tamper
-
Stainless-steel mesh filter for 2 coffees
NOTE:
the graphics in this manual are schematic representations and may not exactly match the device.
2. BEFORE USE
- This appliance is packaged in a way as to protect it during transport. Take the device out of its box and remove all packaging materials. You can keep the original box and other packaging elements in a safe place. This will help you prevent damage to the device when transporting it in the future. In case the original packaging is disposed of, make sure all packaging materials are recycled accordingly.
- Make sure all parts and components are included and in good conditions. If there is any
ENGLISH
piece missing or in bad conditions, contact the Official Cecotec Technical Support Service immediately.
Box content:
- Coffee machine
- Stainless-steel mesh filter for 1 coffee
- Stainless-steel mesh filter for 2 coffees
- Measuring spoon with tamper
- Portafilter
- Instruction manual
First cleaning
Warning: clean the coffee machine before using it for the first time to remove all possible manufacturing residues.
- Pour water into the water tank, do not exceed the "MAX" mark, and place the water tank in its correct position.
- Place any of the stainless-steel mesh filters in the filter holder (without coffee).
- Place a cup on the cup/mug tray. Make sure the steam knob is turned completely clockwise.
- Connect the power cord of the coffee machine to the power supply and press the power button. The red indicator light will light up indicating the machine is preheating.
- Press the coffee button for the pump to start pumping water. To stop this process, press it again.
- The red and green indicator lights will light up when the preheating process is finished.
- Press the coffee button for the machine to dispense water.
- Once the machine has finished dispensing water, pour all the remaining water away and clean all the containers thoroughly. Now, the machine is ready to be used.
Warning: when activating the pump for the first time, the appliance may produce some noise which will disappear after 20 seconds. This is because the machine is releasing air and is completely normal, it does not affect the operation.
3. OPERATION
Preheating
- It is suggested to preheat the appliance, including the filter holder, filter, and cup, so the coffee flavour is not affected by cold parts.
-
Remove the detachable tank and open the tank cover to fill it with the desired amount of water. Do not exceed the "MAX" mark in the tank. Place the tank correctly in the coffee machine.
-
Insert a stainless-steel mesh filter into the filter holder, pull the fixing tab backwards,
ENGLISH
ensure that the filter holder tube is aligned with the groove in the appliance, insert the filter holder into the appliance, and finally release the fixing tab.
- Fix the portafilter firmly in the coffee machine by turning it counterclockwise to the Lock position.
- Place a cup on the cup/mug tray.
- Connect the machine to the power supply and make sure the steam knob is completely turned clockwise.
- Press the power button. The red indicator light will light up indicating the machine is preheating.
- Press the coffee button again to pump water, then press it once more to stop the function. This process will pump water from the tank to the boiler.
Espresso
- Remove the filter holder by turning it clockwise. Add ground coffee to the stainless-steel filter with the measuring spoon (one spoon of ground coffee can make about a cup of coffee), then use the other end of the measuring spoon to press down the coffee.
- Pull the fixing tab backwards, make sure the filter holder is aligned with the groove in the appliance, insert the filter holder into the appliance, and release the fixing tab. Fix it firmly in the coffee machine by turning it clockwise to the "lock" position.
- Pour out the hot water from the cup and place the hot cup on the cup tray.
- Press the power button: the red indicator light will turn on. Once the red and green light indicators turn steady on, press the coffee button. The coffee machine will start brewing coffee.
- Press the power button to stop when you have obtained the desired amount of coffee. The indicator lights will turn off and the machine will stop running.
Warning: do not leave the coffee machine unattended during operation as some of the steps require manual operation.
Milk froth/Cappuccino
- Prepare an espresso in a slightly longer glass. Make sure the steam knob is turned completely clockwise.
- Press the steam button and wait until the red and green indicators light up steady.
- Fill a jug with about 100 grams of milk for each cappuccino to be prepared.
- Turn the steam knob slowly counterclockwise: the milk frother will start producing steam.
- Insert the milk frother into the milk by about 2 cm, froth milk while you move the container up and down.
- Once you have frothed milk to your liking, turn the steam knob slowly all the way clockwise.
- Pour the frothed milk into the previously brewed espresso. Sweeten to taste and if desired, sprinkle the froth with a little cocoa powder.
- To switch off the machine, press the power button.
ENGLISH
Note:
- It is recommended to use whole milk for best-quality results.
- Use a jug of 65-75 mm diameter and sufficiently tall. The volume of milk will be doubled when it is frothed.
- For optimal milk froth results, use cold and whole milk.
- Do not turn the steam knob quickly, milk could spill and cause burns.
- Clean the steam outlet with a wet sponge immediately after use.
Warning: clean the steam outlet with a wet sponge immediately after use. Be careful not to burn yourself! Then, remove the steamer and clean the duct interior part. It is also recommended to emit steam again to clean possible milk remaining inside the tube.
Before brewing another coffee, allow the machine to rest for 5 minutes.
Heating up drinks
- The steamer (without the milk frother) can be used to heat up beverages like hot chocolate, water, or tea.
- Turn the steam knob completely counterclockwise and press the steam button, wait until the red and green indicator lights turn on steady.
- Remove the milk frother from the steamer.
- Insert the steamer tube into the liquid to be heated. Turn the steam knob gently anticlockwise to start producing steam.
- When the required temperature is reached, turn the steam knob to the off position.
- Press the steam button to stop steam from being released.
Note: the machine will automatically turn off after 25 minutes of no operation unless the power button is pressed.
4. CLEANING AND MAINTENANCE
- Turn the appliance off, unplug it from the power supply and allow it to cool down before cleaning or repairing it.
- Use a soft, damp cloth to clean the surface of the device.
- Do not use corrosive or abrasive cleaning agents or sponges when cleaning the machine as they may damage the surface.
- Do not immerse the appliance or any of its non-removable parts in water.
- Clean the water tank, drip tray, cup/mug tray, and other removable parts periodically and dry them before re-installing them.
- Note: to clean the filter and filter holder, turn the filter holder counterclockwise, throw away all coffee residue, and rinse with water.
Cleaning mineral deposits
- Fill up the water tank with water and a descaler following the proportions indicated by the descaler manufacturer.
- Insert the portafilter.
- Press the power button and wait until the red and green indicators light up.
- Press the coffee button for the machine to dispense 2 cups of water. Then, press the coffee button again to close the pump and wait for 5 seconds.
- Place the jug under the steamer and turn the steam knob completely counterclockwise (at least 135°).
- Press the coffee button for the machine to dispense 2 cups of water. Then, press the coffee button again to close the pump and wait for 5 seconds.
- Restart the coffee machine and repeat these steps until there is no more water left in the tank (at least 3 times).
- Brew a coffee with tap water up to the MAX mark, without coffee powder, and repeat the before steps until there is no more water in the tank (at least 3 times).
5. TROUBLESHOOTING
| Problem Possible cause | use Possible solution | |
| Coffee does not come out | No water in tank. Add water. | |
| Coffee grind is too fine. Grind medium-ground coffee. | ||
| There is too much coffee in the filter. | Fill filter with less coffee. | |
| The coffee machine is not switched on or connected. | Connect the unit to a power supply and turn it on. | |
| Coffee has been tamped/ compressed too much. | Refill the filter basket with coffee, do not tamp too much. | |
| Too little coffee or too little pressure | Mineral deposits in the coffee machine. | Perform a complete descaling. |
| No water/steam There | There is no water in the water tank, or it is not installed properly. | Fill the water tank and switch on the machine. |
| The machine is not preheated. | The machine needs to be preheated before coffee can be brewed. Once the machine is preheated, the indicator light will turn on. |
ENGLISH
| Coffee comes out around the edge of the portafilter | Portafilter not rotated to full lock position. | Rotate filter holder to full lock position. |
| There is ground coffee on the edge of the filter. | Wipe off the rim. | |
| There is too much coffee in the filter. | Fill with less coffee. | |
| Coffee is too light Coffee is not enough ground, or the grounds are not pressed enough. | Replace the coffee powder and flatten it with the measuring spoon with tamper. | |
| No steam Te steamer is blocked. Use a fine wire to feed it through the duct and clean the steamer after each use. | ||
| Coffee is not brewed well | Too much or too little coffee powder. | 1 cup of coffee requires 1 coffee spoon and must be pressed down. Coffee powder cannot be too thick or too fine. Too thick coffee cannot be completely extracted, too fine will affect the amount and quality of coffee. |
| The coffee machine does not froth milk well | The milk used is not suitable for this function. | Use whole milk. |
| The steam function was enabled before the indicator light turned on. | Steam can only be released after the steam indicator light changes from flashing to steady light. | |
6. TECHNICAL SPECIFICATIONS
Model: Power Espresso 20 Professionale
Product reference: 01556
Power: 850 W
Voltage and frequency: 220-240 V\~, 50 Hz
Technical specifications may change without prior notification to improve product quality.
Made in China | Designed in Spain
7. DISPOSAL OF OLD ELECTRICAL AND ELECTRONIC APPLIANCES
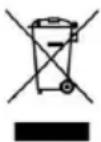
This symbol indicates that, according to the applicable regulations, the appliance and/or batteries must be disposed of separately from household waste. When this product reaches the end of its shelf life, you should dispose of the batteries/accumulators and take them to a collection point designated by the local authorities.
Consumers must contact their local authorities or retailer for information concerning the correct disposal of old appliances and/or their batteries.
Compliance with the above guidelines will help protecting the environment.
8. TECHNICAL SUPPORT AND WARRANTY
Cecotec shall be liable to the end user or consumer for any lack of conformity that exists at the time of delivery of the product under the terms, conditions, and deadlines established by the applicable regulations.
It is recommended that repairs be carried out by qualified personnel.
If at any moment you detect any problem with your product or have any doubt, do not hesitate to contact the official Cecotec Technical Support Service at +34 963 210 728.
ENGLISH
9. COPYRIGHT
The intellectual property rights over the texts in this manual belong to CECOTEC INNOVACIONES, S.L. All rights reserved. The contents of this publication may not, in whole or in part, be reproduced, stored in a retrieval system, transmitted, or distributed by any means (electronic, mechanical, photocopying, recording, or similar) without the prior authorization of CECOTEC INNOVACIONES, S.L.
1. PIÈCES ET COMPOSANTS
Img. 1.
5. PROBLEEMOPLOSSING
text_image
Technical diagram of a coffee maker with numbered parts for identification and assembly reference.Fig./Img./Abb./Afb./Rys./Obr.1
www.cecotec.es