
MM 3012 - Mincer AMICA - Free user manual and instructions
Find the device manual for free MM 3012 AMICA in PDF.

| Brand | Amica |
| Model | MM 3012 |
| Category | Meat grinder |
| Usage | Household |
| Rated voltage | 220-240 V ~ 50 Hz |
| Rated power | 1000 W |
| Features | Meat grinding, sausage making, kebbeh preparation |
| Included accessories | Screw, blade, grinding plates (coarse, medium, fine), sausage stuffing tubes (large and small), kebbeh attachments, pusher, food tray |
| Controls | On/off/reverse button, unlock button |
| Safety | Automatic shut-off in case of thermal overload, protection against no-load operation |
| Maintenance | Hand wash removable parts with a soft brush; do not wash the motor with water |
| Blade material | Metal (likely stainless steel) |
| Capacity | Not specified; do not overload |
| Maximum operating time | 10 minutes continuous |
| Precautions | Do not grind bones, nuts, frozen meat; use the pusher, not fingers |
| Warranty | Incorrect use voids warranty |
Frequently Asked Questions - MM 3012 AMICA
User questions about MM 3012 AMICA
0 question about this device. Answer the ones you know or ask your own.
Ask a new question about this device
Download the instructions for your Mincer in PDF format for free! Find your manual MM 3012 - AMICA and take your electronic device back in hand. On this page are published all the documents necessary for the use of your device. MM 3012 by AMICA.
USER MANUAL MM 3012 AMICA
natural_image
Black and white photo of a Amica MAX 2000W electrician (no visible text or symbols on the device body)PL INSTRUKCJA OBSŁUGI 6
EN USER MANUAL 10
CS NÁVOD K OBSLUZE 14
SK NÁVOD NA OBSLUHU 18
flowchart
graph TD
    A["Step 1: Cutting a kitchen knife"] --> B["Step 2: Disassembly with parts labeled ①, ②, ③"]
    B --> C["Step 3: Disassembly with parts labeled ①, ②, ③"]
    C --> D["Step 4: Disassembly with parts labeled ①, ②, ③"]
    D --> E["Step 5: Disassembly with parts labeled ①, ②, ③"]
    E --> F["Step 6: Disassembly with parts labeled ①, ②, ③"]
    F --> G["Step 7: Disassembly with parts labeled ①, ②, ③"]
    G --> H["Step 8: Disassembly with parts labeled ①, ②, ③"]
flowchart
graph TD
    A["Step 1: Grimmer with feed and waste"] --> B["Step 2: Stacking and feeding"]
    B --> C["Step 3: Stacking and feeding with waste"]
    C --> D["Step 4: Stacking and feeding with waste"]
    D --> E["Step 5: Stacking and feeding with waste"]
    E --> F["Step 6: Stacking and feeding with waste"]
    F --> G["Step 7: Stacking and feeding with waste"]
flowchart
graph LR
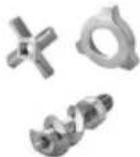
A["Implant with + symbol"] --> B["Dissection with screw and nut"]
B --> C["Dissection with + symbol"]
natural_image
Line drawing of a portable device with a cable and plug, no text or symbols presentWSKAZÓWKI DÓTYCZĄCE BEZ-PIECZEŃSTWA UŻYTKOWANIA
SAFETY INSTRUCTIONS FOR USE
To avoid the risk of serious injury when using a meat grinder, follow basic safety rules, including the following.
BEFORE OPERATING THE MEAT GRINDER, CAREFULLY REVIEW THE INSTRUCTIONS, NOTES, AND WARNINGS.
• Always unplug the appliance from the power supply when leaving it unattended and before installing or removing accessories and before cleaning.
- Children are not allowed to operate this appliance. Keep the appliance and the power cord out of the reach of children.
- Be careful when handling cutting blades and when cleaning.
- Do not put your fingers into the metal body while the appliance is operating.
- Before changing accessories turn off the appliance and unplug it from the power supply.
- If the power cord is damaged it must be replaced to prevent danger. The power cord must be replaced by a service authorised by the manufacturer or by another suitably qualified person.
- Do not use your fingers or any other object (e.g. a spoon) to push ingredients into the hopper while the appliance is operating. Only use the pusher to feed the ingredients
- Before inserting the auger, cutting blade and grinding plate into the appliance body, make sure the hopper is completely assembled and locked.
- This appliance meets the standards of EC Regulation 1935/2004 on materials and products intended for contact with food.
- This appliance can be used by children aged 8 years and older or by persons with physical, mental or sensory handicaps, or by those who are inexperienced or unfamiliar with the appliance, provided they are supervised or have been instructed how to safely use the appliance and are familiar with risks associated with the use of the appliance. Ensure that children do not play with the appliance. Do not allow children to clean and maintain the appliance unless they are 8 years or older and are supervised by a competent person.
- Pull the plug from the wall outlet before replacing accessories.
- Comply with local regulations and dispose of non-functioning electrical appliances at designated waste collection points. The packaging material is recyclable. Dispose of the packaging in an environmentally friendly manner and make it available for recycling collection.
• Take caution when clean-
ing the attachments. After cleaning the cutting blade and grinding plate, apply cooking oil to the surface to prevent rust.
- Before removing the grinding attachment, make sure the meat grinder is turned off. Ensure the appliance is correctly assembled before connecting it to the power socket.
- Press the On / Off button to turn off the appliance.
- Do not operate the appliance for more than 10 minutes continuously.
- Before you put the plug into the wall outlet, make sure your hands are dry.
- Not following warnings and safe use instructions can void the warranty and pose a risk of serious injury.
- If the meat grinder's fastening ring becomes loose, stop working and disconnect the appliance from the power supply.
- If the retaining ring is not securely attached, do not operate the appliance.
- SAVE THESE INSTRUCTIONS. THIS APPLIANCE IS FOR HOUSEHOLD USE ONLY.
Electrical requirements:
Make sure that the voltage indicated on the nameplate corresponds to that of your home electrical mains. Alternating current must be used, typically marked \~.
In accordance with European Directive 2012/19/EU and Polish legislation regarding used electrical and electronic goods, this appliance is marked with the symbol of the crossed-out waste container. This marking indicates that the appliance must not be disposed of together with other household waste after it has been used.
The user is obliged to hand it over to waste collection centre collect-
ing used electrical and electronic goods. The collectors, including local collection points, shops and local authority departments provide recycling schemes.
Proper handling of used electrical and electronic goods helps avoid environmental and health hazards resulting from the presence of dangerous components and the inappropriate storage and processing of such goods.
SPECIFICATION:
Model - MM 3011/MM 4011
Rated voltage - AC 220-240V \~ 50Hz
Rated power - 1000 W
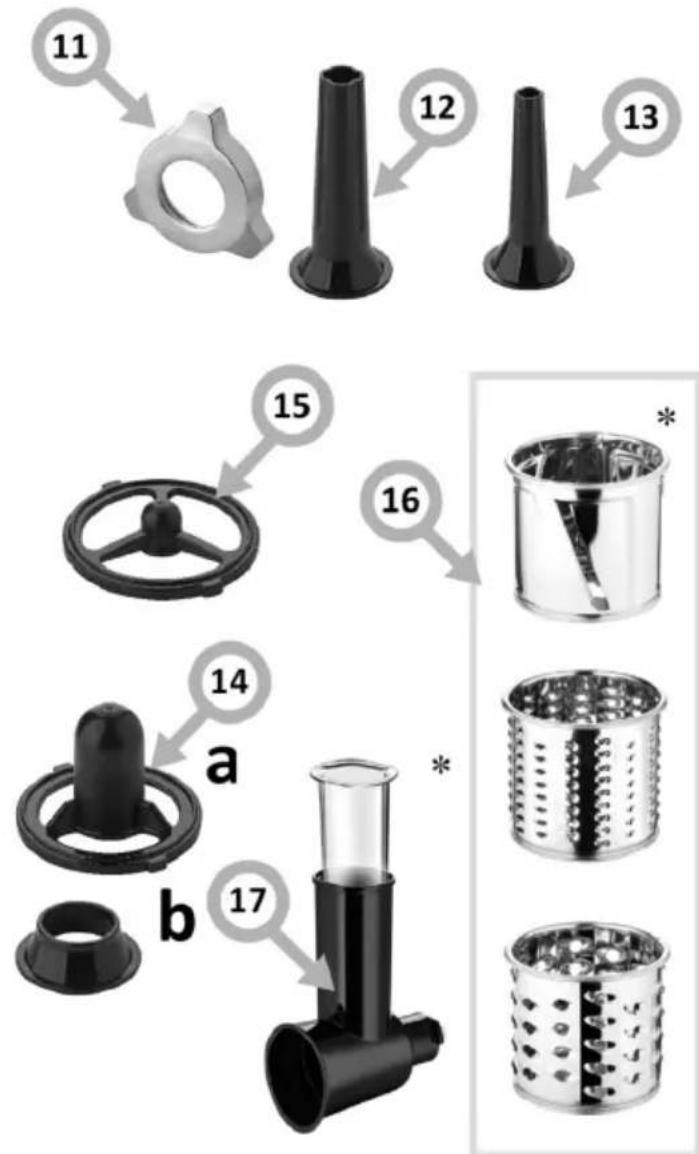
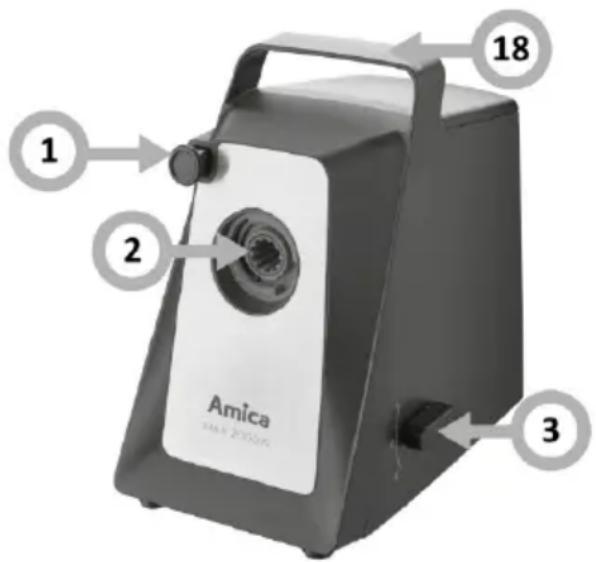
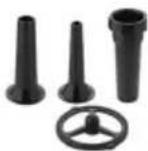
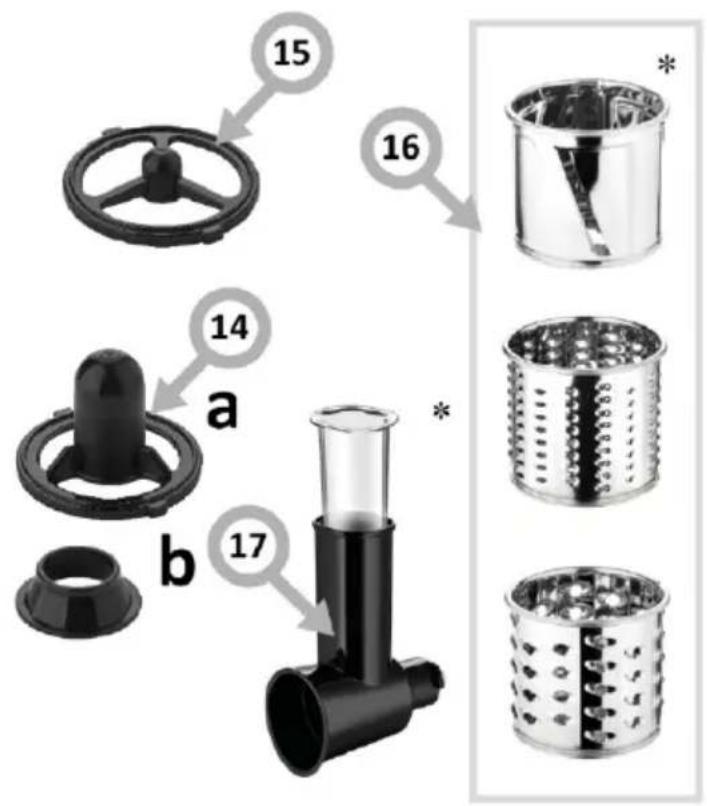
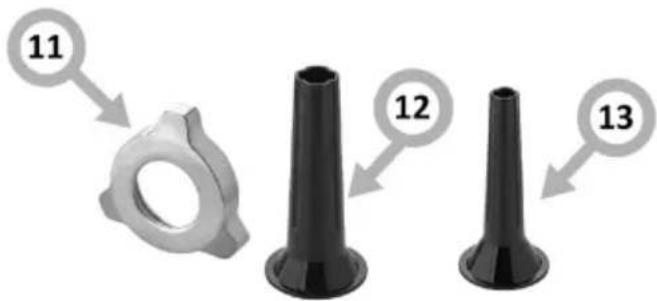
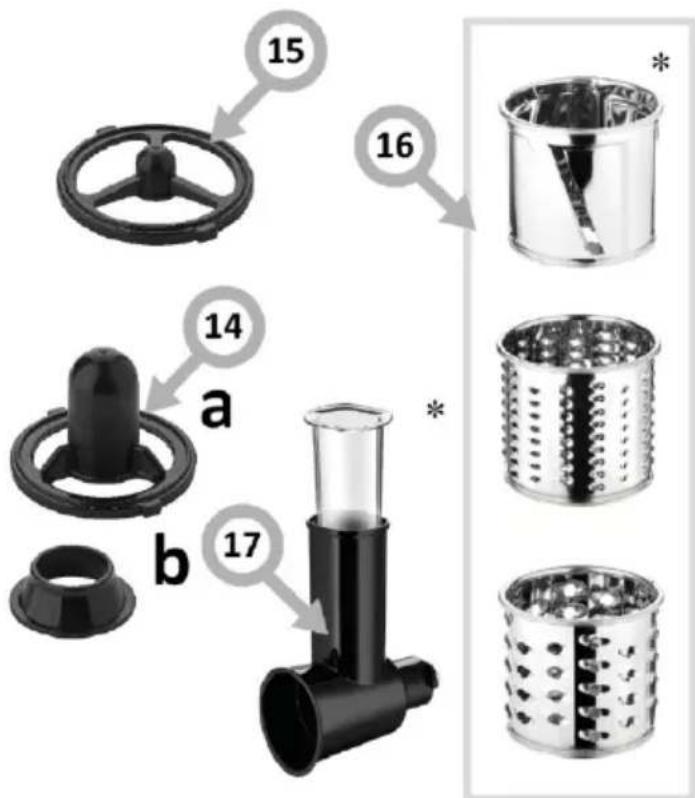
FEATURES AND COMPONENTS
- Release button
- Motor
- On/off/reverse control button
- Accessory compartment
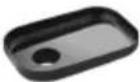
- Pusher
- Ingredients feeder tray
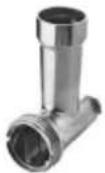
- Feeding tube
- Auger
- Cutting blade
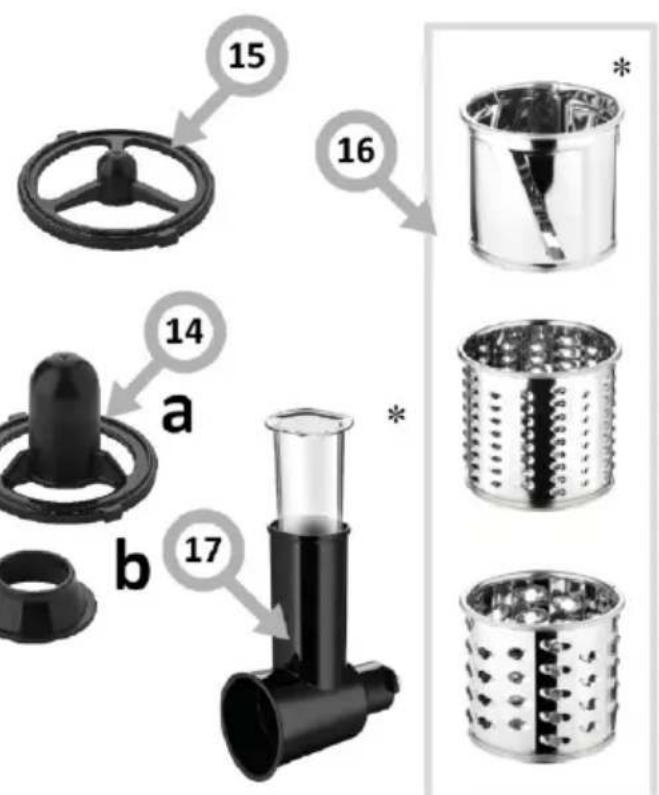
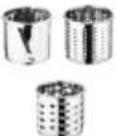
- Grinding plate (coarse/medium/fine)
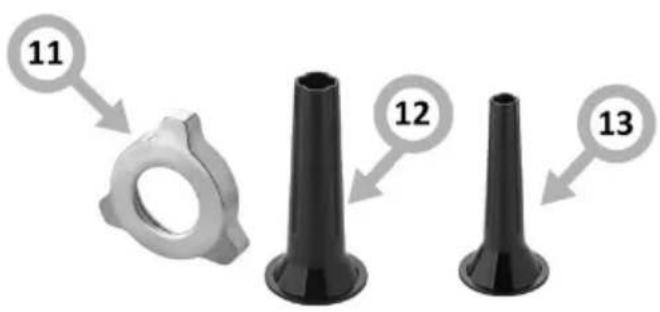
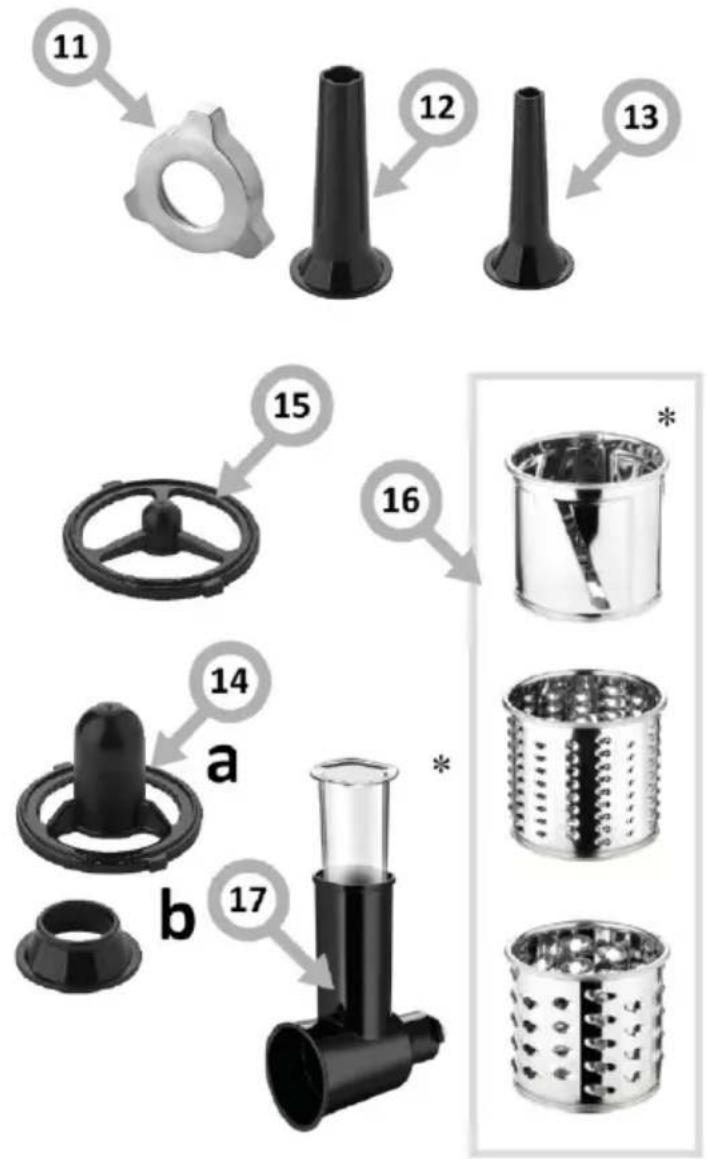
- Screw on ring
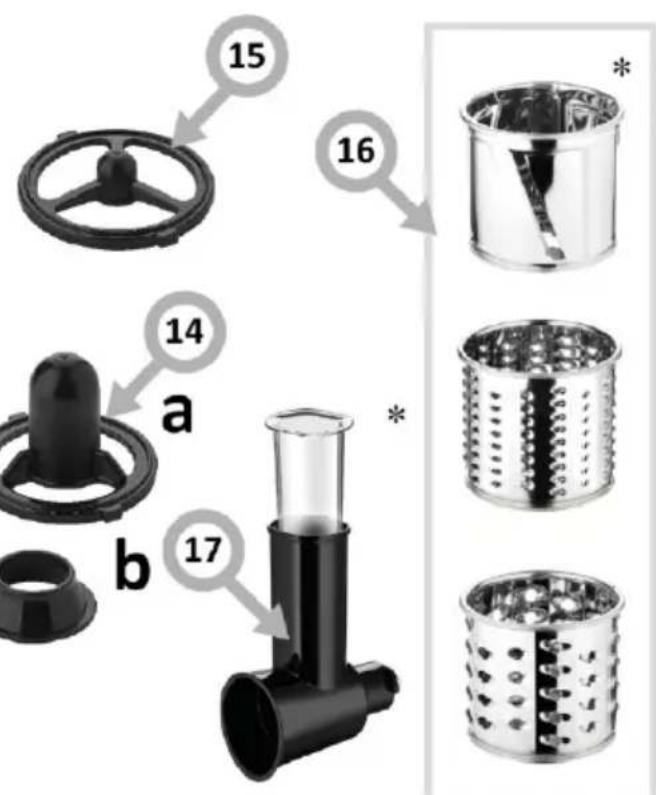
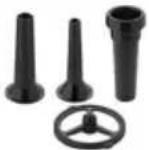
- Thick sausage attachment
- Thin sausage attachment
- Kebbe attachments : a/b
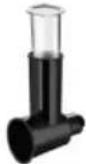
- Sausage attachment
- Shredders* (applies to model: MM 4011)
- Shredding tube* (applies to model: MM 4011)
- Carrying handle

natural_image
Close-up of a mechanical device with a labeled component (4) and internal structure, no readable text or symbols beyond the number.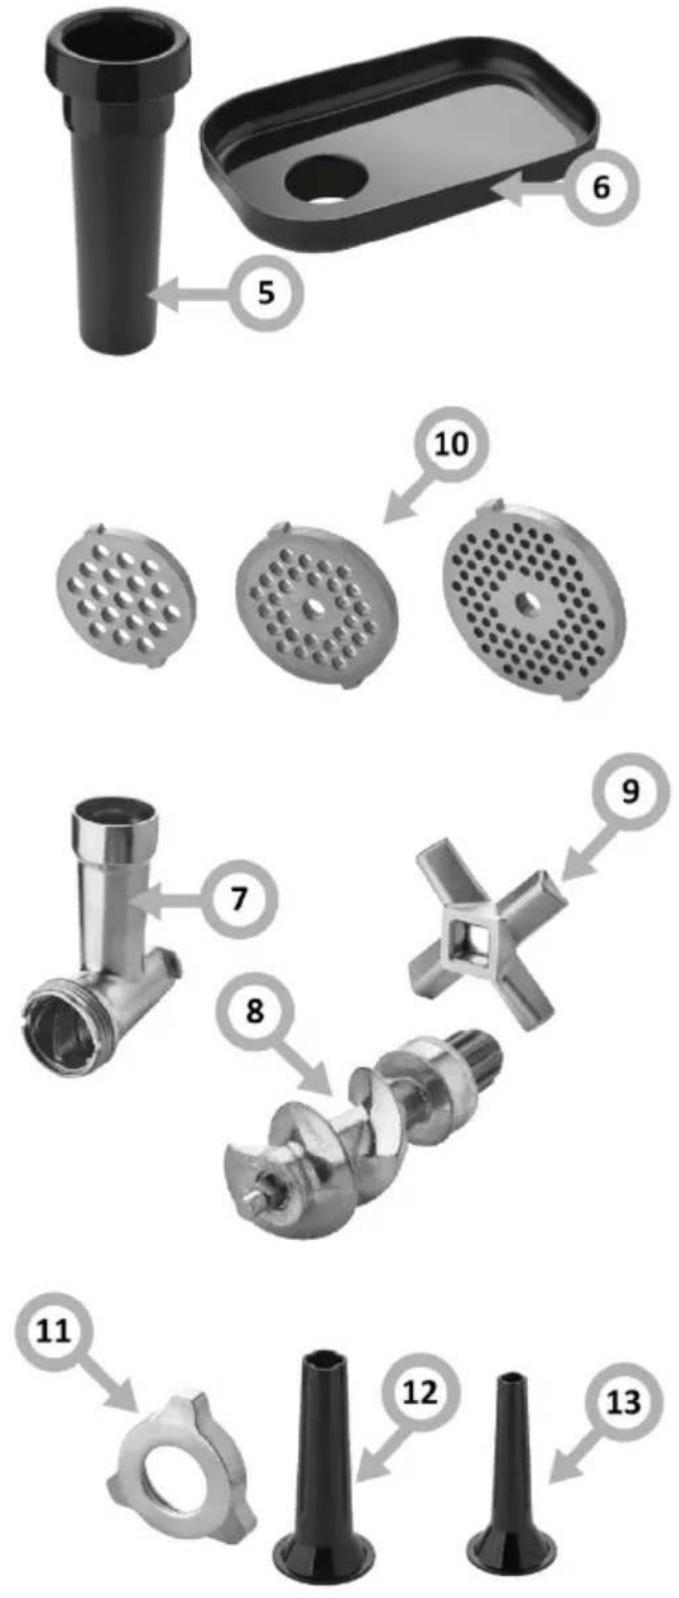

* Available on selected models
NOTE:
Figures are for illustrative purposes only Individual models may vary.
OPERATE THE APPLIANCE
Before first use, thoroughly wash the parts in contact with food. Then you need to assemble the appliance.
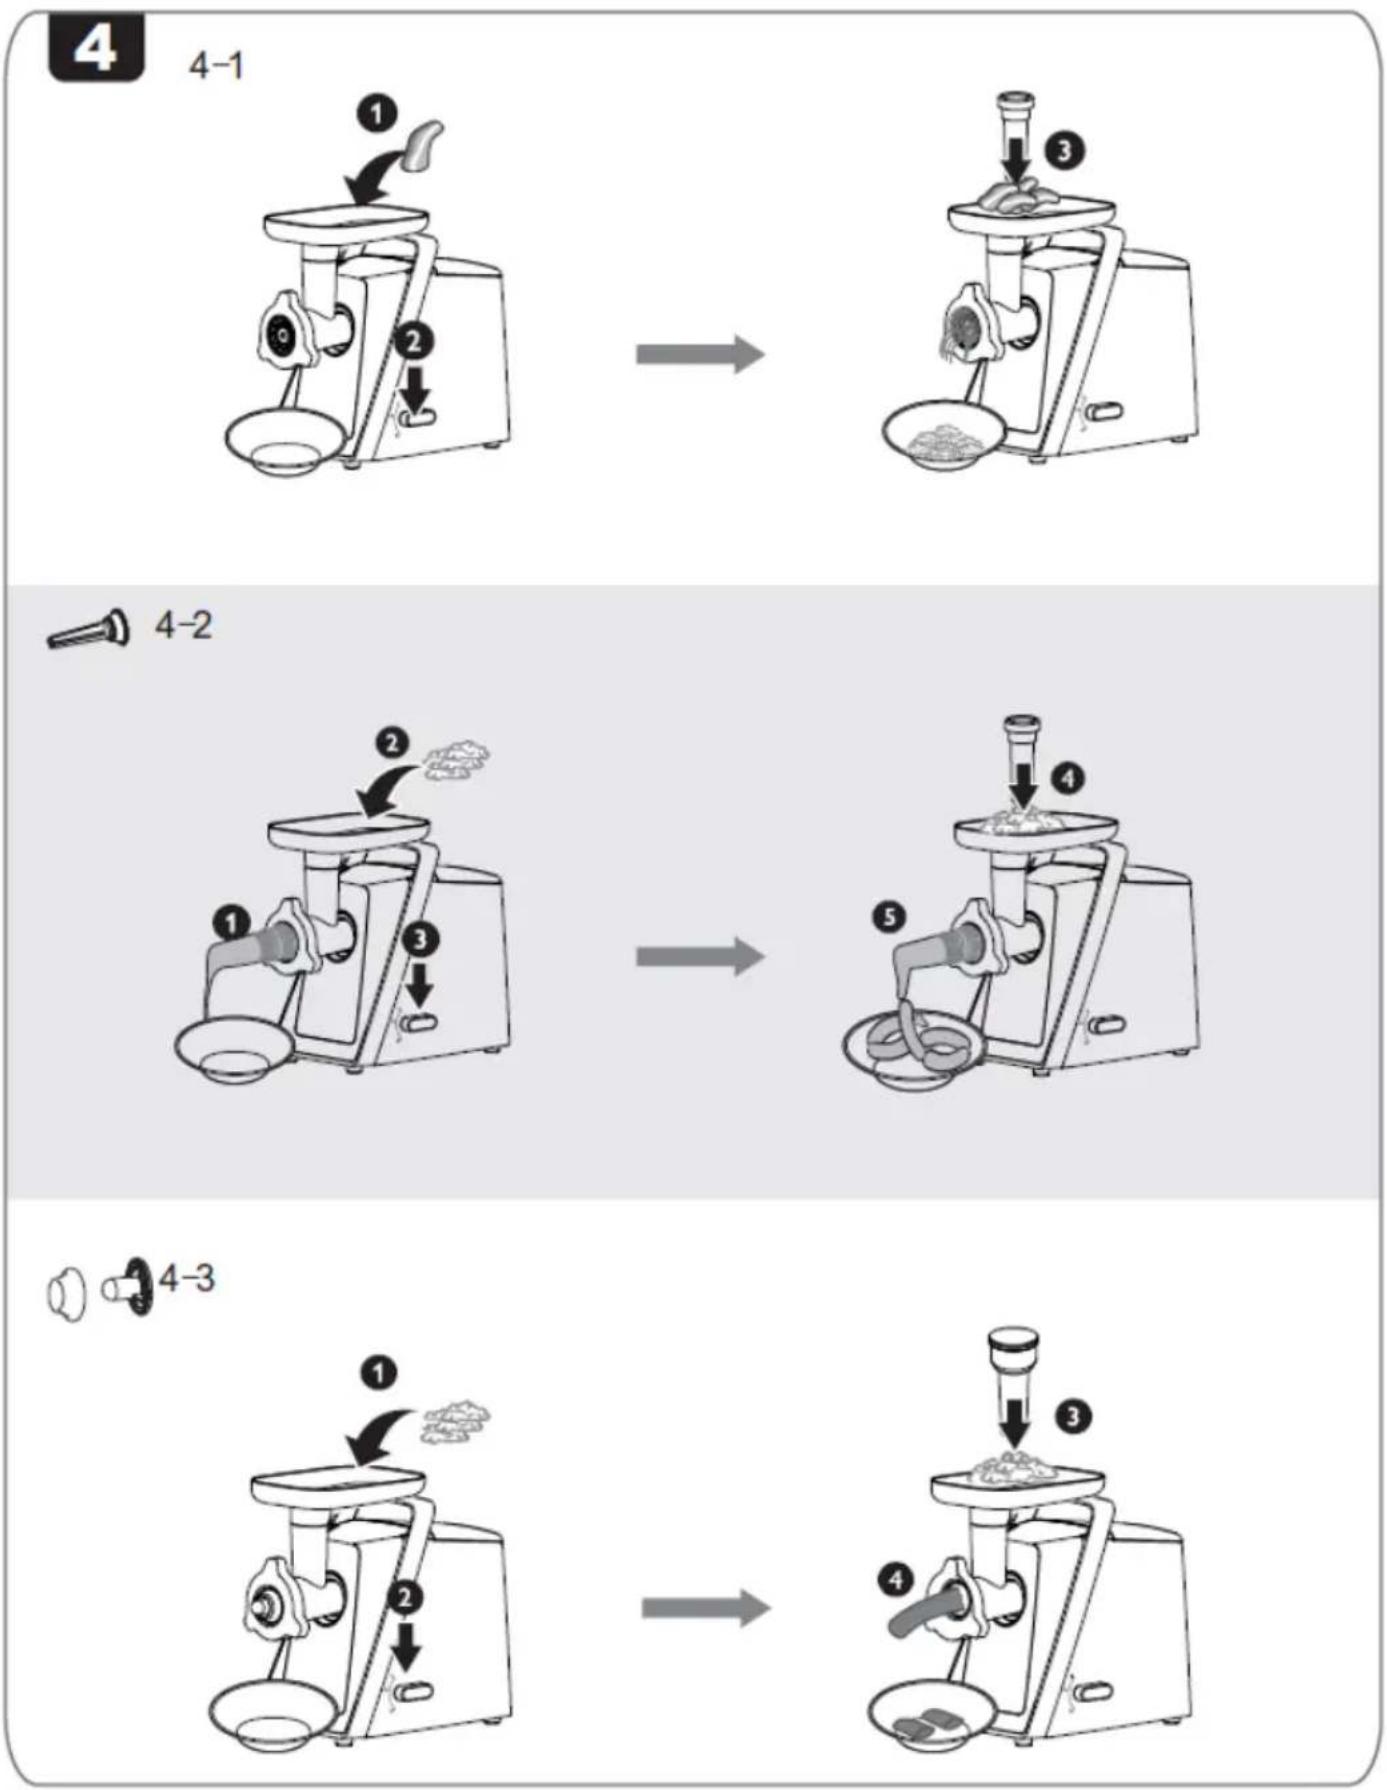
Minced meat (Figure 4-1):
Before use, assemble the appliance as shown in Figure 2-1. Refer to Figure 3-1 for disassembly information.
- Never grind bones, nuts or other hard ingredients.
-Never mince frozen meat! Before grinding, defrost the meat.
-Do not overload the appliance by forcing too much meat into the feeding tube.
-Choose the suitable grinding plate for your preferred meat grinding thickness. You can also grind the meat more than once for a finer texture.
-Remove bones, cartilage and tendons from meat as thoroughly as possible.
-If a blockage occurs, turn off the appliance, then trun down the speed, then set the appliance to reverse (R) to clear the blockage.
Sausages (Figure 4-2):
Before use, assemble the appliance as shown in Figure 2-2. Refer to Figure 3-2 for disassembly information.
-Use attachments intended for sausages
-Make sure the protrusions on the appliance body are aligned with the notches on the motor.
-Do not block the air outlet grooves of the sausage attachment.
-Do not make the sausage too thick to avoid excessive stretching of the casings.
-Wet the sausage casing so that it does not stick to the sausage attachment.
Kebbe (Figure 4-3):
Before use, assemble the appliance as shown in Figure 2-3. Refer to Figure 3-3 for disassembly information.
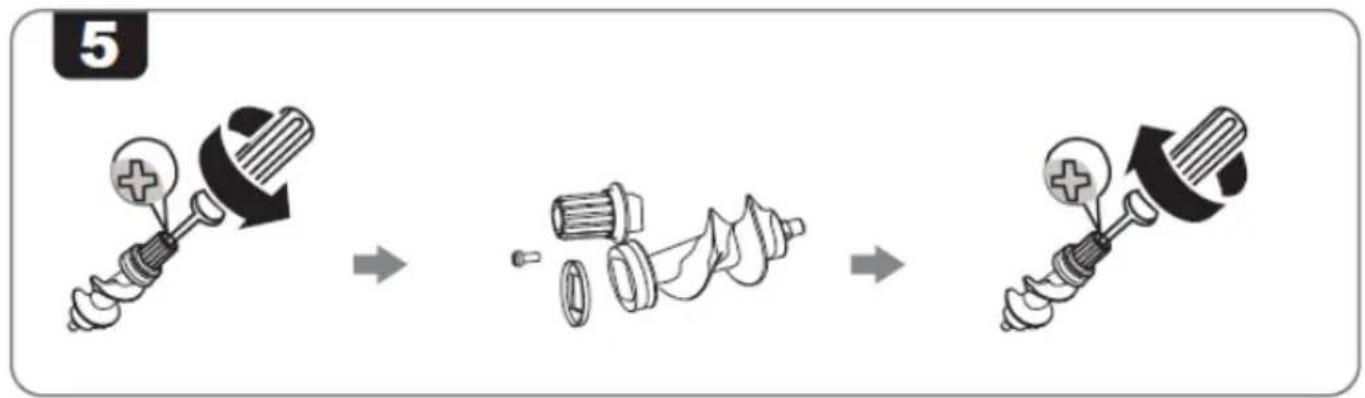
Replace the spline shaft - figure 5
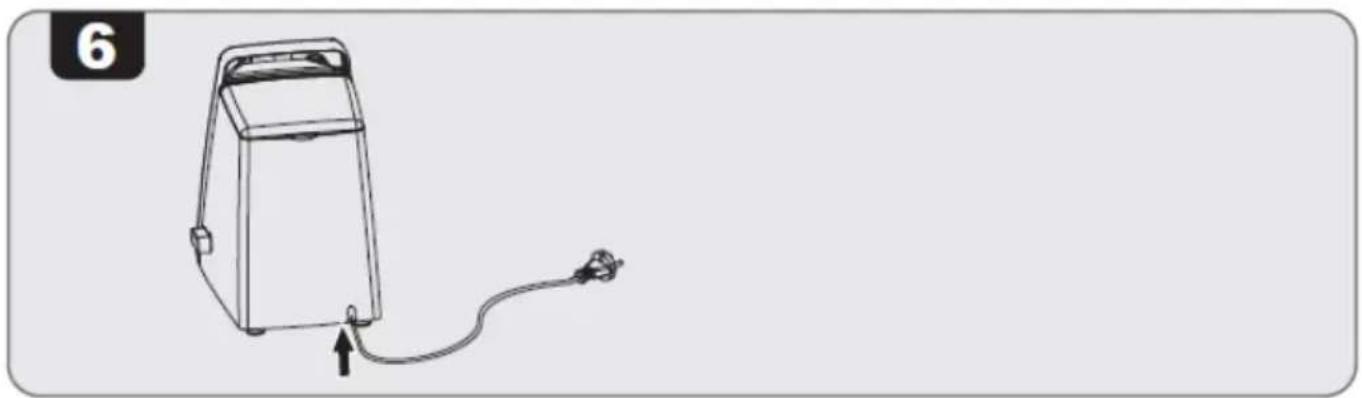
Store the appliance - figure 6
TROUBLESHOOTING:
| The motor unit does not start or the cutting blade does not rotate. | - Make sure the plug is properly inserted into the wall outlet.- The motor overload protection may have been activated (see overload protection). |
| The shredding tube cannot be removed from the base. | - Check if the release button is pressed.- The release button does not work. |
| The grinding result is poor. - Check if the cutting blade, grinding plate and screw-on ring are properly assembled.- Tighten the ring. | |
| Overload protection:This appliance is equipped with thermal motor protection. If the appliance overheats, it turns off automatically. Unplug the appliance and allow it to cool to room temperature. Then insert the plug back into the wall power socket and turn on the appliance. Contact your dealer or authorised service centre if the overload protection is triggered too frequently. | |
CLEANING AND CARE:
Before first use, thoroughly wash the parts in contact with food. Before removing accessories or cleaning the motor unit, turn off the appliance and disconnect the plug from the wall socket.
Do not immerse the motor unit in water or rinse it under running water. Do not wash metal parts in the dishwasher.
Clean the base with a damp cloth.
Wash the removable parts with a soft brush in water with detergent, rinse with clean water, and then immediately wipe dry with a soft cloth.
If the appliance will not be used for a long time, lubricate the surfaces of the grinding plate and cutting blade with cooking oil. Lightly coat metal parts with grease or cooking oil to prevent rusting.
The motor unit will be damaged if the worm shaft cannot rotate.
| √ | × | √ | |
| √ | √ | √ | |
| √ | × | √ | |
| √ | × | √ | |
| √ | √ | √ |


POKYNY K BEZPEČNÉMU POUŽÍ-VÁNÍ
natural_image
Interior view of a mechanical device with a labeled component (4), showing internal components and no visible text or symbols.

natural_image
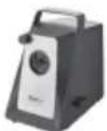
Close-up of a black electronic device with a circular label pointing to a component, no visible text or symbols on the device itself.
natural_image
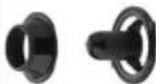
Two black plastic components: a cylindrical pin and a rectangular tray, with numbered arrows pointing to each component (no text or symbols on the parts themselves)
natural_image
Three circular metal grates with perforated surfaces, one being cut with a numbered label '10' (no text or symbols on the grates themselves)
natural_image
Close-up of a black electronic device with a circular annotation labeled '4' pointing to a component (no readable text or symbols beyond the label)
natural_image
Two black plastic components: a cylindrical pin and a rectangular tray, with numbered arrows indicating parts of each (no text or symbols present)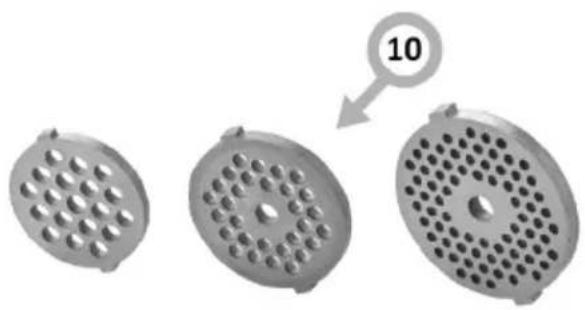
natural_image
Three circular metal grates with perforated surfaces, one being cut with a numbered label '10' (no text or symbols on the grates themselves)


natural_image
Close-up of a black electronic device with a circular annotation labeled '4' pointing to a component (no readable text or symbols beyond the label)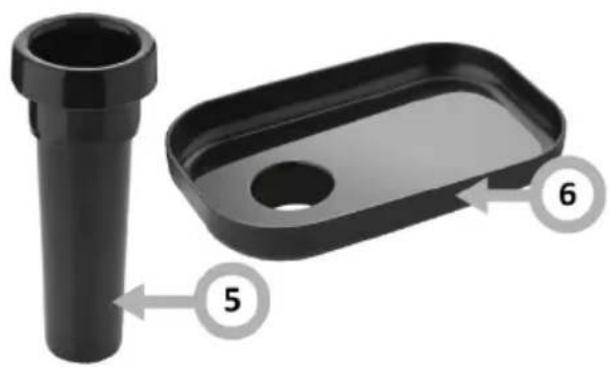
natural_image
Two black plastic components: a cylindrical pin and a rectangular tray, with numbered arrows indicating parts of each (no text or symbols present)
natural_image
Three circular metal grates with perforated surfaces, one being cut with a numbered label '10' (no text or symbols on the grates themselves)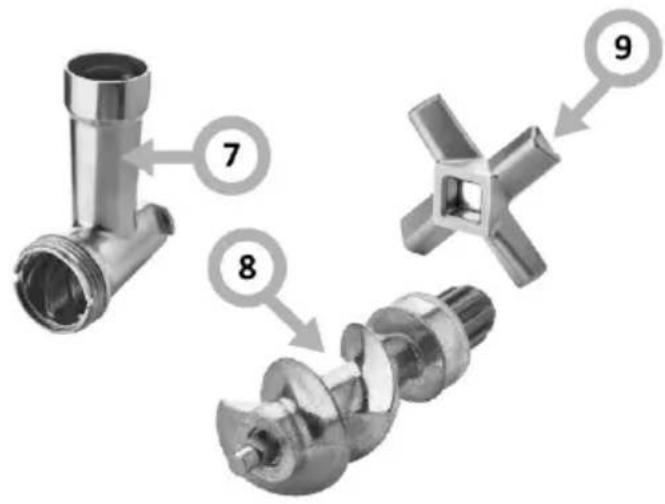

natural_image
Close-up of a black electronic device with a circular annotation labeled '4' pointing to a component (no readable text or symbols beyond the label)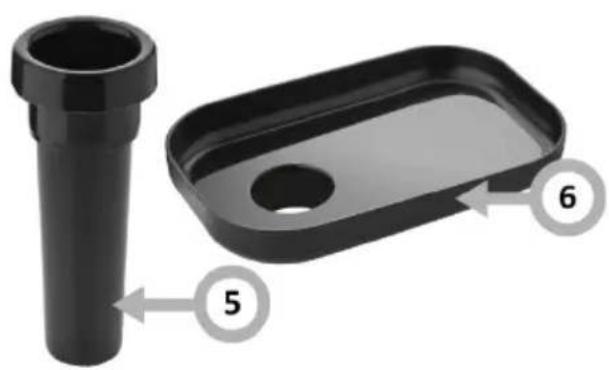
natural_image
Two black plastic components: a cylindrical pin and a rectangular tray, with numbered arrows indicating parts of each (no text or symbols present)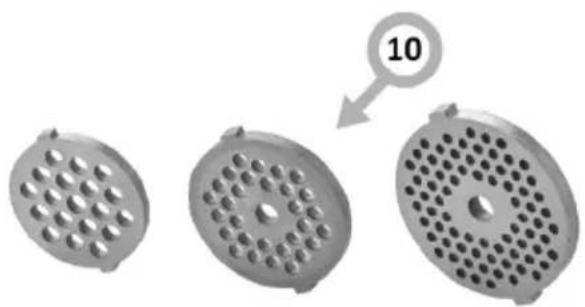
natural_image
Three circular metal components with perforated surfaces, one being cut by a circle labeled '10' (no text or symbols on the components themselves)

* в избрани модели.
ВНИМАНИЕ:

 |  |  |  |
 |  |  |  |
 |  |  |  |
 |  |  |  |
 |  |  |  |
 |  |  |  |
 |  |  |  |
natural_image
Close-up of a black electronic device with a circular annotation labeled '4' pointing to a component (no readable text or symbols beyond the label)
natural_image
Black plastic mechanical component with labeled parts (no text or symbols on the part itself)
natural_image
Three circular metal grates with perforated surfaces, one being cut with a numbered label '10' (no text or symbols on the grates themselves)

* la anumite modele.
ATENTIE:
Imaginile au caracter pur informativ. Unele modele individuale pot varia.
FUNCTIONAREA APARATULUI:

- WSKAZÓWKI DÓTYCZĄCE BEZ-PIECZEŃSTWA UŻYTKOWANIA
- SAFETY INSTRUCTIONS FOR USE
- SPECIFICATION:
- FEATURES AND COMPONENTS
- NOTE:
- OPERATE THE APPLIANCE
- Minced meat (Figure 4-1):
- Sausages (Figure 4-2):
- Kebbe (Figure 4-3):
- TROUBLESHOOTING:
- CLEANING AND CARE:
- POKYNY K BEZPEČNÉMU POUŽÍ-VÁNÍ
- ВНИМАНИЕ:
- ATENTIE:
- FUNCTIONAREA APARATULUI:
Brand : AMICA
Model : MM 3012
Category : Mincer