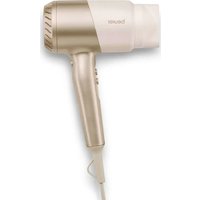
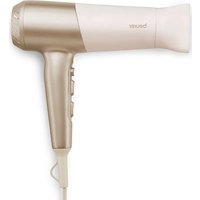
HL 22 - Hair Dryers BEURER - Free user manual and instructions
Find the device manual for free HL 22 BEURER in PDF.

User questions about HL 22 BEURER
0 question about this device. Answer the ones you know or ask your own.
Ask a new question about this device
Download the instructions for your Hair Dryers in PDF format for free! Find your manual HL 22 - BEURER and take your electronic device back in hand. On this page are published all the documents necessary for the use of your device. HL 22 by BEURER.
USER MANUAL HL 22 BEURER
natural_image
Beaker with hairpin and digital brush, no visible text or symbols on device bodynatural_image
Illustration of an open book with a geometric arrow pointing to its pages, no text or symbols present.EN Unfold page 3 before reading the instructions for use.
natural_image
Symbol of a trash bin with crossed lines indicating no waste or plastic discharge (no text or labels)https://www.beurer.com/web/we-landingpages/de/cede-clarationofconformity.php
8. GARANTIE
Read these instructions for use carefully. Observe the warnings and safety notes. Keep these instructions for use for future reference. Make the instructions for use accessible to other users. If the device is passed on, provide the instructions for use to the next user as well.
Included in delivery
Check that the exterior of the cardboard delivery packaging is intact and make sure that all contents are present. Before use, ensure that there is no visible damage to the device or accessories and that all packaging material has been removed. If you have any doubts, do not use the device and contact your retailer or the specified Customer Services address.
1 x Split End Trimmer
1 x Cleaning brush
1 x USB charging cable
Table of contents
- IMPORTANT SAFETY NOTES 13
- SIGNS AND SYMBOLS....14
- DEVICE DESCRIPTION 15
- USING THE DEVICE....15
- CLEANING AND MAINTENANCE.... 17
- DISPOSAL....18
- TECHNICAL DATA....19
- WARRANTY....19
1. IMPORTANT SAFETY NOTES
- The device must only be used for the purpose for which it was designed and in the manner specified in the instructions for use.
- This device may be used by children over the age of 8 and by people with reduced physical, sensory or mental skills, or a lack of experience and/or knowledge, provided that they are supervised or have been instructed on how to use the device safely, and have understood the risks involved.
• Children must not play with the device.
- Danger of suffocation! Keep packaging materials away from children.
- Cleaning and user maintenance must not be performed by children unless supervised.
- Do not use this appliance near bathtubs, shower trays or other containers that have water in them.
- This device is not designed for use in commercial areas.
- Risk of electric shock! Ensure that no water gets inside the device!
Notes on handling batteries
- If your skin or eyes come into contact with fluid from a battery cell, wash the affected areas with water and seek medical assistance.
- Protect batteries from excessive heat.
- Risk of explosion! Never throw batteries into a fire.
- Do not disassemble, split or crush the batteries.
- Batteries must be charged correctly prior to use. The instructions from the manufacturer and the specifications regarding correct charging in these instructions for use must be observed at all times.
- Fully charge the battery prior to initial use.
- In order to achieve as long a battery service life as possible, fully charge the battery at least 2 times a year.
2. SIGNS AND SYMBOLS
The following symbols are used on the device, in these instructions for use, on the packaging and on the device's type plate:
 | This device must not be used near water or in water (e.g. in a wash basin, or in the shower or bath) – risk of electric shock! |
 | Warning notice indicating a risk of injury or damage to health. |
| 21PAP | Dispose of packaging in an environmentally friendly manner. |
 | Read the instructions for use. |
 | CE labellingThis product satisfies the requirements of the applicable European and national directives. |
| —— | Direct currentThe device is suitable for use with direct current only. |
 | The products demonstrably meet the requirements of the Technical Regulations of the EAEU. |
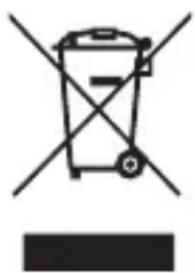
 | Disposal in accordance with the Waste Electrical and Electronic Equipment EC Directive – WEEE. |
 | United Kingdom Conformity Assessed Mark |
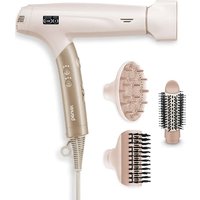
3. DEVICE DESCRIPTION
The corresponding drawings are shown on page 3.
1 Display
4 Cutting chamber
2 ON/OFF button
5 Collection tray
3 Plate locking system
6 Charging socket
4. USING THE DEVICE
Charging the battery

The device should only be charged with a mains adapter with an output of 1 A.
Before using the device for the first time, you must charge it for a minimum of 2 hours.
- Connect the device using the supplied charging cable and a compatible USB connection (mains adapter not included in delivery) (see Figure A).
- During charging, the battery symbol in the display 1 is displayed in red. Once the device is fully charged, the battery symbol turns green.
- Remove the charging cable from the device. The device is now ready for use.
Direct drive function
If the battery is completely flat, you can continue using the device immediately via mains operation.
Travel lock
The device has a travel lock. If the travel lock is activated, it is not possible to switch on the device. The travel lock prevents the device from switching on unintentionally (e.g. when being carried in a suitcase).
- To activate the travel lock, press and hold the ON/OFF button 2 for 3 seconds. A red suitcase symbol flashes on the display 1. The device is now locked. If you press the ON/OFF button 2 while the travel lock is activated, the red suitcase symbol flashes briefly.
- To deactivate the travel lock, press and hold the ON/OFF button ② again for 3 seconds. The device switches on and is now unlocked.
Using the device
- Comb your hair with a large-toothed comb to get rid of any tangles. Your hair should be clean, dry and free from styling products.
-
Slide the plate locking system 3 down to unlock the device (see Figure B). Make sure that the collection tray 5 is inserted.
-
Switch on the device using the ON/OFF button 2. Use the ON/OFF button 2 to select the correct direction of use. The correct direction of use depends on which hand you are using or which side of your head you are using the device on. The green arrows in the display 1 should point towards the floor during use.
- Part the hair into individual sections that are approximately 2 to 3 cm wide.
- Hold a section taut and place it between the plates near the roots (see Figure C).
- Slowly move the device from the roots to the tips in a fluid motion (see Figure D). Dry and broken hair tips are cut off and land in the collection tray 5.
- To switch off the device, press the ON/OFF button 2 until the green arrows disappear from the display.
- Press the two plates together and slide the plate locking system 3 upwards.
5. CLEANING AND MAINTENANCE
WARNING
Risk of injury/crushing! Switch off the device before removing the collection tray 5 from the device. Do not reach into the cutting chamber from behind while the device is switched on!
- Slide the collection tray 5 on. Clean the collection tray 5 and cutting chamber 4 with the cleaning brush after each use.
- The device housing can be cleaned with a soft cloth dampened with warm water.
- Your device is maintenance-free.
- Protect the device from dust, dirt and humidity.
-
Do not clean the device in the dishwasher.
-
Do not use any aggressive, caustic, abrasive or corrosive cleaning products or hard brushes!
6. DISPOSAL
WARNING
The integrated battery cannot be removed for disposal. Risk of explosion and injury. The lithium-ion battery used in this device must not be disposed of in household waste, but must be disposed of correctly. For information on disposal, please contact the authorised seller or a municipal collection point. When disposing of the device, you must point out that it contains a battery. Discharge the battery before disposal. Take the device and switch it on until the battery is flat.
For environmental reasons, do not dispose of the device in household waste at the end of its service life. Dispose of the device at a suitable local collection or recycling point in your country. Observe the local regulations for material disposal. Dispose of the device in accordance with EC Directive – WEEE (Waste Electrical and Electronic Equipment).
If you have any questions, please contact the local authorities responsible for waste disposal.
natural_image
Symbol of a trash bin with crossed lines indicating no waste or restriction, and a solid black rectangle below (no text or labels)You can obtain the location of collection points for old devices from the local or municipal authorities, local waste disposal company or your dealer, for example.
7. TECHNICAL DATA
| Dimensions 25.6 x 4.1 x 4.4 cm | |
| Weight 261 g | |
| Device input 5.0 V | --- 1.0 A |
| Ambient conditions Only approved for indoor use | |
| Battery:CapacityNominal voltageType designation | 1800 mAh3.7 VLithium-ion |
Subject to technical changes.
The Declaration of Conformity for this product can be found at the following address:
https://www.beurer.com/web/we-landingpages/de/cedecla- rationofconformity.php
8. WARRANTY
Further information on the warranty and warranty conditions can be found in the warranty leaflet supplied.
FRANÇAIS

Remarques relatives aux batteries
natural_image
Symbol of a trash bin with crossed lines indicating no waste or restriction, plus a solid black rectangle below (no text or labels)https://www.beurer.com/web/we-landingpages/de/cede-clarationofconformity.php
8. GARANTIE
natural_image
Symbol of a trash bin with crossed lines indicating no waste or restriction, and a solid black rectangle below (no text or labels)https://www.beurer.com/web/we-landingpages/de/cede-clarationofconformity.php
8. GARANTÍA
natural_image
Symbol of a trash bin with crossed lines indicating no waste or restriction, and a solid black rectangle below (no text or labels)https://www.beurer.com/web/we-landingpages/de/cedeclamationofconformity.php
8. GARANZIA
natural_image
Symbol of a trash bin with crossed lines indicating no waste or restriction, and a solid black rectangle below (no text or labels)https://www.beurer.com/web/we-landingpages/de/cedeclamationofconformity.php
8. GARANTI
natural_image
Simple line drawing of a trash bin with no text or symbolscedeclarationofconformity.php
8. ГАРАНТИЯ
natural_image
Symbol of a trash bin with crossed lines indicating no waste or restriction, and a solid black rectangle below (no text or labels)https://www.beurer.com/web/we-landingpages/de/cedecla- rationofconformity.php
8. GWARANCJA
3. BESCHRIJVING VAN HET APPARAAT
natural_image
Symbol of a trash bin with crossed lines indicating no waste, and a solid black rectangle below (no text or labels)https://www.beurer.com/web/we-landingpages/de/cedeclamationofconformity.php
8. GARANTIE
natural_image
Symbol of a trash bin crossed with diagonal lines, no text or labels presentelektrisk og elektronisk udstyr – WEEE (Waste Electrical and Electronic Equipment).
https://www.beurer.com/web/we-landingpages/de/cedecla- rationofconformity.php
8. GARANTI
natural_image
Symbol of a trash bin crossed with a diagonal line and a horizontal bar below (no text or numbers present)https://www.beurer.com/web/we-landingpages/de/cedecla- rationofconformity.php
8. GARANTI
natural_image
Symbol of a trash bin with crossed lines indicating no waste or discharge, and a solid black rectangle below (no text or labels)avfall. Produktet kan leveres inn på et lokalt innsamlingssted. Følg de lokale forskriftene ved avfallshåndtering av materialene. Produktet skal avfallshåndteres i henhold til EU-direktivet om elektrisk og elektronisk avfall – WEEE (Waste Electrical and Electronic Equipment).
natural_image
Symbol of a trash bin crossed with no text or labels, accompanied by a black rectangular block below (no readable text or symbols)https://www.beurer.com/web/we-landingpages/de/cede-clarationofconformity.php