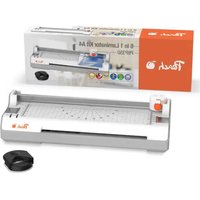
PBP350 - Laminating machine Peach - Free user manual and instructions
Find the device manual for free PBP350 Peach in PDF.


| Product type | Laminating machine |
| Brand | Peach |
| Model | PBP350 |
| Power supply | 230 V, standard mains plug |
| Main functions | Hot and cold lamination, cutting (straight, wavy, perforated), corner rounding |
| Preheating temperature | About 3 to 5 minutes for hot lamination |
| Compatible pouch types | Standard lamination pouches for hot and cold (cold requires special pouches not included) |
| Maximum cutting capacity | 3 sheets of 80 g/m² |
| Dimensions (approx.) | Not specified in manual, estimate: approx 45 x 15 x 10 cm |
| Weight (approx.) | Not specified, estimate: approx 2 kg |
| Light indicators | Red power indicator (POWER), green ready indicator (READY) |
| Safety | Anti-jam switch (ABS) to remove jammed pouches, automatic shutdown after 2 hours of operation, do not use in humid environments |
| Maintenance and cleaning | External cleaning with damp cloth, internal cleaning with matte cardboard or blotting paper at operating temperature |
| Spare parts and repairability | Replacement cutting heads available from Peach or www.peachstore.com; do not open or repair yourself |
| Recommended use | Indoor domestic use only, not commercial or industrial |
| Environment | Do not dispose of with household waste (WEEE directive 2012/19/EC) |
Frequently Asked Questions - PBP350 Peach
User questions about PBP350 Peach
0 question about this device. Answer the ones you know or ask your own.
Ask a new question about this device
Download the instructions for your Laminating machine in PDF format for free! Find your manual PBP350 - Peach and take your electronic device back in hand. On this page are published all the documents necessary for the use of your device. PBP350 by Peach.
USER MANUAL PBP350 Peach
6 in 1 Laminator Kit A4
Peach
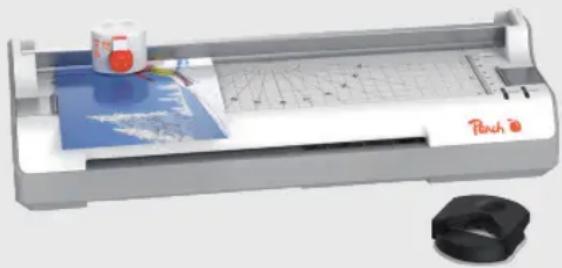
natural_image
Exterior view of a Parch printer with paper and grid paper (no visible text or symbols)Bedienungsanleitung
Operating instructions
Mode d'emploi
6 in 1 Laminator Kit A4
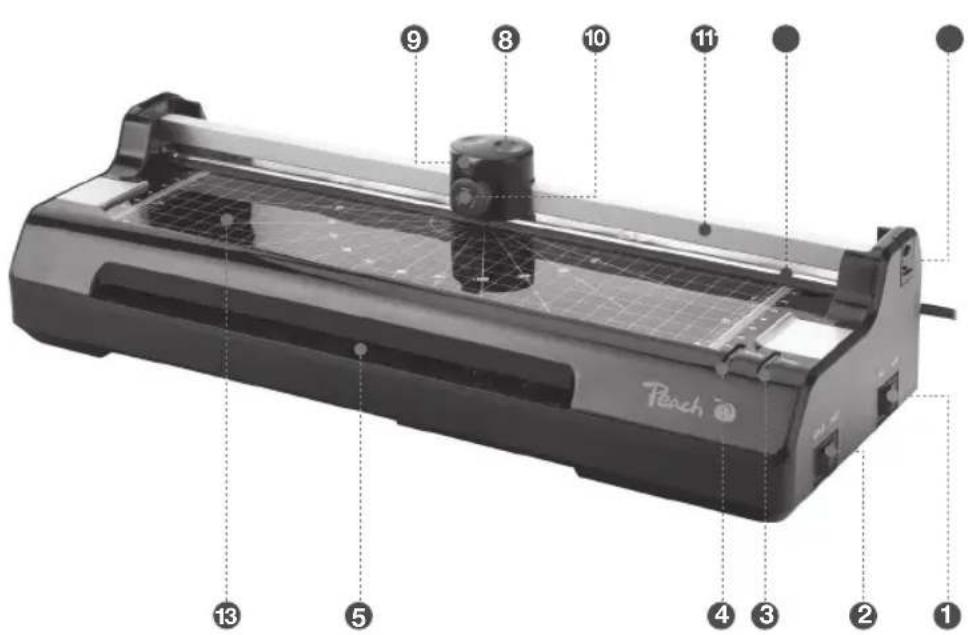
text_image
Pench 13 5 9 8 10 11 4 3 2 1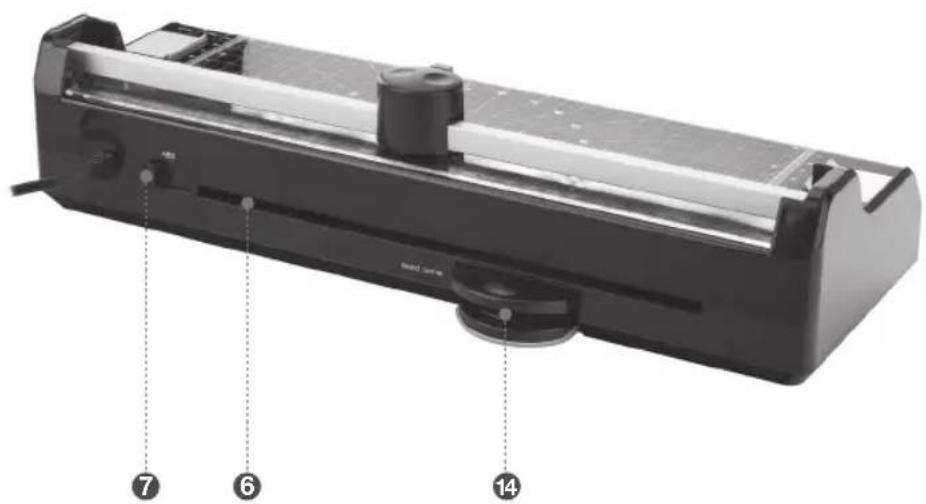
text_image
Labeled diagram of a portable electronic device showing numbered componentsDE
Bedienungsanleitung
natural_image
Illustration of a hand pouring liquid into a pipe with a valve, no text or symbols presentnatural_image
Simple line drawing of a mechanical component with a downward arrow indicating force or direction (no text or symbols)IMPORTANT SAFETY INSTRUCTIONS - KEEP FOR FUTURE USE
The machine is for indoor use only. Plug the machine into an easily accessible outlet.
To avoid electric shocks, the laminator must not be used in humid or wet conditions and water must never be allowed to come into contact with the machine, the connection cable or the socket.
● Place the machine is on a stable surface.
- Keep the machine away from heat and water sources.
● Turn off the machine after each use.
● Unplug the machine when not in use for extended periods of time.
- Keep away from pets, while in use.
● The power cord must not come into contact with hot surfaces.
- Don't leave power cord hanging from cupboards or shelves.
● The device must not be used if the power cord is damaged.
- Don't attempt to open or otherwise repair the machine.
- Don't exceed the machines quoted performance.
- Don't laminate sharp or metal objects (eg: staples, paper clips).
● The laminator is not intended for commercial or industrial applications.
● After 2 hours of operation the appliance must be allowed to cool down for at least half an hour (Switch off).
● Never touch the cutting blades.
● The corner rounder may only be used to cut photos, documents, cardboard or lamination foils.
- Remove any staples or paper clips from the document before trimming.
- Do not grease or sharpen the cutting blades.
- Remove any staples or paper clips from the document before trimming.
● This product can be used by children aged 8 years and older and by persons with reduced physical, sensory or mental abilities or lack of experience and knowledge if they are supervised or instructed in the safe use of the product and understand the resulting dangers.
● Children must not play with the product.
Description
① Power switch (ON/OFF)
② Selector switch "hot / cold lamination"
③ Operation indicator (red)
④ "Ready" indicator (green)
⑤ Slot for pouch input (front)
⑥ Pouch outlet (rear)
⑦ Anti-blocking switch (ABS)
⑧ Cutter head (trimmer)
⑨ Setting lock
10 Blade selector wheel
11 Guide rail
12 Press rail
13 Visual positioning grid
14 Corner rounder
15 End cap
Installation
- Make sure switch ① is in the "OFF" position.
- Connect the power cord to a normal 230 volt outlet.
- During the first applications, any remaining lubricant may evaporate. If you notice a slight smell of fire or small clouds of smoke with a new device, you can continue to work normally. If this still happens after prolonged use, please contact technical support.
Laminating
Only use special films designed specifically for laminating. Test laminate scrap sheets and set the machine before final laminating. Remove staples and other metal articles prior to laminating.
Heat-sensitive documents (eg: tickets etc.) cannot be heat laminated on hot. Don't laminate an empty pouches.
- Switch on the device by setting the power switch ① to position "I". The operation indicator ③ (POWER) lights up red.
- If the machine is not in use, set the power switch ① to position "0" and the operation indicator ③ is off.
- Use the selector switch ② to choose the desired laminating pouch type.
Hot laminating:
Set the selector switch ② to the (HOT) position, the indicator lamp ④ (READY) will not light. The machine is now in the warm-up mode. As soon as the indicator ④ (READY) lights green (after approx. 3-5 minutes), the machine is ready and the laminating can start.
-
Place the document to be laminated in a laminating pouch of the appropriate size. Make sure that all corners of the document are at least two millimeters away from the edge of the laminating pouch.
-
Slowly insert the laminating pouch with the sealed side first into the slot ⑤ at the front side. Push the pouch into the machine until it is caught by the rollers and pulled in.
-
The finished laminated pouch is ejected from the foil ejection opening (back side) ⑥ . Make sure that there is enough space behind the device to allow the pouch to exit unhindered. Let the laminated pouch cool down for at least one minute before touching it.
COLD laminating:
The green READY indicator ④ lights up as soon as the selector switch ② is in the (COLD) position. The machine is ready for cold laminating.
Note: For cold laminating special laminating pouches must be used. These are not included in the starter package.
Note: To switch from HOT to COLD laminating, move the selector switch ② to the (COLD) position. It takes several minutes to cool down the machine. Wait at least 10 minutes before starting cold laminating. Otherwise, the laminated document may be damaged, which may cause damage to the machine itself.
Jammed laminating pouches
If the pouch has been pulled in at an angle or is jammed in the device, please proceed as follows.
- Switch off the device by setting the power switch ① to position "0". The indicator ③ (POWER) goes out. The laminating pouch will not be drawn in any further.
- Push the anti-blocking switch ⑦ aside and hold it in this position.
- Pull the laminating pouch out of the machine by hand.
- Start the laminating process again.
Cutting
Caution: The cutter blades are very sharp! Never touch or grasp the cutting blades!
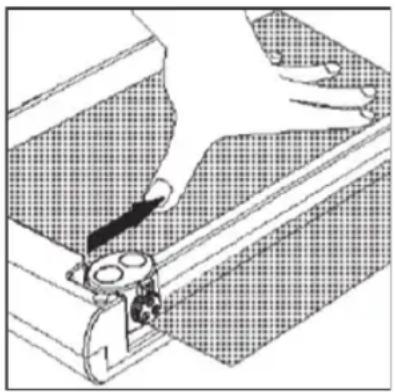
- Move the cutter head ⑧ to one side of the guide rail ⑪.
- To choose the desired cutting style (straight, wave or perforation) pull the setting lock ⑨ upwards to the "Open" position.
- Turn the blade selector 10 until the symbol related to the required cut (straight, wave, perforation) is at the top.
- Press the setting lock ⑨ downwards to the "Lock" position.
- Put the material to be cut under the transparent press rail 12 at the required position. Align a straight edge of the material with the visual positioning grid 13.
Note: A maximum of 3 sheets (80g/m ^2 ) can be cut at once.
- Hold the material to be cut firmly with one hand so that it can't slip during cutting. Otherwise the cut may be inaccurate.
natural_image
Illustration of a hand using a tool to interact with a mechanical device (no text or symbols visible)- To complete the process, press the cutting head ⑧ down and slide it along the guide rail ⑪ to the other side.
Note: To prevent a faulty cutting edge, do not run the cutting head back again but remove the cut material directly after completing the cut.
Replacing the Cutting Head
If the blades of the trimmer have become dull, they can be replaced. New cutting heads, fully assembled with three blades, are available from your Peach dealer or at www.peachstore.com
- Remove the end cap 15 by sliding it up.
- Insert the new cutter head, reinstall the guide rail and push the end cap 15 back into its original position.
Caution: Do not touch the blades - they are extremely sharp!
Operation of the corner rounder
The corner rounder 15 is located in the bottom of the unit, so that it is always ready to hand. It produces a clean, rounded corner simultaneously on up to 3 sheets (80g/m ^2 ) or on a laminated document.
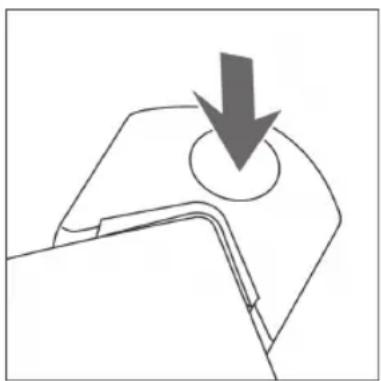
- Remove the corner rounder from the machine and place it on a stable work surface.
- Position the document in the silver corner.
- Press the raised button down firmly.
natural_image
Simple line drawing of a mechanical component with a downward arrow indicating force or direction (no text or symbols)The cutting waste is collected in the corner rounder. To empty, turn the corner rounder upside down and remove the transparent cover.
Maintenance and cleaning
Unplug the appliance from the wall outlet. Allow the unit to cool down. The outside of the unit can be cleaned with a damp cloth. Do not use solvents or flammable materials for cleaning. To clean the internal parts of the unit from possible contamination, a matte cardboard of approx. 250 g/m^2 or a special blotting paper can be used. Run the sheets through the warm machine to remove any residue from the rollers.
Disposal
Guideline 2012/19/EU concerning the handling, collection, recycling and disposal of electrical and electronic equipment and their components ('waste electrical and electronic equipment', known as WEEE).
The crossed symbol on a waste container indicates that the machine or appliance must not be disposed of with household waste, but must be handed over to an appropriately equipped collection point for proper disposal.
Directives

We declare that this device has been manufactured in accordance with the applicable rules and regulations.
FR
Mode d'emploi
CONSIGNES DE SÉCURITÉ IMPORTANTES - À CONSERVER POUR UNE UTILISATION ULTÉRIEURE
natural_image
Diagram of a robotic arm operating a mechanical device (no text or symbols visible)natural_image
Simple line drawing of a mechanical component with a downward arrow indicating force or direction (no text or symbols)natural_image
Diagram of a mechanical device with a lever and base, showing no text or symbolsnatural_image
Simple line drawing of a mechanical component with a downward arrow indicating force or direction (no text or symbols)natural_image
Diagram of a hand operating a mechanical device with a curved tool, no visible text or symbolsnatural_image
Simple line drawing of a mechanical component with a downward arrow indicating force or direction (no text or symbols)natural_image
Diagram of a hand operating a mechanical device with a curved tool, no text or symbols presentnatural_image
Pure mechanical component diagram without any text, numbers, or symbolsDÔLEŽITÉ BEZPEČNOSTNÉ POKYNY – USCHOVAJTE SI ICH PRE POTREBU V BUDÚCNOSTI
natural_image
Illustration of a hand using a tool to interact with a mechanical device (no text or symbols visible)- Na dokončenie procesu stlačte rezaciu hlavu ⑧ nadol a posuňte ju pozdlž vodiacej lišty ⑪ na druhú stranu.
natural_image
Simple line drawing of a mechanical component with a downward arrow indicating force or direction (no text or symbols)natural_image
Diagram of a hand operating a mechanical device with a curved arrow indicating motion (no text or symbols present)natural_image
Pure mechanical component diagram without any text, numbers, or symbols6 in 1 Laminator Kit A4
Laminator
| Functions: Hot / Cold |
| Maximum size: DIN A4 / 230 mm |
| Warm-up time 3 minutes |
| Laminating speed: 250 mm /min |
| Pouch thickness: Up to 2x125 mic |
| Power supply: 220-240 V, 50Hz |
| Power consumption: 430 W |
| Dimensions 438 x 158 x 80 mm |
| Weight : 2.4kg |
Roller Cutter
| Cutting capacity : | Max. 3 sheets A4 (80g/m ^2 ) |
| Max. 1 laminated sheet | |
| Max. cutting lenght: 250 mm | |
Corner rounder
| Cutting capacity : | Max. 3 sheets ( 80g/m^2 )Max. 1 laminated sheet |

3T Supplies AG, Peach Division
CH-8834 Schindellegi (Switzerland)
Tel: +41 44 787 68 30
Fax: +41 44 787 68 50
e-mail: support@peach.info
Stand der Informationen · Last Information Update · Version des informations · Versione delle informazioni · Estado de las informaciones · Uppgiftslämnare · Informasjonsstatus
- Stav informací · Stav informácií · Stan informacji · Az