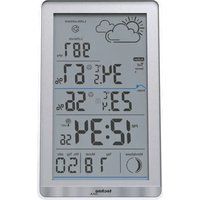
WS 9218 - Thermometer Techno Line - Free user manual and instructions
Find the device manual for free WS 9218 Techno Line in PDF.


| Product type | Thermometer with weather station |
| Brand | Techno Line |
| Model | WS 9218 |
| Station power supply | 2 AAA batteries (not included) |
| Outdoor sensor power supply | 2 AAA batteries (not included) |
| Number of sensor channels | 3 (channels 1, 2, 3) |
| Transmission frequency | 434 MHz |
| Maximum range | 100 m in open field |
| Indoor temperature range | 0 °C to +50 °C |
| Outdoor temperature range | -40 °C to +70 °C |
| Humidity range | 20 % to 95 % |
| Atmospheric pressure range | 800 to 1100 hPa |
| Time display | Radio-controlled DCF-77, 12/24 h format |
| Calendar | January 1, 2000 to December 31, 2099 |
| Weekday languages | 7 languages (French, English, German, etc.) |
| Alarm | With 5-minute snooze function |
| Weather forecast | 4 symbols: sunny, partly cloudy, cloudy, rainy |
| Moon phase | 8 phases displayed |
| Comfort index | Based on temperature and humidity |
| Trends | Indoor/outdoor temperature and atmospheric pressure |
| Cleaning | Soft dry cloth, do not immerse |
| Battery safety | Use alkaline batteries, observe polarity, do not throw into fire |
Frequently Asked Questions - WS 9218 Techno Line
User questions about WS 9218 Techno Line
0 question about this device. Answer the ones you know or ask your own.
Ask a new question about this device
Download the instructions for your Thermometer in PDF format for free! Find your manual WS 9218 - Techno Line and take your electronic device back in hand. On this page are published all the documents necessary for the use of your device. WS 9218 by Techno Line.
USER MANUAL WS 9218 Techno Line
WS 9218 - Instruction manual
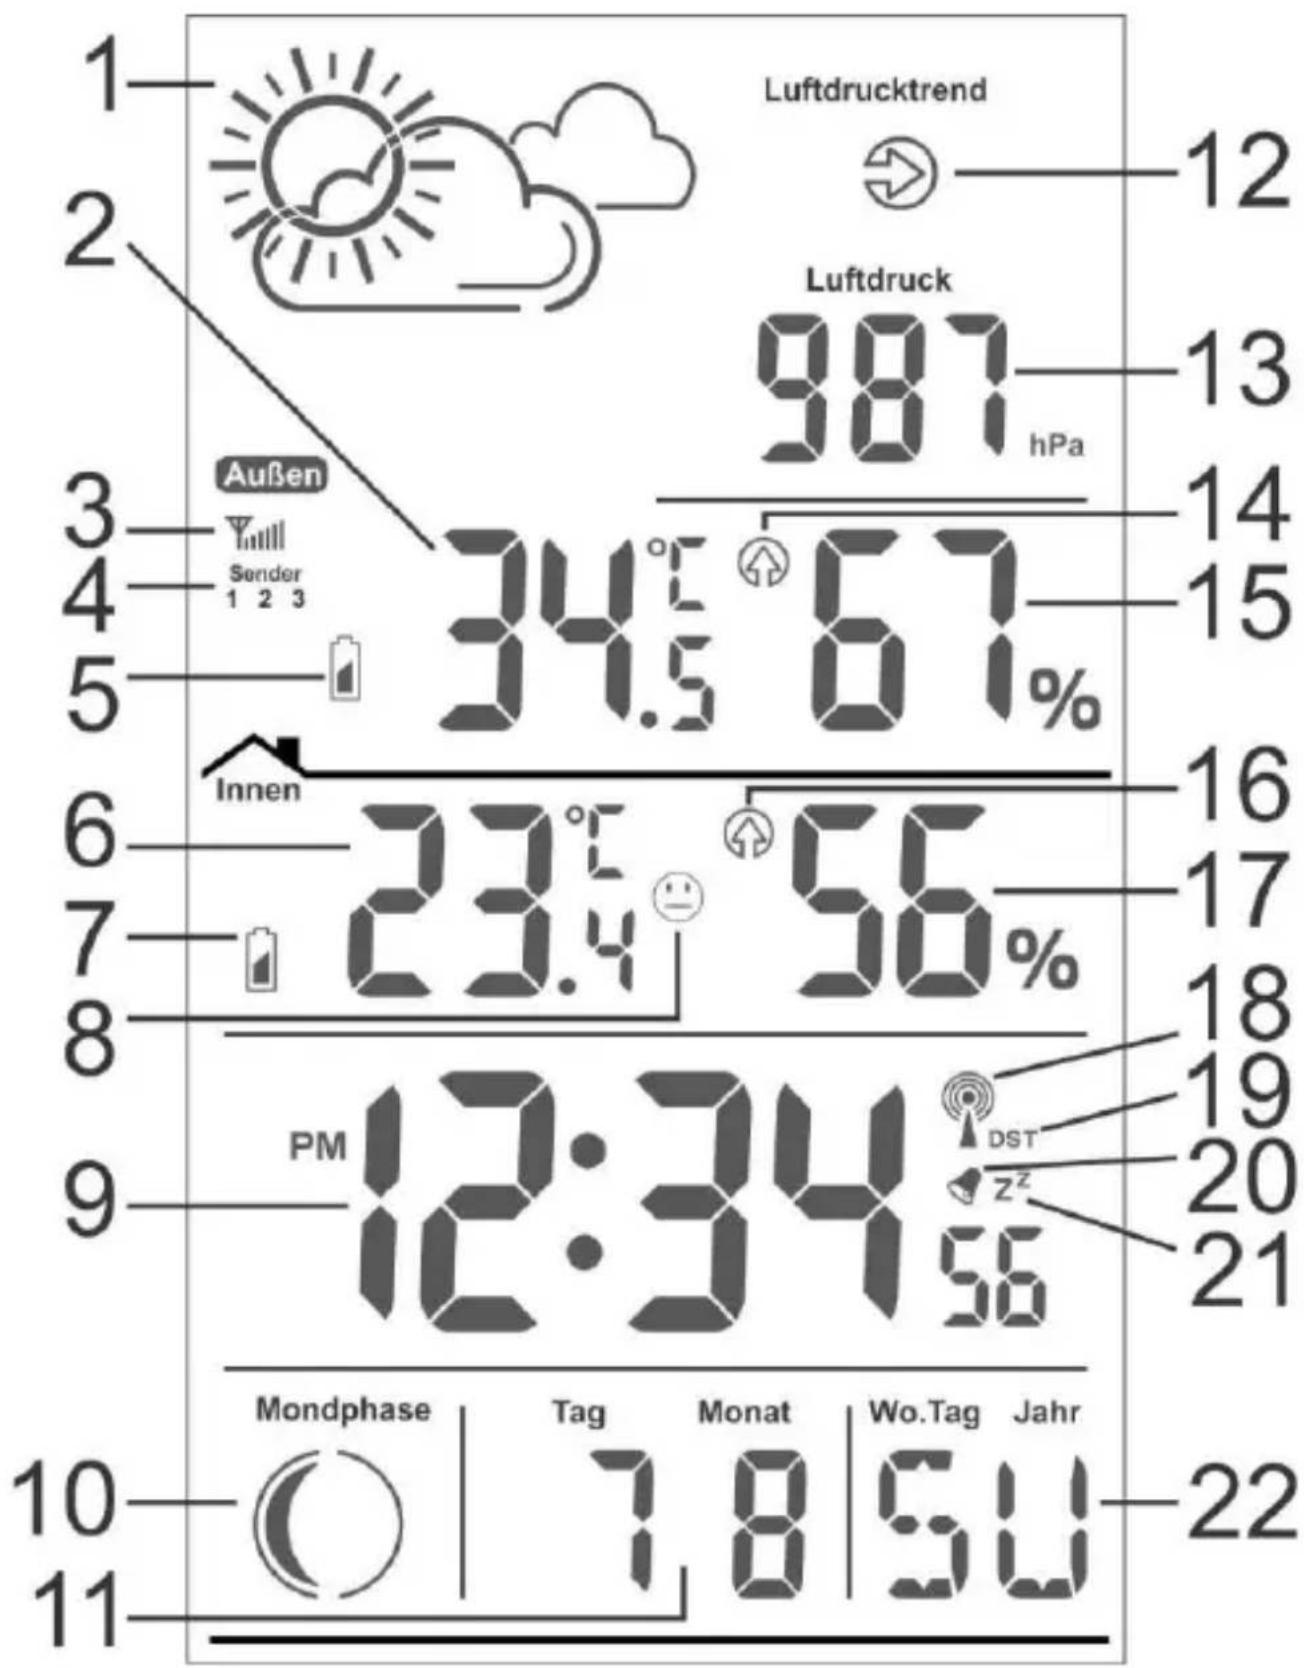
Overview - Display
EN1
1- Weather forecast icon 12- Air pressure trend icon
2- Outdoor temperature 13- Air pressure
3- Sensor signal reception icon 14- Outdoor temperature trend icon
4- Outdoor channel icon 15- Outdoor humidity
5- Sensor low battery indicator 16- Indoor temperature trend icon
6- Indoor temperature 17- Indoor humidity
7- Station low battery indicator 18- Time signal reception icon
8- Comfort symbol 19-Daylight saving time icon (DST)
9-Time 20-Alarmicon
10-Moon phase symbol 21-Snooze icon
11- Date and month 22- Weekday / Year
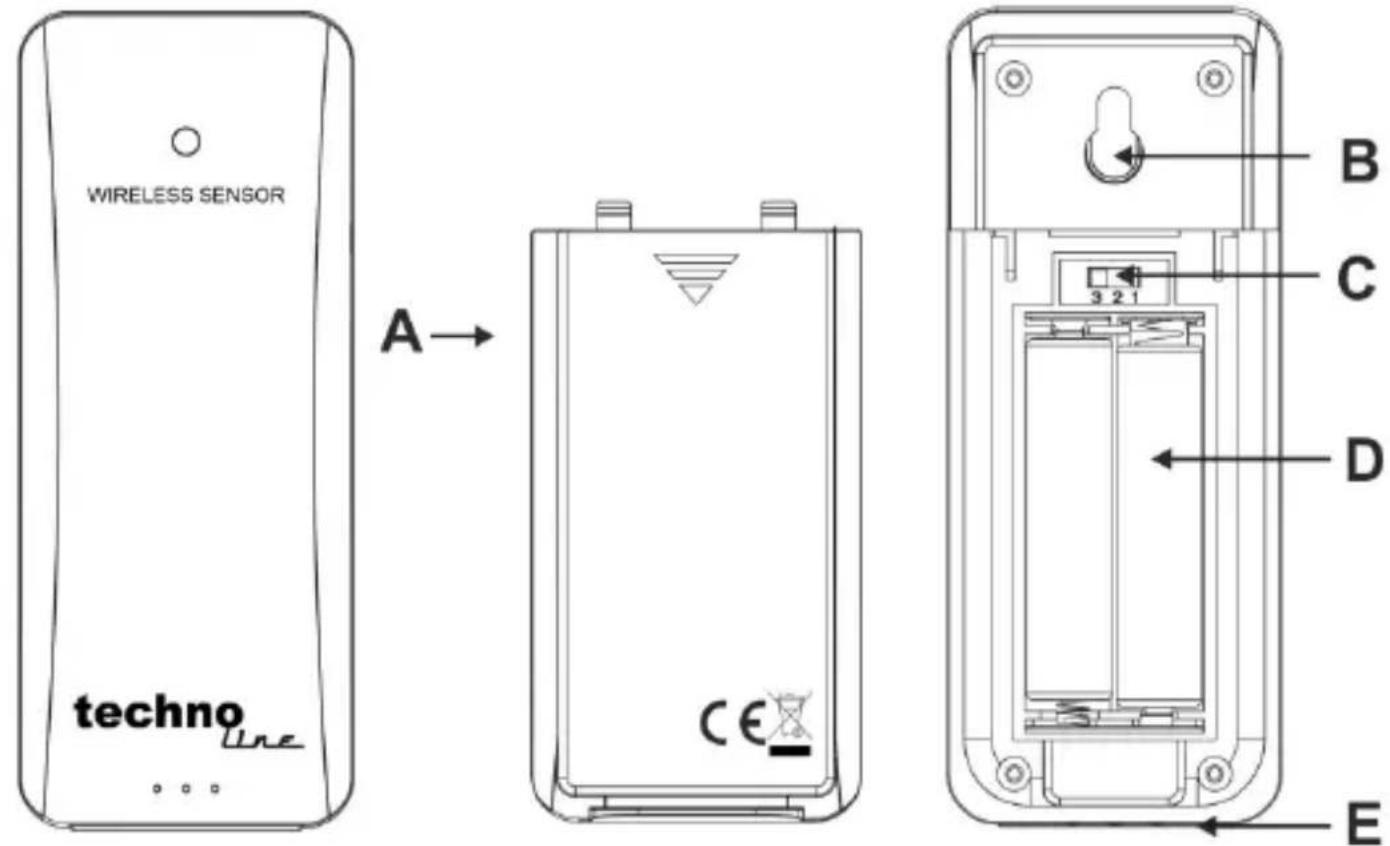
Overview - Sensor TX106-TH
A- Battery compartment cover D- Battery compartment
B-Eyelet for suspension E-Stand
C- Channel switch (1, 2, 3)
Main functions
- DCF-77 radio-controlled time
12/24 hour time display - Calendar function: January 1, 2000 - December 31, 2099
- Week display in seven languages (English, German, French, Italian, Spanish, Dutch, Danish)
- Alarm with 5-minute snooze function
- Indoor temperature measuring range: 0^ to +50^
- Outdoor temperature measuring range: -40°C to + 70°C
- Humidity measuring range: 20% to 95% .
3 outdoor sensor channels
Transmission frequency: 434 MHz
Maximum transmission power: 10 dBm
Air pressure range: 800 to 1100 Hpa - Trend for Indoor / outdoor temperature and air pressure
- Weather forecast function
- Moon phase indication function
- Low battery indicator
Daylight saving time (DST) function - Priority: Active Alarm > Sensor signal reception > Time signal reception
- Function buttons: ZEIT, ALARM, SENDER, ▲, ▼, Zzz
Getting started:
- Remove the battery compartment cover of the outdoor sensor and insert 2 × AAA size battery while observing the correct polarity [“+” and “-” marks]. Close the cover of the battery compartment again.
- Remove the battery compartment cover of the base station and insert 2 × AAA size battery while observing the correct polarity [“+” and “-” marks]. Close the cover of the battery compartment again.
- Place the base station securely on a flat surface.
- The remote sensor should be securely mounted onto a horizontal surface.
Notes:
- Make sure that the sensor is set to the same channel as displayed on the station. Set the sensor channel by using the channel switch on the back of the sensor (1, 2 or 3) and press the SENDER button on the back of the station to set the channel of the station (1, 2 or 3)
Sensor signal receiving mode
- The main unit automatically starts receiving transmission from outdoor sensor for outdoor temperature & humidity.
- The outdoor sensor will automatically transmit temperature and humidity signal to the main unit after batteries inserted.
- If main unit failed to receive transmission from outdoor thermo sensor in first 3 minutes after the batteries inserted ("- - . - "display on the LCD), hold the "SENDER" button for 3 seconds to receive transmission manually. Signal strength icon " " flashes on the LCD.
Notes:
- For best measuring, place the outdoor sensor outside and protected from rainfall, strong winds and direct sunlight.
- Transmissions between receiver (station) and transmitter (sensor) can reach up to 100m in an open area. In open areas there are no interfering obstacles such as buildings, trees, vehicles, high voltage lines, etc.
- When powering or resetting, the device goes into radio reception mode for 3 minutes. The signal strength icon " is displayed on LCD.
Outdoor sensor channels
- Press the "SENDER" button to view the outdoor sensor channel 1, 2 or 3 on the display. "1", "2" or "3" will be displayed under signal strength " accordingly.
- Only one sensor can be connected to each channel at a time.
- To connect a sensor to a certain channel, select the channel 1, 2 or 3 on the channel switch on the backside of the outdoor sensor before starting it. Select the corresponding channel on the station and hold the "SENDER" button for 3 seconds to receive transmission manually.
Radio controlled time & time signal receiving mode
- 3 minutes after batteries are inserted or station is reset and main unit finishes receiving the transmission from outdoor sensor, the clock automatically starts to scan for the DCF-77 time signal. The time signal
reception icon" ” flashes on the LCD.
| ▲ flashes, indicating active DCF signal reception | ▲ stays on and flashes, indicating successful signal reception | ▲ disappears, Indicating failed signal reception |
- The clock automatically scans the time signal at 1:00, 2:00, 3:00, 4:00, 5:00 every day to maintain accurate timing. If reception fails on all

times, scanning stops (" " on LCD disappear) on this day and starts a next attempt on 1:00 of the next day.
- The clock can be set to scan the time signal manually by holding the "▼" button for 3 seconds. Each reception takes about 7 minutes. If receptions fail, scanning stops.
- Manually stop scanning by holding the “ ” button for 3 seconds.
- "DST" shown on the LCD if it is in daylight saving time mode.
Manual time setting
- In time display mode, press the “▲” button to switch between 12 hour or 24 hour display mode. In 12 hour display mode, the PM icon will be displayed in the afternoon hours.
- In time display mode, hold the "ZEIT" button for 3 seconds to enter time setting mode.
- Press the “▲” or the “▼” button to adjust the setting and press the “ZEIT” button to confirm each setting. Keep the “▲” or the “▼” button pressed, to accelerate the process and reach the desired value more quickly.
The setting sequence is shown as follows: year -> month -> day -> weekday language -> hour -> minute -> time zone setting -> exit - Time zone setting can be used to set difference from DCF-77 time, for example 0 for Germany or -1 for UK.
7 languages can be selected for the weekday in the following order: German (GE) -> English (EN) -> Italian (IT) -> French (FR) -> Dutch (NE) -> Spanish (ES) -> Danish (DA) -> back to the beginning with German (GE) - The languages and their selected abbreviations for each day of the week are shown in the following table:
| Language | English | German | French | Spanish | Italian | Dutch | Danish |
| Symbol | EN | GE | FR | ES | IT | NE | DA |
| Monday | MO | MO | LU | LU | LU | MA | MA |
| Tuesday | TU | DI | MA | MA | MA | DI | TI |
| Wednesday | WE | MI | ME | MI | ME | WO | ON |
| Thursday | TH | DO | JE | JU | GI | DO | TO |
| Friday | FR | FR | VE | VI | VE | VR | FR |
| Saturday | SA | SA | SA | SA | SA | ZA | LO |
| Sunday | SU | SO | DI | DO | DO | ZO | SO |
Notes:
The second can only be adjusted to zero.
- The time setting will automatically exit in 10 seconds without any adjustment from buttons.
- The time zone is used for the countries that can receive the DCF time signal, but where the time zone differs from the German time. When the country time is faster than the German time for 1 hour, the zone should be set to 1. Then the clock will set 1 hour faster from the signal time received automatically.
Alarm setting:
- Hold the "ALARM" button for 3 seconds to enter alarm time setting. Press "▲" or "▼" button to adjust the alarm time. Press the "ALARM" button to confirm the setting.
The setting sequence is shown as follows: hour -> minute -> exit - Press the "ALARM" button to switch alarm on or off. The alarm icon " " is shown on the display once the alarm is set on and is no longer displayed once the alarm is set off again.
- Press the "ZEIT" button to view the alarm time and "AL" will be displayed on the display.
Note:
- The alarm setting will automatically exit in 10 seconds without any adjustment from buttons.
Alarm and snooze function:
- When alarm sounds, alarm icon “♂” is flashing. Press the “Zzz” button to activate the snooze alarm (“♂” flash on the LCD) or any
other button to stop the alarm and it will sound at the same time of the next day.
- During active snooze function, the snooze icon “ ^ ” will flesh next to the alarm icon “” and the alarm will stop for 5 minutes, then it sounds again. This snooze function can be enabled for countless times.
- Press any button except the "Zzz" button during the snooze function to stop the snooze alarm.
Note:
- The alarm will sound for 2 minutes and increases in intensity over time before it automatically stops, if not interrupted by pressing any buttons.
Moon phase
- Moon phase is based on the calendar date and displayed as one of the following 8 states:
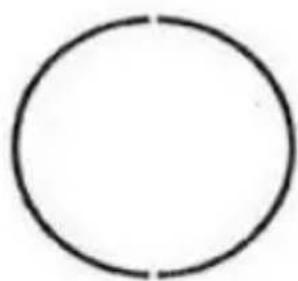
Full moon
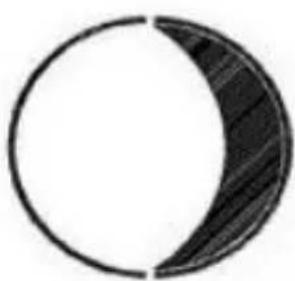
Waning gibbous
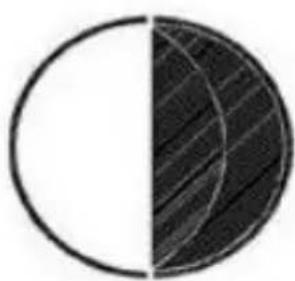
Last quarter
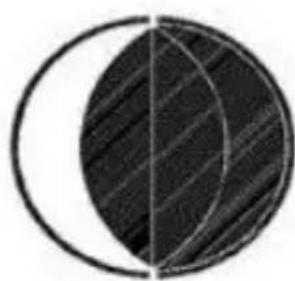
Waning crescent
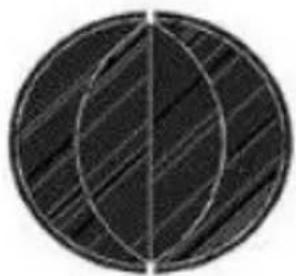
New moon
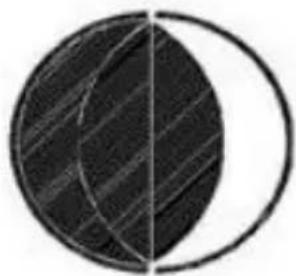
Waxing crescent
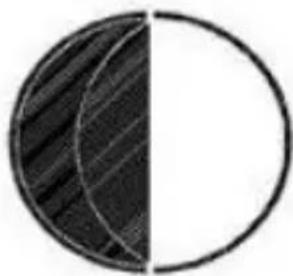
First quarter
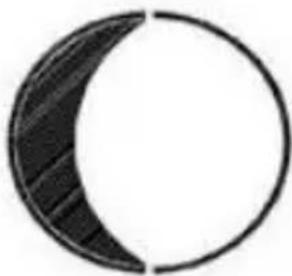
Waxing gibbous
Air pressure and weather forecast
Air pressure range: 800-1100Hpa
- Air pressure trend displayed in arrow symbols (same as temperature trend and will be used for weather forecast of station.)
- 4 symbols for weather forecast as follows:
| Sunny | |
| Slightly cloudy | |
| Cloudy | |
| Rainy |
Temperature & Humidity
- Press the “▼” button to switch between temperature display in ^ C or ^ F .
- Indoor temperature range: 0 to 50^, lower than 0^ display LL.L, higher than 50^ display HH.H
EN8
- Indoor temperature accuracy: + / - 1^ C during 0 24^ C
+/- 2°C during 25~50°C - Outdoor temperature range: -40 70^ lower than -40^ display LL.L, higher than 70^ display HH.H
- Outdoor temperature accuracy: +/-1^ during 20 30^
+/-2°C during 10~20°C & 30-40°C
+/- 3°C during -40~10°C & 50-70°C - Humidity range: 20%~95%
Humidity accuracy: +/-5% when in 40%-80%, others is +/-8% - Temperature trend function:
| Temperature rising more than 1℃ within 1hour | |
| Temperature rising or falling below 1℃ within 1hour | |
| Temperature falling more than 1℃ within 1hour |
Comfort Index
- Comfort index is based on temperature and humidity:
| Humidity <40% Temperature: any temperature Status: Dry | |
| Humidity in 40% ~ 70% Temperature: 20~28°C Status: Comfortable | |
| Humidity >70% Temperature: any temperature Status: Wet |
Low battery indicator:
- The low battery indicator “ l ” will appear next to the indoor temperature on the display if the base station has low battery power or appear next to the outdoor temperature on the display if the outdoor sensor has low battery power.
- The batteries in the station or the sensor should be replaced with fresh batteries accordingly.
Hereby, Technotrade declares that the products WS 9218 and TX106-TH are in compliance with the essential requirements and other relevant provisions of Directive 2014/53/EU and ROHS 2011/65/EC. The original EU declaration of conformity may be found at: www.technoline.de/doc/4029665092188
Environmental reception effects
The station obtains the accurate time with wireless technology. Same as all wireless devices, the reception is maybe affected by the following circumstances:
- long transmitting distance
- nearby mountains and valleys
- near freeway, railway, airports, high voltage cable etc.
- near construction site
among tall buildings - inside concrete buildings
- near electrical appliances (computers, TV's, etc) and metallic structures
- inside moving vehicles
Place the station at a location with optimal signal, i.e. close to a window and away from metal surfaces or electrical appliances.
EN10
Precautions
- The base station is intended to be used only indoor, the outdoor sensor is intended for outdoor use only.
- Do not subject the unit to excessive force or shock.
- Do not expose the unit to extreme temperatures, direct sunlight, dust or humidity.
- Do not immerse in water.
- Avoid contact with any corrosive materials.
- Do not dispose this unit in a fire as it may explode.
- Do not open the inner back case or tamper with any components of this unit.
Batteries safety warnings
- Use only alkaline batteries, not rechargeable batteries.
- Install batteries correctly by matching the polarities (+/-) .
- Always replace a complete set of batteries.
- Never mix used and new batteries.
- Remove exhausted batteries immediately.
- Remove batteries when not in use.
- Do not recharge and do not dispose of batteries in fire as the batteries may explode.
- Ensure batteries are stored away from metal objects as contact may cause a short circuit.
- Avoid exposing batteries to extreme temperature or humidity or direct sunlight.
- Keep all batteries out of reach from children. They are a choking hazard.
Use the product only for its intended purpose!
Consideration of duty according to the battery law
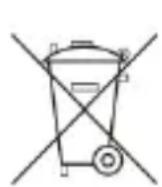
Old batteries do not belong to domestic waste because they could cause damages of health and environment. You can return used batteries free of charge to your dealer and collection points. As end-user you are committed by law to
bring back needed batteries to distributors and other collecting points!
Consideration of duty according to the law of electrical devices
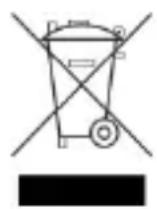
This symbol means that you must dispose of electrical devices separated from the General household waste when it reaches the end of its useful life. Take your unit to your local waste collection point or recycling centre. This applies to all countries of the European Union, and to other European
countries with a separate waste collection system.
D-Vano battery
E- Supporto
IT2
Funzioni principali
- WS 9218 - Instruction manual
- Main functions
- Getting started:
- Notes:
- Sensor signal receiving mode
- Outdoor sensor channels
- Radio controlled time & time signal receiving mode
- Manual time setting
- Alarm setting:
- Note:
- Alarm and snooze function:
- Moon phase
- Air pressure and weather forecast
- Temperature & Humidity
- Comfort Index
- Low battery indicator:
- Environmental reception effects
- EN10
- Precautions
- Batteries safety warnings
- Consideration of duty according to the battery law
- IT2
- Funzioni principali
Brand : Techno Line
Model : WS 9218
Category : Thermometer