PCI 6DC LP - Speaker TANNOY - Free user manual and instructions
Find the device manual for free PCI 6DC LP TANNOY in PDF.

User questions about PCI 6DC LP TANNOY
0 question about this device. Answer the ones you know or ask your own.
Ask a new question about this device
Download the instructions for your Speaker in PDF format for free! Find your manual PCI 6DC LP - TANNOY and take your electronic device back in hand. On this page are published all the documents necessary for the use of your device. PCI 6DC LP by TANNOY.
USER MANUAL PCI 6DC LP TANNOY
natural_image
Pure grid pattern with diagonal lines and a small central dark rectangle (no text or symbols)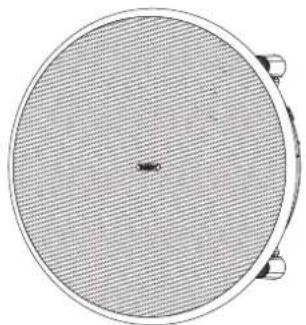
natural_image
Circular object with a textured surface and four small protrusions at the bottom (no text or symbols)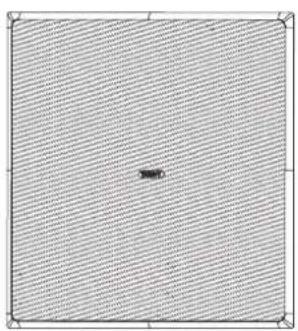
natural_image
Square grid pattern with diagonal hatching and a small dark rectangular object at center (no text or symbols)
natural_image
Circular diagram with a mesh pattern and a small central dot, no text or symbols presentQCI 6DC
High-Performance 6" Dual Concentric In-Ceiling Loudspeaker for Installation Applications
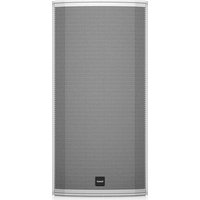
PCI 6DC
Premium 6" Dual Concentric In-Ceiling Loudspeaker for Installation Applications
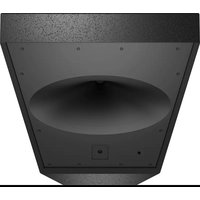
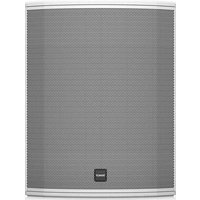
PCI 6DC LP
Premium Low Profile 6" Dual Concentric In-Ceiling Loudspeaker for Installation Applications
2 QCI 6DC/PCI 6DC/PCI SDC | P Quick Start Guide 3
EN
ES

Important Safety Instructions
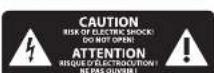
Terminal's marked with this symbol carry electrical current of sufficient magnitude to constitute risk of electric shock. the only high quality professional speaker cables with 15" TS or twist- lacking plugs pre installed. All other installation or modification should be performed only by qualified personnel.
This symbol, wherever it appears, alerts you to the presence of uninsulated dangerous voltage inside the enclosure – voltage that may be sufficient to constitute a risk of shock.
This symbol, wherever it appears, alerts you to important operating and maintenance instructions in the accompanying literature. Please read the manual.
Caution To reduce the risk of electric shock, do not remove the top cover (or the rear section). No user serviceable parts include. Refer servicing to qualified personnel.
Caution To reduce the risk of fire or electric shock, do not expose this appliance to rain and moisture. The apparatus shall not be exposed to dripping or splashing liquids and no objects filled with liquids, such as wares, shall be plated on the apparatus.
Caution These service instructions are for use by qualified service personnel only. To reduce the risk of electric shock do not perform any servicing other than that contained in the operation instructions. Repairs have to be performed by qualified service personnel.
- Read these instructions.
- Keep these instructions.
- Here all warnings.
- Follow all instructions.
- Do not use this apparatus near water.
- Clean only with dry cloth.
- Do not lock any ventilation openings, install in accordance with the manufacturer's instructions.
-
Do not install near any heat sources such as rotators, heat registers, stores, or other apparatus (including amplifiers) that produce heat.
-
Do not defeat the safety purpose of the polarized or grounding-type plug. A polarized plug has two blades with one wider than the other. A grounding-type plug has two blades and a third grounding proong. The wide blade or the third proong are provided for your safety. If the provided plug does not fit into your outlet, consult an electrician for replacement of the otherwise outlet.
-
Protect the power cord from being walked on or pinched particularly at plugs, convenience receptacles, and the point where they eat from the apparatus.
-
Use only attachments/accessories specified by the manufacturer.

- Use only with the cart, stand, tripod, bracket, or table specified by the manufacturer, or sold with the apparatus. When a cart is used, use caution when moving the cart/apparatus combination to avoid
injury from tip-over
-
Unplug this apparatus during lightning storms or when unused for long periods of time.
-
Refer all servicing to qualified service personnel. Servicing is required when the apparatus has been damaged in any way, such as power supply cord or plug in damaged, liquid has been spilled or objects have fallen into the apparatus, the apparatus has been exposed to rain or moisture, does not operate normally, or has been dropped.
-
The apparatus shall be connected to a AWNG socket outlet with a protective earthing connection.
-
Where the MAINS plug or an appliance coupler is used as the disconnect device, the disconnect device shall remain nearly operable.

- Correct disposal of this product: This symbol indicates that this product must not be disposed of with household waste, according to the WEE Directive (2012/19/EU) and
should be taken to a collection center licensed for the recycling of waste electrical and electronic equipment (EEI). The mislanding of this type of waste could have a possible negative impact on the environment and human health due to potentially hazardous substances that are generally associated with EII. At the same time, your cooperation in the correct disposal of this product will contribute to the efficient use of natural resources. For more information about where you can take your waste equipment for recycling, please contact your local city office, or your household waste collection service.
-
Do not install in a confined space, such as a book case or similar unit.
-
Do not place naked flame sources, such as lighted candles, on the apparatus.
-
Please keep the environmental aspects of battery disposal in mind. Batteries must be disposed-of at a battery collection point.
-
This apparatus may be used in tropical and moderate climates up to 45°C.
LEGAL DISCLAIMER
Music Tribe accepts no liability for any loss which may be suffered by any person who relies either wholly or in part upon any description, photograph, or statement contained herein. Technical specifications, appearances and other information are subject to change without notice. All trademarks are the property of their respective owners, Midas, Blank Teknik, Lab Guppen, Lake, Tannoy, Turbosound, TC Electronics, TC Helicon, Behninger, Sugora, Aston Microphones, Aston Microphones and Coeladora are trademarks or registered trademarks of Music Tribe Global Brands Ltd. © Music Tribe Global Brands Ltd. 2022 All rights reserved.
LIMITED WARRANTY
For the applicable warranty terms and conditions and additional information regarding Music Tribe's Limited Warranty, please see complete details online at community.musictribe.com/pages/support?warranty.

BESCHRÄNKTE GARANTIE
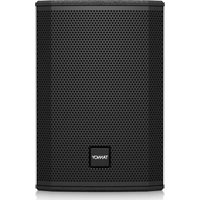
Thank you for purchasing this Tannoy high-performance ceiling loudspeaker. This product range is suited for high-level music and speech reinforcement applications requiring exceptional sonic quality with uncompromised reliability.
Features
QCI 6DC
• High-performance loudspeaker for ceiling installation applications
- 6° Dual Concentric driver featuring Tannoy Omnimagnet technology
• Torus Ogive waveguide for improved directivity - Glass fibre cone with high-excision, rubber surround for high power handling
- 70 Watts continuous, 280 Watts peak power
- Extremely thin bezel for discreet installation
PCI 6DC
• Premium, high-definition loudspeaker for ceiling installation applications
+ 6° Dual Concentric driver featuring Tannoy point-source constant directivity
- Tulip Waveguide for a smooth, uniform frequency response over a wide area of coverage unachievable with discrete, two-way designs
- Blue Kewlar® cone with high-excursion, rubber surround for high power handling
+ 3-way variable high-frequency level switch for customised performance preferences
- 70 Watts continuous, 280 Watts peak power
PCI 6DC LP
- Premium, high-definition loudspeaker for ceiling installation applications
- Low profile chassis design to offer great sound from tight space situations
- 6° Dual Concentric driver featuring Tannoy Omnimagnet technology
- Torus Ogive waveguide for improved directivity
- Blue Kewlar® cone with high excursion, rubber surround for high power handling
• 3-way variable high-frequency level switch for customised performance preferences - 70 Watts continuous, 280 Watts peak power
Common Features:
- Extremely thin bezel for discreet installation - Includes round and square baffles and grilles for versatile applications - Rigid chassis for improved bass performance and durable application - Integrated construction for easy installation - Semi-matt white finish fits unobinsively in any environment - Powder coated UV resistant perforated steel mesh grille with dust protection - Removable grilles for custom painting - Self-aligning clamp mounting system - Optional Tamnoy logo grille badge included
Unpacking
Every Tannoy product and accessory is carefully inspected before packing. After unpacking, please inspect your product to make sure no damage has occurred in transit. In the unlikely event of any damage, would you please notify your dealer immediately and retain your shipping carton, as your dealer may ask you to return the faulty unit to them for inspection.
Safety Notices
Some regional construction codes require the use of a secondary method of securing loudspeakers in ceiling to provide security of a backup support. A secondary support line should be attached from the rear of the product to a source point on the ceiling. Please consult the relevant construction codes in your region.
When using a power driver to install the product it is essential to use the correct torque level settings to avoid over tightening and damage to the ceiling material or clamps.
Recommended torque setting: 1.5 km.
Tannoy will not be held responsible for any damages caused by the improper installation of these loudspeakers.
EN
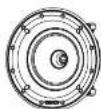
Product Feature Identification
QCI 6DC

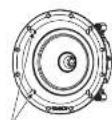
text_image
Dual Concentric Speaker Screws (A4) for tightening clampsSpeaker Assembly
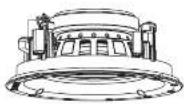

text_image
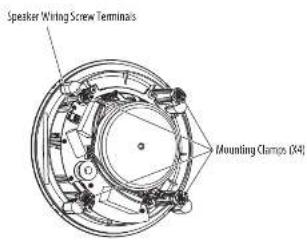
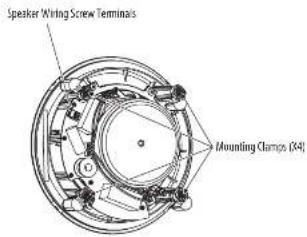
Speaker Wiring Screw Terminals Mounting Clamps (X4)Supplied Items

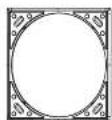
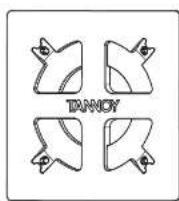
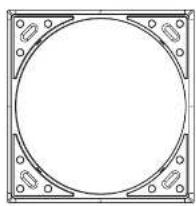
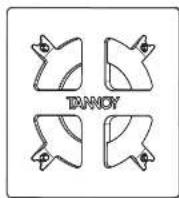
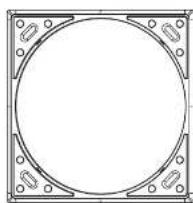
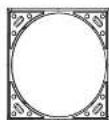
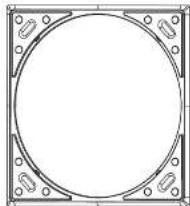
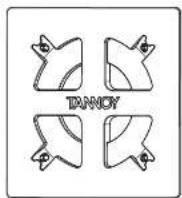
Square Grille
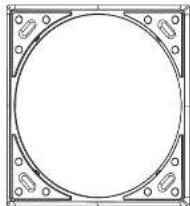
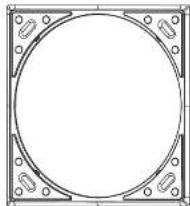
natural_image
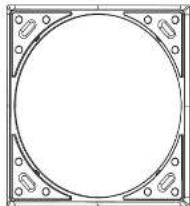
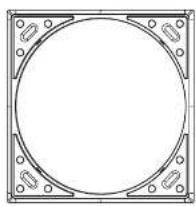
Pure geometric diagram of a square frame with a central circle and corner brackets (no text or symbols)Square Baffle for Square Grille
Paint Mask for Square Baffle

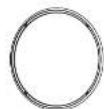
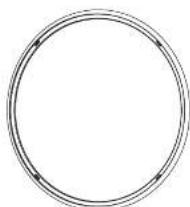
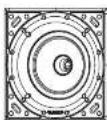
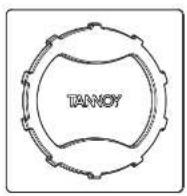
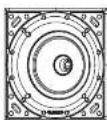
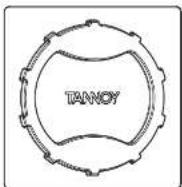
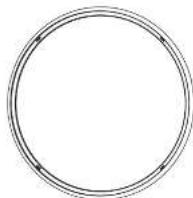
Circular Grille

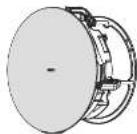
natural_image
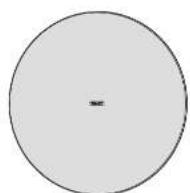
Simple circular diagram with two concentric rings and a small arrow inside (no text or symbols)Circular Baffle for Circular Grille

Paint Mask for Circular Baffle
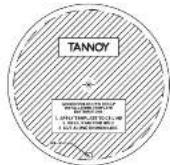
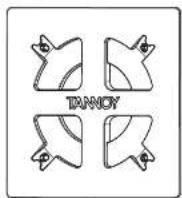
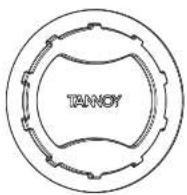
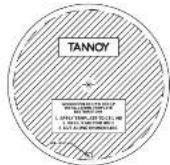
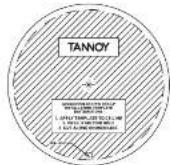
Cutout Installation Template
Product Feature Identification
PCI 6DC Supplied Items
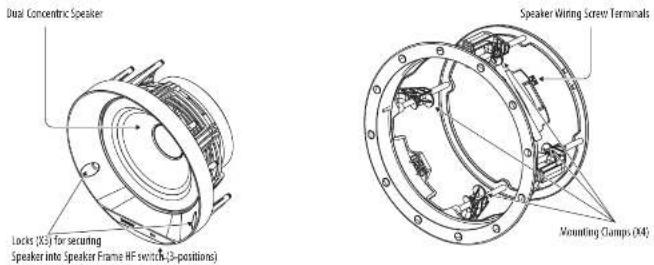
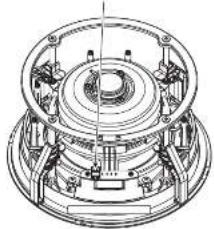
text_image
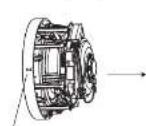
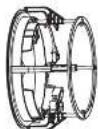
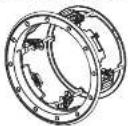
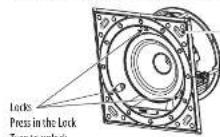
Dual Concentric Speaker Locker (XS) for securing Speaker into Speaker Frame HF switch (3-positions) Speaker Wiring Screw Terminals Mounting Clamps (94)Speaker Assembly Speaker Frame

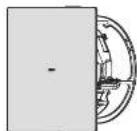
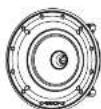
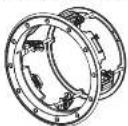
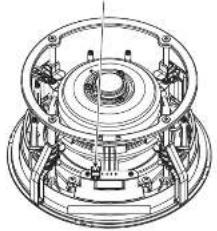
natural_image
Technical line drawings of a mechanical assembly, showing front and side views (no text or symbols)Speaker and Frame Assembly Speaker Frame Rear View
Square Grille

Square Baffle for Square Grille

Paint Mask for Square Baffle

Circular Grille

Circular Baffle for Circular Grille

Paint Mask for Circular Baffle

Cutout Installation Template
Wiring and Setting Up Installation
Terminal Connections
- WARNING: To avoid potential damage to your loudspeaker, ensure that the amplifier is switched OFF prior to connecting or disconnecting any cables.
- Before switching the amplifier ON, double check that all connections are secure and that the polarity is correct.
- Note: For each speaker in this series, the correct square or circular baffle has to be fitted before connecting the speaker wiring. (The baffles are fitted from behind, and so the speaker wires cannot be connected while the baffles are being installed.)
- The two screw terminals on the rear of each speaker are labeled positive (−), and negative (−). These connect respectively to the positive (−) and negative (−) output terminals of your audio power amplifier.
- Strip off approximately 8 mm (1/4") of the outer protective layer of one conductor and twist its inner cores together to prevent shorting from stray wires. Insert the core into the screw terminal while ensuring that correct polarity is maintained. Repeat this for both speaker wires. Tighten the two screws to make a secure connection.
- The screw terminals for the PCI 6DC are located on the rear of the speaker. The screw terminals for the PCI 6DC and PCI 6DC LP are located on the speaker frame. The PCI 6DC and PCI 6DC LP frame can be preinstalled and wired up, and the speaker assembly added at a later stage.
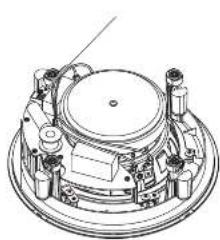
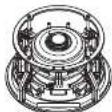
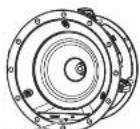
natural_image
Technical line drawing of a mechanical assembly with no visible text or symbols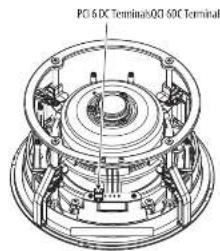
text_image
PCI 6 DC Terminals/PCI 50C TerminalQCI 6DC
- WARNING: To avoid potential damage to your loudspeaker, ensure that the amplifier is switched OFF prior to connecting or disconnecting any cables.
- The procedure below describes the installation of the speaker into a typical stud ceiling or wall with drywall plasterboard.
- Locate a suitable mounting position for the speaker, using a stud-finder.
WARNING: Make sure that there are no power lines, other cables, or plumbing such as water, sewer, gas lines in the chosen cutout location. Also make sure that the location is far enough from the closest wall stud so that the clamping mechanism can operate without interference. - Use the supplied cutout template as a guide, and cut out a circular hole in the drywall/plasterboard. Remove any debris from the hole. Use a suitable adhesive in the local area inside the hole to seal the drywall to the studs and joints, to prevent ceiling buzzing.
Cutout Installation Template
- Run the speaker wire from your amplifier to this location, leaving enough slack to allow for the connection.
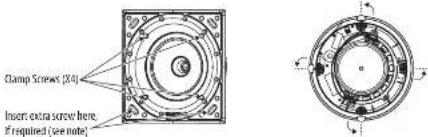
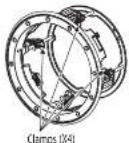
- To use the square speaker grille, first move the mounting clamps out of the way by undoing the four screws accessible from the front of the speaker. Remove the backing from the strips of double-sided tape, and push the speaker into the supplied square baffle.
Clamp Screws (X4)
Square Baffle Square Baffle and Speaker

- If you want to use the circular speaker grille, install the supplied circular baffle instead.

Circular Baffle Circular Baffle and Speaker
- Follow the information on the previous pages to connect the speaker wires from your power amplifier to the speaker terminals. Make sure to check that the polarity is correct and that the positive and negative wires are securely and correctly connected.
-
Make sure that the clamps are all in their rest position, then press the speaker/baffle assembly into the cutout hole in the wall, making sure that the speaker wires are not trapped.
-
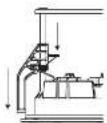
Tighten the four screws accessible from the front of the speaker, until all four clamps are holding the speaker in place. As the screws are tightened, the clamps rotate out of their rest position and clamp to the drywall/plastered board.
Note: After installation, if the square baffle does not press flat against the drywall, insert a 35" long screw in the oval depression in each corner of the baffle, and hand-tighten until the baffle is flat against the drywall.
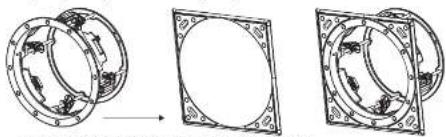
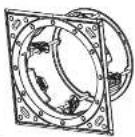
- Install the square grille by pressing it into the square baffle. Small magnets hold it in place.
natural_image
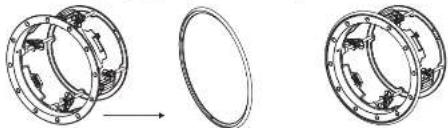
Three technical diagrams showing a square frame with concentric circles and side panels, no text or symbols present.- Alternatively install the circular grille by pressing it into the circular grille. Small magnets hold it in place.
natural_image
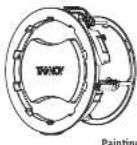
Three circular diagrams showing a transformation from a blank circle to a circular structure with internal components (no text or symbols)- The grilles may be painted to match the decor, before they are fitted onto the speaker baffle.
- Use the supplied square or circular masks to help protect the speaker cones when painting.

Painting Masks in Place
Installation
PCI 6DC and PCI 6DC LP
- WARNING: To avoid potential damage to your loudspeaker, ensure that the amplifier is switched OFF prior to connecting or disconnecting any cables.
- The procedure below describes the installation of the speaker into a typical stud ceiling with drywall/plasterboard. The PCI 6DC and PCI 6DC LP speaker frame is installed and wired, then the speaker assembly can be added later.
- Locate a suitable mounting position for the speaker, using a stud-finder.
WARNING: Make sure that there are no power lines, other cables, or plumbing such as water, sewer, gas lines in the chosen cutout location. Also make sure that the location is far enough from the closest wall stud so that the clamping mechanism can operate without interference. - Use the supplied cutout template as a guide, and cut out a circular hole in the drywall/plasterboard. Remove any debris from the hole. Use a suitable adhesive in the local area inside the hole to seal the drywall to the studs and joints, to prevent ceiling bunting.

Cutout Installation Template
- Run the speaker wire from your amplifier to this location, leaving enough slack to allow for the connection.
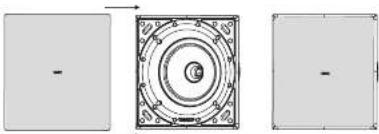
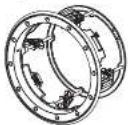
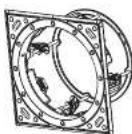
- To use the square speaker grille, first move the mounting clamps out of the way as described in step 9 below. Remove the backing from the strips of double-sided tape, and push the speaker frame into the supplied square baffle.
natural_image
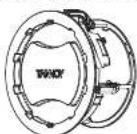
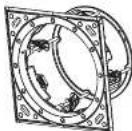
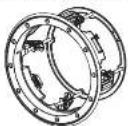
Three mechanical assembly diagrams showing a circular component being rotated into a square frame (no text or symbols)Speaker Frame Square Baffle Speaker Frame with Square Baffle
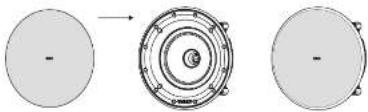
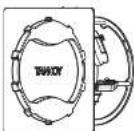
- To use the circular speaker grille, push the speaker frame into the supplied circular baffle instead.
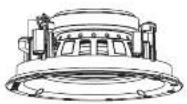
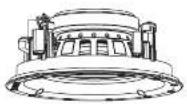
natural_image
Diagram showing a mechanical assembly transformation from a circular ring to a flanged ring (no text or symbols present)Speaker Frame Circular Baffle Speaker Frame with Circular Baffle
22 QCISDC/PC16DC/PC18DCIF
- Follow the information on the previous pages to connect the speaker wires from your power amplifier to the speaker terminals on the speaker frame. Make sure to check that the polarity is correct and that the positive and negative wires are securely and correctly connected. Secure the speaker wiring to the rear ring of the frame with be-wraps to prevent movement.

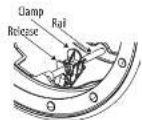
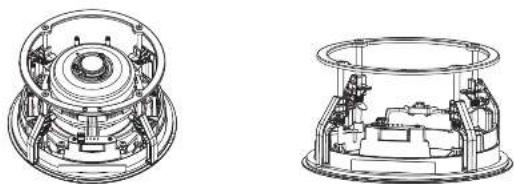
- Carefully press the speaker frame into the cutout hole, making sure the speaker wires are not pinched. Reach inside the frame and rotate the clamps outwards and pull the clamps forward on their rails to secure the speaker frame to the drywall/plasterboard. To remove the speaker frame from the hole, press the release tabs and push the clamps back.
- Use the supplied square or circular masks to help protect the speaker cones when painting.

Painting Mask in Place
- The grilles can be painted separately.
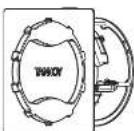
- To mount the speaker into the mounted speaker frame, align the connector on the speaker, with the corresponding connector on the speaker frame. The outer ring of the speaker has an alignment guide channel that fits an alignment stub on the frame.
Alignment guide
Quick Star Guide
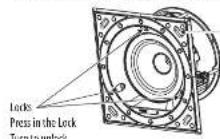
- To lock the speaker in place in the frame, press down on the three lock buttons on the front of the speaker.
Notes: After installation, if the square baffle does not press flat against the drywall, insert a 1/2" screw in the oval depression in each corner of the baffle, and hand-tighten until the baffle is flat against the drywall.

Insert extra screw here, if required (see note)
- To unlock the speaker from the speaker frame, first support the weight of the speaker, and rotate each lock with a screwdriver less than half a turn.
- The HF switch has three positions, with 0 dB being flat. Adjust as necessary to suit the room position and acoustic conditions.
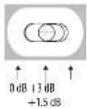
HF Switch HF Switch
- Install the square grille by pressing it into the square baffle. Small magnets hold it in place. Alternatively, install the circular grille by pressing it into the circular baffle.
Introducción
text_image
Dual Concentric Speaker Screens (X4) for tightening ClampsSpeaker Assembly


text_image
Speaker Wiring Screw Terminals Mounting Clamps (X4)Elementos suministrados

Square Grille
natural_image
Pure geometric diagram of a square frame with a central circular hole and corner bolt holes (no text or symbols)Square Baffle for Square Grille
Paint Mask for Square Baffle

Circular Grille
natural_image
Simple circular diagram with two concentric rings and a small loop at the center (no text or symbols)Circular Baffle for Circular Grille

Paint Mask for Circular Baffle

Cutout Installation Template
text_image
Dual Concentric Speaker Locker (XS) for securing Speaker into Speaker Frame HF switch, β-positions) Speaker Wiring Screw Terminals Mounting Clamps (OA)Speaker Assembly Speaker Frame

natural_image
Technical line drawings of a mechanical assembly, showing front and side views (no text or symbols)Speaker and Frame Assembly Speaker Frame Rear View

Square Grille

natural_image
Pure geometric diagram of a square frame with a central circle and corner brackets (no text or symbols)Square Baffle for Square Grille

Paint Mask for Square Baffle

Circular Grille

natural_image
Simple circular outline with no text, numbers, or symbolsCircular Baffle for Circular Grille
Paint Mask for Circular Baffle

Cutout Installation Template
natural_image
Technical line drawing of a mechanical assembly with no visible text or symbolsPCI 6 DC Terminals QD 6DC Terminals
natural_image
Technical line drawing of a mechanical assembly with concentric rings and mounting brackets (no text or symbols)QCI 6DC
Clamp Screws (34) Square Baffle Square Baffle and Speaker
Circular Battle Circular Battle and Speaker
natural_image
Three technical diagrams showing a square frame with concentric circles and side panels, no text or symbols present.natural_image
Three circular diagrams showing a transformation from a blank circle to a circular structure with internal components (no text or symbols)
Painting Masks in Place
Instalación
PCI 6DC y PCI 6DC LP

Speaker Frame Square Baffle Speaker Frame with Square Baffle
Speaker Frame Circular Baffle Speaker Frame with Circular Baffle
34 QCISDC/PC16DC/PC16DCIF
Painting Mask in Place


Insert extra screw here, if required (see note)
text_image
Dual Concentric Speaker Screens (X4) for tightening ClampsSpeaker Assembly

text_image
Speaker Wiring Screw Terminals Mounting Clamps (X4)Articles fournis

Square Grille
natural_image
Pure geometric diagram of a square frame with a central circular hole and corner bolt holes (no text or symbols)Square Baffle for Square Grille

Paint Mask for Square Baffle

Circular Grille

natural_image
Simple circular diagram with two concentric rings and a small arrow inside (no text or symbols)Circular Baffle for Circular Grille

Paint Mask for Circular Baffle
Cutout Installation Template
text_image
Dual Concentric Speaker Locks (XS) for securing Speaker into Speaker Frame HF switch, β-positions) Speaker Wiring Screw Terminals Mounting Clamps (MF)Speaker Assembly Speaker Frame

natural_image
Technical line drawings of a mechanical assembly, showing front and side views (no text or symbols)Speaker and Frame Assembly Speaker Frame Rear View
Square Grille
natural_image
Pure geometric diagram of a square frame with a central circle and corner brackets (no text or symbols)Square Baffle for Square Grille
Paint Mask for Square Baffle

Circular Grille

natural_image
Simple circular outline with no text, numbers, or symbolsCircular Baffle for Circular Grille
Paint Mask for Circular Baffle

Cutout Installation Template
natural_image
Technical line drawing of a mechanical assembly with no visible text or symbolsPCI 6 DC Terminals QD 6DC Terminals
natural_image
Technical line drawing of a mechanical assembly with concentric circular components and mounting brackets (no text or symbols)QCI 6DC
Clamp Screws (34) Square Baffle Square Baffle and Speaker

Circular Battle Circular Battle and Speaker
natural_image
Three abstract geometric diagrams showing a square with concentric circles and a central circle, each with a horizontal bar at the bottom (no text or symbols)natural_image
Three circular diagrams showing a transformation from a blank circle to a circular structure with internal components (no text or symbols)
Painting Masks in Place
Installation
Speaker Frame Square Baffle Speaker Frame with Square Baffle
Speaker Frame Circular Baffle Speaker Frame with Circular Baffle

Painting Mask in Place


Insert extra screw here, if required (see note)
text_image
Dual Concentric Speaker Screens (X4) for tightening ClampsSpeaker Assembly

text_image
Speaker Wiring Screw Terminals Mounting Clamps (X4)natural_image
Pure geometric diagram of a square frame with a central circular hole and corner bolt holes (no text or symbols)Square Baffle for Square Grille

Paint Mask for Square Baffle
Circular Grille

natural_image
Simple circular diagram with two concentric rings and a small arrow inside (no text or symbols)Circular Baffle for Circular Grille

Paint Mask for Circular Baffle

Cutout Installation Template
text_image
Dual Concentric Speaker Locker (XS) for securing Speaker into Speaker Frame HF switch (3-positions) Speaker Wiring Screw Terminals Mounting Clamps (94)Speaker Assembly Speaker Frame

natural_image
Technical line drawings of a mechanical assembly, showing front and side views (no text or symbols)Speaker and Frame Assembly Speaker Frame Rear View

Square Grille

Square Baffle for Square Grille
Paint Mask for Square Baffle

Circular Grille

Circular Baffle for Circular Grille

Paint Mask for Circular Baffle

Cutout Installation Template
text_image
PQ 6 DC Terminals 0Q 50C TerminalsQCI 6DC
Clamp Screws (14) Square Baffle Square Baffle and Speaker
Circular Baffle Circular Baffle and Speaker
QCI SDC/PCI 6DC/PCI 6DC IF
natural_image
Three circular diagrams showing a transformation from a single circle to a multi-layered ring structure (no text or symbols)
Painting Masks in Place
Installation
Quick Star Guide
57
Speaker Frame Square Baffle Speaker Frame with Square Baffle
Speaker Frame Circular Baffle Speaker Frame with Circular Baffle
58 QCISDC/PC16DC/PC16DCIF
Painting Mask in Place
Insert extra screw here, if required (see note)
text_image
Dual Concentric Speaker Screens (X4) for tightening ClampsSpeaker Assembly


text_image
Speaker Wiring Screw Terminals Mounting Clamps (X4)Itens Fornecidos

Square Grille

natural_image
Pure geometric diagram of a square frame with a central circular hole and corner bolt holes (no text or symbols)Square Baffle for Square Grille

Paint Mask for Square Baffle

Circular Grille

natural_image
Simple circular diagram with two concentric rings and a small loop at the center (no text or symbols)Circular Baffle for Circular Grille

Paint Mask for Circular Baffle

Cutout Installation Template
text_image
Dual Concentric Speaker Locks (XS) for securing Speaker into Speaker Frame HF switch, β-positions) Speaker Wiring Screw Terminals Mounting Clamps (M4)Speaker Assembly Speaker Frame
natural_image
Technical line drawings of a mechanical assembly, showing front and side views (no text or symbols)Speaker and Frame Assembly Speaker Frame Rear View

Square Grille
natural_image
Pure geometric diagram of a square frame with a central circle and corner bolt holes (no text or symbols)Square Baffle for Square Grille

Paint Mask for Square Baffle

Circular Grille

natural_image
Simple circular outline with no text, numbers, or symbolsCircular Baffle for Circular Grille

Paint Mask for Circular Baffle

Cutout Installation Template
natural_image
Technical line drawing of a mechanical assembly with no visible text or symbolsPCI 6 DC Terminals QD 6DC Terminals

natural_image
Technical line drawing of a mechanical assembly with concentric circular components and mounting brackets (no text or symbols)QCI 6DC

Square Baffle Square Baffle and Speaker

Circular Baffle Circular Baffle and Speaker
natural_image
Three abstract geometric diagrams showing circular and square patterns with no text or symbolsnatural_image
Three circular diagrams showing a transformation from a circle with minus signs to a central circular pattern with concentric rings and radial lines (no text or symbols)
Painting Masks in Place
Instalação
PCI 6DC e PCI 6DC LP
Speaker Frame Square Baffle Speaker Frame with Square Baffle
Speaker Frame Circular Baffle Speaker Frame with Circular Baffle
70 QCISDC/PC16DC/PC18DCIF

Painting Mask in Place


Insert extra screw here, if required (see note)
text_image
Dual Concentric Speaker Screens (X4) for tightening ClampsSpeaker Assembly

text_image
Speaker Wiring Screw Terminals Mounting Clamps (X4)Articoli forniti

Square Grille

natural_image
Pure geometric diagram of a square frame with a central circular hole and corner bolt holes (no text or symbols)Square Baffle for Square Grille
Paint Mask for Square Baffle

Circular Grille

natural_image
Simple circular diagram with two concentric rings and a small loop at the center (no text or symbols)Circular Baffle for Circular Grille

Paint Mask for Circular Baffle

Cutout Installation Template
text_image
Dual Concentric Speaker Locks (XS) for securing Speaker into Speaker Frame HF switch, β-positions) Speaker Wiring Screw Terminals Mounting Clamps (M4)Speaker Assembly Speaker Frame

natural_image
Technical line drawings of a mechanical assembly, showing front and side views (no text or symbols)Speaker and Frame Assembly Speaker Frame Rear View

Square Grille

natural_image
Pure geometric diagram of a square frame with a central circle and corner bolt holes (no text or symbols)Square Baffle for Square Grille
Paint Mask for Square Baffle

Circular Grille
natural_image
Simple circular outline with no text, numbers, or symbolsCircular Baffle for Circular Grille

Paint Mask for Circular Baffle

Cutout Installation Template
natural_image
Technical line drawing of a mechanical assembly with no visible text or symbols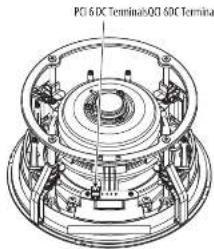
text_image
PCI 6 DC Terminal/PCI 50C TerminalQCI 6DC
Clamp Screws (X4) Square Baffle Square Baffle and Speaker

Circular Baffle Circular Baffle and Speaker
natural_image
Three technical diagrams showing a circular component with internal features, no text or symbols present.natural_image
Three circular diagrams showing a transformation from a circle with minus signs to a central circular pattern with concentric rings and radial lines (no text or symbols)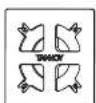
Painting Masks in Place
Installazione
PCI 6DC e PCI 6DC LP
natural_image
Three mechanical assembly diagrams showing a circular component being rotated into a square frame (no text or symbols)Speaker Frame Square Baffle Speaker Frame with Square Baffle
natural_image
Diagram showing three stages of a mechanical bearing assembly: before, after, and after (no text or labels)Speaker Frame Circular Baffle Speaker Frame with Circular Baffle
82
QCI SDC/PCI 6DC/PCI 6DC IF

Painting Mask in Place


Insert extra screw here, if required (see note)
text_image
Dual Concentric Speaker Screens (X4) for tightening ClampsSpeaker Assembly


text_image
Speaker Wiring Screw Terminals Mounting Clamps (X4)Geleverde artikelen

Square Grille

natural_image
Pure geometric diagram of a square frame with a central circular hole and corner bolt holes (no text or symbols)Square Baffle for Square Grille

Paint Mask for Square Baffle

Circular Grille

natural_image
Simple circular diagram with two concentric rings and a small arrow inside (no text or symbols)Circular Baffle for Circular Grille

Paint Mask for Circular Baffle

Cutout Installation Template

QCI SDC/PCI 6DC/PCI 6DC IF
Quick Star Guide
89
text_image
Dual Concentric Speaker Locker (XS) for securing Speaker into Speaker Frame HF switch (3-positions) Speaker Wiring Screw Terminals Mounting Clamps (94)Speaker Assembly Speaker Frame

natural_image
Technical line drawings of a mechanical assembly, showing front and side views (no text or symbols)Speaker and Frame Assembly Speaker Frame Rear View

Square Grille
Square Baffle for Square Grille

Paint Mask for Square Baffle
Circular Grille

Circular Baffle for Circular Grille

Paint Mask for Circular Baffle

Cutout Installation Template
text_image
PQ 6DC Terminals 0Q 50C TerminalsQCI 6DC
Clamp Screws (A4) Square Baffle Square Baffle and Speaker
Circular Baffle Circular Baffle and Speaker
natural_image
Three technical diagrams showing a circular component with internal features, no text or symbols present.natural_image
Three circular diagrams showing a transformation from a circle with minus signs to a central circular pattern with concentric rings and radial elements (no text or symbols)
Painting Masks in Place
Installatie
PCI 6DC en PCI 6DC LP
natural_image
Three mechanical components with circular features, shown in different orientations (no text or symbols)Speaker Frame Square Baffle Speaker Frame with Square Baffle
natural_image
Diagram showing three stages of a mechanical bearing assembly: before, after, and after (no text or labels)Speaker Frame Circular Baffle Speaker Frame with Circular Baffle

Painting Mask in Place

Insert extra screw here, if required (see note)
QCI SDC/PCI 6DC/PCI 6DC IF
Quick Star Guide
99
text_image
Dual Concentric Speaker Screens (X4) for tightening ClampsSpeaker Assembly


text_image
Speaker Wiring Screw Terminals Mounting Clamps (X4)Levererade artiklar

Square Grille

natural_image
Pure geometric diagram of a square frame with a central circular hole and corner bolt holes (no text or symbols)Square Baffle for Square Grille

Paint Mask for Square Baffle

Circular Grille

natural_image
Simple circular diagram with two concentric rings and a small arrow inside (no text or symbols)Circular Baffle for Circular Grille

Paint Mask for Circular Baffle

Cutout Installation Template
text_image
Dual Concentric Speaker Locker (XS) for securing Speaker into Speaker Frame HF switch (3-positions) Speaker Wiring Screw Terminals Mounting Clamps (94)Speaker Assembly Speaker Frame

natural_image
Technical line drawings of a mechanical assembly, showing front and side views (no text or symbols)Speaker and Frame Assembly Speaker Frame Rear View

Square Grille

natural_image
Pure geometric diagram of a square frame with a central circle and corner bolt holes (no text or symbols)Square Baffle for Square Grille

Paint Mask for Square Baffle
Circular Grille

natural_image
Simple circular outline with no text, numbers, or symbolsCircular Baffle for Circular Grille

Paint Mask for Circular Baffle

Cutout Installation Template
102 QCI BDC/PCI 6DC/PCI/SDC LP Quick Start Guide 103
natural_image
Technical line drawing of a mechanical assembly with no visible text or symbols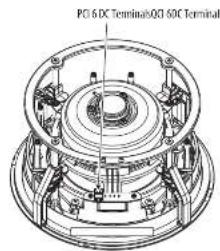
text_image
PCI 6 DC Terminals/PCI 50C TerminalQCI 6DC
Square Baffle Square Baffle and Speaker
Circular Baffle Circular Baffle and Speaker
text_image
Clamp Screws (204) Insert extra screw here, if required (see note)natural_image
Three-panel diagram showing a circular component with internal patterns, no text or symbols present.natural_image
Three circular diagrams showing a transformation from a single circle to a larger circular structure with internal components (no text or symbols)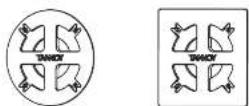
Painting Masks in Place
Installation
natural_image
Three mechanical assembly diagrams showing a circular component being rotated into a square frame (no text or symbols)Speaker Frame Square Baffle Speaker Frame with Square Baffle
natural_image
Diagram showing a mechanical assembly transformation from a circular ring to a flanged ring (no text or symbols present)Speaker Frame Circular Baffle Speaker Frame with Circular Baffle
106 QCI 8DC/PCI 6DC/PCI SDC LP Quick Start Guide 107

Painting Mask in Place

Insert extra screw here, if required (see note)
text_image
Dual Concentric Speaker Screws (X4) for tightening clampsSpeaker Assembly

text_image
Speaker Wiring Screw Terminals Mounting Clamps (X4)Dostarczone elementy

Square Grille
natural_image
Pure geometric diagram of a square frame with a central circular hole and corner bolt holes (no text or symbols)Square Baffle for Square Grille
Paint Mask for Square Baffle

Circular Grille

natural_image
Simple circular diagram with two concentric rings and a small arrow inside (no text or symbols)Circular Baffle for Circular Grille

Paint Mask for Circular Baffle
Cutout Installation Template
112 QCTSDC/PCI 8DC/PC 6DC IP Quick Start Guide 113
text_image
Dual Concentric Speaker Locker (X3) for securing Speaker into Speaker Frame HF switch (3-positions) Speaker Wiring Screw Terminals Mounting Clamps (94)Speaker Assembly Speaker Frame

natural_image
Technical line drawings of a mechanical assembly, showing front and side views (no text or symbols)Speaker and Frame Assembly Speaker Frame Rear View

Square Grille

Square Baffle for Square Grille
Paint Mask for Square Baffle

Circular Grille
Circular Baffle for Circular Grille

Paint Mask for Circular Baffle

Cutout Installation Template
114 QCTSDC/PCI BDC/PC 6DC I P Quick Start Guide 115
natural_image
Technical line drawing of a mechanical assembly with no visible text or symbols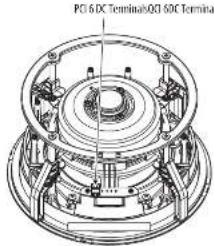
text_image
PCI 6 DC Terminal/PCI 50C TerminalQCI 6DC
Clamp Screws (34) Square Baffle Square Baffle and Speaker

Circular Baffle Circular Baffle and Speaker
natural_image
Three technical diagrams showing a circular component with internal structure, no text or symbols present.natural_image
Three circular diagrams showing a transformation from a circle with minus signs to a central circular pattern with concentric rings and radial lines (no text or symbols)
Painting Masks in Place
Instalacja
PCI 6DC i PCI 6DC LP
Speaker Frame Square Baffle Speaker Frame with Square Baffle

Speaker Frame Circular Baffle Speaker Frame with Circular Baffle
118 QCTSDC/PCI 6DC/PC 6DC IP Quick Start Guide 119

Painting Mask in Place

Insert extra screw here, if required (see note)
120 QCI/SDC/PCI 6DC/PCI 6DCIF
Quick Start Guide 121
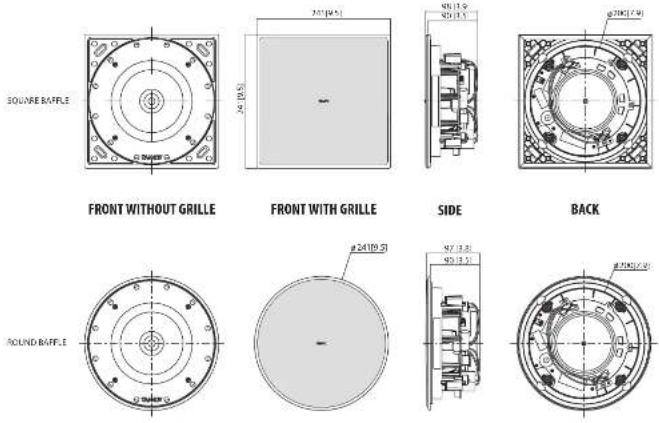
PCI 6DC Dimensions PCI 6DC LP Dimensions
EN
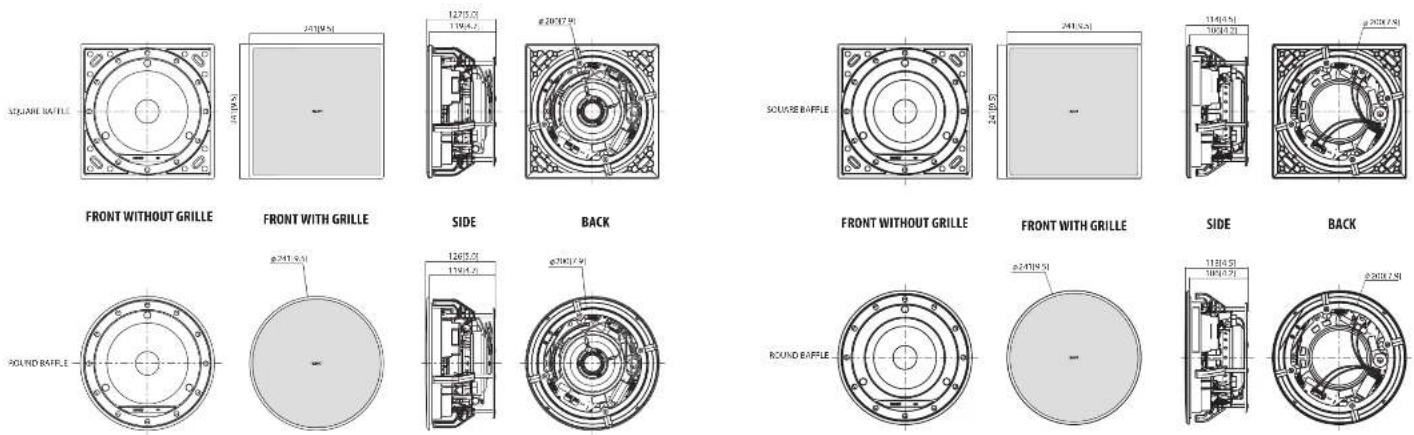
Dimensions are mm [inch]. Dimensions are mm [inch]
122 QCTSDC/FCI.SDC/PC BOCIP Quick Start Guide 123
EN
QCI 6DC Dimensions
Dimensions are mm [inch]
Specifications
QCI 6DC PCI 6DC PCI 6DC LP
| Processing | |||
| Frequency response (-13 dB) 55 Hz - 20 Hz | 160 Hz - 20 kHz 50 Hz - 20 kHz | ||
| Frequency response (-10 dB) 33 Hz - 20 kHz | 160 Hz - 20 kHz 35 Hz - 20 kHz | ||
| Sensitivity (V) vs. temp (dB) dB (dB/8.6 dB) | |||
| Nominal dispersion | 90° conical @ -6 dB point | 90° conical @ -6 dB point | 90° conical @ -6 dB point |
| Power handling (IEC) | |||
| Average 20 W | 70 W | 70 W | |
| Programme | 140 W | 140 W | 140 W |
| Peak | 280 W | 280 W | 280 W |
| Recommendations amplifier power | 210 W @ 8.0 | 210 W @ 8.0 | 210 W @ 8.0 |
| Nominal impedance (Lo Z) | 8.0 | 8.0 | 8.0 |
| Rated maximum SPL (1 m, Lo Z) | |||
| Average | 104 dB | 105 dB | 104 dB |
| Peak | 110 dB | 109 dB | 110 dB |
| Crossover point | 2 kHz | 1.5 kHz | 2 MHz |
| Transducers | |||
| Low frequency diameter/material/hyge | 165.5 mm (6") | 165.5 mm (6") | 165.5 mm (6") |
| High frequency diameter/material/hyge | 25.4 mm (1") | 25.4 mm (1") | 25.4 mm (1") |
| Physical | |||
| Back can | (BACK CAN S): Steel, with powder coating | (BACK CAN S): Steel, with powder coating | (BACK CAN S): Steel, with powder coating |
| Baffle | Reflect loaded ULM1 V-4 rated ABS | Reflect loaded ULM1 V-4 rated ABS | Reflect loaded ULM1 V-4 rated ABS |
| Grille | Steel, with weather resistant coating | Steel, with weather resistant coating | Steel, with weather resistant coating |
| Safety features | N/A | N/A | N/A |
| Clamping design | Security toggle clamp | Security toggle clamp | Security toggle clamp |
| Connectors | Phonic contact terminal block | Phonic contact terminal block | Phoenix Contact terminal blocks |
| Dimensions | |||
| Dimensions (InxOut) | 30 x 241 x 241 mm (3.9 x 9.5 x 9.5") | 127 x 241 x 241 mm (3 x 9.5 x 9.5") | 114 x 241 x 241 mm (4.5 x 9.5 x 9.5") |
| Bevel dimensions | 241 x 241 mm (9.5 x 9.5") | 241 x 241 mm (9.5 x 9.5") | 241 x 241 mm (9.5 x 9.5") |
| Mounting depth | 50 mm (3.5") | 119 mm (3.5") | 106 mm (3.2") |
| Hole output dimensions | 202 mm (8") | 202 mm (8") | 202 mm (8") |
| Net weight | 2.0kg | 3.0kg | 2.0kg |
| Included accessories | Circular grille, square grille, circular grille, square grille, circular paint mask, square paint mask, outlet template, screws(4 pcs) | Circular grille, square grille, circular grille, square grille, circular paint mask, square paint mask, outlet template, screws(4 pcs) | Circular grille, square grille, circular grille, square grille, circular paint mask, square paint mask, outlet template, screws(4 pcs) |
| Optional accessories | Option 1: BACK CAN SOption 2: PMK 6" | Option 1: BACK CAN SOption 2: PMK 6" | Option 1: BACK CAN SOption 2: PMK 6" |
| Packed quantity | 1 | 1 | 1 |
EN
124 QCTSDC/FCLSDC/PC BOCIP Quick Start Guide 125
Other important information

Important Information

Informations importantes
Hereby, Music Tribe declares that this product is in compliance with Directive 2011/06/EU and Amendment 2015/063/EU, Directive 2012/19/EU, Regulation 519/2012 REACH SWHC and Directive 1907/2006/EC, and this passive product is not applicable to LMC Directive 2014/30/EU, LV Directive 2014/35/EU.
Full text of EU DoC is available at https://community.musictribe.com/
EU Representative: Music Tribe Brands DK A/S
Address: Gammel Strand 41, DK-1202 Kabenhaven K, Denmark
UK Representative: Music Tribe Brands UK Ltd.
Address: 6 Lloyds Avenue, Unit 4CL London EC3N 345, United Kingdom
EN