PCI 25BCTP643C - Oven CANDY - Free user manual and instructions
Find the device manual for free PCI 25BCTP643C CANDY in PDF.

User questions about PCI 25BCTP643C CANDY
0 question about this device. Answer the ones you know or ask your own.
Ask a new question about this device
Download the instructions for your Oven in PDF format for free! Find your manual PCI 25BCTP643C - CANDY and take your electronic device back in hand. On this page are published all the documents necessary for the use of your device. PCI 25BCTP643C by CANDY.
USER MANUAL PCI 25BCTP643C CANDY
Safety Reminding and Maintenance:
- WARNING: The appliance and its accessible parts become hot during use. Care should be taken to avoid touching heating elements.
Children under 8 Year of age must be kept away from the appliance unless they are continuously supervised. - This appliance can be used by children aged from 8 years and above and persons with reduced physical, sensory or mental capabilities or lack of experience and knowledge if they have been given supervision or instruction concerning use of the appliance in a safe way and understand the hazards involved.
Children must not play with the appliance. - Cleaning and user maintenance shall not be made by children without supervision
WARNING: Unattended cooking on a hob with fat or oil can be dangerous and may result in fire. - NEVER try to extinguish a fire with water, but switch off the appliance and then cover flame e.g. with a lid or a fire blanket.
- WARNING: Danger of fire: do not store items on the cooking surfaces.
- WARNING: If the surface is cracked, switch off the appliance to avoid the possibility of electric shock.
- Do not use a steam cleaner for cleaning operations
-
Metallic objects such as knives, forks, spoons and sauce pan lids must not be placed on the hob surface as they can get hot. Any spillage should be removed from the lid before opening.
-
The hob surface must be allowed to cool down before closing the lid.
- After use, switch off the hob element by its control. Do not rely on the pan detector.
- This appliance is not intended to be operated by means of an external timer or separate remote - control system.
- The means for disconnection must be incorporated in the fixed wiring in accordance with the wiring rules.
- The instructions state the type of cord to be used, taking into account the temperature of the rear surface of the appliance.
- If the supply cord is damaged, it must be replaced by the manufacturer its service agent or similarly qualified persons in order to avoid a hazard.
- CAUTION: In order to avoid a hazard due to inadvertent resetting of the thermal cutout, this appliance must not be supplied through an external switching device, such as a timer, or connected to a circuit that is regularly switched on and off by the utility.
WARNING: Use only hob guards designed by manufacturer of the cooking appliance or indicated by the manufacturer of the appliance in the instructions for use as suitable or hob guards incorporated in the appliance. The use of inappropriate guards can cause accidents.
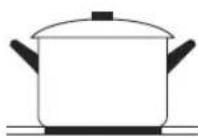
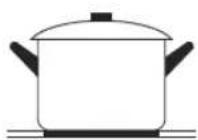
- Always use the appropriate cookware.
- Always place the pan in the center of the unit that you are cooking on.
- Do not place anything on control panel.
-
Do not use the surface as a cutting board.
-
The hob surface must be allowed to cool down before closing the lid.
- CAUTION: the cooking process must be supervised. A short term cooking process has to be supervised continuously
Dear Customer:
Thank you for purchasing the CANDY induction hob. We hope it will give many years of good service.
Please read this instruction manual carefully before using the hob and keep it in a safe place for future reference.
Product Introduction
The induction hob caters for all kind of cooking, with its electromagnetic cookingzones, and its micro-computerised controls and multi-functions, making it the ideal choice for todays family.
Manufactured with specially imported materials, the CANDY induction hob is extremely user-friendly, durable and safe.
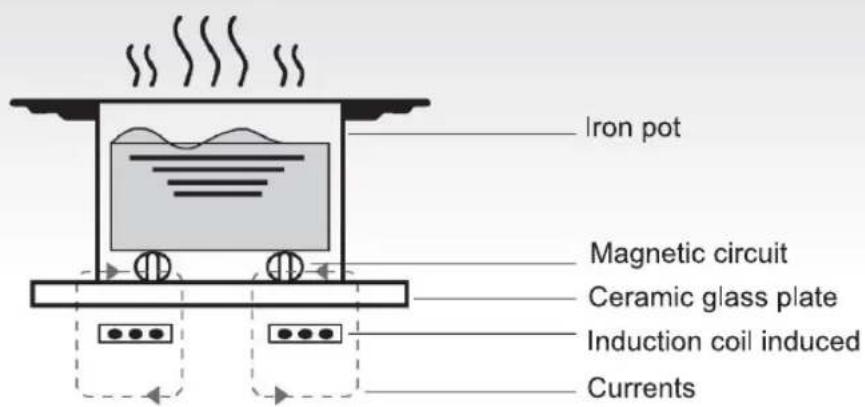
Working Principle
The induction hob comprises a coil, a hotplate made of ferromagnetic material and a control system. Electrical current generates a powerful magnetic field through the coil. This produces a large number of vortices which in turn generate heat which is then transmitted through the cookingzone to the cooking vessel.
Safety
This hob was specially designed for domestic use.
In its constant search to improve its products, CANDY reserves the right to modify any technical, programme or aesthetic aspects of the appliance at any time.
Protection from over-heating
A sensor monitors the temperature in the cooking zones. When the temperature exceeds a safe level, the cooking zone is automatically switched off.
- Detection of small or non-magnetic items
When a pan with a diameter of less than 80 mm, or some other small item (e.g. knife, fork, key) or a non-magnetic pan (e.g. aluminium) has been left on the hob, a buzzer sounds for approximately one minute, after which the hob goes automatically on to standby.
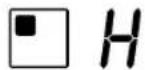
Residual heat warning
When the hob has been operating for some time, there will be some residual heat. The letter "H" appears to warn you to keep away from it.
Auto shutdown
Another safety feature of the induction hob is auto shutdown. This occurs whenever you forget to switch off a cooking zone.
The default shutdown times are shown in the table below:
| Power level | The heating zone shut down automatically after |
| 1~3 | 8 hours |
| 4~6 | 4 hours |
| 7~9 | 2 hours |
When the pan is removed from the cooking zone, it stops heating immediately and switches itself off after the buzzer has sounded for one minute.
Warning: Anyone who has been fitted with a heart pacemaker should consult a doctor before using the induction hotplate.
Installation
- Cut a hole in the worktop of the dimension shown in the diagram below. A minimum of 50mm space should be left around the hole. The worktop should be at least 30 mm thick and made of heat-resistant material.
As shown in Figure (1)

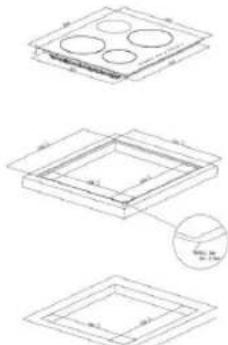
Figure (1)
Flush installation: Feasible only if the oven is not installed under the counter
- It is essential that the induction hob is well ventilated and that the air intake and exit are not blocked.
Make sure the hob is correctly installed as shown in Figure 2.
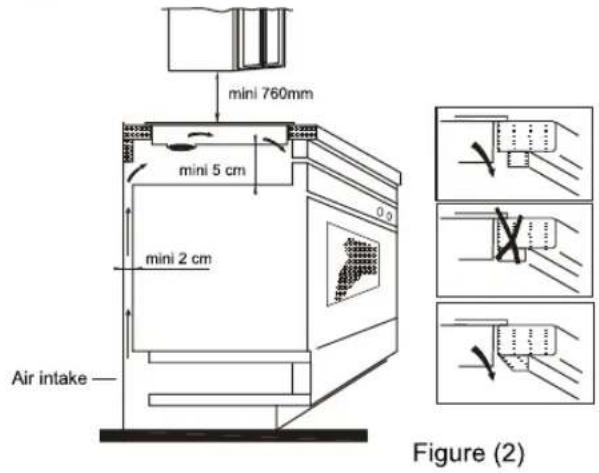
Figure (2)
NB: For safety, the gap between the hob and any cupboard above it should be at least 760~mm
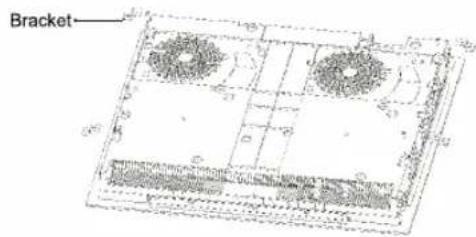
- Fix the hob to the worktop using the four brackets on the base of the hob. The position of the brackets can be adjusted according to the thickness of the top.
Warnings:
(1) The induction hob must be installed by a properly qualified person. We have our own qualified installers. Never try to install the appliance yourself.
(2) The induction hob must not be installed above refrigerators, freezers, dishwashers or tumble dryers.
(3) The induction hob should be installed so that optimum radiation of heat is possible.
(4) The wall and the area above the hob should be able to withstand heat.
(5) To avoid any damage, the sandwich layer and adhesive should be heat-resistant.
4. Connection to power supply
The socket should be connected in compliance with the relevant standard, to a single-pole circuit breaker. The method of connection is shown in Figure 3.
Figure (3)
| Voltage | Wire connection | |||
| 380-415V 3N~ | 1 2 L1 L2 Black Brown | 3 4 N Blue | 5 1 Yellow/Green | |
| 220-240V~ | 1 2 L Black & Brown | 3 4 N Blue | 5 1 Yellow/Green | |
If the cable is damaged or needs replacing, this should be done by an after-sales technician using the proper tools, so as to avoid any accidents.
If the appliance is being connected directly to the mains supply, an omnipolar circuit breaker must be installed with a minimum gap of 3 mm between the contacts.
The installer must ensure that the correct electrical connection has been made and that it complies with safety regulations.
The cable must not be bent or compressed. The cable must be checked regularly and only replaced by a properly qualified person.
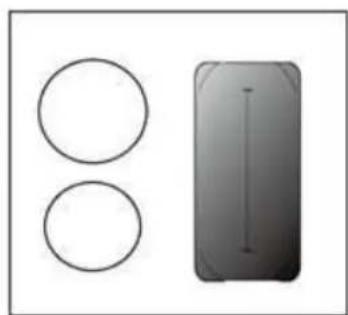
Diagram of induction hob:
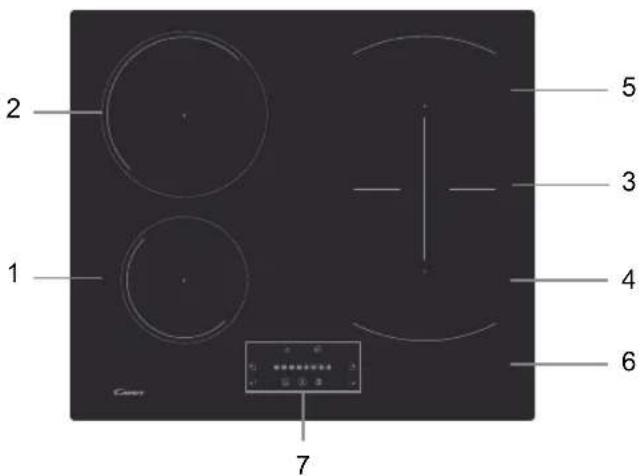
- Max. 1400W/1500W zone
- Max. 2400W/2600W zone
- Max. 3000W/3600W zone
-
Control panel
-
Max. 1800W/2000W zone
- Max. 1800W/2000W zone
- Glass plate
Schematic diagram of the control panel
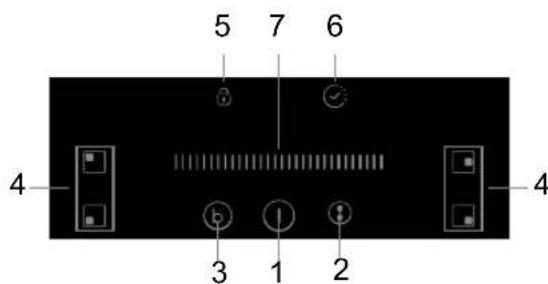
- On/Off c lortno
- Heating zone selection controls
- Flexible Area control
- Keylock control
- Boost
o n ti meo r6 c - Power / Timer slider touch control
Operation of Product
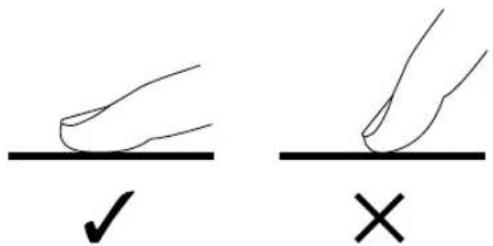
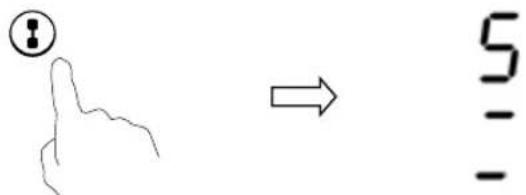
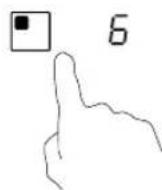
Touch Controls
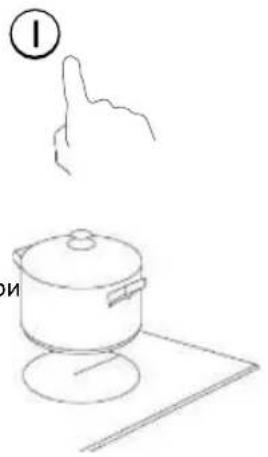
The controls respond to touch, so you don't need to apply any pressure.
Use the ball of your finger, not its tip.
You will hear a beep each time a touch is registered.
Make sure the controls are always clean, dry, and that there is no object (e.g. a utensil or a cloth) covering them. Even a thin film of water may make the controls difficult to operate.
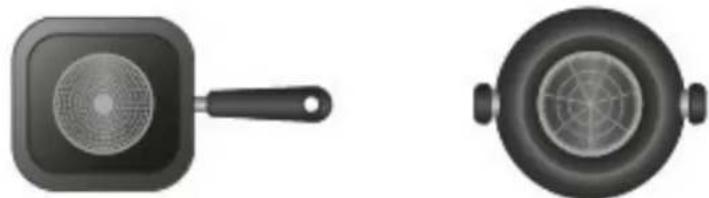
Choosing the right Cookware

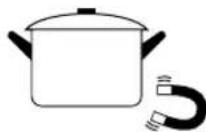
- Only use cookware with a base suitable for induction cooking. Look for the induction symbol on the packaging or on the bottle
of the pan.
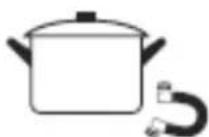
- You can check whether your cookware is suitable by carrying out a magnet test.
Move a magnet towards the base of the pan. If it is attracted, the pan is suitable for induction.
If you do not have a magnet:
- Put some water in the pan you want to check.
- If does not flash in the display and the water is heating, the pan is suitable.
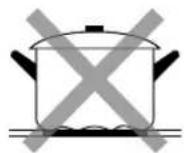
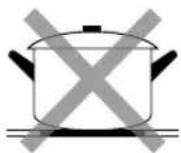
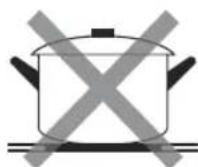
Cookware made from the following materials is not suitable: pure stainless steel, aluminium or copper without a magnetic base, glass, wood, porcelain, ceramic, and earthenware.
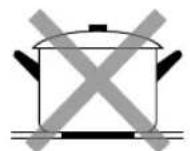
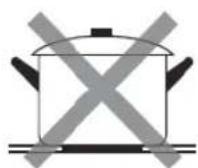
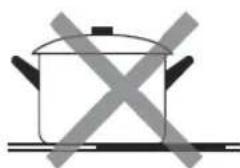
Do not use cookware with jagged edges or a curved base.

Make sure that the base of your pan is smooth, sits flat against the glass, and is the same size as the cooking zone. Use pans whose diameter is as large as the graphic of the zone selected. Using a pot a slightly wider energy will be used at its maximum efficiency. If you use smaller pot efficiency could be less than expected. Pot less than 140mm could be undetected by the hob. Always centre your pan on the cooking zone.

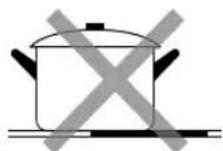

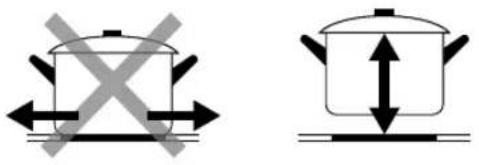
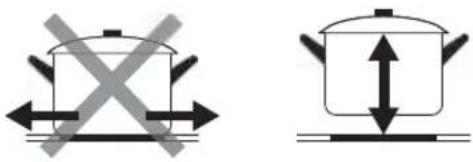
Always lift pans off the Induction hob - do not slide, or they may scratch the glass.
How to use
Start cooking
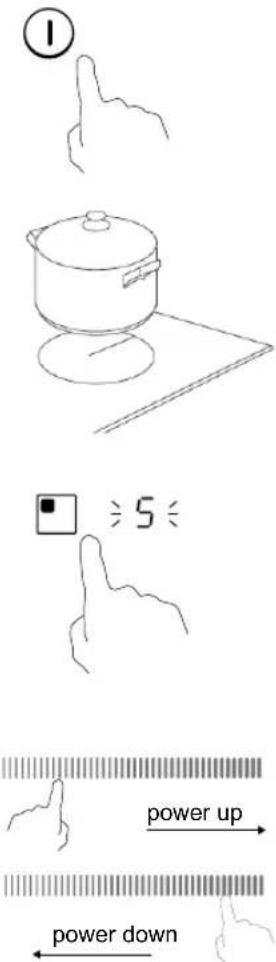
Touch the ON/OFF control. After power on, the buzzer beeps once, all displays show "−" or "−−", indicating that the induction hob has entered the state of standby mode.
Place a suitable pan on the cooking zone that you wish to use.
- Make sure the bottom of the pan and the surface of the cooking zone are clean and dry.
Touching the heating zone selection control, and an indicator next to the key will flash
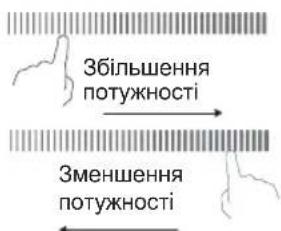
Select a heat setting by touching the slider control
-
If you don't choose a heat setting within 1 minute, the Induction hob will automatically switch off. You will need to start again at step 1.
-
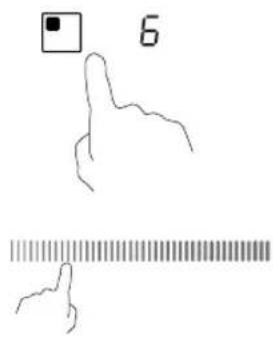
You can modify the heat setting at any time during cooking.
If the display flashes ≥ u < alternately with the heat setting
This means that:
- you have not placed a pan on the correct cooking zone or,
the pan you're using is not suitable for induction cooking or, - the pan is too small or not properly centered on the cooking zone.
No heating takes place unless there is a suitable pan on the cooking zone.
The display will automatically disappear after 1 minute if no suitable pan is placed on it.
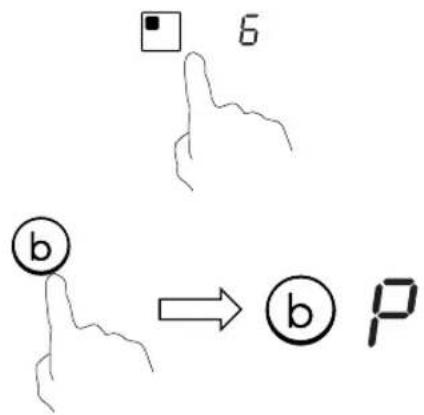
Finish cooking
Touching the heating zone selection control that you wish to switch off
Turn the cooking zone off by touching the slider to "I".
Make sure the displayshows"0"
Turn the whole cooktop off by touching the ON/OFF control.
Beware of hot surfaces
H will show which cooking zone is hot to touch. It will disappear when the surface has cooled down to a safe temperature. It can also be used as an energy saving function if you want to heat further pans, use the hotplate that is still hot.
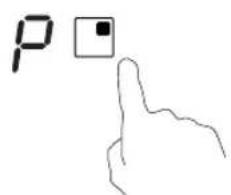
Using the Boost function
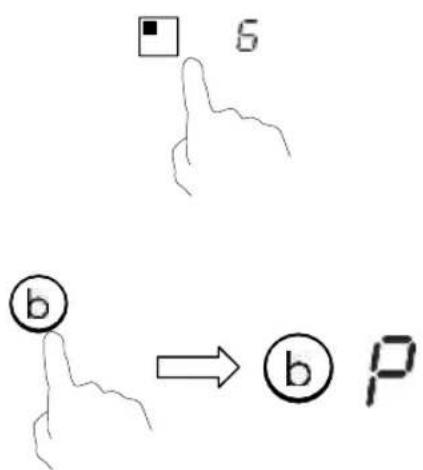
Activate the boost function
Touching the heating zone selection control.
Cancel the Boost function
Touching the heating zone selection control that you wish to cancel the boost function
Touching the "Boost" control to cancel the Boost function, then the cooking zone will revert to its original setting.

The function can work in any cooking zone.
The cooking zone returns to its original setting after 5 minutes.
If the original heat setting equals 0, it will return to 9 after 5 minutes.
FLEXIBLE AREA
- This area can be used as a single zone or as two different zones, accordingly to the cooking needs anytime.
- Free area is made of two independent inductors that can be controlled separately.
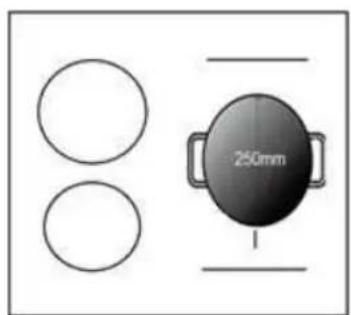
As big zone
- To activate the free area as a single big zone, Touching the Flexible Area control.
- As a big zone, we suggest the used as the follow:
Cookware: 250mm or 280mm diameter cookware (Square or Oval cookware are acceptable)
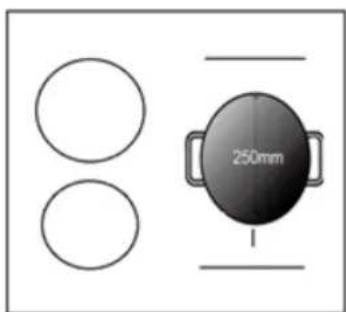
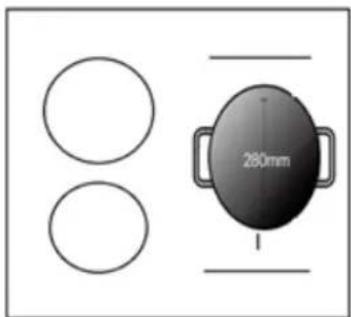
We don't recommend other operations except for above mentioned three operations because it might effect the heating of appliance
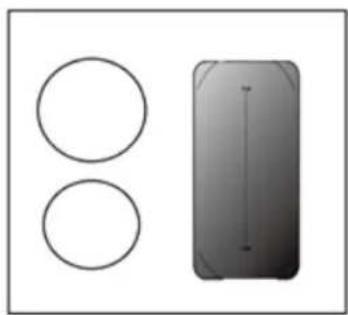
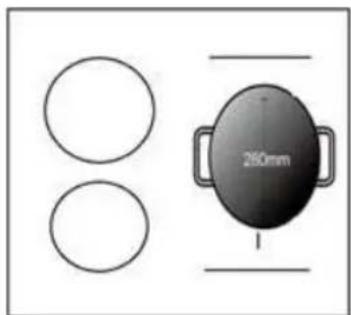
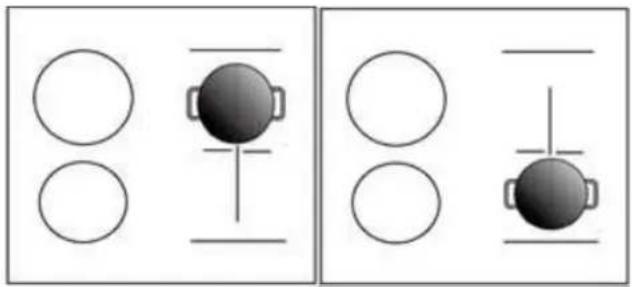
As two independent zones
To use the flexible area as two different zones, you can have two choices of heating.
(a) Put a pan on the right up side or the right down side of the flexible zone.
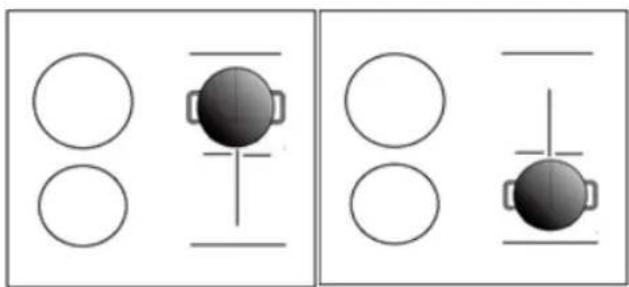
(b)Put two pans on both sides of the flexible zone.
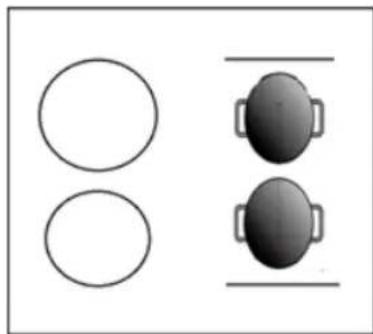
Notice: Make sure the pan is bigger than 12cm.
Locking the Controls
- You can lock the controls to prevent unintended use (for example children accidentally turning the cooking zones on).
- When the controls are locked, all the controls except the ON/OFF control are disabled.
To lock the controls
Touch the lock control
The timer indicator will show "Lo"
To unlock the controls
Touch and hold the lock control for a while.

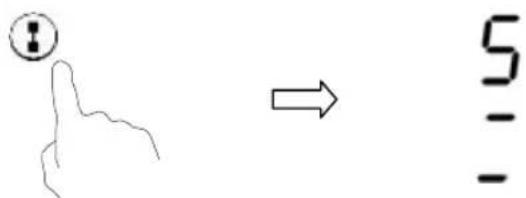
When the hob is in the lock mode, all the controls are disable except the ON/OFF ①, you can always turn the induction hob off with the ON/OFF ① control in an emergency, but you shall unlock the hob first in the next operation.
Timer control
You can use the timer in two different ways:
a) You can use it as a minute minder. In this case, the timer will not turn any cooking zone off when the set time is up.
b) You can set it to turn one or more cooking zones off after the set time is up. The timer of maximum is 99 min.
(a) Using the Timer as a Minute Minder
If you are not selecting any cooking zone
Make sure the cooktop is turned on.
Note: you can use the minute minder at least one zone shall be active.
Touch timer control, the "10" will show in the timer display. and the "0" flashes.
Set the time by touching the slider control. (e.g. 5)


Touch timer control again, the "1" will flash

Set the time by touching the slider control (e.g.9), now the timer you set is 95 minutes.


When the time is set, it will begin to count down immediately. The display will show the remaining time
Buzzer will beep for 30 seconds and the timer indicator shows"--"when the setting time finished.

b) Setting the timer to turn one cooking zone off
Set one zone
Touching the heating zone selection control that you want to set the timer for.
In short time, touch timer control, the "10" will show in the timer display and the "0" flashes.

Set the time by touching the slider control. (e.g. 5)


Touch timer control again, the "1" will flash.

Set the time by touching the slider control (e.g.9), now the timer you set is 95 minutes.


When the time is set, it will begin to count down immediately. The display will show the remaining time.
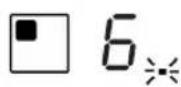
NOTE: The red dot next to power level indicator will illuminate indicating that zone is selected.
When cooking timer expires, the corresponding cooking zone will be switched off automatically.


Other cooking zone will keep operating if they are turned on previously.
The pictures shown above are for reference only, and the final product shall prevail.
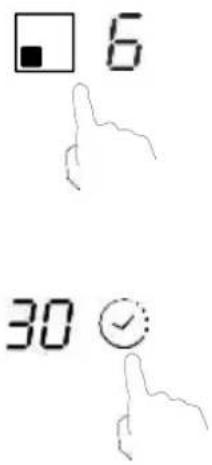
set more zones:
The steps for setting more zones are similar to the steps of setting one zone; When you set the time for several cooking zones simultaneously, decimal dots of the relevant cooking zones are on. The minute display shows the min. timer. The dot of the corresponding zone flashes. The shown as below:
(set to 15 minutes)

(set to 45 minutes)
Once the countdown timer expires, the corresponding zone will switch off. Then it will show the new min. timer and the dot of corresponding zone will flash.
The shown as right:


(set to 30 minutes)
Touch the heating zone selection control, the corresponding timer will be shown in the timer indicator.
C)Cancel the timer
Touching the heating zone selection control that you want to cancel the timer
Touch the slider control to set the timer to "00", the timer is cancelled
Power Management Function
- it is possible to set a maximum power absorption level for the induction hob, choosing up to different power ranges.
induction hobs are able to limit themselves automatically in order to work at lower power, to avoid the risk of overloading. - It is not necessary to put any pots on the heating zones. We suggest to start setting within 5 seconds after connecting the power. You need to enter the power setting mode within 60 seconds to enter Power Management Function.
| To enter Power Management Function | |
| 1. Please be noted that do not turn on the hob. At this stage, press "Boost" and "Lock" at the same time. b b b | The "S" symbol will be displayed on zone #1. |
| 2. Press "Lock" key. b b b | The symbol "S" will be displayed on zone #1 and symbol "E" will be displayed on zone #2. |
| 3. Press "Boost" and "Lock" keys at the same time again. b b b | The symbol "S" will be displayed on zone #1, "E" will be displayed on zone #2, and "t" will be displayed on zone #3. At the same time, the current maximum power mode (7.4) will be displayed on the timer indicator. |
| To switch to another level | |
| short press the "Boost" key b b b | There are 6 power levels, from "7.4" to "2.5". The timer indicator will show one of them. "7.4": the maximum power is 7.4kW. "6.5": the maximum power is 6.5kW. "5.5": the maximum power is 5.5kW. "4.5": the maximum power is 4.5kW. "3.5": the maximum power is 3.5kW. "2.5": the maximum power is 2.5kW. |
| Confirmation Power Management Function | |
| After the desired power setting mode is selected, please press “Lock” key | When the timer indicator stops flickering, the power mode is set successfully. |
| Exit Power Management Function | |
| After the setting, make sure to dis-connect the power and connect it again. | Then the hob will be turned off. |
Default working times
Auto shut down is a safety protection function for your induction hob. It shut down automatically if ever you forget to turn off your cooking. The default working times for various power levels are shown in the below table:
| Power level 1 2 3 4 | 5 | 6 | 7 | 8 | 9 | ||||
| Default working timer (hour) 8 8 | 8 | 4 | 4 | 4 | 2 | 2 | 2 |
When the pot is removed, the induction hob can stop heating immediately and the hob automatically switch off after 2 minutes.
Selection of cooking vessels
Iron oil frying

Stainless steel
Iron pan Iron kettle
n kettle

Enamel
stainless steel kettle
Enamel cooking utesil
Iron plate
You may have a number of different cooking vessels
- This induction hob can identify a variety of cooking vessels, which you can test by one of the following methods:
Place the vessel on the cooking zone. If the corresponding cooking zone displays a power level, then the vessel is suitable. If "U" flashes, then the vessel is not suitable for use with the induction hob.
- Hold a magnet to the vessel. If the magnet is attracted to the vessel is suitable for use with the induction hob.
NB: The base of the vessel must contain magnetic material.
It must have flat bottom with a diameter according to the table 1 below.
-
Use only ferromagnetic cookwares made from enameled steel, cast iron or stainless steel but compatible with induction
-
Use pans whose diameter of the ferromagnetic area (base of the pan) is in the range of dimensions in the table below. (Table 1)
-
If you use smaller pots, performance could be affected
- If you use pot with a diameter smaller than the one indicated in the table 1, pots may not be detected
According to the dimension of the zone you can use pots of different diameters as picture below:

-
If the ferromagnetic part covers only partially the base of the pan, only the ferromagnetic area will heat up, the rest of the base may not heat up a sufficient temperature for cooking.
-
If the ferromagnetic area is not homogeneous, but presents others material such as aluminum this may affect the heating up and the pan detection.
If the base of the pan is similar to the pictures below the pan could be not detected.
| The base diameter of induction cookware | ||
| Cooking zone | Minimum(mm) | Maximum(mm) |
| 1 120 | 160 | |
| 2 | 160 | 210 |
| 3&4 | 140 180 | |
| Flexible Area | 250 | 386*180 |
The above may vary according to the size of the pan and the material it is made from.
Cleanness and Maintenance
The surface of the induction hob may be easily cleaned in the following way:
| Type of contamination | Method of cleaning | Cleaning materials |
| Light | Immerse in hot water and wipe dry | Cleaning sponge |
| Rings and lime scale | Apply white vinegar to the area, wipe with a soft cloth or use a commercially available product | Special adhesive for ceramic glass |
| Sweetmeat, melted aluminium or plastics | Use a special scraper for ceramic glass to remove residue (a silicon product is best) | Special adhesive for ceramic glass |
NB: Disconnect the power supply before cleaning.
Failure Display and Inspection
The induction hob is equipped with a self diagnostic function. With this test the technician is able to check the function of several components without disassembling or dismounting the hob from the working surface.
Troubleshooting
1) Failure code occur during customer using & Solution;
| Failure code | Problem | Solution |
| No Auto-Recovery | ||
| E1 | Ceramic plate temperature sensor failure-- open circuit. | Check the connection or replace the ceramic plate temperature sensor. |
| E2 | Ceramic plate temperature sensor failure-- short circuit. | |
| Eb | Ceramic plate temperature sensor failure | |
| E3 | High temperature of ceramic plate sensor. | Wait for the temperature of ceramic plate return to normal. Touch "ON/OFF" button to restart unit. |
| E4 | Temperature sensor of the IGBT failure-- open circuit. | Replace the power board. |
| E5 | Temperature sensor of the IGBT failure-- short circuit | |
| E6 | High temperature of IGBT. | Wait for the temperature of IGBT return to normal. Touch "ON/OFF" button to restart unit. Check whether the fan runs smoothly; if not, replace the fan. |
| E7 | Supply voltage is below the rated voltage. | Please inspect whether power supply is normal. |
| E8 | Supply voltage is above the rated voltage. | Power on after the power supply is normal. |
| U1 | Communication error. | Reinsert the connection between the display board and the power board. Replace the power board or the display board. |
2) Specific Failure & Solution
| Failure | Problem | Solution A | Solution B |
| The LED does not come on when unit is plugged in. | No power supplied. | Check to see if plug is secured tightly in outlet and that outlet is working. | |
| The accessory power board and the display board connected failure. | Check the connection. | ||
| The accessory power board is damaged. | Replace the accessory power board. | ||
| The display board is damaged. | Replace the display board. | ||
| Some buttons can't work, or the LED display is not normal. | The display board is damaged. | Replace the display board. | |
| The Cooking Mode Indicator comes on, but heating does not start. | High temperature of the hob. | Ambient temperature may be too high. Air Intake or Air Vent may be blocked. | |
| There is something wrong with the fan. | Check whether the fan runs smoothly; if not, replace the fan. | ||
| The power board is damaged. | Replace the power board. | ||
| Heating stops suddenly during operation and the display flashes "u". | Pan Type is wrong. | Use the proper pot (refer to the instruction manual.) | Pan detection circuit is damaged, replace the power board. |
| Pot diameter is too small. | |||
| Cooker has overheated; | Unit is overheated. Wait for temperature to return to normal. | ||
| Push "ON/OFF" button to restart unit. | |||
| Heating zones of the same side (Such as the first and the second zone) would display "u". | The power board and the display board connected failure; | Check the connection. | |
| The display board of communicate part is damaged. | Replace the display board. | ||
| The Main board is damaged. | Replace the power board. | ||
| Fan motor sounds abnormal. | The fan motor is damaged. | Replace the fan. |
The above are the judgment and inspection of common failures.
Please do not disassemble the unit by yourself to avoid any dangers and damages to the induction hob.
Customer Care Service
If a fault should occur, before calling After Sales Service, please do the following:
- Check that the appliance is correctly plugged in.
-Read the failure and display table above
If you are still unable to resolve the problem, switch off the appliance, do not try to dismantle it, and call
After Sales Service.
Special Declaration
The contents of this manual have been carefully checked. However, the company cannot be held responsible for any misprints or omissions.
Also, any technical modifications may be included in a revised version of the manual without notice. The appearance and colour of the appliance in this manual may differ from the actual one.

DISPOSAL: Do not dispose this product as unsorted municipal waste. Collection of such waste separately for special treatment is necessary.
This appliance is labelled in compliance with European directive 2012/19/EC for Waste Electrical and Electronic Equipment (WEEE).
By ensuring that this appliance is disposed of correctly, you will help prevent any possible damage to the environment and to human health, which might otherwise be caused if it were disposed of in the wrong way.
The symbol on the product indicates that it may not be treated as normal household waste. It should be taken to a collection point for the recycling of electrical and electronic goods.
This appliance requires specialist waste disposal. For further information regarding the treatment, recovery and recycling of this product please contact your local council, your household waste disposal service, or the shop where you purchased it.
For more detailed information about treatment, recovery and recycling of this product, please contact your local city office, your household waste disposal service or the shop where you purchased the product.
Ta npapanav eivai oieyxyoi kai oiaoaeic yia TIO Koivc baaec.
Mnvaouvapuooyeite n ovoia v a aov kivouoc knty eotywnk eoia.
CTaHdapTHN Yac BUMKHeHHB Kaa3aHO HnKHeHaBeDeHi Ta6nui:
Bn6ip npabnIbHoro nocyu

BVKOPNCOTByTe TINbKn Nocyd 3 OCHOBOH, npndaTHOIO nIHykuiHOro npiroTOBaHHj Xi. WykaTe iNykuHn CmBoH naYnakobu a60 BnH3y KacTpyni.
BmMOKeTe nepeBipNTn, nN iNxOaNTb Bau nocyd, npobibuMarnHITHN TECT.
Ha6n3bTe MarHIT Do OCHOBn KAcTpyNi. RaKIO BIn npntaryetbcra, KAcTpyNnDxOoNTb DnI INyDuKuiHoro pnproTyBaHHa.
Ky y Bac Hema MarHity:
- HaniTe TpoXn BOiN B KAcTpyIIO, kY Bu XOHeTe nepeBipNTN.
- RaHnHa dncnnei He 6nMa e a Boda HarpBaetbca, kactpyna nixoDntb
- NocyD, BnroTOBneHm i3 TaKnx MaTepiAIB, He nIiXoOJNb: YnCTa HepKaBInHa CTaN, aIIOmiHi a60Mi b 6e3 MarHITHO OCHOB, CKNO, DepeBO, fapOp, Kepamika I rHHHNI NOcyD.
He BnKopncToBnyTe nocydi3 HepiBHMn Kpaamn a6o KpNBOO OCHOBOIO.

IpekoHaTeC, 0o OCHBa KAcTpynI rnaKa, po3MiueHa pIBHO Ha cKl Mae TaKm Camm po3Mp, kI i 3OHa npiroToyBaHn. BnkOpncToByte KacTpyni, diAMeTp rKnx BiINOBiae po3Mipy 3O6paKeHHBn6paHOi 3OHN. RaIO KAcTpynr TPOxN Wnpa, eHepr8 Byde BnkOpncTOByBaTnca 3 MAkCMmaHBIO eFeKTNBHCtIO. RaIO Bn6paTN MeHsU KAcTpynIO, eFeKTNBHcTB 6yDe HnXue nepeD6aYBaHO rPBn. KaCTpynI diametpom MeHwe HIX 140 MM MoXe 6yTN He BnABNeHa BapInbHOIO NOBExHc. 3abXn PO3MiuyTe KAcTpynIO nOcepeDiH 3OHN npiroToyBaHH.

K KopncTyBaTncb
NouataK npHroTyBaHHa
Cehcnpa KhONka yBIMKHeHHB/BIMKHeHH. Picra BBIMKHeHH JKNBHeHH 3BykOBn CnHAn npOnyHae Odn H pa3, Ha BCix dncnpeX BIDo6pa3ntbcra - afo - ,IO BkayE Ha Te, IO iNdykuiHa BapuNbHa naHeb nepeuIbA B pexm oqikvBaHH.
IocTaBTe BiINObiHy KactpyHn Ha 3OHy npriToYbaHHra, kY Bn 6aKaTe BnkOpN
- IpekeohaiTeca, 0o ochoBa kactpyni ta nobepxHa 3OHn npiroTybaHHy ucti ny cyxi.
TopKhitbca KhoNk Bn6opy 30Hn HarpibaHn, nicna yoro iHnkatop npuy i3 KhonkoI noHe 6nmatn.
Bn6epiTb npaMeTpHarpiBaHH, TopKHyBUnc nob3yHka.
- RaIO Bu He BnBepete HanaTByaHna HarpibaHn npotaROM 1 XBUNHH, iHykuiHa BapuNbHa NOBepxra ABTomatUHO BMKHeTBc. Bam notpi6Ho 6ynde noaTu 3HOby 3 KpOky 1.
- Bn moKTe 3mHHT npaMeTp nHarpiBaHHB 6ydb- kN yac nd qac npiroToyBaHHA K

JaKuo Ha dncnnei nonepeiminHoo 6JMaac>3 napametpom HarpibaHHa
Ue o3naue 10
Bn He nomictiN KAcTpyn Ho npabunbHy 30Hy npiroTuBaHHa6o,
KactpyIy,ky BN BnBukopncTObyeTe,He nixOOnt bIy IHyckuiHoro npriroTybaHHa 6o,
Kactpyra 3aHaTOMana a6o HenpabunbHpo03MiueHa Ha 30Hi nprirotybaHHA.
HarpibahnHe BiD6yBaetbca, Kaio Ha 30Hi npuroTybaHHa Hemae BldnoBIOHOKactpyni.
Icnnne ABOMaTHHO BmKHeTbcr 1 XBNH, RaH OHa BapnBHi NOBepxHi He BCTaHOBNeHO BiNobiHO Kactpyni.
3aBepWeHHn npiroToyBaHHn
Topkhitbcn KHonKn Bn6opy 30H HarpibaHHa, kky notpiHo BUMKHyTu.
BmKHTb KOHOpky, npOBiBn NOB3yHOK Do «|». NpekoHaTeca, 10 DaCnne BiO6paXac «0».
BIMKHiTb yciO BapunIbHy NoBepxHIO, TopKHyBUnc b KOnKn yBIMKHeHHBIMKHeHH.
OctepiraTecraqyHn noBepxHb.
JIitepa Bka3yc, kka 30Ha npiroToyBaHHra rapa.BoHa 3HnKHe, KOJIN nobepxHry OxonoHe do 6e3neuHoT tempepatypn.
Ue TAKOX MOXHa BnKOpNCTOByBaTN KfYHKcIO
eHepro36bepekeHHa. KaO Bu XoYeTe HarpitN iHsi KacTpyni, BnKOpNCTOByIe
KOHΦopky, Ka ige rapya.
BnKopncTaHnH cyHKciI IIOcnJIeHHa
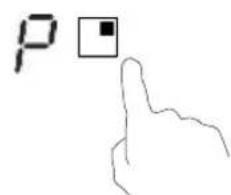
YbIMKHeHHyHKuII NocuJIeHHa
TopKHiTbCkHONKn Bn6Opy 30Hn HarpIbHaHn.
Iicna HataeHHa KhoNn NocnHHe Hdkatop 30HN BiO6pa3ntb «P», a NotyXhictb DoCgHrMaKcMMy.
BumKHeHHa yHKuII nocnHeHHa
HaTnCHiB KhoNky BnOpy 30Hn HarpibaHn, dna JKOI notpi6Ho BmKHyTu FyHKUHO NOcJIeHHr.
HaTnCHiB KONky «IocnneHry» BIOB BMKHyTN FyHKciO
«IocnneHry», nicra zuBOrO KOHOpka NOBepHeTBcA Do
noatKOBnx HalaunTyBaHb.

Lya yHKui MoKe npauHOBaTn 3 bJyko KOHOpKOIO.
Yepe3 5 xBnIHN 30Ha npriroTyBaHH NOBepHcBc DO nooATKOBnx HanaWtYBaHb.
KIO NOATKOBNI npamet HarpibaHnO 0,BIN nobepheTbCdo 9 uepe3 5 xBNHH.
THYUKA 3OHA
LIO 30Hy 6yDb-KoJIM MoKHa BnKOpNCTOByBaTn KOHy KOHΦopKy a6o Dbi OkpeMi KOHΦopKn BiINOiDHO Do NOTpe nprirotyBaHH.
BilbHa 30Ha cKnadaetbcra 3 DBOX He3aJIeKHNx iHnyKTOpIB, KIMM MoKHa KepyBaTN OKpemO.
KoHaBeNka30Ha
- ⅢσδakntyBaTN BInbHy 3OHy RaOJHy BeNik Ky KOHΦopKy, HATnCHITb KONk Ky rhyKoi 30HN.
2.ЯкВЕПИКУ30HNYMnpONoHYeMO BnKOpncTObyBaTuN HAcTyPHe:
Nocyd iameptom 250 a6o 280 MM (MOxHa BnKOpncToByBaTu KbapdHn a6o OBaBbHn nocyd).
Mn He pekomeHdyemO iHux onepaui, Kpim Bnue3a3naeHnx Tpbox, OckijbKn ce MoKeBnHyTn Ha HarpBaHH npnady.
Ak Dbi Okpemi 30Hn
Iiud BnKOpncTaHHra Hryko30Hn k DBOX OKpemix 3OH y Bac dyde dBa BapiaHTN HaripabaHHa.
(a) Nomicitb kactpynIO B npabomy BepxHbomy a6o npabomy HxKbmy KyTI rhykuoi 30HN.
a) Bn MoXeTe BnKOpNCTaTH NOro YK HaraDyBaHH. Y TaKOMy pa3i TaMep He BmKHe KODHOI 3OHn npiroToYBaHH, KOJI BCTaHOBnEH uAC MHe
b) Bn MoKeTe BCTaHOBtN Ioro DnI BUMKHeHH OndHiEi a6o DeKiNbKOx 3OH npriroTyBaHHnICJIrTO, Rk BCTaHOBJIeH N ac MnHE. MakcMaJIbHe 3HaehHH TaIMeda CTaHOBtB 99 XB.
a) BnKOpncTaHH TaMepa Ka HaraNyBaHHa
Akuo Bn He BnpaJN KdoHoi KOHopKn
IpekeKaHaTeCe, 0o BapInbHa NOBepxH BAIMKHeHa.
PpIMITka: 106B BnKOpNCTOByBaTN HaraDyBaHHa Yacy, npHaMHi OJHa 3OHa NOBHHa 6Tn AKTNBHO.
TopKHItcK HONK TaMepa Ha DnCnnei TaMepa 3'ABITbcr «10» i6JImatme «O».
BcTaHOBIb Yac, TopKHyBmCb NobaYHka (HaNPKlaI, 5).


TopkhItbcKhOnkntaHmepauepa3niclaZbOro6nMaTMHe 1
BctaHObit yac, TopKHyBwncb nob3yHka (Hanpknad, 9). Tenepe TaMep BCTaHOBNeHO ha 95 XBnHH.


Koln Yac BcTaHOBNeHO, BiDnik po3noUHeTBcB BiPpa3y. Ha dinnei BiO6pa3ntbCra uac, 3a annuBcra.
3ByKOBm CnHn LyHaTmme npotrOm 30 cekyHd, a iHdkaTOp TaMepa BiDObpa3ntb «-», KOJI 3aKiHHTbcra BCTaHOBNeHn Yac.

b) HanaTyBaHHa TaMepa dIg BUMKHeHHa ODiHc KOHOpKn
BctaHObitoHy30Hy.
HaTnCHiB KhoNky Bn6opy 30Hn HarpBaHH, nIy AkoI notpi6Ho BCTaHOBTu TaMep.
Yepe3 KopoTkn Yac TopKHTbc8 KNHKn TaImepa Ha DnCnIe TaImepa 3'YBNTbc8 «10» i6NImatime «O».

BctahOBiB yac,TopKHyBunbc Nob3yHka (HanpNKnaI,5).

TopkhItbc KaHONKaTaimepa ue pa3,nicla zboRo 6JImatmme «1»

BcTaHObitb yac, TopKHyBwncb nob3yHka (Hanpknad, 9). Tenep TaImeP BcTaHOBNeHo Ha 95 XBnIH.


KoH qac BcTaHOBHe, BiNik po3noHcBc BiPa3y. Ha DnCnnei BiO6pa3ntbCqac, 00 3aannBCr.
PIMITKA: npuy 3 iHdkaTOpom piBn noTyxNocTi 3acBInTbcra YepBOHa Kpanka, lo Bkaye Ha opaHy 30Hy.

Iicra3akHHeHHa cacy TaMepa BiNobiHa 3oHa npiroTyBaHHa 6yde ABTOMATUHO BIMKHeHa.


IHwi 30H npiroToyBaHH npoOBoKyBaTmYb npaIOBAtn, kio BOH 6yn BBIMKHei paHiwe.
BnuehebeH3o6paKeHH npu3HaueHJI niue dIy IOBik, nepebary MaTUME kiHcEbn npodyKT. Hanautyte KInbka 3OH:
Ihctpykii 0do HanaaHTyBaHHK iibkoX 3oH noDi6Hi do HanaaHTyBaHHa Odnie 3OHN.
KoHn HanaTbAtu cac nIe KekbKox BapunbHex 3OH OJHOaCHO, yBIMKHyTBcR DecrKOBI pO3diIOBAUi BiNOBiDHNBapunbHex 3OH. EKpaH XBUNH BIDOppaKaTUME XBNJINHH TaNMEp. IHNkATOP BiNObiHOi 3OH N6NMaTUME.
JIKIOKA3aHOHIXKHe:


(HanaTobaHnHa 15 XbInnH)


(HanaTObaHo Ha 45 XBUNIH)
Iicn3aBepweHbBiNiky TaMepa BiNobiHa 30Ha BmKHeTbcra. Iicn cboRo BiO6pa3ntbca HOBn XBnHHn TaMep iHdkaTop BiNOBiHOi 30H6nMaTme. Ra noka3aHo cnpaba:


(HanaTobaoHa 30 xBuninH)
TopkhitcKaONKn Bn6opy 30Hn HarpBaHHa i BiNobiHn TaImep 6yde BiO6paKeHo Ha iHnkaTopi TaIMepa.
c) BümMHzenn Taïmepa
HaTnCHiB KhoNky Bn6opy 3oHn HarpiBaHHa, dna koi notpi6Ho BmKHyTu TaMep.
Topkhitbc KhoNk TaHmepa, nCnI yBoI hDnKaTOp 6nMaTme.
TopkhitbocnoB3yHka,io6 BCTaHOBHT TaMep Ha «00», nicra zuboro TaMep 6ynde BMKHeHO.
Bnue3a3Nahe He cydxKeHHMa Ta nepeBipko 3araJbHnx BnDIB HecnpabHOCTI.
Bynb nacka, He po3bnpaTe npncptiin camoctiHoo, 06 yHKHTn 6ydb-koI He6e3neKn I nowKOJKeHH aHkyuHoiBapnilbHOi nobepxhi.
Cnyx6a πiTpμmKn kIεHTiB
Y pa3i BnHKnHeHH HeCnpaBHOCTi, nepu Hix 3BepHyTncr Do cnyx6n nicJnpoJaXHoro o6cIyroByBaHHa BnKoHaIte HaCTynHe:
- IpebeipTe, cn npnlaad npabnIbHo niknIoueHO do eIekTpomepeksi.
-PererIyHbTe BnueHaBeJeHy TaJIuIO 3 ONUC HecnpaBHOCTeN.
KuO BV Doci He MoKeTe BnpiHTn npo6JeMy, BmKHiTb npiHaD, He HamaaTeCyaDemOnTyBaTu NOro 3aTeJePhoHyTe B
cnyk6y nicnnpo#aXHoro 06cnyroByBaHHa.
Cneuiabha 3aBa
3mict zboro noci6nka 6yno peTeIbHo nepeBipeHo. Ipote kOMnaHia He Hece BiNobiJaIbHoCTi 3a 6y-b-ki NOMIKu NpOnyueHHra.
Takok Mm MoKem BoHocn6ydb-aki TexHiHy 3MiHN B OHOBJeHy BepCIO zuBoRo noci6nka 6e3 nonepaHbOro nobiDomHeHH. 3OBHIHN BuRJa i Konip npnady B cboMy noci6nky moKyTB BiDiPI3HaTnca Bi DiIChoro.
YTNJI3AUJr: LIO npodykuio He cnid nomiuatn ceped HeiDCOPTOBAnHX KOMyHaIbHNx BIXOIDB. BaxNvBum c Okpemn 36ip TAKN bIXoDIB nIcneiaJIbHOI o6pOKn.
Ley npnaad mae MapkyBaHHa BIDnoBIDHO do NnpeKTHBn EC 2012/19/EC 0do BIXOXiB eEeKTPnHOro Ta eEeKTPoHnHO o6laHaHHa(BEEO).
IpaBnIbHa ytni3aui cyboro npnnaDy donomoxe 3anobirn noteniiHni shkodi HABKoIIuHbOMy cepeoBnuCy n 3doPob'IO IIOde, Ra Ka moKnBa npn HeHaIeXHi ytni3aui npnlaDy.
I03NaUka Ha npOdykuu 03Haauε, Μι έ He MoXHa NOMiuaTn pa3oM i3BnuaHMMn no6yTOBmN BIXxOaMn. Lio npOdykuio cniD doppaBn T B nyHKT 36opy dny nepepo6Kn eJektpnHnx Ta eJektpoHHnx KOMnoHEHTIB.
Ley npnlaq nobuHEn 6yTu yTNI3OBAHN BiIDNOiHNM faxIBaMn. DeTaIbHiuy iHopmaioo o6pO6Kn, BiHOBHeHHra Ta nepepo6Kn daHO npOyKcII MOxHa di3HaTNC B MicueBipai, cny6i yTNI3auii no6yTOBnx BIXOXIB a60 x y Mara3HHi, de BN npnd6ann ce npnaad.
DeTalbHiuy Infopmauio 0do o6p6kn, BiHOBneneHa Ta nepepo6kn daohi npOykuimoxHa i3HaTncB MicueBi padi, cnky6i ytniaui no6yTOBnx BIXxOIB a6o x y mara3HH, de BN npD6aHn cei npna.
Prajirea in ulei in fonta

Inox
Vas din fonta
Ceainic din fier

3 Safety Indications
7 General Instructions
9 Product description
10 Display description
12 Cooking Modes
13 General notes on cleaning
13 Maintenance
15 Troubleshooting
114 Installation
Safety Indications
- During cooking, moisture may condense inside the oven cavity or on the glass of the door. This is a normal condition. To reduce this effect, wait 10- 15 minutes after turning on the power before putting food inside the oven. In any case, the condensation disappears when the oven reaches the cooking temperature.
- Cook the vegetables in a container with a lid instead of an open tray.
- Avoid leaving food inside the oven after cooking for more than 15/20 minutes.
- WARNING: the accessible parts can become hot when the oven is in use. Young children should be kept at a safe distance.
- WARNING: the accessible parts can become hot when the grill is in use. Children should be kept at a safe distance.
- Disconnect the appliance from the mains electricity supply before carrying out any work or maintenance.
- WARNING: in order to avoid any danger caused by the accidental resetting of the thermal interruption device, the appliance should not be powered by an external switching device, such as a timer, or be connected to a circuit that is regularly switched on and off.
- Children under 8 should be kept at a safe distance from the appliance if not continuously supervised.
Children should not play with the appliance. - The appliance can be used by those aged 8 or over and by those with limited physical, sensorial or mental capacities, without experience or knowledge of the product, only if supervised or provided with instruction as to the operation of the appliance, in a safe way with awareness of the possible risks.
- Cleaning and maintenance should not be carried out by unsupervised children.
- Do not use rough or abrasive materials or sharp metal scrapers to clean the oven door glasses, as they can scratch the surface
and cause the glass to shatter.
- The oven must be switched off before removing the removable parts. After cleaning, reassemble them according the instructions.
- Only use the meat probe recommended for this oven.
- Do not use a steam cleaner or high pressure spray for cleaning operations.
- WARNING: the appliance and accessible parts become hot during use. Be careful not to touch any hot parts.
- WARNING: ensure that the appliance is switched off before replacing the bulb, to avoid the possibility of electric shocks.
- IF THE OVEN IS PROVIDED BY THE MANUFACTURER WITHOUT PLUG:
THE APPLIANCE MUST NOT BE CONNECTED TO THE POWER SOURCE USING PLUG OR SOCKETS, BUT MUST BE DIRECTLY CONNECTED TO THE SUPPLY MAINS. The connection to the power source must be carried out by a suitably qualified professional. In order to have an installation compliant to the current safety legislation the oven must be connected only placing an omnipolar breaker, with contact separation compliant to the requirements for overvoltage category III, between the appliance and the power source. The omnipolar breaker must bear the maximum connected load and must be in line with current legislation. The yellow-green earth cable should not be interrupted by the breaker. The omnipolar breaker used for the connection must be easily accessible when the appliance is installed.
The connection to the power source must be carried out by a suitably qualified professional considering the polarity of the oven and of the power source.
The disconnection must be achieved incorporating a switch in the fixed wiring in accordance with the wiring rules
- IF THE OVEN IS PROVLED BY THE MANUFACTURER WITH PLUG:
The socket must be suitable for the load indicated on the tag and must have ground contact connected and in operation. The earth conductor is yellow-green in colour. This operation should be carried out by a suitably qualified professional. In case of incompatibility between the socket and the appliance plug, ask a qualified electrician to substitute the socket with another suitable type. The plug and the socket must be conformed to the current norms of the installation country. Connection to the power source can also be made by placing an omnipolar breaker, with contact separation compliant to the requirements for overvoltage category III, between the appliance and the power source that can bear the maximum connected load and that is in line with current legislation. The yellow-green earth cable should not be interrupted by the breaker. The socket or omnipolar breaker used for the connection should be easily accessible when the appliance is installed.
The disconnection may be achieved by having the plug accessible or by incorporating a switch in the fixed wiring in accordance with the wiring rules.
- If the power cable is damaged, it should be substituted with a cable or special bundle available from the manufacturer or by contacting the customer service department. The type of power cable must be H05V2V2-F. This operation should be carried out by a suitably qualified professional. The earth conductor (yellow-green) must be approximately 10 mm longer than the other conductors. For any repairs, refer only to the Customer Care Department and request the use of original spare parts.
- Failure to comply with the above can compromise the safety of the appliance and invalidate the guarantee.
- Any excess of spilled material should be removed before cleaning.
-
A long power supply failure during an occurring cooking phase may cause a malfunction of the monitor. In this case contact customer service.
-
The appliance must not be installed behind a decorative door in order to avoid overheating.
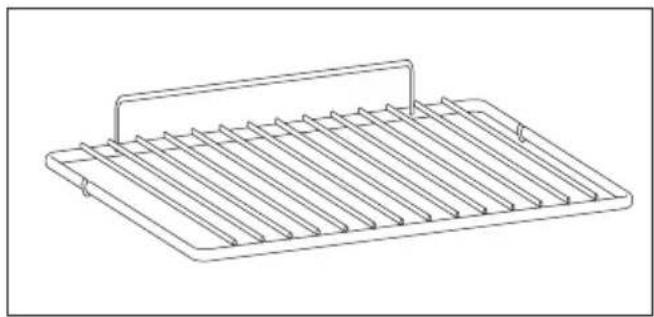
- When you place the shelf inside, make sure that the stop is directed upwards and in the back of the cavity. The shelf must be inserted completely into the cavity.
- When inserting the grid tray pay attention that the anti-slide edge is positioned rearwards and upwards.
- WARNING: Do not line the oven walls with aluminium foil or single-use protection available from stores. Aluminium foil or any other protection, in direct contact with the hot enamel, risk melting and deteriorating the enamel of the insides.
WARNING: Never remove the oven door seal. - CAUTION: Do not refill the cavity bottom with water during cooking or when the oven is hot.
- No additional operation/setting is required in order to operate the appliance at the rated frequencies.
- The oven can be located high in a column or under a worktop. Before fixing, you must ensure good ventilation in the oven space to allow proper circulation of the fresh air required for cooling and protecting the internal parts. Make the openings specified on last page according to the type of fitting.
- For a correct use of the oven it is advisable not to put the food in direct contact with the racks and trays, but to use oven papers and / or special containers.
General Instructions
We thank you for choosing one of our products. For the best results with your oven, you should read this manual carefully and retain it for future reference. Before installing the oven, take note of the serial number so that you can give it to customer service staff if any repairs are required. Having removed the oven from its packaging, check that it has not been damaged during transportation. If you have doubts, do not use the oven and refer to a qualified technician for advice. Keep all of the packaging material (plastic bags, polystyrene, nails) out of the reach of children. When the oven is switched on for the first time, strong smelling smoke can develop, which is caused by the glue on the insulation panels surrounding the oven heating for the first time. This is absolutely normal and, if it occurs, you should wait for the smoke to dissipate before putting food in the oven. The manufacturer accepts no responsibility in cases where the instructions contained in this document are not observed.
NOTE: the oven functions, properties and accessories cited in this manual will vary, depending on the model you have purchased.
Safety Indications
Only use the oven for its intended purpose, that is only for the cooking of foods; any other use, for example as a heat source, is considered improper and therefore dangerous. The manufacturer cannot be held responsible for any damage resulting from improper, incorrect or unreasonable usage.
The use of any electrical appliance implies the observance of some fundamental rules:
- do not pull on the power cable to disconnect the plug from the socket;
- do not touch the appliance with wet or damp hands or feet;
- in general the use of adaptors, multiple sockets and extension cables is not recommended;
- in case of malfunction and/or poor operation, switch off the appliance and do not tamper with it.
Electrical Safety
ENSURE THAT AN ELECTRICIAN OR QUALIFIED TECHNICIAN MAKES THE ELECTRICAL CONNECTIONS. The power supply to which the oven is connected must conform with the laws in force in the country of installation. The manufacturer accepts no responsibility for any damage caused by the failure to observe these instructions. The oven must be connected to an electrical supply with an earthed wall outlet or a disconnector with multiple poles, depending on the laws in force in the country of installation. The electrical supply should be protected with suitable fuses and the cables used must have a transverse section that can ensure correct supply to the oven.
CONNECTION
The oven is supplied with a power cable that should only be connected to an electrical supply with 220-240 Vac power between the phases or between the phase and neutral. Before the oven is connected to the electrical supply, it is important to check:
- power voltage indicated on the gauge;
- the setting of the disconnector.
The grounding wire connected to the oven's earth terminal must be connected to the earth terminal of the power supply.
WARNING
Before connecting the oven to the power supply, ask a qualified electrician to check the continuity of the power supply's earth terminal. The manufacturer accepts no responsibility for any accidents or other problems caused by failure to connect the oven to the earth terminal or by an earth connection that has defective continuity.
NOTE: as the oven could require maintenance work, it is advisable to keep another wall socket available so that the oven can be connected to this if it is removed from the space in which it is installed. The power cable must only be substituted by technical service staff or by technicians with equivalent qualifications.
A low light around the central main switch could be present when the oven is off. This is a normal behavior. I can be removed just turning the plug upside down or swapping the supply terminals.
Recommendations
After each use of the oven, a minimum of cleaning will help keep the oven perfectly clean. Do not line the oven walls with aluminium foil or single-use protection available from stores. Aluminium foil or any other protection, in direct contact with the hot enamel, risks melting and deteriorating the enamel of the insides. In order to prevent excessive dirtying of your oven and the resulting strong smokey smells, we recommend not using the oven at very high temperature. It is better to extend the cooking time and lower the temperature a little. In addition to the accessories supplied with the oven, we advise you only use dishes and baking moulds resistant to very high temperatures.
Installation
The manufacturers have no obligation to carry this out. If the assistance of the manufacturer is required to rectify faults arising from incorrect installation, this assistance is not covered by the guarantee. The installation instructions for professionally qualified personnel must be followed. Incorrect installation may cause harm or injury to people, animals or belongings. The manufacturer cannot be held responsible for such harm or injury.
The oven can be located high in a column or under a worktop. Before fixing, you must ensure good ventilation in the oven space to allow proper circulation of the fresh air required for cooling and protecting the internal parts. Make the openings specified on last page according to the type of fitting.
Product description
ACCESSIONS
Drip tray
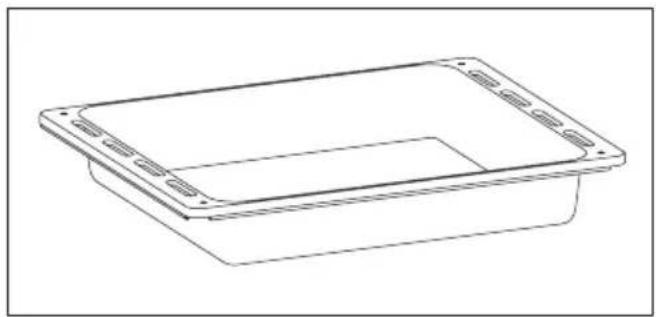
Collects residues that drip when cooking food on the grills.
Lateral wire grids (only if present)
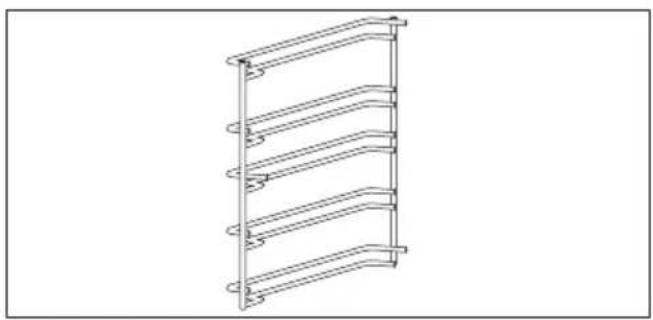
Located on both sides of the oven cavity, holds metal grills and drip pans.
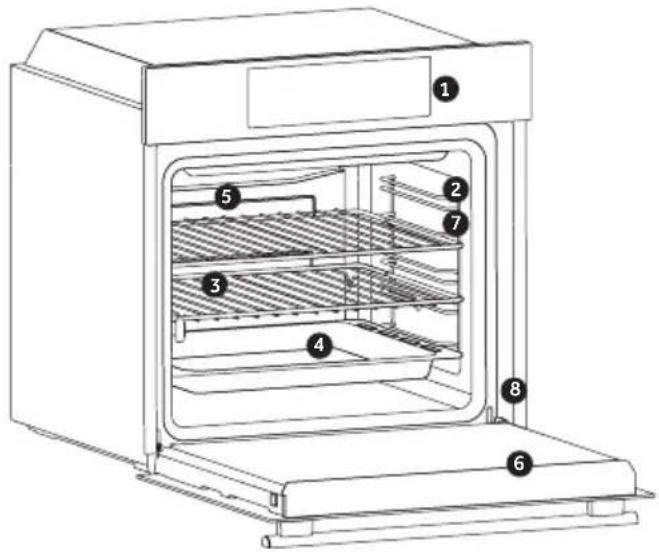
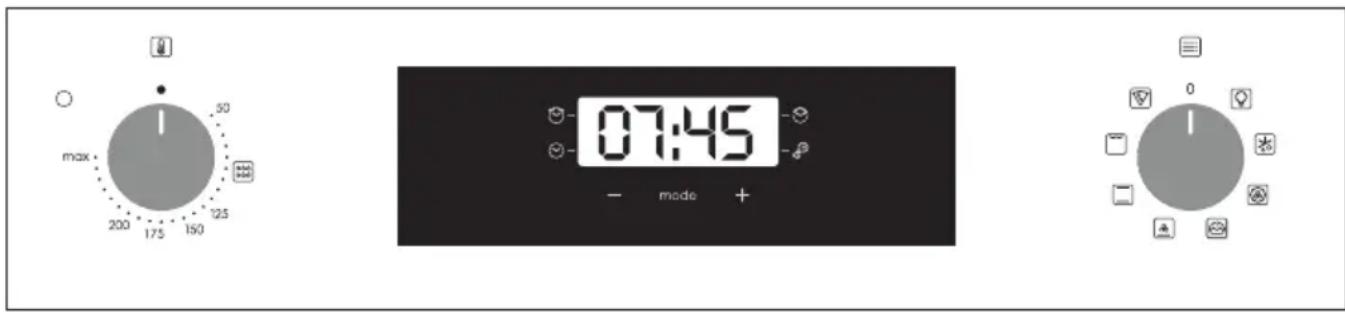
First Use
- Control panel
- Shelf positions (lateral wire grid if included)
- Grids
- Trays
- Fan (if present)
- Oven door
- Lateral wire grids (if present: only for flat cavity)
- Serial number
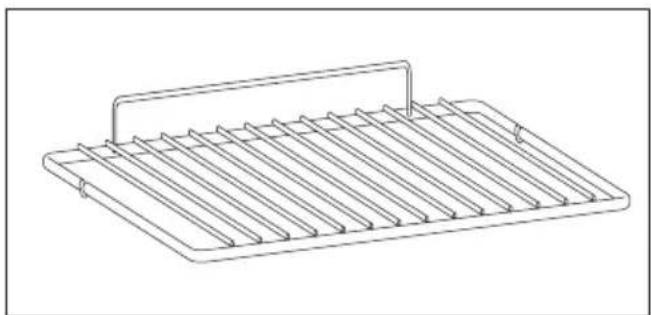
Metal grid

Holds baking trays and plates.
PRELIMINARY CLEANING; Clean the oven before using for the first time. Wipe over external surfaces with a damp soft cloth. Wash all accessories and wipe inside the oven with a solution of hot water and washing up liquid. Set the empty oven to the maximum temperature and leave on for about 1 hour, this will remove any lingering smells of newness.
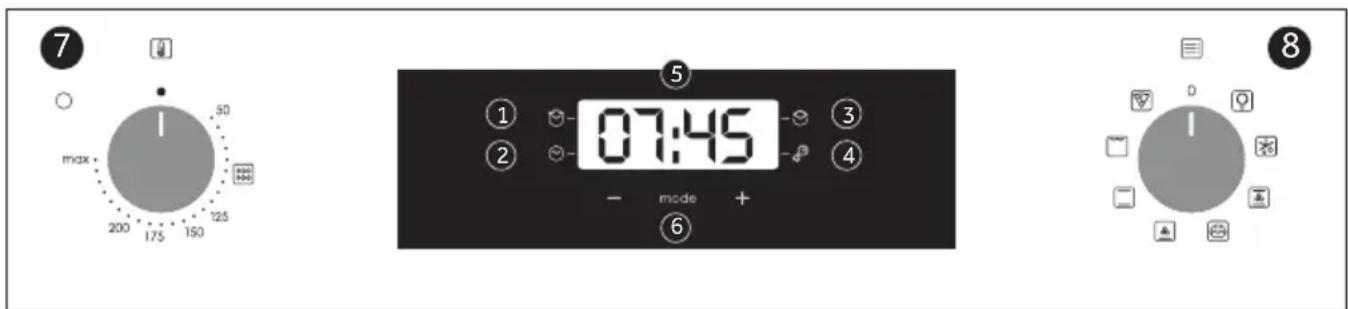
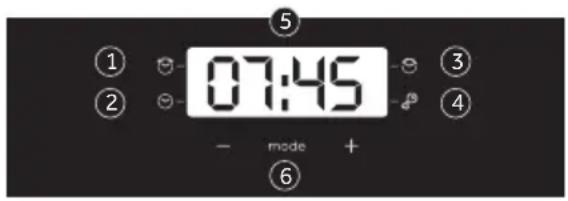
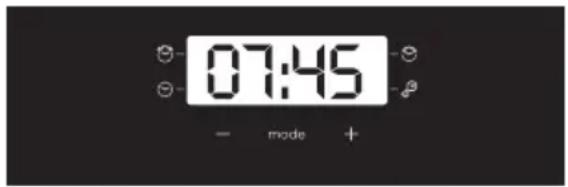
- Minute minder
- Clock setting
- Cooking time
- Child Lock
- Temperature or clock display
- LCD display adjustment controls
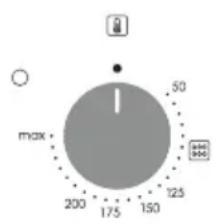
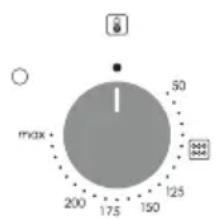
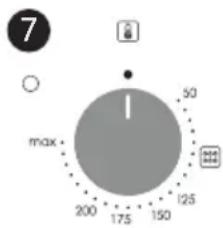
- Thermostat selector knob
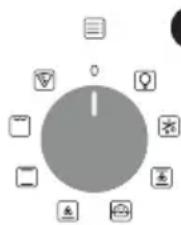
- Function selector knob
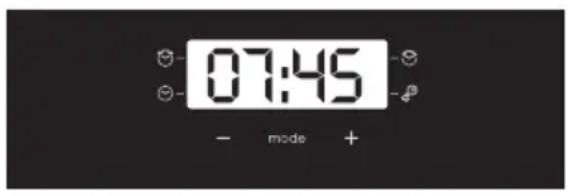
WARNING: the first operation to carry out after the oven has been installed or following the interruption of power supply (this is recognizable the display pulsating and showing 12:00) is setting the correct time. This is achieved as follows.
- Push the central button 4 times
- Set time with "-" +" buttons.
- Release all buttons.
ATTENTION: The oven will only operate providing the clock is set.
| FUNCTION HOW TO ACTIVATE | HOW TO DEACTIVATE | WHAT IT DOES WHY | IT IS NEEDED | |
| KEY LOCK | Child Lock function is activated by touching Set (+) for a minimum of 5 seconds. From this moment on all other function are locked and the display will flash STOP and preset time intermittently. From this moment on all other functions are locked, LED of child lock turn on, the display will flash STOP and present time intermittently | Child Lock function is deactivated by touching touchpad Set (+) again for a minimum of 5 seconds. From this moment on all functions are selectable again. From this moment LED of child lock turn off and all functions are selectable again. | ||
| MINUTE MINDER | Push the central button 1 timesPress the buttons “-” “+” to set the required timeRelease all the buttons | When the set time as elapsed an audible alarm is activated (this alarm will stop on its own, however it can be stopped immediately by pressing the button) SELECT. | Sounds an alarm at the end of the set time.During the process, the display shows the remaining time. | Allows to use the oven as alarm clock (could be activated either with operating the oven or with out operating the oven) |
| COOKING TIME | Push the central button 2 timesPress the buttons “-” or “+” to set the lenght of cooking requiredRelease all buttonsSet the cooking function with the oven function selector | Push any button to stop the signal. Push the central button to return to the clock function. | It allows to preset the cooking time required for the recipe chosen.To check how long is left to run press the SELECT button 2 Times.To alter/change the preset time press SELECT and “-” “+” buttons. | When the time is elapsed the oven will switch off automatically. Should you wish to stop cooking earlier either turn the function selector to 0, or set time to 0:00 (SELECT and “-” “+” buttons) |
| Symbol | T°C de-fault | T°C range | Function |
| LAMP: Turns on the oven light. | |||
| DEFROST: When the dial is set to this position. The fan circulates air at room temperature around the frozen food so that it defrosts in a few min-utes without the protein content of the food being changed or altered. | |||
| 180 | 50 ÷ MAX | MULTI-LEVEL: We recommend you use this method for poultry, pastries, fish and vegetables. Heat penetrates into the food better and both the cooking and preheating times are reduced. You can cook different foods at the same time with or without the same preparation in one or more positions. This cooking method gives even heat distribution and the smells are not mixed. Allow about ten minutes extra when cooking foods at the same time. | |
| 210 | |||
| 190 50 ÷ MAX | * COOK LIGHT: This function allows to cook in a healthier way, by reducing the amount of fat or oil required. The combination of heating elements with a pulsating cycle of air ensures a perfect baking result. | ||
| 210 50 ÷ MAX | BOTTOM HEATING + FAN: The bottom heating element is used with the fan circulating the air inside the oven. This method is ideal for juicy fruit flans, tarts, quiches and pâté. It prevents food from drying and encourages rising in cakes, bread dough and other bottom-cooked food. Place the shelf in the bottom position. | ||
| 220 50 ÷ MAX | * CONVENTIONAL: Both top and bottom heating elements are used. Preheat the oven for about ten minutes. This method is ideal for all traditional roasting and baking. For seizing red meats, roast beef, leg of lamb, game, bread, foil wrapped food (papillotes), flaky pastry. Place the food and its dish on a shelf in mid position. | ||
| 200 50 ÷ MAX | GRILL: use the grill with the door closed. The top heating element is used alone and you can adjust the temper-ature. Five minutes preheating is required to get the elements red-hot. Success is guaranteed for grills, kebabs and gratin dishes. White meats should be put at a distance from the grill; the cooking time is longer, but the meat will be tastier. You can put red meats and fish fillets on the shelf with the drip tray underneath. | ||
| 220 50 ÷ MAX | PIZZA - With this function hot air circulated in the oven to ensure perfect result for dishes such as pizza or cake. | ||
General notes on cleaning
The lifecycle of the appliance can be extended through regular cleaning. Wait for the oven to cool before carrying out manual cleaning operations. Never use abrasive detergents, steel wool or sharp objects for cleaning, so as to not irreparably damage the enamelled parts. Use only water, soap or bleach-based detergents (ammonia).
GLASS PARTS
It is advisable to clean the glass window with absorbent kitchen towel after every use of the oven. To remove more obstinate stains, you can use a detergent-soaked sponge, well wrung out, and then rinse with water.
OVEN WINDOW SEAL
If dirty, the seal can be cleaned with a slightly
damp sponge.
ACCESSIONS
Clean accessories with a wet, soapy sponge before rinsing and drying them: avoid using abrasive detergents.
DRIP PAN
After using the grill, remove the pan from the oven. Pour the hot fat into a container and wash the pan in hot water, using a sponge and washing-up liquid.
If greasy residues remain, immerse the pan in water and detergent. Alternatively, you can wash the pan in the dishwasher or use a commercial oven detergent. Never put a dirty pan back into the oven.
Maintenance
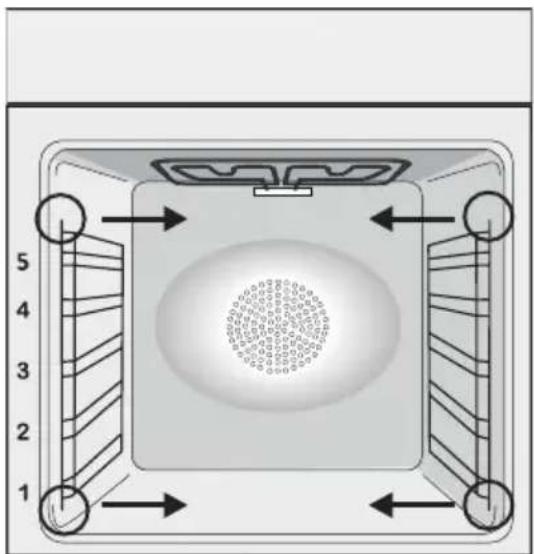
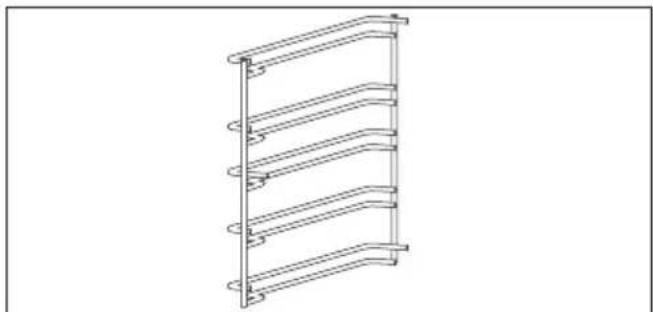
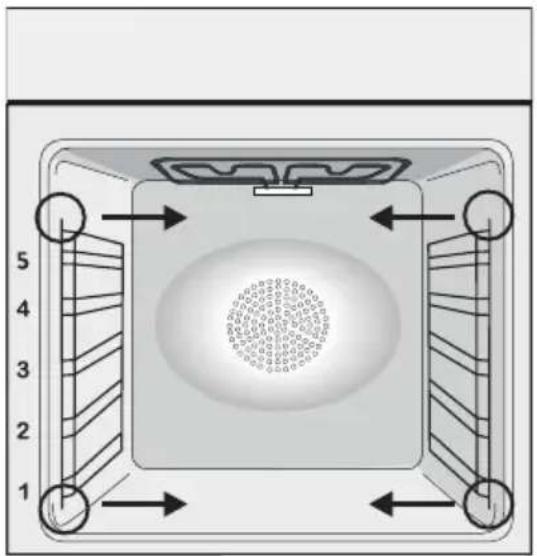
REMOVAL AND CLEANING OF THE SIDE RACKS
- Remove the wire racks by pulling them in the direction of the arrows (see below)
- To clean the wire racks either put them in the dishwasher or use a wet sponge, ensuring that they are dried afterwards.
- After the cleaning process install the wire racks in reverse order."
CHANGING THE BULB
- Disconnect the oven from the mains supply.
- Undo the glass cover, unscrew the bulb and replace it with a new bulb of the same type.
- Once the defective bulb is replaced, replace the glass cover.
This product contains one or more light sources of energy efficiency class G (Lamp) /F (10 Led).
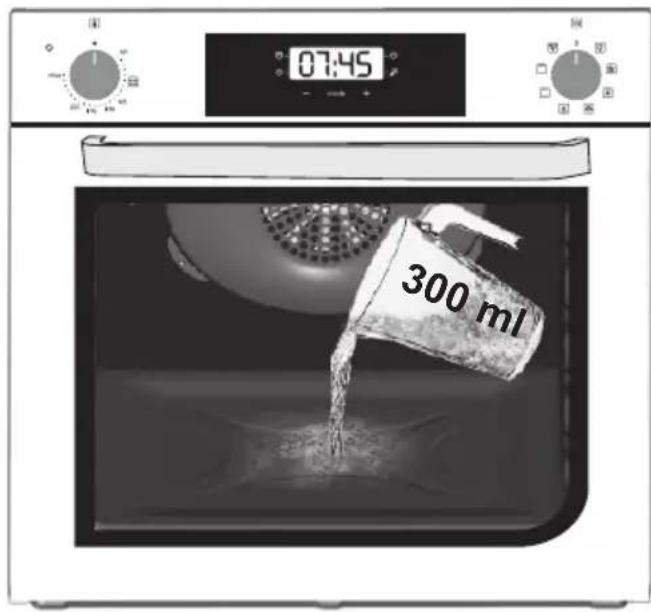
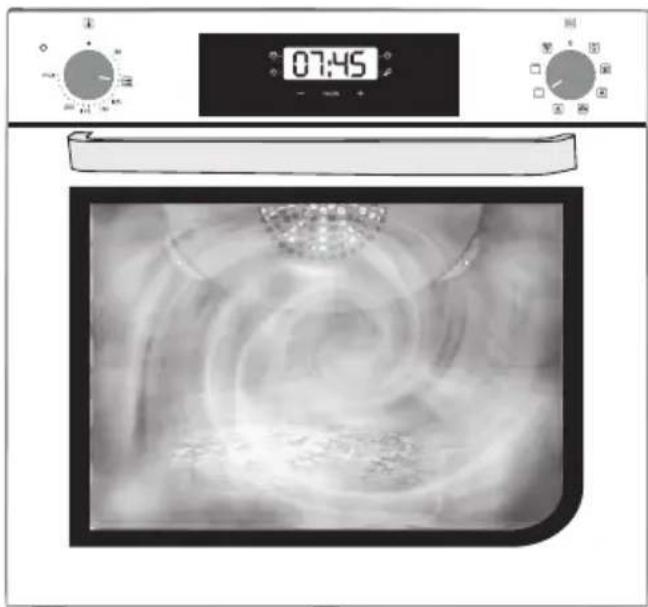
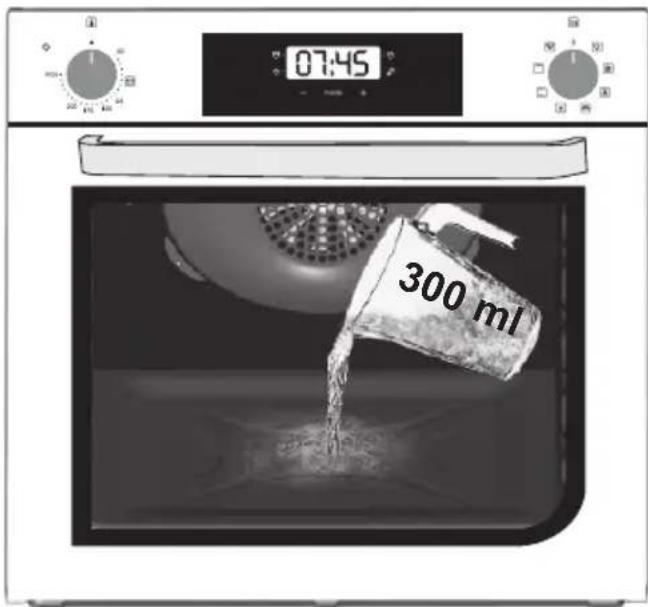
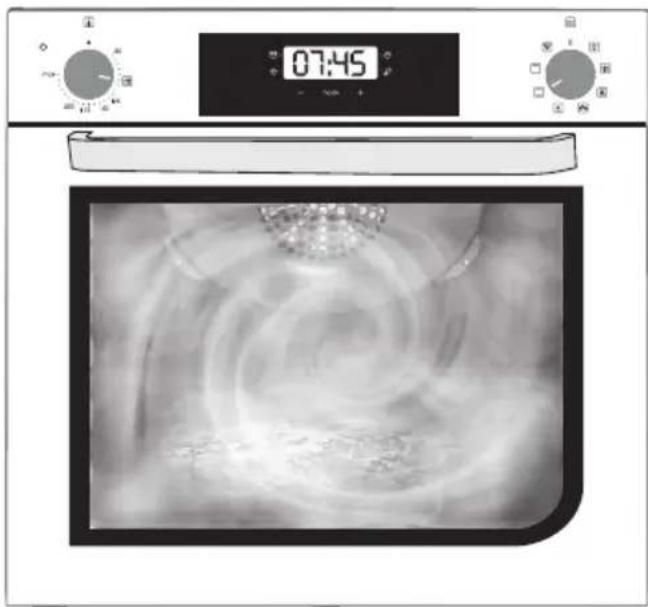
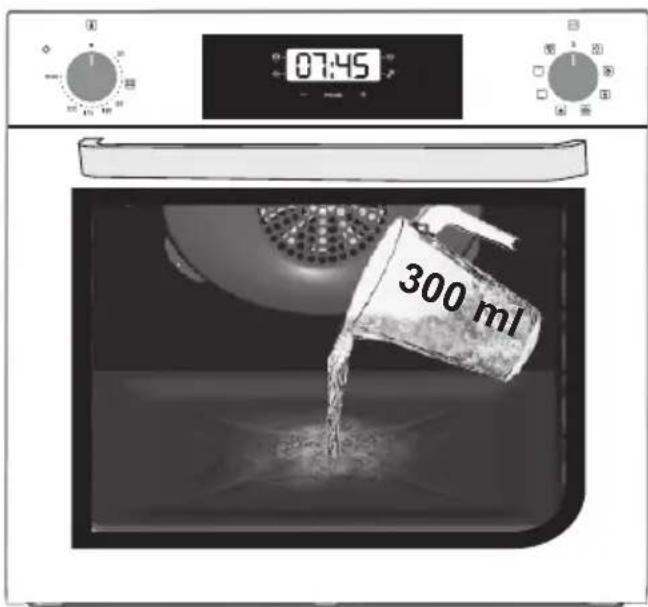
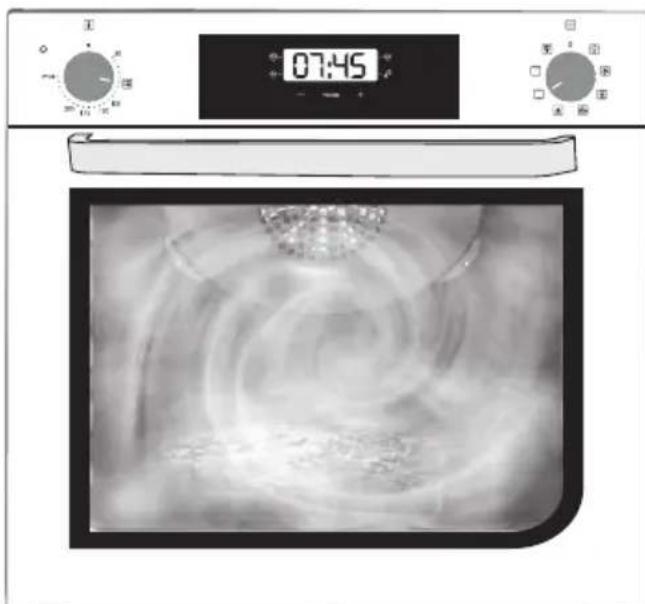
The Aquactiva procedure uses steam to help remove remaining fat and food particles from the oven.
- Pour 300 ml of water into the Aquactiva container at the bottom of the oven.
- Set the oven function to Static ( )or Bottom ( theater
- Set the temperature to the Aquactiva icon
- Allow the program to operate for 30 minutes.
- After 30 minutes switch off the program and allow the oven to cool down.
- When the appliance is cool, clean the inner surfaces of the oven with a cloth.
Warning: Make sure that the appliance is cool before you touch it.
Care must be taken with all hot surfaces as there is a risk of burns.
Use distilled or drinkable water.
Waste management and environmental protection
This appliance is labelled in accordance with European Directive 2012/19/EU regarding electric and electronic appliances (WEEE). The WEEE contain both polluting substances (that can have a negative ef
fect on the environment) and base elements (that can be reused). It is important that
WEEE undergo specific treatments to correctly remove and dispose of the pollutants and recover all the materials. Individuals can play an important role in ensuring that the WEEE do not become an environmental problem; it is essential to follow a few basic rules:
-
the WEEE should not be treated as domestic waste;
-
the WEEE should be taken to dedicated collection areas managed by the town council or a registered company.
In many countries, domestic collections may be available for large WEEEs. When you buy a new appliance, the old one can be returned to the vendor who must accept it free of charge as a one-off, as long as the appliance is of an equivalent type and has the same functions as the purchased appliance.
SAVING AND RESPECTING THE ENVIRONMENT
Where possible, avoid pre-heating the oven and always try to fill it. Open the oven door as infrequently as possible, because heat from the cavity disperses every time it is opened.
For a significant energy saving, switch off the oven between 5 and 10 minutes before the planned end of the cooking time, and use the residual heat that the oven continues to generate. Keep the seals clean and in order, to avoid any heat dispersal outside of the cavity. If you have an electric contract with an hourly tariff, the "delayed cooking" programme makes energy saving more simple, moving the cooking process to start at the reduced tariff time slot.
Troubleshooting
| Problem Possible cause Solution | ||
| the oven does not heat up | The clock is not set Set the clock | |
| The oven does not heat up | A cooking function and temperature has not been set | Ensure that the necessary settings are correct |
| No reaction of the touch user interface | Steam and condensation on the user interface panel | Clean with a microfiber cloth the user interface panel to remove the condensation layer |
Use distilled or drinkable water.
EN If the furniture is coverage with a bottom at the back part, provide an opening for the power supply cable.
EN If the oven does not have a cooling fan, create an opening 460mm× 15mm
EN If the mounting of the plinth does not allow air circulation, it is necessary to create an opening of 500 × 10 ~mm or the same surface in 5000 ~mm^2 .
Cb6upa octaTbU, KOINTO npokanBaT npn roTBeHa Ha XpaHa Ha rpnIOBete.
TeIeHa cTpaHnca
Pa3noJoxeHn OT DBeTe CtpaHn Ha KaMepaTaHa
fypHaT,DbpKaT MeTaHn FrpIIOBe N TaBn 3a
OTcExJaHe.
Pbpa ynoptpe6a
ПЕДВAPИTEЛнопuctBAHE
IOnuHCTe foypHaT, npedn da r n3nOJ3BaTe 3a npBb Nt. 3a6bpWeTe BbHnHTe NOBbpxHOCTn C HABlaXHeHa MeKa KbPna. I3MnIte BCNUKn npucno6JeHnRn 3a6bpWeTe BbTpEulHOCTTa Ha fypHaTa c pa3TBOp Ha TOnJa BOda n npenapat 3a MneHe. BkIoUeTe foypHaTa Ha MaKcImaHa TempepaTpyn I octabete Da pa60rN OKoNo 1 Yac - TaKa Ue 6bDat OTCTpaHEn OCTaBHyHnte Mnpn3Mn Ha "HOBO".
1.Панелзayypablenne
2.ПоЗИЦИнHa peшETkaTа(TeJIeHa cTpahNua, aKO e BKNIOUeHa)
3.Скapiи
4. TaBn
5. BeHTnlaTOp (aKO nMa)
6. BpaTnUka Ha yypHaTa
7. TeJeHn cTpaHnU (aKo nMa: camo 3a nnockn KaMepu)
8. CepneH Homep
MeTaHa cKapa
Ibpxn TaBn n dpync bdoBe 3a neuehe.


- Taïmep
- Hac troponka Na yacobnka
- PpOdbJIxKTeJIHOCHT Ha rotBeHeTo
4.3aKJIouBaHe cpeu y deca
5.Пoka3BaHe Ha TempepaTypa TnIu YacOBHnKa
6.Управлие на有很大忡ркite на LCDДистпя - Konque 3a perylnipahe Ha Tepmoctata
- Konque 3a n36op Ha fyuHKnna
BHIMAHHE: npBbTa onepaun 3a n3BbpWbHe cIeK kaTo fypHaTa e 6nla INHCTaIIpaHa IIN cIeD ppeKbcBaHe Ha 3axpaHbAHeto (TOBa ce pa3No3HaBa OT MInraHTo Ha nnCnJe) e 3aDaBaHTo Ha npabNlHoto Bpeme. TOBa ce noCTnRa, KaKTo CJIeDbA:
- HaTnchHeTe 电HTpaHnH6byToH 4 nTn
- 3aДаиTeВpeMeToC"-"+"6уTOHn.
- Ocbo6oJeTe BCnK6bToHn
BHIMAHNE:Фурнataиpe pa6OTn caMo npu ycNoBHe Ye YacOBHnKbTe HacTpoeH.
| ФУнКЦИЙ KAK | ДА AKТВИРАМЕ | КAK ДА ИЗКЛIOЧИTE | KAKBO ПРABИ | 3АКAKBO CE ИЗПОЛ3BA |
| 3AKЛIOчBAHE | ΦУнКцЯтta 3a ЗakлIOчBaHe 3a Deca ce akTbИрpa c HATNCKaHe Ha Set (HастrosBaHe) (+) 3a MINHmUm 5 sekyнд. OT ToZn MOMENT HATAbK Bcunckn Ostahaln ФУнКцЯс ca ZakILOчeHn и диспягл.Tse Mira ha 3 sekyндNi INTePbAIn STOP (CTOП) n празьарNTeLHNo ЗададенOTO bVpeme cпразьсваня. OT ToZn MOMENT HATAbK Bcunckn dpyrtnФунКцin Se ca 3aklIOчeHn, cBeTodIOdYt 3a „3aklIOчBaNe cspu deza" ce BkIOUcb, ha ДиCSIIeR Ye prIMnIRBa „STOP" n.Ye ce nOKaBa bVpeMeTo ha празьсваня. | ΦУнКцЯтta 3a ЗakлIOчBaHe 3a Deca ce De3akTbИрpaчe HATNCKaHe Ha TbIpada Set (HастrosBaHe) (+) OTTOBO 3a MINHmUm 5 sekyнд. OTToZn MOMENT HATAbK BCUChk ФунКциMorat da ce n36IparT OTHOB. OTToZn MOMENT cBeTodIOdYtte Ha "3aklIOчBaNe cspu deza" ce n3KJILOUvBAT и BCUChkФунКци MORAT da 6bdaT n36PbAn OTHOB. | ||
| TAΙМЕР | Hatichete ZeentpalHn 6byToN 1 nbTn Hatichete 6byToHnite “-”“+”, 3a Da HACTPOInte HuzhHOTo bVpeMe. ОсвобodeTe BCUChk 6byToN | Korato 3aZadadHTo bVpeMe N3TeYe, 3ByKobA anapMa CngHauNImura Краi. CLeD KaTo ce akTbIpuR, ta3n anapMa ζe cnpe camocToTetlHo, Hо можеТуDAЯ cnperte BefdHaraчe3 HatickaHe Na HЯко OT 6byToHnite. | В края na ЗададенOTO bVpeMe npo3bUyaba anapMa. По bpeMe na proUceca dncIJIeYn Poka3Ba octabauZIoTo bVpeMe. | ПоЗБOLЯВa ИзПОЛЗВaHETO haФурнатka katO 6ydUnHnK (можеда ce akTbIpuR kAKTO no bpeMe Ha pa6Ota haФурната, тaka иprn ИЗКIOUeHa Фурna) |
| ВРЕМЕ 3A ГOTBEHE | Изберетe ФунКцЯтta 3a rotVeNe c Коштeto 3a ИЗбор ha ФунКцяla Ha Фурнata, tempepatypata, Ha КОТо ИСКATE DA rotBHTe c KОнчeto Ha termoctata. Hatichete ZeentpalHn 6byToN 1 nbTn Hatichete 6byToHnite “-”Ли +“, 3a da ЗаддeTe Heo6xOДIMaTa ПробьлькітELHOCHT ha rotBheneto ОсвobodeTe BCUChk 6byToN 3AБЕЛEXKKA: Ако Фурната e ИзКLOчЕн ha IamPaTa СВETn, ФунКцяla TA Планирано bVpeMe 3a rotBhene NaЯma da pa6ToN. | Hatichete NaKoi 6byToN, 3a Da Cnpete CngHauNImura. ЗаддeТал� 6byToN, 3a Da ce BbPrte KbM ФунКцЯтta YacOBnIK. | ПоЗБOLЯВa ЗададenOTO ha Heo6xOДIMOTO 3a CbOTBeTHOTo rCTne bpeMe 3a rotBVEhe. 3a Da proBovepite KoIko bpeMe OCTaba, HATSCHete 6byToHa MENU (MEHIO) 1 nbT. 3a Da ИЗМeHnte/ nPOMeHnte прдВарNTeLHIO ЗаддeHOTo bVpeMe, HATSCHete MENU (MEHIO) и 6byToHnite “-”, “+”. | В края na прогаматa, прогамата дава 3 прedlyрдNTeLHn сИннala и hab ДиСПлЕЯ спОВВЯ надпс "End" (Kрай). Hасточte превкLOчВаTeЯ 3a ИЗбор на ФунКцяla Ha "0", 3a DA se CBpvHete КыmФунКцяla T YacOBnIK. |
| Селектор нас Функции | Термостат селектор | Дианазон На T°C | Фуннкции |
| LAMP: влесува с Bretлина на Inteprinopa. | |||
| Влесува осветленисту на чурна. Това ще akту在线咨询а ветоматunicho вентлиatorа за охлajдаме (camo по мody,则, кочу поимат) | |||
| 180 210 | 50÷MAX | MHОГЕТАЖНО ГOTBEHE: Изолотьат с дolyен и ropen нагревату лдаши с вentлиatorа, кочу сизкулра вьздуха вътpe вьв Фурна. Ппеньорьчы с за зеленчу, пьба и др. Тонлината habлиа в xра на подобре и врешената за пгетонлаян ГOTBEHE с habлиа вьздуха Можete д погетя разлuchныхсану садовсementsно. Този меток дава много добра дисрибuya на токлинату и миримите не симсbat. Можete да OCTавITE okolo 10 min nobechу karato rotвite nobechу ot 1 Ясти. | |
| 190 50÷MAX | * COOK LIGHT: Таши Функции поЗвол�еву гOTBEHE по лени пос-здравословен Начичесу намальва: псалочую OT наогревату сизкул; Колочеву мадуни. Сьчетаную OT наогревату сизкул; Вьздушеницьогогату: погgingату: погgingату: погgingату: погgingату: погgingату: погgingату: погgingату: погgingату: погgingату: погgingату: погgingату: погgingату: погgingату: погgingату: погgingату: погgingату: погgingату: Погgingату: Погgingату: Погgingату: Погgingату: Погgingату: Погgingату: Погgingату: Погgingату: Погgingату: Погgingату: Погgingату: Погgingату: Погgingату: Погgingату: Погgingату: Погgingату: Погgingат�: Погgingату: Погgingату: Погgingату: Погgingату: Погgingату: Погgingату: Погgingату: Погgingату: Погgingату: Погgingату: Погgingату: Погgingату: Погgingату: Погgingату: Погgingату: Погgingату: ПогGINGATY: ПогGINGATY: ПогGINGATY: ПогGINGATY: ПогGINGATY: ПогGINGATY: ПогGINGATY: ПогGINGATY: ПогGINGATY: ПогGINGATY: ПогGINGATY: ПогGINGATY: ПогGINGATY: ПогGINGATY: ПогGINGATY: ПогGINGATY: ПогGINGATY: Погgingату: Погgingату: Погgingату: Погgingату: Погgingату: Погgingату: Погgingату: Погgingату: Погgingату: Погgingату: Погgingату: Погgingату: Погgingату: Погgingату: Погgingату: Погgingату: Погgedу: ПогGEDU: ПогGEDU: ПогGEDU: ПогGEDU: ПогGEDU: ПогGEDU: ПогGEDU: ПогGEDU: ПогGEDU: ПогGEDU: ПогGEDU: ПогGEDU: ПогGEDU: ПогGEDU: ПогGEDU: ПогGEDU: ПогGEDU: ПогGEDU: ПогGEDU: ПогGEDU: ПогGED U: ПогGEDU: ПогGEDU: ПогGEDU: ПогGEDU: ПогGEDU: ПогGEDU: ПогGEDU: ПогGEDU: ПогGEDU: ПогGEDU: ПогGEDU: ПогGEDU: ПогGEDU: ПогGEDU: ПогGEDU: ПогGEDU: ПогGEDU: ПогGEDU: ПогGEDU: ПогGED/U: ПогGEDU: ПогGEDU: ПогGEDU: ПогGEDU: ПогGEDU: ПогGEDU: ПогGEDU: ПогGEDU: ПогGEDU: ПогGEDU: ПогGEDU: ПогGEDU: ПогGEDU: ПогGEDU: ПогGEDU: ПогGEDU: ПогGEDU: ПогGEDU: ПогGEDU: ПогGED,U: ПогGEDU: ПогGEDU: ПогGEDU: ПогGEDU: ПогGEDU: ПогGEDU: ПогGEDU: ПогGEDU: ПогGEDU: ПогGEDU: ПогGEDU: ПогGEDU: ПогGEDU: ПогGEDU: ПогGEDU: ПогGEDU: ПогGEDU: ПогGEDU: ПогGEDU: ПогGED_U: ПогGEDU: ПогGEDU: ПогGEDU: ПогGEDU: ПогGEDU: ПогGEDU: ПогGEDU: ПогGEDU: ПогGEDU: ПогGEDU: ПогGEDU: ПогGEDU: ПогGEDU: ПогGEDU: ПогGEDU: ПогGEDU: ПогGEDU: ПогGEDU: ПогGEDU: ПогGED-U: ПогGEDU: ПогGEDU: ПогGEDU: ПогGEDU: ПогGEDU: ПогGEDU: ПогGEDU: ПогGEDU: ПогGEDU: ПогGEDU: ПогGEDU: ПогGEDU: ПогGEDU: ПогGEDU: ПогGEDU: ПогGEDU: ПогGEDU: ПогGEDU: ПогGEDU: ПогGED(U): ПогGEDU: ПогGEDU: ПогGEDU: ПогGEDU: ПогGEDU: ПогGEDU: ПогGEDU: ПогGEDU: ПогGEDU: ПогGEDU: ПогGEDU: ПогGEDU: ПогGEDU: ПогGEDU: ПогGEDU: ПогGEDU: ПогGEDU: ПогGEDU: ПогGEDU: ПогGEDU: |
O6и 6eJekn no nOuNCTBaHeto
Xn3HeHnT uKbJHa To3n ypeD MoKe Da 6bDe yDbLnKeH, KaTo rO NouchTBaTe peoBHO. N3yakaTe fypHaTa Da N3CTnHe, npei Da N3BbPbBaTe pChN DeuHocTn PO NouchTbaHeTo i. Hnkora He N3NoI3BaIte abpa3nBn PpenapaTn, TeJeHn YeTk nIin OCTpn PpeMetn 3a NouchTBe, 3a da N36erHete HeonnpabmO yBpejdahe Ha emai npaHnte qactn. N3noI3BaIte camo Boda, canyH nn IppenapaTn Ha OCHOBA Ha 6eJIHaTata (amOHaHn).
CTbKJIeHn YACTN
IpeopbTuTeJHo e da noocTbaTe CTbkHeHn Ipo3OpeuC c nonBaUa KuyxHeHcKa KbPNa CLeB BcAko NOn3BaHe Ha cyPhata. 3a npEmaxBaHe Ha No-ynOpNTn neTHa MoKeTe Da n3NoJ3BaTe HanoEHa C npenapat r6Ba, KOrTO CTe n3ueDnI NDo6pe, n CneT TOBa n3PnakHeTe C Boda.
yIbTHeHHe HA IPO3OPEla HA
ΦYPHATA
Ako e 3a4aHANO, yNtBTHHeHHeTo MoKe da 6bJe NOuCTeHO C NeKO HABNaXHeHa T6a.
ПРИСПОСOBLENHЯ
IOnuCTBaTe npncnocO6JIeHnra Tc MOKpa HacanyHncaHa Tb6a, npdeN da rN n3PnakHeTe NnoCyuWte. 136aRbAte n3NoJ3BaHepTo Ha a6pa3nBn npenapatn.
TABA 3A OTTNUAHE
CleKaTo n3NoJ3BaTe rpnla, CbaJeTe TaBata ot cyphata. N3cunete ropeaTa Ma3HnHa B KOHTeHep n 3MnIte TaBata C ropea BA, KaTo n3NoJ3BaTe Tb6a n TeuHOCT 3a NOUcTbAHe. Ako octaHaT Ma3Hn OCTaTbCu, Notonete TaBata BB BoDa n DeTepreHT. Dpyra Bb3MOxHOCTe Da n3MneTe TaBata B CbDOMNJaHaTa MaUnHa NN da n3NoJ3BaTe O6NKHOBeH DeTepreHT. Hnkora He NoCTaBnTe Mpbcha Taba O6paTHO BbB cyphata.
Poaepbxxka
HCTpyKznn 3a CBAJHe N NOUcTbaHe Ha CTpaHnHnTe cToiKn
1.ИЗваде Te MeTaHnTe cKapn, KaTo rN I3ДbPnaTe NO NOCOKa Ha CTrpeLknte (BIX NO-Дoly).
2.3a da nouchte Me taHHe ckapn rnoocTaBe T CbdoMnaHa Ta MaunHa nI IN 3noJ3BaIte BnaJHa Tb6a, a cneT TOBa ce yBepTe, ye ca noDcyWeH.
3. Cne nocntBaHe nocTaBeTe MeTaHnIte ckapn B o6paTHna pei.
CMRAHAKPYUKATA
1.ИЗКЛЮЧЕТе ФурнATEROTaxpaHBAHeTO.
2. CbaIeTe cTBkLeHnKaIaK, pa3BnTe KpyuKaTa n I NOdMeHeTe C HOBa OT cbUtn.
3. Cne KaTo NoDMHeTe N3rOpraJaTa KpyUka, NoCTaBeTe o6paTHo CTbKJIeHnKaIaK.
To3n npo4yKT cbIbprka eINH nII NOBuee n3TOUHNuHa cCBeTInHa c KlaC 3a eHeprnHa eΦeKTHBHOCT G (Jamna)/F (10 Led ocBeTJIeHne).
AquactivaФункця
IpoceDypata no Aquactiva n3noJ3Ba npa, 3a da ce noJnomorHe npemaxBaHeto Ha Ma3HHn I xpaHITeHNuactnU ONfypHaT.
1.ИЗлеле 300 мл вора в контейнера за Aquactivа на дьhoeTo на Фурна.Ta.
2.3aainTe yHkuiTa Static( )nNBoiOT ( )HarpaHe.
3. HactpoTe TemnepaTypaAqactiva icon.
4.Octabete nporpaMaTda pa6oTN B npOdbJxKeHHe Ha 30 MInHyTN.
5.Cne30MnHyTuN3KJIuOHeTppoRpaMaTaIJaNo3BOJNaHaΦypHaTaJaCe OxlaNi.
6. Korato ypeBte nCTnHa, noCtTe BbTpEHNTE NOBbpxHOCTn Ha cyphata c Kbpna.
Ipeynpexdene: YbepTe ce, ye ypeBt e nCTnHaJ, ppei Da ro doKoche. TpaBa da ce BHMaBA C BCNUKIN OpeuNIOBbpxHOCTN, Tb KaTO cBueCTByBa PnCK OT n3rapHe. N3noJIbaIte IeCTNIIPAHa NN INTEeHa BOda.
YnpaBHeHne Ha OTnadbCHTe n 3aunTa Ha OKoJHaTa CpeDa
To3n ypeI e Mapknipan
cBflacHO eBponeNcKa
DInpeKTHBa 2012/19/EO 3a
OTnadbUOn OT eJeKTPnuecko
H eJeKTPoHNo O6OpyDbAHe
(WEEE). WEEE cBdbpxka
eHNOBpeMeHHO 3aMbpcraBaIu
cy6ctaHcHn (KoHTOMorat Da OKaKaT OTpuateJIHO Bb3deICTBHe BbpxO KOKHaTa CpeDa) IN OCHOBH N KOMHOENTN (KOHTOMoRAt Da ce n3noJ3BaT NOBTOPO. BaxHo e WEEE Da 6bDat o6pa6OteHN IO CneuΦuHn HaunH COrpIeI npabINHOTo OTcTpaHBAHe I N3XBpJrHTo Ha BCNUKN 3aMbpCtTeJI N Bb3BpBuaHeTo IN peuKInpaHe Ha BCNUKN MaTePnaJI.
OTdJIHnTe HnINBnIMoRaT Do OKaKaT BaXHa poJra, ocIpyBaIKu, ye WEEE hMa da cTaHaT npObIeM 3a OkONHaTa CpeDa; BaKHO e Da 6bDaT CneDbaHn HAKOIN OCHOBNI npaBnla:
WEEE He Tp6Ba Da 6bDat TpeTnpaHn KaTo DOMaKNHcN OTNaDbU.
WEEE Tp6Ba Da 6bDat npedabAHn B CbOTBeHTHe Cb6paTeHN NyHKTOBe, ynpablaBAnO To 6uHaTa Nn peNCTpnpaHn KOMNaHn. BMHO DpbXaBn, 3a roJeMn WEEE, MoKe Da Ce npedna Ta Cb6paHne OT DoMoBeTe.
Korato KnyBaTe HOB ypeI, CTapnT MoKe Da 6bIe BbpHAT Ha TbproBeua, KOITo Da ro npnbepete 6e3PnAthO Ha 6a3a eHO-KbM eHNO, DOkATO O6OpyDbaHeto e OT CbUINr TIN Ma CbUInTe FyHKuN KATO DOCTaBeHOTO 6opuyDbaHe.
CNECTBAHE HA EHEPnI N OIIA3BAHE HA OKOIHATA CPEDA
Korato e BB3MOXHO n36yBaIte npedBapnteJIHOTo 3aqrpaBaHe Ha cyphata. No BpeMe Ha rotBeHe OTbapYTe BpTaTa Ha cyphata BB3MOxHo Hau-MaIKo, 3aUTo npn BCaKO OTbapYHe ce r6n TOnnHa. 3a 3HaunTeJHa IKOHOMnHa eHepnN3KIOUcTe cyphata 5-10 MNHTn ppei nnAHHpAHnT KpaHbpeMeTO 3a rotBeHe n N3NOJ3BaInTe OCTaTBuHaT aONnHa, KOrTO cyphata npodblkaba Da reHepnpa. 3a da n36berHeTe 3ary6a Ha TOnnHa NOdIbpKaIte YnCTn N B peD yPbTHEnra Ta Ha cyphata. Ako mATE pa3nnuHn TapnO 3a eJeKTprueckata eHepnN i3noJ3BaInTe OTLOKeHNrT CTapt, 3a da cTApTnpate RotBeHTo Ha no-HnCKaTa Tapna.
Отстразнын на поземп.
USTEDA ENERGIJE I BRIGA ZA OKOLIS
Ukolico je moguce, izbjegavajte nepotrebnozagrijavanje prazne pecnice. Vrata otvarajsteo je manje moguce, kako biste smanjili gubitak topline iz unutrasnjosti. Za značajnu ušteduenergije, iskljucite pecnicu 5 do 10 minuta prije planiranog zavrsetka pecenjai iskoristite preostalu toplinu pecnice. Održavajte brte cistimaipripazite da su pravilno učvrscene, kako biste izbjegli gubitak topline. Ukolico imate dvotarifno brojilo, iskoristite funkcjju odgode početkapecenja za period jeftinije elektricne energije.
Rjesavanje problema
| Problem Moguči Uzrok Rješenje | ||
| Pećnica se ne zagrijava Sat niJE postavljen Postavite sat | ||
| Pećnica se ne zagrijava | Nisu postavljeni funkcjija kuhanja i tem-peratura | Pobrinite se da su potrebne postavke pravilne |
| Dodirno korisničko sučelje ne reagira | Para i kondenzacija na ploči korisničkog sučelja | Ploču korisničkog sučelja očistite krpor od mikrovlakana kako biste uklonili kondenzirani sloj |
Collects residues that drip when cooking food on the grills.
Located on both sides of the oven cavity, holds metal grills and drip pans.
Prva upotreba
- Upravljacka ploča
- Položaji polica (bočna Žičana mreža ako je uključena)
- Mreze
- Pladnjevi
- Ventilator (ako postoji)
- Vrata pećnice
- BočneŽičane resetke (ako postoj: samo za ravnu šupljin)
- Serijski broj
Metalna rešetka
Holds baking trays and plates.
PRELIMINARNO CISCENJE; Ocistite renu pre prve upotrebe. Prebrisite speljasnje povrsine sa vlaznom mekom krpom. Operite sve dodatke i prebrisite unutrajsost rerne rastvorom vode i malo deterdventa za ručno pranje sudova, a potom isperite. Potom uključite renu na maksimalnu temperaturi ostavite da radi okо sat vremena, kako bi se sagoreli industrijski ostaci.


- Zapisnik minuta
- Podesavlje sata
- Vrijeme kuhanja
- Zaključano za decu
- Prikaz temperature ili sata
- Kontrole za podešavanje LCD ekrana
- Gumb za odabir termostata
- Gumb za odabir funkcije
UPOZORENJE: prva operacija koju treba izvrsiti nakon sto je peć instalirana ili nakon prekida napajanja (ovo je prepoznatljivo na displejukoji pulsira i prikazuje 12:00) postavlja tačno vrijeme. To se postiže na sljedeći način.
- Pritisnite centralno dugme.
- Postavite vrijeme tipkama " - " " +".
- Otpustite sve tipke.
PAZNJA: Pećnica ce raditi samo ako je sat po-deşen.
| FUNKCIJA KAKO KORISTITI KAKO DEAktIVATI STA JE BILJEŠKA | ||||
| ZA-KLJUČAV-ANJE | Opcija za zakljćevanje se aktivira takosto se dugme „Set“ (+) zadrži pritisnutimrajmanje 5 sekund. Od tog trenutka pa nadalje sve druge opcjijeće biti zak-lujčane a na displejuce u intervalma od 3 sekunde naizmeničnostreperiti STOP i podešeno vreme. Od ogov trenutkaće sve druge funkcjije biti zakljucane, LED indicator funkcjije „Zakljucano za decu“će biti ukljuchen, a na ekranuće se naizmenićno prikazi-vati oznaka “STOP” i tekuciće vreme. | Opcija za zakljćevanje se deaktiviradodirom tačpedaPostavite (+) ponovonajmanje 5 sekund. Od ogov trenutka na swim funkcjama se ponovo moze odabrati. Od ogov trenutkaće LED indicator funkcjije „Zakljucano za decu“biti iskljucen a sve druge funkcjijeće ponovo biti do-stupne. | ||
| MINUTNIPOSETNIK | Pritisnite centralnodugme 3 putaPritisnite dugmad“-““+”da biste postaviliželjeno vremeOslobodite sve dugmad | Nakon što podešeno vreme prode, aktivi-race se zvučni alarm. Taj alarmće se sam zaustaviti ali se moze i ranije zaustaviti pritismok na bilo koje dugme. | Zvuči alarm na kraju podešenog vremena. Tokom procesa, ekran prikazuje preostalo vreme. | Omogućava upotrebu pećnice kao budilnika (moze se aktivirati bilosar radom pećnice il bezupotrebe pećnice) |
| VREMKUVANJAKRE | Pomoću dugmeta sa izborom programa iz-aberite opcjüku vanja, a pomću dugmeta sa termostatom iz-berite temperaturu na kojoj Želite da kuvate.Pritisnite centralnodugme 1 putaPritisnite dugmad“-“ili“+”da biste podesili dužinu kuvanjaOslobodite sve dugmadNAPOMONA: Ako je sporet iskljćen ili je ukljčena lampica, opcjia s rasporedm vremena za kuvanje neće raditi. | Pritisnite bilo koji taster da zaustavite signal. Pritisnite centralnodugme da biste se vratili na funkcjiju sata. | Omogućava po-dešavanje vremena kuhanja potrebnog za odabrani recept. Da biste proverili koliko dugo treba da se pokrene, pritsnite dugme MENU 1 put.Za promenu / promjenu prethodno podešenog vremena pritsnite MENU i“-”“+” dugmad. | Po završetku programa pojavićse se 3 signala upozorenja a na displejećepisati“Kraj”.Postavite dugme sa izborom pro-grama na“0” kakobiste se vratili na sat. |
| Selektor funkcija | T°C prepo- ručena | T°C opseg | Funkcija |
| SVETLO: Uključuje svetlo unutar reme. | |||
| ODMRZAVANJE: Ventilator okrece vazduh na sobnoj temperaturi OKO zaledene hrane takado se odliedi za nekoliko minuta bez da sadržaj be-lančevina u hrani bude promenjen. Temperatura je unapred poděsena na 40°C. | |||
| VIŠE NIVOA: Koriste se oba grejacza zajedno sa ventilatorom koji okrece vruć vazduh u unutrašnjosti rerne. Žav način kuvanja preporučujemo zaŽivinu, peciva, ribu i povrće. Ovim načinom kuvanja postižemo bolje pro-diranje toplote, a vrijeme zagrejavanja i kuvanja su kraći. Kuvanje pomoću ventilatoria omogucuje da razlčita jela kuvate zajedno u isto vreme na ra-zlčitim položajima u reni uz Jednaku raspodelu toplote, a bez opasnosti od mešanje ukusa i mirisa. Kada kuvate razlčitu hranu u isto vrieme, kuv-aje 10 minuta duže. | |||
Generalne napomene o ciscenju
Zivotni vek aparata moze biti produzen reguIarnim ciscenjem. Sacekajte da se rerna ohladni pre nego sto krenete sa ručnim ciscen -jem. Nikada nemojte koristiti abrazivne deterdžente, metalnu vunu, ostre predmete za ciscenje kako ne bi ostetili emajlrane delove. Koristite samo vodu, deterdžent ili preparate na baz hlora (ili amonijaka).
STAKLENIDELOVI
Preporucjemo da staklo rerne očistite sa de belom kućnom krpom nakon svakog korišćenja rerne. Kako bi uklonili skoreljne fleke, možete koristiti sunder natopljen deterdžentom (dobro isceden), a potom isprati vodom..