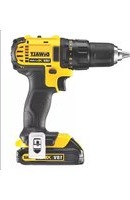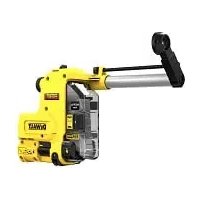
D25304DH - Drill DEWALT - Free user manual and instructions
Find the device manual for free D25304DH DEWALT in PDF.


User questions about D25304DH DEWALT
0 question about this device. Answer the ones you know or ask your own.
Ask a new question about this device
Download the instructions for your Drill in PDF format for free! Find your manual D25304DH - DEWALT and take your electronic device back in hand. On this page are published all the documents necessary for the use of your device. D25304DH by DEWALT.
USER MANUAL D25304DH DEWALT
English (original instructions) 15
Bader risiko for brand.
You have chosen a DEWALT tool. Years of experience, thorough product development and innovation make DEWALT one of the most reliable partners for professional power tool users.
Technical Data
| D25304DH | |
| Contact pressure N 80 | |
| Max. drilling depth mm 180 | |
| Max. drilling diameter mm 26 | |
| Noise values and vibration values (triax vector sum) of the combination of power tool and connected dust extraction system according to EN62841-2-6. To calculate the noise and vibration values of the combination of power tool and connected extraction system, the LPA (Power Tool), LWA (Power Tool), K (Power Tool) and ahHG (Power Tool) values from the operation instructions of the attached power tool are required. | |
| LPA (emission sound pressure level) dB(A) | LPA (Power Tool) +3dB |
| LWA (sound power level) dB(A) | LWA (Power Tool) +3dB |
| K (uncertainty for the given sound level) dB(A) | K (Power Tool) |
Drilling into concrete
Dust extraction will not increase the vibration of the attached power tool.
Vibration emission value a_h,HD =
m/s² aHp (Power Tool)
Uncertainty K
m/s² K(Power Tool)
The vibration and/or noise emission level given in this information sheet has been measured in accordance with a standardised test given in EN62841 and may be used to compare one tool with another. It may be used for a preliminary assessment of exposure.

WARNING: The declared vibration and/or noise emission level represents the main applications of the tool. However, if the tool is used for different applications, with different accessories or is poorly maintained, the vibration and/or noise emission may differ. This may significantly increase the exposure level over the total working period.
An estimation of the level of exposure to vibration and/or noise should also take into account the times when the tool is switched off or when it is running but not actually doing the job. This may significantly reduce the exposure level over the total working period.
Identify additional safety measures to protect the operator from the effects of vibration and/or noise such as: maintain the tool and the accessories, keep the hands warm (relevant for vibration), organisation of work patterns.
EC-Declaration of Conformity
Machinery Directive

Dust Extraction System
D25304DH
DEWALT declares that these products described under Technical
Data are in compliance with the following Directive and
Standard: 2006/42/EC, EN62841-1:2015 + A11:2022.
For more information, please contact DEWALT at the following address or refer to the back of the manual.
The undersigned is responsible for compilation of the technical file and makes this declaration on behalf of DEWALT.
Markus Rompel
Vice-President Engineering, PTE-Europa
65510, Idstein, Germany
18.11.2022
DECLARATION OF CONFORMITY THE SUPPLY OF MACHINERY (SAFETY) REGULATIONS 2008

Dust Extraction System D25304DH
DEWALT declares that these products described under Technical Data are in compliance with the following Regulation and Standard:
The Supply of Machinery (Safety) Regulations, 2008, S.I.
2008/1597 (as amended), EN62841-1:2015 + A11:2022.
For more information, please contact DEWALT at the following address or refer to the back of the manual.
The undersigned is responsible for compilation of the technical file and makes this declaration on behalf of DEWALT.
Karl Evans
Vice President Professional Power Tools EANZ GTS
DEWALT UK, 270 Bath Road, Slough
Berkshire, SL1 4DX
England
18.11.2022
WARNING: To reduce the risk of injury, read the instruction manual.
Definitions: Safety Guidelines
The definitions below describe the level of severity for each signal word. Please read the manual and pay attention to these symbols.
DANGER: Indicates an imminently hazardous situation which, if not avoided, will result in death or serious injury.
WARNING: Indicates a potentially hazardous situation.
WRONG, if not avoided, could result in death or serious injury.
CAITION: Indicates a potentially hazardous situation when, if not avoided, may result in minor or moderate injury.
NOTICE: Indicates a practice not related to personal injury which, if not avoided, may result in property damage.
Notes risk of electric shock.
Notes risk of fire.
Safety Instructions
WARNING! Always observe safety regulations applicable in your country to reduce the risk of fire, electric shock and personal injury.
Read all of this manual carefully before operating the attachment. Also refer to the manual of any power tool that will be used with this attachment.
SAVE THIS MANUAL FOR FUTURE REFERENCE
General Safety Rules
- Keep work area clear. Cluttered areas and benches invite injuries.
- Keep children away. Do not let children come into contact with the tool or extension cord. Supervision is required for those under 16 years of age.
- Use appropriate tool. The intended use is described in this instruction manual. Do not force small tools or attachments to do the job of a heavy-duty tool. The tool will do the job better and safer at the rate for which it was intended.
WARNING: The use of any accessory or attachment or performance of any operation with this tool, other than those recommended in this instruction manual may present a risk of personal injury.
Additional Specific Safety Rules for Dust Extraction Systems
- Do not use the attachment for drilling applications in wood, steel or plastic.
- Do not use the attachment in core drilling applications.
- Do not use the attachment for chiselling applications.
Use only power tools recommended by DEWALT with this attachment. For more information about DEWALT power tools compatible with this attachment, please contact your local dealer, refer to the addresses at the back of the manual or visit www.dewalt.com.
- Modifications to the tool and dust extractor or interventions in its parts are not permitted.
- Do not use the tool in damp or wet conditions.
- Do not allow to be used as a toy. Close attention is necessary when used by or near children.
- Use only as described in this manual. Use only manufacturer's recommended attachments.
- Do not put any object into openings. Do not use with any opening blocked; keep free of dust, lint, hair and anything that may reduce air flow.
- Keep hair, loose clothing, fingers and all parts of body away from openings and moving parts.
- Do not use to pick up flammable or combustible liquids, such as gasoline, or use in areas where they may be present.
Risks of Dust
This device collects a significant percentage of the dust generated, but not all.
Certain dusts such as mineral dust containing quartz are considered carcinogenic. For the extraction of such dusts, a dust extractor or extraction system with an officially-approved protection class in compliance with the locally applicable dust protection regulations and suitable for the material to be worked on shall be used. If necessary, also wear a respiratory protection mask which is suitable for the dust in question. Ensure good ventilation of the workplace.
Material containing asbestos may only be handled by professionals.
Observe regulations applicable in your country for the materials to be processed.
Residual Risks
The following risks are inherent to the use of the dust extraction system:
Injuries caused by touching the rotating parts or hot parts of the tool.
In spite of the application of the relevant safety regulations and the implementation of safety devices, certain residual risks cannot be avoided. These are:
Impairment of hearing.
- Risk of squeezing fingers when changing the accessory.
- Health hazards caused by breathing dust developed when working in concrete and/or masonry.
Markings on Dust Extraction System
The following pictogram is shown on the dust extractor:

Read instruction manual before use.
Date Code Position (Fig. D)
The production date code 19 consists of a 4-digit year followed by a 2-digit week and is extended by a 2-digit factory code.
Package Contents
The package contains:
1 Dust extraction system
1 Cordless dust extraction head/dust brush
1 Corded dust extraction head/dust brush
1 Corded tool adaptor
1 Instruction manual
- Check for damage to the tool, parts or accessories which may have occurred during transport.
Take the time to thoroughly read and understand this manual prior to operation.
Description (Fig. A-E, G)
WARNING: Never modify the power tool or any part of it. Damage or personal injury could result.
1 Dust extraction system
2 Base release buttons
3 Dust collection box
4 Dust collection box release buttons
5 Telescope
6 Depth adjustment button
7 Length adjustment button
8 Dust extraction head
9 Dust brush
10 Locking and release shoe
11 Release catch
12 Hammer foot
13 Filter
14 Snap-fit connector
15 Filter frame
16 Filter cleaning mechanism
17 Corded tool adaptor
18 Support grooves
19 Date code
Intended Use
Your dust extraction system D25304DH has been designed for the extraction of dust in professional hammerdrilling in masonry or concrete, and with solid drill bits mounted to the power tool. DO NOT use for drilling plastic, wood or metal. DO NOT use with hollow bits or core bits.
Please observe the national regulations when working with substances hazardous to health.
This dust extraction system will fit DEWALT 18V cordless SDS plus hammer DCH283, 54V cordless SDS plus hammers DCH323, DCH333 and DCH334, and corded SDS plus* hammers D25333 and D25334. For more information about DEWALT power tools compatible with this attachment, please contact your local dealer, refer to the addresses at the back of the manual or visit www.dewalt.com.
DO NOT use under wet conditions or in presence of flammable liquids or gases.
The dust extraction system is an attachment for use with professional power tools.
DO NOT let children come into contact with the tool.
Supervision is required when inexperienced operators use this tool.
- Young children and the infirm. This appliance is not intended for use by young children or infirm persons without supervision.
- This product is not intended for use by persons (including children) suffering from diminished physical, sensory or mental abilities; lack of experience, knowledge or skills unless they are supervised by a person responsible for their safety. Children should never be left alone with this product.
ASSEMBLY AND ADJUSTMENTS
WARNING: To reduce the risk of serious personal injury, turn tool off and disconnect battery pack or power source before making any adjustments or removing/installing attachments or accessories. An accidental start-up can cause injury.
Attaching and Removing the Dust Extraction System to a Cordless Tool
DCH283, DCH323, DCH333 and DCH334 Only
WARNING: To reduce the risk of personal injury, AYS operate the tool with the side handle properly installed and securely tightened. Failure to do so may result in the side handle slipping during tool operation and subsequent loss of control. Hold tool with both hands to maximize control.
To Attach the Dust Extraction System (Fig. A, B)
Your dust extraction system comes ready to use with the cordless DCH283, DCH323, DCH333 and DCH334.
- Remove the drill bit if attached to the rotary hammer.
- Ensure the base release buttons 2 are depressed and locked in the open position before attempting to fit the dust extraction system to the rotary hammer.
- Insert hammer into the extractor, ensuring that both the support grooves 18 are aligned on the sides of the hammer to the dust extractor. The base release buttons will click into the locked position when hammer is properly seated in the extractor.
NOTE: The hammer will not slide into the dust extractor if the base release buttons are in the locked position.
- Test to see if the dust extractor is properly installed on the rotary hammer:
a. Install the dust extractor.
b. Start your drilling operation and stop after 6mm
c. Lift the tool and check if the dust extraction is working. There should be no debris.
d. If the dust extractor is operating properly continue your work.
To Remove the System
To remove the dust extraction system, pull downwards on the two extractor base release buttons and slide the extraction system off the rails (Fig. B).
Attaching and Removing the Dust Extraction System to a Cored Tool
D25333 and D25334 Only
WARNING: To reduce the risk of personal injury, AYS operate the tool with the side handle properly installed and securely tightened. Failure to do so may result in the side handle slipping during tool operation and subsequent loss of control. Hold tool with both hands to maximize control.
To Attach the Dust Extraction System (Fig. A, B)
To use the dust extractor with the D25333 and D25334 you will first need to install the corded tool adaptor 17 and the corded dust extraction head.
- Remove the drill bit if attached to the rotary hammer.
- Install the corded dust extraction head on the dust extractor.
- Ensure the base release buttons 2 are depressed and are in the unlocked position before attempting to fit the dust extraction system to the rotary hammer.
- Attach the adaptor by sliding it forward on the grooves. The adaptor will click in place when properly installed on the dust extractor.
- Insert hammer into the extractor, ensuring that both the support grooves 18 are aligned on the sides of the hammer to the dust extractor. The base release buttons will click into the locked position when hammer is properly seated in the extractor.
nOTE: The hammer will not slide into the dust extractor if the base release buttons are in the locked position.
- Test to see if the dust extractor is properly installed on the rotary hammer:
a. Install the dust extractor.
b. Start your drilling operation and stop after 6mm
c. Lift the tool and check if the dust extraction is working. There should be no debris.
d. If the dust extractor is operating properly continue your work.
To Remove the System
To remove the dust extraction system, pull downwards on the two extractor base release buttons and slide the extraction system off the rails (Fig. B).
OPERATION
WARNING: To reduce the risk of serious personal injury, turn tool off and disconnect battery pack or power source before making any adjustments or removing/installing attachments or accessories. An accidental start-up can cause injury.
WARNING: Always observe the safety instructions and applicable regulations.
WARNING: Always read and operate the tool as instructed in the tool instruction manual.
Proper Hand Position (Fig. F)
WARNING: To reduce the risk of serious personal injury, YS use proper hand position as shown.
WARNING: To reduce the risk of serious personal injury, ALWAYS hold securely in anticipation of a sudden reaction.
Proper hand position requires one hand on the main handle of the hammer and one hand on the side handle. The side handle must be installed for proper use.
Switching On and Off
The extraction system automatically starts when the rotary hammer is turned on.
Filter Cleaning Mechanism
The filter cleaning mechanism is a feature that uses the motor in the extractor to force air through the HEPA filter. Refer to Emptying the Dust Collector for instructions on proper use.
Setting the Drilling Depth (Fig. A)
Press the depth adjustment button 6 on the front of the slider and move it to the desired drilling depth. Release the button.
Adjusting the Drill Length (Fig. A)
- Insert the appropriate drill bit.
- Hold the dust extraction head 8 against a wall.
- Push the tool to make the drill bit touch the surface wall.
- Press the length adjustment button 7 on top of the back slider and move it to the desired length. Release the button.
- Gently withdraw the tool assembly from the wall, taking care that the spring-loaded mechanism does not release.
Emptying the Dust Collector (Fig. A, D, E)
WARNING: Wear approved eye protection and approved mask when performing this procedure.
The dust collection box 3 should be emptied as soon as the performance has noticeably decreased or is full.
- Press the dust collection box release buttons 4 and pull the dust collection box away from the dust extraction system. Once the catch mechanism is clear of the dust extraction system the upper joint will also release allowing the dust collection box to be removed completely.
- To empty the dust collection box 3 position it over a suitable container to catch the dust contained within it. Lift up the release catch 11 to open the dust collection box, separating the canister from the lid. Gently tapping the dust collection box will encourage any dust trapped within the filter to also be removed. Once the filter lid and canister are empty, reattach them, ensuring the release catch 11 is securely fastened. Refer to Figure E.
- To reattach the dust collection box to the dust extraction system first insert the rounded profile of the upper joint into the recess on the dust extraction system. Pivot the dust
collection box down so that the release buttons click back into place. Refer to Figure D.
- With the dust collection box properly installed, depress the filter cleaning mechanism 16 and squeeze trigger on tool. Allow the system to run for 5 seconds and release trigger. This should be done after every emptying of the dust collection box.
NOTE: Use of a Dust Box Evacuator (DWH079D) provides an easy solution to safely empty and dispose of the dust stored inside the dust box. Remove the dust box from your tool, slide it onto the Dust Box Evacuator and attach it to a dedicated standalone dust extractor, allowing for the emptying of the dust box in seconds.
MAINTENANCE
Your DEWALT dust extraction system has been designed to operate over a long period of time with a minimum of maintenance. Continuous satisfactory operation depends upon proper care and regular cleaning.
IMPORTANT: Check all external parts of the device and the filter for damage at regular intervals. Check whether all operating elements function properly. Do not operate the device if any parts are damaged or if the controls do not function properly. If necessary, the device should be repaired at a DEWALT service centre.
WARNING: To reduce the risk of serious personal injury, turn tool off and disconnect battery pack or power source before making any adjustments or removing/installing attachments or accessories. An accidental start-up can cause injury.

ING: Use only DEWALT replacement parts.
Replacing the Dust Collection Filter Box Element (Fig. A, D, E)
WARNING: Wear approved eye protection and approved mask when performing this procedure.
NOTE: The filter should be replaced after every 350 full to empty filter box emptying cycles.
- Press the dust collection box release buttons 4 and pull the dust collection box away from the dust extraction system. Once the catch mechanism is clear of the dust extraction system the upper joint will also release allowing the dust collection box to be removed completely.
- Discard dust collection box 3 and replace with a new filter box.
- To reattach the dust collection box to the dust extraction system, first insert the rounded profile of the upper joint into the recess on the dust extraction system. Pivot the dust collection box down so that the release buttons click back into place.
Replacing the Dust Brush (Fig. G)
WARNING: Wear approved eye protection and approved mask when performing this procedure.
The dust brush will wear during use and will need to be replaced at the same time as the filter.
- Push the snap-fit connector button 14, and pull the dust extraction head 8 out of the head holder.
- Insert the new extraction head back into the head holder. The centring pin will stick into the open end of the dust brush and secure it in place.
Cleaning
WARNING: Electrical shock and mechanical hazard. Connect the electrical appliance from the power source before cleaning.
WARNING: To ensure safe and efficient operation, it's key to keep the electrical appliance and the ventilation slots clean.
WARNING: Never use solvents or other harsh chemicals for cleaning the non-metallic parts of the tool. These chemicals may weaken the materials used in these parts. Use a cloth dampened only with water and mild soap. Never let any liquid get inside the tool; never immerse any part of the tool into a liquid.
Ventilation slots can be cleaned using a dry, soft non-metallic brush and/or a suitable vacuum cleaner. Do not use water or any cleaning solutions. Wear approved eye protection and an approved dust mask.
Cleaning the Dust Collector
WARNING: Do not use a brush or compressed air to clean the dust collector or filter.
During intensive use the dust collector becomes clogged with dust. Refer to Emptying the Dust Collector under Operation.
Optional Accessories
WARNING: Since accessories, other than those offered by WALT, have not been tested with this product, use of such accessories with this tool could be hazardous. To reduce the risk of injury, only DEWALT recommended accessories should be used with this product.
When replacing the dust extraction filter, replace with part number N684523.
Consult your dealer for further information on the appropriate accessories.
Protecting the Environment
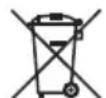
Separate collection. Products and batteries marked with this symbol must not be disposed of with normal household waste.

Products and batteries contain materials that
can be recovered or recycled reducing the demand for raw materials. Please recycle electrical products and batteries according to local provisions. Further information is available at www.2helpU.com.
SISTEMA DE EXTRACJON DE POLVOD25304DH
jEnhorabuena!
PpOaIpEeTikA PApEλKóμEva
NEIIOIHSH: ENiOJn eTo npoiov auto dev
doKipaaTe iAa npalekoEvva EKToc ano auta
nou diathevtai ano tnv DEWALT, nXpnoT uXov tetoov
npalekoEvuv ne to epyaieio auto mtopevi aivai
enikivnu. Ia va eAttwoTe Tov kivduvo Tpaumauoou,
npenei va xpoiaonoeite movo npalekoEvnau
ouviotwta ano tnv DEWALT.
Otauav avtikaiotate to piaTPO eaywync okovnc, xpoioiote to avtalaktko me kwdko N684523.
Ia neipoootepe c nnpoopopec oxetikac ta katalna npaeakoeva, ououauveute tov avtinpocnoe tov onio ouvepyazot.
Tia Tnv npoostaia tou nepiabaovtoc
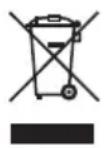
Xwpiot ouAloy. Ta npoiovt ka oIaTapie c nou enionmaivovtai e auto to ouuolo dev npenei va anoppintovtai aqi e ta koiva oikia anaoppipmuata.
Ta npoiovtkaoi i npataiec nepiexouv uikacouu npopoovvaavakntnboovnvaavakukwfoovwote vaueiwtoov oi avaykec yia npwec uace. Napakaoloue va avakukwveTe ta nektpika npoiovta kai tic npataiec oupwva e touc toikooc kavovioouc. PepiooTepe c npopopie, diathevtai otov 10TOTIO www.2helpU.com.
| Belgique etLuxembourg Belgie en Luxemburg | DeWALT - Belgium BVBAEgid Walschaertstraße 162800 Mechelen | Tel: NL32 15 47 37 63Tdd: FR32 15 47 37 64Fac:32 15 47 37 99 |
| Danmark | DeWALT (Stanley Black&Decker AS)Roskildevej 222620 Albertsland | Tel:70 20 15 10Fac:70 22 49 10 |
| Deutschland DeWALT | Richard-Klinger-Str. 1165510 Idstein | Tel:06126-21-0Fac:06126-21-2770 |
| Ελλάς | DeWALT (Ελλάς A.E.EGPΑ-TPAΟΙΑ Στραβανος 7 & A. Boukouρεγης Πιαρδα 166 74, ΑθηγΑ SERVICE : Κιχος Κότος 2 (Xδα Αδμα) - 193 00 Αυπρούρους | www.dewalt.grGreece(Service@sdbinc.com |
| Espana | DeWALT Iberica, S.C.A.Parce de Nogocios "Mas Blau"Edificio Muntiadas, c/Bergadá, 1, Of. A608820 El Prat de Llobregat (Barcelona) | www.dewalt.esrespuesta.postventa@sdbinc.com |
| France | DeWALT (Stanley Black & Decker France SAS)62 Chemin de la Bruyère69570 Dardilly, France | Tel:04 72 20 39 20Fac:04 72 20 39 00 |
| SchweizSuisseSwitzera | DeWALTIn der Luberzen 428902 Urdorf | Tel:044-755 60 70Fac:044-730 70 67 |
| Ireland DeWALT | Building 4500, Kinsale RoadCork Airport Business ParkCork, Ireland | Tel:00353-2781800Fac:01278 1811 |
| Italia DeWALT | via Energypark 620871 Vimercate (MIB), II | Tel:800-01435339 039-9590200Fac:39 039-9590311 |
| Netherlands DeWALT | Netherlands BVPostbus 83,6120 AB BORIN | Tel:31 164 283 063Fac:31 164 283 200 |
| Norge DeWALT | Postboks 46130405 Oslo, Norge | Tel:45 25 13 00Fac:45 25 08 00 |
| Österreich | DLWALTWerzeug Vertriebsges m.b.HObeltaerstrasse 248, A-1230 Wien | Tel:01-66116-0Fac:01-66116-614 |
| Portugal | DLWALTEd. D Dinis, Quina da FonteRua dos Malhores 2, 2A 2° Esq.Oeiras e S. Jualao da Barra, paço de Arcos e Caxas2770 071 Paço de Arcos | Tel: +351 214667500Fac: +351214667580 |
| Suomi | DeWALTPL4700521 Helsinki, Suomi | Puh:010 400 4333Fakst:0800 411 340 |
| Sverige | DLWALTBOX 9443122 MöndalSverige | Tel:031 68 61 60Fac:031 68 60 08 |
| Türkije | Sanayi ve Ticaret Bakanligi teblignce kullanim ümrü 7 yldür.Stanley Black & Decker Turkey Acı Üretim San. Tic. Ltd.StlAND Kozyataji - Ikenköy Mah. Umut Sak. AND Ofis Srl. No: 10-12 / 82-83-84Atasehir/Stanbul, Türkeiye | Tel: +90 216 665 2900Fakst: +90 216 665 2901 |
| United Kingdom | DeWALT, 270 Bath Road;Slough, Berks SL1 4DX | Tel:01753-567055Fac:01753-572112 |
| Australia / New Zealand | DLWALT810 Whitehorse Road Box HILLVIC 3128 Australia | Tel: Aust 1800 654 155Tel: NZ 0800 339 258 |
| Middle East Africa | DeWALTP.O. Box - 17164Jebel Ali Free Zone (South), Dubai, UAE | Tel:971 4 812 7400Fac:971 4 2822765 |