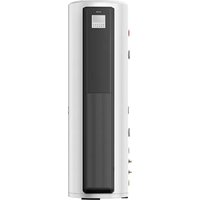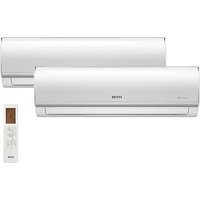
UNIG - Air Conditioning HTW - Free user manual and instructions
Find the device manual for free UNIG HTW in PDF.


User questions about UNIG HTW
0 question about this device. Answer the ones you know or ask your own.
Ask a new question about this device
Download the instructions for your Air Conditioning in PDF format for free! Find your manual UNIG - HTW and take your electronic device back in hand. On this page are published all the documents necessary for the use of your device. UNIG by HTW.
USER MANUAL UNIG HTW
EN OWNER'S AND INSTALLATION MANUAL
FR MANUEL DE L'UTILISATEUR ET D'INSTALLATION
Please, read carefully this manual before using the product.
DIAGRAMA DEL PRODUCTO
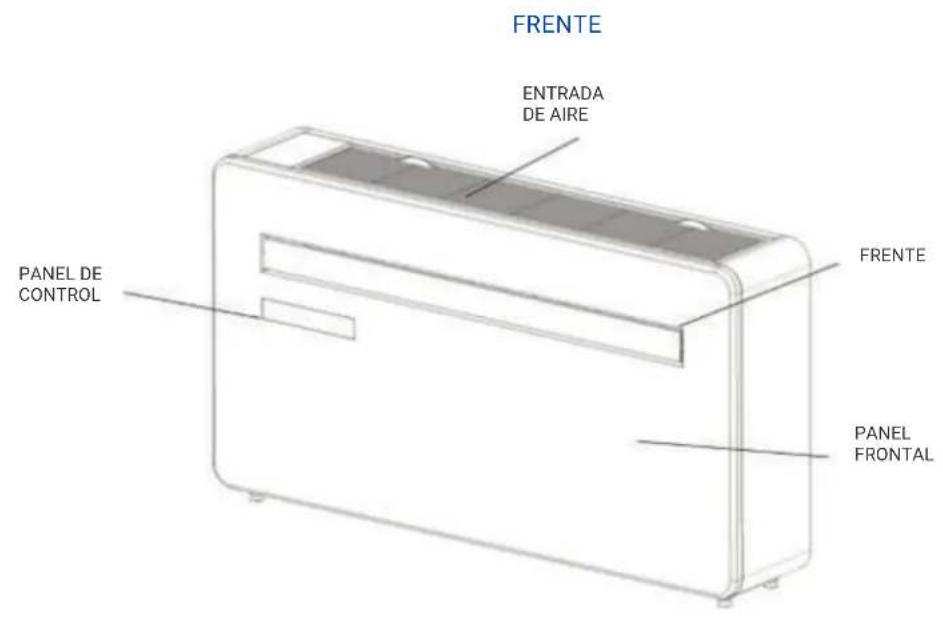
text_image
FRENTE ENTRADA DE AIRE PANEL DE CONTROL FRENTE PANEL FRONTALATRÁS
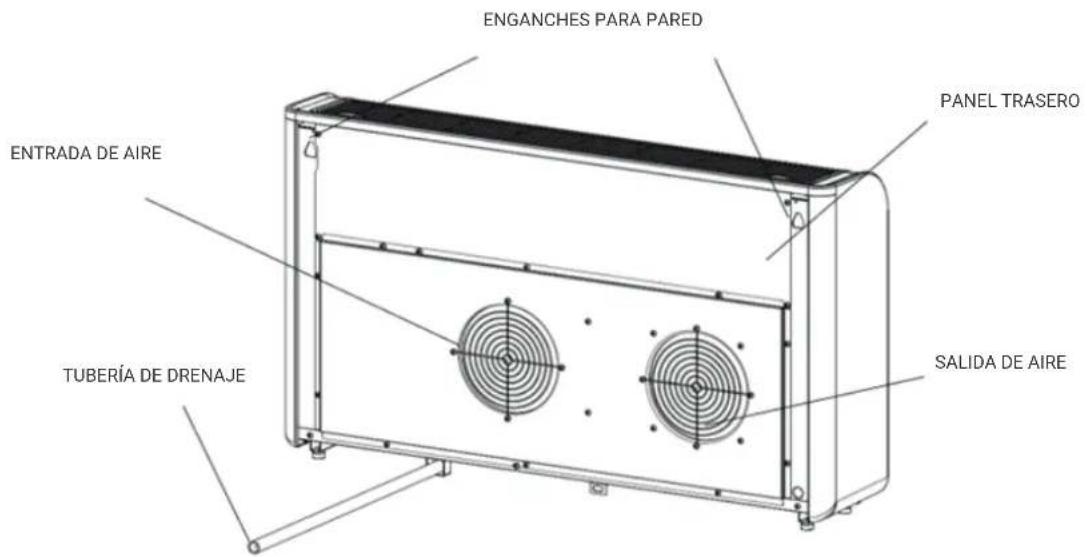
text_image
ENGANCHES PARA PARED PANEL TRASERO ENTRADA DE AIRE TUBERÍA DE DRENAJE SALIDA DE AIREnatural_image
Line drawing of a rectangular electronic device with a recessed panel (no text or symbols)AIRE ACONDICIONADO
natural_image
Simple diagram with dots and circles, no text or symbols presentPLANTILLA DE PARED
CONDUCTOS DE
PLÁSTICO, HOJAS (X2)
natural_image
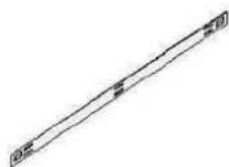
Simple line drawing of a diagonal line with no text or symbolsSOPORTE DE PARED
MANDO A DISTANCIA
DIAGRAMA DEL PRODUCTO
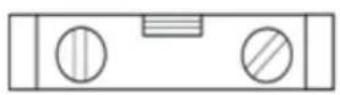
NIVELADOR
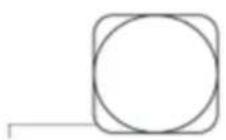
TAPA DE MEDIDA

LAPIZ
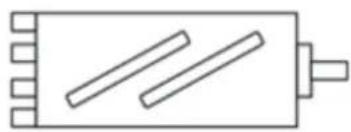
natural_image
Simple line drawing of a rectangular object with three diagonal lines and a protruding rod (no text or symbols)180mm CORE DRILL
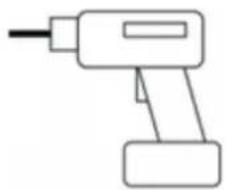
natural_image
Simple line drawing of a handheld electric drill (no text or symbols)TALADRO
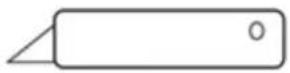
CUTER

8mm BROCA PARA
ALBAÑILERÍA

natural_image
Close-up of a twist drill bit (no text or symbols visible)25mm BROCA PARA ALBAÑILERÍA
natural_image
Isometric diagram showing a ceiling-mounted air conditioner unit and its internal panel, placed on a checkered floor (no text or symbols)
natural_image
Pure mechanical diagram showing a lever and pivot point without any text or symbolsnatural_image
Diagram showing two white oval shapes on a brick wall with a diagonal line and arrows indicating direction (no text or symbols)natural_image
Diagram showing two cylindrical containers mounted on a wall, one with arrows indicating direction (no text or symbols)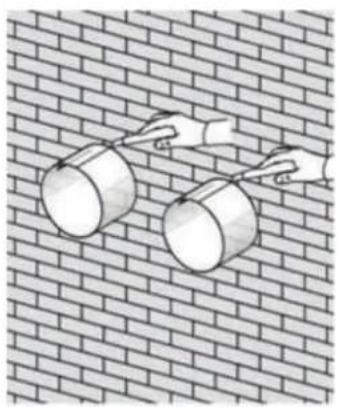
natural_image
Illustration of two hands stretching a cylindrical object on a brick wall (no text or symbols)natural_image
Illustration of a hand using a tool to install a wall-mounted component, next to a brick wall with a pipe fitting (no text or symbols present)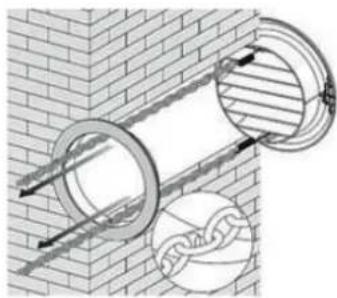
natural_image
Diagram showing two circular pipe fittings inserted into a brick wall, with one retaining a chain (no text or symbols present)natural_image
Diagram of a brick wall with a pipe and circular opening, showing structural details (no text or symbols)natural_image
Technical line drawing of a rectangular electronic device with two fans and a cable, no text or symbols presentFig 1
3. INSTALACIÓN
natural_image
Technical diagram of a wall-mounted HVAC unit with two fans and mounting brackets, shown with magnified views (no text or symbols)Nota:
natural_image
Illustration of a white air conditioner unit with ventilation grilles, mounted on a grid background (no text or symbols)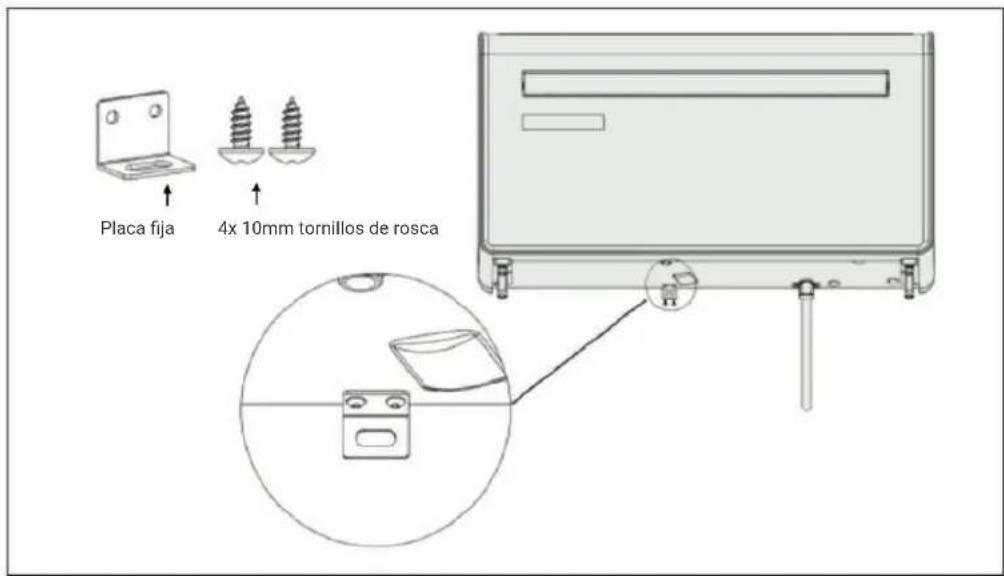
text_image
Placa fija 4x 10mm tornillos de roscaPANEL DE CONTROL
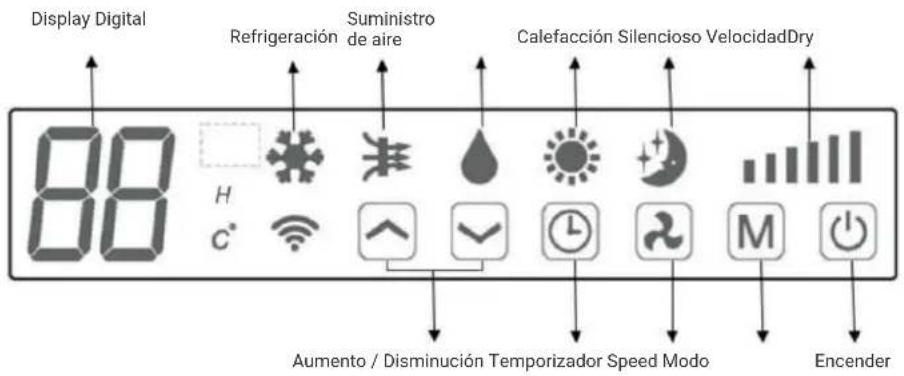
text_image
QR code image containing encoded data, no visible human-readable text
text_image
GIApp™GIApp
Para Android
text_image
GIApp" Log In Sign Up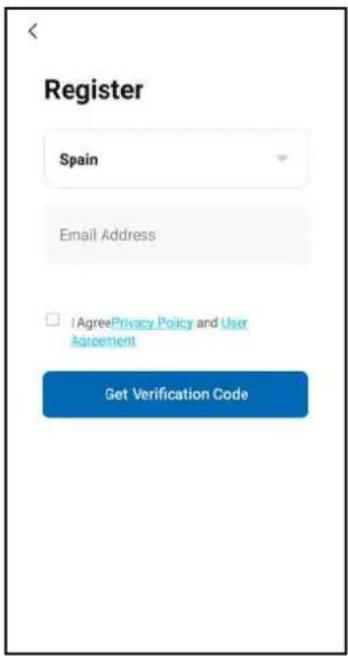
text_image
Register Spain Email Address I Agree Privacy Policy and User Agreement Get Verification Codetext_image
Enter Verification Code Autofill code from messages at to your email oscar@groupsa.com Resend ($3s) Didn't get a code?€ & _ - 1 2 3 ?
@ ( ) = + 4 5 6 ! (&= ' ; % / 7 8 9 abc " → * , 0 .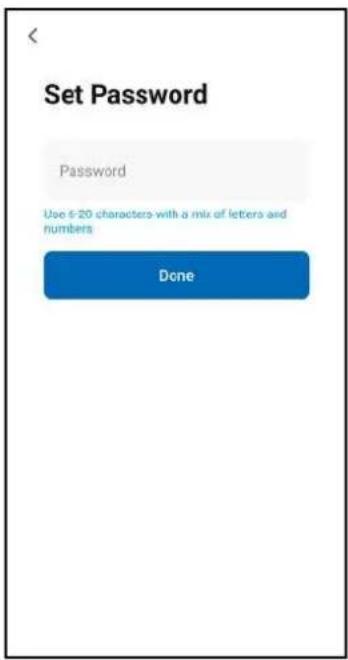
text_image
Set Password Password Use 6-20 characters with a mix of letters and numbers DoneINICIAR SESIÓN
text_image
GIApp™ Log In Sign Up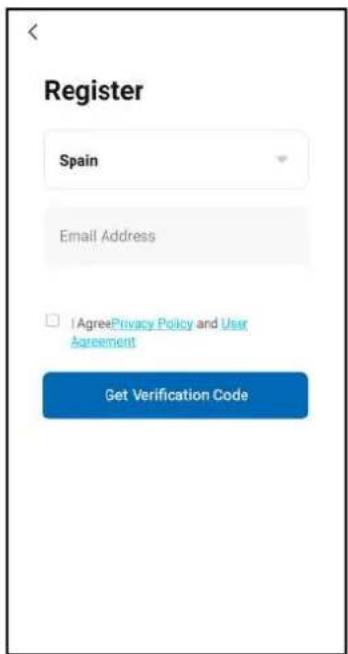
text_image
Register Spain Email Address AgreePrivacy Policy and User Agreement Get Verification Codetext_image
No devices Add Device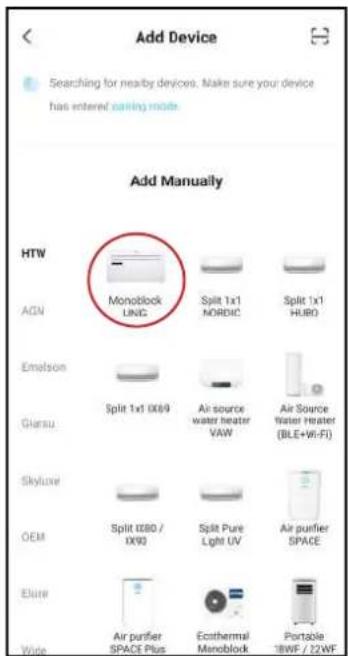
text_image
Add Device Searching for nearby devices. Make sure your device has entered/ raising mode. Add Manually HTW AGN Monoblock UNIC Split 1x1 NORDIC Split 1x1 HURO Emalson Split 1x1 (IX69) Air source water heater VAW Air Source water heater (BLE+VI-FI) Giasu Skyluxe OEM Split (X80 / IX90) Split Pure Light UV Air purifier SPACE Elite Air purifier SPACE Plus Ecothermal Monoblock Portable 18WF / 22WFtext_image
Reset the device Press and hold the RESET button for 5 seconds until the indicator blinks (subject to the user manual). Confirm the indicator is blinking slowly. Next Resetting Devices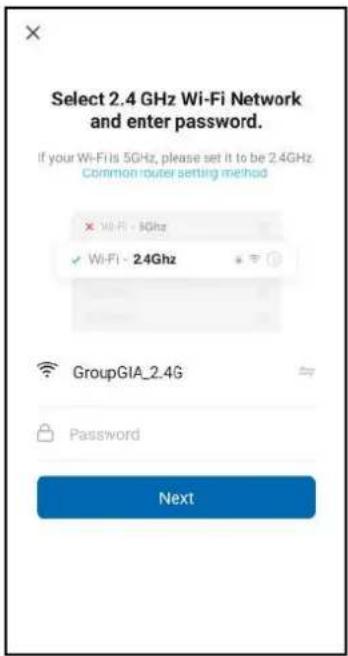
text_image
Select 2.4 GHz Wi-Fi Network and enter password. If your Wi-Fi is 5GHz, please set it to be 2.4GHz. Common router setting method Wi-Fi - 3GHz Wi-Fi - 2.4GHz GroupGIA_2.4G Password Nexttext_image
Enter Verification Code ! Autofill code from messages at to your email oscar@groupon.com Hesend ($1s) Didn't get a code?€ & _ - 1 2 3 ?
@ ( ) = + 4 5 6 ! (&= ' : % / 7 8 9 abc " * , 0 .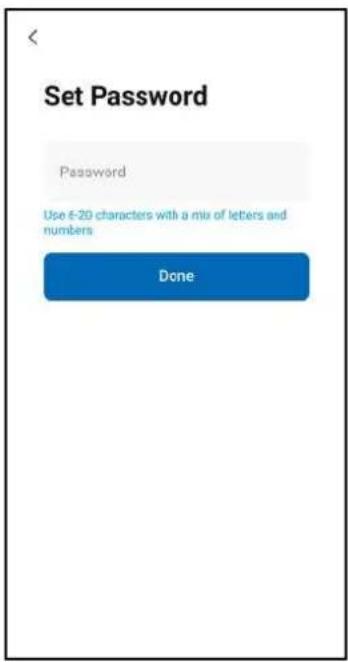
text_image
Set Password Password Use 6-20 characters with a mix of letters and numbers Donetext_image
Connecting Device NEW THE NETWORK STUDIO. Make one your device to save the server. 01:54 Scan devices. Tingate or Cloud. Holdiza the device.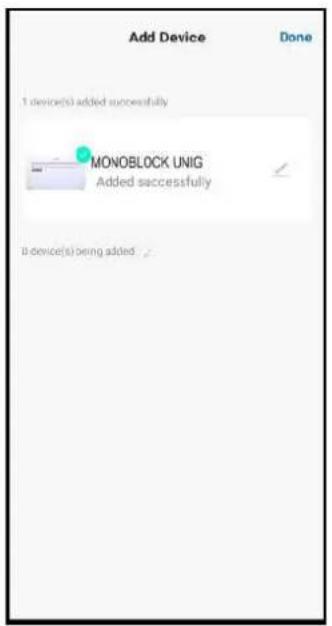
text_image
Add Device Done 1 device(s) added successfully MONOBLOCK UNIG Added successfully 0 device(s) being added.Avisos
text_image
Home Management Create a home Join a hometext_image
Cancel Create a home Home Name* Enter Home Location Set Rooms: Living Room Master Bedroom Second Bedroom Dining Room Kitchen Study Roomtext_image
Cancel Add Room Save Room Name Recommend Living Room Master Bedroom Second Bedroom Dining Room Kitchen Study Room Porch Balcony Kids Room Closettext_image
Control Panel Not playing TP-LNK _BSTF Bluetooth h Flashlight Vibration Auto-rotate Huawei Share Airplane media Mobile data Location Screen shot Eye Comfort Personal hotspot Screen Recorder Wireless Projectiontext_image
Devices to be added: 1 Monochrome Unit Addtext_image
Enter Wi-Fi Information Choose Wi-Fi and enter password TP-LINK_B57F ...... Nexttext_image
Add Device 1 devices(1) being added Monoblock Unit Being added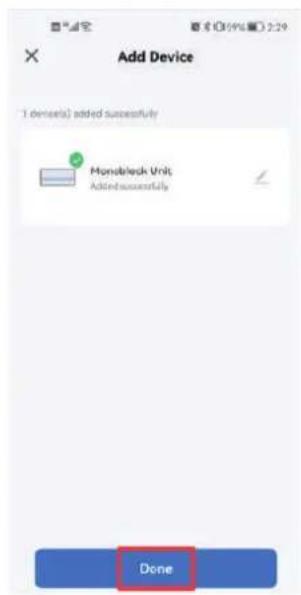
text_image
Add Device 1 denote(s) added successfully Monableack Unit Added successfully Done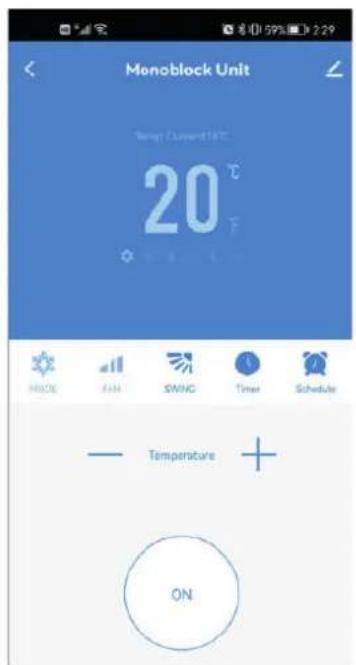
text_image
Monoblock Unit Temp: Current 14°C 20 °C HIND FIN SWING Timer Schedule Temperature ONtext_image
No device Devices to be added: 1 Monoblock Unit Add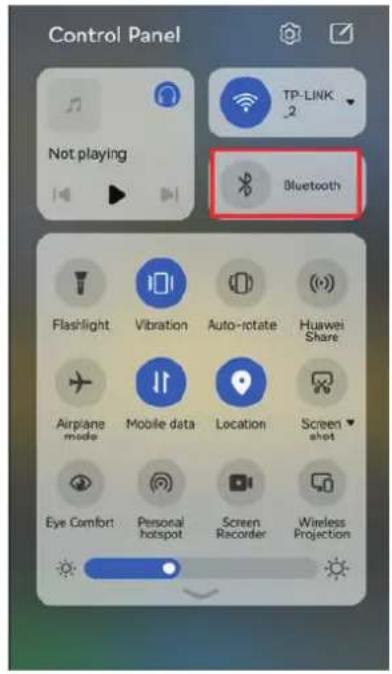
text_image
Control Panel Not playing TP-LINK Bluetooth Flashlight Vibration Auto-rotate Huawei Share Airplane mode Mobile data Location Screen shot Eye Comfort Personal hotspot Screen Recorder Wireless Projectiontext_image
Add Device Searching for nearby devices. Make sure your device has entered joining mode. Add Manually HTW AON Monotlock UNG Split 1x1 NORDIC Split 1x1 HUBO Emelson Giaisu Split 1x1 IX69 Air source water heater VAW Air Source Water Heater (BLE+Wi-Fi) Skyluxe OEM Split Ø80 / DKD Split Pure Light UV Air purifier SPACE Eluxe Air purifier Euphoroid Productor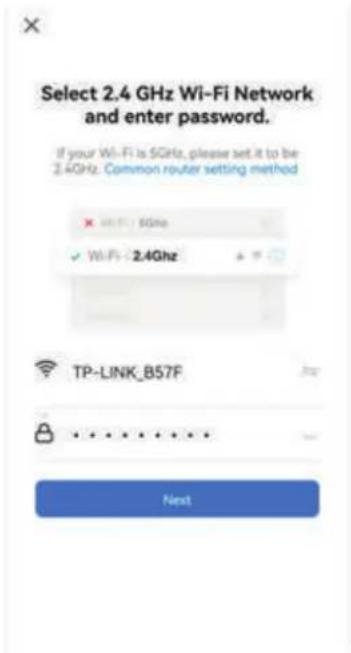
text_image
Select 2.4 GHz Wi-Fi Network and enter password. If your Wi-Fi is 5GHz, please set it to be 2.4GHz. Common router setting method × Wi-Fi: 5GHz ✓ Wi-Fi: 2.4GHz TP-LINK_B57F Nexttext_image
Reset the device Press and hold the RESET button for 5 seconds until the indicator blinks Select the status of the indicator light or hear the beep: Blink Slowly Blink Quicklytext_image
Add Device PlanStack Unit Dome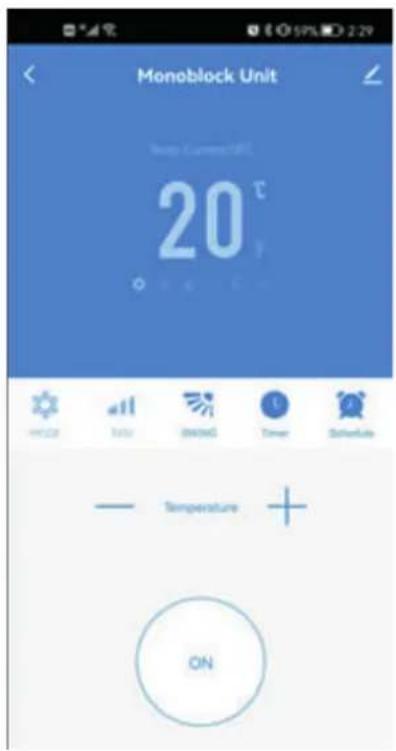
text_image
Monoblock Unit Temp Current: 15°C 20 °C Temperature ONtext_image
No devices Add Devicetext_image
Add Device Searching for nearly devices. Make sure your device has entered parting needs Add Manually HTW AON Monoclock UNVG Split 1x1 NORDC Split 1x1 FUB2 Emilion Split 1x1 309 Air source water heater VAV Air Source Water Heater (BLC+40-FI) Glam Split 1x1 309 Air source water heater VAV Air Source Water Heater (BLC+40-FI) SkyLabs OEM Split 000 / 0500 Split Pure Light UV Air outflow SPACE Bluetext_image
Select 2.4 GHz Wi-Fi Network and enter password. If your Wi-Fi is 5GHz, please set it to be 2.4GHz. Common router setting method XP-LINK_B57F Nexttext_image
Select 2.4 GHz Wi-Fi Network and enter password. If your Wi-Fi is 5GHz, please set it to be 2.4GHz. Common router setting method TP-LINK_B57F Next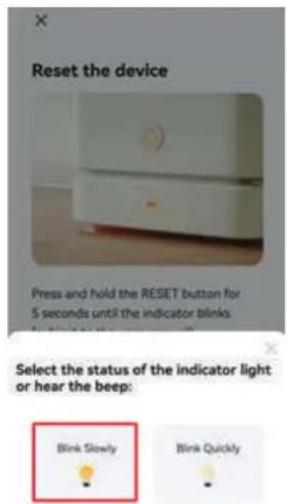
text_image
Reset the device Press and hold the RESET button for 5 seconds until the indicator blinks Select the status of the indicator light or hear the beep: Blink Slowly Blink Quickly
text_image
Connect your mobile phone to the device's hotspot 1. Please connect your phone to the hotspot shown below ✓ SmartLife-XXXX ✓ SL-XXXX 2. Return to this app and continue adding devicestext_image
Casa 1 Welcome Home Set your home based for more information All Devices Living Room Master ... Monoblock Unit Inverter Home Smart Mytext_image
All Devices Living Room Master Monoblock Unit Invertertext_image
Casa 1 Welcome Home Set your Home Location for more information. All Devices Monoblock Unit Inverter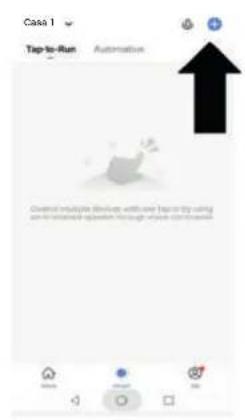
text_image
Case 1 Tap-to-Run Automation Overall multiple devices with one tap-to-by using on an isolated operation through which continues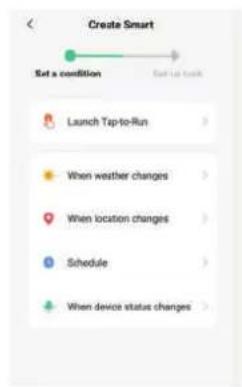
text_image
Create Smart Set a condition Set to Back Launch Tap-to-Run When weather changes When location changes Schedule When device status changes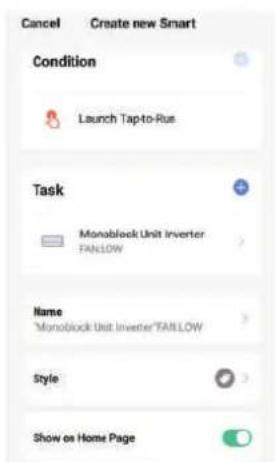
text_image
Cancel Create new Smart Condition Launch Tap-to-Rus Task Monoblock Unit Inverter FAN10W Name "Monoblock Unit Inverter"FANLOW" Style Show on Home Pagetext_image
Select Function Power > Set Temp > Temp Current > MODE > FAN >text_image
Casa 1 Welcome Home Get your home location the Home information All Devices Noneblock Unit Inverter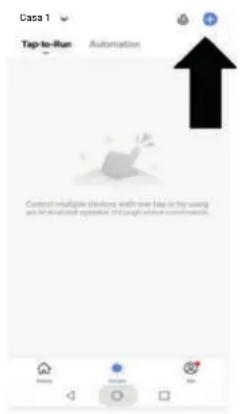
text_image
Casa 1 Top-to-Run Automation Control multiple devices with one bit or by using and An automated operation through where commands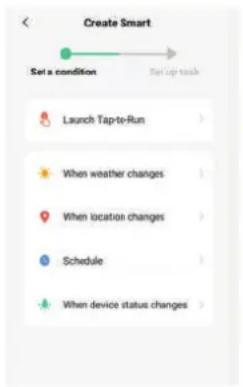
text_image
Create Smart Set a condition Set up task Launch Tap-to-Run When weather changes When location changes Schedule When device status changes
text_image
Cancel Create new Smart Condition Launch Tap-to-Rus Task Monoblock Unit Inverter FANLOW Name "Monoblock Unit Inverter"FANLOW Style Show on Home Pagetext_image
Select Function Power > Set Temp > Temp Current > MODE > FAN >text_image
JNY-AL10 Edit account information Home Management Message Center FAQ & Feedback More Services Settings Exit Home Settings Home Name 我的家 > Room Management DRoom(a) > Home Location > Home Member Kevin Horse Owner > 86-15981459260 Add Member Delete HomeA MÍ
text_image
Account and Security Mobile Number > Email Unbound > Region Finland Change Login Password > Pattern Lock Not Set > Delete Account >text_image
More Services My Order Featured Cloud Storage for Cameras Third-Party Voice Services Alexa Google Assistant SmartThings XIAODU Tencent Xiaowei DingDong IFTTT Google Fit Data Synch...INTEGRACIÓN
- Carefully read the instructions before installing and/or operating the unit.
• This appliance is for indoor use only. - This unit must be only connected to a 220-240 V / 50 Hz earthed outlet.
• Installation must be in accordance with regulations of the country where the unit is used. - If you are in any doubt about the suitability of your electrical supply have it checked and, if necessary, modified by a qualified electrician.
- This air conditioner has been tested and is safe to use. However, as with any electrical appliance - use it with care.
- Disconnect the power from the appliance before dismantling, assembling or cleaning.
- Avoid touching any moving parts of the appliance.
- Never insert fingers, pencils or any other objects though the guard.
- This appliance is not intended for use by persons (including children) with reduced physical, sensory or mental capabilities. It is also not intended for use by those with a lack of experience and knowledge, unless they have been given supervision or instruction concerning the use of the appliance by a person responsible for their safety.
- Do not leave children unsupervised with this appliance.
- Do not clean the unit by spraying it or immersing it in water.
- Never connect the unit to an electrical outlet using an extension cord. If an outlet is not available, one should be installed by a qualified electrician.
- Do not operate the unit unless it has been fully installed following the guidance provided within this manual.
- Never operate this appliance if the cord or plug is damaged. Ensure the power cord is not stretched or exposed to sharp objects/edges.
- A damaged supply cord should be replaced by the manufacturer or a qualified electrician in order to avoid a hazard.
- Any service other than regular cleaning or filter replacement should be performed by an authorized service representative. Failure to comply could result in a voided warranty.
- Do not use the appliance for any purpose other than its intended use.
- Avoid restarting the air conditioner unless 3 minutes have passed since being turned off. This prevents damage to the compressor.
- Never use the mains plug as a switch to start and turn off the air conditioner. Use the provided ON/OFF button located on the control panel.
- The appliance should not be installed in laundry or wet rooms.
- The appliance must be installed in a room without sources of ignition (for example: open flames, an operating gas appliance or an operating electric heater).
- The unit must be installed on a solid vertical wall by a competent person. The electricity supply must only be connected after installation is complete.
• R290 refrigerant gas complies with European environmental directives.
• R290 has a low GWP (Global Warming Potential) of 3. - The air conditioner contains about 290g of R290 refrigerant gas.
- Do not install or store in an unventilated space with an area smaller than 15 m2 per unit. The room must be such as to prevent stagnation of possible leaks of refrigerant gas as there could be a danger of fire or explosion hazard should the refrigerant come into contact with electric heaters, stoves or other sources of ignition.
- If the appliance is installed, used or stored in an unventilated room, the room must be such as to prevent stagnation of possible leaks of refrigerant gas as there could be a danger of fire or explosion should the refrigerant come into contact with electric heaters, stoves or other sources of ignition.
• Refrigerant gas may be odourless.
1. SAFETY INSTRUCTIONS
- Do not use the product and contact the retailer for advice, if damage has occurred to the unit which may have compromised the refrigerant system.
- Any repairs or maintenance must only be carried out on the unit by a suitably qualified engineer. Before opening and servicing the unit the authorized engineer must be in possession of a copy of the manufacturer's service manual and must follow the safety information contained within it to ensure all hazards are minimized.
- The refrigerant system should not be perforated or punctured.
ENERGY SAVING AND UNIT SAFETY PROTECTION TIPS
- Do not cover or restrict the airflow from the outlet or inlet grills.
- Keep the filters clean. Under normal conditions, filters should only need cleaning once every three weeks (approximately). Since the filters remove airborne particles, more frequent cleaning maybe necessary, depending on the air quality.
- For the initial start-up set the fan speed to maximum and the thermostat to 4-5 degree lower than the current temperature. After, set the fan switch to low and set the thermostat to your desired setting.
- To protect the unit, we recommend not using the cool mode when the ambient temperature is higher than 35^ .
NOTE : Some pictures and information may vary from the final product. This is due to continual product improvement.
PRODUCT OVERVIEW
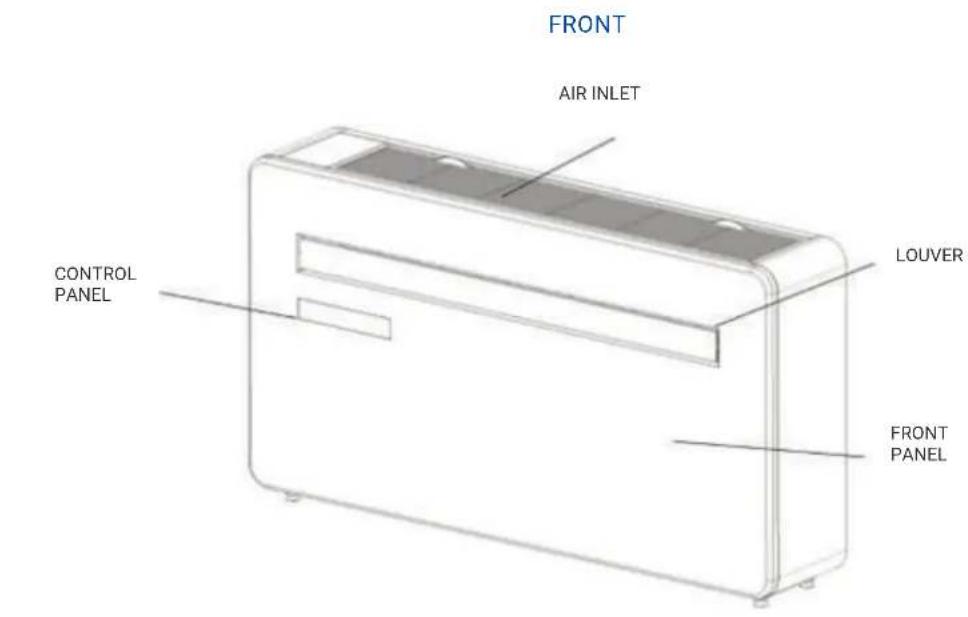
text_image
FRONT AIR INLET CONTROL PANEL LOUVER FRONT PANELBACK
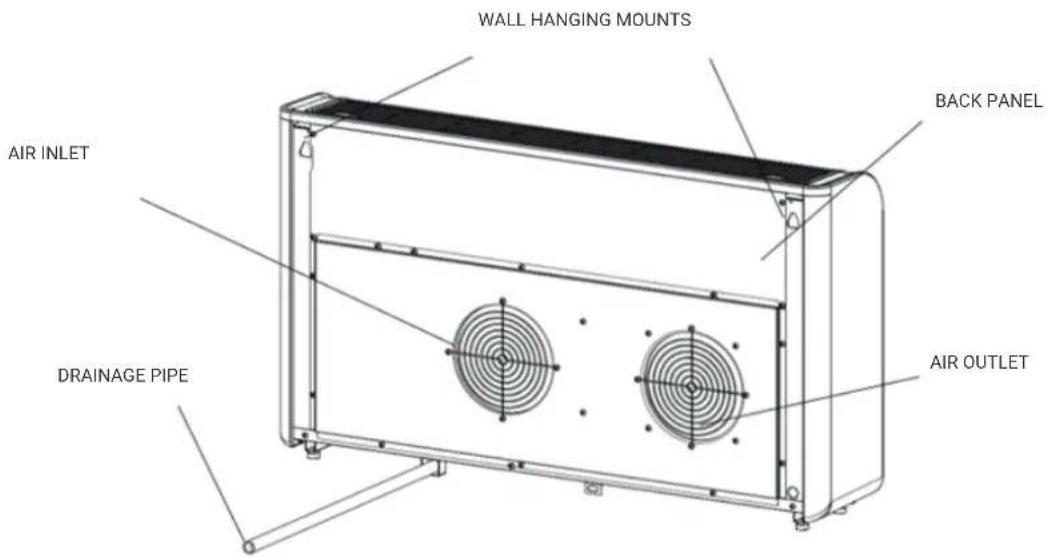
text_image
WALL HANGING MOUNTS BACK PANEL AIR INLET DRAINAGE PIPE AIR OUTLET2. PRODUCT DESCRIPTION
PRODUCT DIAGRAM
FEATURES
- Simple operation.
• Self-evaporative function with energy saving technology.
• Sleek design that seamlessly fits into any style home. - Bright LED screen-indicates temperature and current mode.
- On / off timer function-allows you to choose when the unit operates.
• WIFI App control providing additional functionality.
• Three fan speeds.
• Four modes to suit your every need including : Cooling / Heating / Fan / Dry - Silent running option, perfect for a restful night sleep.
WHATS INCLUDED
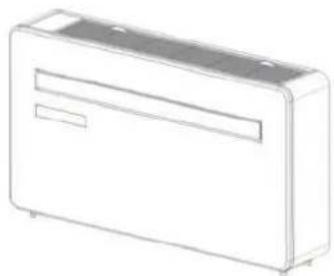
natural_image
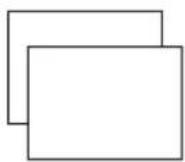
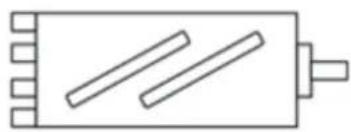
Line drawing of a rectangular electronic device with a recessed top and side slots (no text or symbols)AIR CONDITIONER
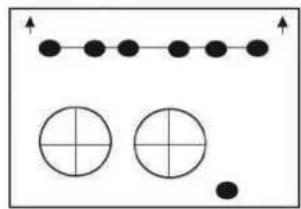
natural_image
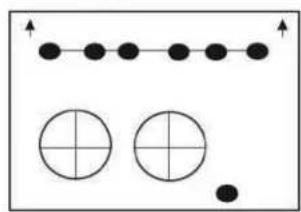
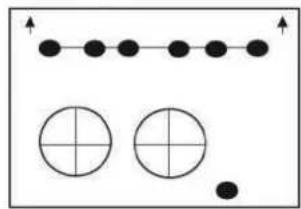
Simple diagram with dots and circles, no text or symbols presentWALL TEMPLATE
PLASTIC DUCTING SHEET (X2)
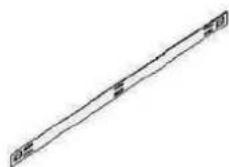
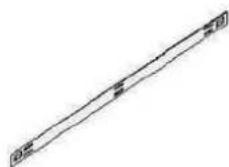
WALL BRACKET
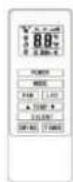
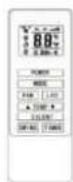
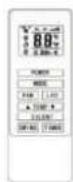
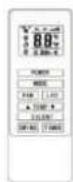
REMOTE CONTROL
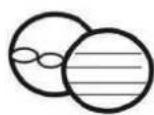
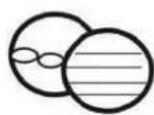
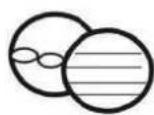
VENT COVER ASSEMBLY (X2) (CHAIN, INDOOR RING AND OUTDOOR COVER)
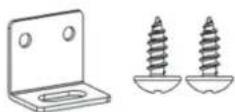
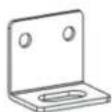
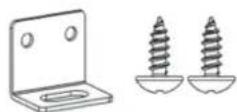
FIXED PLATE
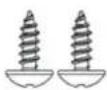
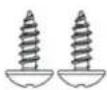
2PCS
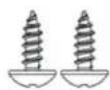
TAPPING
SCRE
(4x10mm)
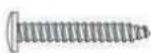
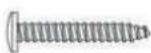
7PCS SCREWS (5×60mm)
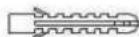
7PCS SCREWS (5×60mm)

DIAGRAMS FOR ILLUSTRATIVE PURPOSES ONLY
DIAGRAMS FOR ILLUSTRATIVE PURPOSES ONLY
TOOLS NEEDED FOR INSTALLATION
PRODUCT DIAGRAM

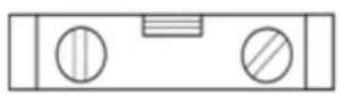
SPIRIT LEVEL
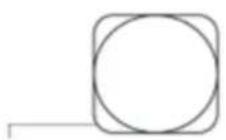
TAPE MEASURE

PENCIL
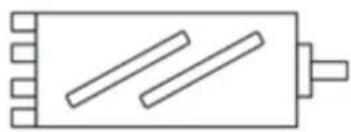
natural_image
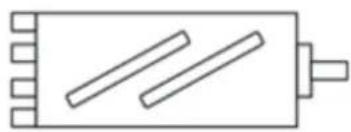
Simple line drawing of a rectangular object with three diagonal lines and a protruding rod (no text or symbols)180mm CORE DRILL
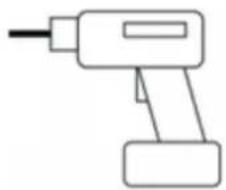
natural_image
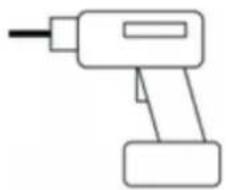
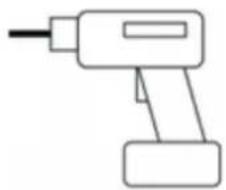
Simple line drawing of a handheld electric drill (no text or symbols)DRILL
SHARP KNIFE

8mm MASONRY DRILL BIT

natural_image
Close-up of a twist drill bit (no text or symbols visible)25mm MASONRY DRILL BIT
- BEFORE STARTING INSTALLATION, PLEASE ENSURE YOU HAVE ALL SUITABLE EQUIPMENT AVAILABLE AND UNDERSTAND THE STEPS INVOLVED IN INSTALLATION. IF IN ANY DOUBT,
• PROFESSIONAL ADVICE SHOULD BE SOUGHT. - THE INSTALLER MUST ENSURE THAT THE PLANNED POSITION OF THE AIR CONDITIONER IS SUITABLE, AND THAT THERE ARE NO CABLES AND PIPES INSIDE THE WALL, AND NO OTHER OBSTRUCTIONS FIXED ON THE WALL, WHICH WOULD PRESENT A DANGER AND/OR PREVENT COMPLETION OF INSTALLATION.
3. INSTALLATION
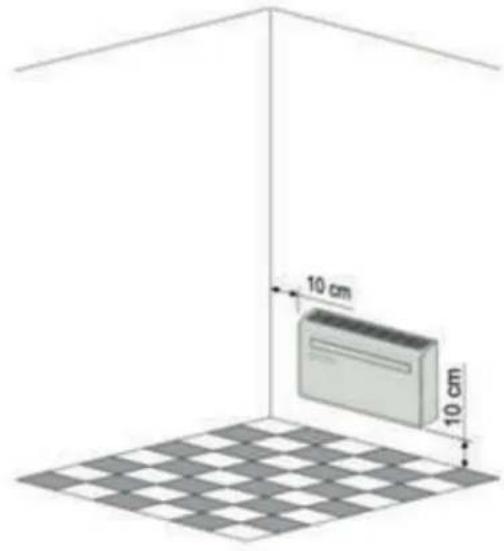
text_image
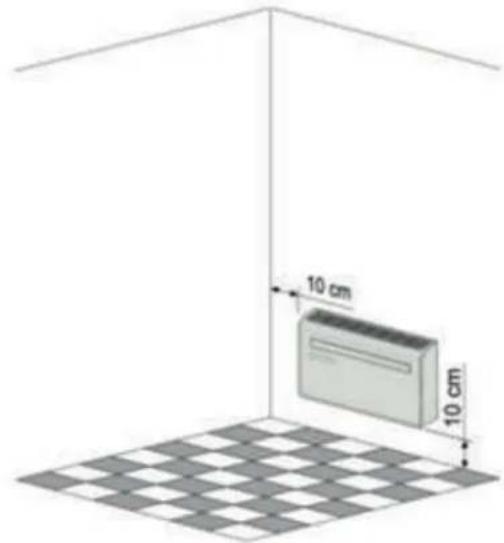
10 cm 10 cmThis unit must be installed on an external wall, as it vents directly out of its rear. and ensure the wall is flat, solid and reliable.
Leave at least 10 cm of space to the left, right and base of the machine. At least 20cm of space must be left above the unit to help air flow smoothly and stay away from curtains, plan faucets, furniture and others appliances etc.
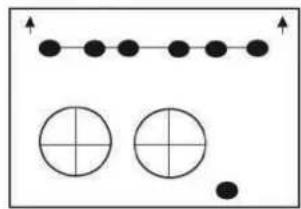
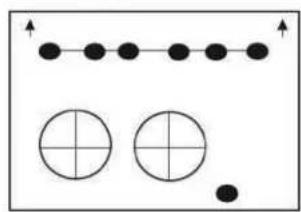
Paste the supplied installation template paper in position on the wall, ensuring that the reference line is level using a spirit level.
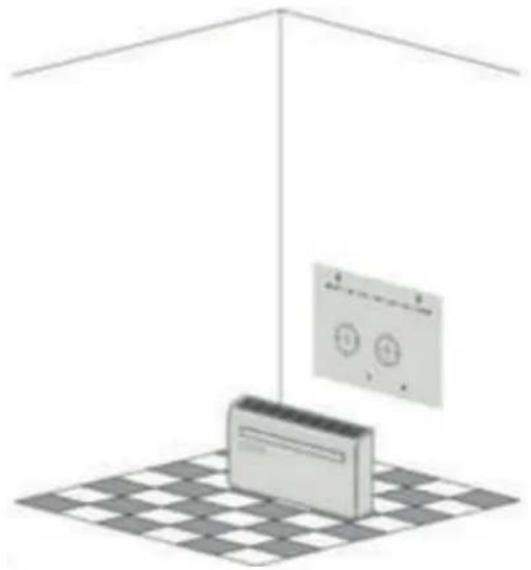
natural_image
Isometric diagram of a ceiling-mounted air conditioner unit placed on a checkered floor (no text or symbols)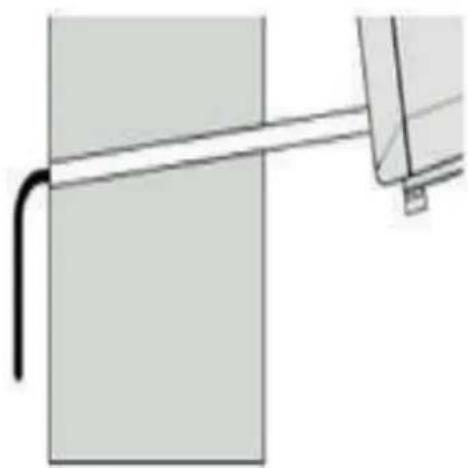
natural_image
Pure mechanical diagram showing a lever and pivot point without any text or symbolsUse a 180 mm core drill to drill the two holes for the units ventilation, ensuring that both the holes are aligned with the template. ensuring that the holes are at a downward angle (min 5 degrees) and aligned with the template.
The hole for the drainage pipe must be drilled using a 25mm Drill bit.
Ensure the hole is at a downward angle (min 5 degrees) so that the water will drain correctly.
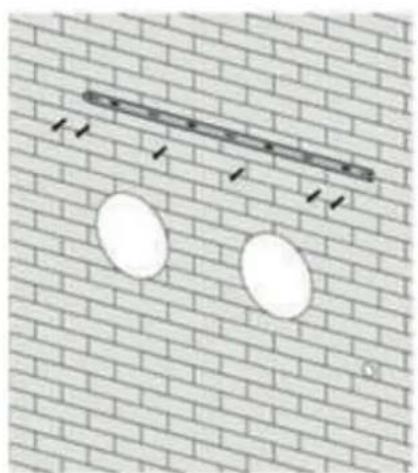
Use the template to mark the position of the screws for the hanging rail, using a spirit level to ensure it is straight and level.
Drill the marked holes using a suitable 8mm drill bit and insert wall plugs. Line the hanging rail with the holes, and fix the rail into position using the supplied screws.
Ensure that the hanging rail is securely fastened onto the wall, and that there is no risk of the unit tipping or falling.
natural_image
Diagram showing two white oval shapes on a brick wall with a diagonal line and arrows indicating direction (no text or symbols)Note: The machine performs best when it is installed on a wall with a thickness not exceeding 240mm.
Roll the plastic vent sheets into a tube and feed them from the inside into the holes previously made. Ensure the tubes sit flush to the interior wall.
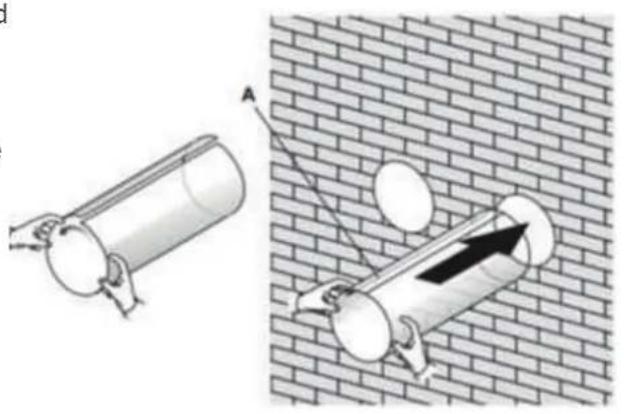
natural_image
Diagram showing two cylindrical tanks connected to a wall with circular elements, one with an arrow and label 'A' pointing to the cylinder (no text or symbols on main diagram)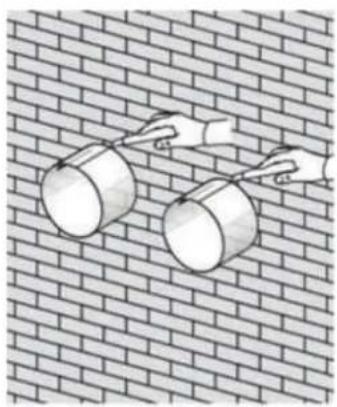
natural_image
Illustration of two hands stretching a cylindrical object on a brick wall (no text or symbols)Go outside and trim off the excess vent tube using a sharp knife, keeping the edge as neat as possible.
Insert the indoor fixing ring from the vent cover onto the indoor side of the air vent. Then fold the external vent cover in half. Attach the chains to each side of the vent cover, before sliding the cover outside through the vent hole.
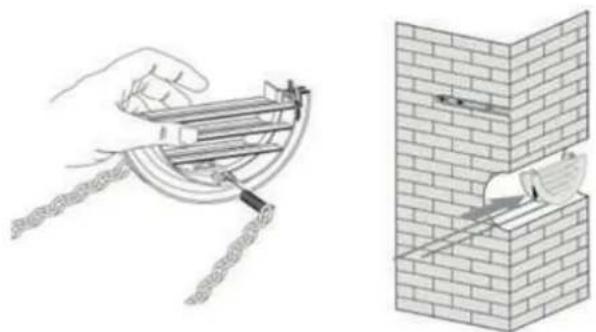
natural_image
Illustration of a hand using a tool to install a wall-mounted component, next to a brick wall with a pipe fitting (no text or symbols present)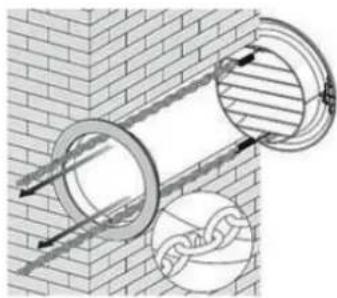
natural_image
Diagram of two circular pipe fittings inserted into a brick wall, with one showing internal structure and the other a chain link (no text or symbols)Expand the external cover, before tightly fixing the chains by hooking onto the indoor fixing ring. This will hold the external cover firmly in position. Repeat for the second vent.
Once the chains are fitted and secure, any excess chain should be removed by cutting
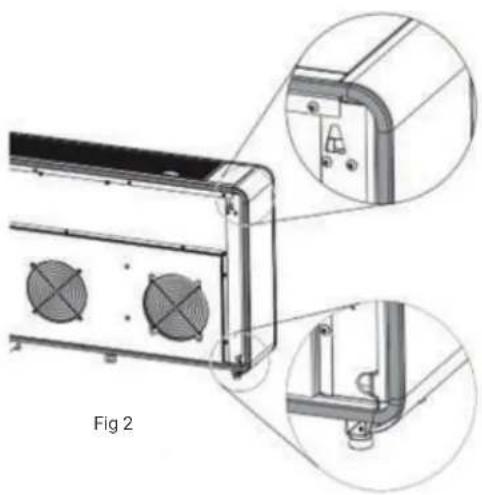
the chain. Paste the sealing strip in the accessories along the edge of the back for whole circle of the machine, cut off the excessive length if needed.
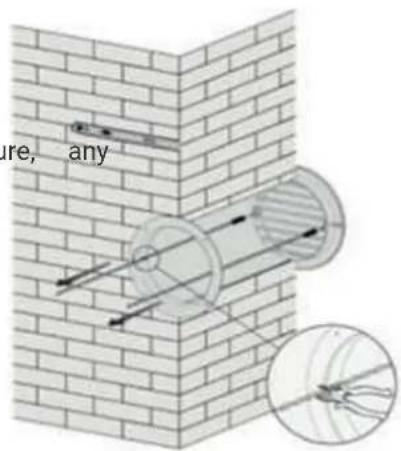
text_image
are, any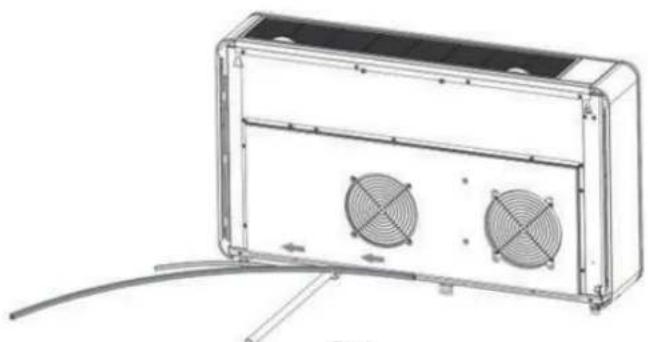
natural_image
Technical line drawing of a rectangular electronic device with two fans and a cable, no text or symbols presentFig 1
3. INSTALLATION
natural_image
Technical diagram of a wall-mounted air conditioner unit with two fans, shown with close-up views of internal components (no text or symbols)Note:
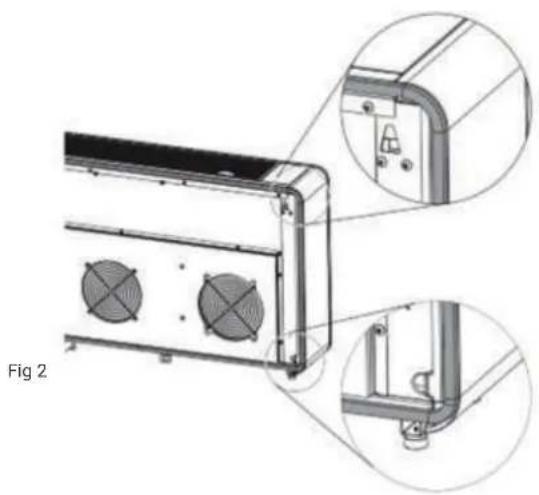
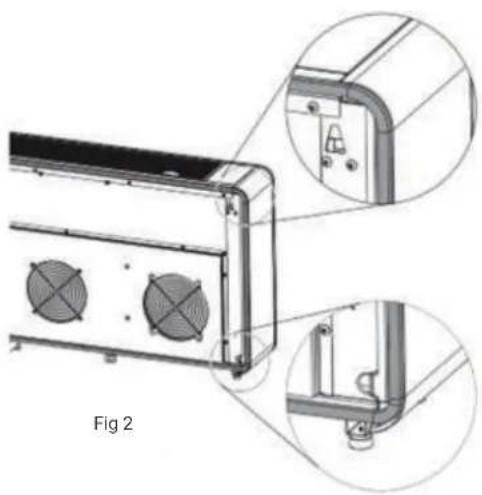
- The sealing strip should be pasted along the edge of the machine, as shown in Figure1.
- Please peel the striping layer on the sealing strip gradually while pasting.
- Paste from the bottom of the machine first.
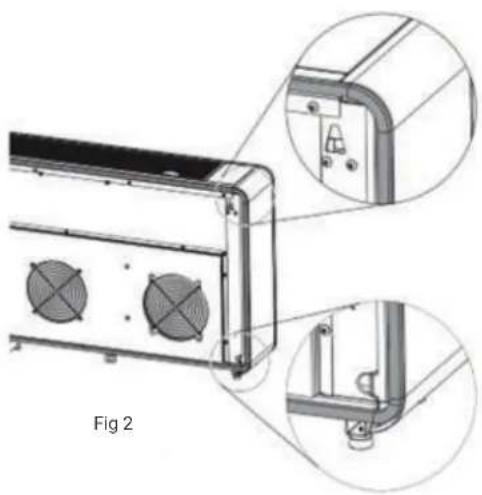
- The position of the corner should be pasted as shown in Figure 2.
- Improper pasting may cause extra noise.
natural_image
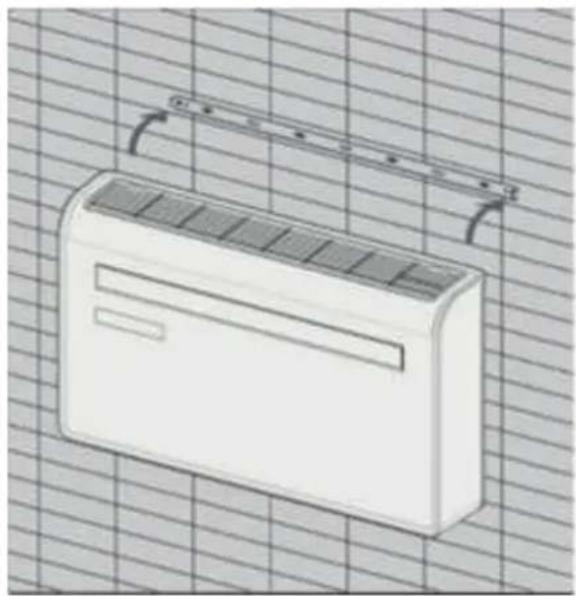
Illustration of a white air conditioner unit with a grid background (no text or symbols)Lift the unit onto the wall, align the hanging holes with the hooks on the hanging rail and gently rest the unit into place.
At the same time, slide the drain pipe through the drainage hole.
NOTE:
1st: please ensure that the backside of product is tightly attached on the wall to avoid additional vibration and noise.
2nd : The end of the external water pipe must be placed in an open space or drain. Avoid damage or constriction to the drainage pipe to ensure the unit drains.
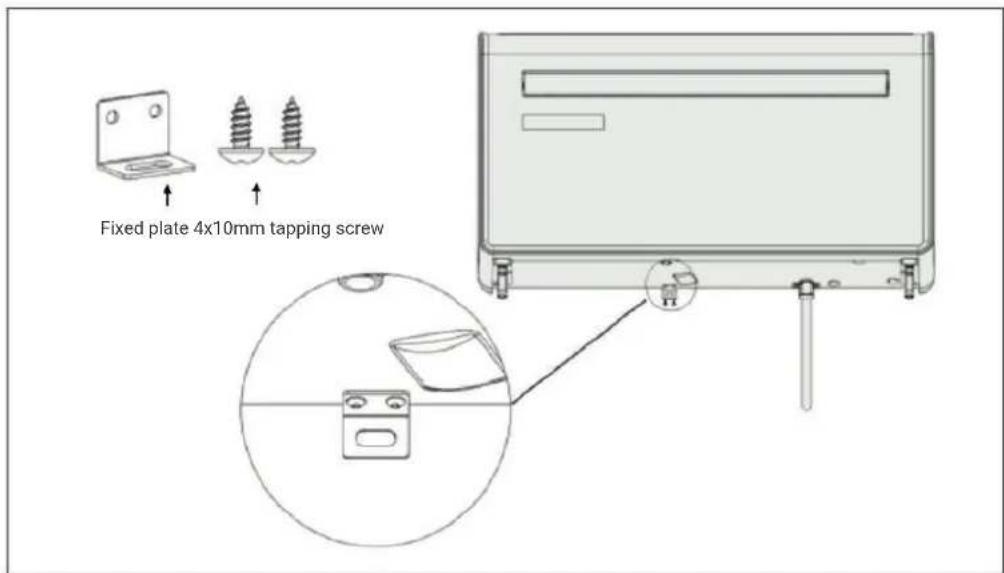
text_image
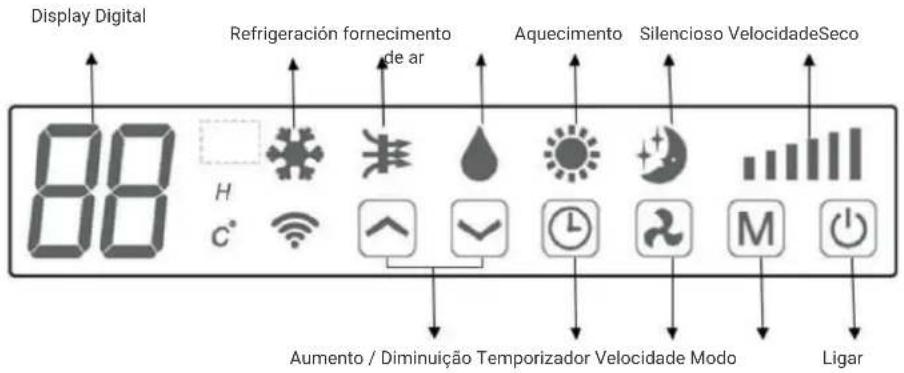
Fixed plate 4x10mm tapping screwCONTROL PANEL
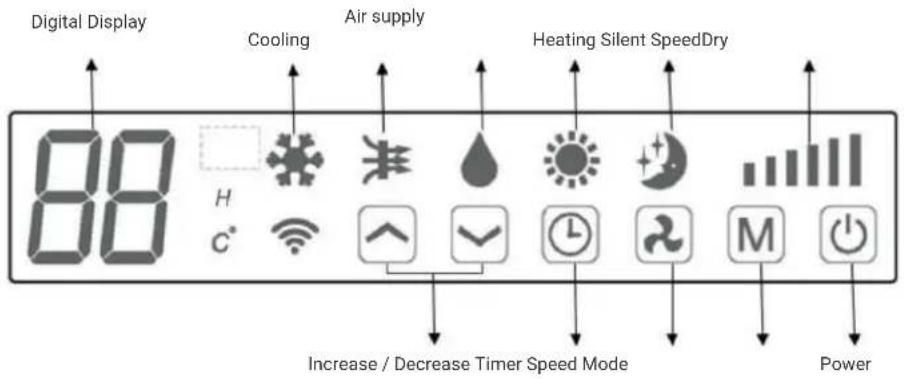
text_image
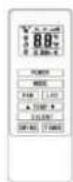
Digital Display Cooling Air supply Heating Silent SpeedDry 88 H C° Increase / Decrease Timer Speed Mode PowerREMOTE CONTROL
The air conditioner can be controlled with the remote control. Two AAA-batteries are required. NOTE: Further details of the functions can be found on the following page.
| POWER | Press the POWER button to turn the machine on or off. | 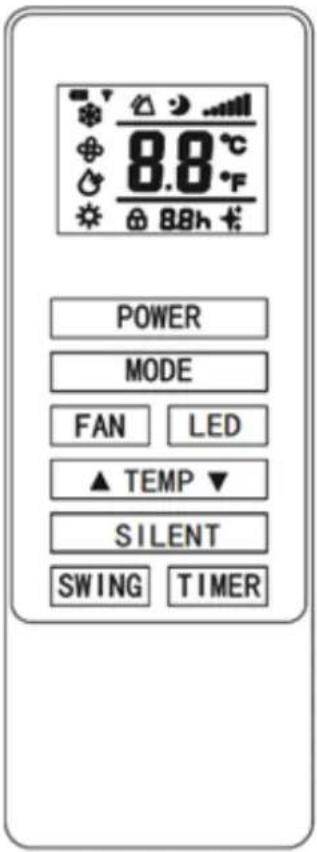 |
| MODE | Press the MODE button to switch between cooling, heating, fan and dry modes. | |
| FAN | Press the FAN button to change between high, medium and low fan speeds | |
| LED | Press the LED button to open or close the LED light on unit, it can be a choice for sleep condition. | |
| Press the UP button to increase the desired temperature or timer duration | ||
| Press the DOWN button to decrease the desired temperature or timer duration | ||
| SILENT | Press it for silent mode, In Silent mode, noise will be lower, fan works in low speed, frequency is low. | |
| SWING | Press to turn the louver swing function on and off (only activated by the remote control & APP) | |
| TIMER | Press the TIMER button to set the automatic switch-on/off. |
3. OPERATION
FUNCTIONS
The air conditioner can be controlled using the remote control. Two AAA batteries are required. NOTE: You will find more information about the functions on the next page.
 POWER POWER | Press “POWER” to turn the unit On or Off. | |
 MODE MODE | Press to change between the 4 different modes. The display will show the symbol for the mode currently selected. | |
 COOLING COOLING | The cooling function allows the air conditioner to cool the room and at the same time reduces air humidity. The desired temperature can be adjusted using the increase and decrease button between 16°C and 30°C. The fan speed can also be adjusted using the speed button. | |
| [W42W] DRY | Dry mode will extract moisture from the air, which will be drained outside using the installed drain pipe. the fan speed cannot be adjusted in dry mode. | |
| [B-35] FAN | In fan mode the appliance will recirculate the air within the room, and will not cool, heat or dehumidify. The fan speed can be adjusted using the Speed button, But the desired temperature can not be set. | |
 HEATING HEATING | The heating function allows the air conditioner to heat the room. The desired temperature can be adjusted using the increase and decrease button between 16°C and 30°C. The fan speed can also be adjusted using the speed button. | |
 FAN SPEED FAN SPEED |  SILENT SILENT | Silent mode can be activated from APP or the remote control, It can also be activated by pressing " + " on unit control panel at the same time. It will only operate in cooling or heating modes, the fan speed will change to low and noise will be lower. |
| [S53A] | Press to change the fan speed between Low, Medium and High. The fan speed cannot be adjusted in Dry or Silent modes. | |
 TIMER TIMER | The air conditioner contains a 24 hour timer, which can be used to either set a delayed start, or a set period of operation. | |
| SHUTDOWN TIMER: While the unit is running press the timer button, the display will flash “0” 5 times. After the 5th flash, use the up and down buttons to adjust the duration in 1 hour increments between 1 to 24 hours. When the timer has elapsed, the unit will shutdown automatically. | ||
| DELAYED START TIMER: With the unit in standby, press the timer button, the display will flash “0” 5 times. After the 5th flash, use the up and down buttons to adjust the duration in 1 hour increments between 1 to 24 hours. After the timer has elapsed, the unit will start up in the same mode with the same settings as when it was turned off. | ||
| INCREASE AND DECREASE | Used within cooling and heating modes to adjust the desired temperature16-30°C. Also used while setting the timer to adjust the duration. | |
| SWING MODE | After machine turns on, press the “SWING” button, louver will swing continuously up and down; by pressing the button again the movement will stop and the louver remain in that position. Swing mode can only be adjusted from the remote, and will initially be turned on by default. the louver will close automatic once switch OFF the product. | |
| COMPRESSOR PROTECTION | There is a 3 minutes delay on power on. In order to protect the life of the compressor and electronic components please do not switch on the unit for at least 5 minutes after you turned the unit off. | |
WIFI SETUP AND SMART FEATURES
WIFI SETUP
BEFORE YOU START
- Ensure your router provides a standard 2.4ghz connection.
- If your router is dual band ensure that both networks have different network names (SSID). The provider of your router / Internet service provider will be able to provide advice specific to your router.
- Place the air conditioner as close as possible to the router during setup.
- Once the app has been installed on your phone, turn off the data connection, and ensure your phone is connected to your router via WIFI.
5. CONNECTION METHODS AVAILABLE FOR SETUP
The air conditioner has two different setup modes, Quick Connection and AP connection (Access Point). The quick connection is a quick and simple way to set the unit up. The AP connection uses a direct local WIFI connection between your phone and the air conditioner to upload the network details. In Standby mode press and hold the speed button for 3 seconds (until you hear a bleep) to enter the WiFi connection mode.
Please ensure your device is in the correct WiFi connection mode for the connection type you are attempting, the flashing of the WiFi light on your air conditioner will indicate this.
| Connection Type Frequency of Flashes | |
| Quick Connection Flashes twice per second | |
| AP Connection (Access Point) Flashes once per three seconds |
CHANGING BETWEEN CONNECTION TYPES
To change the unit between the two WiFi connection modes, hold the Speed button for 3 seconds.
| Press on the register button at the bottom of the screen. | Read the Privacy policy and press the Agree Button. | Enter your email address or phone number and press continue to register. |
DOWNLOAD AND INSTALL THE APP
text_image
QR code image containing encoded data, no visible human-readable text
text_image
GIA PPGIApp
Para Android
- Method 1: Scan the QR code with browser scanner, download and install the APP. Method 2: Open Google "Play Store" of your smart phone, search "GIApp", download and install the APP.

For iOS
- Method 1: Scan the QR code and follow the tips to enter "AppStore", download and install the APP. Method 2: Open Apple "APP Store" of your smartphone and search "GIApp", download and install the APP.

natural_image
Blue square icon with a white stylized 'A' or 'X' symbol, no text or numbers present.Note
Enable Storage/Location/Camera permissions for the App when the install. Otherwise, some problems may appear when operating.
6. DOWNLOAD AND INSTALL THE APP
SIGN UP
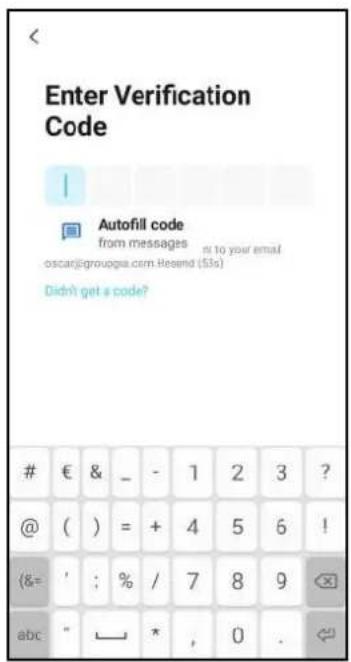
When you open the app for the first time, start your registration. Click on "Sign Up", enter your email address, check the box "I Agree with the Privacy Policy and User Agreement", click on "Get Verification Code" and receive a verification code.
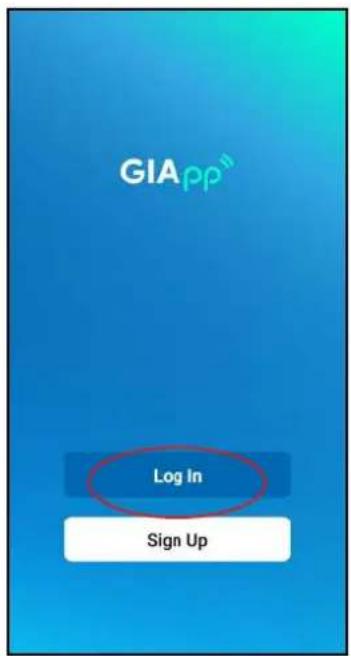
text_image
GIApp™ Log In Sign Up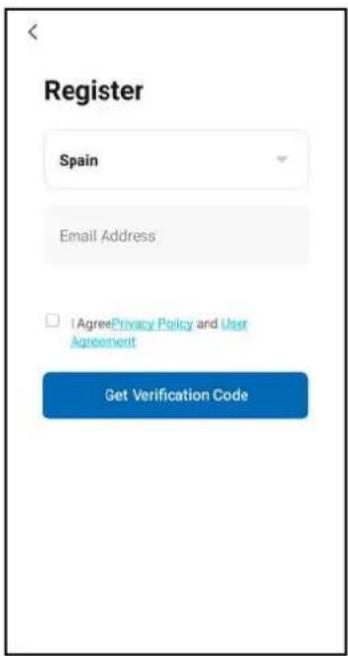
text_image
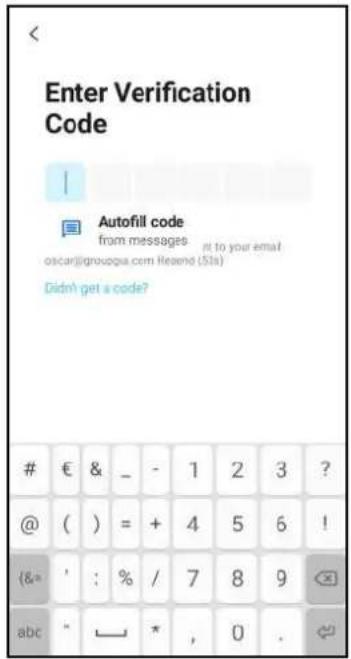
Register Spain Email Address AgreePrivacy Policy and User Agreement Get Verification CodeEnter the code, confirm your password, and then tap "Done". After the successful verification, the registration process is over and the application goes to the home page.
text_image
Enter Verification Code ! Autofill code from messages st to your email oscar@grougua.com Hesend ($5s) Didn't get a code?€ & _ - 1 2 3 ?
@ ( ) = + 4 5 6 ! (&= ' ; % / 7 8 9 abc " ↘ * , 0 .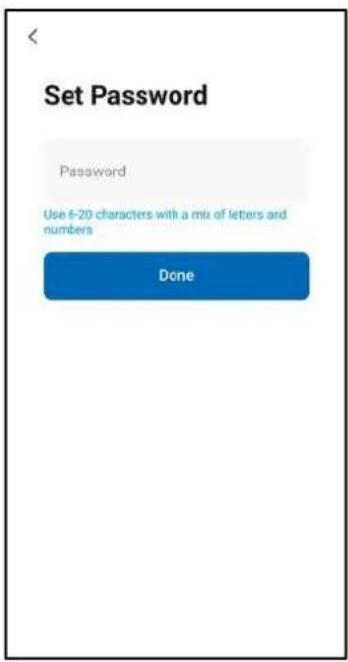
text_image
Set Password Password Use 6-20 characters with a mix of letters and numbers DoneLOG IN
- Click "Log In", choose your country, enter the registered account and password, and tap the "Log In" button.
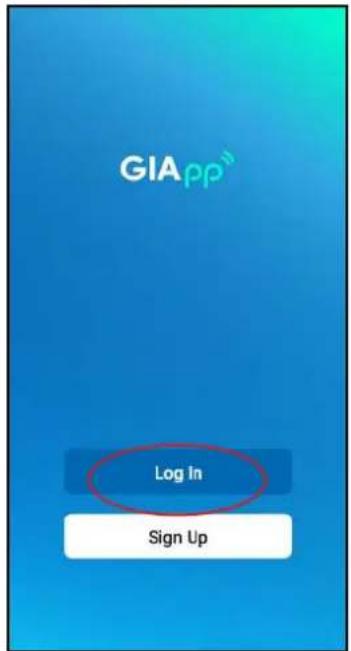
text_image
GIA PP Log In Sign Up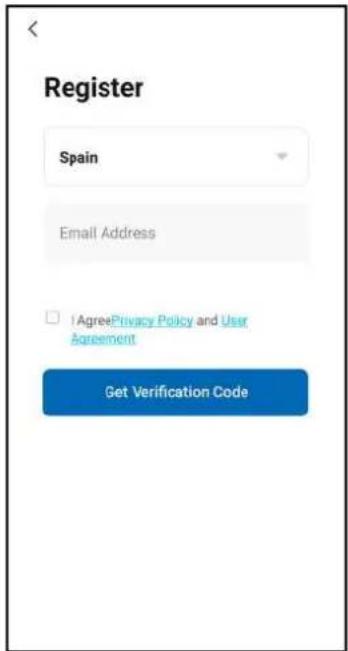
text_image
Register Spain Email Address AgreePrivacy Policy and User Agreement Get Verification CodeADDING A DEVICE
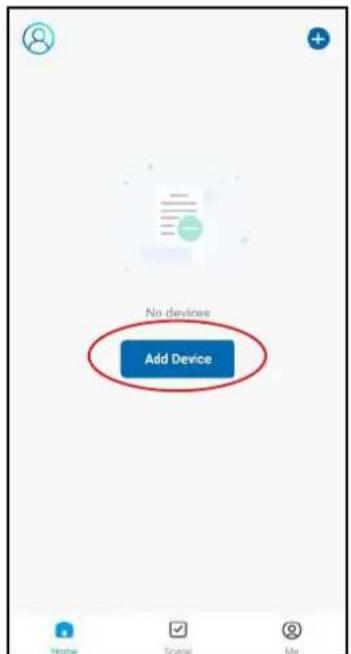
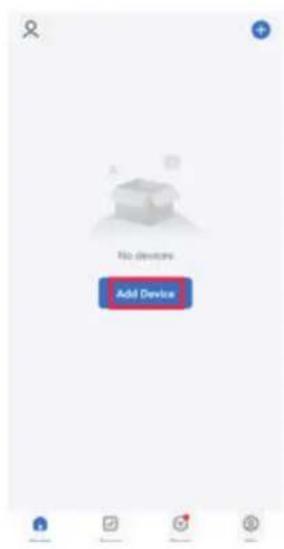
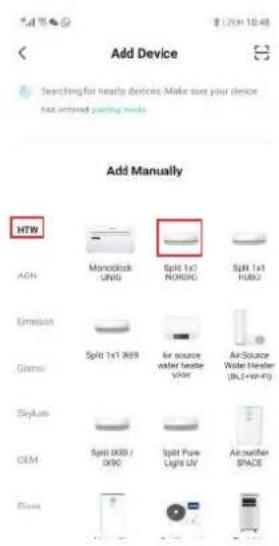
- 1. Open the app, tap on "Add Device". You can see the interface of a list of devices as shown in the screenshot below. Select your device from the list.
text_image
No devices Add Device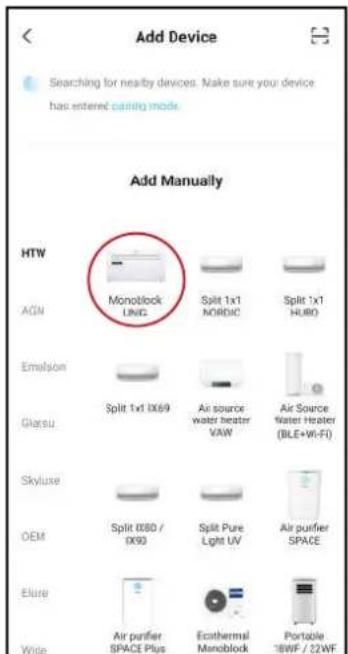
text_image
Add Device Searching for nearby devices. Make sure you device has entered calling mode. Add Manually HTW AGN Monollock UNIC Split 1x1 NORDIC Split 1x1 HUBO Emalson Glasu Split 1x1 IX69 Air source water heater VAW Air Source Water Heater (BLE+VI-FI) Skyluxe OEM Split I880 / IX90 Split Pure Light UV Air purifier SPACE Elure Wise Air purifier SPACE Plus Ecothermal Monoblock Portable 1BWF / 22WF7. ADD A DEVICE
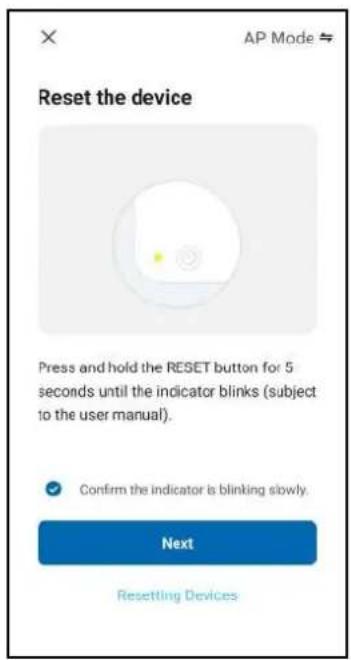
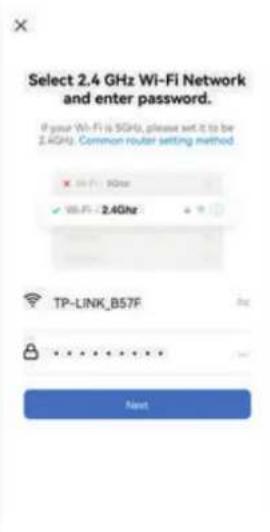
- Reboot the device. Press and hold the "RESET" button for 5 seconds until the indicator flashes. Click on "Next". Select your own Wi-Fi network, type your own Wi-Fi router password and tap "Next".
text_image
Reset the device Press and hold the RESET button for 5 seconds until the indicator blinks (subject to the user manual). Confirm the indicator is blinking slowly. Next Resetting Devices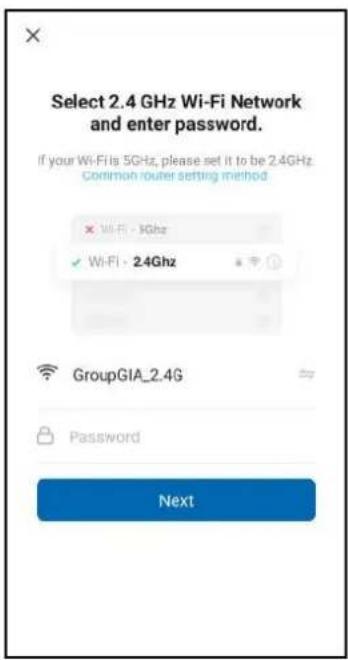
text_image
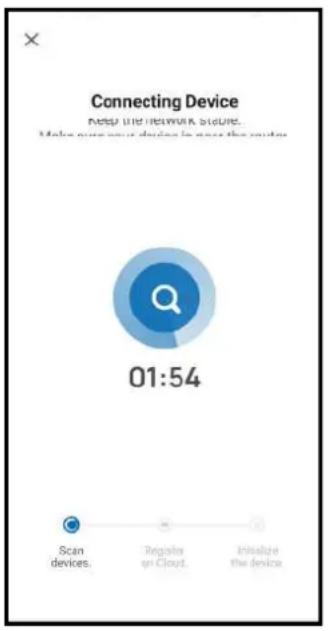
Select 2.4 GHz Wi-Fi Network and enter password. If your Wi-Fi is 5GHz, please set it to be 2.4GHz. Common router setting method × Wi-Fi · 10Ghz ✓ Wi-Fi · 2.4Ghz GroupGIA_2.4G Password Next- After the device reboots, the "Connecting Device" screen will appear. Keep the network stable. Make sure the device is close to the router.
text_image
Enter Verification Code Autofill code from messages - at to your email oscarj@grouppa.com Herein (SIs) Didn't get a code?€ & _ - 1 2 3 ?
@ ( ) = + 4 5 6 ! (&* ' : % / 7 8 9 abc " → * , 0 .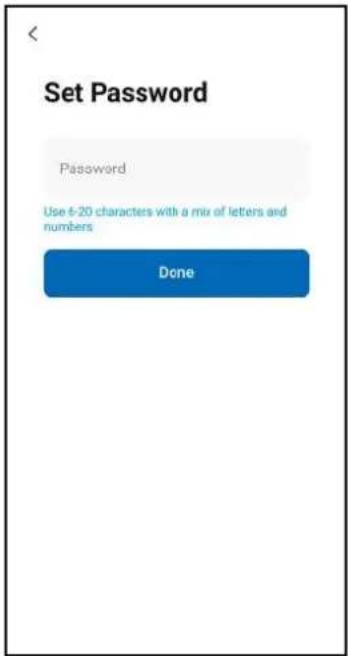
text_image
Set Password Password Use 6-20 characters with a mix of letters and numbers Done• 4. When the device is successfully connected, the first capture screen will appear. If you press on it, it will take you to the screen of the second capture, from which you can control the device.
text_image
Connecting Device Keep the network state. Make your device in your route 01:54 Scan devices. Regulate on Cloud. Involve the device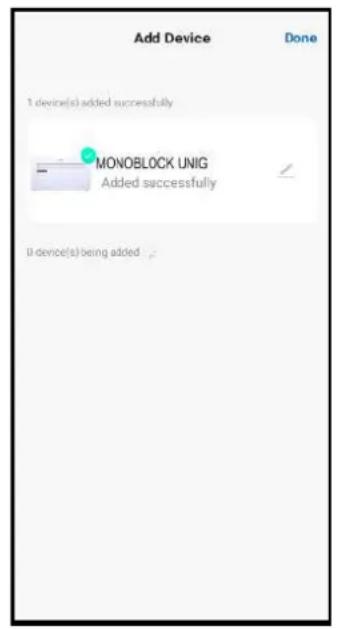
text_image
Add Device Done 1 device(s) added successfully MONOBLOCK UNIG Added successfully 2 device(s) being added.Warnings
• 1. The control quality of the app is affected by your smartphone, Wi-Fi network, distance from the router, and Internet status. It has nothing to do with the unit itself.
- 2. If you find that you couldn't control with your smart phone, please check your internet status at first, then check whether it is successfully connected with the unit. If these circumstances are ok, please delete the device in your app and start the procedures again.
- 3. If you still can't solve the problems by the above methods, please use the unit with your normal controller, and then ask for after-sale service.
8. ADD MORE DEVICES
GIApp is designed so it can work with a large number of compatible smart devices within your home. It can also be set up to work with multiple devices within different houses. As such during the setup process, the app requires that different areas are created and named to allow easy management of all your devices. When new devices are added, they are assigned to one of the rooms you have created.
CREATING ROOMS
- Press on the create a home button.
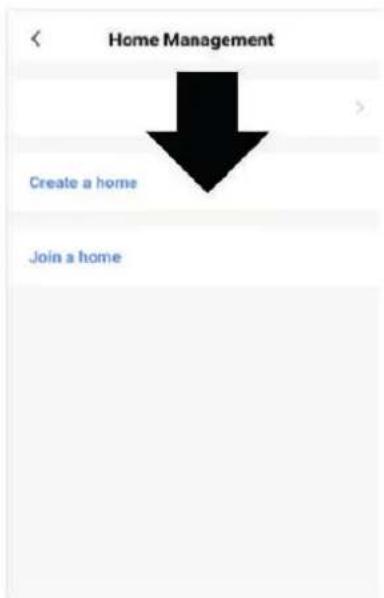
text_image
Home Management Create a home Join a home- Type in a name for your home
- Press "home location" button to select the location of your home. (See SETTING YOUR LOCATION below)
- New rooms can be added by pressing the ADD ROOM option at the bottom. (See ADD ANOTHER ROOM below).
And untick any rooms that are not required on the app, then Press SAVE in the top right corner.

text_image
Cancel Create a home Home Name* Enter Home Location Set Rooms: Living Room Master Bedroom Second Bedroom Dining Room Kitchen Study RoomSETTING YOUR
LOCATION
Use your finger to move the orange HOME symbol.
When the symbol is in the approximate location of your home, press the confirm button in the top right corner.
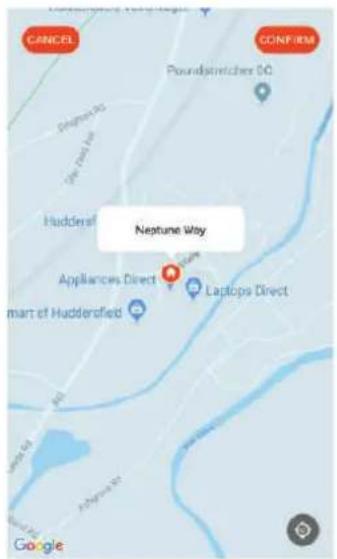
text_image
CANCEL CONFIRM Poundstnetzler 50 Huddersfield Neptune Way Appliances Direct Laptops Direct Mart of Huddersfield GoogleADD ANOTHER
ROOM
Type in the name of the room, and press Done in the top right corner
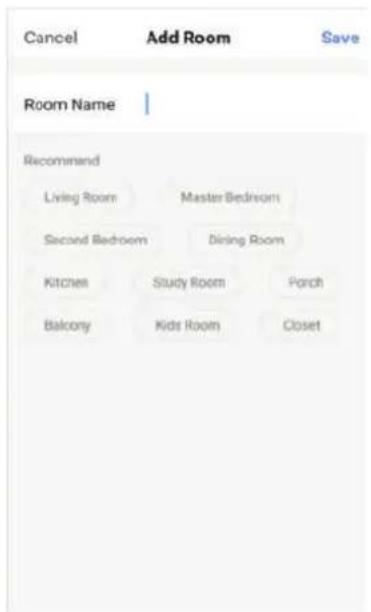
text_image
Cancel Add Room Save Room Name Recommend Living Room Master Bedroom Second Bedroom Dining Room Kitchen Study Room Porch Balcony Kids Room ClosetCONNECTING USING BLUETOOTH & WIFI
- Open the Bluetooth of your phone.
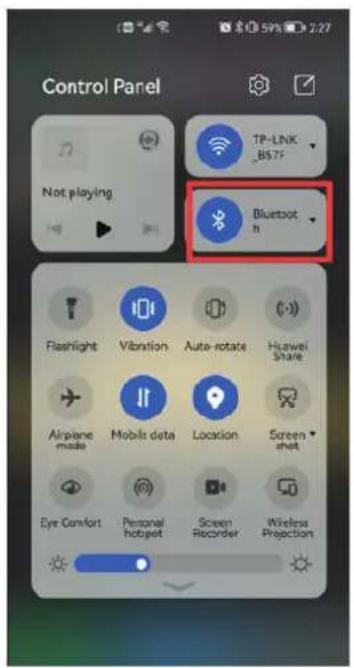
text_image
Control Panel Not playing TP-LNK _BSTF Bluetooth h Flashlight Vibration Auto-rotate Huawei Share Airplane media Mobile data Location Screen shot Eye Comfort Personal hotspot Screen Recorder Wireless Projection- When the device is powered on and to be connected, the connected Bluetooth device will pop up automatically after opening the App for a moment. Click "Add" button for connection..
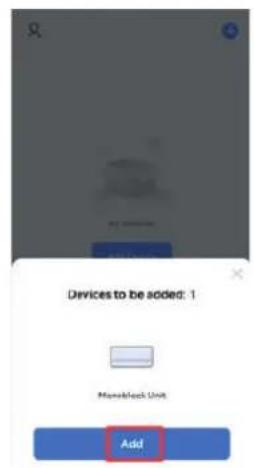
text_image
Devices to be added: 1 NewBook Unit Add- Enter the Wi-Fi information interface, enter the password and click "Next" to continue the operation.
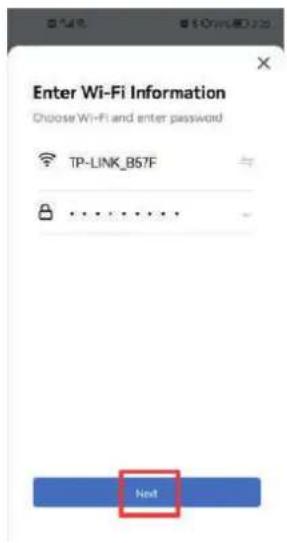
text_image
Enter Wi-Fi Information Choose Wi-Fi and enter password TP-LINK_B57F ...... Next-
Enter the device connection interface after the progress bar is finished and the device successfully connected
-
Click the "Done" button to enter the operation interface of the is device.
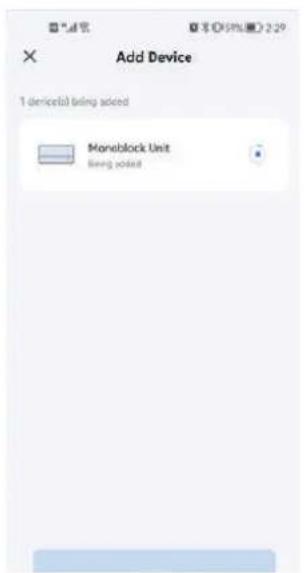
text_image
Add Device 1 devices(1) being asked Monoblock Unit Being posted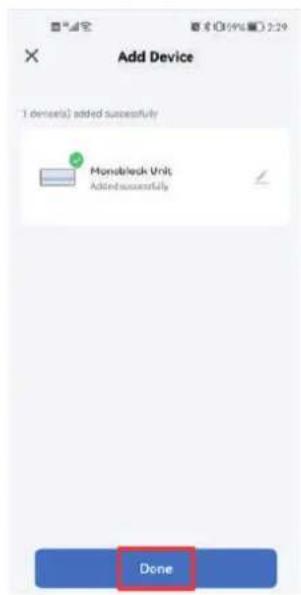
text_image
Add Device 1 denote(s) added successfully Monableack Unit Added successfully Done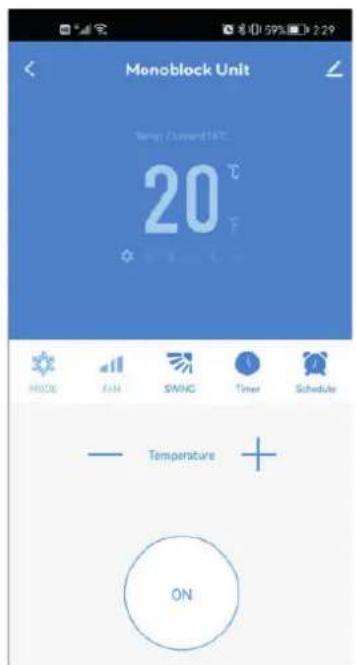
text_image
Monoblock Unit Temp: Current 14°C 20 °C HIND FIN SWING Timer Schedule Temperature ON8. ADD MORE DEVICES
If you don't want to use Bluetooth connection, just need to Exit the Bluetooth connection prompt or turn off Bluetooth and follow the below steps to connect the unit with Quick connection and AP connection.
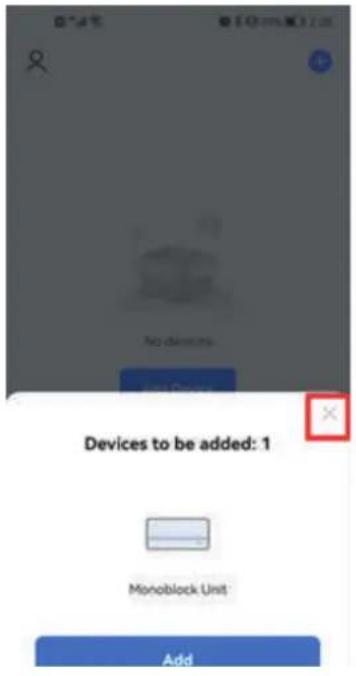
text_image
No devices Devices to be added: 1 Monoblock Unit Add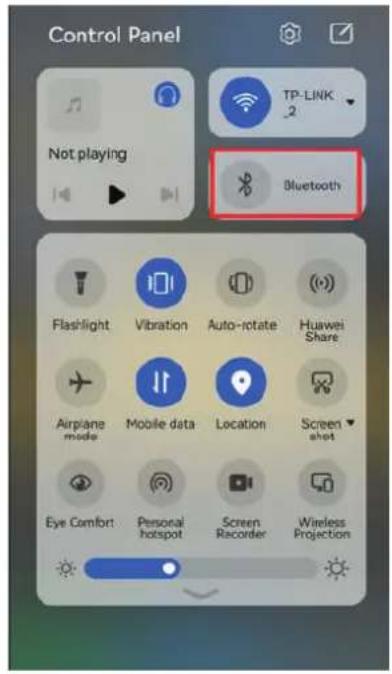
text_image
Control Panel Not playing TP-LINK 2 Bluetooth Flashlight Vibration Auto-rotate Huawei Share Airplane mode Mobile data Location Screen shot Eye Comfort Personal hotspot Screen Recorder Wireless ProjectionCONNECTING USING QUICK CONNECTION
Before initiating the connection, make sure the unit is in standby mode, with the WiFi light flashing twice per second. If not follow the instructions for changing the connection mode. Also ensure your phone is connected to the WiFi network. (We advise turning mobile data off during setup)
-
Click "Add Device" for operation
-
Select the type of device as "Large Home Appliance"
-
Connect a WIFI and enter the password.

text_image
No devices Add Device 54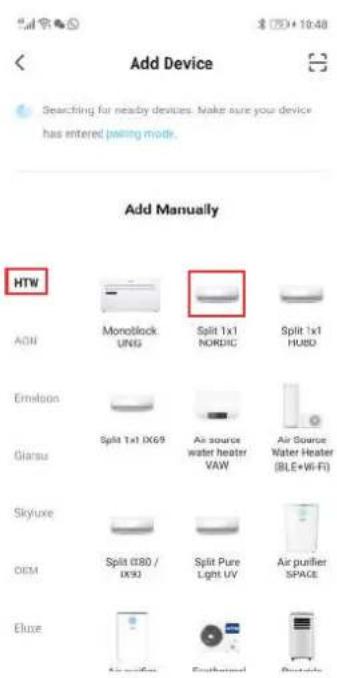
text_image
Add Device Searching for nearby devices. Make sure your device has entered joining mode. Add Manually HTW AON Monotlock UNIG Split 1x1 NORDIC Split 1x1 HUBO Emulsion Glansu Split 1x1 IX69 Air source water heater VAW Air Source Water Heater (BLE+Wi-Fi) Skyluxe DIEM Split (380 / IX90) Split Pure Light UV Air purifier SPACE Eluxe Air purifier Ethyroid Shapebox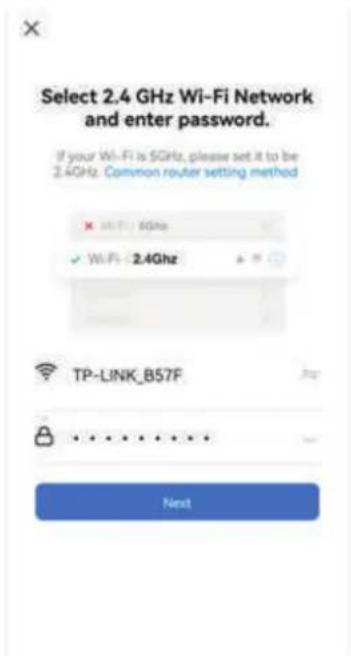
text_image
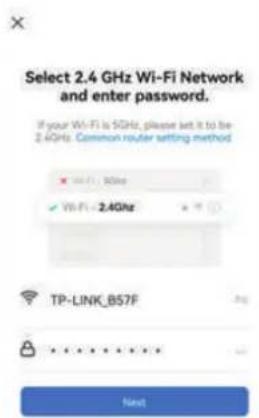
Select 2.4 GHz Wi-Fi Network and enter password. If your Wi-Fi is 5GHz, please set it to be 2.4GHz. Common router setting method × Wi-Fi: 5GHz ✓ Wi-Fi: 2.4GHz TP-LINK_B57F Next- Ensure the WIFI light on the air conditioner is flashing twice second.
text_image
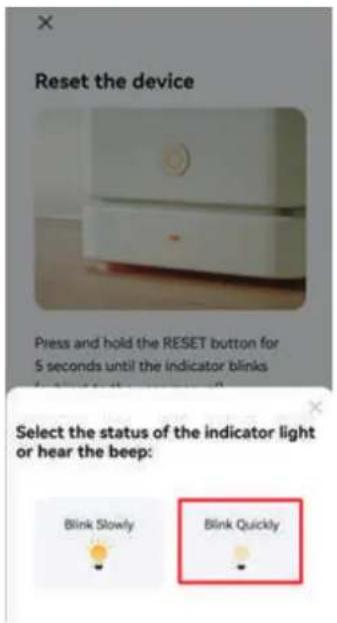
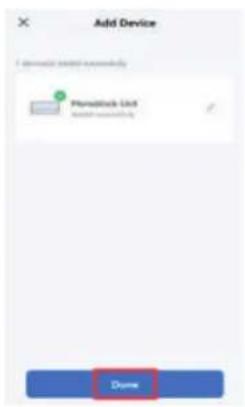
Reset the device Press and hold the RESET button for 5 seconds until the indicator blinks Select the status of the indicator light or hear the beep: Blink Slowly Blink Quickly- Enter the device connection pinterface after the progress bar is finished and the device is successfully connected. Click the "Done" button to enter the operation interface of the device.
text_image
Add Device PlanStack Unit Dome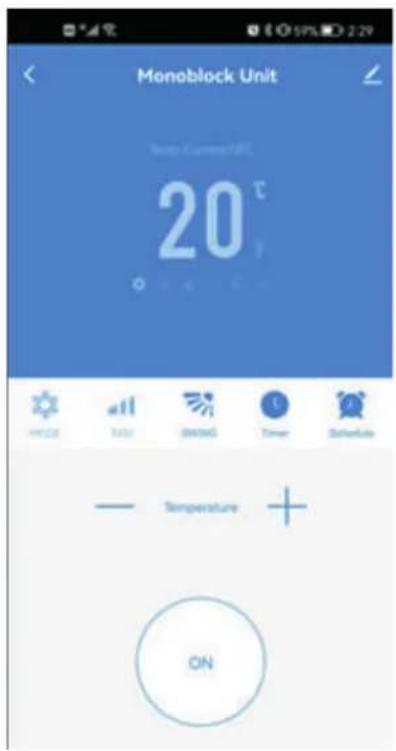
text_image
Monoblock Unit Temp Current: 15°C 20 °C Temperature ON8. ADD MORE DEVICES
CONNECTING USING AP MODE (ALTERNATIVE METHOD)
Before initiating the connection, make sure the unit is in standby mode, with the WiFi light flashing once per three seconds. If not follow the instructions for changing the WiFi connection mode. Also ensure your phone is connected to the WiFi network. (We advise turning mobile data off during setup)
-
Click "Add Device" for operation.
-
Select the type of device as "Large Home Appliance".
-
Change to the AP mode in the top right of the screen.
text_image
No devices Add Device- Connect a WIFI and enter the password.
text_image
Add Device Searching for nearby devices. Make sure your device has approved pairing mode Add Manually HTW ACN Monoclock LNG Split 1x1 NORDC Split 1x1 HUBU Emotion Split 1x1 X69 Air source water heater VWR Air Source Water Heater (BLC+40-F) Glassi SkyLine OEM Split 000 / 0000 Split Pure Light UV Air source SPACE Three- Ensure the WIFI light on the air conditioner is flashing once per second.
text_image
Select 2.4 GHz Wi-Fi Network and enter password. If your Wi-Fi is 5GHz, please set it to be 2.4GHz. Common router setting method XP-LINK_B57F Next- Get into network settings in your phone and connect to the "Smart Life xxx" connection. There is no password to enter. Then return back to the app to complete setup.
text_image
Select 2.4 GHz Wi-Fi Network and enter password. If your Wi-Fi is 5GHz, please set it to be 2.4GHz. Common router setting method XP - Wi-Fi: 5GHz ✓ Wi-Fi: 2.4GHz TP-LINK_BS7F Next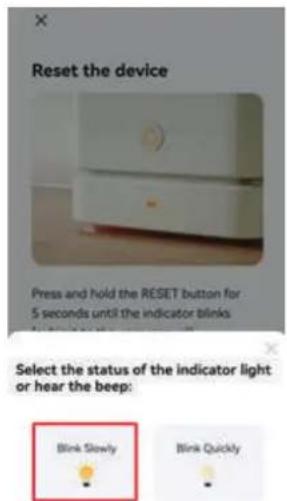
text_image
Reset the device Press and hold the RESET button for 5 seconds until the indicator blinks Select the status of the indicator light or hear the beep: Blink Slowly Blink Quickly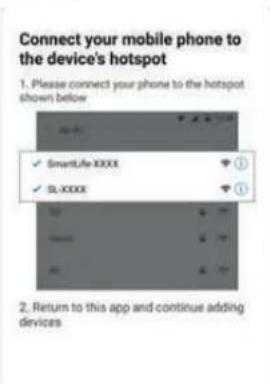
text_image
Connect your mobile phone to the device's hotspot 1. Please connect your phone to the hotspot shown below ✓ SmartLife-XXXX ✓ SL-XXXX 2. Return to this app and continue adding devicesOnce the connection process has completed, go back to the network settings on your phone to ensure your phone has reconnected to your WIFI router.
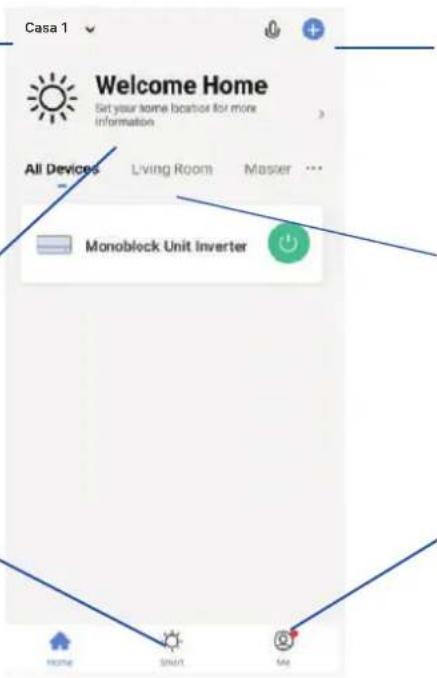
CONTROLLING YOUR DEVICE THROUGH THE APP THE HOME SCREEN
Change Home: You can change between them if you created more than one home.
Add Device: Add new device on the APP, and go through the setup process.
Environmental information: Shown outdoor temperature and humidity based on the location details..
text_image
Casa 1 Welcome Home Set your home location for more information All Devices Living Room Master Monoblock Unit Inverter Home Smart MyRoom Management: Use to view the units set up within each room. And Allows rooms to be added, removed or renamed.
Smart Scene: Allows you to program intelligent behaviour based on the internal and external environment.
Me: Provides the option for changing settings.
Each device has its own entry on the home screen to allow the user to either quickly turn the unit on or off, or to enter the device screen to make other changes.
Name of Air Conditioner: Click to enter the Device Screen.
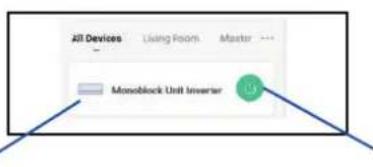
text_image
All Devices Living Room Master Monoblock Unit InverterON / OFF Button : Click to quickly turn on or off the device.
9. USE OF THE HOME SCREEN
DEVICE SCREEN
The device screen is the main control screen for the air conditioner, providing access to the controls to amend the functions and settings
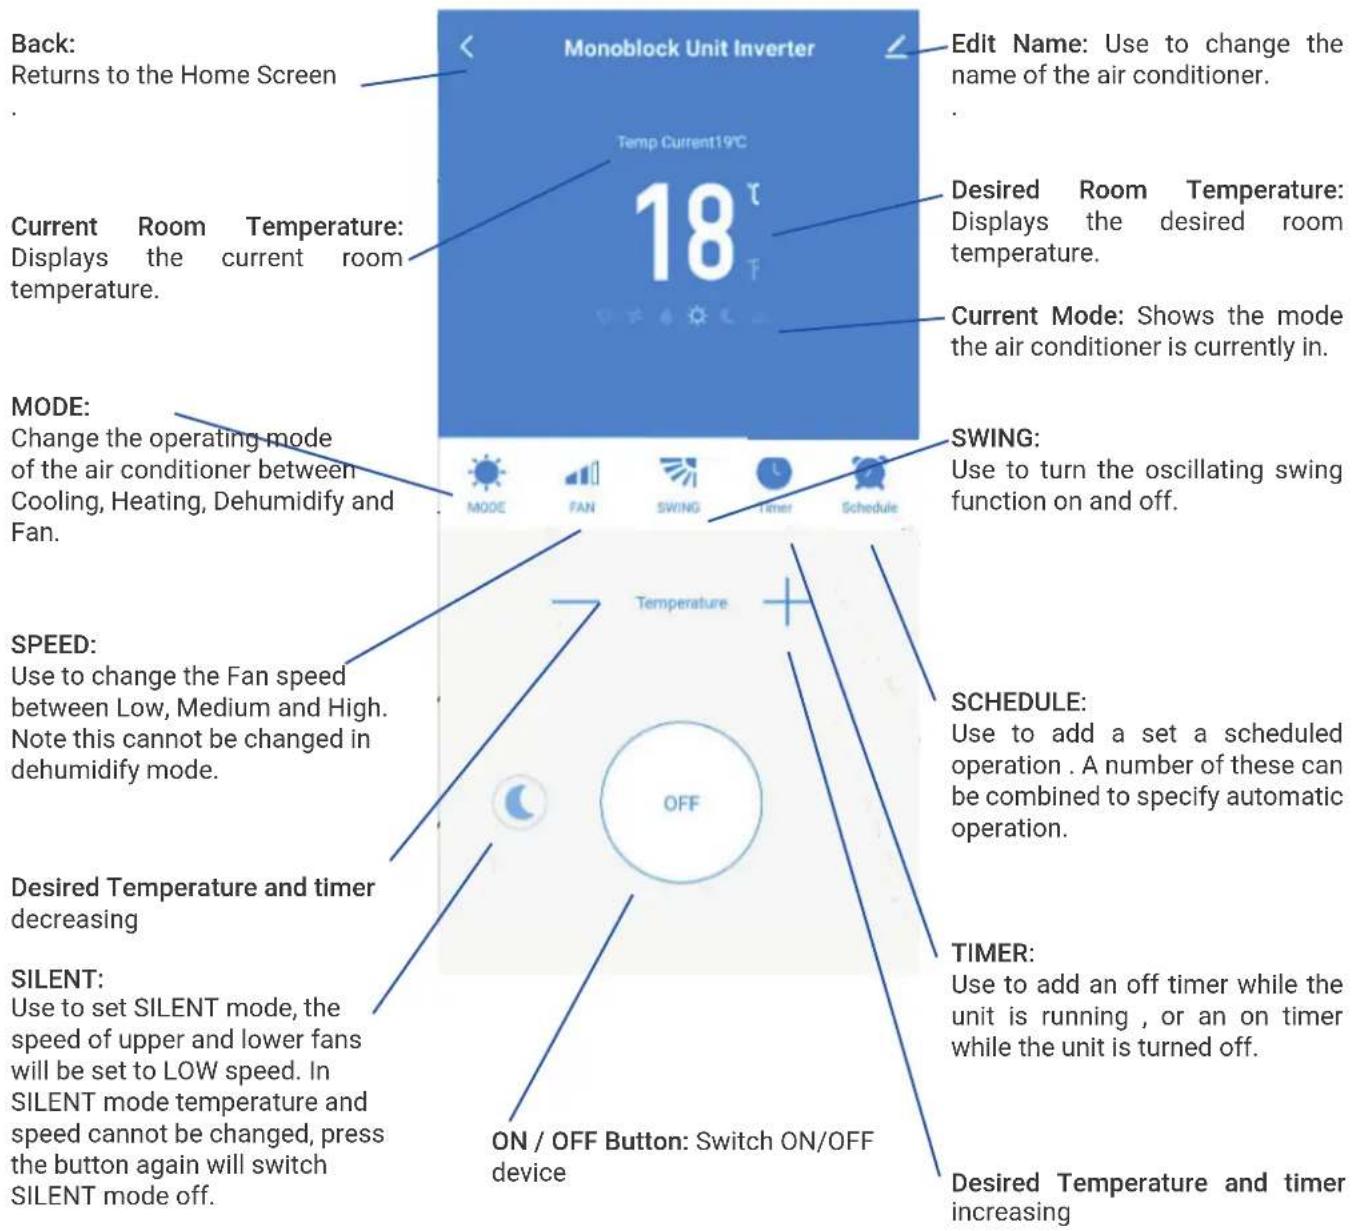
text_image
Back: Returns to the Home Screen Current Room Temperature: Displays the current room temperature. MODE: Change the operating mode of the air conditioner between Cooling, Heating, Dehumidify and Fan. SPEED: Use to change the Fan speed between Low, Medium and High. Note this cannot be changed in dehumidify mode. Desired Temperature and timer decreasing SILENT: Use to set SILENT mode, the speed of upper and lower fans will be set to LOW speed. In SILENT mode temperature and speed cannot be changed, press the button again will switch SILENT mode off. Monoblock Unit Inverter Temp Current19°C 18 °F Edit Name: Use to change the name of the air conditioner. Desired Room Temperature: Displays the desired room temperature. Current Mode: Shows the mode the air conditioner is currently in. SWING: Use to turn the oscillating swing function on and off. SCHEDULE: Use to add a set a scheduled operation . A number of these can be combined to specify automatic operation. TIMER: Use to add an off timer while the unit is running , or an on timer while the unit is turned off. ON / OFF Button: Switch ON/OFF device Desired Temperature and timer increasing**Due to continuous development of the app, the layout and available features may be subject to change.
Smart Scenes is a powerful tool providing the option to customise the operation of the air conditioner based both on conditions within the room and outside influences. This gives the user the option of specifying much more intelligent actions. These are split into two categories Scene and Automation.
SCENE
Scene allows for a one touch button to be added to the Home screen. The button can be used to change a number of settings in one go, and can change all the settings within the unit. A number of scenes can easily be setup, allowing the user to easily change between a number of preset configurations.
Below is an example of how to set up a scene:
-
Press on the Smart Scene tab at the bottom of the Home screen.
-
Press on the Plus in the top right corner to add a smart scene.
-
Press on the Launch Tap-to-Run to create a new Scene.
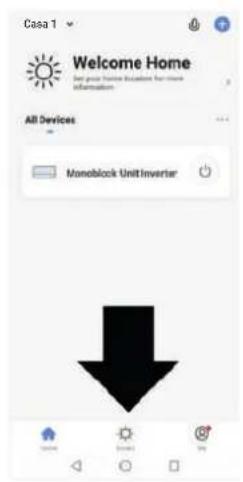
text_image
Casa 1 Welcome Home Set price home location for more information. All Devices Monoblock Unit Inverter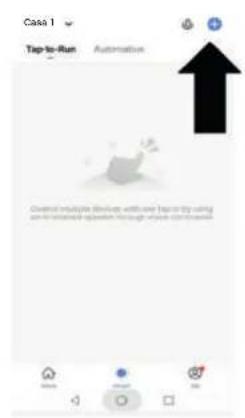
text_image
Case 1 Tap-to-Run Automation Control multiple devices with one step in try using on the related question through which continues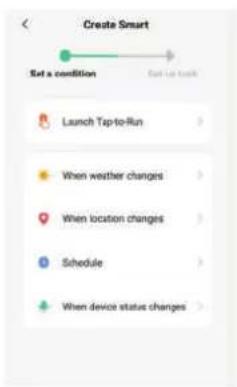
text_image
Create Smart Set a condition Start up track Launch Tap-to-Run When weather changes When location changes Schedule When device status changes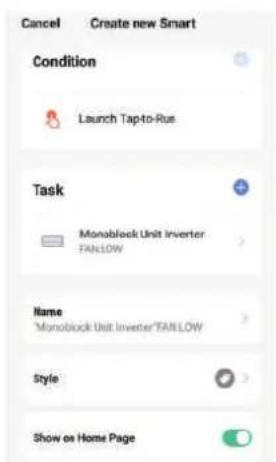
text_image
Cancel Create new Smart Condition Launch Tap-to-Rus Task Monoblock Unit Inverter FAN10W Name Monoblock Unit Inverter/FAN10W Style Show on Home Page- Press the arrow next to "Name" to input the name for your Scene
Show on Home Page: Leave this on if you require the scene to be displayed as a button on the Home Screen
Press the Blue Plus to add the action required. Then select the air conditioner from the list of devices.
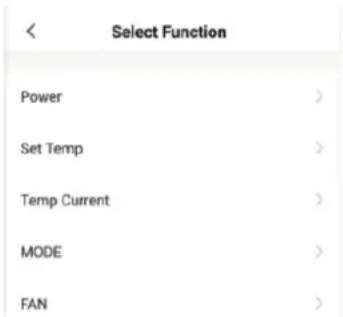
- Chose the function, set the value for the function, and then press the arrow button in the top left corner, to return to the previous screen.
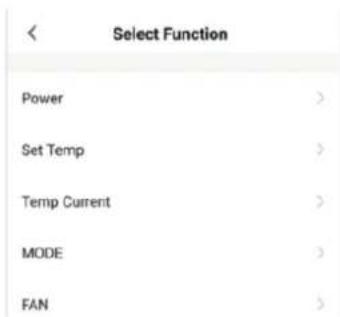
text_image
Select Function Power > Set Temp > Temp Current > MODE > FAN >- 6. Once all the functions required have been added, press the Save button in the top right corner to finalise and save your new Scene.
11. AUTOMATION
Automation allows an automatic action to be set up for the device. This can be triggered by the Time, indoor temperature, humidity of the room, weather conditions, and a range of other influences.
-
Press on the Smart Scene tab at the bottom of the Home screen..
-
Press on the Plus in the top right corner to add a smart scene.
-
Press on the Launch Tap-to-Run to create a new Scene.
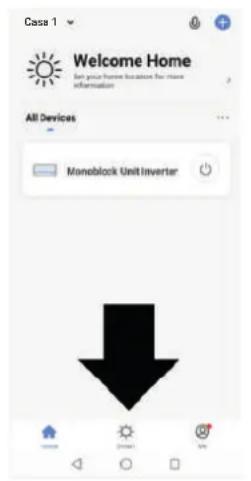
text_image
Casa 1 Welcome Home Get your home location the Home information All Devices Noneblock Unit Inverter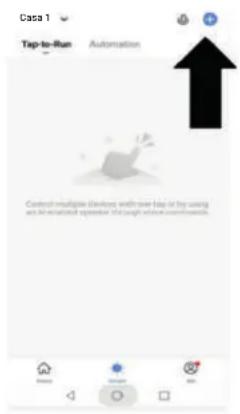
text_image
Casa 1 Top-to-Run Automation Control multiple devices with one bit or by using and An automated operation through where commands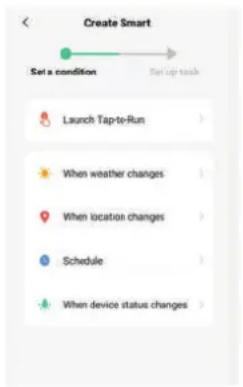
text_image
Create Smart Set a condition Set up task Launch Tap-to-Run When weather changes When location changes Schedule When device status changes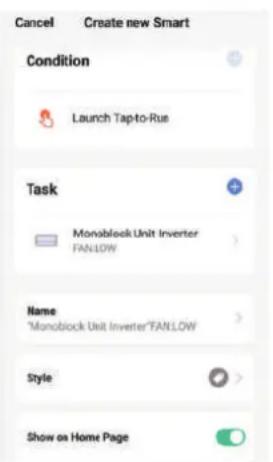
text_image
Cancel Create new Smart Condition Launch Tap-to-Rus Task Monoblock Unit Inverter FANLOW Name "Monoblock Unit Inverter"FANLOW Style Show on Home Page- Setup is very similar to the scene setup on the previous page, and includes an extra section for specifying a trigger for the scene to start.
Press the arrow next to "Name" to input the name for your Scene Show on Home Page: Leave this on if you require the scene to be displayed as a button on the Home Screen
Press the Blue Plus to add the action required. Then select the air conditioner from the list of devices.
- Chose the function, set the value for the function, and then press the arrow button in the top left corner, to return to the previous screen.
text_image
Select Function Power > Set Temp > Temp Current > MODE > FAN >- Chose the function, and then press the arrow button in the top left corner, to return to the previous screen.
text_image
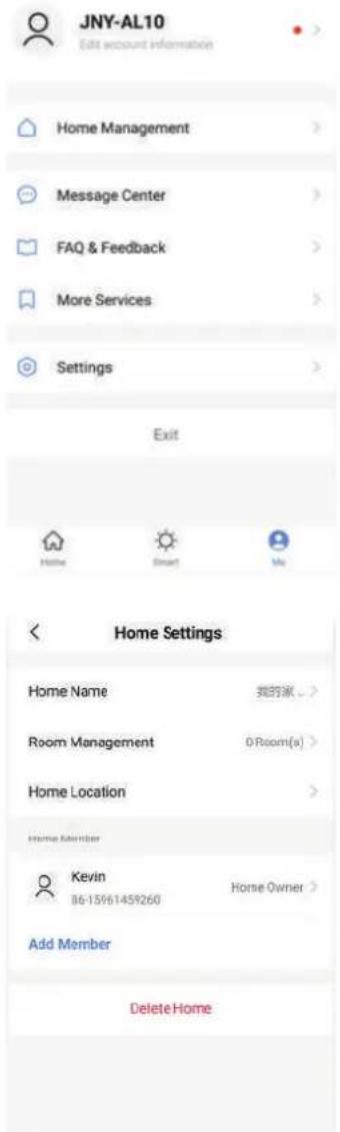
JNY-AL10 Edit account information Home Management Message Center FAQ & Feedback More Services Settings Exit Home Smart Me Home Settings Home Name 我的家 > Room Management DRoom(a) > Home Location Home Member Kevin 86-15%6145%260 Home Owner > Add Member Delete HomeTO ME
The profile tab gives you the option to edit both your detail, and use the added features of the unit.
CHANGING THE NAME OF YOUR DEVICE
When in any of the device screens further settings for the device can be accessed, by pressing on the three dots in the top right hand corner. The top option within this allows you to change the name of the device to something relevant to the use of the product, such as "Living Room Air Conditioner". Within the menu, you also have the option of setting up a pattern lock or change your password.
DEVICE SHARING
This allows you to share access to the controls of your air conditioner with friends and family.
text_image
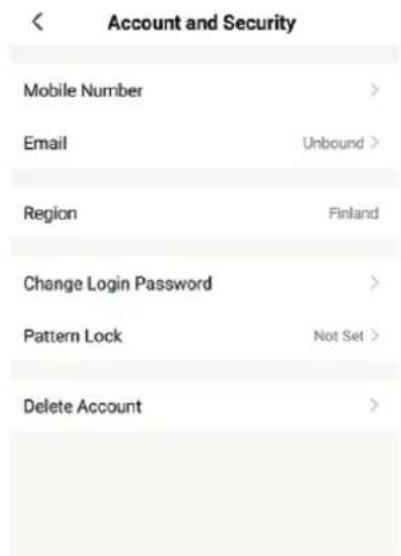
Account and Security Mobile Number > Email Unbound > Region Finland Change Login Password > Pattern Lock Not Set > Delete Account >In page "Home Management", select "My home", you could "Add Member" there to share access to the controls of your air conditioner with friends and family, pls refer to the left picture.
text_image
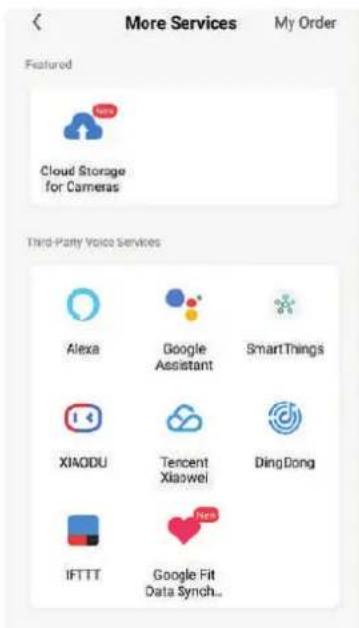
More Services My Order Featured Cloud Storage for Cameras Third Party Voice Services Alexa Google Assistant SmartThings XIAODU Tencent Xiaowei DingDong IFTTT Google Fit Data Synch...INTEGRATION
This allows the unit to be integrated with your favourite home automation hardware such as Google Home and the Amazon Echo.
Select "More Services", you could integrate with third-party voice services, pls refer to the left picture.
12. TROUBLESHOOTING
Do not repair or disassemble the air conditioning. Unqualified repair will invalidate the warranty and may lead to failure, causing injuries and property damage. Only use it as directed in this user manual and only perform operations advised here.
| Problem Reasons Solutions | ||
| The air conditioner does not work | There is no electricity. | Check the unit is plugged in, and the socket is working normally. |
| The ambient temperature is too low or too high. | Only use to use the machine with a room temperature between 7 and 35°C. | |
| In cooling mode, the room temperature is lower than the desired temperature; in heating mode, the room temperature is higher than the desired temperature. | Adjust the desired room temperature. | |
| In dehumidification (dry) mode, the ambient temperature is low. | Ensure that the room temperature is above 17°C for dry mode. | |
| There is direct sunlight. Use curtains to reduce heat from the sun. | ||
| The cooling or heating effect is poor | Doors or windows are open; there are a lot of people; or in cooling mode, there are other sources of heat (e.g. fridges) | Close doors and windows; increase air conditioning power |
| The filters screen is dirty. Clean or replace the filter screen. | ||
| The air inlet or outlet is blocked. | Clear obstructions; make sure the unit is installed as per the instructions | |
| The air conditioner is leaking | The unit is not straight | La unidad no es recta.Utilice un nivel de burbuja para comprobar que la unidad está horizontal, si no se retira de la pared y Recto. |
| The drain pipe is blocked | Check the drain pipe to ensure it is not blocked or constricted. | |
| Compressor does not work. Overheat | protection operational | Wait for 3 minutes until the temperature is lowered, and then restart the machine. |
| The remote control does not work. | The remote control is not aligned with the direction of the remote-control receiver. | Let the remote control get close to the air conditioner, and make sure that the remote control directly faces to the direction of the remote-control receiver. |
| Batteries poor. Replace batteries. | ||
If problems not listed in the table occur or recommended solutions do not work, please contact the service centre.
ERROR CODES
| Fault code Description of the fault | Código defallo | Fault code | |
| F1 Compressor | IPM error P8 Zero-crossing fault detection | ||
| F2 PFC/IPM error | PA | Return air sensor temperature abnormal protection | |
| F3 Compressor | start error PC Coil tube overload protection(outdoor) | ||
| F4 | Compressor running out of step | PE Abnormal refrigerant circulation | |
| F5 | Location detection loop failure | PH Exhaust temperature protection | |
| F6 PCB communication error E0 Sensor on suction pipe error | |||
| F7 | Coil sensor error (outdoor) | E1 | Temperature sensor error |
| F8 | Sensor on suction pipe error | E2 | Sensor error on indoor coil tube |
| FA | Phase current over current protection | E3 | DC fan Feedback failure |
| FE | EE error (outdoor) | E4 | Communication error |
| Florida | Water-full protection | E5 | Water-splash motor error |
| P1 | Over-heat protection on top of compressor | E6 | Temperature sensor error(outdoor) |
| P2 | Dc bus voltage Under voltage protection | E7 | Fan motor error (outdoor) |
| P3 | AC Input voltage protection | E8 | Fan feedback fault |
| P4 | AC over-current protection | EE | EE error |
| P5 | AC under voltage protection | EA | Reversing fault of four-way valve |
| P6 | Coil tube overload protection | Eb | Fluoride deficiency protection |
| P7 | Defrost protection on coil tube | - | - |
FRANÇAIS
MANUEL DE L'UTILISATEUR ET D'INSTALLATION
MONOBLOCK
UNIG
HTW-AAM35DA-R290
TABLE DES MATIÈRES
01 CONSIGNES DE SÉCURITÉ ...... 67
02 DESCRIPTION DU PRODUIT....69
03 INSTALLATION 72
04 FONCTIONNEMENT....75
05 LES MÉTHODES DE CONNEXION DISPONIBLES POUR LA CONFIGURATION .... 78
06 TÉLÉCHARGER ET INSTALLER
L'APPLICATION....79
07 AJOUTER UN APPAREIL 82
08 AJOUTER PLUS DE DISPOSITIFS 84
09 UTILISATION DE L'ÉCRAN D'ACCUEIL.... 89
10 SCÈNES INTELLIGENTES 91
11 AUTOMATISATION.... 92
12 RÉSOLUTION DE PROBLÈMES 94
IMPORTANT!
LES CLIMATISEURS DOIVENT TOUJOURS ÊTRE ENTREPOSÉS ET TRANSPORTÉS VERTICALE, DES DOMMAGES SINON IRRÉPARABLES PEUVENT ÊTRE CAUSÉS À LE COMPRESSEUR ; EN CAS DE DOUTE, NOUS VOUS SUGGÉRONS D'ATTENDRE AU MOINS 24 HEURES SUIVANT L'INSTALLATION AVANT DE DÉMARRER L'UNITÉ.
natural_image
Line drawing of a rectangular electronic device with a recessed top and side slots (no text or symbols)CLIMATISEUR
natural_image
Simple diagram with dots and circles, no text or symbols presentMODÈLE MURAL
CONDUITS EN
PLASTIQUE (X2)
SOPORTE DE PARED
MANDO A DISTANCIA
ENSEMBLE DE COUVERCLE D'ÉVENT (X2) (CHAÎNE, ANNEAU INTÉRIEUR ET COUVERTURE EXTÉRIEURE)
FIXE
2 PIÈCES À
TARAUDER
(4x10mm)
7PCS VIS (5×60mm)
7 PRISES MURALES (8×40mm)

BANDE D'ÉTANCHÉITÉ
DIAGRAMME À DES FINS D'ILLUSTRATION UNIQUEMENT
OUTILS NÉCESSAIRES
DIAGRAMME DE PRODUIT
NIVEAU À BULLE
MÈTRE À RUBAN

PENCIL
natural_image
Simple line drawing of a rectangular object with three diagonal lines and a protruding rod (no text or symbols)CAROTTE 180 mm
natural_image
Simple line drawing of a handheld electric drill (no text or symbols)PERCE
COUTEAU

FORET À
MAÇONNERIE 8mm

natural_image
Close-up of a twist drill bit (no text or symbols visible)FORET À MAÇONNERIE 25mm
- AVANT DE COMMENCER L'INSTALLATION, VEUILLEZ VOUS ASSURER D'AVOIR TOUT L'ÉQUIPEMENT APPROPRIÉ DISPONIBLE ET DE COMPRENDRE LES ÉTAPES IMPLIQUÉES DANS L'INSTALLATION. EN CAS DE DOUTE, UN CONSEIL PROFESSIONNEL DOIT ÊTRE RECHERCHÉ.
• L'INSTALLATEUR DOIT S'ASSURER QUE LA POSITION PRÉVUE DU CLIMATISEUR EST ADAPTÉE, ET QU'IL N'Y A PAS DE CÂBLES ET DE TUYAUX À L'INTÉRIEUR DU MUR, NI D'AUTRES OBSTACLES FIXÉS SUR LE MUR, QUI PRESENTERAIT UN DANGER ET/OU EMPÊCHERAIT LA FIN DE L'INSTALLATION.
3. INSTALLATION
text_image
10 cm 10 cmnatural_image
Isometric diagram showing a ceiling-mounted air conditioner unit and its internal panel, placed on a checkered floor (no text or symbols)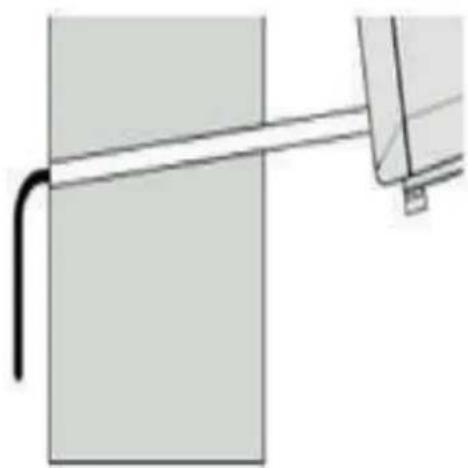
natural_image
Pure mechanical diagram showing a lever and pivot (no text or symbols)natural_image
Diagram showing two white oval shapes on a brick wall with a diagonal line and arrows indicating direction (no text or symbols)natural_image
Diagram showing two cylindrical tanks mounted on a brick wall, with one larger and connected to a smaller, black arrow indicating direction (no text or symbols present)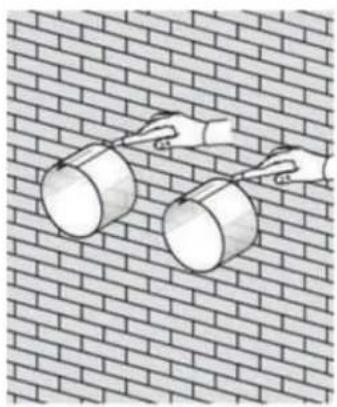
natural_image
Illustration of two hands stretching a cylindrical object on a brick wall (no text or symbols)natural_image
Illustration of a hand using a tool to interact with a mechanical device (no text or symbols visible)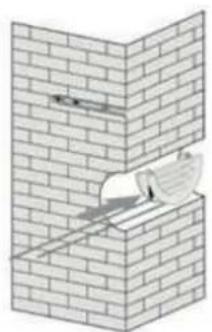
natural_image
Diagram of a brick wall corner with a pipe and valve, showing structural details (no text or symbols)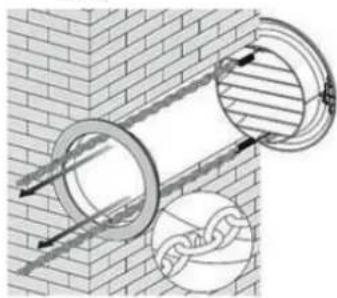
natural_image
Diagram of two circular pipe fittings inserted into a brick wall, with one retaining a ball (no text or symbols present)natural_image
Diagram of a brick wall with a pipe and circular opening, showing structural details (no text or symbols)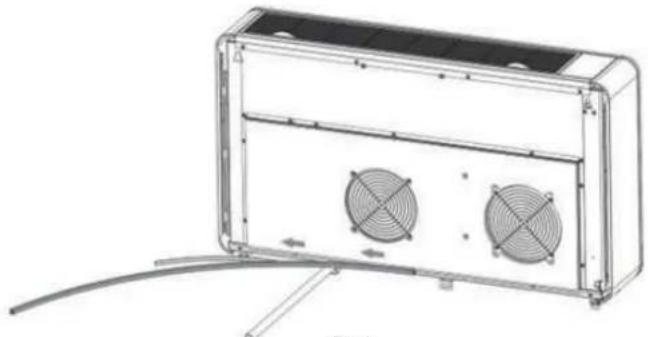
natural_image
Technical line drawing of a rectangular electronic device with two fans and a cable, no text or symbols presentFig 1
3. INSTALLATION
natural_image
Technical diagram of a wall-mounted HVAC unit with two fans and mounting brackets, shown with magnified views (no text or symbols)Note:
natural_image
Illustration of a white air conditioner unit with ventilation grilles, placed on a grid background (no text or symbols)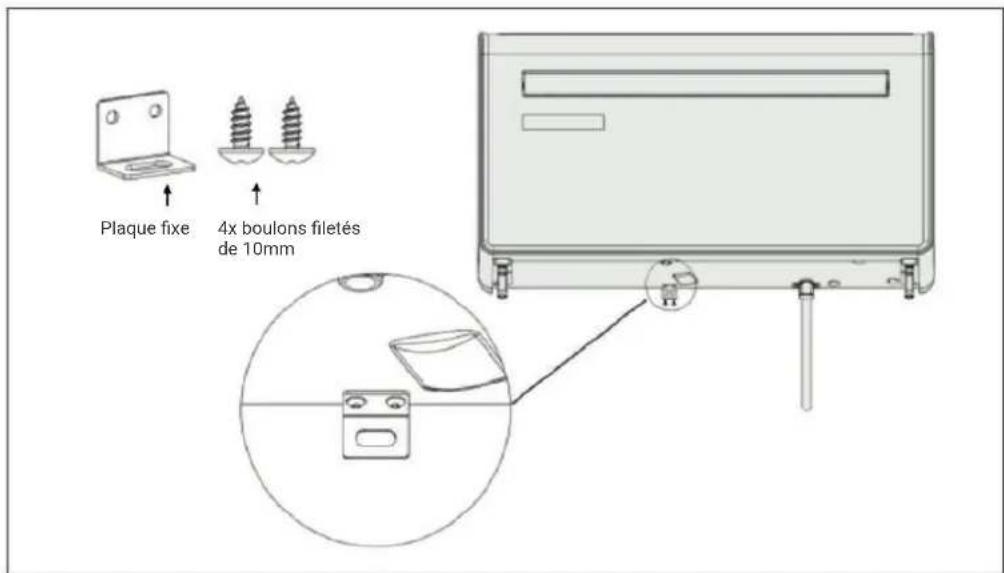
text_image
Plaque fixe 4x boulons filetés de 10mmPANNEAU DE COMMANDE
text_image
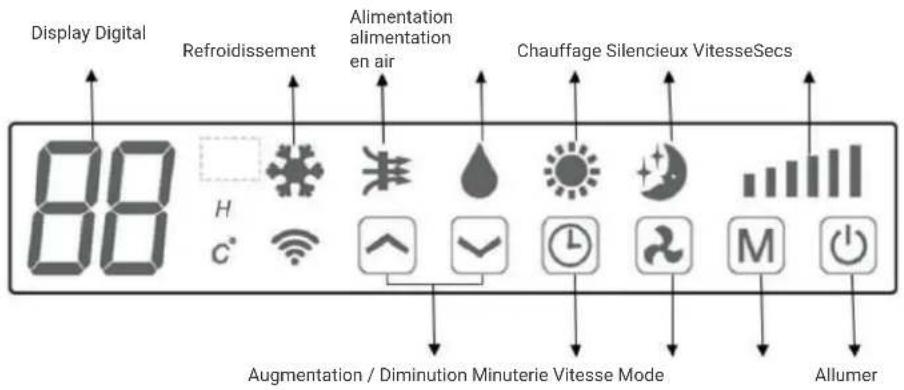
Display Digital Refroidissement Alimentation alimentation en air Chauffage Silencieux VitesseSecs 88 H C° Augmentation / Diminution Minuterie Vitesse Mode AllumerTÉLÉCOMMANDE
text_image
QR code image containing encoded data, no visible human-readable text
text_image
GIA PPGIApp
Para Android
natural_image
Blue square icon with white abstract geometric design resembling a stylized letter or symbol (no text or numbers)Note
text_image
GIApp™ Log In Sign Up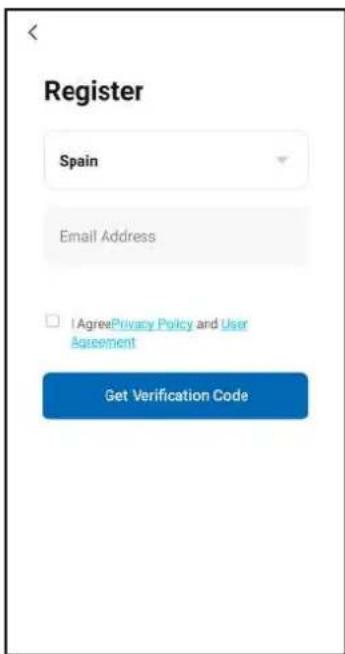
text_image
Register Spain Email Address I AgreePrivacy Policy and User Agreement Get Verification Codetext_image
Enter Verification Code ! Autofill code from messages at to your email sicar@groupia.com Hesand (SIs) Didn't get a code?€ & _ - 1 2 3 ?
@ ( ) = + 4 5 6 ! (&= ' ; % / 7 8 9 abc " → * , 0 .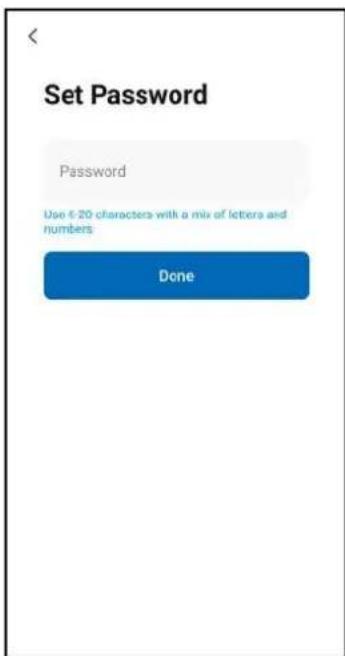
text_image
Set Password Password Use 6-20 characters with a mix of letters and numbers Done6. TÉLÉCHARGER ET INSTALLER L'APPLICATION
COMMENCER LA SESSION
text_image
GIApp™ Log In Sign Up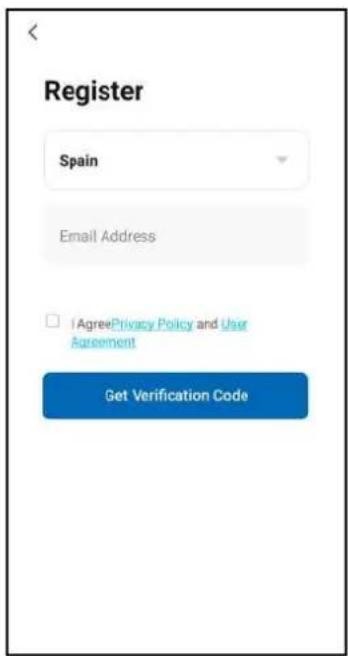
text_image
Register Spain Email Address □ AgreePrivacy Policy and User Agreement Get Verification CodeAJOUTER UN APPAREIL
¿Comment ajouter un appareil?
text_image
No devices Add Device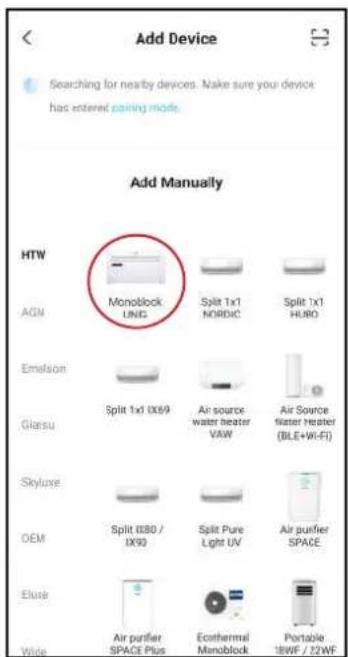
text_image
Add Device Searching for nearby devices. Make sure your device has entered pairing mode. Add Manually HTW AGN Monoblock UNIC Split 1x1 NORDIC Split 1x1 HURO Emulsion Split 1x1 IX69 Air source water heater VAW Air Source water heater (BLE+Wi-Fi) Glasu Skyluxe OEM Split I80 / IX90 Split Pure Light UV Air purifier SPACE Elube Air purifier SPACE Plus Ecothermal Monoblock Portable 18WF / 22WF7. AJOUTER UN APPAREIL
text_image
AP Mode Reset the device Press and hold the RESET button for 5 seconds until the indicator blinks (subject to the user manual). Confirm the indicator is blinking slowly. Next Resetting Devices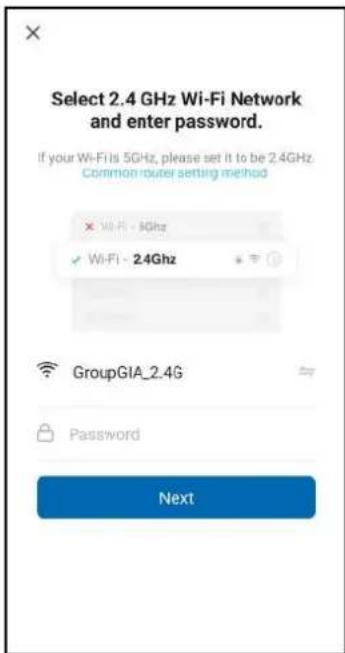
text_image
Select 2.4 GHz Wi-Fi Network and enter password. If your Wi-Fi is 5GHz, please set it to be 2.4GHz Common router setting method Wi-Fi - 3GHz Wi-Fi - 2.4GHz GroupGIA_2.4G Password Nexttext_image
Enter Verification Code Autofill code from messages at to your email oscar@groupia.com Resend (SIs) Didn't get a code?€ & _ - 1 2 3 ?
@ ( ) = + 4 5 6 ! (&= ' : % / 7 8 9 abc " → * , 0 .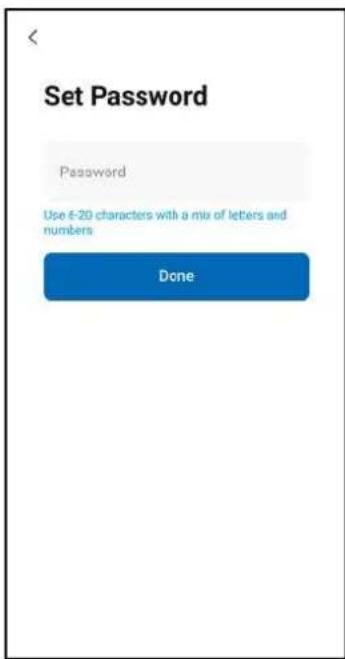
text_image
Set Password Password Use 6-20 characters with a mix of letters and numbers Donetext_image
Connecting Device NEESE THE NETWORK STUDIO. Make new device to save the user. 01:54 Scan devices. Regulate up Cloud Midimize the device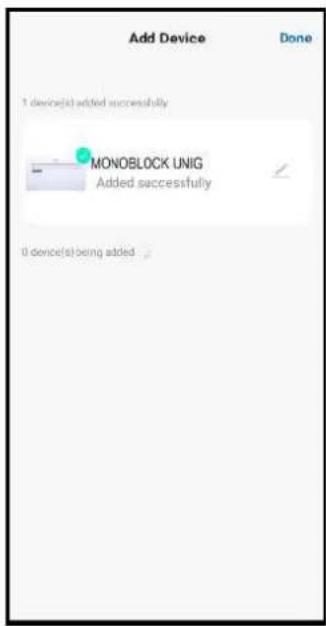
text_image
Add Device Done 1 device(s) added successfully MONOBLOCK UNIG Added successfully 0 device(s) being added.Avis
text_image
Home Management Create a home Join a hometext_image
Cancel Create a home Home Name* Enter Home Location Set Rooms: Living Room Master Bedroom Second Bedroom Dining Room Kitchen Study Roomtext_image
Cancel Add Room Save Room Name Recommend Living Room Master Bedroom Second Bedroom Dining Room Kitches Study Room Perch Balcony Kids Room ClosetCONNEXION EN UTILISANT BLUETOOTH & WI-FI
text_image
Control Panel Not playing TP-LNK _BSTF Bluetooth h Flashlight Vibration Auto-rotate Huawei Share Airplane media Mobile data Location Screen shot Eye Comfort Personal hotspot Screen Recorder Wireless Projectiontext_image
Devices to be added: 1 Monochrome Unit Addtext_image
Enter Wi-Fi Information Choose Wi-Fi and enter password TP-LINK_B57F ...... Nexttext_image
Add Device 1 devices(1) being added Monoblock Unit Being addedtext_image
Add Device 1 denote(s) added successfully Monableack Unit Added successfully Done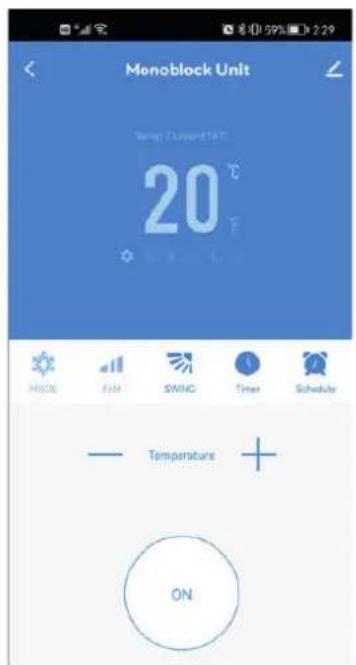
text_image
Monoblock Unit Temperature 20°C 20 °F ON8. AJOUTER PLUS DE DISPOSITIFS
text_image
No devices Devices to be added: 1 Monoblock Unit Add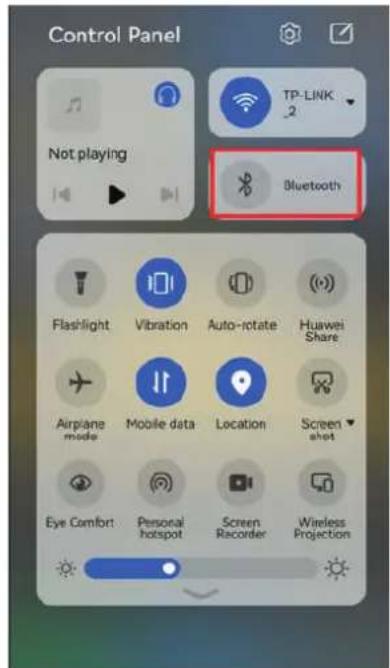
text_image
Control Panel Not playing TP-LINK 2 Bluetooth Flashlight Vibration Auto-rotate Huawei Share Airplane mode Mobile data Location Screen shot Eye Comfort Personal hotspot Screen Recorder Wireless ProjectionCONNEXION À L'AIDE DE LA CONNEXION RAPIDE
text_image
Add Device Searching for nearby devices. Make sure your device has entered joining mode. Add Manually HTW AON Monotlock UNIG Split 1x1 NORDIC Split 1x1 HUBO Emulsion Glansu Split 1x1 IX69 Air source water heater VAW Air Source Water Heater (BLE+Wi-Fi) Skyluxe OEM Split GB0 / IX90 Split Pure Light UV Air purifier SPACE Eluxe Air purifier Enthusioid Enthusioid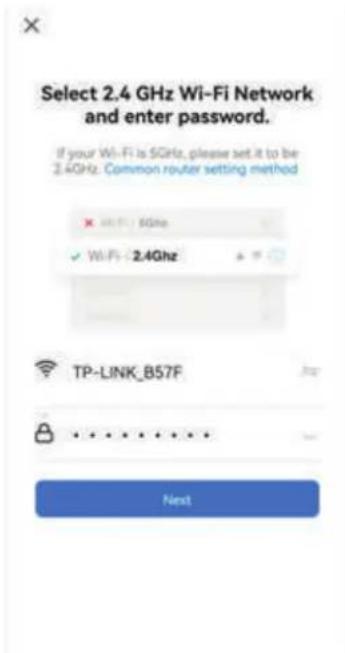
text_image
Select 2.4 GHz Wi-Fi Network and enter password. If your Wi-Fi is 5GHz, please set it to be 2.4GHz. Common router setting method × Wi-Fi: 5GHz ✓ Wi-Fi: 2.4GHz TP-LINK_857F Nexttext_image
Reset the device Press and hold the RESET button for 5 seconds until the indicator blinks Select the status of the indicator light or hear the beep: Blink Slowly Blink Quicklytext_image
Add Device PlanStack Unit Dome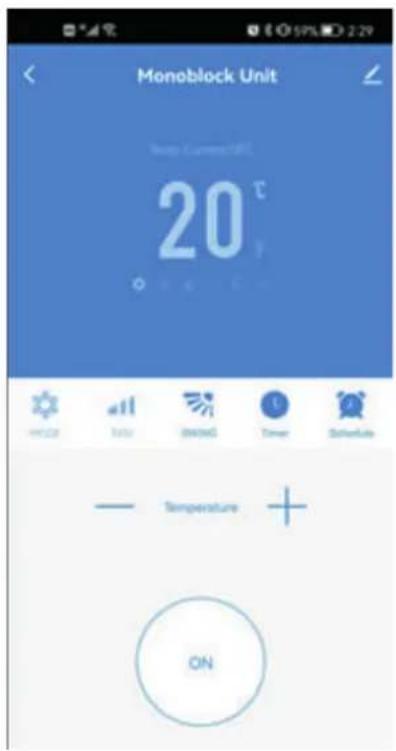
text_image
Monoblock Unit Temp Current: 15°C 20 °C Temperature ON8. AJOUTER PLUS DE DISPOSITIFS
CONNEXION EN MODE AP (MÉTHODE ALTERNATIVE)
text_image
No devices Add Devicetext_image
Add Device Searching for nearby devices. Make sure your device has around pairing mode Add Manually HTW AGN Simelion Giantay SkyLine OEM Air Source Water Heater (BLC+10-Ft) Split 1x1 X69 Air source water heater VPH Air Source Water Heater (BLC+10-Ft) Split 000 / 0000 Split Pure Light UV Air source SPACEtext_image
Select 2.4 GHz Wi-Fi Network and enter password. If your Wi-Fi is 5GHz, please set it to be 2.4GHz. Common router setting method XP-LINK_B57F Nexttext_image
Select 2.4 GHz Wi-Fi Network and enter password. If your Wi-Fi is 5GHz, please set it to be 2.4GHz. Common router setting method Wi-Fi: 2.4GHz Wi-Fi: 2.4GHz TP-LINK_BS7F Next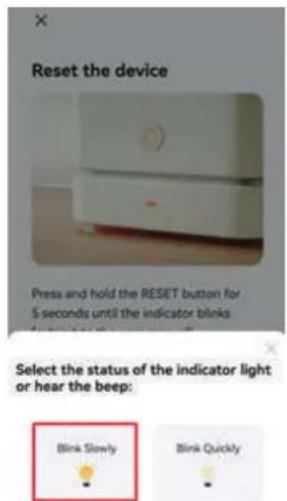
text_image
Reset the device Press and hold the RESET button for 5 seconds until the indicator blinks. Select the status of the indicator light or hear the beep: Blink Slowly Blink Quickly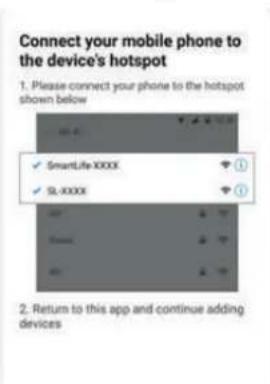
text_image
Connect your mobile phone to the device's hotspot 1. Please connect your phone to the hotspot shown below ✓ SmartLife XXXX ✓ SL XXXX 2. Return to this app and continue adding devicestext_image
All Devices Living Room Master Monoblock Unit Invertertext_image
Casa 1 Welcome Home Set price home location for more information. All Devices Monoblock Unit Inverter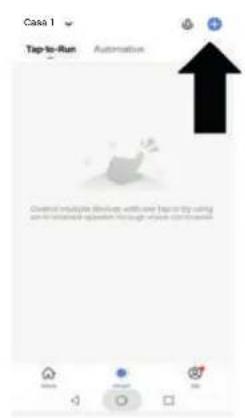
text_image
Case 1 Tap-to-Run Automation Control multiple devices with one step in try using on the related question through which continues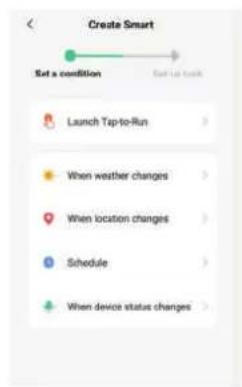
text_image
Create Smart Set a condition Get Up Back Launch Tap-to-Run When weather changes When location changes Schedule When device status changes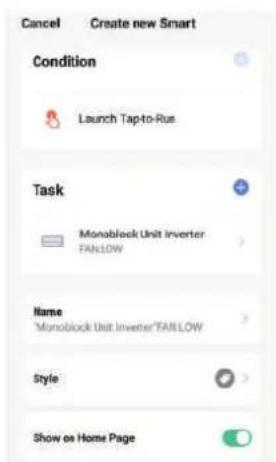
text_image
Cancel Create new Smart Condition Launch Tap-to-Rus Task Monoblock Unit Inverter FAN10W Name "Monoblock Unit Inverter"FANLOW" Style Show on Home Pagetext_image
Select Function Power > Set Temp > Temp Current > MODE > FAN >text_image
Casa 1 Welcome Home Set your Home location for more information All Devices Manoblock Unit Inverter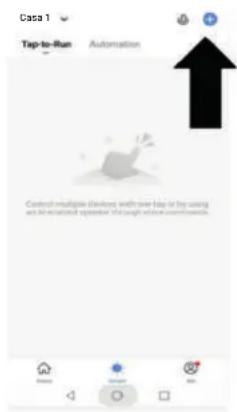
text_image
Casa 1 Top-to-Run Automation Control multiple devices with over tape or key using and all automated operation through voice commands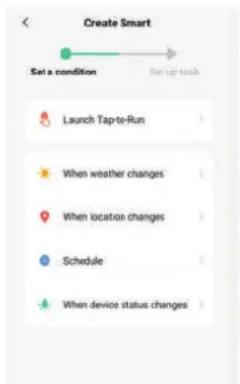
text_image
Create Smart Set a condition Start up task Launch Tap-to-Run When weather changes When location changes Schedule When device status changes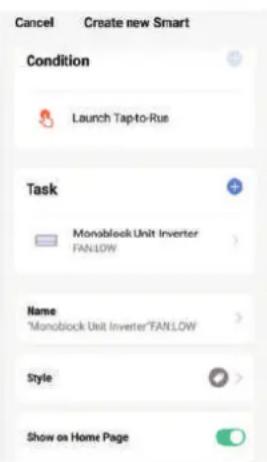
text_image
Cancel Create new Smart Condition Launch Tap-to-Rus Task Monoblock Unit Inverter FANLOW Name "Monoblock Unit Inverter"FANLOW Style Show on Home Pagetext_image
Select Function Power > Set Temp > Temp Current > MODE > FAN >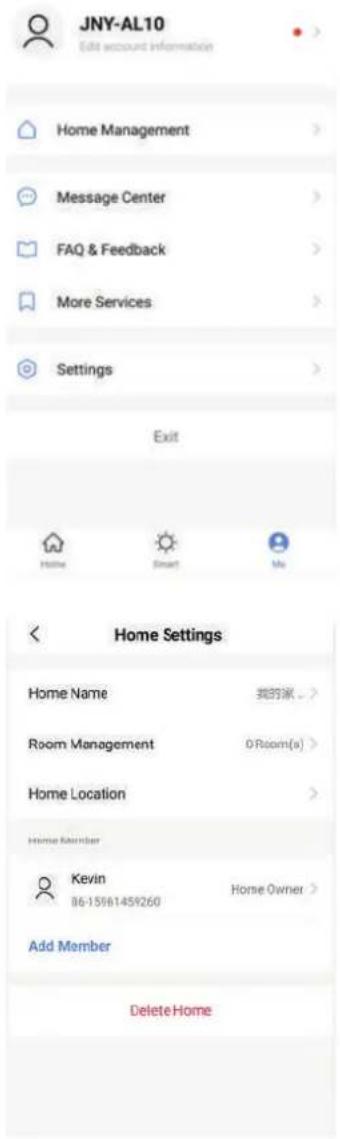
text_image
JNY-AL10 Edit account information Home Management Message Center FAQ & Feedback More Services Settings Exit Home Settings Home Name 我的家 > Room Management DRoom(a) > Home Location > Home Member Kevin Home Owner > B6-15981459260 Add Member Delete HomeMOI
text_image
Account and Security Mobile Number > Email Unbound > Region Finland Change Login Password > Pattern Lock Not Set > Delete Account >text_image
More Services My Order Featured Cloud Storage for Cameras Third-Party Voice Services Alexa Google Assistant SmartThings XIAODU Tencent Xiaowei DingDong IFTTT Google Fit Data Synch...L'INTÉGRATION
DIAGRAMA DO PRODUTOII
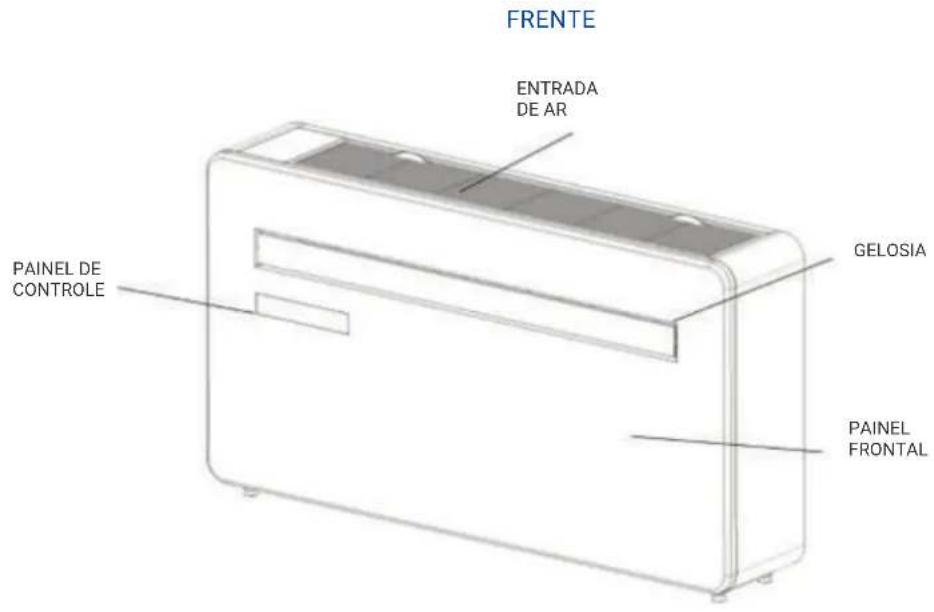
text_image
FRENTE ENTRADA DE AR GELOSIA PAINEL DE CONTROLE PAINEL FRONTALVOLTAR
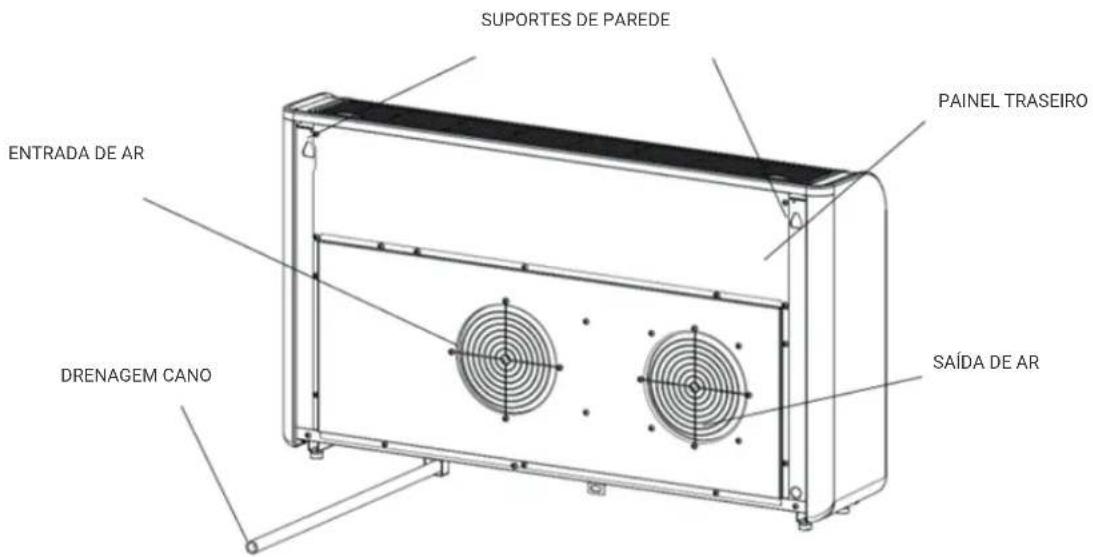
text_image
SUPORTES DE PAREDE PAINEL TRASEIRO ENTRADA DE AR DRENAGEM CANO SAÍDA DE ARDIAGRAMA APENAS PARA FINS ILUSTRATIVOS
CARACTERÍSTICAS
natural_image
Line drawing of a rectangular electronic device with a recessed top and side slots (no text or symbols)AR CONDICIONADO
natural_image
Simple diagram with dots and circles, no text or symbols presentMODELO DE PAREDE
DUTO DE PLÁSTICO
FOLHA (X2)
SUPORTE DE PAREDE
CONTROLE REMOTO
7 PARAFUSOS (5×60mm)
7 PCS PLUGUES DE PAREDE

BANDA DE VEDAÇÃO
DIAGRAMAS APENAS PARA FINS ILUSTRATIVOS
INSTALAÇÃO
FERRAMENTAS NECESSÁRIAS
NIVEL ESPIRITUAL
FITA MÉTRICA

LAPIZ
natural_image
Simple line drawing of a rectangular object with three diagonal lines and a protruding rod (no text or symbols)BROCA NÚCLEO 180mm
natural_image
Simple line drawing of a handheld electric drill (no text or symbols)FURA
LÁPIS

BROCA DE ALVENARIA
DE 8mm

natural_image
Close-up of a twist drill bit (no text or symbols visible)BROCA DE ALVENARIA DE 25mm
natural_image
Pure mechanical diagram showing a lever and pivot point without any text or symbolsnatural_image
Diagram showing two cylindrical tanks mounted on a brick wall, one with directional arrows indicating movement or force (no text or symbols present)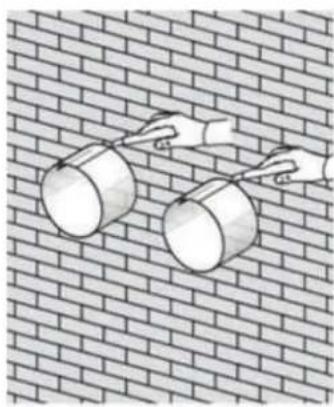
natural_image
Illustration of two large cylindrical objects hanging from a brick wall, with no text or symbols present.natural_image
Illustration of a hand using a tool to install a wall-mounted cable, next to a brick wall with a pipe fitting (no text or symbols present)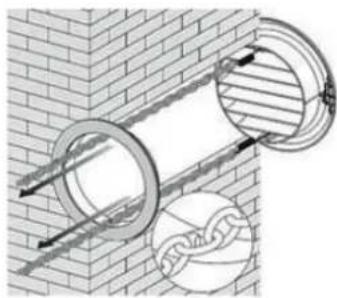
natural_image
Diagram of two circular pipe fittings inserted into a brick wall, with one showing internal structure and the other a chain link (no text or symbols)natural_image
Diagram of a brick wall with a pipe and cable, showing structural details (no text or symbols)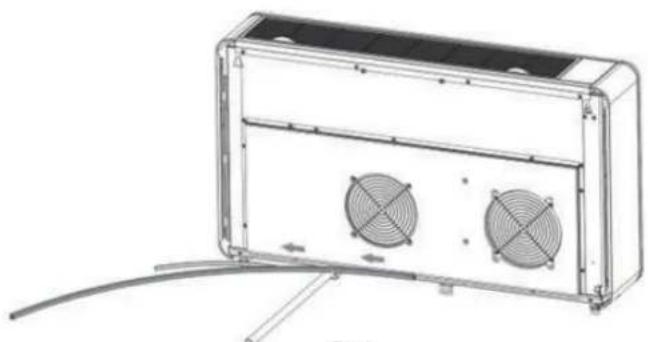
natural_image
Technical line drawing of a rectangular electronic device with two fans and a cable, no text or symbols presentFig 1
3. INSTALAÇÃO
natural_image
Technical diagram of a wall-mounted air conditioner unit with two fans, shown in two views (Fig 2), no text or symbols present.Nota:
natural_image
Illustration of a white air conditioner unit with ventilation grilles, placed on a grid background (no text or symbols)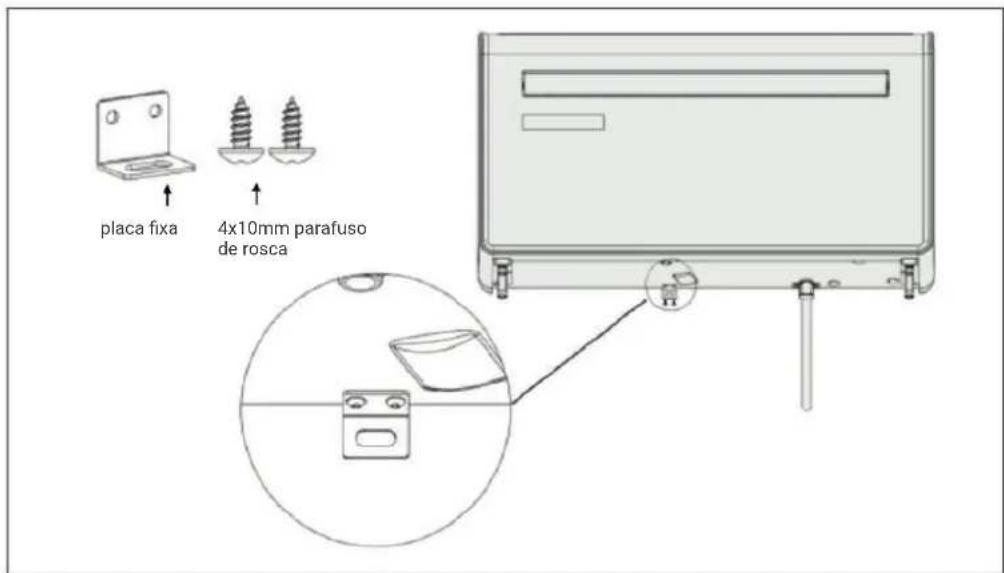
text_image
placa fixa 4x10mm parafuso de roscaPAINEL DE CONTROLE
text_image
QR code image containing encoded data, no visible human-readable text
text_image
GIA PPGIApp
Para Android
natural_image
Blue square icon with a white abstract symbol resembling a stylized letter or logo (no text or numbers)Nota
text_image
GIApp" Log In Sign Up
text_image
Register Spain Email Address I Agree Privacy Policy and User Agreement Get Verification Codetext_image
Enter Verification Code Autofill code from messages at to your email oscar@groupsa.com Resend ($3s) Didn't get a code?€ & _ - 1 2 3 ?
@ ( ) = + 4 5 6 ! (&= ' ; % / 7 8 9 abc " → * , 0 .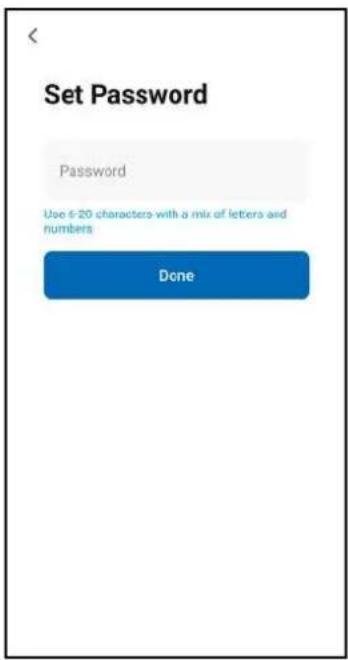
text_image
Set Password Password Use 6-20 characters with a mix of letters and numbers DoneINICIAR SESSÃO
text_image
GIApp™ Log In Sign Up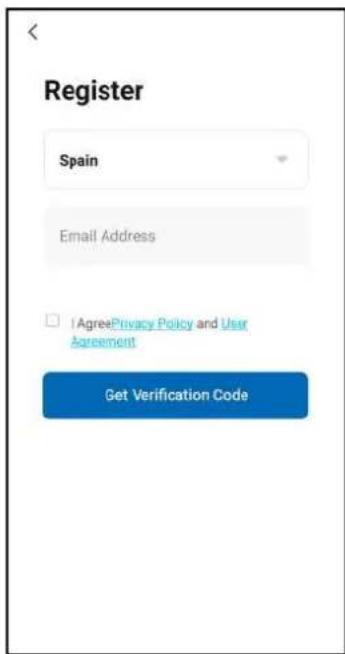
text_image
Register Spain Email Address AgreePrivacy Policy and User Agreement Get Verification CodeADICIONAR UM DISPOSITIVO
text_image
No devices Add Device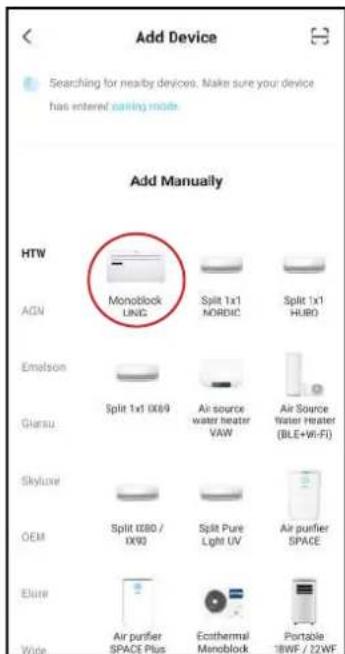
text_image
Add Device Searching for nearby devices. Make sure your device has entered saving mode. Add Manually HTW AGN EMolson Glarau Skyluxe OEM Elite Wire Monoblock UNC Split 1x1 NORDIC Split 1x1 HURO Split 1x1 (0X9) Air source water heater VAW Air Source Water Heater (BLE+Wi-Fi) Split 1080 / DX90 Split Pure Light UV Air purifier SPACE Air purifier SPACE Plus Ecothermal Monoblock Portable 1BWF / 22WF7. ADICIONAR UM DISPOSITIVO
text_image
Reset the device Press and hold the RESET button for 5 seconds until the indicator blinks (subject to the user manual). Confirm the indicator is blinking slowly. Next Resetting Devices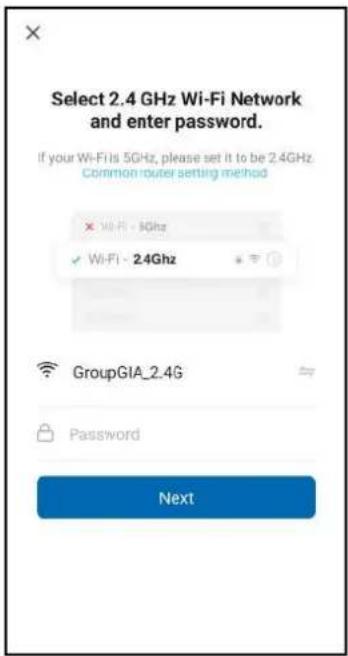
text_image
Select 2.4 GHz Wi-Fi Network and enter password. If your Wi-Fi is 5GHz, please set it to be 2.4GHz. Common router setting method Wi-Fi - 3GHz Wi-Fi - 2.4GHz GroupGIA_2.4G Password Nexttext_image
Enter Verification Code ! Autofill code from messages at to your email oscar@groupon.com Hesend ($1s) Didn't get a code?€ & _ - 1 2 3 ?
@ ( ) = + 4 5 6 ! (&= ' : % / 7 8 9 abc " * , 0 .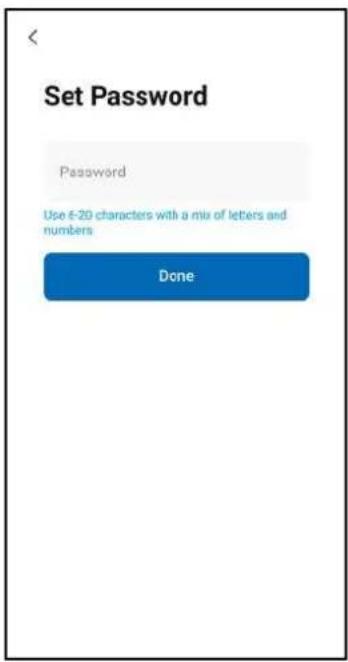
text_image
Set Password Password Use 6-20 characters with a mix of letters and numbers Donetext_image
Connecting Device NEW THE NETWORK STUDIO. Make one your device to save the server. 01:54 Scan devices. Tingate or Cloud. Holdiza the device.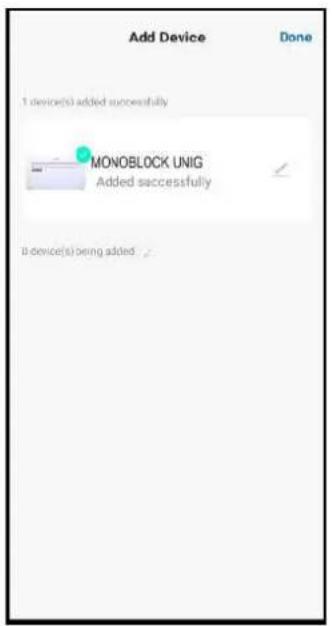
text_image
Add Device Done 1 device(s) added successfully MONOBLOCK UNIG Added successfully 0 device(s) being added.Avisos
text_image
Home Management Create a home Join a hometext_image
Cancel Create a home Home Name* Enter Home Location Set Rooms: Living Room Master Bedroom Second Bedroom Dining Room Kitchen Study Roomtext_image
Cancel Add Room Save Room Name Recommend Living Room Master Bedroom Second Bedroom Dining Room Kitchen Study Room Porch Balcony Kids Room Closettext_image
Control Panel Not playing TP-LNK _BSTF Bluetooth h Flashlight Vibration Auto-rotate Huawei Share Airplane media Mobile data Location Screen shot Eye Comfort Personal hotspot Screen Recorder Wireless Projectiontext_image
Devices to be added: 1 NewBook Unit Addtext_image
Enter Wi-Fi Information Choose Wi-Fi and enter password TP-LINK_B57F ...... Nexttext_image
Add Device 1 devices(1) being asked Monoblock Unit Being addedtext_image
Add Device 1 denote(s) added successfully Monableack Unit Added successfully Done
text_image
Monoblock Unit Temperature 20°C 20 °F ON8. ADICIONAR MAIS DISPOSITIVOS
text_image
No device Devices to be added: 1 Monoblock Unit Add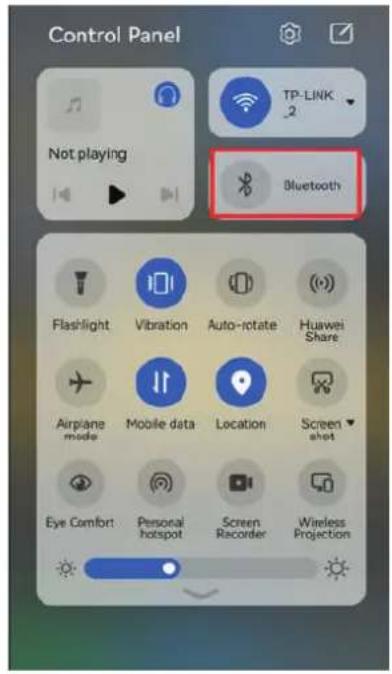
text_image
Control Panel Not playing TP-LINK 2 Bluetooth Flashlight Vibration Auto-rotate Huawei Share Airplane mode Mobile data Location Screen shot Eye Comfort Personal hotspot Screen Recorder Wireless ProjectionCONEXÃO USANDO CONEXÃO RÁPIDA
text_image
Add Device Searching for nearby devices. Make sure your device has entered passing mode. Add Manually HTW AON Monotlock UNIG Split 1x1 NORDIC Split 1x1 HUBO Emulsion Glarus Split 1x1 DX69 Air source water heater VAW Air Source Water Heater (BLE+Wi-Fi) Skyluxe DEM Split Ø80 / DX90 Split Pure Light UV Air purifier SPACE Eluxe Air purifier Ethyroid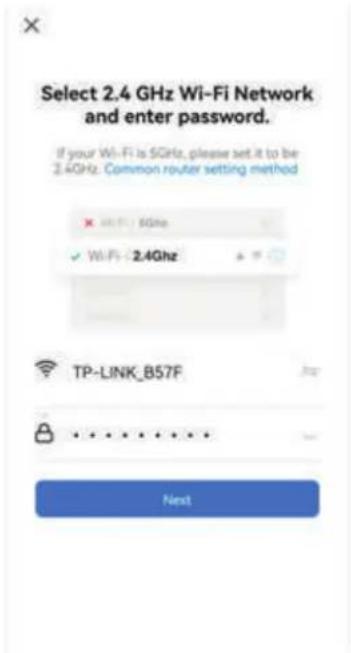
text_image
Select 2.4 GHz Wi-Fi Network and enter password. If your Wi-Fi is 5GHz, please set it to be 2.4GHz. Common router setting method × Wi-Fi: 5GHz ✓ Wi-Fi: 2.4GHz TP-LINK_B57F Nexttext_image
Reset the device Press and hold the RESET button for 5 seconds until the indicator blinks Select the status of the indicator light or hear the beep: Blink Slowly Blink Quicklytext_image
Add Device PlanStack Unit Dome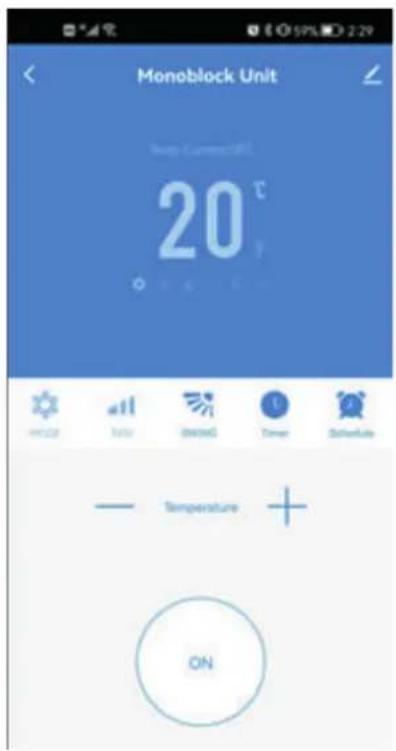
text_image
Monoblock Unit Temp Current: 15°C 20 °C Temperature ON8. ADICIONAR MAIS DISPOSITIVOS
CONEXÃO USANDO O MODO AP (MÉTODO ALTERNATIVO)
text_image
No devices Add Devicetext_image
Add Device Searching for nearby devices. Make sure your device has entered joining needs Add Manually HTW Monoclock UNVG Split 1x1 NORGC Split 1x1 HUBG AGN Emulsion Split 1x1 3089 Air source water heater VAN Air Source Water Heater (BLT+40-FI) Glens SkyAue OEM Split 000 / 0X90 Split Pure Light UV Air surfier SPACE Eliastext_image
Select 2.4 GHz Wi-Fi Network and enter password. If your Wi-Fi is 5GHz, please set it to be 2.4GHz. Common router setting method TP-LINK_B57F Nexttext_image
Select 2.4 GHz Wi-Fi Network and enter password. If your Wi-Fi is SGHz, please set it to be 2.4GHz. Common router setting method TP-LINK_B57F Next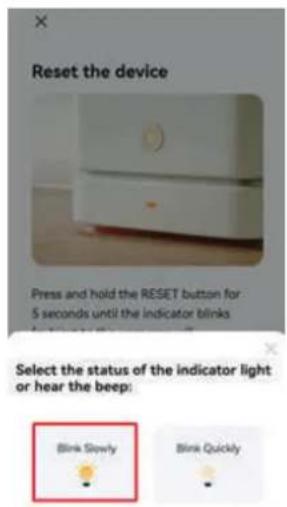
text_image
Reset the device Press and hold the RESET button for 5 seconds until the indicator blinks Select the status of the indicator light or hear the beep: Blink Slowly Blink Quickly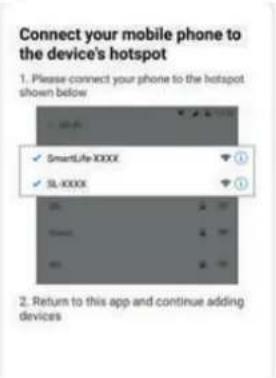
text_image
Connect your mobile phone to the device's hotspot 1. Please connect your phone to the hotspot shown below ✓ SmartLife-XXXX ✓ SL-XXXX 2. Return to this app and continue adding devicestext_image
Casa 1 Welcome Home Set your home location for more Information All Devices Living Room Master ... Monoblock Unit Inverter Home Smart Metext_image
All Devices Living Room Master Monoblock Unit Invertertext_image
Casa 1 Welcome Home Set price home location for more information. All Devices Monoblock Unit Inverter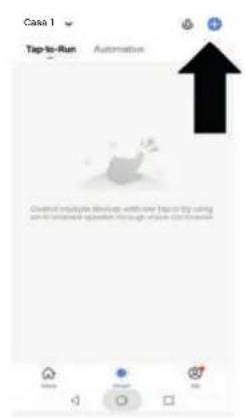
text_image
Case 1 Tap-to-Run Automation Control multiple devices with one step in try using on the related question through which continues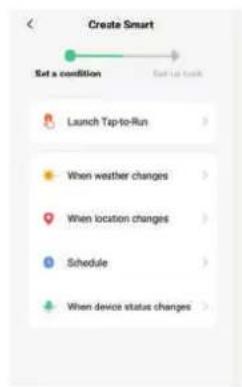
text_image
Create Smart Set a condition Set to Back Launch Tap-to-Run When weather changes When location changes Schedule When device status changes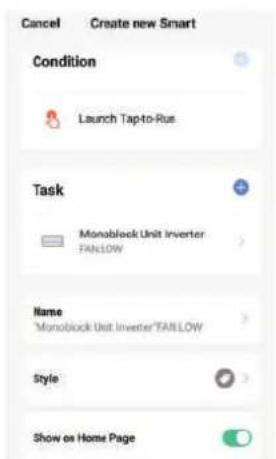
text_image
Cancel Create new Smart Condition Launch Tap-to-Rus Task Monoblock Unit Inverter FANLOW Name Monoblock Unit Inverter/FANLOW Style Show on Home Pagetext_image
Select Function Power > Set Temp > Temp Current > MODE > FAN >text_image
Casa 1 Welcome Home Set your Home location for more information All Devices Monoblock Unit Inverter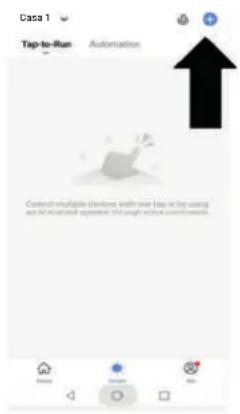
text_image
Casa 1 Top-to-Run Automation Control multiple devices with one bit or by using and An automated operation through where commands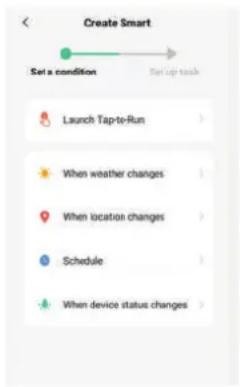
text_image
Create Smart Set a condition Start up task Launch Tap-to-Run When weather changes When location changes Schedule When device status changes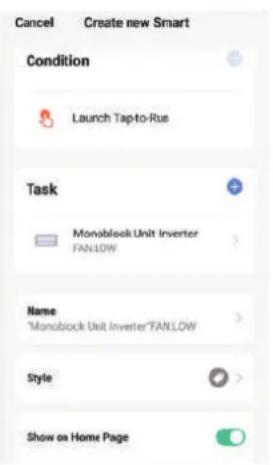
text_image
Cancel Create new Smart Condition Launch Tap-to-Rus Task Monoblock Unit Inverter FANLOW Name "Monoblock Unit Inverter"FANLOW Style Show on Home Pagetext_image
Select Function Power > Set Temp > Temp Current > MODE > FAN >text_image
JNY-AL10 Edit account information Home Management Message Center FAQ & Feedback More Services Settings Exit Home Settings Home Name 我的家 > Room Management DRoom(a) > Home Location > Home Member Kevin Horse Owner > 86-15981459260 Add Member Delete HomeA MÍ
text_image
Account and Security Mobile Number > Email Unbound > Region Finland Change Login Password > Pattern Lock Not Set > Delete Account >text_image
More Services My Order Featured Cloud Storage for Cameras Third-Party Voice Services Alexa Google Assistant SmartThings XIAODU Tencent Xiaowei DingDong IFTTT Google Fit Data Synch...INTEGRAÇÃO
natural_image
Line drawing of a rectangular electronic device with a recessed panel (no text or symbols)CLIMATIZZAZIONE
natural_image
Simple diagram with dots and circles, no text or symbols presentMODELLO DELLA PARETE
CONDOTTI E LASTRE
DI PLASTICA (X2)

natural_image
Simple line drawing of a diagonal line with no text or symbolsSTAFFA A PARETE
CONTROLLO REMOTO
GRUPPO COPERCHIO DI VENTILAZIONE
GRUPPO COPERCHIO DI VENTILAZIONE (X2)
(CATENA, ANELLO INTERNO
E COPERTURA ESTERNA)
PIASTRA FISSA
VITE PER
MASCHIATURA 2 PZ
(4x10mm)
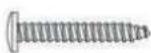
7 VITI (5×60 mm)
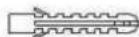
7 TAPPI A MURO (8×40 mm)

FASCIA DI SIGILLATURA
DIAGRAMMA A SCOPO PURAMENTE ILLUSTRATIVO
natural_image
Simple line drawing of a rectangular object with three diagonal lines and a protruding shaft (no text or symbols)TRAPANO A COLONNA DA 180 MM
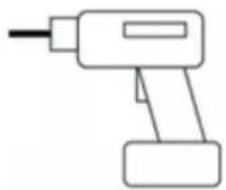
natural_image
Simple line drawing of a handheld electric drill (no text or symbols)TRAPANO
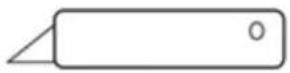
CUCITORE

BRITTO DA 8 mm PER
MASTRATURA

natural_image
Close-up of a twist drill bit (no text or symbols visible)FRESA da 25 mm PER MURATURA
natural_image
Isometric diagram showing a ceiling-mounted air conditioner unit and its internal panel, placed on a checkered floor (no text or symbols)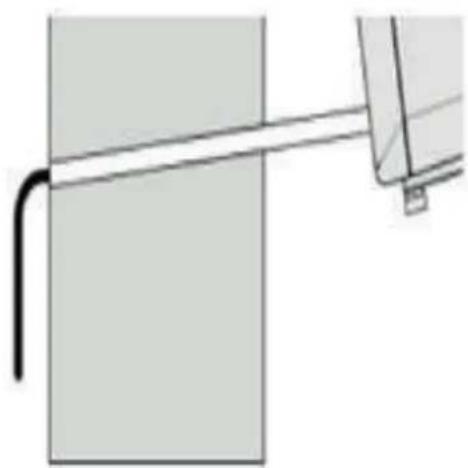
natural_image
Pure mechanical diagram showing a lever and pivot point without any text or symbolsnatural_image
Diagram showing two white oval shapes on a brick wall with a diagonal line and directional arrows (no text or symbols)natural_image
Diagram showing two cylindrical tanks mounted on a brick wall, one with directional arrows indicating movement or force (no text or symbols present)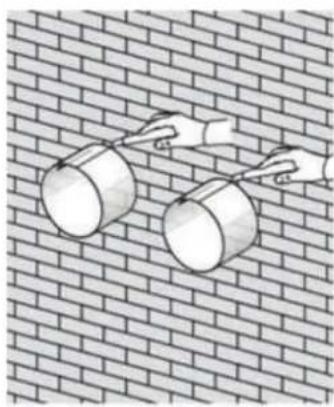
natural_image
Illustration of two large cylindrical objects hanging from a brick wall, with no text or symbols present.natural_image
Illustration of a hand using a tool to install a wall-mounted component, next to a brick wall with a saw (no text or symbols present)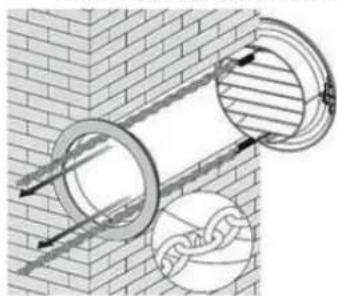
natural_image
Diagram of two circular pipe fittings mounted on a brick wall, with one showing internal structure and the other showing chain links (no text or symbols)natural_image
Technical line drawing of a rectangular electronic device with two fans and a cable, no text or symbols presentFig 1
3. INSTALLAZIONE
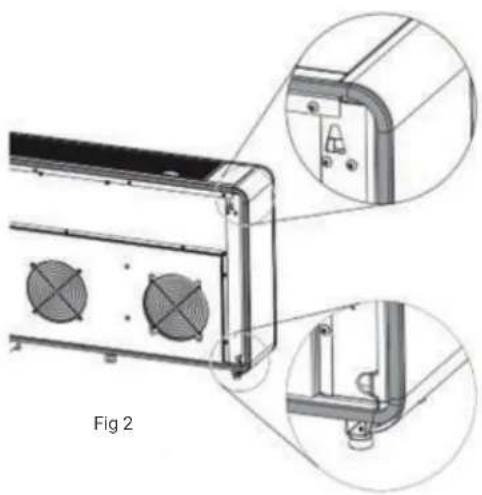
natural_image
Technical diagram of a wall-mounted HVAC unit with two fans and mounting brackets, shown in two views (no text or symbols)Nota:
natural_image
Illustration of a white air conditioner unit with ventilation grilles, placed on a grid background (no text or symbols)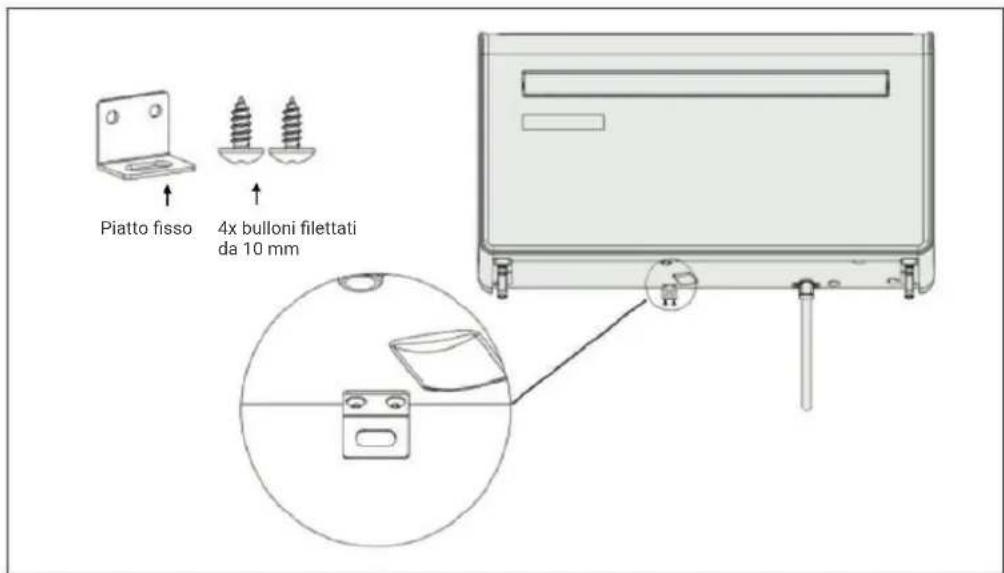
text_image
QR code image containing encoded data, no visible human-readable text
text_image
GIApp™GIApp
Para Android
natural_image
Blue square icon with white abstract geometric design resembling a stylized letter 'A' (no text or symbols)Nota
text_image
GIApp" Log In Sign Up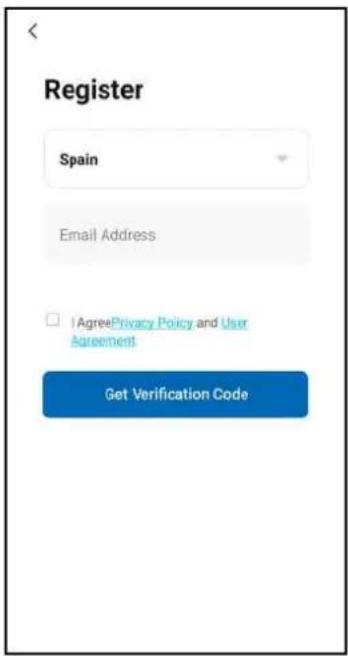
text_image
Register Spain Email Address I Agree Privacy Policy and User Agreement Get Verification Codetext_image
Enter Verification Code Autofill code from messages at to your email oscar@groupsa.com Resend ($3s) Didn't get a code?€ & _ - 1 2 3 ?
@ ( ) = + 4 5 6 ! (&= ' ; % / 7 8 9 abc " → * , 0 .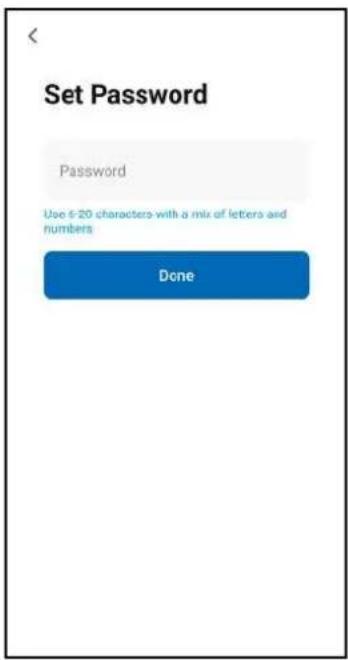
text_image
Set Password Password Use 6-20 characters with a mix of letters and numbers DoneACCESSO
text_image
GIApp™ Log In Sign Up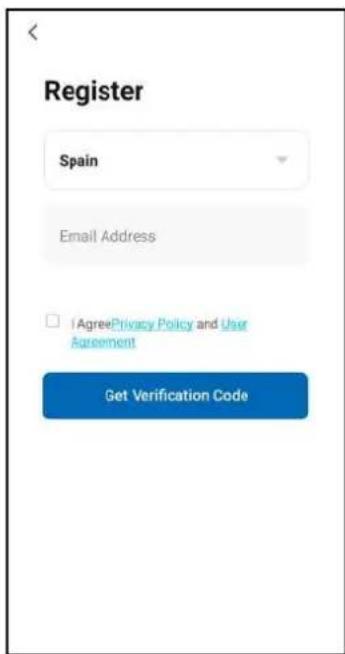
text_image
Register Spain Email Address □ AgreePrivacy Policy and User Agreement Get Verification CodeAGGIUNGI UN DISPOSITIVO
text_image
No devices Add Device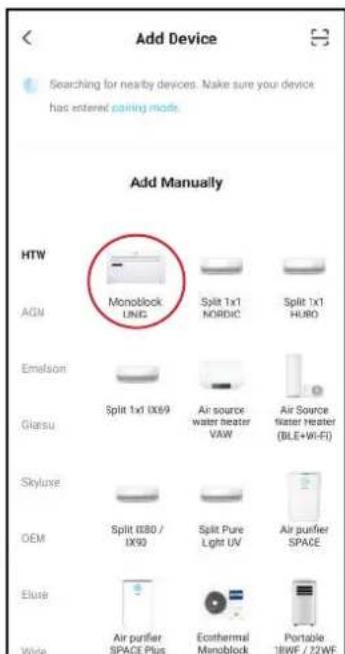
text_image
Add Device Searching for nearby devices. Make sure your device has entered pairing mode. Add Manually HTW AGN Emalson Glasu Skyluxe OEM Elube White Monoklock UNIC Split 1x1 NORDIC Split 1x1 HURO Split 1x1 (IX69) Air source water heater VAW Air Source water heater (BLE+VI-FI) Split I880 / IX90 Split Pure Light UV Air purifier SPACE Air purifier SPACE Plus Ecothermal Monoblock Portable 18WF / 22WF7. AGGIUNGERE UN DISPOSITIVO
text_image
Reset the device Press and hold the RESET button for 5 seconds until the indicator blinks (subject to the user manual). Confirm the indicator is blinking slowly. Next Resetting Devices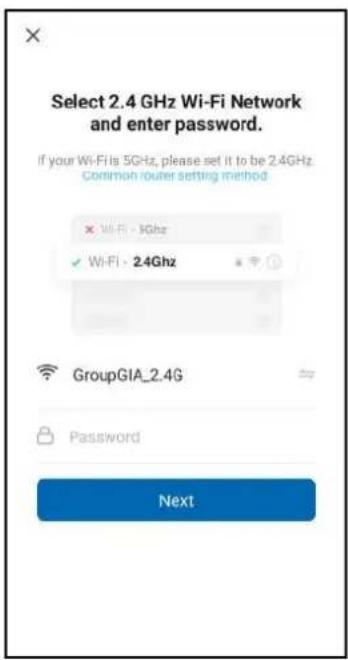
text_image
Select 2.4 GHz Wi-Fi Network and enter password. If your Wi-Fi is 5GHz, please set it to be 2.4GHz. Common router setting method × Wi-Fi · 10Ghz ✓ Wi-Fi · 2.4Ghz GroupGIA_2.4G Password Nexttext_image
Enter Verification Code Autofill code from messages - at to your email oscarj@grouppa.com Herein (SIs) Didn't get a code?€ & _ - 1 2 3 ?
@ ( ) = + 4 5 6 ! (&* ' : % / 7 8 9 abc " → * , 0 .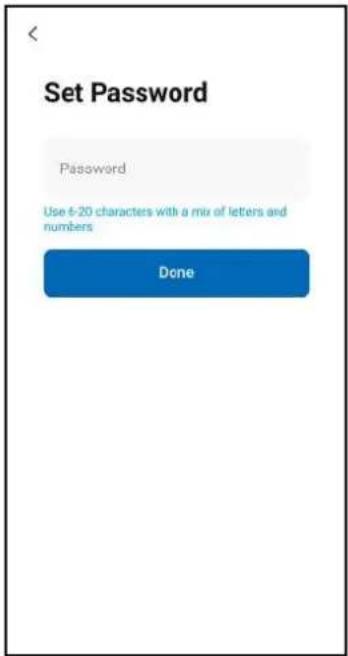
text_image
Set Password Password Use 6-20 characters with a mix of letters and numbers Donetext_image
Connecting Device NEW THE NETWORK STUDIO. Make one your device in open the route 01:54 Scan devices. Tingator or Cloud. Initiate the device.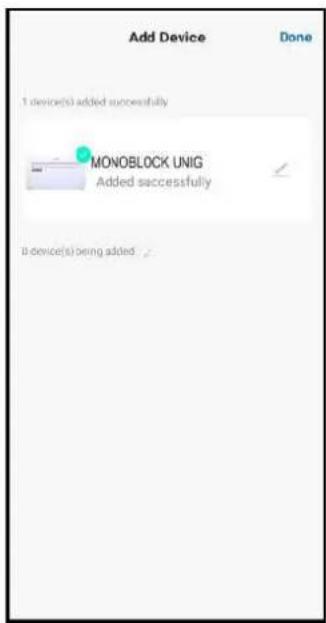
text_image
Add Device Done 1 device(s) added successfully MONOBLOCK UNIG Added successfully B device(s) being added.• Avvisi
text_image
Home Management Create a home Join a hometext_image
Cancel Create a home Home Name* Enter Home Location Set Rooms: Living Room Master Bedroom Second Bedroom Dining Room Kitchen Study RoomIMPOSTARE LA PROPRIA POSI-
text_image
Cancel Add Room Save Room Name Recommend Living Room Master Bedroom Second Bedroom Dining Room Kitches Study Room Porch Balcony Kids Room Closettext_image
Control Panel Not playing TP-LNK _BSTF Bluetooth h Flashlight Vibration Auto-rotate Huawei Share Airplane media Mobile data Location Screen shot Eye Comfort Personal hotspot Screen Recorder Wireless Projectiontext_image
Devices to be added: 1 Monochrome Unit Addtext_image
Enter Wi-Fi Information Choose Wi-Fi and enter password TP-LINK_B57F ...... Nexttext_image
Add Device 1 devices(1) being asked Monoblock Unit Being addedtext_image
Add Device 1 denote(s) added successfully Monableack Unit Added successfully Done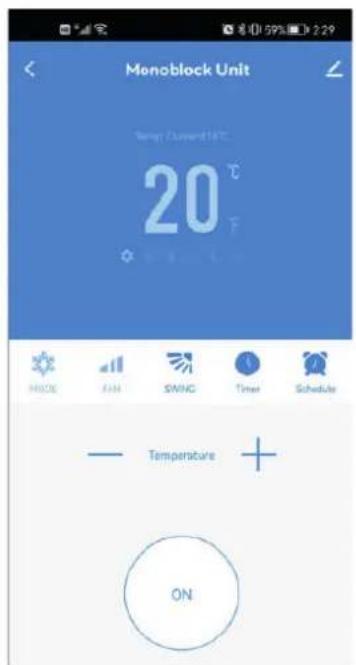
text_image
Monoblock Unit Temp: Current 14°C 20 °C HIND FIN SWING Timer Schedule Temperature ON8. AGGIUNGERE ALTRI DISPOSITIVI
text_image
No device Devices to be added: 1 Monoblock Unit Add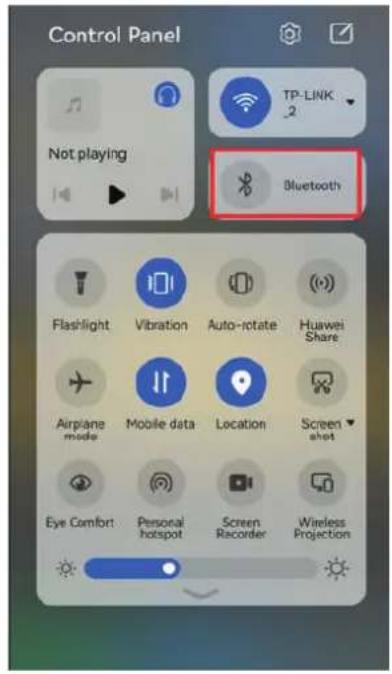
text_image
Control Panel Not playing TP-LINK Bluetooth Flashlight Vibration Auto-rotate Huawei Share Airplane mode Mobile data Location Screen shot Eye Comfort Personal hotspot Screen Recorder Wireless ProjectionCONNESSIONE TRAMITE ATTACCO RAPIDO
text_image
No devices Add Device 150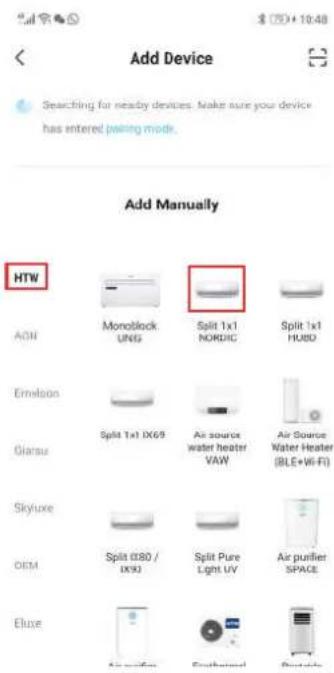
text_image
Add Device Searching for nearby devices. Make sure your device has entered joining mode. Add Manually HTW AON Monotlock UNG Split 1x1 NORDIC Split 1x1 HUBO Emelson Giaisu Split 1x1 IX69 Air source water heater VAW Air Source Water Heater (BLE+Wi-Fi) Skyluxe OEM Split Ø80 / DKD Split Pure Light UV Air purifier SPACE Eluxe Air purifier Euphoroid Productor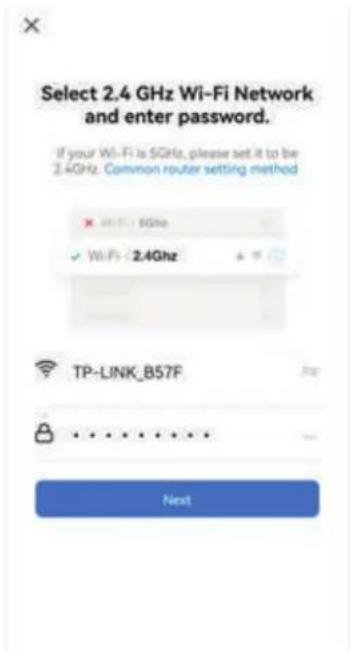
text_image
Select 2.4 GHz Wi-Fi Network and enter password. If your Wi-Fi is 5GHz, please set it to be 2.4GHz. Common router setting method × Wi-Fi: 5GHz ✓ Wi-Fi: 2.4GHz TP-LINK_B57F Nexttext_image
Reset the device Press and hold the RESET button for 5 seconds until the indicator blinks Select the status of the indicator light or hear the beep: Blink Slowly Blink Quicklytext_image
Add Device PlanStack Unit Dome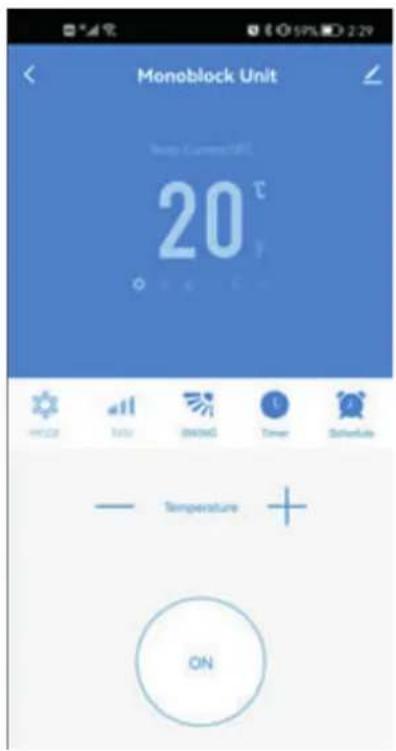
text_image
Monoblock Unit Temp Current: 15°C 20 °C Temperature ON8. AGGIUNGERE ALTRI DISPOSITIVI
CONNESSIONE IN MODALITÀ AP (METODO ALTERNATIVO)
text_image
No devices Add Devicetext_image
Add Device Searching for nearly devices. Make sure your device has entered parting needs Add Manually HTW AON Monoclock UNVG Split 1x1 NORDC Split 1x1 FUB2 Emilion Split 1x1 369 Air source water heater VAV Air Source Water Heater (BLC+40-FI) Glam Split 1x1 369 Air source water heater VAV Air Source Water Heater (BLC+40-FI) SkyLabs OEM Split 000 / 0500 Split Pure Light UV Air outflow SPACE Bluetext_image
Select 2.4 GHz Wi-Fi Network and enter password. If your Wi-Fi is 5GHz, please set it to be 2.4GHz. Common router setting method XP-LINK_B57F Nexttext_image
Select 2.4 GHz Wi-Fi Network and enter password. If your Wi-Fi is 5GHz, please set it to be 2.4GHz. Common router setting method TP-LINK_B57F Next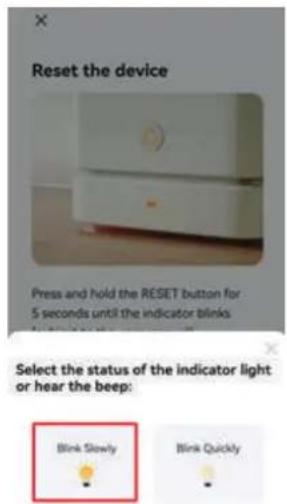
text_image
Reset the device Press and hold the RESET button for 5 seconds until the indicator blinks Select the status of the indicator light or hear the beep: Blink Slowly Blink Quickly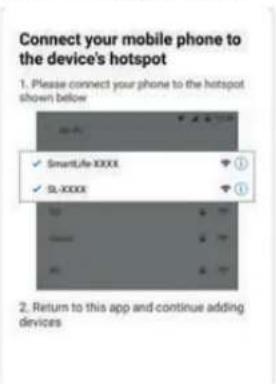
text_image
Connect your mobile phone to the device's hotspot 1. Please connect your phone to the hotspot shown below ✓ SmartLife-XXXX ✓ SL-XXXX 2. Return to this app and continue adding devicestext_image
All Devices Living Room Master Monoblock Unit Invertertext_image
Casa 1 Welcome Home Set price home location for more information. All Devices Monoblock Unit Inverter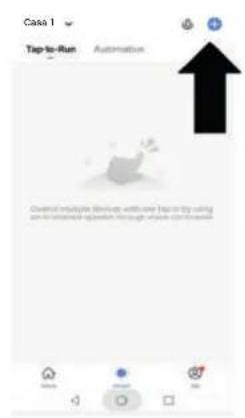
text_image
Case 1 Tap-to-Run Automation Control multiple devices with one step in try using on the related question through which continues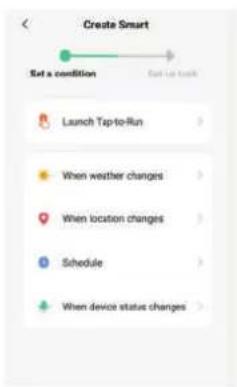
text_image
Create Smart Set a condition Start up track Launch Tap-to-Run When weather changes When location changes Schedule When device status changes
text_image
Cancel Create new Smart Condition Launch Tap-to-Rus Task Monoblock Unit Inverter FAN10W Name Monoblock Unit Inverter/FAN10W Style Show on Home Pagetext_image
Power Set Temp Temp Current MODE FANtext_image
Casa 1 Welcome Home Set your Home location for more information All Devices Monoblock Unit Inverter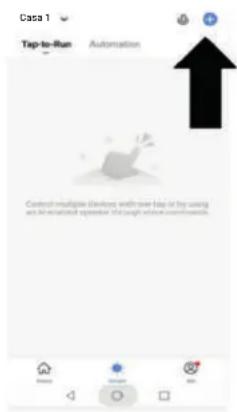
text_image
Casa 1 Top-to-Run Automation Control multiple devices with over tape or key using and all installed operation through video command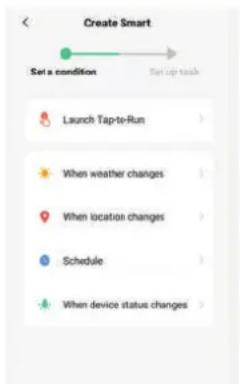
text_image
Create Smart Set a condition Start up task Launch Tap-to-Run When weather changes When location changes Schedule When device status changes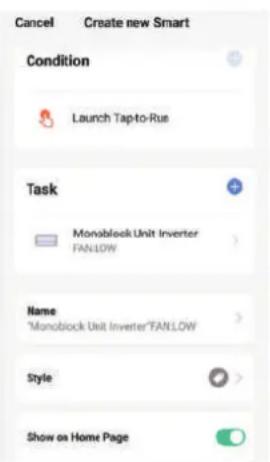
text_image
Cancel Create new Smart Condition Launch Tap-to-Rus Task Monoblock Unit Inverter FANLOW Name "Monoblock Unit Inverter"FANLOW Style Show on Home Pagetext_image
Select Function Power > Set Temp > Temp Current > MODE > FAN >text_image
JNY-AL10 Edit account information Home Management Message Center FAQ & Feedback More Services Settings Exit Home Settings Home Name 我的家 > Room Management DRoom(a) > Home Location > Home Member Kevin Horse Owner > 86-15981459260 Add Member Delete HomeME
text_image
Account and Security Mobile Number > Email Unbound > Region Finland Change Login Password > Pattern Lock Not Set > Delete Account >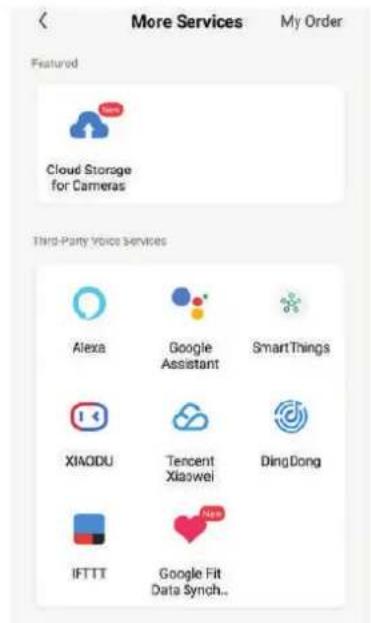
text_image
More Services My Order Featured Cloud Storage for Cameras Third-Party Voice Services Alexa Google Assistant SmartThings XIAODU Tencent Xiaowei DingDong IFTTT Google Fit Data Synch...INTEGRAZIONE
info@htwspain.com - www.htwspain.com
ESPAÑA
info@htwspain.com
FRANCE
info@htwfrance.com
PORTUGAL
info@htw.pt
ITALY
info.it@htwspain.com
INFORMACIÓN SAT
sat@groupgia.com
+34 933904220
sat.fr@groupgia.com
+33 465430168
sat.pt@groupgia.com sat.it@groupgia.com
+39 05641715509


At the end of its working life, the product must not be disposed of as urban waste. It must be taken to a special local authority deifferentiated waste collection centre or to a dealer providing this service. Disposing of a household appliance separately avoids possible negative consequences for the environment and health deriving from inappropriate disposal and enables the constituent materials to be recovered to obtain significant savings in energy and resources. As a reminder of the need to dispose of household appliances separately, the product is marked with a crossed-outwheeled dustbin.
AVERTISSEMENTS POUR L'ÉLIMINATION CORRECTE DU PRODUIT AUX TERMES DE LA DIRECTIVE 2002/96 / CE.