
RM350D - Robot mower MAKITA - Free user manual and instructions
Find the device manual for free RM350D MAKITA in PDF.

| Product type | Robotic lawnmower |
| Brand | Makita |
| Model | RM350D |
| Rated voltage | 18 V DC |
| Battery capacity | 5.0 Ah (Lithium-ion) |
| Dimensions (L x W x H) | 700 x 560 x 270 mm |
| Weight | 13.7 kg |
| Blade motor idling speed | 2,300 min⁻¹ |
| Maximum mowing area | 3,500 m² |
| Maximum slope | 26° (49%) |
| Mowing width | 240 mm |
| Cutting height | 20 to 60 mm (electric adjustment in 9 positions) |
| Number of blades | 3 |
| Replacement blade | Ref. 1913M9-3 |
| Protection rating | IPX4 |
| Power adapter | AAD01 |
| Charging station | RST001 |
| Included cables | Boundary wire and guide wire |
| Sound pressure level | 70 dB(A) |
| Sound power level | 59 dB(A) |
| Safety | PIN code, anti-theft alarm, emergency stop, lift and tilt sensors |
| Main functions | Automatic mowing, weekly scheduling, spiral cutting, random navigation, automatic return to station |
| Maintenance | Regular cleaning, blade replacement, periodic inspection |
| Spare parts available | Blade set, cable repair kit, pegs, connectors |
| Repairability | Replaceable battery (removal by disassembly), Makita after-sales service |
Frequently Asked Questions - RM350D MAKITA
User questions about RM350D MAKITA
0 question about this device. Answer the ones you know or ask your own.
Ask a new question about this device
Download the instructions for your Robot mower in PDF format for free! Find your manual RM350D - MAKITA and take your electronic device back in hand. On this page are published all the documents necessary for the use of your device. RM350D by MAKITA.
USER MANUAL RM350D MAKITA
Safety precautions. 15
Noise 16
Declarations of Conformity 16
Names of parts 16
Introduction of separately sold items 16
PREPARATION 16
Turning the power on/off. 17
Charging the Robotic Mower 17
Things that should be understood before use. 17
HOW TO USE 18
Control panel operations 18
Starting mowing. 18
Stopping mowing. 19
SETTING MENUS 19
Start Mowing Menu 20
Mowing with automatic operation and charging 20
Mowing without automatic charging. 20
Starting auto mowing at the desired timing (Putting scheduled mowing on hold) 20
Mowing in a spiral pattern 20
Park Preferences 21
Returning the Robotic Mower to the charging station 21
Returning the Robotic Mower to the charging station and restarting operation at the scheduled time. 21
Returning the Robotic Mower to the charging station and restart
ing operation at the preset schedule. 21
Mowing Preferences 21
Changing and registering the mowing area 21
Scheduling mowing 21
Determining the cutting height 22
Navigation Preferences. 23
Setting the active search period for the guide signal. 23
Cutting the grass near the boundary. 23
Setting the movement distance to the mowing start point. 23
Selecting the departure method from the charging station.....23
Adjusting the departure angles from the charging station 24
Adjusting the width of offset navigation. 25
Mowing unmowed grass 25
Security Preferences 25
Setting the alarm sounding time 25
Changing the PIN code 26
Preventing wire signal interference. 26
Protecting the Robotic Mower from theft. 26
Other Settings. 26
Saving/ loading user preferences 26
Changing the date and time settings 26
Changing the display language 27
Resetting the user preferences 27
Browsing the product information 27
Managing the LED on/off time 27
Checking the details of operation errors 27
MAINTENANCE 28
Cleaning 28
Inspecting the mower blades 28
Replacing the mower blades 28
Periodic inspections 29
Handling after the season ends 29
When disposing of this product. 30
PROTECTION SYSTEM 30
Protection system and Error Indication 30
TROUBLESHOOTING 31
If you think there is a malfunction 31
INTRODUCTION
Specifications
| Model: RM350D | ||
| Rated voltage D.C. 18 V | ||
| Battery capacity 5.0 Ah | ||
| Dimensions(L x W x H) | 700 mm x 560 mm x 270 mm | |
| Weight 13.7 kg | ||
| No load motor speed Blade motor 2,300 min | -1 | |
| Maximum mowing area 3,500 m | 2 | |
| Maximum slope climbing angle 26° (49%) | ||
| Mower blade Swing back blade | 3 blades | |
| Part number of replacement mower blade 1913M9-3 | ||
| Mowing width 240 mm | ||
| Cutting height 20 mm - 60 mm | 9-step electric adjustment in 5 mm increments | |
| Protection degree | IPX4 | |
| Applicable AC adapter | AAD01 | |
| Applicable charging stations | RST001 | |
| Boundary wireGuide wire | Operating frequency band | 3.3 kHz - 50 kHz |
| Maximum magnetic field strength(measured according to EN303 447) | 38 dBμA/m | |
Due to our continuing program of research and development, the specifications herein are subject to change without notice.
Major features and AC adapter may differ from country to country.
Weight according to EPTA-Procedure 01/2014
Symbol marks
The followings show the symbols which may be used for the equipment. Be sure that you understand their meaning before use.
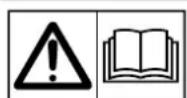
WARNING - Read user instructions before operating the machine.

WARNING - Keep a safe distance from the machine when operating.
The machine may throw objects and injury result.
WARNING - Set the anti-theft function and then turn off the power of the machine before working on or lifting the machine.
Otherwise the mower blade may injure your hand and foot.
The disabling device for this machine is a restart lock by the PIN code.
You can operate the restart lock in the anti-theft function settings.
If restart lock is enabled, you will be required to enter your PIN to restart the machine.
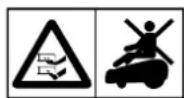
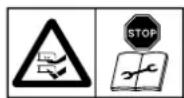
WARNING - Do not ride on the machine.
Otherwise the mower blade may injure your hand and foot.

Only for EU countries
Due to the presence of hazardous components in the equipment, waste electrical and electronic equipment, accumulators and batteries may have a negative impact on the environment and human health.
Do not dispose of electrical and electronic appliances or batteries with household waste!
In accordance with the European Directive on waste electrical and electronic equipment and on accumulators and batteries and waste accumulators and batteries, as well as their adaptation to national law, waste electrical equipment, batteries and accumulators should be stored separately and delivered to a separate collection point for municipal waste, operating in accordance with the regulations on environmental protection.
This is indicated by the symbol of the crossed-out wheeled bin placed on the equipment.
Intended use
This machine is intended for automatic mowing and charging.
Safety precautions
- Warning - Do not touch rotating blades. Doing so may cause injury.
- Never allow children, persons with reduced physical, sensory or mental capabilities or lack of experience and knowledge or people unfamiliar with the instructions to use the machine, local regulations may restrict the age of the operator.
- Do not to allow children to be in the vicinity or play with the machine when it is operating.
- Do not touch the mower blades or wheels until they have come to a complete stop.
- Do not charge the machine with other than the supplied charging station. Do not use an AC adapter other than one specified in this Instruction Manual.
- When disposing of the internal battery at the end of its service life, follow your local regulations relating to battery disposal. For how to remove the battery, refer to the chapter "When disposing of this product" hereafter.
- Turn off the power switch of the Robotic Mower in the following cases.
- When removing foreign matter jammed in the machine.
Before inspecting, cleaning, or working on the machine or the charging station. Also unplug the power cable of the AC adapter before inspe c ing, cleaning, or working on the charging station. - When inspecting the machine for damage after striking a foreign object.
If the machine starts to vibrate abnormally. In this case, check that the machine is not damaged before restarting it. - Inspect the machine, peripheral devices, power cable, and extension cable before use to make sure there is no damage or signs of aging deterioration.
- Never operate the machine or peripheral devices with defective guards or shields, without safety devices, or with damaged or worn cables.
- Do not connect a damaged cable to a power supply. If a cable connected to a power supply is damaged, do not touch the cable before disconnection from the power supply. Otherwise, electric shock may result.
-
Install the AC adapter and captire cable outside the mowing area. Otherwise, cable damage or electric shock may result.
-
Stop using the machine immediately if an accident or breakdown occurs.
- Stop using the machine immediately if the electrolyte leaks.
- Unplug the power plug from the power outlet if the cable becomes damaged during use.
- It is recommended to connect the power plug of the cabtire cable only to a power supply circuit that is protected by a residual current device (RCD) with a trip current of 30mA or less.
- Avoid using this machine or peripheral devices in bad weather and especially when there is a risk of lightning.
- Stop using the machine immediately if abnormal vibration occurs.
- When using the machine in a public space, it is necessary to post warning signs around the work area. The warning signs should display the following text contents.
"Warning! Automatic lawnmower! Keep away from the machine! Supervise children!"
Fig.1
- The power cable of the AC adapter cannot be replaced. If the power cable becomes damaged, it is necessary to dispose of the AC adapter.
- If the work area adjoins a public road, establish a border between the work area and the public road. Otherwise, the machine may reach over into the public road and cause an accident.
- Make sure that there are no people, pets, or small animals in the work area before use. They may get caught in the machine, resulting in injury.
- Do not use the AC adapter in a location that is exposed to rain, damp, or wet. Otherwise, electric shock may result.
- Do not touch the AC plug of the AC adapter with wet hands. Otherwise, electric shock may result.
- Connect the AC plug of the AC adapter to an outdoor power outlet.
- Wear gloves when installing and removing wires. Otherwise, the wires may cause an injury.
- Be careful not to hit your fingers or hand with the hammer when driving the pegs.
- Install the wires so that they do not float from the ground. Otherwise, your foot may get caught, resulting in injury.
- Be careful not to pinch your fingers when opening and closing the terminal cover.
- Do not touch the mower blades while they are rising or lowering. Your fingers may get caught, resulting in injury.
- Be careful not to pinch your fingers when opening and closing the display cover.
- Keep your face away from rotating tires and mower blades. Your clothing may become caught, resulting in suffocation.
- Do not look into the mower blades during operation. Flying objects may get into your eyes.
- Do not touch rotating wheels. Your fingers may get caught, resulting in injury.
- Be sure to install the mower blades properly according to this Instruction Manual. Otherwise, the mower blades may come loose unexpectedly, resulting in injury.
- Carry this machine with the mower blade side facing away from you. Otherwise, you may come into contact with the wheels and mower blades, resulting in injury.
- Carry this machine by holding the grip. If carried by holding other than the grip, the machine will be unstable and may be dropped, resulting in injury.
Important safety instructions for battery
- Before using the Robotic Mower, read all instructions and warning markings.
- If operating time has become excessively shorter, stop operating immediately. It may result in a risk of overheating, possible burns and even an explosion.
- Do not store and use the machine in locations where the temperature may reach or exceed 45^ (113°F).
- Do not incinerate the battery even if it is completely worn out. The battery can explode due to heating.
- The contained lithium-ion batteries are subject to the Dangerous Goods Legislation requirements. For commercial transports e.g. by third parties or forwarding agents, special requirement on packaging and labeling must be observed. For preparation of the item being shipped, consulting an expert for hazardous material is required. Please also observe possible more detailed national regulations.
- Do not use the machine near high-voltage electrical power transmission lines. Doing so may result in a malfunction or
breakdown of the machine or battery.
- Store the product in a safe place out of the reach of children.
- Never service damaged battery. Service of battery should only be performed by the manufacturer or authorized service providers.
SAVE THESE INSTRUCTIONS.
CAUTION: Only use genuine Makita batteries. Use of non-genuine Makita batteries, or batteries that have been altered, may result in the battery bursting causing fires, personal injury and damage. It will also void the Makita warranty for the Makita tool and charger.
Tips for maintaining maximum battery life
- Never recharge a fully charged battery. Overcharging shortens the battery service life.
- Charge the battery with ambient temperature at 10^ - 40^ (50^ - 104^) . Let a hot battery cool down before charging it.
- Charge the battery if you do not use it for a long period (more than six months).
Noise
The typical A-weighted noise level determined according to EN50636-2-107:
Sound pressure level (L_pA) : 70 dB(A) or less
Sound power level (L_wA):59 dB (A) Uncertainty (K):3.1 dB (A)
The noise level under working may exceed 80 dB (A).
NOTE: The declared noise emission value(s) are measured by the standard test method, and may be used for mutual comparison between machines.
NOTE: The declared noise emission value(s) may also be used in a preliminary assessment of exposure.
WARNING: The noise actually emitted in use of the machine may differ from the declared value(s) depending on the usage of the machine, and especially the type of material to be processed.
WARNING: Be sure to take safety measures to protect workers based on estimates of exposure under the actual conditions of use (consider the entire operating cycle including the time the machine is switched off and the idling time in addition to the operating time).
Declarations of Conformity
For European countries only
The Declarations of conformity are included in Annex A to this instruction manual.
Names of parts
Fig.2
- Robotic Mower
- "STOP" button
- Display cover
- Rear wheel
- LED
- Charging socket
- Control panel
- Top cover
-
Chassis
-
Slider shaft
- Rubber retainer
- Front w
- Power switch
- Grip
- USB cap
(Do not open. This is for maintenance servicing.)
- Blade cover
- Blade base
- Mower blade
- Skid plate
Introduction of separately sold items
CAUTION: These accessories or attachments are recommended for use with your Makita products specified in this manual. The use of any other accessories or attachments might present a risk of injury to persons. Only use accessory or attachment for its stated purpose.
For details of separately sold items, refer to the catalog or contact the dealer or our sales office.
- Blade set
Set of mower blades and fixing screws
- Charging station
- Station base
- Charging terminal
- Terminal cover
- Station housing
- Station indicator
- Wire cover
- Boundary wire
- Guide wire
29.Wire - Peg
- Connector
- Coupler
- AC adapter
(The plug shape will differ from region to region.)
- Cabtire cable
- Screw peg
(For fixing the charging station) - Hex wrench 6
·Wire
Wire repair set
Set of wire, couplers, and pegs
- Peg
Coupler
NOTE: Some separately sold items in the list may be supplied with the machine as standard accessories at the time of purchase. Standard accessories may differ depending on the country of purchase.
PREPARATION
The following preparations are needed to use this product.
1.Preparing the work area
Determine the range to be mowed by the Robotic Mower. Enclose the work area with the boundary wire, and connect the power supply to the charging station. Install a guide wire as necessary.
For the detailed procedure, refer to the enclosed Setup Guide.
2. Initial setting of the Robotic Mower
When using the Robotic Mower for the first time, it is necessary to set the language, date and time, mowing area, and PIN code.
For the detailed procedure, refer to the enclosed Setup Guide.
3. Charging the Robotic Mower
The battery of the Robotic Mower is not charged sufficiently when factory-shipped. Charge the battery before use.
For the charging procedure, refer to the section "Charging the Robotic Mower" (Page 17) in this manual.
Turning the power on/off
The power switch is located on the underside of the Robotic Mower. Press the side of the power switch to turn on the power, or the 0 side to turn off the power.
Fig.3: 1. Power switch
Charging the Robotic Mower
Checking the remaining battery capacity
- Press the "STOP" button.
The display cover opens.
Fig.4: 1. "STOP" button 2. Display cover 3. Control panel
-
Turn on the power switch of the Robotic Mower.
-
Press the button on the control panel.
The [Main menu] appears. You can check the remaining battery capacity at the upper right of the screen.
Main menu
Fig.5: 1. Remaining battery capacity indication
| LCD screen indication Remaining battery capacity | |
| 80 - 100 % | |
| 60 - 80 % | |
| 20 - 60 % | |
| 0 - 20 % | |
Charging
- Turn on the power switch of the Robotic Mower.
NOTE: Charging is performed only when the power switch of the Robotic Mower is turned on.
NOTE: If the battery is fully discharged, it will take longer than usual for the charging to begin.
NOTE: If the battery is hot or cold, charging will not begin.
- Dock the Robotic Mower with the charging station.
Fig.6: 1. Charging station 2. LED
When charging starts, the LED blinks green. When charging is complete, the LED turns off.
Things that should be understood before use
Work environment
Check that the area to be mowed by the Robotic Mower conforms to the following items.
The grass height is 65mm or less.
If the grass is too long, cut it down in advance.
- There are no obstacles such as stones, sticks, or tools.
The Robotic Mower may fling or catch obstacles, resulting in an accident.
- There are no puddles.
The Robotic Mower can mow lawns in the rain, but wet grass tends to stick to the Robotic Mower, and the possibility of slipping on steep slopes increases.
- There is no snow accumulation.
The Robotic Mower may slip and not operate correctly.
Charging station
The charging station charges the Robotic Mower and flows signals in the boundary wire and guide wire.
Check that the location to install the charging station conforms to the following items.
- It is close to the power supply.
It is a level location.
The installation location has a slope within ± 5^ of level. - The location should be protected from the sun.
- When installing the charging station on the lawn directly, keep the lawn short.
- There is a space of 3m or more in front of the boundary wire.
NOTICE: Do not bend the station base.
Boundary wire
The boundary wire defines the area where the Robotic Mower is to perform mowing work.
Install the boundary wire around the boundary of the area where the Robotic Mower is to perform mowing work.
For the installation method, refer to the chapter "Installing the
Boundary Wire" in the Setup Guide.
Guide wire
This wire guides the Robotic Mower when it returns to the charging station. This wire also guides the lawn mower to areas that the lawn mower works less frequently due to topographical reasons, etc.
For the installation method, refer to the chapter "Installing the Guide Wire" in the Setup Guide.
Lamp lighting
The Robotic Mower and the charging station indicate various states by the lighting patterns of their lamps.
Fig.7: 1. LED 2. Station indicator
Robotic Mower
| LED State | |
| Green/blinking Charging | (Turns off when charging is complete) |
| White/blinking Operating | (Blinks for the time specified by the [LED] setting) |
| Red/blinking Error occurrence | |
| Off Standby/Power off | or other than the above |
Charging station
| Station Indicator State | |
| Red/lighted Error occurrence | |
| Red/blinking There is an abnormality in the boundary wire connection | |
| Green/lighted The boundary wire is connected successfully |
HOW TO USE
Control panel operations
When the "STOP" button is pressed, the display cover opens and the control panel can be operated.
Fig.8: 1. LCD screen 2. Menu buttons 3. Operation keys 4. Numeric keys 5. "STOP" button
| Button/ key Function | ||
| Menu buttons | Returns the Robotic Mower to the charging station. After pressing this button, select the desired return method. | |
| Displays the [Main menu]. | ||
| Starts mowing. After pressing this button, select the desired mowing method. | ||
| Operation keys | Select items on the screen. The selected item is highlighted (white-black inverted display). | |
| Returns to the previous screen/ operation. | ||
| Executes the selected item. | ||
| Numeric keys | 0 ~ 9 | Enter numbers. They can be operated only when numeric entry is possible. |
Selecting and executing items on the LCD screen
LCD screen operations are performed mainly with the Main menu. Press the button to display the Main menu.
Main menu
Fig.9: 1. Date 2. Time 3. Remaining battery capacity 4. Cutting height 5. Currently selected setting menu 6. Setting menu icons
Operations within the LCD screen use the operation keys and numeric keys. The available buttons/keys differ according to the items displayed on the screen.
When selection items are arranged side by side
When items are arranged side by side, select with the keys and execute with the key.
Fig.10: 1. Selected item
When selection items are arranged vertically
When items are arranged vertically, select with the keys and execute with the key.
Fig.11: 1. Selected item
When further options are available
When triangular arrow marks appear next to the selected item, further options are available. Select the item with the direction key(s) indicated by the triangular arrow marks, and finalize the selection with the key.
Fig.12
When entering numbers
On the PIN code entry screen and for selection items where values are entered, enter with the 0 - 9 sys and finalize the entry with the key.
Fig.13
NOTE: When entering a value with two or more digits, enter in order from the upper digits (or the first number). If you make a mistake, enter arbitrary numbers to all digits and then enter the correct numbers again.
Starting mowing
WARNING: Be sure to observe the following items when the Robotic Mower is in operation.
- Do not put your hands and feet under or look under the chassis.
- Keep your face and hands away from rotating wheels.
- Do not let children or pets enter the work area.
NOTICE: The Robotic Mower is intended only for mowing lawns. Clear away any weeds from the work area in advance.
NOTICE: Clear away objects such as small stones and sticks that may hinder Robotic Mower operation from the work area in advance.
NOTICE: Mowing will be unable to start if the station indicator is off or if it is lighted or blinking red.
There may be an error in the charging station or a broken boundary wire. If the station indicator is blinking in red, check the following.
- Is the AC adapter connected to a power outlet?
- Is the cab tire cable connected correctly to the AC adapter and the charging station?
- Are the charging station and the boundary wire connected correctly?
- Is there an open circuit in the boundary wire?
- Are the connectors and couplers on the boundary wire connected correctly?
There may be an temporary error due to lightning or other causes or temperature protection of the charging station. If the station indicator is lighted in red, take the following actions.
- Unplug the cabtire cable from the charging station, wait until the station indiator goes out, and then reconnect the cabtire cable.
- If this does not solve the problem, connect the cabtire cable after some time has passed.
Fig.14: 1. Station indicator
The factory default settings are defined as follows. To change the default settings, refer to the instructions on the major setting items listed under "SETTING MENUS" (Page 19).
| Major setting item Initial value | |
| Mowing area Area set by the initial setting | |
| Cutting height Consistent (60 mm) | |
| Boundary overreach 32 cm | |
| Spiral cutting Enable | |
To start mowing at once
To start mowing at once, perform the mowing start operation on the control panel.
- Press the "STOP" button.
The display cover opens.
Fig.15: 1."STOP" button 2. Display cover 3. Control panel - Press the button on the control panel.
- Select the desired option.
| Option | Details |
| Auto mowing | Mows by automatic operation and charging. When the remaining battery capacity becomes low, the Robotic Mower automatically returns to the charging station and charges. When charging is complete, mowing restarts. The operation is performed within the scheduled mowing period that you configured |
| Mowing without charging | Mows without charging. If the remaining battery capacity runs out partway, the machine stops at that point. You can select the duration time for mowing without charging. (Until battery empty / For 30 min / For 90 min)The scheduled mowing will be disabled during this option.• Select this option in a sub area. |
| Option Details | |
| Deactivate schedules | Disables the scheduled mowing and starts mowing at once. You can select the period to disable the schedules. (For 24 hours / For 3 days) |
| Mowing - With spiral cutting | Starts mowing in a spiral pattern from an arbitrary location. Select [Auto mowing] in the main area and [Mowing without charging] in a sub area. |
| NOTE: Main area refers to the work area where the charging station is installed and the Robotic Mower can return automatically. In contrast, sub area refers to a work area where there is no path wide enough for the Robotic Mower to return to the charging station and it is necessary to move the Robotic Mower by carrying it by hand. For details, refer to "Start Mowing Menu" (Page 20) in this manual. |
4. Close the display cover.
Mowing starts. The LED blinks white during operation.
| NOTE: The LED will blink for the time set in advance by the [LED] setting. |
| NOTICE: When closing the display cover, press down firmly until it clicks. |
Specifying the date and time to start mowing
Specify the date and time to perform mowing from the following setting item, and put the Robotic Mower into the stand-by state. [Top menu] > [Main menu] > [Mowing preferences] > [Schedule] For the detailed setting method, refer to the section "Start Mowing Menu" (Page 20).
Stopping mowing
There are two methods for stopping mowing as follows.
Stop mowing and remain in place (Pause)
When the "STOP" button is pressed during operation, the display cover opens and mowing will pause.
Fig.16: 1. "STOP" button 2. Display cover
Stop mowing and return to the charging station (End)
- Press the "STOP" button during operation, and then press the button on the control panel.
Fig.17: 1."STOP" button 2. Display cover 3. Control panel - Select the desired option.
| Option Details | |
| Stay at charging station | The Robotic Mower returns to and stays at the charging station. |
| Schedule restart time | The Robotic Mower returns once to the charging station, and then restarts mowing after the set time. |
| Restart on schedule | The Robotic Mower returns to the charging station, and then starts mowing at the scheduled date and time. |
- Close the display cover.
| NOTICE: When closing the display cover, press down firmly until it clicks. |
SETTING MENUS
Oper the th t t ch t t.
Top menu screen that appears after the power is turned on (except when starting up for the first time)
Fig.18
| Button Menu | name What can be set using the sub menus | Reference page | ||
| Start mowing | Mow by automatic operation and charging. 20 | |||
| Mow without automatic charging. 20 | ||||
| Start auto mowing at the desired timing. (Scheduled mowing is put on hold.) 20 | ||||
| Mow in a spiral pattern. 20 | ||||
| Park | Return the Robotic Mower to the charging station. 21 | |||
| Return the Robotic Mower to the charging station, and restart operation at the scheduled time. | 21 | |||
| Return the Robotic Mower to the charging station, and restart operation at the preset schedule. | 21 | |||
| Main menu | Mowing preferences | Change and register the mowing area. 21 | ||
| Schedule mowing. 21 | ||||
| Determine the cutting height. 22 | ||||
| Navigation preferences | Set the guide signal active search period. | 23 | ||
| Cut the grass near the boundary. | 23 | |||
| Set the movement distance to the mowing start point. | 23 | |||
| Select the departure method from the charging station. | 23 | |||
| Adjust the departure angles from the charging station. | 24 | |||
| Adjust the width of offset navigation. | 25 | |||
| Mow unmowed grass. | 25 | |||
| Security | Set the alarm sounding time. | 25 | ||
| Change the PIN code. | 26 | |||
| Prevent wire signal interference. | 26 | |||
| Protect the Robotic Mower from theft. | 26 | |||
| Others | Save/load user preferences. | 26 | ||
| Change the date and time settings. | 26 | |||
| Change the display language. | 27 | |||
| Reset the user preferences. | 27 | |||
| Browse the product information. | 27 | |||
| Manage the LED on/off time. | 27 | |||
| Check the details of operation errors. | 27 | |||
Start Mowing Menu
CAUTION: When starting up the Robotic Mower for the first time after installing the wires in the work area as advance preparation, be sure to have the Robotic Mower automatically depart once from the docked state with the charging station.
When the Robotic Mower automatically departs from the charging station, it saves the magnetic field in its memory and performs autonomous control so that docking operation is performed properly thereafter. If this task is not performed, the Robotic Mower may not execute docking properly when returning, or may otherwise not function properly.
Select and execute one of the following two methods to have the Robotic Mower automatically depart from the charging station.
- Dock the fully charged Robotic Mower with the charging station within the pre-scheduled operation time (or at any time when using the [Deactivate schedules] sub menu), and then issue the start instruction using the [Start mowing] menu. For details, refer to "Start Mowing Menu" (Page 20).
- Tentatively register the departure method in the [Mower departing points] sub menu of the [Navigation preferences] menu, and perform test navigation. For details, refer to "Selecting the departure method from the charging station" (Page 23).
Mowing with automatic operation and charging
[Top menu] > [Start mowing] > [Auto mowing]
The lawn of the main area enclosed by the boundary wire is mowed automatically. When this menu is selected, the Robotic Mower is automatically controlled according to the contents set by each menu. Even if the remaining battery capacity becomes low, the Robotic
Mower can automatically repeat charging and continue to neatly mow the lawn within the area.
About the main area
This is the mowing work area that has the charging station located within its boundary. The Robotic Mower continues to navigate randomly and mow the lawn within this area while repeatedly returning and departing centering on the charging station.
Fig.19: 1. Main area 2. Charging station 3. Boundary wire
- Press the button on the control panel.
The sub menu appears.
Fig.20
- Select [Auto mowing].
Press the key, and the message [Close the display cover to start mowing.] appears.
- Close the display cover.
The Robotic Mower starts mowing
Mowing without automatic charging
[Top menu] > [Start mowing] > [Mowing without charging]
Automatic operation continues within the time set in advanced or until the battery capacity runs out.
Operate the Robotic Mower with this setting when mowing the sub are which has no path to and from the main area. Also in the main area, use this setting when mowing only for the selected time which does not need to return to the charging station or to charge.
About the sub area
This is a separate mowing work area that is enclosed by the boundary wire but does not have a path wide enough for the Robotic Mower to pass to the main area. Mowing is performed automatically while detecting the wire signals, but automatic return to the charging station is not possible.
Fig.21: 1. Main area 2. Charging station 3. Boundary wire 4. Path 5. Sub area
NOTICE: In order to operate the Robotic Mower in a sub area, move the Robotic Mower by hand from the main area to the sub area in advance.
NOTICE: To charge the Robotic Mower working in a sub area, temporarily stop the Robotic Mower and turn off the power, and then carry it to the main area. After moving the Robotic Mower, turn on the power again and manually connect it to the installed charging station.
- Press the button on the control panel.
The sub menu appears.
- Select [Mowing without charging].
The option menu appears.
- Select the desired option.
| Option Details | |
| Until battery empty | Mows automatically until the remaining battery capacity runs out. |
| For 30 min Mows automatically for 30 minutes. | |
| For 90 min Mows automatically for 90 minutes. | |
Press the key, and the message [Close the display cover to start mowing.] appears.
- Close the display cover.
The Robotic Mower starts mowing.
NOTE: When [Until battery empty] is executed, the Robotic Mower will stop at the point where the remaining battery capacity runs out. To charge the Robotic Mower, manually connect it to the charging station in the main area.
Starting auto mowing at the desired timing (Putting scheduled mowing on hold)
[Top menu] > [Start mowing] > [Deactivate schedules]
You can put pre-scheduled mowing work on hold for a certain period and have the Robotic Mower operate automatically at the necessary or convenient timing. The Robotic Mower normally executes and stops mowing according to a preset schedule, but selecting this menu lets you operate the Robotic Mower automatically even outside the scheduled times.
NOTE: Once the set period passes, the pre-registered schedule becomes enabled again and the Robotic Mower restarts work according to the preset schedule.
- Press the button on the control panel.
The sub menu appears.
- Select [Deactivate schedules].
The option menu appears.
- Select the desired option.
| Option Details | |
| For 24 hours Puts the mowing work scheduled in the Robotic Mower on hold for 24 hours. | |
| For 3 days Puts the mowing work scheduled in the Robotic Mower on hold for 3 days. | |
Press the key, and the message [Close the display cover to start mowing.] appears.
- Close the display cover.
The Robotic Mower starts mowing.
NOTE: To stop the mowing work within the set period, operate the Robotic Mower manually such as by pressing the "STOP" button on the Robotic Mower or by using the [Park] menu, etc.
Mowing in a spiral pattern
[Top menu] > [Start mowing] > [Mowing - With spiral cutting]
Mowing starts in a spiral pattern from a point of concern within the area, such as a place where the grass is dense or where the grass height is uneven due to unmowed grass, etc. After navigating in a spiral pattern to mow the lawn intensively in a specific location, the Robotic Mower transitions to normal navigation and continues mowing the entire area.
Normal path and spiral path
The Robotic Mower normally calculates its path automatically and navigates randomly in straight lines within the area to achieve an even lawn finish. However, you can prioritize and intensively mow a target area of concern to achieve a good finish by starting spiral cutting from a specific location, such as a place where the grass is dense, unmowed grass remains, or the grass grows faster than other places.
Fig.22: 1. Normal path 2. Spiral path
-
Turn off its power switch and place the Robotic Mower in the location to start spiral cutting. Then turn on the power switch.
-
Press the button on the control panel.
The sub menu appears. - Select [Mowing - With spiral cutting].
The option menu appears. - Select the desired option.
| Option Details | |
| Auto mowing Exec | Executes spiral cutting in the main area, and when complete, continues mowing by automatic operation and charging. |
| Mowing without charging | Executes spiral cutting, and when complete, continues auto mowing within the specified period and without automatic charging. |
Press the key, and the message [Close the display cover to start mowing.] appears.
5. Close the display cover.
The Robotic Mower starts mowing
Park Preferences
NOTE: It is recommended to set the active search period for the guide signal to "0" (zero), if you do not install guide wires in your work area. It helps the Robotic Mower return to the charging station quickly. For details, refer to "Setting the active search period for the guide signal" (Page 23).
Returning the Robotic Mower to the charging station
[Top menu] > [Park] > [Stay at charging station]
The mowing work is stopped and the Robotic Mower is returned to the charging station.
- Press the button on the control panel.
The sub menu appears.
Fig.23 - Select [Stay at charging station].
Press the key, and the message [Close the display cover to return to the charging station.] appears. - Close the display cover.
The Robotic Mower returns to the charging station.
Returning the Robotic Mower to the charging station and restarting operation at the scheduled time
[Top menu] > [Park] > [Schedule restart time]
The Robotic Mower is returned to the charging station, and then operation is restarted after the specified time.
- Press the button on the control panel.
The sub menu appears. - Select [Schedule restart time].
The entry screen appears. - Use the keypad and enter the desired time.
Fig.24
NOTE: You can enter a time to restart of 0 to 99 hours. The initial setting is 3 hours.
- Press the key to verify the entry.
The message [Close the display cover to return to the charging station.] appears. - Close the display cover.
The Robotic Mower returns to the charging station.
Returning the Robotic Mower to the charging station and restarting operation at the preset schedule
[Top menu] > [Park] > [Restart on schedule]
The Robotic Mower is returned to the charging station, and then operation is restarted at the preset mowing schedule. The Robotic Mower continues to stand by after returning to the charging station, and then automatically departs from the station to meet the next preset mowing schedule.
NOTE: If the Robotic Mower is not sufficiently charged, it will not start mowing even if the preset schedule approaches. Mowing will restart once charging is complete.
NOTE: The schedule displayed on the screen cannot be created, changed, or deleted from this menu. To adjust the schedule, select [Schedule] in the [Mowing preferences] menu and redo the settings
- Press the button on the control panel.
The sub menu appears. The mowing schedule is displayed next to [Restart on schedule]. The displayed date and time are the next planned restart schedule after the Robotic Mower has returned to the charging station.
- Select [Restart on schedule].
Confirm the displayed start schedule and continue with the setting.
Fig.25: 1. Next planned restart schedule
Press the key, and the message [Close the display cover to return to the charging station.] appears.
3. Close the display cover.
The Robotic Mower returns to the charging station.
Mowing Preferences
Changing and registering the mowing area
[Top menu] > [Main menu] > [Mowing preferences] > [Mowing area]
This is used to change the mowing area size registered when the Robotic Mower was started up for the first time, or to register the size of a new mowing area. The Robotic Mower figures out the optimal mowing process and efficiently mows the lawn based on the mowing area information set here.
NOTICE: Set an appropriate mowing area. If the set value deviates greatly from the actual area, there may be unmowed places, etc.
- Press the button on the control panel.
The [Main menu] appears. - Select displayed on the screen.
Fig.26
The sub menu appears.
-
Select [Mowing area].
Fig.27 -
Use the keypad and select the size range of your mowing area.
Fig.28: 1. Triangular arrow marks
NOTE: When triangular arrow marks are displayed next to the option, press the keys to switch the option display. When the desired option appears, press the key to verify the selection.
- Follow the message displayed on the screen and complete the setting.
When the message [Saved successfully.] appears, press the key.
Scheduling mowing
[Top menu] > [Main menu] > [Mowing preferences] > [Schedule]
Set a week's mowing schedule in advance to perform mowing in accordance with the weather and lifestyle patterns. An appropriate work plan will also stabilize the mowing frequency and maintain the lawn in good condition for a longer time.
CAUTION: Draw up daily and weekly work schedules during closed and unattended hours. Prepare schedules to avoid a chance to encounter nocturnal animals. Someone nearby or wild animals might be harmed by mowing operations.
NOTE: Find well-balanced schedules to avoid heavy mower traffic that causes lawn compaction. Turn long mowing hours into scheduled time blocks so the traffic can be redirected to give worn-down areas a break.
- Press the button on the control panel.
The [Main menu] appears. -
Select displayed on the screen.
The sub menu appears. -
Select [Schedule].
The weekly schedule setting screen appears.
- Use the keypad to select the day to set the schedule.
Press the keys to highlight the desired day and then press the key.
You can select multiple days at once. An underline is displayed below the selected day(s).
Fig.29: 1. Day selection indication 2. Time period when mowing work is scheduled 3. Time period when mowing work is not scheduled
| NOTE: When the days are selected and the detailed time schedule is set, the registered work timetable for each day is displayed. Time periods without a schedule set appear white. |
- Select [Time schedule].
The time schedule setting screen appears.
- Select the desired option.
| Option Details | |
| Work 24 hours The Robotic Mower operates all day long. When this option is selected, a check mark appears in the [Schedule 1:] checkbox and [00:00] - [24:00] is displayed. | |
| Park 24 hours The Robotic Mower remains parked all day long. When this option is selected, the check marks are removed from the [Schedule 1:] and [Schedule 2:] checkboxes and [00:00] - [00:00] is displayed. | |
| Schedule 1: The Robotic Mower operates at the set time. | |
| Schedule 2: The Robotic Mower operates at the set time. | |
Fig.30
Setting schedules
(1) Use the keypad and place a check mark in the checkbox of the schedule option to be set.
(2) Use the keys to highlight the hour or minute entry field to be set.
(3) Use the keypad and enter the time.
(4) Repeat steps 2 and 3 to enter all the hour and minute entry fields.
| NOTICE: To enable a schedule setting, be sure to place a check mark in the checkbox. |
| NOTICE: The times entered to [Schedule 1:] and [Schedule 2:] cannot overlap. |
- Select [Verify].
When the message [Saved successfully.] appears, press the key.
Recommended operating duration time for a selected mowing area
The table shows benchmark run time suggested for your mowing area size category. Design your own daily and weekly schedules according to your needs.
| Mowing area size (m2) | Weekly working days (days) | Daily working hours (hours) | Time table examples |
| 500 5 5 07:00 | 12:00 | ||
| 7 3.5 07:00 - 10:30 | |||
| 750 5 7.5 07:00 | 0 - 14:30 | ||
| 7 5.5 07:00 - 12:30 | |||
| 1,000 5 10 07:00 | 00 - 17:00 | ||
| 7 7 07:00 - 14:00 | |||
| 1,500 5 14.5 00 | 7:00 - 21:30 | ||
| 7 10.5 07:00 - 17:30 | |||
| 2,000 5 19.5 00 | 4:00 - 23:30 | ||
| 7 14 07:00 - 21:00 | |||
| 2,500 6 20 03:00 | 00 - 23:00 | ||
| 7 17.5 05:00 - 22:30 | |||
| 3,000 7 21 02:00 | 00 - 23:00 | ||
| 3,500 7 24 00:00 | 00 - 24:00 |
Determining the cutting height
[Top menu] > [Main menu] > [Mowing preferences] > [Cutting height]
Set the cutting height manually or by using the auto function. The Robotic Mower automatically adjusts the blade height according to the set grass height.
| NOTICE: Mowing long grass to a short length all at once may cause the grass to die, or the cut grass may block up inside the Robotic Mower. |
NOTE: Do not try to cut long grass all at once. Instead, mow the lawn in steps, leaving a day or two between mowing sessions, until the lawn becomes evenly short. Lawn clippings would be no longer than 5mm in a single mowing session. The damage and burden on the lawn can be reduced to maintain a beautiful lawn finish by setting an appropriate grass height and mowing frequency.
NOTE: The maximum cutting height setting value for the Robotic Mower is 60 mm. If the grass height at the start of mowing exceeds this maximum value, cut the grass to 65 mm or less with a Makita lawn mower or other machine before using the Robotic Mower.
Fig.31
- Press the button on the control panel.
The [Main menu] appears. - Select displayed on the screen.
The sub menu appears. - Select [Cutting height].
The menu selection screen appears. - Select the desired menu.
| Menu | Details |
| Manual (consistent) | This sets a consistent cutting height. |
| Auto | By entering the grass heights at the start and end of mowing, the Robotic Mower automatically adjusts the blade height in steps. |
The cutting height entry screen appears.
5.Use the keys to adjust the cutting height.
When the desired height is displayed on the screen, press the key to verify the setting. When there are multiple entry fields, select all the values and then press the key.
[Manual (consistent)] menu entry screen
Fig.32
[Auto] menu entry screen
Fig.33: 1. Grass height at work start 2. Target grass height
- Follow the message displayed on the screen and complete the setting.
When the message [Saved successfully.] appears, press the key.
Navigation Preferences
CAUTION: When starting up the Robotic Mower for the first time after installing the wires in the work area as advance preparation, be sure to have the Robotic Mower automatically depart once from the docked state with the charging station.
When the Robotic Mower automatically departs from the charging station, it saves the magnetic field in its memory and performs autonomous control so that docking operation is performed properly thereafter. If this task is not performed, the Robotic Mower may not execute docking properly when returning, or may otherwise not function properly.
Select and execute one of the following two methods to have the Robotic Mower automatically depart from the charging station.
- Dock the fully charged Robotic Mower with the charging station within the pre-scheduled operation time (or at any time when using the [Deactivate schedules] sub menu), and then issue the start instruction using the [Start mowing] menu. For details, refer to "Start Mowing Menu" (Page 20).
- Tentatively register the departure method in the [Mower departing points] sub menu of the [Navigation preferences] menu, and perform test navigation. For details, refer to "Selecting the departure method from the charging station" (Page 23).
Setting the active search period for the guide signal
[Top menu] > [Main menu] > [Navigation preferences] > [Active search period for guide wire]
Set the period that the Robotic Mower actively searches for the control signal from the guide wire.
NOTE: When returning to the charging station, the Robotic Mower detects the signal transmitted from the guide wire, and follows that signal to efficiently trace the return path to the station.
NOTE: If the signal from the guide wire cannot be detected within the active search period, operation switches to search over a wide range including the signal from the boundary wire, and the Robotic Mower returns to the charging station according to the detected control signal.
NOTE: It is recommended to set the active search period for the guide signal to "0" (zero), if you do not install guide wires in your work area.
- Press the button on the control panel.
The [Main menu] appears. - Select displayed on the screen.
The sub menu appears. - Select [Active search period for guide wire].
Fig.34
The entry screen appears.
- Use the keypad and enter the desired search period.
Fig.35
NOTE: You can enter an active search period of 0 to 10 min. The initial setting is 10 min. If a value that exceeds the setting range is entered, it is automatically replaced with the maximum value.
- Press the key to verify the entry.
When the message [Saved successfully.] appears, press the key.
Cutting the grass near the boundary
[Top menu] > [Main menu] > [Navigation preferences] > [Boundary overreach]
Adjust the distance by which the Robotic Mower is to exceed the boundary wire in order to neatly cut the grass near the boundary.
Movement of the Robotic Mower near the boundary
When the Robotic Mower approaches the boundary wire installed around the mowing area, it detects the signal from the wire and prepares to change direction. When boundary overreach is set, the Robotic Mower mows up to a certain distance outside the wire, and then returns to within the boundary, automatically turns, and continues mowing. By setting an appropriate boundary overreach, you can achieve a good lawn finish without leaving grass unmowed near the boundary.
Fig.36: 1. Boundary wire 2. Boundary overreach 3. Wire signal 4. Mowing path
- Press the button on the control panel.
The [Main menu] appears.
- Select displayed on the screen.
The sub menu appears.
- Select [Boundary overreach].
The entry screen appears.
- Use the keypad and enter the distance by which the Robotic Mower is to reach over the boundary wire.
Fig.37
NOTE: You can enter an overreach distance of 20 to 50~cm NOTE: If a value that is below the setting range is entered, the message [Invalid input.] appears. Select [OK] and then press the key. The entry screen appears again.
NOTE: If a value that exceeds the setting range is entered, it is automatically replaced with the maximum value.
- Press the key to verify the entry.
When the message [Saved successfully.] appears, press the key.
Setting the movement distance to the mowing start point
[Top menu] > [Main menu] > [Navigation preferences] > [Departure position]
Set the movement distance until the Robotic Mower starts mowing after departing from the charging station. The Robotic Mower initially moves away from the charging station without mowing, and then starts mowing after moving for the distance set here.
Why is it necessary to move to the mowing start point?
When the Robotic Mower departs from the charging station, it does not start mowing immediately, and instead starts mowing after moving a certain distance from the station. This is because setting a slightly distant work start position enables to avoid overlapping or biased work paths, and to more efficiently reach difficult-to-access areas.
Fig.38: 1. Charging station 2. Work start position 3. Movement distance
- Press the button on the control panel.
The [Main menu] appears. - Select displayed on the screen.
The sub menu appears. - Select [Departure position].
The entry screen appears. - Use the keypad and enter the distance that the Robotic Mower is to move before starting mowing.
Fig.39
NOTE: You can enter a departure position of 80 to 300cm
NOTE: If a value that is below the setting range is entered, the message [Invalid input.] appears. Select [OK] and then press the key. The entry screen appears again.
NOTE: If a value that exceeds the setting range is entered, it is automatically replaced with the maximum value.
- Press the key to verify the entry.
When the message [Saved successfully.] appears, press the key.
Selecting the departure method from the charging station
[Top menu] > [Main menu] > [Navigation preferences] > [Mower departing points]
Set how the Robotic Mower is to depart from the charging station and start mowing. You can register and adjust the execution priority of up to five different departure methods, including the type of wire signal to follow and the movement distance to the mower departing points when departing from the station.
Skillfully combining multiple mower departing points
In addition to starting mowing by departing directly from the charging station, the Robotic Mower can also move away from the station along the boundary wire or guide wire for a certain distance and then start work from that point. By combining multiple departure methods in accordance with the shape and layout of the work area, you can avoid overlapping or biased work paths, arrive directly to areas that are difficult to access by normal navigation, and achieve an even lawn finish over the entire area.
Fig.40: 1. Charging station 2. Boundary wire 3. Guide wire
- Mower departing points
NOTICE: Dock the Robotic Mower with the charging station before setting the departure methods.
- Press the button on the control panel.
The [Main menu] appears. - Select displayed on the screen.
The sub menu appears. - Select [Mower departing points].
The menu selection screen appears. - Select the number of the profile to register the departure method.
▶ Fig.41: 1. Forwards to left along boundary wire 2. Forwards to right along boundary wire 3. E-wire path with = 1
right along boundary wire 3. Forwards along guide wire 1 4.Forwards along guide wire 2
The option menu appears.
5. Use the keypad and enter the desired conditions to the option format fields displayed on the screen.
| Option Details | |
| Wire to trace: Select the type of wire that the Robotic Mower is to trace after departing from the charging station.Use the keys to display the desired wire type. To depart directly from the charging station without tracing a specific wire, select [-]. | |
| Departure position: | Enter the distance that the Robotic Mower is to move from the station before starting the mowing work. You can enter a distance of 0 to 800 m. |
| Probability Enter | the probability of executing the set profile as a percentage. |
Fig.42: 1. Maximum probability value that can be entered
NOTE: If you set as the described figures, the total probability of [Mower departing points] is 60% . As for the remaining 40% , the Robotic Mower departs directly from the charging station. When the Robotic Mower departs directly from the charging station, the departure angles can be adjusted. For details on the departure angles, refer to the section "Adjusting the departure angles from the charging station".
NOTE: The maximum probability value that can be entered for each profile is displayed to the left of the probability entry field. Enter a value of the displayed maximum value or less. If a value that exceeds the range is entered, it is automatically replaced with the maximum value.
- Select [Test] and execute test operation before registering the settings.
Follow the message displayed on the screen and complete the test operation.
If the test operation results are unsatisfactory, redo the settings.
NOTE: To register the distance setting after test navigation, save the test report by following the instructions on the screen. Then press the key to complete the registration after the message [Saved successfully.] appears. When this registration is complete, the screen returns to the menu selection screen.
NOTE: The Robotic Mower stops automatically near the mower departing point after the test navigation. To redo the settings or register a new profile, manually dock the Robotic Mower to the charging station again.
NOTE: To skip the test navigation, select [Verify] and register the setting.
When the message [Saved successfully.] appears, press the key.
- Repeat steps (4) through (6) and register up to five profiles as necessary.
Adjusting the departure angles from the charging station
[Top menu] > [Main menu] > [Navigation preferences] > [Departure angles]
Set the departure angles when the Robotic Mower departs directly from the charging station. Assuming the docking contact point, facing the charging station, as 0^ (12 o'clock), you can set two departure angle ranges between 90^ (3 o'clock) to 270^ (9 o'clock) in the clockwise direction. You can adjust the execution priority of each departure angle.
What is the "probability" that determines the execution priority?
The probability obtained when setting the departure method and departure angles from the charging station expresses the possibility of the Robotic Mower prioritizing operation based on the set contents as a percentage.
For example, if 25% and 75% are entered as the probabilities for ranges 1 and 2 when setting the departure angles, there is a 25% probability that the Robotic Mower will depart at an arbitrary angle within range 1.
Fig.43: 1. Departure angle range 1 2. Departure angle range 2 3. Charging station
- Press the button on the control panel.
The [Main menu] appears.
- Select displayed on the screen.
The sub menu appears.
- Select [Departure angles].
The option menu appears.
- Use the keypad and enter the desired conditions to the option format fields displayed on the screen.
Exit ranges can be set at between 90^ and 270^ .
| Option Details | |
| Exit range 1: Enter | er the 1st angle range for the Robotic Mower to depart from the charging station. (You can also set just one range.) |
| Exit range 2: Enter | er the 2nd angle range for the Robotic Mower to depart from the charging station. |
| Probability Enter | the probability of the Robotic Mower depart- ing within each set angle range as a percentage. |
Fig.44: 1.Exit range 1 (1st angle range) 2.Exit range 2 (2nd angle range) 3. Probability
Setting the departure angles
(1) Use the keys to highlight the angle and probability entry fields to be set.
(2) Use the keypad and enter the angles and probability.
(3) Repeat steps 1 and 2 and enter all the entry fields.
NOTE: When entering only [Exit range 1], the execution probability is automatically set to 100% .
NOTE: When only [Exit range 1:] is entered, the execution probability of [Exit range 1:] cannot be changed. When entry to [Exit range 2:] is started after entering [Exit range 1:] the execution probability of [Exit range 1:] can be changed.
NOTE: Finish entry to [Exit range 1:] before setting [Exit range 2:]. It is not possible to enter only [Exit range 2:].
NOTE: The execution probability of [Exit range 2:] is automatically calculated so that the total with the execution probability of [Exit range 1:] is 100% . The execution probability of [Exit range 1:] is subtracted from 100% , and the remainder probability is automatically displayed as the execution probability of [Exit range 2].
- Select [Verify] and register the settings.
When the message [Saved successfully.] appears, press the key.
Example of setting [Mower departing points] and [Departure angles] from the charging station
For example, if three departure methods are registered with the sub menu [Mower departing points] and the probability for each is set to 20% , the total probability is 60% . The remaining 40% probability is allocated to the execution priority of the departure angle ranges 1 and 2 set by the sub menu [Departure angles]. Here, if 50% and 50% are input as the probabilities for the departure angle ranges 1 and
2, the remaining 40% probability is allocated 50% each for ranges 1 and 2. Therefore, in terms of total probability, the execution priority of departure angle ranges 1 and 2 are calculated as 20% and 20% , respectively.
As a result, the Robotic Mower randomly executes the three departure methods registered with the sub menu [Mower departing points] and the two departure angles registered with the sub menu [Departure angles] with a respective probability of 20% each.
Adjusting the width of offset navigation
[Top menu] > [Main menu] > [Navigation preferences] > [Line trace offset]
The width of the path when navigating along the boundary wire and guide wire is offset within the setting range.
What is offset navigation?
The Robotic Mower moves along the various wires while detecting the signals from the wires. Offset navigation intentionally shifts this movement path little by little from each reference wire to prevent the wheels from repeatedly passing over the same part of the lawn. The Robotic Mower moves while offsetting the path randomly within the range of the set value, enabling to reduce the burden on the lawn on specific paths.
Fig.45: 1. Charging station 2. Boundary wire 3. Guide wire 4. Outer edge reference line 5. Widths of offset navigation
NOTE: When there is a narrow path within the work area, consider the maximum offset width that will let the Robotic Mower pass.
- Press the button on the control panel.
The [Main menu] appears. - Select displayed on the screen.
The sub menu appears.
NOTE: If the menu is not displayed, use the keys to scroll the screen. - Select [Line trace offset].
The option menu appears. - Select the checkbox of the wire name to set the offset path.
| Option Details | |
| G1: This sets the | offset relative to the reference path of the 1st guide wire. The larger the offset value, the wider the offset range from the reference path. |
| G2: This sets the | offset relative to the reference path of the 2nd guide wire. The larger the offset value, the wider the offset range from the reference path. |
| Boundary: This sets | sets the offset relative to the reference path of the boundary wire. The larger the offset value, the wider the offset range from the reference path. |
Fig.46
When a check mark is placed in the checkbox, the offset entry field is automatically highlighted.
- Use the keypad and enter the desired conditions to the option format fields displayed on the screen.
Fig.47
You can enter an offset value of 0 to 9. The following table shows the approximate range of the actual navigation widths for the offset values. The actual range of the navigation widths given in the table may differ according to the work environment and other conditions.
Offset value and navigation width correspondence table
| Offset value | Navigation width | Offset value | Navigation width |
| 0 55 cm | m 5 110 cm | ||
| 1 90 cm | m 6 115 cm | ||
| 2 95 cm | m 7 120 cm | ||
| 3 100 cm | m 8 125 cm | ||
| 4 105 cm | m 9 130 cm |
Image of navigation width fluctuation
Fig.48: 1. Boundary wire 2. Outer edge reference line 3. Navigation width fluctuation range 4. 55~cm 5. 110~cm 6. 130~cm
NOTE: The line where the right face of the Robotic Mower reaches over the boundary wire by about 20 cm to the outside is the outer edge reference line. The navigation width fluctuates toward the inside with the outer edge reference line as zero.
- Select [Verify] and register the settings.
When the message [Saved successfully.] appears, press the key.
Mowing unmowed grass
[Top menu] > [Main menu] > [Navigation preferences] > [Spiral cutting]
When the Robotic Mower detects an area with long or dense grass, etc. during the mowing work, it navigates that area in a spiral pattern to intensely mow the grass. Mowing areas with dense grass in a spiral pattern enables to efficiently achieve a neat lawn finish.
Finding spots with dense grass
The Robotic Mower finds areas with dense grass and unmowed lawn by sensitively detecting the load when cutting the grass. When such a specific area is found, the Robotic Mower navigates in a spiral pattern from that point toward the outside and intensively mows the grass to efficiently achieve a neat and even lawn finish.
Fig.49: 1.Area with dense grass 2.Spiral path
NOTE: The Robotic Mower executes spiral cutting one time per charge. When the Robotic Mower departs the charging station after charging is complete, it first performs normal mowing work continuously for about 30 minutes. When dense or unmowed grass, etc. is detected after that, operation switches to spiral cutting centering on that spot, and then after intensively mowing the grass, the mowing work continues with normal navigation again.
- Press the button on the control panel.
The [Main menu] appears.
- Select displayed on the screen.
The sub menu appears.
NOTE: If the menu is not displayed, use the Keys to scroll the screen.
- Select [Spiral cutting].
The option menu appears. - Select the desired option.
Select the checkbox in front of the option, and then press the key.
| Option Details | |
| Spiral cutting Enables the spiral cutting mode. | |
Fig.50
- Select [Confirm] and register the setting.
When the message [Saved successfully.] appears, press the key.
Security Preferences
Setting the alarm sounding time
[Top menu] > [Main menu] > [Security] > [Alarm duration]
Set the duration of the alarm that sounds for various notification or when an error occurs.
- Press the button on the control panel.
The [Main menu] appears. - Select displayed on the screen.
The PIN code entry screen appears. - Use the keypad and enter the PIN code.
Fig.51
The sub menu appears. - Select [Alarm duration].
Fig.52
The entry screen appears. -
Use the keypad and enter the desired time.
Fig.53
NOTE: You can enter an alarm duration of 1 to 99 min. The initial setting value is 10 min. -
Press the key to verify the entry. When the message [Saved successfully.] appears, press the key.
Changing the PIN code
[Top menu] > [Main menu] > [Security] > [Change PIN code]
This is used to change the currently used PIN code to a new code.
NOTE: If you have forgotten your PIN code, contact our sales office or local dealer.
- Press the button on the control panel. The [Main menu] appears.
- Select displayed on the screen. The PIN code entry screen appears.
- Use the keypad and enter the currently used PIN code. The sub menu appears.
- Select [Change PIN code]. The entry screen appears.
- Use the keypad and enter the new PIN code. Fig.54
- Enter the new PIN code again for confirmation. When the message [The PIN code has been chan press the key.
Preventing wire signal interference
[Top menu] > [Main menu] > [Security] > [Change wire signal]
Change a channel for sending wire signals when it interferes with signals from adjacent work areas.
NOTICE: Dock the Robotic Mower with the charging station before changing the channel.
- Press the button on the control panel. The [Main menu] appears.
- Select displayed on the screen The PIN code entry screen appears.
- Use the keypad and enter the PIN code. The sub menu appears.
- Select [Change wire signal]. The option menu appears.
- Use the keypad and select a new channel code. Fig.55
NOTE: A mark is displayed next to the currently used channel code. (The initial value is [Channel 1].) When changing the channel, select a channel without the mark displayed.
- Follow the message displayed on the screen and complete the setting.
When the message [Dock the mower to the charging station.] appears, select [Confirm] and press the key.
When the message [Completed.] appears, press the key.
Protecting the Robotic Mower from theft
[Top menu] > [Main menu] > [Security] > [Anti-theft] Prevent theft and improper use of the Robotic Mower by setting the operation lock and notification function.
- Press the button on the control panel. The [Main menu] appears.
- Select displayed on the screen. The PIN code entry screen appears.
- Use the keypad and enter the PIN code. The sub menu appears.
-
Select [Anti-theft]. The option menu appears.
-
Use the keypad and place a check mark in the checkbox of the desired option.
You can select multiple options.
| Option Details | |
| Stopped: PIN W | When the Robotic Mower is forcibly stopped, PIN code entry is necessary to restart operation. |
| Stopped: PIN & Alarm | When the Robotic Mower is forcibly stopped, the alarm sounds and PIN code entry is necessary to restart operation. |
| Lifted: PIN & Alarm | When the Robotic Mower is lifted up, the alarm sounds and PIN code entry is necessary to restart operation. |
| Tilted: PIN & Alarm | When the Robotic Mower is tilted by a certain angle or more, the alarm sounds and PIN code entry is necessary to restart operation. |
- Select [Verify] and register the setting. When the message [Saved successfully.] appears, press the key.
Other Settings
Saving/ loading user preferences
[Top menu] > [Main menu] > [Others] > [Save and load preferences]
You can save up to three preferred settings you create and customize in the setting menus and load them at any time. This allows to use a range of user preferences to switch according to the work area and environment.
NOTE: A certain range of items (e.g., date and time, PIN code and so on, set on the initial setting screen) cannot be saved and loaded.
- Press the button on the control panel. The [Main menu] appears.
- Select displayed on the screen. The sub menu appears.
- Select [Save and load preferences]. Fig.56
The menu selection screen appears.
- Select the desired menu.
| Menu Details | |
| Load Loads saved user preferences. | |
| Save Saves the user preferences currently being used. | |
The option menu appears.
5. Select the user preference load source or the save destination option name. Fig.57
NOTE: [Listed now] is displayed to the right of options with user preferences already registered.
- Follow the message displayed on the screen and complete the setting.
When the message [Are you sure?] appears, select [Yes] and press the key.
Changing the date and time settings
[Top menu] > [Main menu] > [Others] > [Date and time]
This is used to adjust or change the date and time set in the Robotic Mower.
- Press the button on the control panel. The [Main menu] appears.
- Select displayed on the screen.
The sub menu appears. - Select [Date and time].
The menu selection screen appears.
4.Use the keys to select the desired menu option.
Select and display the desired format on the screen.
| Menu Option details |
| Date format: Selects the date format from [Year/Month/Day], [Month/Day/Year], or [Day/Month/Year]. |
| Time format: Switches the time format between [12 hours] or [24 hours]. |
Fig.58
- Select [Next].
The date and time entry screen appears. - Use the keypad and enter the desired date and time.
Fig.59
Entering the date and time
(1) Use the 4 / 7 keys to highlight the date or time entry field to be set.
(2) Use the keypad and enter the year, month, and day or the time.
(3) Repeat steps 1 and 2 and enter all the entry fields to be changed.
- Select [Verify].
When the message [Saved successfully.] appears, press the key.
Changing the display language
[Top menu] > [Main menu] > [Others] > [Language]
This is used to change the language displayed on the LCD screen.
- Press the button on the control panel.
The [Main menu] appears. - Select displayed on the screen.
The sub menu appears.
3. Select [Language].
The language selection screen appears.
4. Select the desired language.
The display language of the language selection screen changes.
When the message [Saved successfully.] appears, press the key.
Resetting the user preferences
[Top menu] > [Main menu] > [Others] > [Reset all settings]
This is used to reset all saved user preferences and return them to the initial state.
| NOTICE: Some information and settings entered when starting up the Robotic Mower for the first time, such as the date and time and the PIN code, are not reset. |
- Press the button on the control panel.
The [Main menu] appears. - Select displayed on the screen
The sub menu appears.
3. Select [Reset all settings].
The PIN code entry screen appears.
4. Use the keypad and enter the PIN code.
5. Follow the message displayed on the screen and complete the setting.
When the message [Completed.] appears, press the key.
Browsing the product information
[Top menu] > [Main menu] > [Others] > [Information]
This displays the latest product information, such as the cumulative work time and the software version information.
- Press the button on the control panel.
The [Main menu] appears. - Select displayed on the screen.
The sub menu appears. - Select [Information].
NOTE: After browsing the information, you can return to an upper menu screen by pressing the key or the button.
Press the Key to return to the [Others] sub menu screen, or the button to return to the [Main menu] screen.
Managing the LED on/off time
[Top menu] > [Main menu] > [Others] > [LED]
This is used to control the on and off times of the LED lamp on the top of the Robotic Mower. For details on the LED lamp, refer to "Lamp lighting" (Page 17).
- Press the button on the control panel.
The [Main menu] appears. - Select displayed on the screen.
The sub menu appears.
| NOTE: If the menu is not displayed, use the▲Keys to scroll the screen. |
- Select [LED].
The on/off schedule setting screen appears.
- Select the desired option.
| Option Details | |
| Always ON The | LED is always on. When this option is selected, a check mark is placed in the [Schedule 1:] checkbox and [00:00] - [24:00] is displayed. |
| Always OFF The | LED is always off. When this option is selected, the check marks are removed from both the [Schedule 1:] and [Schedule 2:] checkboxes, and [00:00] - [00:00] is displayed. |
| Schedule 1: The | LED is on within the set time range. |
| Schedule 2: The | LED is on within the set time range. |
Fig.60
Setting schedules
(1) Use the keypad and place a check mark in the checkbox of the schedule option to be set.
(2) Use the keys to highlight the hour or minute entry field to be set.
(3) Use the keypad and enter the time.
(4) Repeat steps 2 and 3 to enter all the hour and minute entry fields.
| NOTICE: To enable a schedule setting, be sure to place a check mark in the checkbox. |
| NOTICE: The times entered to [Schedule 1:] and [Schedule 2:] cannot overlap. |
- Select [Verify].
When the message [Saved successfully.] appears, press the key.
Checking the details of operation errors
[Top menu] > [Main menu] > [Others] > [Error message]
This displays the most recent error messages, including the details, reported to the Robotic Mower.
- Press the button on the control panel.
The [Main menu] appears. - Select displayed on the screen.
The sub menu appears.
| NOTE: If the menu is not displayed, use the▲Keys to scroll the screen. |
- Select [Error message].
The Robotic Mower searches for the error information and displays a list of the reported error codes in order from the newest. - Select an error code to check the details.
Fig.61
The error details screen appears.
5. Check the date and time that the error occurred and the error message contents.
Fig.62
NOTE: After browsing the information, you can return to an upper menu screen by pressing the key or the button.
Press the key to return to the [Others] sub menu screen, or the button to return to the [Main menu] screen.
MAINTENANCE
CAUTION: Always make sure that the power switch of the Robotic Mower is turned off before performing inspection or maintenance. In addition, be sure to unplug the AC adapter from the power outlet when performing maintenance on the charging station.
CAUTION: Always wear gloves and protective eyewear when performing inspection and maintenance. Otherwise, injury may result.
To maintain product SAFETY and RELIABILITY, repairs, any other maintenance or adjustment should be performed by Makita Authorized or Factory Service Centers, always using Makita replacement parts.
Cleaning
NOTICE: Never use gasoline, benzine, thinner, alcohol or the like. Discoloration, deformation or cracks may result.
NOTICE: Periodically clean the machine. Grass clippings may accumulate in the chassis or the charging station.
NOTICE: Do not wash the machine with a high pressure washer. Doing so may result in damage or breakdown.
Cleaning the Robotic Mower
CAUTION: Be careful not to injure yourself with the blades when cleaning the mower blades and surrounding areas.
CAUTION: Be careful not to get your hands or other objects caught between the top cover and chassis or to injure your hands on the edges of the top cover when attaching and removing the top cover.
Wipe clean the surface of the top cover and the underside of the chassis with a dry cloth or a cloth dampened with diluted neutral detergent. Completely wipe away any dirt and clippings that have accumulated on and around the wheels.
Fig.63
NOTE: Wash with water if very dirty. After washing with water, it is recommended to let the machine dry thoroughly before restarting.
Grass clippings may accumulate between the top cover and the chassis. Follow the procedure below to remove the top cover and also clean the upper part of the chassis.
Fig.64: 1. Top cover 2. Chassis 3. Rubber retainer 4. Slider shaft
While holding down the display cover, lift up and disengage the parts of the top cover indicated in the illustration one by one.
Fig.65: 1. Top cover 2. Display cover
NOTE: Make sure that there are no obstacles around when removing the top cover.
NOTE: The top cover and chassis are firmly connected in three locations. Pull up the top cover strongly until the rubber retainers inside the top cover disengage from the slider shafts of the chassis.
When returning the top cover to its original condition, align the rubber retainers of the top cover with the slider shafts of the chassis and press down strongly.
Fig.66
NOTE: Check if the top cover is correctly attached to the chassis by lifting the front and side parts of the top cover. Incorrect attachment may result in detection failure of the sensors.
Cleaning the charging station
Clean away any dirt or clippings that have accumulated on the terminal and base of the charging station.
Fig.67: 1. Charging terminal 2. Station base
Inspecting the mower blades
Follow the procedure below and inspect once per week.
-
Turn off the power switch of the Robotic Mower and turn it upside down.
Fig.68 -
Inspect the condition of the mower blades and the rotation of the blade base.
Check the following points.
- Does the blade base rotate smoothly?
- Are the mower blades excessively worn, cracked, chipped, or bent, etc?
Blade base and mower blades
Fig.69: 1. Normal 2. Worn (A: 17.5 mm or less) 3. Cracked 4. Chipped 5. Bent 6. Blade base
- Inspect the condition of the mower blade fixing screws.
Follow the procedure in the section "Replacing the mower blades" (Page 28) to remove the fixing screws, and check the condition of the fixing screws.
Mower blade fixing screw
Fig.70: 1. Normal 2. Worn 3. Fixing screw
NOTE: If no particular abnormality is observed in weekly inspections, lengthen the inspection interval.
NOTE: The mower blade life will vary according to the operating environment. In particular, conditions such as the following will shorten the life.
- Long mowing time
- Wide work area
- Grass with thick stems and leaves
High seasons for grass growth - Dirt, sand, or other matter adhered to the grass
Replacing the mower blades
WARNING: Replace the mower blades according to the procedure in this manual. If replacement is done by a different method, accident or injury may result.
CAUTION: Always wear protective eyewear and gloves when replacing the mower blades.
CAUTION: Perform the replacement work on a level and stable surface.
NOTICE: Replace the mower blades approximately 2 to 6 weeks. The replacement timing will vary according to the mowing frequency and the condition of the grass.
NOTICE: There are three mower blades. Replace all three blades at once. Even if only one mower blade is damaged, replace all three blades.
NOTICE: The following tools are necessary for mower blade replacement. Prepare these tools in advance.
- Screwdriver (plus) (Used to remove and attach the blades)
- 6 mm metal rod or screwdriver with a length of 160mm or more (Used to fix the blade base)
If the mower blades are excessively worn, cracked, chipped, bent, etc., or the mower blade fixing screws are worn, follow the procedure below and replace them.
- Turn off the power switch of the Robotic Mower and turn it upside down.
- Fix the blade base.
Align the holes of the skid plate, blade base, and blade cover and then insert the metal rod. If the blade base does not rotate, the fixing is complete.
Fig.71: 1. Metal rod 2. Skid plate 3. Blade base 4. Blade cover
3. Remove the mower blades.
Use the plus screwdriver and remove the screws fixing the mower blades.
Fig.72: 1. Screw 2. Mower blade
NOTE: Hold the mower blade with your fingers when removing the screw. Otherwise, the mower blade may fall into the gap between the top cover and the chassis.
4. Attach the new mower blades.
Use the screws supplied with the new mower blades. After attachment, check that the mower blades rotate around the screws.
Fig.73
NOTICE: Be sure to observe the following items to prevent the mower blades from falling off.
- Use the screws supplied with the mower blades. (Do not reuse the removed screws)
- Firmly tighten the screws so that they are not loose.
- Remove the metal rod fixing the blade base, and return the upside-down Robotic Mower to its original condition.
Fig.74:1.Metal rod
NOTE: After replacing the mower blades, remember to turn on the power switch of the Robotic Mower when restarting.
Periodic inspections
Periodically check the following points.
| Inspection site | Check item Countermeasures | Inspection | frequency |
| Robotic Mower | Is there any abnormality with the mower blades? | If mowing cannot be performed well, turn off the power switch, check the mower blades for wear, cracks, or chips, and replace the mower blades if necessary. | Once per week |
| Is the Robotic Mower traveling stable? | If the Robotic Mower travels unstable, turn off the power switch and check if there is any damage to the wheels and axles or if any foreign objects are caught or rubbish and dirt has accumulated on the wheels and axles. If the problem is not resolved, contact our sales office. | Once per month | |
| Is abnormal sound produced? If abnormal sound | is produced, turn off the power switch and check if there are any foreign objects caught in the rotating parts of the wheels and the mower blades. If the problem is not resolved, contact our sales office. | Once per month | |
| Can docking be performed correctly? If docking can | Cannot be performed, turn off the power switch, move the Robotic Mower by hand, and check whether proper docking with the charging station is possible. If proper docking is not possible, check the following points. - Remove any obstacles from near the wheels. - Attach the top cover correctly. (The top cover should be fixed in three places) - If the ground under the station base is uneven, smooth it. | Once per month | |
| Charging station | Is the station indicator lighted green? | If it is lighted or blinking red or off, the Robotic Mower will be unable to execute mowing. Check the following points and take the appropriate countermeasures. - Is the AC adapter connected properly to a power outlet? - Is the cabtire cable connected properly to the AC adapter and the charging station? - Are the boundary wire connectors connected properly to the charging station? - Are couplers attached on the boundary wire connected properly? - Is the boundary wire broken partway? | When the LED of the Robotic Mower lights up or blinks red |
| Is the charging station properly fixed? | If the charging station moves, retighten the screw pegs with the hex wrench 6. | Once per week | |
| Has foreign matter adhered to the terminals? Some | de adhered matter may hinder proper communication and charging. Clean away any dirt on the charging terminal and other terminals. | Once per week | |
| Is the guide wire protruding from the station base? | If the guide wire protrudes from the groove of the station base, insert it again. Once per week | per week | |
| AC adapter and cabtire cable | Are the power plug and connection terminals inserted firmly all the way? | If a power outlet or connection terminal insertion is loose, insert it again. | Once per month |
| Are the cables damaged? | If a cable sheath is peeled or severely damaged, contact our sales office. | Once per month | |
| Work location | Are any foreign objects present? | Clear away any objects that may damage the mower blades or get caught in the rotating parts of the Robotic Mower. (Small stones, sticks, rubbish, string-like objects, etc.) | Once per month |
| Is there any change in the work environment? | Take the following countermeasures. - If the grass height exceeds 65 mm, cut it down to that height or less. - Clear away any weeds that are higher than the lawn. - Fill in any holes or depressions and smooth out local unevenness. - Refrain from use if there are deep puddles or snow accumulation. | Once per month | |
| Is there any abnormality with the boundary wire and guide wire installation? | If the wires float from the ground, fix them again with the pegs. | Once per month |
Handling after the season ends
After mowing season ends, remove the following parts from where they are installed and store them indoors.
- Robotic Mower
- Charging station
- AC adapter
- Cabtire cable
NOTICE: Charge the Robotic Mower before storage.
NOTE: The boundary wire and guide wire(s) can be left installed.
Clean the Robotic Mower and charging station before storing them. In addition, follow the procedures below to remove each part.
Removing the AC adapter
- Unplug the AC adapter from the power outlet.
- Remove the captire cable.
- If the AC adapter is fixed to a wall, remove it from the wall.
Fig.75
NOTE: Remove the AC adapter in the order of the numbers shown in the illustration.
Removing the charging station
CAUTION: Wear gloves when performing the work.
- Open the covers of the charging station and remove the cabtire cable. Fig.76
- Pull off the boundary wire and guide wire terminals, and remove each wire from the charging station.
- Remove the screw pegs from the station base using the hex wrench 6.
Fig.77
Storage
NOTICE: Store the Robotic Mower in the condition with the power switch turned off.
NOTICE: Wipe clean the terminal parts of the charging station, wires, and cables with a dry cloth, etc. before storing them. Storage with dirt adhered may result in rust or corrosion.
NOTICE: Place the screws used to fix the charging station and the AC adapter in a bag or other container and store them carefully so as not to lose them.
Store in a location that satisfies the following conditions.
A flat and stable location
- A location out of direct sunlight and not exposed to rain or snow, etc.
A location with low humidity
A location out of the reach of children
NOTE: The Robotic Mower can be stored upright as illustrated. Also select a flat and stable location when storing upright.
Fig.78
When disposing of this product
When disposing of this product, follow your local regulations and dispose of the separate parts correctly.
WARNING: The Robotic Mower contains a battery. When disposing of this product, remove the battery and dispose of it separately. Failure to dispose of the battery separately may result in accident or injury due to rupture, fire, or smoke.
WARNING: Do not work with wet hands. Doing so may cause an electric shock.
CAUTION: Wear gloves when working.
NOTE: It is necessary to disassemble the chassis in order to remove the battery. Prepare a plus screwdriver.
Removing the battery
NOTICE: Remove the battery only when disposing of this product.
- Turn off the power switch of the Robotic Mower.
-
Remove the top cover.
Fig.79: 1. Power switch 2. Top cover 3. Chassis -
Loosen the 14 screws on the upper part of the chassis and remove the upper housing.
Fig.80: 1. Upper housing
- Disconnect the 2 connectors connected to the battery.
Fig.81: 1. Battery cover 2. Connector (small) 3. Connector (large)
NOTE: If it is hard to perform the procedure, remove the connector attached to the upper housing.
- Disconnect the 3 connectors connected to the main board.
Fig.82: 1. Main board 2. Connector (large) 3. Connector (small) - Remove the 3 battery cover screws.
Fig.83: 1. Battery cover -
Remove the battery cover, and then remove the battery together with the cushion.
Fig.84: 1. Battery cover 2. Battery 3. Cushion -
Remove the battery from the cushion.
Follow your local regulations when disposing of the battery.
CAUTION: Do not disassemble the removed battery.
PROTECTION SYSTEM
Protection system and Error Indication
The Robotic Mower is equipped with a protection system. When an error occurs, the protection system is activated and all motors stop automatically. Details of the error are displayed on the LCD screen with the error code.
| Code Details of the error Cause Action | |||
| E012 | Right wheel motor problem | Foreign objects such as grass or branches are preventing the wheels from rotating, or the driving motor is overloaded due to repeated collisions. | Inspect the wheels and remove any foreign objects. Also check the operating area is compliant with the work environment specified in the instruction manual. Restart the machine after a while. |
| E013 Left | wheel motor problem | ||
| E020 Blade motor overloaded The blade motor is overloaded by some causes. For example, foreign matter such as grass or branches are interfering with the rotation of the blade base. | Inspect around the blade base and remove any foreign objects. Restart the machine after a while. | ||
| E021 Blade motor problem | |||
| E030 Cutting height motor overloaded The cutting height motor is overloaded by some causes. For example, foreign matter such as grass or branches are interfering with the movement of the cutting height adjustment mechanism. | Inspect the cutting height adjustment mechanism and remove any foreign objects. | ||
| E031 Cutting height motor problem | |||
| E040 No wire signal The AC adapter, cabtire cable, or boundary wire connection is poor or damaged. | Check the indicator on the charging station. Green/lighted: Contact the dealer or our sales office. Red/blinking: Check the boundary wire and reconnect. Replace if you find any damage. Off: Check the AC adapter and cabtire cable, and reconnect. Replace if you find any damage. | ||
| Each channel code of the machine and the charging station are different. | Change the channel code of the wire signal appropriately in [Security] menu. | ||
| The machine is too far from the boundary wire. Reinstate all the boundary wire so that the whole of the work area is within 35 m of the boundary wire. | |||
| Signals are blocked by surrounding metal objects (fences, reinforcing steel) and interference from other devices. | Increase the signal strength in the work area by increasing the number of islands in the work area, reducing the work area, etc. | ||
| E041 Outside working area Incorrect boundary wire connection or installation. For example, boundary wires are crossed or the machine goes out of the work area because of the high slope. | Check that the boundary wires are installed properly and connected to the charging station firmly. For the installation method, refer to the chapter for installing the boundary wire in the Setup Guide. | ||
| Signals are blocked by surrounding metal objects (fences, reinforcing steel) and interference from other devices. | Increase the signal strength in the work area by increasing the number of islands in the work area, reducing the work area, etc. | ||
| There is interference with signals from other products nearby. | Change the channel code of the wire signal appropriately in [Security] menu. And reinstall the boundary wires so that both boundary wires keep the distance more than 1 m. | ||
| E051 Temporary problem The machine is in a high temperature, or the "STOP" button remains active after the command of mowing. | Restart the machine after a while or release the "STOP" button by closing the display cover after the command of mowing. | ||
| E060 | Empty battery | The machine could not find a charging station. | Check the installation of the boundary wire and guide wire.For the installation method, refer to the chapter for installing the boundary wire and guide wire in the Setup Guide. |
| The mowing option is set to [Auto mowing] when operating in the sub area. | Set the mowing option to [Mowing without charging] when operating in the sub area. While working in the sub-area, the machine cannot return to the charging station. | ||
| The battery is exhausted. Dock the machine to the charging station to charge.If the problem persists, contact the dealer or our sales office. | |||
| E064 Low battery The battery is over-discharged. | |||
| The battery is exhausted. | |||
| E080 Electronic problem There is a temporary problem relating electronic or firmware in the product. | Restart the machine.If the problem persists, contact the dealer or our sales office. | ||
| E100 Stuck The rear wheels are spinning due to muddy conditions. | Avoid spinning the rear wheels by leveling the ground or limiting the operating area with boundary wire. | ||
| E101 Docking problem The machine has failed to dock with the charging station, or the charging station has an error. | Clean each terminal. If the charging station is tilted or skewed, lay it flat. If the indicator of the charging station is lit red, pull out the plug, wait a while, and then restart the charging station. | ||
| E102 Upside down | The machine is tilted massively or rolled over. | Correct the posture of the machine. | |
| E103 Mower tilted | The machine is tilted beyond the acceptable range. | Move the machine to a flat area. Reinstall the boundary wire so that large slopes are out of the work area. | |
| E104 Lifted The lift sensor is activated because the machine hits or rides on the obstacle. | Keep the distance between the obstacle and the work area, and restart the machine. | ||
| E105 Collision sensor problem | The top cover cannot return to the standard position. | If the machine contacts an obstacle, release the machine from the obstacle. Remove any dirt or foreign objects between the top cover and chassis, and make sure the top cover moves freely around the slider shafts. | |
| E200 Loop sensor problem | The wire sensor has poor contact or has failed. | Contact the dealer or our sales office. | |
| E201 Tilt sensor problem | Failed to communicate with tilt sensor. | ||
| E202 Stop switch problem | The reliability of the "STOP" button is declining. | ||
| E203 IMU sensor problem | Failed to communicate with the IMU sensor. | ||
| E204 Cutting height sensor problem | The sensor of the lifting mechanism has a poor contact or has failed, there is an error in the connection. | ||
| E206 Lift sensor problem | The reliability of the lift sensor is declining. | ||
TROUBLESHOOTING
If you think there is a malfunction
Before asking for repair or making an inquiry, check whether the following apply.
| State of abnormality | Probable cause (malfunction) | Remedy | |
| LCD screen does not display. | Is the power of the Robotic Mower turned off? | Turn on the power of the Robotic Mower. (Refer the section for "Turning the power on/off".) | |
| Robotic Mower does not run. | Does an error of the Robotic Mower occur? (Is the LED blinking in red?) | The Robotic Mower does not run during an error. Check the error code.(Refer the section for "PROTECTION SYSTEM".) | |
| Does an error of the charging station occur? | Check the station indicator. For remedies, see chapter "Starting mowing". | ||
| There may be a broken boundary wire. | Check the station indicator. For remedies, see chapter "Starting mowing". | ||
| Robotic Mower cannot dock to the charging station. | The charging station is deformed. | Place the charging station firmly on a level surface.Refer to the chapter "Locating the charging station" in the Setup Guide for how to install the charging station. | |
| The guidewire is not laid straight from the charging station or the distance is incorrect. | Install the guidewire at least 2 meters straight from the charging station.Refer to the chapter "Guide wire installation conditions" in the Setup Guide for how to install guide wires. | ||
| The guidewire is not properly secured to the charge charging station. | Secure the guidewire to the groove in the center of the station base of the charging station.Refer to the chapter "Installing the guide wire" in of the Setup Guide for how to install the guide wire. | ||
| Robotic Mower does not return to the charging station. | Since Robotic Mower is in the active search period of the guide signal, it does not return with the boundary signal. | If the guide wire is not installed, set the active search period of the guide signal to 0 minutes.Refer to the chapter "Setting the active search period for the guide signal" for the setting procedure. | |
| Robotic Mower does not depart from the charging station after the work area has been changed. | Have the Robotic Mower depart from the charging station and let it save the surrounding magnetic field in its memory.Refer to the chapter "Navigation Preferences" for the setting procedure. | ||
| Robotic Mower cannot return by the boundary signal because the boundary wire installed near the charging station is incorrect. | Install the boundary wire1.5 m straight on both sides of the charging station.Refer to the chapter "Installing the boundary wire" in the Setup Guide for how to install boundary wires. | ||
| State of abnormality Probable cause (malfunction) Remedy | |||
| The battery is empty but not charged when docked in the charging station. | If the battery is fully discharged, it may take some time for the battery to start charging. | Dock the Robotic Mower to the charging station with the main power ON, and wait for a while until the charging starts. If the problem persists, contact our sales office or local dealer. | |
| Robotic Mower stays at the charging station for a long time and will not start mowing. | The display cover is closed, but the mowing start button is not pressed. | Close the display cover after pressing the mowing start button.Refer to the chapter "Starting mowing" for instructions. | |
| Robotic Mower is in standby state after returning to the charging station. | Check the operation options after charging.Refer to the chapter "Park Preferences" for instructions. | ||
| Robotic Mower does not work if battery temperature is too high or too low. | Restart the Robotic Mower after a while. | ||
| Abnormal vibration / noise The mower blade is damaged. Check the condition of the mower blades | and replace them with new blades and screws.Refer to the chapter "Replacing the mower blades" for how to replace. | ||
| Foreign matter is stuck in the mower blade. Check the part around the mower blade and remove any foreign matter. | |||
| Robotic Mower operates unintended time / date. | The date and time of the Robotic Mower are incorrect. | Check the date and time of the Robotic Mower.Refer to the chapter "Changing the date and time settings" for how to set the schedule. | |
| Unintended setting of scheduled mowing. Please change the mowing schedule.Refer to the chapter "Scheduling mowing" for instructions. | |||
| Robotic Mower travels, but the cutting blade motor does not rotate. | The robotic mower has just started driving or it is returning to the charging station. | The blade motor does not rotate when the Robotic Mower has just started driving or when it is returning to the charging station. | |
| Short mowing time The mower blades have worn out and the load on the cutting blade motor has increased. | Replace the mower blade.Refer to the chapter "Replacing the mower blades" for how to replace. | ||
| The end of battery life is approaching. Contact our sales office or local dealer. | |||
| Short mowing time and charging time The end of battery life is approaching. Contact our sales office | or local dealer. | ||
| Uneven lawn mowing The mowing schedule is too short to mow whole work area. | Reduce the size of the work area or extend the schedule.Refer to the chapter "Scheduling mowing" for instructions. | ||
| The mower blades have worn out and the load on the cutting blade motor has increased. | Replace the mower blade.Refer to the chapter "Replacing the mower blades" for how to replace. | ||
| The lawn is too long for the set cutting height. Change the cutting height or cut the lawn to 65 mm or less beforehand.Refer to the chapter "Determining the cutting height" for how to configure. | |||
| Grass, branches, or other foreign matter prevents the blade base or wheels from rotating. | Inspect the blade base or wheels and remove any foreign matter. | ||
| Ruts are formed on the lawn. Robotic Mower travels on a particular path repeatedly. | Adjust the width of offset navigation.Refer to the chapter "Adjusting the width of offset navigation" for how to configure. | ||
| Unable to travel along a path. The width of the path is narrow. The width of the path must be at least 150 cm. | 150 cm.Refer to the chapter "Boundary wire installation conditions" in the Setup Guide for how to install boundary wires. | ||
| Robotic Mower cannot go over two boundary wires to and from the island. | The two boundary wires to and from the island are not close together. | Close (0 cm) the two boundary wires to and from the island.Refer to the chapter "Installing the boundary wire" in the Setup Guide for how to install boundary wires. | |
| Spiral cut does not work. The normal mowing operation has not elapsed 30 minutes. | Spiral cutting works when it detects dense grass after about 30 minutes of normal lawn mowing.For more information, refer to the chapter "Mowing unmowed grass" | ||
| Forgot the PIN code. | - | Contact the dealer or our sales office. | |
Table des matieres
INTRODUCTION 33
Specifications 33
Symboles 33
Utilisations 34
[Menu supérieur] > [Start mowing (Commencer à tandre)] > [Mowing without charging (Tonte sans recharge)]
[Menu supérieur] > [Park (Stationner)] > [Stay at charging station (Rester à la borne de recharge)]
[Startmenü] > [Start mowing (Mähvorgang starten)] > [Mowing without charging (Mähen ohne Ladevorgang)]
[Startmenü] > [Park (Parken)] > [Stay at charging station (An Ladestation bleiben)]
[Startmenü] > [Park (Parken)] > [Schedule restart time (Uhrzeit Neustart planen)]
[Startmenü] > [Park (Parken)] > [Restart on schedule (Neustart nach Plan)]
[Startmenü] > [Main menu (Hauptmenü)] > [Security (Sicherheit)] > [Alarm duration (Alarmdauer)]
[Startmenü] > [Main menu (Hauptmenü)] > [Others (Sonstiges)] > [Language (Sprache)]
[Startmenu] > [Main menu (Hauptmenu)] > [Others (Sonstiges)] > [Information (Information)]
[Startmenü] > [Main menu (Hauptmenü)] > [Others (Sonstiges)] > [LED]
[Menu superiore] > [Start mowing (Taglio)] > [Mowing without charging (Taglioswana ricarica)]
[Menu superiore] > [Start mowing (Taglio)] > [Mowing - With spiral cutting (Taglio - A spirale)]
Fig.6: 1. Laadstation 2. Led-lamp
- De graslength is 65mm of minder.
Fig.7: 1. Led-lamp 2. Laadstationindicator
Robotmaier
Fig.14: 1. Laadstationindicator
[Beginmenu] > [Park (Parkeren)] > [Stay at charging station (In laadstation blijven)]
- Selecteer [Stay at charging station (In laadstation blijven)].
[Beginmenu] > [Park (Parkeren)] > [Restart on schedule (Schema herstarten)]
[Beginmenu] > [Main menu (Hoofdmenu)] > [Security (Beveilinging)] > [Alarm duration (Duur van alarm)]
[Beginmenu] > [Main menu (Hoofdmenu)] > [Security (Beveiling)] > [Anti-theft (Diefstalbeveiling)]
- Selecteer [Anti-theft (Diefstalbeveiliging)].
[Beginmenu] > [Main menu (Hoofdmenu)] > [Others (Overig)] > [Date and time (Datum enijd)]
[Beginmenu] > [Main menu (Hoofdmenu)] > [Others (Overig)] > [Language (Taal)]
[Beginmenu] > [Main menu (Hoofdmenu)] > [Others (Overig)] > [LED (Led)]
KENNISGEVING: Deijdnen ingevoerd in [Schedule 1: (Schema 1:)] en [Schedule 2: (Schema 2:)] mootelijk rather not overlappen.
- Selecteer [Verify (Controlleren)].
[Menu superior] > [Start mowing (Empezar a segar)] > [Mowing without charging (Cortar sin cargar)]
[Menu superior] > [Park (Estacionar)] > [Stay at charging station (Permanecer na址ao de carrogamento)]
Quando surge a mensagem [The PIN code has been changed. (O)...), prima a tecla
Remover o adaptor CA
Móvo yia xwpe ts Eupwnns
Oi Anawoeic Suupoppwos Tepiaaabavovta oTo npaptnma A oTo TApov Exyepio odnyiw.
Ovopata eapntmuatov
Eik.2
Tia evapx xlookotncaeos
Tia evapn xaookotnc aueoos, ektealeote tn aeitoupyia evapns xo- ookotns stov tivaka eleyxou.
- PatrnoTe to koumuT«STOP
AvoivEiToKaTnakiOboVns.
Eik.15: 1. Koumπi «STOP» 2. Kaπaki Θovns 3. NivaKaçελεγxou
- Patniote To koupi OTov Tivaka eEyxou.
- KávTE TnV EITHeuμnTn EITIoyn.
YIaXouu duo meo0oi yia th biakotn ts xlookotns.
AikotnXlookotnc kai npapovn ot n thc (Naon)
Otav Tatnei to Koumu TKA tN diapkeia nC LEIToupyiac, to KATAKI Obovnc avoivc kai n Xlookotn tiEeai e Taun.
Eik.16: 1. Koupi «STOP» 2. Kanaki oovns
AikotnXlookotnc KAI EITpOoN OTOV OTAθμo φoptions (Aηξη)
- Nathote to Koupti 工 Kata n diapkeia TcAeitoupyiac kai, 0tn ouvexia, nathote to Kouptiov Trivaka eEyxou.
EIK.17: 1. Koupi «STOP» 2. Kaia oovs 3. Nivaac «eEyyou - Kávτε Ννγ επιθυμηήν επιλούγι.
Xlookotn xwipacutouatnpoption
[ [Avw \mu \varepsilon \upsilon \upsilon] > [Start mowing (Evapξη \chiλookπης)] > [Mowing without charging (Xλookπη χωρις φόριη)] ]
H autouatn aeitoupyia ouvexicetai evtoc tou xpovou tou exei oiptei TpokataoIka n expi n xwpntikotnta mtatapiac va eavtAnbe. Oeote to poutotikko xlookottnk o ce aitoupyia e autn tn pubuian otav ktealeitai xoookotn o e iia deutepeuovua aepiox nou dev exei diaopoun pios kai ato tvnpia nepioxh. Entions, stnv kupia nepioxh, xpoioutoinote autn tn pubuian kata tnv xlookotn mvo yia TOV ETIAUYevo xpovo kata totoio bev attaiteiAt EITIOPOP h OTAV taOho foptian.
IIInpoopoeysia nEutepeouoa Tepiox
Autivia xepiotn tepioxyia epyaia xlookottntou TepiBaaetai ato to opupa opioBteonc aaaa dev diathe iiaipoun apketaia via va tepvaei to poutiotko xlookottnko tpoc tvKupia tepioxn. Hxlookotn ktealeitai autouata evw yivetal avixuean towonatowoupaw, aa n autopatn etiotpohn otov otauo optianc dev eivai duvatn.
Eik.21: 1. Kupia Tepioxn 2. Taouc opoTnC 3. Upu apioeTnC 4. AipuH 5. Eutepeoua Tepioxh
EIDONIOHE: IpOKeIeVou va 0eTeTo pOHTIKo XLOOKOTIKo OE LEITOUPyia oE DEUTEPEUOua TEPIOXn, METAKIVNOTE TPOKATAOIAkTO pOHTIKo XLOOKOTIKo ME TO XePI aTIO TNY KUPIA TEPIOXn OTN DEUTEPEUOua TEPIOXn.
EIOIeH: TaTn FOPTiOn Tou pOITIKOU XLOOKOTIKou TPO EpyaTeai OE MA DEUTEPEUooua TEPIOXh, DIAKOyTE PPOOwivA TO pOITOTKO XLOOKOTIKo KAI ATTEVEPYOTIOINOTE TIV IOxu. STN OUVExei MetapePte To OTNV KUPA TEPIOXh. Apou MetaapePte To pOITOTKO XLOOKOTIKo, EVPEYOTIOINOTE GAVT NTV IOxu KAI OUVSeToe To XeIPOKivTa ME TOV EYKATEOTnEvO CTABUo FOPTiOnc.
- PatniotTe To Koupti

Tivaka eEyxou.
Euavzetauovou.
2. Eπλεξτ [Mowing without charging (XλookoTnχωpί ϕρόπιη)].
Euavzeta To evou Etnoync.
3. KavTe TnV EInuunr EInaoyn
Eik.22: 1. Kavovikn diapoun 2. πειροίης diapoun
- KλeioTe Tov biakottn peuatoC kai totoetnto To poutotiko Xaookottko atny tototheia oTou a gekivnoi n otteipoeiDc Kotn. 2tn ouvexia, evpyotoinote Tov biakottn peuatoC.
- Patnote To Koupti OTov IVaKa EeYxou.
Euavicetai to Utopevoou.
- Eπλεξτ [Mowing - With spiral cutting (Xλοκοπη - Me σπειρειδόν κοπή)].
EuapaviciTaI to evou Etnioync. - KavTe TnV EInuunr EINAOyN
Piotiu noeis xlookotns
Aaayn kai kataxwpon tns Tepioxx xlookotns
[ [Avw \mu \varepsilon \upsilon \upsilon] > [Main \ menu (Kupio \mu \varepsilon \upsilon \upsilon)] > [Mowing \ preferences (\Pi poti \mu \eta \sigma \epsilon \chi \lambda o o k o m \eta \varsigma)] > [Mowing \ area (\Pi pio \chi n \chi o o k o m \eta \varsigma)] ]
XpnoiioTIOeITAI via TnV aalayn Tou eveOus nC TEPIOXns XlookOTIg TSou exei kataxwntheotav to poutitKO XoOkOTTIKO EKKIVNKe iya TpiWt npa hvi Tou katoxwnon Tou eveOus mC vae TEPIOXns XoOkOTIg. To poutitKO XoOkOTTIKO UTOLOyici T BAEiATIN biAdikacia xlookotng KAI TPOBaive OE ATOTEAEuMATIKXoOkOTIg TOYkaov Baee tiw TAnpoopoiw TEPIOXns XoOkOTIg TSou opcoVTai OTo TaPov.
EIADONOIHE: Opiote ia kataaann n Tepioxn xlookotns. Eav npuoiouevn tni antokaivei onmuavtka ato tv npaymuatikn Tepiox, mtope va utapouv akoupuetaepn KTA.
- PatnoTe To koumu TivakA eEyxou.
Euaviετai to [Main menu (Kúpio μενού)]. - Eπλεξε Ttou εμφανιεται Θην Θθονη.
Eik.26
Euavietai TO UToevoU.
3. Eπλεξτε [Mowing area (Περοχήχλookοτης)]
Eik.27
4. XpnoiHOTIOHTOte TO IANKTPOAOYIO KAI EITIAEETo EUPOC MEYEBOUG TnS TEPIOXns XLOOKOTNS OAS.
Otv eepavioti to mnuu [Saved successfully. (AntoNKeutnke pE tTtuxia.)], nntote to nhtpo
Ppoypaumiaqevn xlookomn
[ [Avw \mu \varepsilon \upsilon \upsilon] > [Main \ menu (Kupio \mu \varepsilon \upsilon \upsilon)] > [Mowing \ preferences (\Pi poti \mu \eta \sigma \epsilon \chi \lambda o o k o m i \eta \varsigma)] > [Schedule (\Pi p o y p a \mu \alpha)] ]
Puθiαte TTOPOvapmaXlookotnncuaεBδoμaδacTpokataBoλiká yia va EKTEAeTe Tn Xlookotnσuφwva μe Tov Kaipó kai ta oitba Tou TpOou ZHs. EvkataaIAnToPoypaumepyaaIacEITIa- ΘePoTIOei Tn auVOTnTaXlookotnnc kai diatnei To ykaov σe kañ kataaatayn iayalutepe xpovo.
AIPOEOXH: Xebiote Kaepiva K Ebdouiaia npoypaumata epyaioac kata n diapkeia wupw KkciuatoC, xwiic eTTiipnoi. Ppoetoiapte Tpoypamata yia va aTOpuyete tv NtavotnTa ouvavntons vuxtoiw zwoV. KATOIOs Tapeuipokoevo n aypiia cwa mtopei va bApTOUV ano Tc epyaiecs xooottns.
NAPATHPHSH: Bpeite Kaia icoppoTneva Tpoypaumata yia va atopuyetye TnV EvToVKN KluoPoplia Tou XLoOkOTTIKou Tou PtoKoAei Oumieon Tou ykaov. Metatpeyte TcPiOAs wpeX loOkotinC Te TpoypaunioEve xpoivke TpeiOouwTe kInOn v a MToPe i va avakateuUvthe iya dialeimu TuW TaalaiTwpneuvv Tepioxw.
- Patrote to koumu ti vivaKa eEyxou.
Euφaviεταi to [Main menu (Kúpio μενού)].
Otv eepavioTei to nuvua [Saved successfully. (Atroekeutnke Etituxia.)], TATNOTE TO TAnktpo
Uviotwuev npovik diapkeia aeitoupyiac yia ia ETIeuyevn TepioxXlookoTns
Tov nivaka napouiaozvrai xapakntpiotikoi xpovoi kteaeons TIOI TPoTeivovtai ia tvkatayopia eeyeouc ts pEioxns XlookotnC OaC. xeidiote ta oka aq nuepnoia kai eBdojiaia TPOypamata, avaloya me tis avaykecs aC.
| Mévyéðç TPEIPOXÍS XLOOKOTÍS (m2) | Húpeç εργασiác tyn εβδομáδa (ημépες) | Ωeç εργασiác tyn ημéρa (ωρες) | Παραδειγματα ωρολογίων προγραματων |
| 500 5 5 07:00 | 12:00 | ||
| 7 3,5 07:00 - 10:30 | |||
| 750 5 7,5 07:00 | - 14:30 | ||
| 7 5,5 07:00 - 12:30 | |||
| 1.000 5 10 07:00 | 00 - 17:00 | ||
| 7 7 07:00 - 14:00 | |||
| 1.500 5 14,5 07:00 | 00 - 21:30 | ||
| 7 10,5 07:00 - 17:30 | |||
| 2.000 5 19,5 04:00 | 00 - 23:30 | ||
| 7 14 07:00 - 21:00 | |||
| 2.500 6 20 03:00 | 00 - 23:00 | ||
| 7 17,5 05:00 - 22:30 | |||
| 3.000 7 21 02:00 | 00 - 23:00 | ||
| 3.500 7 24 00:00 | 00 - 24:00 |
Kaθoipσμος Tou Uψouς Kottns
[ [Avw \mu \varepsilon \upsilon \upsilon] > [Main \ menu (Kupio \mu \varepsilon \upsilon \upsilon)] > [Mowing \ preferences (\Pi \rho \sigma \iota \mu \eta \sigma \iota \varsigma \chi \lambda o o k o m \eta \varsigma)] > [Cutting \ height ('Y \psi o c \ k o m \eta \varsigma)] ]
Purote To uooc KOITNS Xeipokivnta n xpnoioTIOWvTc TnV autoupatn aeitoupyia. To poutiKo xooKOTIKo puoiiei autopata to uooc aapaac avaloya e To puoioevo uoos ykaov.
EIANOIHSH: H xlookotn maakoiu ykaov oKoTvO mkoCte nia tpoei va epeavei to ykaov n To KOpMevo ykaov mtopee va paeie cTO EOWTEPIKO TOPOITOTIKOU XLOOKOTIKOU.
NAPATHPHSH: Mny TPOOATAEITE VA KOUPEWETe JAKPU YKACOV ME TIA.AVITBETA, KOUPEWTE TO YKACOV SE Bnmuata, aHNVOTAC iia n DIO NUEPECI METAU TWV OUVEDPIIWXLOOKOTNS, MEXPTO YKACOV VA VIVEI OMOIOOPA KVTO. To KOUMEV YKACOV DEVPETTEVA EIVAI MEYALUTEPo ATO 5 MM ZIE MAIOVAODIK OUVEDPia XLOOKOTNS. H ZNIiA KA TO FOPTO OTO YKACOV MTPOEVA MEIWDEI WATE VA DIATNPelTAEva OMOPOTe LEIWEUVEO YKACOV, EAV PUHTOIDE TE KATALANLo U0OS YKACOV KA OUXVOTNTA XLOOKOTNS.
IAPATHPHSEH: H eviTn TIn n pOthmns Tou uouc KOTnS Yia To
pouTNIKO XLOOKOTIKo Eivai 60 mm. Av To uwoos ypaaioiou OTnv
apxtnsXLOOKOTNCS UTEPbaivei autn Tne eviTn TIn, KOPTe TO yka-
Zov EwC 65 mm n Aiyotepo e mua Jnxavn Ykazov Tnc Makita n aA lo
unxavma TTIV xpnaiotIOINaTe To pOUNTIKo XLOOKOTIKo.
Eik.31
Euavietai oboyniogaywnkowikou PIN.
- XpnoioutoioTe TO TAnKtpoAoYIO KAI Eoiayayete ToV KwOko PIN TTOXPOIOTIOeITAI ETI TOU TApovToC.
EuaviZeTai TO UTopeVou.
- Eπλεξτe [Change PIN code (Aαλayn Kωδικού PIN)].
Eupaivcetai n obovn iaywyns.
- XpnoiIooToinote To TAnKtpoAoYIO KAI EioayavETe Tov VEO KWoiKO PIN.
Eik.54
- Eiayyete vao tv veo kwok PIN yia etiepaiwn
Otau eepavioTei to nuvua [The PIN code has been changed. (O kwokic PIN exeiaaAei.)]Tnntote TnAnktpo
Atoquyn napeulawv anuatoos upuato
[ [Avw \mu \varepsilon \upsilon \upsilon] > [Main \ menu (Kupio \mu \varepsilon \upsilon \upsilon)] > [Security (Aopaaia)] > [Change \ wire \ signal (Alambda \eta \sigma \mu \alpha \sigma \varsigma kaw) ] ]
[ Alambda \varepsilon \varepsilon e v a kavai iia tny a tnoo tnoi o nmuatov o upaatoc o tav Tapeubetaivouv me ta onnata atro yeiTovikes Tepioxes epyaatac.
EIADONIOHSH:StaOHeUTo pOHTIKo XLoOKOTIKo ME TOV OtaOmuPOTIcN TPIV aAaeTe To Kavai.
- Patrote to koumu oivaka eEyxou.
EuapavzEraTo [Main menu (Kupio evou)]. - Eπλεξτε Π του εμφανιζεται στηγοθόνn.
Euapavietai n othovn Eioaywnkwoikou PIN. - XpnoioutoioTe TO IAnktpoIoyIO KAI EoiayayETe Tov Kwoiko PIN. Emuavizetai To UTOmevoU.
- Eπλεξτe [Change wire signal (Aλλayn Φηματος καλωδίου)]
EuavzEaTIOevouEITIOyNc - XpnoiOIOIOnTe TO TAnKToPOAoyIO KAI EITIAEgTe Evav VEO KwoIKo KaVaioiou.
Eik.55
IAPATHPHSH: To oμádi εμφaviçεtai ðiλa αιτο τόν κωδikó kavaiou tou xρσιοποietai επι tou παρονtος. (H apxikn tiμn εilai [Channel 1 (Kaváli 1).] ) Otav aλλετe to kaváli, eTIλεξte éva kaváli χωpiç vε μφaviçεtai to oμádi.
- Akouothe to mnuua Tou evarctai otnv oovn kai ookn-pwote n pueiion.
Otau epaiaoti to nnuu [Dock the mower to the charging station. (Uvdeote To xoookntiko oTov oTa0o foPtion.)EIIAETE [Confirm (EtIeBaiow)] kai tataote to TAnktpo
Otau eepavioTe to mnuu [Completed. (OaknpwneK.).] TATnOTe TO TAnKTpo
PooTaia Tou pouTIOKoXlookOTIKOaTIO kLoTn
[ [Avw \mu \varepsilon \upsilon \omega] > [Main \, menu (Kupio \, \mu \varepsilon \upsilon \omega)] > [Security (Aσφάλεια)] > [Anti-theft (Avτικλεπικό)] ]
OtauepavioTei to nnuu [Are you sure? (EioTe Bébaioc/-;)], επiλεTE [Yes (Nai)] kai πahtote to πahtp0.
AALayn Tov puOmuioewv nuepouynviaic kai wpa
[ [Avw\mu \varepsilon \upsilon \dot{u} ] > [Main\text{menu} (Kupio\mu \varepsilon \upsilon \dot{u})] > [Others(A\lambda \lambda \varepsilon \varsigma)] > ] [Date and time (Hερομηνία και ωραι)]
XpnoiioToieTia via nTv PPOsApOyn n aalayn TNC npepoynviac kai WpaTou exEi puBIOTEI OTO pOITIKO XlookOTTIKO.
- Nathode to koupti oToV Tivaka Elambdaxou.
Euapaviετai to [Main menu (Kupio ενού]).
EuavciTaI TO UToevoU.
OTav eepaioTeI To mVpu [Saved successfully. (AtoeNKeUTnK e ETTUx(a).]TATNTOe TNIKTPO
Alambda n ts yawosac eupavionc
[ \text{[Avw μεvò]} > \text{[Main menu (Kúpio μεvò)]} > \text{[Others (Aλλες)]} > \text{[Language (Γλωσα)]} ]
XpnoiioTIOeIaYia TnV aAayn Tns yawosac Tou epaavicetai otnv oOvN LCD.
- PatnoTo KoumTo OTov IVaKa EeYxou.
Euφaviεται To [Main menu (Kúpio ενού)].
OtaeepaioTei to nVpu [Saved successfully. (AtoeKetnke e ETTUx(a.)], Tnntote To Nktpo
Etavapopa Tov npotipnoeew xnoTn
[ [Avw\mu \varepsilon \upsilon \upsilon ] > [Main\text{menu} (Kupio\mu \varepsilon \upsilon \upsilon)] > [Others(A\lambda \lambda \varepsilon \varsigma)] > ] [Reset all settings (Erravapopá áhων τυν ρθμισεων)]
XpnoiioTIOEiTai YIA TNY EITAVaVOpA OAW TWV AITOnKKeUeVV NPOIuHaeWv XpOtn KAI TNY EITIOPOH TOUG APXIKN KAToTaON.
EIADONIOIHSH: Meipke s nnpoopiec kai puthetaicou EOA yayovtai kata tny evapen tou poutikou xoookotikou yia Tpwn foopa, otwns nepounvia kai wpa kai o kwodikoc PIN, dev eTavapeovtai.
- PatnoTe To koumu Tivaka Exyou.
EuapaviεταI to [Main menu (Kupio μενού)].
Otv Epaovto mnuva [Saved successfully. (AtoeKETKcE ETTUxica.), TATNOTE TO TAnkTPO
EeYxos Twv AETTOpeeiow Twv OpaAmuTow Aetoupyia
[ [Avw \mu \varepsilon \upsilon \dot{u}] > [Main \ menu (Kúpio μενού)] > [Others (Aλλες)] > [Error \ message (Mηνυμα σφάλματος)] ]
Euapavici ta TIO npoopa Ta nnuuata Opaalato, ouptiaaabevoevwv AETTOpeeiW, TOU avaepovtai OTO pOITOTIK XookotTIKO.
- Patjote to koupti oToV tivaka eEyxou.
Euapaviεταi to [Main menu (Kúpio μενού)].
Baoaawv kai aaeX lookoTNIKOU
Eik.69: 1. Kavovikn 2. Φαρενη (A: 17,5 mm μικοτερο)
3. Payiouevn 4. Σπaσeyn 5. Auyiaouevn 6. Baoλaωv
- EITIEePnTe TIV KATAOaON Tuv BiDwv OTEpeWOns Tuv AApWv XLOOKOTIKOU.
Akoauhnte Tbiadkaiaotnyevontta(AvikataoanTwV Aawv Xlookotnikou) (Seia 176) ia va apaipoeote tic biedes otepeowns, Kai eEyTe TnV kataotaon Twv Biow otepewons.
Bida oTepewons Tuv auow xlookotTIkoou
Eik.70: 1. Kavovikn2. n 3. Bifa otepewonc
IAPATHPHsE:Ev dV papnpe kajia oukykepivv anwuaia otic eobuaie cTtEWPnoe, ttnkuvete Toeodiaotnae TtEwnpns.
IAPATHPHsH: H diapkeia zwo ts nlaus xlookotnikoou oiaapepei avaloya me to Tneipbalaov aeitoupyiac. suykepiieva, kataotaoeis oio aiokouoec oet iipbaobuvouv tn diapkeia zwo.
Meyaoxpovoxlookotn
- Nataia Tepiox npydaas
- Paoiδi με παxioúς μioxouc και φύλα
εεσονμεuηλναπιηγρασδiδ
Xwua, amu kai aaaa uikka TPOaKoAAmEvaa oTo ypaia
AvtikataoTaonTow xlookotTIko
AIPOEIAONIOIH:AVTKaOaTnote TIC AaeCxooKoTTIKOU OuWvuaeTNbiaikciaOTo TaOpv EYxepioEIO.EvN aVTiKAATAOaN YiveIe diaopetiknpeBdo,ITopeiVa TTPOkAnBtAtxmu ntpauatouc.
AIPOEXH:Na opate Tavta TPOATEUTIKA yuaia kai yavTia otavavtkiBtate Tl auecs XlookottIKou.
AINOOXH: EKTeLeTo TnV epyaia avtikataoans 0e 10oT8n kai Otaepn eTlqaveia.
EIDONIOIHSH:NaavTKaOHtATEIcAaeXLOOKOTIKOU TepiTou 2 EwC 6 EbdopadEs. OxpoVos avTKataoTaOns 8a diapepei avaloya me tn ouxVotnta Xlookonk KAI TnV KAATAOaOn Tou ypaoiou.
EIANOIHSH:YTAPxOUV TPEI aueCxlookOTIKOU.NaavTKA-OTATE KAI TTEI TPEI aueTautoxpova.AkouN K EAV mvo ia Aaua XlookOTIKOU TAPouoiacei Znmu,va AVTKAOTATE KAI TIC TPEI.
EIDONIOIHSH: Ta akoloutheta epyaiaeaivai aTAPaTTa yia TnV avtikataoan tns lacua xlookotTIko. Etoiace auta ta epyaiaipokataBoIká.
[ [Ust \, menu] > [Park \, (Park et)] > [Restart \, on \, schedule \, (Zam, prog. \, yen, bas.)] ]
[Ust menu] > [Main menu (Ana menu)] > [Security (Emniyet)] > [Anti-theft (Hirszik onleme)]
[Completed. (Tamamlandi.)] gürntlendiginde ✓ tusuna basin.