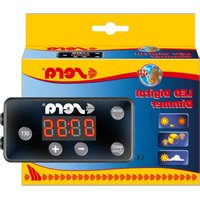
LED Digital Dimmer - Lighting sera - Free user manual and instructions
Find the device manual for free LED Digital Dimmer sera in PDF.


| Product type | Programmable LED light dimmer |
| Brand | sera |
| Model | LED Digital Dimmer |
| Category | Lighting |
| Input power | 10 - 20 V DC, max. 3 A |
| Maximum power | 60 W (20 V DC) / 30 W (10 V DC) |
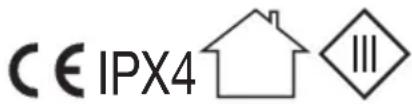
| Protection rating | IPX4 |
| Main functions | Sunrise and sunset programming, cloud simulation (cumulus/cirrus), midday dimming, timer, manual mode, demo mode |
| Number of programs | 7 (F1 to F7) |
| Compatibility | sera LED X-Change tubes, sera LED aquariums, sera LED lamps |
| Display | Digital display |
| Controls | Keys: HOUR, MINUTE, SET, PLUS, MINUS |
| Package contents | Dimmer with cable, 5.5 mm hollow connectors, mounting bracket, 4 screws |
| Recommended location | Dry and accessible location, secured using the bracket |
| Cleaning | Damp cloth with mild detergent; unplug before cleaning |
| Maintenance | No maintenance required |
| Safety | Indoor use only, do not use with AC voltage, keep out of reach of children under 8 years |
| Manufacturer warranty | 2 years from date of purchase |
| Dimensions (approx.) | Not specified in the manual |
| Weight (approx.) | Not specified in the manual |
Frequently Asked Questions - LED Digital Dimmer sera
User questions about LED Digital Dimmer sera
0 question about this device. Answer the ones you know or ask your own.
Ask a new question about this device
Download the instructions for your Lighting in PDF format for free! Find your manual LED Digital Dimmer - sera and take your electronic device back in hand. On this page are published all the documents necessary for the use of your device. LED Digital Dimmer by sera.
USER MANUAL LED Digital Dimmer sera
- Individually programmable dimmer
• Simulates sunrise and sunset
• With cloud scenarios and midday dimming

natural_image
Two stylized sun icons side by side, one with radiating lines and the other with a triangular shape (no text or symbols)

natural_image
Weather icon showing sun partially behind a cloud (no text or symbols)CE
natural_image
Black and white illustration of a fish inside a circular frame, no text or symbols present1
Produkt ähnlich Abbildung
Technische Änderungen und Irrtum vorbehalten
product may not be exactly as illustrated Subject to technical alterations and errors
produit semblable à l'image
Sous réserve de modifications techniques et d'erreurs
JED Digital Dimmer
US Dimmer for LED light control 7
Max. Wattage: 60 W - 20 V DC
30 W - 10 V DC

IPX4
Warnung!
Please read these instructions carefully and keep for future use. When forwarding this unit to third parties, this information for use is also to be handed over.
Congratulations!
Congratulations for buying the LED Digital Dimmer. The sera LED Digital Dimmer is a controller for programming sera LED lighting appliances such as the sera LED X-Change Tubes, sera LED aquariums and the sera LED lights. You can adjust maximum brightness and use the dimmer as a time clock. Combination with the sera LED X-Change sunrise Tubes and some of the sera LED Chips even allows simulating sunrise and sunset in combination with 2 different cloud scenarios and midday dimming as desired. In case of the sera LED X-Change cool daylight Tubes and other sera LED products, dimming does not alter the light color but only changes the brightness. Cloud simulation by the sera LED Digital Dimmer is possible with all LED tubes.
SAFETY PRECAUTION
Use the sera LED Digital Dimmer only as described in this information for use. It is a low voltage dimmer for a range of 10 – 20 V DC. The maximum current on the input side should not exceed 3 A. Maximum input voltage cannot exceed the output voltage.
Application
The brightness of the lamps connected to the Digital Dimmer increases or decreases in pre-programmed steps. Adjustment can be done either automatically or manually.
Application range
The sera LED Digital Dimmer can be used in a ver satile way and allows controlling the sera LED X-Chang ge Tubes as well as the sera LED aquariums and sera LED lights.
sera LED X-Change System
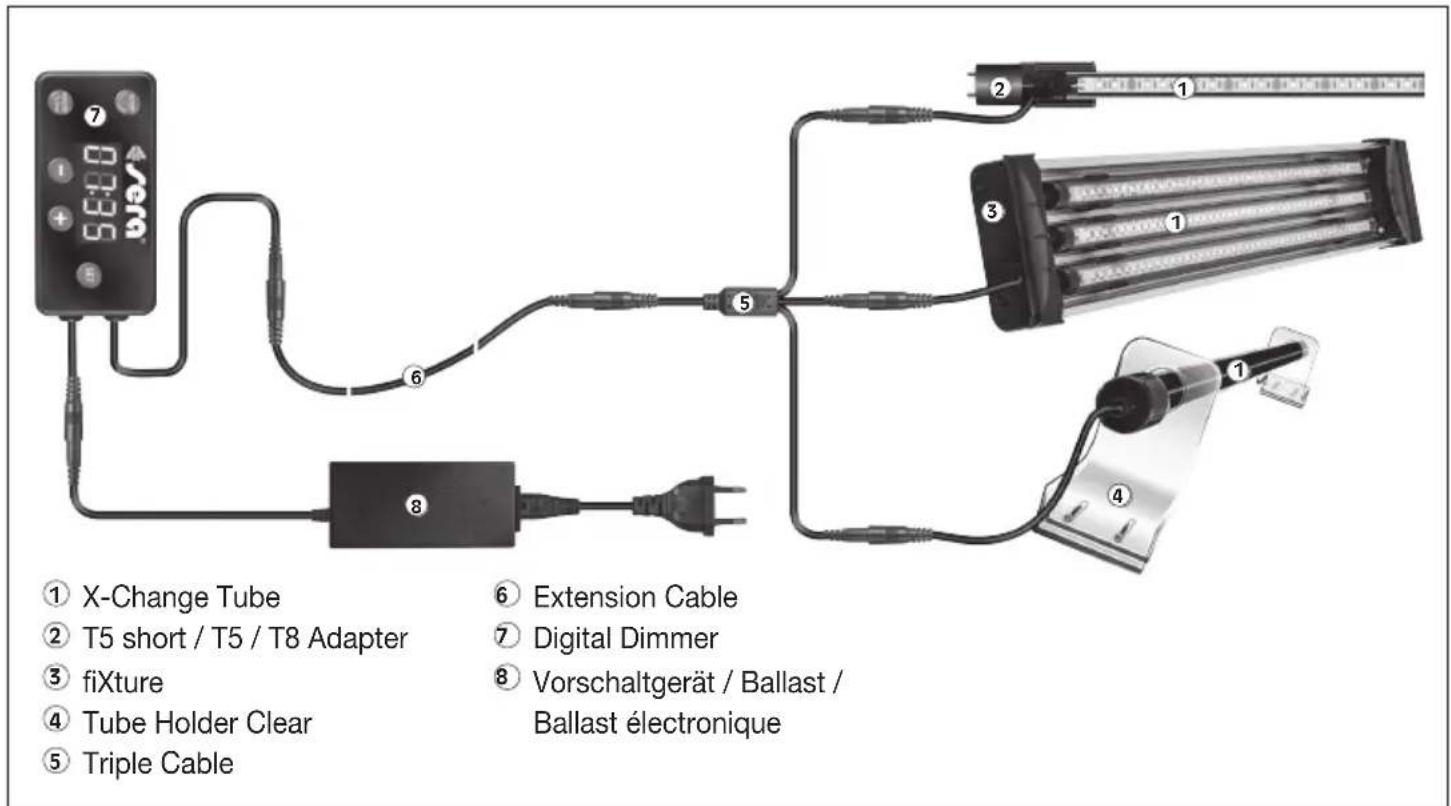
The sera LED Digital Dimmer allows operating one or more sera LED X-Change Tubes (also different lengths) up to a total of 60 W.
sera LED aquariums
All sera LED aquariums such as the marin Biotop LED Cube 130, the Biotop LED Cube 130 XXL, the Biotop Nano LED Cube 60 and the Biotop Nano LED Cube 16 can be operated and programmed with the sera LED Digital Dimmer.
sera LED lamps
The sera Nano LED light and the sera LED light, both equipped with sera LED Chips, can be connected solely or combined with more units by the sera LED Triple Cable, and can be programmed with a single sera LED Digital Dimmer.
When connecting several lamps/units of the same voltage (for example do not combine 12 V and 20 V lamps, but only 12 V and 12 V or 20 V and 20 V), it is necessary to choose a suitable electronic ball last. Make sure the output voltages of the ballast and the operating ranges of the LED lamps are identi cal. For instance, never connect a 12 V LED lamp to a 20 V ballast! Warranty of the devices will be void in case of damage as consequence of inappropriate use!
When the sera LED Digital Dimmer is used with other LED lamps or illuminating light units, make sure that the maximum current flow is not exceeded, and that the lamps are really dimmable in the range of 10 – 20 V. Several LED lamps can be connected to one ballast.
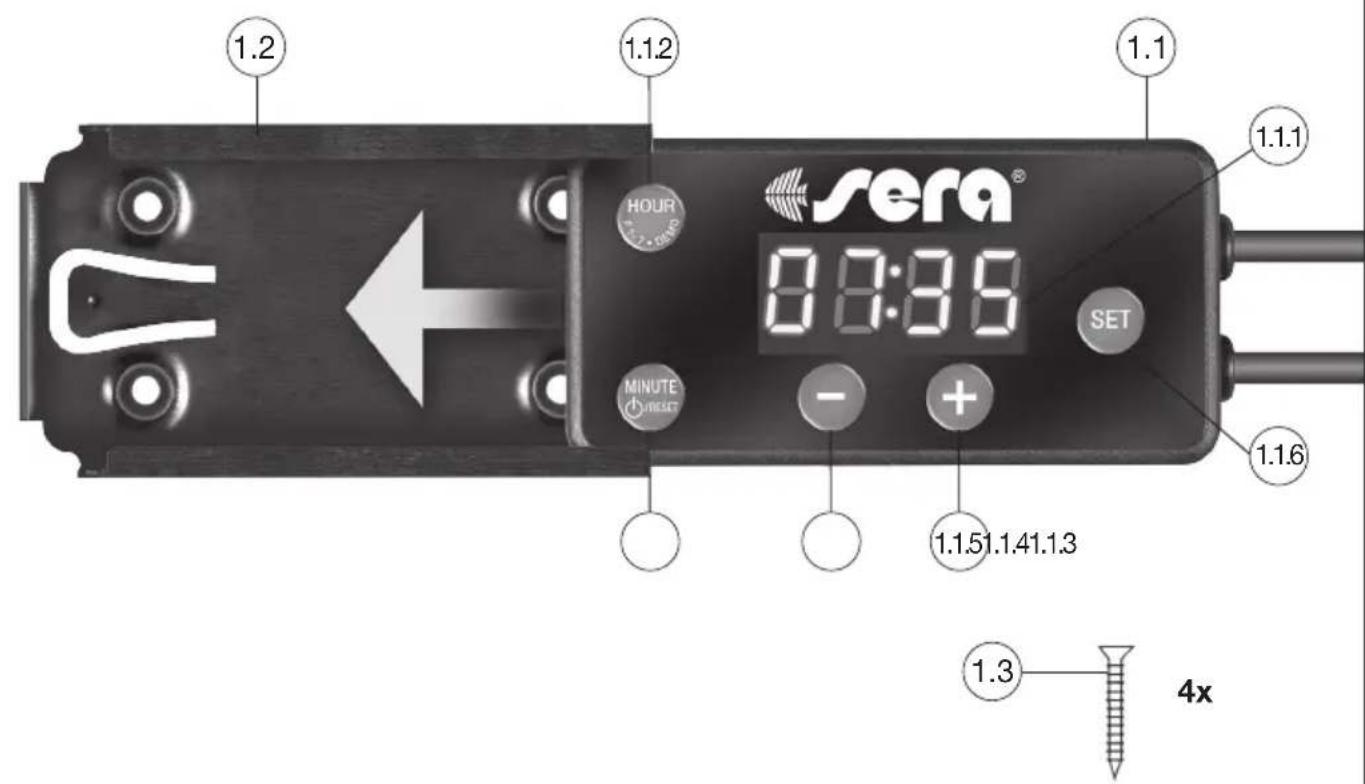
Kit includes (1)
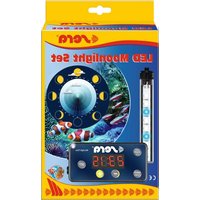
1.1 sera LED Digital Dimmer with cable and 5.5 mm barrel connectors
1.1.1 display
1.1.2 HOUR, F1 - F7, DEMO key
1.1.3 MINUTE, ON/OFF, RESET key
1.1.4 MINUS key
1.1.5 PLUS key
1.1.6 SET key
1.2 holder
1.3 screws (4 pieces)
Assembly instruction
The sera LED Digital Dimmer should be connected between ballast and LED lamp. Should you intend to control more than one light unit, please connect the sera LED Triple Cable to the outlet connector of the dimmer. By adding more triple cables you can even attach more appliances. The barrel connectors of the cables do not allow confusion, and polarity reversion cannot occur.
Location
The sera LED Digital Dimmer should be installed in an easily accessible and dry place. Use the holder for installing the dimmer into the cabinet or where you prefer. The holder (1.2) can be attached with 4 screws (1.3).
Operation
ON/OFF
Press "MINUTE" to switch the light ON/OFF.
Adjusting brightness
You can adjust brightness individually: Adjust the maximum brightness by pressing the keys “+” and “-”. The automatic dimming process also ends at the brightness adjusted here. You can adjust different brightness levels by pressing “+” for a long time, and you can also reach other positions stored with 100% brightness. These depend on the system. In case you stored one of these positions and later on wish to reduce the brightness, you may need to press the “-” key for a longer time to reduce the brightness in visible steps.
Attention! Before using at the aquarium or in case of apparently insufficient brightness inside the aquarium in spite of sufficient LED equipment, first check whether the maximum brightness of the dimmer is adjusted correctly, and correct if required.
Press the “SET” key for approximately 3 seconds. The display will then start to flicker. Then press the “HOUR” key (for adjusting the hours) and “MINUTE” (for adjusting the minutes) to set the actual time. Pressing these keys will increase the displayed digit by “1” every time. If keys are held down, the numbers in the display start to run upwards quickly.
Adjusting the sunrise time
After adjusting the actual time, press the “SET” key. Now “ON” is displayed for the sunrise. The display changes to input mode immediately afterwards. The beginning of the sunrise can be adjusted by the “HOUR” and “MINUTE” keys as desired (see adjusting the actual time).
When choosing one of the F5 – F7 modes, the beginning of the sunrise should be set sooner than 12:45.
Adjusting the sunset time
Press the “SET” key again. Now “OFF” is displayed for setting the sunset time. The display changes to input mode immediately afterwards. The beginning of the sunset can be adjusted by the “HOUR” and “MINUTE” keys as desired (see adjusting the actual time).
When choosing one of the F5 – F7 modes, the beginning of the sunset should not be set sooner than 15:15.
We recommend leaving on the diurnal lighting a half hour longer when using F5 – F7 for planted aquariums.
Adjusting the switch mode
You can adjust the switch mode (F1 - F7) by pressing the "SET" key again. You can choose between the following programs:
| Program | Function Description | |
| F1 Sunrise/sunset with clear sky | Dimming up and down from 0 – 100% – 0% for 15 minutes each | |
| F2 On/Off Switching on or off | automatically without dimming | |
| F3 like F1, plus Cumulus cloud simulation | Smooth light reduction to 10% of the chosen brightness (every 20 minutes for 90 seconds) | |
| F4 like F1, plus Cirrus cloud simulation | Smooth light reduction to 30% of the chosen brightness (every 15 minutes for 90 seconds) | |
| F5 like F1, plus midday dimming from 13:00 – 15:15 | Sunrise/sunset with additional dimming to 30% of maximum brightness from 13:00 – 15:15 | |
| F6 like F3, plus midday dimming | Cumulus cloud simulation with additional dimming to 30 % of maximum brightness from 13:00 – 15:15 | |
| F7 like F4, plus midday dimming | Cirrus cloud simulation with additional dimming to 30% of maximum brightness | |
Pressing the “HOUR” key repeatedly switches the programs in the order F1, F2, F3, F4, F5, F6, F7, F1, F2 ... etc.
During the programs F3 and F4 the light is reduced to 10% or 30% of the adjusted light brightness, respectively. This takes place for slightly over a minute every 20 or 15 minutes, respectively. However, these cloud scenarios only begin one hour after sunrise. Confirm the settings with pressing “SET”. This will put the dimmer back in operation mode.
Reset function
Press the key "MINUTE/ON/OFF/RESET" for 3 seconds. This resets the unit to default settings.
Demo Mode
Press the "HOUR/F1 - F7/DEMO" key for approximately 3 seconds. Now sunrise and sunset will be performed within 75 seconds with one cloud simulation. After finishing, the dimmer will return to operation mode.
Power supply
Should the sera LED Digital Dimmer be disconnected from power supply for minutes or longer, the stored data will be lost and need to be entered again.
Advice
It is impossible to influence the brightness by any manual adjustments while dimming processes are running. Manual dimming procedure adjustments can be done only after finishing.
Functional effects
Depending on the combination of LED tubes connected to the sera LED Digital Dimmer, there are different illumination scenarios. For instance, the “sunrise” tube will start first to simulate the sunrise.
Cleaning
The surfaces can be cleaned carefully with a moist cloth and with a neutral detergent. Make sure no detergent gets into the aquarium. Please unplug the power cord before cleaning.
Maintenance
The sera LED Digital Dimmer does not need to be serviced nor can it be serviced.
SAFETY PRECAUTIONS
Do not pull the cable of the unit and do not expose it to humidity or wet conditions. Use it only inside the house. Do not operate with alternating current (AC)!
Technical Data
Input 10 - 20 V DC Max. 3 A
Max. Wattage: 60 W - 20 V DC
30 W - 10 V DC

Warning!
- Children should be supervised to ensure that they do not play with the appliance.
- The appliance can be used by children above 8 years as well as by persons with reduced physical, sensory or mental capacities, or lack of experience and knowledge, if they have been given supervision or instruction concerning use of the appliance and have understood the dangers arising thereof. Children must not play with the appliance. Cleaning and user maintenance must not be carried out by children unless they are above 8 years old and under supervision. Keep the appliance and its cables out of the reach of children below 8 years of age.
- If the cable is damaged, the dimmer must not be used any more and should be discarded.
Disposal of the unit:
Waste electrical and electronic equipment (WEEE) must not get into domestic waste!
If ever the unit cannot be used anymore, the consumer is legally obliged to hand in waste electrical and electronic equipment (WEEE) separately from domestic waste, e.g. at a collection point of his community/his district. This ensures that waste electrical and electronic equipment (WEEE) is expertly processed and that negative effects to the environment are avoided.
Therefore electrical and electronic equipment bears the following symbol:

Manufacturer guaranty:
We, sera GmbH (warrantor), Borsigstraße 49, 52525 Heinsberg, Germany, grant a 2 year guaranty* for the LED Digital Dimmer covering freedom of defects in material and production, commencing on the purchase date.
Guaranty exclusion (\*):
Any kind of damage on electric cables and plugs of the LED Digital Dimmer are excluded from guaranty, unless the fault arises due to a material or manufacturing flaw.
Expiring of guaranty:
Guaranty obligations are void if:
– the information for use was not followed and the device was exposed to negligent, improper or unsuitable use, maintenance and repair;
- the LED Digital Dimmer is operated with unsuitable products outside the low voltage range of 10 – 20 V with 3 A at the maximum;
– the device was damaged by external force, external influences or intentionally;
– third party spare parts not approved by the company sera were installed.
Our obligations:
In case of a guaranty claim, the sera GmbH at their own discretion obliges to either repair the device, or to replace or repair the faulty part, or to replace the device with a functioning product of the same value.
Your obligations:
Important: In case the device is faulty, please first consult our retailer where you purchased the device and let him check whether a guaranty case is applicable before you turn in the device as a complaint. This is the only way to avoid unnecessary freight costs you could possibly be charged for.
Manufacturer contact:
sera GmbH
Borsigstraße 49
52525 Heinsberg
Germany
Phone: +49 2452 9126-0
Fax: +49 2452 5922
Hotline: +49 2452 9126-15
E-mail: info@sera.de
Max. Wattage: 60 W - 20 V DC
30 W - 10 V DC
CEIPX4
Waarschuwing!
Max. Wattage: 60 W - 20 V DC
30 W - 10 V DC
CEIPX4
Avvertenze!
Max. Wattage: 60 W - 20 V DC
30 W - 10 V DC

¡Advertencia!
Max. Wattage: 60 W - 20 V DC
30 W - 10 V DC

Advertência!
Max. Wattage: 60 W – 20 V DC
30 W - 10 V DC

Varning!
Max. Wattage: 60 W - 20 V DC
30 W - 10 V DC

Varoitus!
Max. Wattage: 60 W - 20 V DC
30 W - 10 V DC
Advarsel!
Max. Wattage: 60 W - 20 V DC
30 W - 10 V DC
CEIPX4
Uyarı!
Max. Wattage: 60 W - 20 V DC
30 W - 10 V DC
Varování!
Max. Wattage: 60 W-20 V DC
30 W-10 V DC
Figyelmeztetés!
Max. Wattage: 60 W - 20 V DC
30 W - 10 V DC

IPX4

Ostrzeżenie!
- JED Digital Dimmer
- Warnung!
- Congratulations!
- SAFETY PRECAUTION
- Application
- Application range
- sera LED X-Change System
- sera LED aquariums
- sera LED lamps
- Kit includes (1)
- Assembly instruction
- Location
- Operation
- ON/OFF
- Adjusting brightness
- Adjusting the sunrise time
- Adjusting the sunset time
- Adjusting the switch mode
- Reset function
- Demo Mode
- Power supply
- Advice
- Functional effects
- Cleaning
- Maintenance
- SAFETY PRECAUTIONS
- Technical Data
- Warning!
- Disposal of the unit:
- Waste electrical and electronic equipment (WEEE) must not get into domestic waste!
- Manufacturer guaranty:
- Guaranty exclusion (\*):
- Expiring of guaranty:
- Our obligations:
- Your obligations:
- Manufacturer contact:
- sera GmbH
- Waarschuwing!
- Avvertenze!
- ¡Advertencia!
- Advertência!
- Varning!
- Varoitus!
- Advarsel!
- Uyarı!
- Varování!
- Figyelmeztetés!
- Ostrzeżenie!
Brand : sera
Model : LED Digital Dimmer
Category : Lighting