
SX4 - Firearm WINCHESTER - Free user manual and instructions
Find the device manual for free SX4 WINCHESTER in PDF.


User questions about SX4 WINCHESTER
0 question about this device. Answer the ones you know or ask your own.
Ask a new question about this device
Download the instructions for your Firearm in PDF format for free! Find your manual SX4 - WINCHESTER and take your electronic device back in hand. On this page are published all the documents necessary for the use of your device. SX4 by WINCHESTER.
USER MANUAL SX4 WINCHESTER
text_image
WINCHESTER® RIFLES AND SHOTGUNSBEDIENUNGSANLEITUNG - OWNER'S MANUAL - MANUEL DE L'UTILISATEUR - MANUAL DE INSTRUCCIONES MANUALE DI ISTRUZIONI - ИНСТРУКЦИЯ ПО ЭКСПЛУАТАЦИИ - BRUKSANVISNING - MANUAL - KULLANIM KILAVUZU
DEUTSCI
For validating the guarantee for your firearm, we invite you to register its serial number on our winchesterint.com site under the heading «Guarantee».
FRANÇAIS
Carefully read this entire manual before using your new Winchester firearm.
We thank you for having chosen a Winchester Super X4. We hope it gives you many years of satisfaction. It has been made with the greatest of care and includes all the know-how of unsmith's tradition as well as the characteristics intended to provide the hunter or shooter with the same pleasure when practising his sport.
BASIC SAFETY RULES
- Before handling, always ensure that your gun is unloaded.
- Always keep the safety on when you are not shooting, even if you are certain that it is unloaded.
- Only press the trigger with your forefinger if you are about to fire, otherwise place it against the trigger guard.
- Never point a gun at someone, even if you are certain that it is unloaded.
- Never fire without knowing the precise point of impact.
Beware of ricochets: Never fire in the water or at rocks. Beware in particular of frozen or very hard ground. - Only the ammunition of the calibre engraved on the upper side of the barrel can be used in your shotgun, for safety reasons.
- In your own interest, as well as that of your gun, avoid allowing any foreign bodies enter the barrel. Earth and snow, etc. can create dangerous zones of excess pressure.
- Unload your gun between uses and during transport.
- Systematically use a gun lock when you store your gun.
Fully approved the trigger lock is perfectly adapted to the mechanism and loading system on your guns. The lock prevents accidents from happening as well as voluntary use by others.
ALL WINCHESTER FIREARMS SOLD WORLDWIDE ARE SYSTEMATICALLY DELIVERED WITH A GUN LOCK.
Safety also involves properly storing your guns at home (out of the reach of children): consider buying a Winchester gun-safe.
WINCHESTER.
TRÈS IMPORTANT : CONSERVEZ CE LIVRE.
ALLA WINCHESTERVAPEN SOM SÄLJS LEVERERAS ALLTID MED ETT VAPENLÅS.
text_image
Labeled diagram of a sports rifle with numbered parts for identificationABBILDUNG A
1 Recoil pad butt plate
2 Buttstock
3 Safety
4 Bolt handle
5 Receiver
6 Ventilated rib
7 Barrel
8 Muzzle
9 Fore arm
10 Magazine cap
11 Trigger guard
12 Trigger
FIGURE A
| 2 3/4" 3" 3 1/2" | |
| 70 mm 76 mm 89 mm |
natural_image
Close-up of hands holding a rifle with red arrows pointing to the lever (no text or symbols visible)Abb. 3
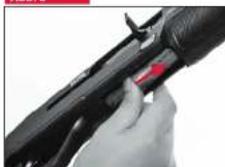
Abb. 4
m = 311
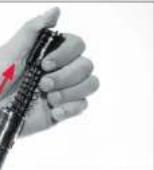
Abb. 5
natural_image
Close-up of a hand holding a pen with a red arrow pointing to the tip (no visible text or symbols)Abb. 6
natural_image
Close-up of a gloved hand holding a mechanical tool with a red arrow indicating motion (no text or symbols visible)Abb. 7
natural_image
Close-up of a hand using a screwdriver to adjust a black object with red arrows indicating movement (no text or symbols visible)Abb. 8
natural_image
Close-up of a person holding a black rifle with red arrows pointing to the handle (no visible text or symbols)WINCHESTER.
CIPLED AND CHETATO
Abb. 9
natural_image
Close-up of a hand using a black tool on a firearm (no visible text or symbols)Fig. 10
natural_image
Close-up of a finger pressing a small electronic component with red arrows indicating force or movement (no text or symbols visible)Abb. 11
natural_image
Close-up of hands using a crimping tool to adjust a metal component (no visible text or symbols)Abb. 12
natural_image
Close-up of a mechanical component with wires and connectors (no visible text or symbols)Abb. 13
natural_image
Close-up of hands using a power tool to adjust or install a cylindrical component (no visible text or symbols)Abb. 14 Abb.
natural_image
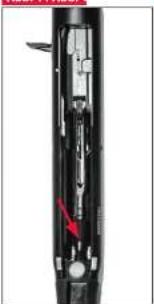
Cross-sectional view of a mechanical device with internal components and a red arrow indicating a specific part (no text or symbols visible)m = 311
natural_image
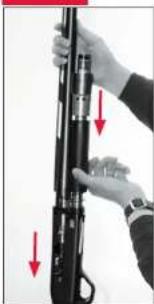
Close-up of hands holding a rifle with red arrows pointing to the stock (no text or symbols visible)Abb. 16
natural_image
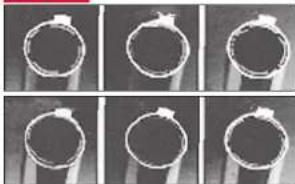
Six grayscale images of a ring with different angles, arranged in two rows (no text or symbols visible)Super X4 SEMI-AUTOMATIC SHOTGUN
The Winchester SX4 semi-automatic shotgun you have just bought part of the wide range of the Winchester products.
It is gas operated and the principle of its operation is based on the use of a part of the combustion energy being diverted to function the loading of the next shotshell. This principle of operation should allow it to adpat to fire with all types of ammunition from the weakest to the strongest without adjustment.
Additionally, the mechanical design of the SX4 shotgun by Winchester's World-wide engineering team, includes the most recent manufacturing techniques.
In designing the gun great attention has been paid to the balance of the gun when it is mounted in to the shooting position. By carefully positioning the key components the balance of the gun has been made to ensure an economical and smooth mount.
RECOMMENDATIONS BEFORE PUTTING INTO SERVICE
All the metallic parts were lubricated before leaving the works in order to protect them from corrosion. Before firing the first round it is absolutely necessary to clean the barrel bore thoroughly. Insert a cleaning rod provided with a flannelette into the chamber and pass it through the barrel. Wipe dry the excess of oil with a smooth cloth until clean and dry.
IMPORTANT NOTES
We would ask that having bought this Shotgun you take full responsibility recognising not only the pleasures that it will bring you as a Hunter or Clay Shooter but also the dangers. You must act as a responsible person for this can make the difference between life or death. The mistakes made with a weapon are often definitive and irretrievable. The lack of caution and the bad handling of a weapon is not excusable. At any time, handle your shotgun with care by respecting its power as well as its potential danger.
OPERATION
The shotgun operates very simply. A part of the combustion gases is deviated to the piston. Under the pressure of the gases the piston slides to the rear, pushes back the moving parts and causes the opening of the mechanism and the ejection of the empty shell. The excess of gas is automatically released by a valve. The breechblock - bolt assembly is forced to the front under the pressure of the return spring and inserts a fresh cartridge into the chamber. The semi-automatic operation of your shotgun allows to fire one after the other the rounds contained in it. When the last round has been ejected, the breechblock remains open under the movement of the breech block release button. In order to force the moving parts back to the front, press the carrier latch knob.
SAFETY
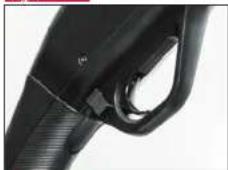
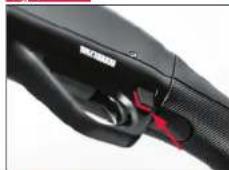
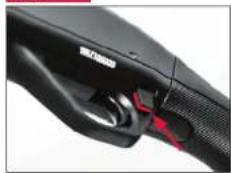
The safety of your shotgun is of transversal type. It is located inside the trigger guard behind the trigger. The large surface of the safety facilitates its handling. When pushed to the right (fig.1), the shotgun is safe and the trigger is locked. When pushed to the left, a red-painted thread is visible (fig. 1'), the shotgun is ready to fire. Get into the habit of leaving your weapon, loaded or not, always in safety position. Release safety only at the moment of firing.
Note: The safety is easily reversible for lefthand use.
IDENTIFICATION MARKS
The shotgun serial number is located in the left side of the receiver at the level of the trigger guard. The gauge, the barrel length and the reboring are indicated in the right side of the barrel.
AMMUNITION
The calibre and length of the chamber are indicated on the side of the upper barrel. Never fire a cartridge that does not correspond, to the calibre specified or has a chamber length longer than that indicated... In order to avoid mistakes, it is simplest to carefully read the inscription on the cartridge box or the cartridge itself.
| 2 3/4" 3" 3 1/2" | |
| 70 mm 76 mm 89 mm |
BE CAREFUL! IT IS NOT THE LENGTH OF THE CARTRIDGE BUT THAT OF THE UNCRIMPED CASE WHICH MUST CORRESPOND TO THE PRESCRIBED CHAMBER LENGTH.
ASSEMBLING
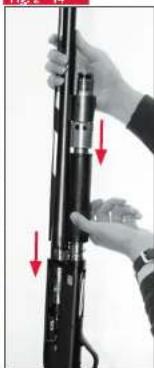
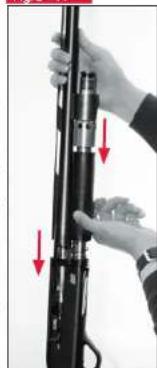
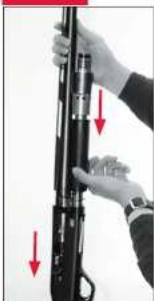
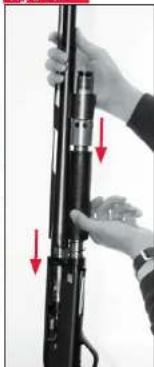
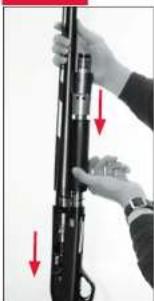
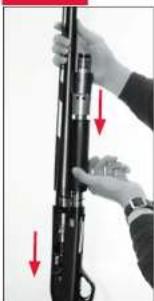
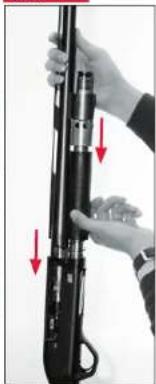
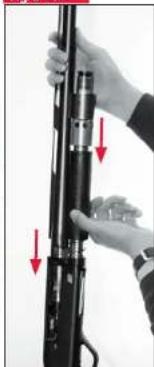
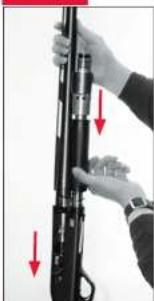
The shotgun is supplied with the barrel removed and the forearm fitted onto the magazine tube. Check for eventual cartridge located in the mechanism. Unscrew the magazine cap and remove the forearm by sliding it to the front. Grasp the operating handle to force the moving parts fully to the rear until locking. The shotgun being held vertically, insert the barrel onto the magazine tube with its extension in the receiver until it stops. (fig. 2) Reinsert the forearm by sliding it onto the magazine tube until contact is reached with the receiver. Screw the magazine cap and make sure it is locked properly.
Force the moving parts back to the front by pressing the carrier latch knob. Avoid inserting the fingers into the ejection opening. Manually allow the mechanism to move back and forth several times and make sure the magazine cap is firmly tightened.
LOADING
The safety should be engaged. Avoid inserting the fingers into the ejection opening. Three methods are used for feeding the shotgun :
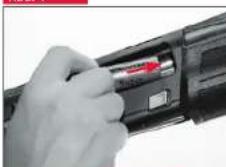
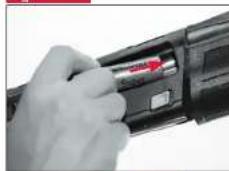
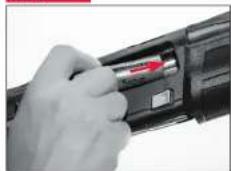
- Conventional loading, the moving parts are located forwards. Insert a cartridge into the magazine tube by pushing back the magazine spring retainer. Fill the magazine with the number of necessary cartridges and each time you insert a fresh cartridge, push back the last cartridge inside the magazine (fig. 2). Grasp the operating handle and drive the breechblock back to the rear. Release the breechblock that will insert a cartridge into the chamber. Complete the loading operation by inserting an additional cartridge into the magazine.
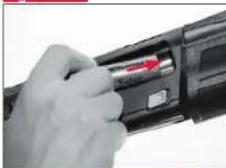
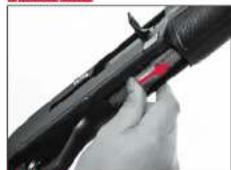
- Loading from the ejection opening, the moving parts are located backwards. Insert a cartridge through the ejection opening into the chamber or onto the carrier (fig. 3). Press the carrier latch knob to force the moving parts back to the front by feeding a cartridge into the chamber. Fill the magazine up to its maximum capacity.
- Speed Loading (20 gauge only)
The Speed Load function of the Super X®4 20 gauge models makes loading the chamber fast and convenient. With the bolt open and the magazine empty, the first shell inserted into the magazine will be instantly loaded into the chamber. To use this feature, perform the following operation.
-
With the magazine empty, lock the bolt to the rear in the open position
-
Insert a shell into the magazine. The shell will be automatically cycled from the magazine to the chamber.
UNLOADING
The safety should be engaged. Grasp the operating handle and drive the breechblock back and forth in order to eject the cartridges located in the shotgun. The latter must remain open after ejection of the last cartridge.
MAGAZINE REDUCER
Your shotgun is supplied with or without a round capacity reducer installed in the magazine. The magazine capacity is then of 2 cartridges. If a capacity of 4 cartridges is required, the reducer can be removed. At this moment make sure you are observing the rules in force in your country.
CAUTION: IN ORDER TO MEET THE REQUIREMENTS OF SOME MARKETS, THE MAGAZINE CAPACITY CAN BE REDUCED TO 3 CARTRIDGES. IN THAT CASE, THIS SECTION IS NOT APPLICABLE.
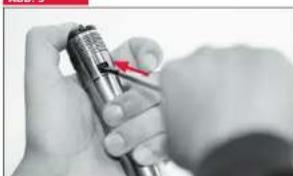
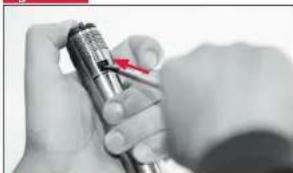
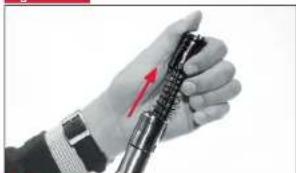
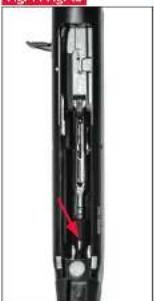
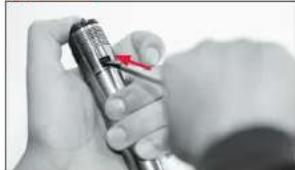
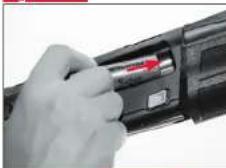
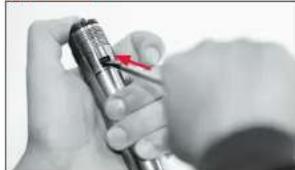
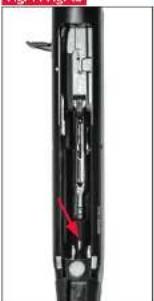
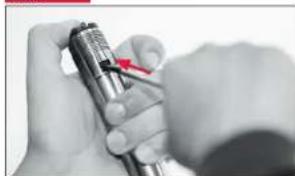
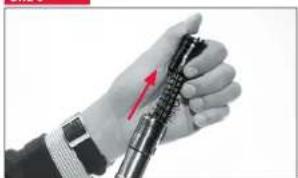
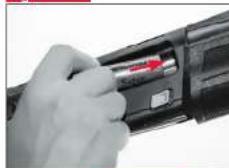
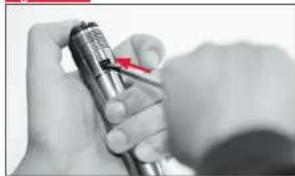
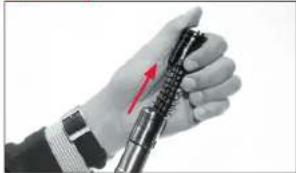
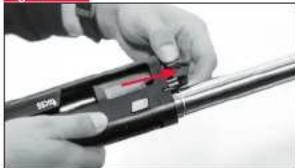
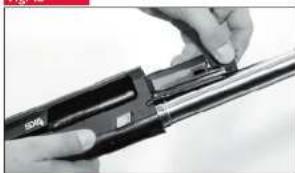
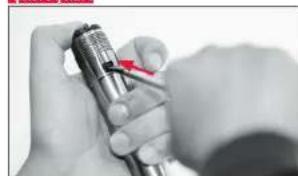
Disassembly. Unscrew and remove the magazine cap. Remove the forearm by sliding it to the front. Possibly remove the barrel. By holding the magazine spring retainer, drive in the retaining tongue (fig. 5) to release partially the spring (fig. 6). Take care of the spring that is under pressure, hold it firmly and direct it to a safe place. Remove the reducer.
Reassembly. The magazine spring retainer being positioned on its spring engage the whole assembly into the magazine tube by directing and pressing down the retaining tongue. Make sure it is properly locked. Reassemble the forearm by sliding it onto the magazine tube. Screw the magazine cap fully home.
NOTE: THE REDUCER IS ALWAYS POSITIONED BETWEEN THE MAGAZINE SPRING AND THE MAGAZINE SPRING RETAINER, THE REFINED PORTION ENGAGED IN THE SPRING.
DISASSEMBLY
The hammer should be cocked, the moving parts located to the front and the safety engaged.
Shotgun. Unscrew and remove the magazine cap. Remove the forearm by sliding it to the front. Withdraw the barrel. For storage purpose: reinsert the forearm on the magazine tube and rescrew the magazine cap.
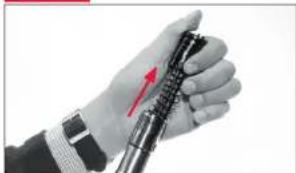
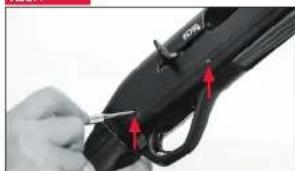
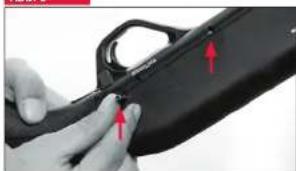
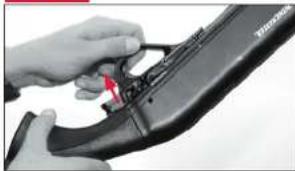
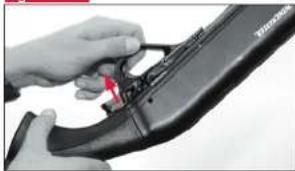
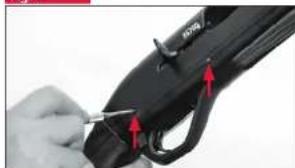
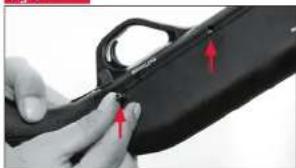
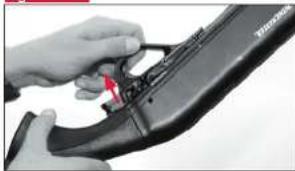
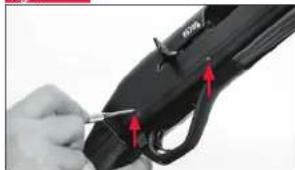
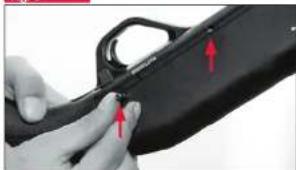
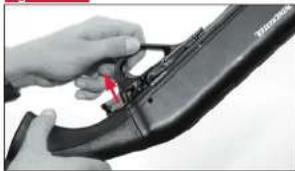
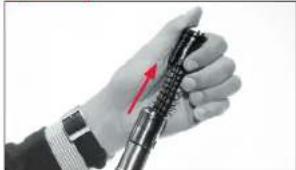
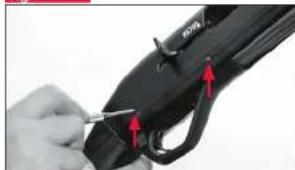
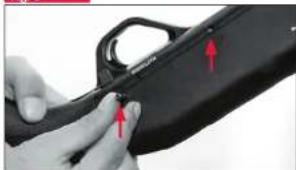
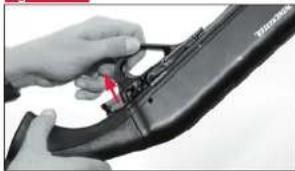
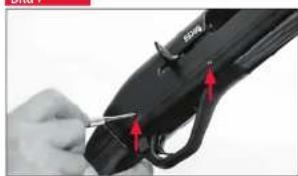
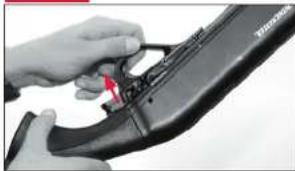
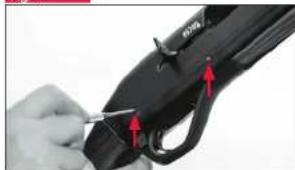
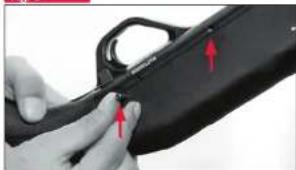
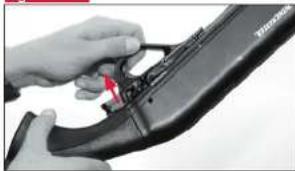
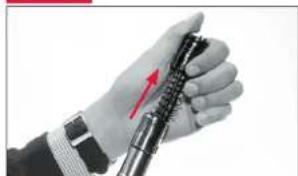
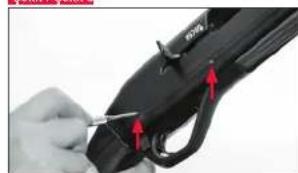
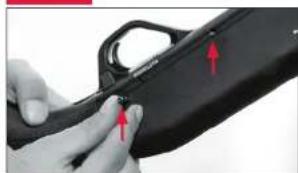
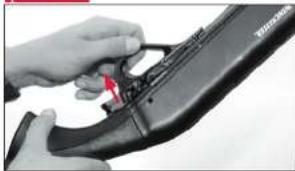
Trigger guard. The shotgun is in side position as shown in fig. 7. Push back the trigger guard pins using a drift. Remove both pins (fig. 8) and then the trigger guard (fig. 9).
The cocking lever can be removed by hand. It is clipped in place and can be extracted simply by pulling firmly on it. Once removed, it can serve as a pin punch for removing the trigger guard.
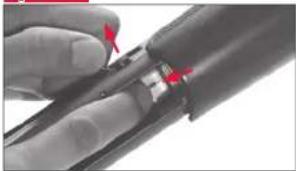
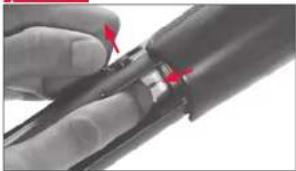
On 20 gauge models, remove the bolt handle by holding the shotgun with the loading port up. Press the shell stop while pulling outward on the bolt handle (fig. 10).
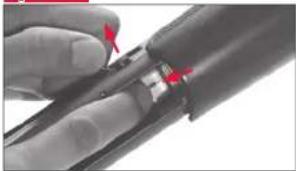
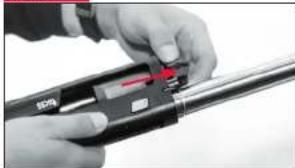
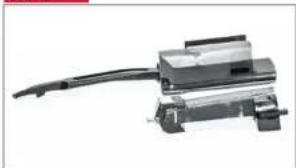
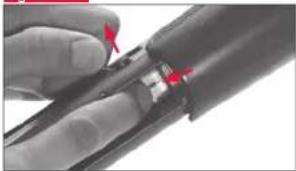
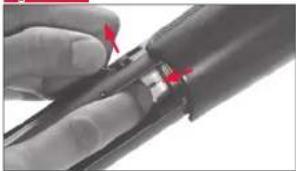
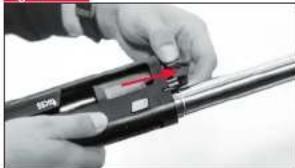
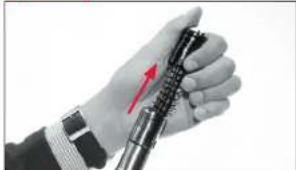
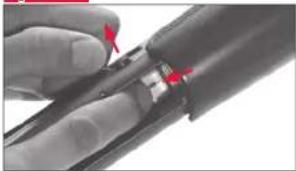
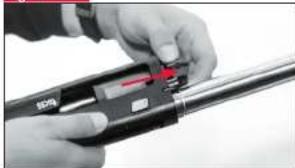
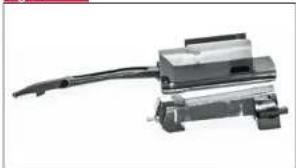
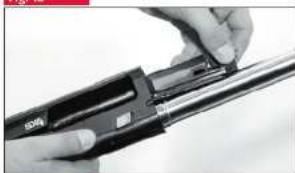
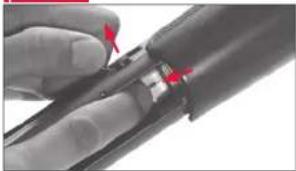
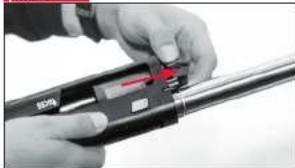
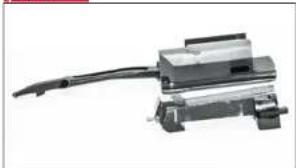
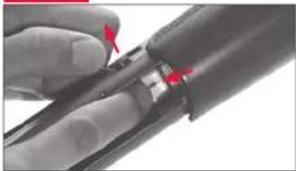
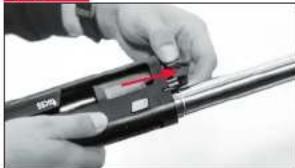
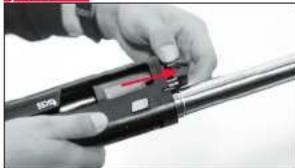
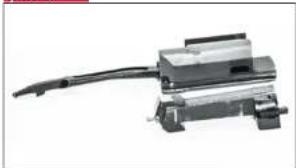
Moving parts. The barrel and the forearm should be removed. Disengage the piston, the cocking sleeve as well as its return spring. Remove the cocking handle as indicated above. Drive in the cartridge stop to release the operating handle laterally. Hold the shotgun horizontally and the cartridge stop pressed in order to disengage the moving parts to the front (fig. 11). The bolt and the breechblock can be separated for cleaning (fig. 12).
REASSEMBLY
The safety should be engaged.
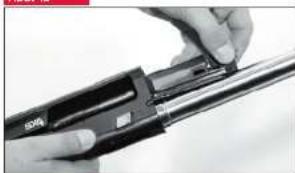
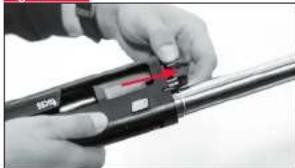
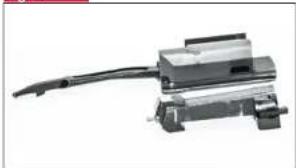
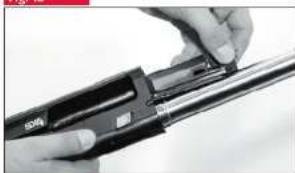
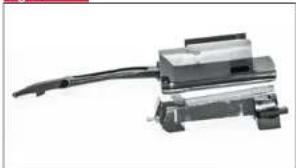
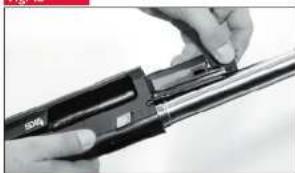
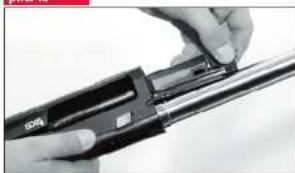
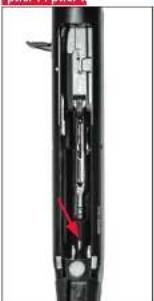
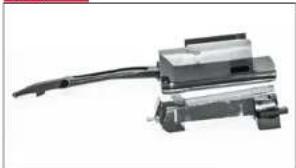
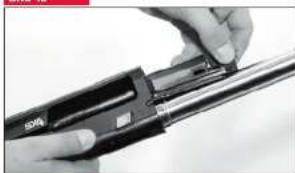
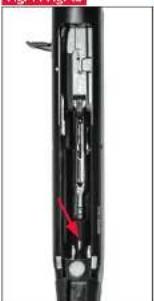
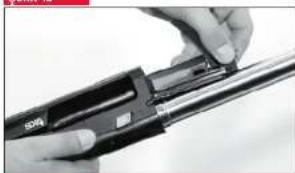
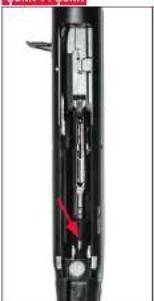
The moving parts. The bolt and the breechblock must be assembled and the shotgun positioned vertically. Engage the moving parts into the receiver guideways (fig. 13) until the link tail is engaged into the moving parts plunger (fig. 14). Refit the cocking handle by pushing firmly into the breech slot.
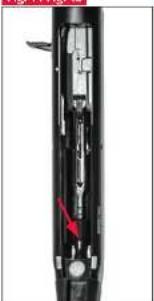
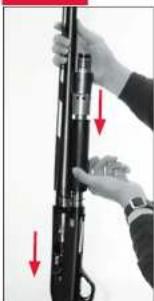
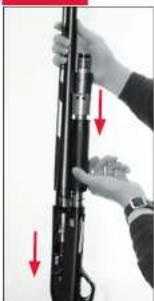
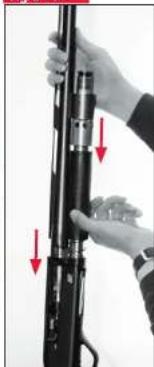
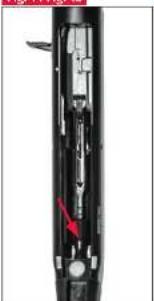
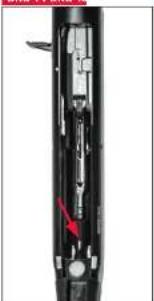
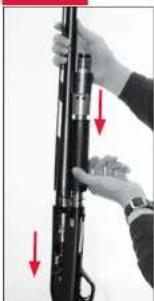
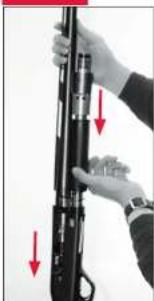
Insert the return spring, the cocking sleeve and then the piston onto the magazine tube (fig. 15) by making sure that its extension is properly fitted into the left hand hole of the receiver.
On 20 gauge models, replace the bolt handle by inserting it into the slot in the bolt by holding the shotgun with the loading port up and pressing the shell stop while inserting the bolt handle into the slot.
IMPORTANT: ON 20 GAUGE MODELS, IT MAY BE NECESSARY TO PULL OUT ON THE BOLT HANDLE SLIGHTLY UNTIL THE SHELL STOP CLICKS BACK IN PLACE. FAILURE TO FOLLOW THESE INSTRUCTIONS WILL RESULT IN THE INABILITY TO LOAD THE MAGAZINE.
Trigger guard. The shotgun is positioned vertically. Check for proper positioning of the link tail in the plunger of the moving parts by forcing the moving parts to the rear. Engage the trigger guard into the receiver. Exert some pressure on the trigger guard to align the holes, insert the pins (first the front pin) and locate them fully home by exerting a pressure.
Shotgun. Follow the procedure described in the abovementioned section "Assembly".
FIRING
Load the shotgun and release the safety. Each pressure on the trigger causes firing, the mechanism ejects the empty shell and reinserts a live cartridge into the chamber.
INTERCHANGEABLE INVECTOR PLUS CHOKES
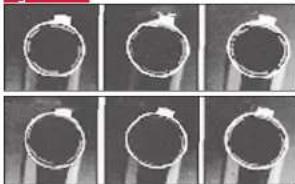
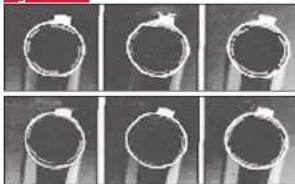
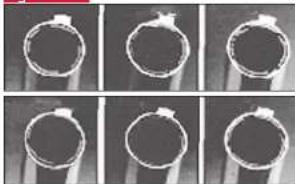
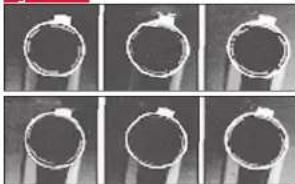
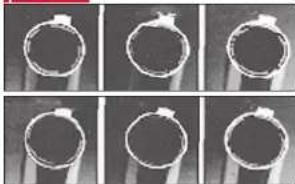
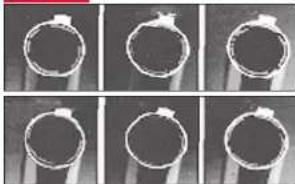
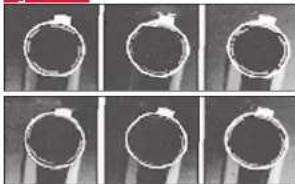
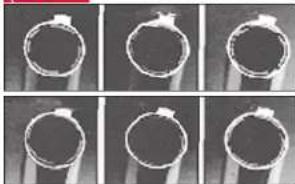
The gun you have just bought is equipped with removable 62 mm long Invector Plus chokes. This special feature is shown by a special marking on the barrel. The choke pattern is indicated on each Invector Plus by the number of rim notches. (Fig 16).
12 Bore Invector Plus range
| Rim notches Correspondance | |||
| lead pellets steel pellets | |||
| I 1/1 [0] | |||
| II 3/4 1/1 A-B | |||
| III 1/2 1/1 A-B | |||
| III 1/4 1/2 A-B | |||
| III 1 Skeet 1/4 A-B | |||
| None Cyl. 1/4 A-B | |||
[1] : Do not use any steel shot cartridges with steel pellets
A : Can handle "standard" steel shots ONLY as defined by the C.I.P.
B: For "high performance" steel shot cartridges with steel pellets, only use a gun that has been specifically tested for "steel shot".
PRECAUTIONARY MEASURES: BEFORE ANY HANDLING MAKE SURE THAT YOUR SHOTGUN IS UNLOADED.
- Never shoot without having fitted the Invector into the shotgun.
- Only use the supplied wrench.
- Make sure that the magazine tube is properly screwed fully home without protruding out of the barrel muzzle.
- Periodically check for correct tightening of the tube on the barrel.
ADJUSTING THE STOCK LENGTH
Your SX4 can easily be adapted to your size. It is supplied with two spacers. One spacer is fitted as standard on the stock, the other is supplied in the box with your firearm.
To shorten your firearm by 7 mm, simply unscrew the two butt plate screws and remove the spacer. To extend your stock by 7 mm, simply add an extra spacer.
MAINTENANCE
Before any maintenance operation make sure that your shotgun is empty by inspecting the chamber, the carrier and the magazine tube. The shotgun must be cleaned as soon as is practically possible after each occasion that it is used. For all round cleaning and lubrication we recommend you to use Legia Spray.
Proceed as follows: Allow the moving parts to recoil and spray with Legia Spray into the barrel. Allow the product to react several minutes. In the meantime clean the shotgun outside using a smooth cleaning cloth lightly oil-soaked in order to remove any trace of sweat left by fingers and to protect the metallic surfaces from corrosion. Insert a cleaning rod equipped with a clean flannelette soaked with Legia Spray into the barrel. Replace the flannelette until it comes out clean. Possibly insist on the connecting portion between the chamber and the barrel. Spray into the barrel once more to protect it until the next utilization. Avoid applying oil in excess because this eases the retention of
grits and unburned powder. From time to time spray some oil on the mechanism in order to deposit a light film which will protect the internal parts from corrosion and will keep a smooth functioning.
STORAGE
Responsible storage of shotguns and ammunition is essential and care should always be taken to ensure that your guns are not accessible to other members of your family or unauthorised people. Additionally your guns should always be stored in a dry place with some ventilation and away from any direct heat source so that the wooden parts due not completely dry out.
Fig.1
natural_image
Close-up of a black mechanical component with a handle and grip (no visible text or symbols)Fig. 1'
natural_image
Close-up of a black mechanical device with red clamped parts, no visible text or symbolsFig.2-14
natural_image
Close-up of hands holding a rifle with red arrows pointing to the lever (no text or symbols visible)Fig. 3
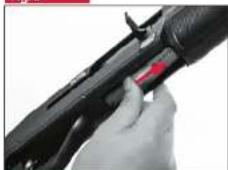
Fig. 4
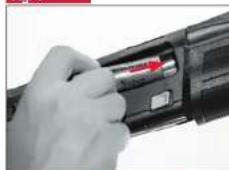
Fig. 5
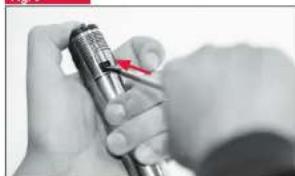
natural_image
Close-up of hands holding a pen with a red arrow pointing to the tip (no visible text or symbols)Fig. 6
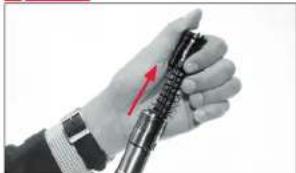
natural_image
Close-up of a hand holding a mechanical spring or tool, with a red arrow indicating force direction (no text or symbols visible)Fig. 7
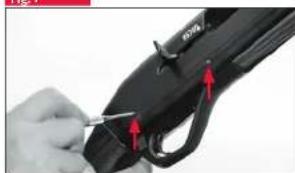
natural_image
Close-up of a hand using a tool to adjust a black object with red arrows indicating movement (no text or symbols visible)Fig. 8
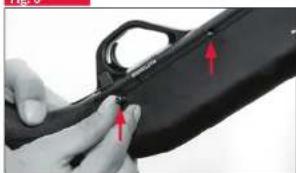
natural_image
Close-up of a hand holding a black object with red arrows pointing to features (no text or symbols visible)Fig. 9
natural_image
Close-up of a hand using a handheld device to adjust a black object (no visible text or symbols)Fig. 10
natural_image
Close-up of a finger pressing a small electronic component with red arrows indicating force or movement (no text or symbols visible)Fig. 11
natural_image
Close-up of hands using a power tool to adjust cable (no visible text or symbols)Fig. 12
natural_image
Mechanical component with attached cable and housing (no visible text or symbols)Fig. 13
natural_image
Close-up of hands using a power tool to press or install a cylindrical component (no visible text or symbols)Fig. 14 Fig. 15
natural_image
Cross-sectional diagram of a mechanical device with internal components and a red arrow indicating a specific part (no text or symbols present)m = 311
natural_image
Close-up of hands holding a rifle with red arrows pointing to the shaft (no text or symbols visible)Fig. 16
natural_image
Six identical circular ring images arranged in a 2x2 grid, showing different angles and shapes (no text or symbols visible)FUSIL SEMI-AUTOMATIQUE Super X4 :
| 2 3/4" 3" 3 1/2" | |
| 70 mm 76 mm 89 mm |
ATTENTION! CE N'EST PAS LA LONGUEUR DE LA CARTOUCHE, MAIS BIEN CELLE DE LA DOUILLE DÉPLOYÉE QUI DOIT CORRES PONDRE À LA LONGUEUR DE LA CHAMBRE.
ASSEMBLAGE
natural_image
Close-up of a black and red object resembling a stylus or abstract form, with no visible text or symbols.Fig. 2-1
natural_image
Close-up of hands holding a black cylindrical object with red arrows pointing to features (no text or symbols visible)Fig. 3

Fig. 4
(四) 本说明仅供参考。
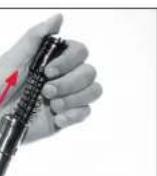
Fig. 5
natural_image
Close-up of a hand holding a small electronic device with a red arrow pointing to its tip (no visible text or symbols)Fig. 6
natural_image
Close-up of a hand holding a metallic object with a red arrow pointing to it, no visible text or symbols.Fig.7
natural_image
Close-up of a hand using a tool to adjust or install a black object with red arrows indicating movement (no text or symbols visible)Fig. 8
natural_image
Close-up of a hand holding a black rifle with red arrows pointing to the handle (no text or symbols visible)WINCHESTER.
Fig. 9
natural_image
Close-up of a hand using a black tool on a firearm (no visible text or symbols)Fig. 10
natural_image
Close-up of a finger pressing a small electronic component with red arrows indicating force or movement (no text or symbols visible)Fig. 11
natural_image
Close-up of hands using a crimping tool to adjust a metal component (no visible text or symbols)Fig. 12
natural_image
Mechanical component with attached cable and housing (no visible text or symbols)Fig. 13
natural_image
Close-up of hands using a handheld tool to press or install a cylindrical device (no visible text or symbols)Fig. 14 Fig. 15
natural_image
Cross-sectional diagram of a mechanical device with internal components and a red arrow indicating a specific part (no text or symbols present)m = 311
natural_image
Close-up of hands holding a rifle with red arrows pointing to the shaft (no text or symbols visible)Fig. 16
natural_image
Six identical circular ring images arranged in a 2x2 grid, showing varying thickness and shading (no text or symbols)ESCOPETA SEMIAUTOMATICA Super X4:
natural_image
Close-up of a black mechanical device with red buttons and a white label (no readable text or symbols)Fig.2-14
natural_image
Close-up of hands adjusting a rifle with red arrows indicating movement (no text or symbols visible)Fig. 3
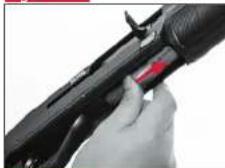
Fig. 4
(1)
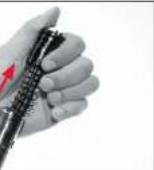
Fig. 5
natural_image
Close-up of a hand holding a pen or stylus, with no visible text or symbolsFig. 6
natural_image
Close-up of a gloved hand holding a mechanical tool with a red arrow indicating motion (no text or symbols visible)Fig. 7
natural_image
Close-up of a hand using a tool to adjust a black object with red arrows indicating movement (no text or symbols visible)Fig. 8
natural_image
Close-up of a hand holding a black rifle with red arrows pointing to the grip (no text or symbols visible)34 35
Fig. 9
natural_image
Close-up of a hand using a handheld device to adjust a black object (no visible text or symbols)Fig. 10
natural_image
Close-up of a finger pressing a small electronic component with red arrows indicating force or movement (no text or symbols visible)Fig. 11
natural_image
Close-up of hands using a power tool to adjust cable (no visible text or symbols)Fig. 12
natural_image
Mechanical component with attached cable and housing (no visible text or symbols)Fig. 13
natural_image
Close-up of hands using a power tool to apply material (no visible text or symbols)Fig. 14 Fig. 15
natural_image
Cross-sectional diagram of a mechanical device with internal components and a red arrow indicating a specific part (no text or symbols present)m = 311
natural_image
Close-up of hands holding a rifle with red arrows pointing to the shaft (no text or symbols visible)Fig. 16
natural_image
Six identical circular ring images arranged in a 2x2 grid, showing different angles and shapes (no text or symbols visible)FUCILE SEMIAUTOMATICO
Super X4:
| 2 3/4" 3" 3 1/2" | |
| 70 mm 76 mm 89 mm |
ATTENZIONE! NON È LA LUNGHEZZA DEILA CARTUCCIA MA BEN SI QUELLA DEL BOSSOLO CHE DEVE CORRISPONDERE ALLA LUNGHEZZA, DELLA CAMERA
MONTAGGIO
natural_image
Close-up of a black mechanical device with red clamps and a white top (no visible text or symbols)Fig. 2 - 14
natural_image
Close-up of hands holding a rifle with red arrows pointing to the handle (no text or symbols visible)Fig. 3
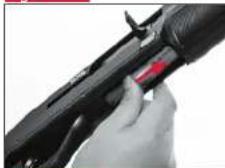
Fig. 4
The Ground Truth image displays a single, solid horizontal line. According to Rule 2 (UNDERSCORE & LINE RULES), this is a stylistic or background line, not a placeholder underscore. Therefore, the OCR result must ignore it and output nothing or only meaningful text. The provided OCR content is "____", which consists of four underscores. This is an incorrect interpretation of the line as a placeholder, violating the rule that stylistic lines must be ignored. The OCR has hallucinated underscores where none should exist based on the GT's visual context. Hence, the OCR result is inconsistent with the Ground Truth.
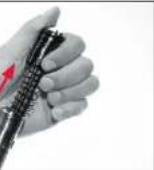
Fig. 5
natural_image
Close-up of a hand holding a pen with a red arrow pointing to the tip (no visible text or symbols)Fig. 6
natural_image
Close-up of a gloved hand holding a mechanical tool with a red arrow indicating motion (no text or symbols visible)Fig. 7
natural_image
Close-up of a hand using a tool to adjust a black object with red arrows indicating movement (no text or symbols visible)Fig. 8
natural_image
Close-up of a hand holding a black rifle with red arrows pointing to the handle (no visible text or symbols)WINCHESTER.
Fig. 9
natural_image
Close-up of a hand using a black tool on a firearm (no visible text or symbols)Fig. 10
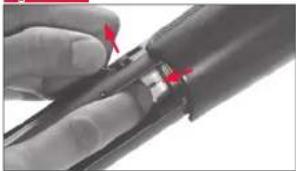
natural_image
Close-up of a finger pressing a small electronic component with red arrows indicating force or movement (no text or symbols visible)Fig. 11
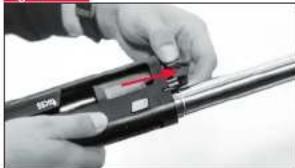
natural_image
Close-up of hands using a crimping tool to adjust a metal component (no visible text or symbols)Fig. 12
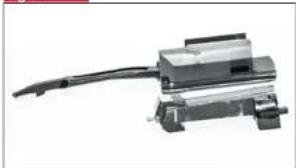
natural_image
Mechanical component with attached cable and housing (no visible text or symbols)Fig. 13
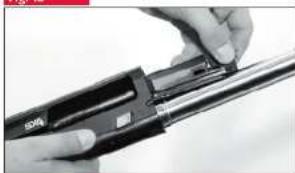
natural_image
Close-up of hands using a power tool to press or install a cable (no visible text or symbols)Fig. 14 Fig. 15
natural_image
Cross-sectional diagram of a mechanical device with internal components and a red arrow indicating a specific part (no text or symbols present)m = 311
natural_image
Close-up of hands holding a rifle with red arrows pointing to the shaft (no text or symbols visible)Fig. 16
natural_image
Six identical circular ring images arranged in a 2x2 grid, showing different angles and shapes (no text or symbols visible)ПОЛУАВТОМАТИЧЕСКОЕ РУЖЬЕ Super X4 :
natural_image
Close-up of a hand using a black tool on a firearm (no visible text or symbols)рис. 10
natural_image
Close-up of a finger pressing a small electronic component with red arrows indicating force or movement (no text or symbols visible)рис. 11
natural_image
Close-up of hands using a crimping tool to adjust a metal component (no visible text or symbols)рис. 12
natural_image
Close-up of a mechanical component with wires and connectors (no visible text or symbols)рис. 13
natural_image
Close-up of hands using a power tool to press or install a cable (no visible text or symbols)рис. 14 рис.
natural_image
Cross-sectional diagram of a mechanical device with internal components and a red arrow indicating a specific part (no text or symbols present)m = 311
natural_image
Close-up of hands holding a rifle with red arrows pointing to the shaft (no text or symbols visible)рис. 16
natural_image
Six identical circular ring images arranged in a 2x2 grid, showing different angles and shapes (no text or symbols visible)Super X4 HALVAUTOMATISKT HAGELGEVÄR
| 2 3/4" 3" 3 1/2" | |
| 70 mm 76 mm 89 mm |
VAR FÖRSIKTIG! DET ÄR INTE LÄNGDEN PÅ PATRONEN SOM ÄR DEN VIKTIGA, UTAN LÄNGDEN PÅ PATRONEN NÄR MAN HAR SKJUTIT MED DEN.
SAMMANSÄTTNING
natural_image
Close-up of a black mechanical component with a handle and textured grip (no visible text or symbols)Bild 1
natural_image
Close-up of a black mechanical device with red clamped components (no visible text or symbols)Bild 2 - 14
natural_image
Close-up of hands holding a rifle with red arrows pointing to the handle (no text or symbols visible)Bild 3
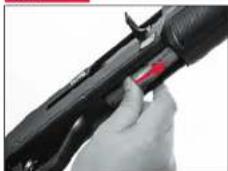
Bild 4
natural_image
Close-up of a hand inserting a cylindrical component into a battery (no visible text or symbols)广力云智慧零售收银系统
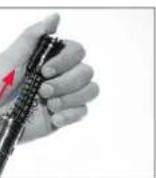
Bild 5
natural_image
Close-up of a hand holding a pen or tool, with a red arrow pointing to the pen tip (no visible text or symbols)Bild 6
natural_image
Close-up of a hand holding a mechanical tool with a red arrow pointing to the handle (no text or symbols visible)Bild 7
natural_image
Close-up of a hand using a tool to adjust or install a black object with red arrows indicating points (no text or symbols visible)Bild 8

natural_image
Close-up of a hand holding a black firearm with red arrows pointing to the handle (no text or symbols visible)Bild 9
natural_image
Close-up of a hand using a black tool on a firearm (no visible text or symbols)Bild 10
natural_image
Close-up of a finger pressing a small electronic component with red arrows indicating force or movement (no text or symbols visible)Bild 11
natural_image
Close-up of hands using a crimping tool to adjust a metal component (no visible text or symbols)Bild 12
natural_image
Mechanical component with attached cable and housing (no visible text or symbols)Bild 13
natural_image
Close-up of hands using a power tool to adjust or install a cylindrical component (no visible text or symbols)Bild 14 Bild 15
natural_image
Cross-sectional diagram of a mechanical device with internal components and a red arrow indicating a specific part (no text or symbols present)m = 311
natural_image
Close-up of hands holding a rifle with red arrows pointing to the shaft (no text or symbols visible)Bild 16
natural_image
Six identical circular ring images arranged in a 2x2 grid, each with a different top surface (no text or symbols visible)ESPINGARDA SEMI-AUTOMÁTIC Super X4 :
natural_image
Close-up of a black mechanical device with red clamped components (no visible text or symbols)Fig.2-14
natural_image
Close-up of hands holding a rifle with red arrows pointing to the shaft (no text or symbols visible)Fig. 3
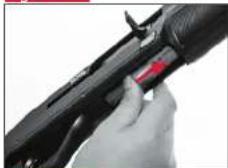
Fig. 4
(1)
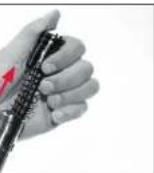
Fig. 5
natural_image
Close-up of a hand holding a pen with a red arrow pointing to the tip (no visible text or symbols)Fig. 6
natural_image
Close-up of a hand holding a mechanical tool with a red arrow indicating force or direction (no text or symbols visible)Fig. 7
natural_image
Close-up of a hand using a tool to adjust a black object with red arrows indicating movement (no text or symbols visible)Fig. 8
natural_image
Close-up of a hand holding a black rifle with red arrows pointing to the handle (no visible text or symbols)58
59
Fig. 9
natural_image
Close-up of a hand using a black tool on a firearm (no visible text or symbols)Fig.10
natural_image
Close-up of a finger pressing a small electronic component with red arrows indicating force or movement (no text or symbols visible)Fig. 11
natural_image
Close-up of hands using a crimping tool to adjust a metal component (no visible text or symbols)Fig. 12

natural_image
Mechanical component with attached cable and housing (no visible text or symbols)Fig. 13
natural_image
Close-up of hands using a power tool to press or install a cable (no visible text or symbols)Fig. 14 Fig. 15
natural_image
Cross-sectional diagram of a mechanical device with internal components and a red arrow indicating a specific part (no text or symbols present)m = 311
natural_image
Close-up of hands holding a rifle with red arrows pointing to the shaft (no text or symbols visible)Fig. 16
natural_image
Six identical circular ring images arranged in a 2x2 grid, each with a small object on top (no text or symbols visible)Super X4 YARI OTOMATİK TÜFEK
| 2 3/4" 3" 3 1/2" | |
| 70 mm 76 mm 89 mm |
DİKKATLİ OLUNI BELİRTİLEN HAZNE UZUNLUĞUNA, SADECE FİŞEGİN UZUNLUĞU DEĞİL, AYNI ZAMANDA KIVRILMAMIŞ KOVANIN UZUNLUĞUNUN DA UYUMLU OLMASI GEREKİR.
MONTAJ
12 Bore Invector Plus
natural_image
Close-up of a black mechanical component with a handle and circular opening (no visible text or symbols)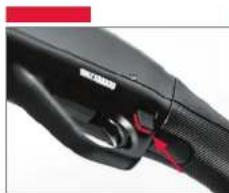
natural_image
Close-up of a black car handle with red buttons and a white plastic clip (no visible text or symbols)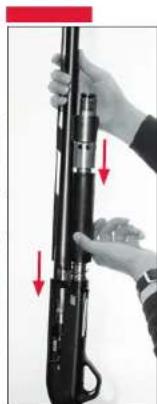
natural_image
Close-up of hands holding a rifle with red arrows pointing to the barrel (no text or symbols visible)Şekil 3 Şekil 4
natural_image
Close-up of a hand holding a firearm with a red trigger clip (no visible text or symbols)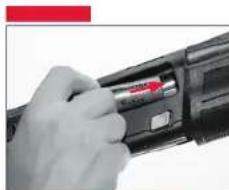
natural_image
Close-up of a hand inserting a black cylindrical battery into a black casing (no visible text or symbols)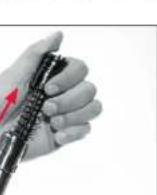
Şekil 5 Şekil 6
natural_image
Close-up of hands holding a pen or tool, with a red arrow pointing to the pen tip (no visible text or symbols)[Non-Text]
natural_image
Close-up of a hand holding a mechanical component with a red arrow indicating direction (no text or symbols visible)Şekil 7 Şekil 8
natural_image
Close-up of a hand using a tool to adjust or install a black object with red arrows indicating movement (no text or symbols visible)[Non-Text]
natural_image
Close-up of a hand holding a black object with red arrows pointing to features (no text or symbols visible)WINCHESTER.
Şekil 9
natural_image
Close-up of hands using a handheld device to adjust a black object (no visible text or symbols)Şekil 10
natural_image
Close-up of a finger pressing a small electronic component with red arrows indicating force or movement (no text or symbols visible)Şekil 11
natural_image
Close-up of hands using a crimping tool to adjust a metal rod (no visible text or symbols)Şekil 12
natural_image
Mechanical component with metallic housing and cable (no visible text or symbols)Şekil 13
natural_image
Close-up of hands using a handheld device to adjust or install a cylindrical component (no visible text or symbols)Şekil 14 Şekil
natural_image
Cross-sectional diagram of a mechanical device with internal components and a red arrow indicating a specific part (no text or symbols present)[Non-Text]
natural_image
Close-up of hands holding a rifle with red arrows pointing to the barrel (no text or symbols visible)Şekil 16
natural_image
Six grayscale circular ring images arranged in a 3x3 grid, showing different angles and shapes (no text or symbols visible)NOTE
NOTENOTE
WINCHESTER®
RIFLES AND SHOTGUNS
Browning International S.A. Parc Industriel des Hauts-Sarts • 3ème Avenue, 25 • B - 4040 Herstal