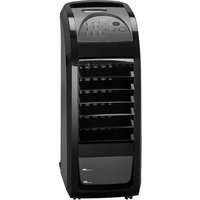
USER MANUAL LK 5689 AEG
Ventilator/Air Cooler
Ventilator/Air Cooler
Overview of the Components
Press 1 x = NATURAL
32 English Instruction Manual
Thank you for choosing our product. We hope you enjoy using the appliance.
Symbols in these Instructions for Use
Important information for your safety is specially marked. It is essential to comply with these instructions in order to avoid accidents and prevent damage to the machine:

WARNING:
This warns you of dangers to your health and indicates possible injury risks.

CAUTION:
This refers to possible hazards to the machine or other objects.

NOTE: This highlights tips and information.
General Notes
Read the operating instructions carefully before putting the appliance into operation and keep the instructions including the warranty, the receipt and, if possible, the box with the
internal packing. If you give this device to other people, please also pass on the operating instructions.
- The appliance is designed exclusively for private use and for the envisaged purpose. This appliance is not fit for commercial use.
- Do not use it outdoors. Keep it away from sources of heat, direct sunlight, humidity (never dip it into any liquid) and sharp edges. Do not use the appliance with wet hands. If the appliance is humid or wet, unplug it immediately.
- When cleaning or putting it away, switch off the appliance and always pull out the plug from the socket (pull the plug itself, not the lead) if the appliance is not being used and remove the attached accessories.
- The device and the mains lead have to be checked regularly for signs of damage. If damage is found the device must not be used.
- Use only original spare parts.
- In order to ensure your children's safety, please keep all packaging (plastic bags, boxes, polystyrene etc.) out of their reach.

WARNING:
Do not allow small children to play with the foil. There is a danger of suffocation!
Special Safety Instructions for this Appliance
- Disconnect the device from the mains supply when refilling with water or during cleaning.
- Do not leave the unit unattended for hours at a time. Do not leave your home whilst the unit is in operation.
- Never stick fingers or other objects through the protection grid.
- Watch out for long hair! It can be caught in the fan owing to the air turbulence!
- Operate the device only once it is completely assembled.
- Select a stable base to avoid the tipping of the fan during use!
- Do not place the device immediately next to stoves or other sources of heat.
- When the device is in operation, it must not be moved.
- Handle the device with extreme caution when there is water in the water tank.
- Do not use the device in the kitchen or in the bathroom.
- Drain the water from the water tank when the device is not in use.
- Do not try to repair the appliance on your own. Always contact an authorized technician. If the supply cord is damaged, it must be replaced by the manufacturer, its service agent or similarly qualified persons in order to avoid a hazard.
- This appliance can be used by children aged from 8 years and above and persons with reduced physical, sensory or mental capabilities or lack of experience and knowledge if they have been given supervision or instruction concerning use of the appliance in a safe way and understand the hazards involved. Children shall not play with the appliance.
- Cleaning and user maintenance shall not be made by children without supervision.
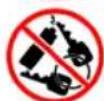
Handling Batteries
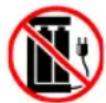
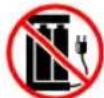
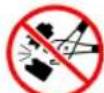
Do not charge!
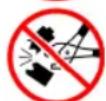
Do not disassemble!
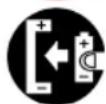
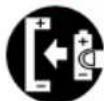
Insert correctly!

Danger of explosion! Do not expose batteries to intense heat, such as sunlight, fire or similar.
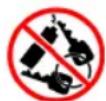
Do not short circuit!
- Different battery types or new and used batteries must not be used together.
- Batteries can leak and lose battery acid. If the remote control is not used for a long period of time, remove the batteries. If a battery leaks, do not rub the fluid into the eyes or the skin. If acid comes into contact with the eyes, rinse with purified water and seek medical advice if symptoms persist.
Intended Use
This appliance acts as a fan and/or air cooler, air humidifier. It is intended exclusively for this purpose and may only be used as such. It may only be used in the manner described in these instructions for use. The device must not be used for commercial purposes.
Any other use of this device is considered to be contrary to the intended use and may result in damage to materials or even personal injury.
The manufacturer does not assume any liability for damages resulting from improper use.
Overview of the Components / Delivery Scope
1 Storage compartment for remote control 2 Control panel
2a IR receiver for remote 2b MODE button 2c TIMER button 2d SPEED button 2e SWING button 2f HUMIDIFIER button 2g ON/OFF button
3 Castors
4 Fins 5 Lever 6 Carrying handle 7 Water tank lock 8 Water tank 9 Cable wrap 10 Humidifier cartridge 11 Air intake filter
Without illustration:
2 × Batteries of type R03 "AAA" 1.5V
Unpacking the Appliance
- Remove the device from its packaging.
- Remove all packaging materials such as foils, filling materials, cable holders, and carton packaging.
- Check the scope of delivery for completeness.
- If there are missing parts or obvious damage, do not use the device. Return it to your retailer immediately.
NOTE:
There may still be dust or production remains on the device. We recommend that you clean the device as described under "Cleaning".
Position
The ideal position is a non-slip, flat surface.
Water
- Only use distilled or boiled, cold tap water without additives.

CAUTION:
Do not fill the water tank with water from clothes dryers or water with additives (such as scented oils, perfume, softeners, or other chemicals). Doing so may damage the appliance.
- Replace the water every 3 - 4 days, even if it has not yet been used.
- Remove the water from the water tank if the appliance is out of use for long periods.
Fill with Water
- Place the device on its operation site.
- Open the lock of the water tank located on the rear panel. For unlocking, turn it counter-clockwise.
- Pull out the water tank up to the stop
- Fill the water tank. When doing so, observe the following:
- Min. filling capacity of 1.5 litres (min), Max. filling capacity of 4.5 litres (max).
- Slide the water tank back into the device.
- Close the lock by turning it clockwise.
Putting into Service
Power Cord
Unwind the power cord from the cable wrap at the back of the unit.
Electrical Connection
- Before inserting the plug into the socket, make sure that the mains voltage to be used matches that of the device. You can find this information on the nameplate.
- Connect the device to a duly installed protective contact socket. A signal will sound indicating that the appliance is ready for use.
Fitting Batteries into the Remote Control
- Open the lid of the battery compartment on the rear of the remote control.
- Insert 2 MICRO batteries of type R03 "AAA" 1.5 V.
- Please ensure the correct polarity. Details can be found in the battery compartment.
- Close the battery compartment.
Remote Control Range
The remote control has a range of approx. 10 meters. If this range becomes shorter, the batteries must be changed.
- To use the remote control, point it at the sensor on the front of the switch housing.
- Make sure there are no obstacles between the remote control and the sensor.
- The angle of the remote control to the remote control sensor should not exceed 30° to the right, left, up, and down.
Using the Appliance
Basic Settings
- Open the fins when using the device. With closed fins, the device does not work properly. The air cooler always starts in normal mode with low speed.
- If you interrupt the operation without unplugging the power cord, the previously set operating mode remains stored.
Operation
You can operate the appliance using the remote control as well as the buttons on the switch housing. The functions are identical.
NOTE:
The LED's on the switch housing indicate the settings.
ON/OFF Switch on/off
Use the ON/OFF button to switch the appliance on or off.
SWING
Oscillation
The inner ventilation grid swivels automatically when you select the SWING function. The outer ventilation grids can be adjusted horizontally by hand.
SPEED Speed level
Press the SPEED button to select one of the three different speeds.
LOW
low
MEDIUM
high
TIMER
Timer
If you want the timer to switch the device off, press the TIMER button.

NOTE:
Each time you press the TIMER button, the operating period is increased. The respective indicator lights indicate the operating time.
MODE Wind Change Functions
The device has the two special functions: NATURAL and SLEEP. The speed of the fan varies between the functions.
Press the MODE button to switch these functions on.
This mode simulates natural wind movement. Pressing the SPEED button you can change the speed level.
Relax in this mode with rich wind variants. Pressing the SPEED button you can change the speed level.
Choose the speed level by pressing the SPEED button.
HUMIDIFIER Humidifier
In addition to the fan, you can switch on the air cooler / humidifier. To do so, press the HUMIDIFIER button. The indicator light above this button lights up. This function is suitable for rooms up to 20m2
Adding a pleasant level of humidity provides the following benefits:
It ensures a healthy room climate and thus your wellbeing. - It prevents the raising of dust and is therefore ideally suited for allergy sufferers. - Your skin is supplied with moisture. - It protects your furniture from drying out and prevents a forming of gaps in parquet or wood floors. - Electrostatic charge in the air is suppressed.
Refill Water
- Switch off the appliance.
- Disconnect the plug from the mains.
- Proceed as described under "Fill with water".
Change the Water
The water should be changed every 3 - 4 days.
- Switch off the appliance.
- Disconnect the plug from the mains.
- Remove the air intake filter.
- Loosen the screw on top of the humidifier cartridge.
- Drag the humidifier cartridge forward and then upward with the handle.
- Remove the water tank.
- Empty the water tank and rinse it with clean water.
- Proceed as described under 4-6, in the section "Water → Fill with Water".
- Reinstall the humidifier cartridge and the air inlet filter.
End of Operation
- Switch off the appliance.
- Disconnect the plug from the mains.
- You intend to not use the appliance for some time? Then empty the water tank! (Proceed as described under 1-7, in the section "Change the Water" section.) Let the fan run for 20 minutes on HIGH. This helps to dry the inside of the appliance.
- You can store the power cable on the cord wrap.
Cleaning

WARNING:
Always remove the mains plug before cleaning the device! - Make sure no water enters the openings of the unit during cleaning. Otherwise this might result in an electric shock or fire.

CAUTION:
- Do not use a wire brush or any abrasive items.
- Do not use any acidic or abrasive detergents.
Housing
- Clean the outside of the device with a dry cloth without any additives.
- If the device is very dirty, wet a cloth with water and then wipe the device dry once you have finished.
Water Tank
- Rinse the water tank with clean water.
- Wipe the water tank dry.
Humidifier Cartridge and Air Inlet Filter
Clean these parts carefully under slow-running water. Let them dry completely before you put the parts back in place.

CAUTION:
Put the unit into operation only once it is completely assembled.
Storage
- Clean the device as described. Let the accessories dry completely. We recommend that you store the device in its original packaging when it is not to be used for a longer period. Always store the device at a well-ventilated and dry place out of the reach of children.
Troubleshooting
| Problem Cause Solution | |
| The device has no check the mains outlet. power supply. | Defective electronics Seek advice from a dealer or service centre. |
| The water is too old or dirty. Change the water and clean the humidifier. | Clean the humidifier cartridge as described under "Cleaning→ Humidifier Cartridge and Air Inlet Filter". |
| The humidifier cartridge is dirty. |
Technical Data
Model: LK 5689
Power supply: 220-240V~, 50Hz
Power consumption: 70W
Protection class: II
Net weight: approx. 6.00kg
The right to make technical and design modifications in the course of continuous product development remains reserved.
This device has been tested according to all relevant current CE guidelines, such as electromagnetic compatibility and low voltage directives, and has been constructed in accordance with the latest safety regulations.
Disposal
Battery Disposal
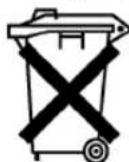
As a consumer you are obliged by law to return old batteries/accumulators.
Remove the batteries from the remote control before disposing of the appliance.
Return the batteries to a collection facility for the collection of old batteries or hazardous waste. Contact your local authority for more information.
Meaning of the "Dustbin" Symbol
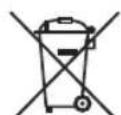
Protect our environment: do not dispose of electrical equipment in the domestic waste.
Please return any electrical equipment that you will no longer use to the collection points provided for their disposal.
This helps avoid the potential effects of incorrect disposal on the environment and human health.
This will contribute to the recycling and other forms of reutilisation of electrical and electronic equipment.
Information concerning where the equipment can be disposed of can be obtained from your local authority.
Instruction manual
CTC Clatronic Sp. z o.o
Indicates a possible danger to the product or other surrounding objects.

NOTE: Provides additional information.
Information
Before using the appliance, carefully read the enclosed instruction manual and keep it in a safe place, together with the warranty card, cash receipt, and, if possible, the cardboard box with packaging material. If you give the appliance to someone else, be sure to also pass on the instruction manual.
Use the appliance only in the intended manner and for its intended purpose. The appliance is not intended for commercial use. Do not use the appliance outdoors. Protect the appliance from heat, direct sunlight, moisture (in no case immerse it in water) and impacts against sharp edges. Do not touch the appliance with wet hands. If the appliance is damp or wet, unplug it from the socket immediately. - After use, during assembly of accessories, cleaning or when putting the appliance away, always unplug it from the socket (pull the plug, not the cable). - The power cord must be regularly checked for signs of damage. If the appliance is damaged, it must not be used. - Use only original spare parts. - For safety reasons, do not leave packaging (plastic bags, cardboard, polystyrene, etc.) unattended.
WARNING

Do not play with the power cord. Danger of suffocation!
Do not use batteries of different types, old and new batteries together.
50 Russian
Batteries may leak and damage the device. If the device is not used for a long time, remove the batteries. If battery fluid leaks, do not allow it to come into contact with eyes or skin. If acid contacts eyes, rinse with plenty of water and seek medical help immediately in case of injury symptoms.
Intended Use
This device works as a fan for air circulation, air humidifier.
It is intended exclusively for this purpose. It may only be used in the manner described in this instruction manual. You are not permitted to use the device for industrial purposes.
Any other application is considered improper use and may cause material damage or even personal injury.
The manufacturer is not liable for damage caused by improper use of the device.
Overview of device parts / Scope of delivery
1 Remote control compartment 2 Control panel
2a IR receiver for remote control 2b MODE button 2c TIMER button 2d SPEED button 2e SWING button 2f HUMIDIFIER button
2g ON/OFF button
3 Support rollers 4 Cooling fins 5 Handle 6 Carrying handle 7 Water tank cap 8 Water tank 9 Cord winding hook 10 Humidifier cartridge 11 Filter for incoming air purification
Not shown in the figure:
2x BaTapeKn TnR03"AAA"1,5B
PacnaKOBka yctpOuCTBa
1. Remove the device from the packaging. 2. Remove all packaging materials, such as plastic film, filler material, cable ties, and boxes. 3. Make sure that the box contains the complete delivery set. 4. If you find missing components or damage to the device, do not turn on the juicer. Return it to the seller.
I I PIMMEYAHIA:
On the device, there may still be some dust particles left after the manufacturing process. It is recommended to clean the device as described in the "Installation" section.
Mectonoloxene np6opa
As the location for the device, choose a non-slip surface.
Boda
- Use only distilled or boiled cold water without any additives.
BHIMAHNE:
Do not fill the water tank with tap water or water that contains any additives (such as aromatic oils, fragrances, softeners, or other chemical substances). This can damage the device.
- Change the water every 3-4 days, even if the device is not used. Pour out the water from the tank if the device is not used for long periods of time.
HanoJIHeHneEMKocTn BODO
1. Place the device on its working surface. 2. Open the water tank tap located on the rear panel. To open, turn it counterclockwise. 3. Pull out the water tank until it stops. 4. Fill the tank with water. While filling, follow the following:
- Min. volume 1.5 liters (min),
- Max. volume 4.5 liters (max).
- Fill the water tank back into the device.
- Close the tap by turning it clockwise.
Preparing the device for operation
Power cord
Unwind the power cord from its storage place at the rear of the device.
Connection to the power supply
- Before plugging into the socket, make sure that the mains voltage matches the operating voltage of the device. Information on this is found on the type plate of the device.
- Plug the device into a grounded socket with mains voltage. A sound signal will sound, indicating that the device is ready for operation.
The operating time of the remote control is approximately 10 months. If it decreases, the batteries should be replaced.
To use the device, point it at the sensor located on the front panel of the housing. - Make sure that there are no obstacles between the remote control and the sensor. - The angle at which the remote control is positioned relative to the sensor must not exceed 30° from the right, left, below, or above.
Use of the device
Preparatory adjustment
- The device must be opened to cool the radiator fins. With closed cooling fins, the device will not work properly. The fan always starts operating in normal mode at low speed.
- If you interrupt operation, do not disconnect the power cord from the mains; the previously set operating mode is retained.
Control
The device can be controlled both with the remote control and with the buttons on the control panel. Their functions are identical.
NOTE
The settings are indicated by the indicator lights on the control panel.
ON/OFF - Turning on/off
Use the ON/OFF button to turn the device on and off.
SWING - Changing the direction
The internal ventilation grille rotates automatically when the SWING function is turned on. The external ventilation grille can be adjusted horizontally manually.
SPEED - Speed
Press the SPEED button to select one of three speeds:
LOW - Low, MEDIUM - Medium, HIGH - High
TIMER - Timer
If you want to turn off the device automatically at a programmed time, press the TIMER button.
When you press the TIMER button, the operating time increases. The corresponding indicator lamps show the operating time.
MODE button
The device has two special modes: NATURAL and SLEEP. In these two modes, the fan speed changes differently.
To enable these modes, press the MODE button.
Press 1 time = NATURAL. This mode simulates natural wind movement. Press the SPEED button to change the speed. - Press 2 times = SLEEP. Relax with this mode thanks to the wind options. Press the SPEED button to change the speed. Press 3 times = Normal mode. Choose the speed level by pressing the SPEED button.
HUMIDIFIER button
To add cooling freshness, you can turn on the air cooler/humidifier. To do this, press the HUMIDIFIER button. The indicator lamp on this button lights up. This function is suitable for rooms up to 20 m².
Adding a pleasant level of humidity gives the following:
A healthy microclimate in the room and care for your health. - Prevents the formation of dust, which is dangerous for allergy sufferers.
52 Russian
Your furniture can crack from dryness. - Protects furniture from drying out, prevents the formation of uneven parquet on wooden floors. - Reduces the content of static electricity in the air.
Filling the water tank
- Turn off the device.
- Unplug the plug from the socket. 3. Continue as described in the section "Filling the water tank".
Replace the water
In the humidifier.
- Turn off the device.
- Pull the plug out of the socket.
- Remove the filter for cleaning the incoming air.
- Unscrew the screw on top of the humidifier cover. Using the handle, pull the humidifier cartridge forward and then upward.
- Remove the water tank. 7. Pour out the water from the tank and rinse it with clean water. 8. Then proceed as described in points 4-6 of the section "Water → Filling the water tank". 9. Install the humidifier cartridge and the filter for cleaning the incoming air back in place.
End of work
- Turn off the device.
- Pull the plug out of the socket.
- Are you not going to use the device for some time?
Empty the water tanks. (Proceed as described in points 1-7 of section 1-7 "Replace the water"). Leave the fan running for 20 minutes on HIGH (high speed). This will help dry the inside of the device.
- Store the power cord wrapped around the cord holder.
Cleaning

WARNING
- Before cleaning, always unplug the device! Make sure that no water enters the device's opening during cleaning. This could cause an electric shock or fire.

WARNING:
Do not use wire brushes or other abrasive objects. Do not use strong or abrasive cleaning agents.
Placement
- Wipe the device with a dry cloth without cleaning agents. Remove heavy soiling with a damp cloth, then wipe dry.
Water tank
Empty the water tank regularly. Rinse the tank with clean water.
Humidifier filter
Rinse the filter under running water. Let it dry completely before reinstalling.

WARNING:
Use the device only after full assembly.
Storage
- Clean the device as described. Let accessories dry completely.
- It is recommended to store the device in its original packaging if it will not be used for a long time. Always store the device in a dry, well-ventilated place, out of reach of children.
Troubleshooting
Electromagnetic compatibility and conformity
In accordance with the requirements for low-voltage equipment, it was also designed and built taking into account the latest safety technology requirements.
| الله | الله | الله | |
| الله جَبْعَنَ وَالله رَزَرِ .الله بَعَلُ بَعَلُ | الله مَعَلَ وَالله عَلَد\( 1\text{;} \) | \( .\text{الله}5\text{الله}1\text{;}.\text{الله}2\text{;} \) | |
| \( .\text{الله}5\text{الله}1\text{;}.\text{الله}2\text{;} \) وَالله رَزَرِ وَالله رَزَرِ\( .\text{الله}5\text{الله}1\text{;}.\text{الله}2\text{;} \) | \( .\text{الله}5\text{الله}1\text{;}.\text{الله}2\text{;} \) | \( .\text{الله}5\text{الله}1\text{;}.\text{الله}2\text{;} \) | |
| \( .\text{الله}5\text{الله}1\text{;}.\text{الله}2\text{;} \) وَالله رَزَرِ\( .\text{الله}5\text{الله}1\text{;}.\text{الله}2\text{;} \) | \( .\text{الله}5\text{الله}1\text{;}.\text{الله}2\text{;} \) | \( .\text{الله}5\text{الله}1\text{;}.\left.\text{ }.\text{ }.\text{ }.\text{ }.\text{ }.\text{ }.\text{ }.\text{ }.\text{ }.\text{ }.\text{ }.\text{ }.\text{ }.\text{ }.\text{ }.\text{ }.\text{ }.\text{ }.\text{ }.\text{ }.\text{ }.\text{ }.\text{ }.\text{ }.\text{ }.\text{ }\left.\text{ }.\text{ }.\text{ }.\text{ }.\text{ }.\text{ }.\text{ }.\text{ }.\text{ }.\text{ }.\text{ }.\text{ }.\text{ }.\text{ }.\text{ }.\text{ }.\text{ }.\text{ }.\text{ }.\text{ }.\text{ }.\text{ }.\text{ }.\text{ }.\text{\quad }.\text{\quad }.\text{\quad }.\text{\quad }.\text{\quad }.\text{\quad }.\text{\quad }.\text{\quad }.\text{\quad }.\text{\quad }.\text{\quad }.\text{\quad }.\text{\quad }.\text{\quad }.\text{\quad }.\text{\quad }.\text{\quad }.\text{\quad }.\text{\quad }.\text{\quad }.\text{\text{ }} \) | \( .\text{الله}5\text{الله}1\text{;}.\text{ }.\text{ }.\text{ }.\text{ }.\text{ }.\text{ }.\text{ }.\text{ }.\text{ }.\text{ }.\text{ }.\text{ }.\text{ }.\text{ }.\text{ }.\text{ }.\text{ }.\text{ }.\text{ }.\text{ }.\text{ }.\text{ }.\text{ }.\text{ }.\text{ }
\] |
a.10201 a.104
4.
A
:
y
:
1
Therefore, it exactly satisfies x^2 + y^2 >= 4.
Therefore, 14 * 2 * 3 * 4 = 56.
:
{1,2,3,4} union {1,2,3,4} union {1,2,3,4}
- y = 1 .
- | x - 2| = 5/4 .
Therefore, 3^x - 2 = 0
a1 = 2, a2 = -4,
1.2.5.11
-
-
-
-
-
-
-
-
-
- Therefore, omega = 1.5
y
.
guaa aaa 0 1. 2. 3. 4. 5. 6.
30 Jz j s oall jg z aag .j z sall jgs j g j g
JUaIg JUaIg JuaIg UauuJoo 20
jglz1 p1u2w1 a.s
zaww
j5i laie paia (sai jgal Jao y) jgal plauwui iie (aie jll gai)
A
.SWING a,b,g u31 u 1a1u1u1u1u1u1u1u1u1u1u1u1u1u1u1u1u1u1u1u1u1u1u1u1u1u1u1u1u1u1u
- .olalj jz 121y jg aaii oogag ggy yjlll aggl lcls k
jI 155 155 155 155 155 155 155 155 155
.
. j4jJl
J 1
3
40315
11
15 R03“AAA”2
j4 = j1 J2
.1
.2gS1
.3
Therefore, 4ab = 2ab
:
()()()()()()()()
Therefore, y1 y2 = c1 c2
AaAs 150
.
- 1.
aui piai iue yu uol uol j 4
(min) 15 1,5
max)45
yjulj 00 Jolzai
joo
- 1,2,3 , 4,5 , 6,7
J 1
aagw w yjy jy jy

joojoooo
Therefore a1 = 2, a(n+1) = 1/2
Therefore S3 = 1/2 * 2^2 * 3^2 = 8
1
Table 2
()
.
SΔACD = 1/2 · CD × AC = 1/2 × AC
MODE JJ 2b
TIMER JJ 2c
SPEED 2d
SWINGjj2e
HUMIDIFIERjj 2f
ON/OFFjj2g
Therefore, b2 = 6
WARRANTY CARD
warranty card · garantiekaart · carte de garantie · scheda di garanzia · tarjeta de garantía · cartão de garantia · garantikort · karta gwarancyjna · záruční list · karta jamstva · carte de garantie · гарантийная карта · záručný list · garancijski list · garanciajegy · гарантийный формуляр · гарантийный талон
LK 5689
24 months warranty according to warranty declaration - 24 maanden garantie volgens garantieverklaring - 24 mois de garantie selon la déclaration de garantie - 24 mesi di garanzia secondo la dichiarazione di garanzia - 24 meses de garantía de acuerdo con la declaración de garantía - 24 meses de garantia, de acordo com a declaração de garantia - 24 måneders garanti i henhold til garantibetingelserne - 24 miesiące gwarancji na podstawie oświadczenia gwarancyjnego - záruka 24 měsíců podle prohlášení o záruce - 24 mjesečno jamstvo u skladu s jamstvenom deklaracijom - 24 luni garanție conform declarației de garanție - 24 месеца гаранция съобразно с гаранционната декларация - 24-mesačná záruka podľa vyhlásenia o záruke - 24-mesečna garancija, skladno z garancijsko izjavo - 24 hónap garancia a garanciafeltételekben leírtak szerint - гарантія на 24 місяці відповідно до заяви про гарантію - гарантия 24 месяца согласно заявлению о гарантии
Date of purchase, dealer stamp, signature - date of purchase, dealer stamp, signature - aankoopdatum, dealerstempel, handtekening - date d'achat, tampon du concessionnaire, signature - data di acquisto, timbro del rivenditore, firma - fecha de compra, sello del distribuidor, firma - data de compra, carimbo do distribuidor, assinatura - købsdato, forhandlerstempel, signatur - data zakupu, pieczęć sprzedawcy, podpis - datum zakoupení, razítko prodejce, podpis - datum kupovine, žig trgovca, potpis - data de achiziție, ștampila furnizorului, semnătura - дата на покупката, печат на продавача, подпис - dátum nákupu, pečiatka obchodníka/predajcu, podpis - datum nakupa, žig trgovca, podpis - vásárlás dátuma, kereskedő bélyegzője, aláírás - дата на придобиване, печат на продавача, подпис - дата приобретения, штамп продавца, подпись
ETV
www.etrvd