RF-DP-400 - Phone Renkforce - Free user manual and instructions
Find the device manual for free RF-DP-400 Renkforce in PDF.


User questions about RF-DP-400 Renkforce
0 question about this device. Answer the ones you know or ask your own.
Ask a new question about this device
Download the instructions for your Phone in PDF format for free! Find your manual RF-DP-400 - Renkforce and take your electronic device back in hand. On this page are published all the documents necessary for the use of your device. RF-DP-400 by Renkforce.
USER MANUAL RF-DP-400 Renkforce
natural_image
Abstract geometric star-like pattern with five petal-like shapes and dot patterns (no text or symbols)renkforce
GB Operating Instructions
Corded phone for seniors DF-DP-400
Item No. 2619752 Page 14 - 25
F Notice d'emploi
2 Introduction....15
3 Intended use....15
4 Delivery content....15
5 Up-to-date operating instructions....15
6 Description of symbols....15
7 Safety Instructions....16
7.1 General information....16
7.2 Handling....16
7.3 Operating environment....16
7.4 Operation....16
7.5 (Rechargeable) batteries 16
7.6 Connected devices....17
8 Operating elements 17
9 Installation....18
9.1 Inserting the batteries....18
9.2 Connecting and setting up the telephone 18
10 Operation....18
10.1 Setting the date and time....18
10.2 Setting the alarm....19
10.3 Setting the volume of the ringtone.... 19
10.4 Setting the regional prefix.... 19
10.5 Setting the outgoing prefix....20
10.6 Setting the IP prefix ....20
10.7 Setting the flash time 21
10.8 Setting the display contrast....21
10.9 Assigning speed dial buttons 21
10.10 Making calls....22
10.11 Answering calls 22
10.12 Muting the ringtone or calls....23
10.13 Viewing past calls 23
11 Troubleshooting....23
12 Cleaning and maintenance....24
13 Disposal....24
13.1 Product 24
13.2 (Rechargeable) batteries 24
14 Technical data....25
2 Introduction
Dear customer,
Thank you for purchasing this product.
If there are any technical questions, please contact: www.conrad.com/contact
3 Intended use
This product is a corded landline telephone with speed dial buttons and a speakerphone/hands-free mode.
The product is intended for indoor use only. Do not use it outdoors. Contact with moisture must be avoided under all circumstances.
Using the product for purposes other than those described above may damage the product. Improper use can cause a short circuit, fire or other hazards.
This product complies with statutory, national and European regulations. For safety and approval purposes, you must not rebuild and/or modify the product.
Read the operating instructions carefully and store them in a safe place. Make this product available to third parties only together with the operating instructions.
All company and product names contained herein are trademarks of their respective owners. All rights reserved.
4 Delivery content
Base station
Receiver
Coiled cord for receiver
Connection cable (RJ11 to RJ11)
RJ11/TAE-N adapter
Operating instructions
5 Up-to-date operating instructions
Download the latest operating instructions at www.conrad.com/downloads or scan the QR code shown. Follow the instructions on the website.
6 Description of symbols
The following symbols are on the product/appliance or are used in the text:

The symbol warns of hazards that can lead to personal injury.

The symbol warns of dangerous voltage that can lead to personal injury by electric shock.
7 Safety Instructions

Read the operating instructions carefully and especially observe the safety information. If you do not follow the safety instructions and information on proper handling in this manual, we assume no liability for any resulting personal injury or damage to property. Such cases will invalidate the warranty/guarantee.
7.1 General information
The device is not a toy. Keep it out of the reach of children and pets.
Do not leave packaging material lying around carelessly. It may become a dangerous plaything for children.
- Should you have any questions or concerns after reading this document, please contact our technical support or a professional technician.
■ Maintenance, modifications and repairs must be carried out by a technician or a specialist repair centre.
7.2 Handling
- Handle the product carefully. Impact, shocks or a fall even from a low height can damage the product.
7.3 Operating environment
- Do not expose the product to any mechanical stress.
- Protect the product from extreme temperatures, strong jolts, flammable gases, vapours, and solvents.
7.4 Operation

Do not use the product in thunderstorms, as there is a risk of electric shocks caused by lightning strikes. In addition, the product may be damaged. Unplug the product from the telephone socket during thunderstorms.
Consult an expert when in doubt about the operation, safety or connection of the device.
If it is no longer possible to operate the product safely, stop using it and prevent unauthorised use. DO NOT attempt to repair the product yourself. Safe operation can no longer be guaranteed if the product:
– is visibly damaged,
– is no longer working properly,
– has been stored for extended periods in poor ambient conditions or
– has been subjected to any serious transport-related stress.
7.5 (Rechargeable) batteries
Pay attention to correct polarity when inserting the batteries.
If you do not plan to use the product for an extended period, remove the batteries to prevent damage from leaking. Leaking or damaged batteries may cause acid burns if they come into contact with your skin. Always use suitable protective gloves when handling damaged batteries.
Batteries must be kept out of reach of children. Do not leave batteries lying around, as there is risk that children or pets may swallow them.
All batteries should be replaced at the same time. Mixing old and new batteries in the device can lead to battery leakage and device damage.
Batteries must not be dismantled, short-circuited or thrown into open flames. Never attempt to recharge non-rechargeable batteries. This may cause an explosion!
7.6 Connected devices
Always observe the safety information and operating instructions of any other devices which are connected to the product.
8 Operating elements
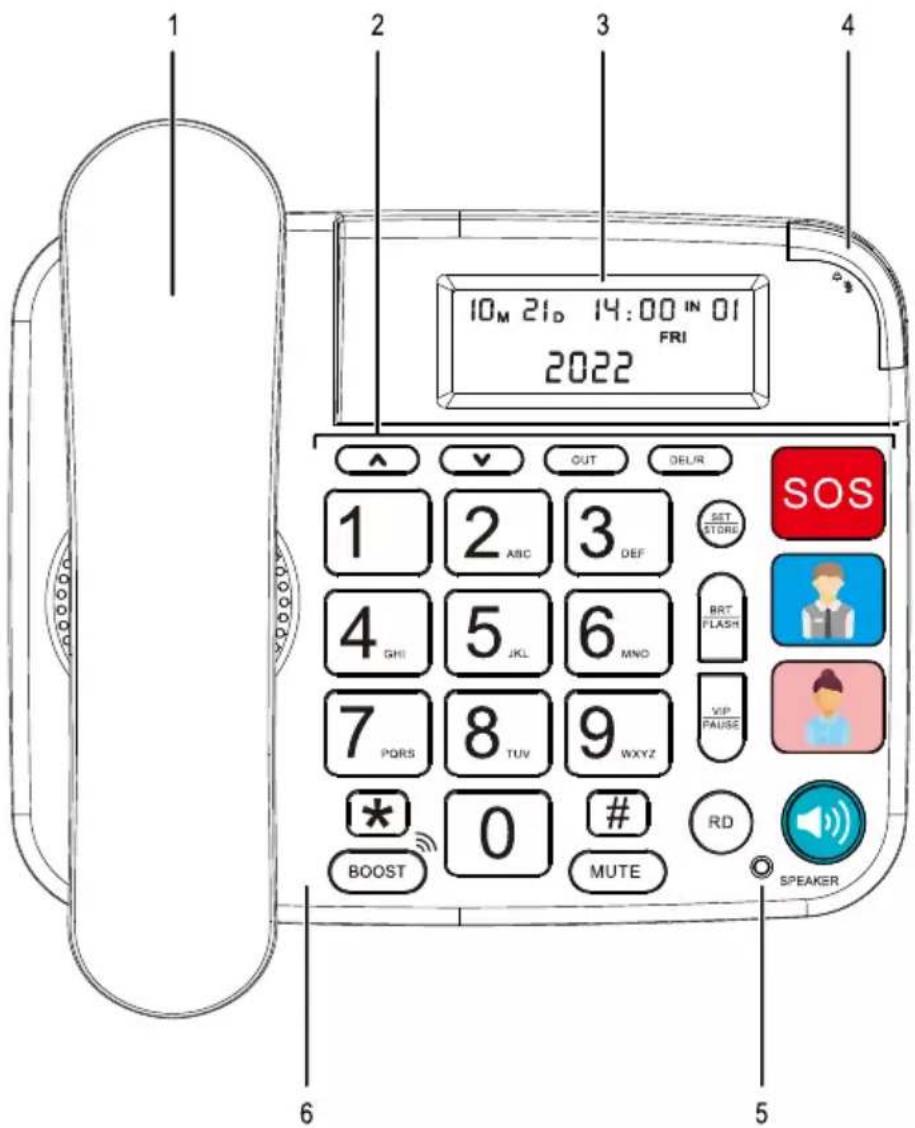
text_image
1 2 3 4 10M 21D 14:00 IN 01 FRI 2022 ↑ ↓ OUT DEUR 1 2 ABC 3 DEF SET STORE SOS 4 GHI 5 JKL 6 MNO BRT FLASH 7 PORS 8 TUV 9 WXYZ VIP PAUSE * + BOOST 0 # MUTE RD SPEAKER 51 Receiver
2 Number and function keys
3 Display
4 Indicator light
5 Hands-free LED
6 Base station
9 Installation
9.1 Inserting the batteries
Note:
The batteries are only required for the automatic display backlight. All other functions can be used when no batteries are inserted.
- Remove the battery compartment cover on the bottom of the base station (6).
- Insert 3 AA batteries (not included). Ensure that the batteries are inserted with the correct polarity. The positive and negative terminals are marked on the batteries and on the inside of the battery compartment cover.
- Replace the battery compartment cover.
9.2 Connecting and setting up the telephone
- Connect the receiver (1) to the base station (6) using the supplied coiled cable.
- Connect the base station (6) to the telephone socket using the supplied connection cable:
- You can connect the cable directly to RJ11 telephone sockets.
-
Use the supplied RJ11/TAE-N adapter for TAE-N telephone sockets.
-
Place the phone on a solid level surface.
10 Operation
10.1 Setting the date and time
- When the receiver (1) is in place, press the "SET / STORE" button.
→ The settings menu will be displayed.
→ The display will show the first submenu "SET 1 DATE".
- Press the "SET / STORE" button.
→ The set year will flash on the display.
-
Set the current year using the arrow buttons, and then confirm your entry by pressing the "SET / STORE" button again.
→ The set month will flash on the display. -
Set the current month using the arrow buttons, and then confirm your entry by pressing the "SET / STORE" button again.
-
Repeat the same steps in order to set the current day, hour and minute, one after the other.
-
Press the "DEL/R" button to exit the settings menu.
Note:
- After the date and time have been set, the display (3) will automatically show the current calendar week and the current month.
– The date and time are automatically updated when an incoming FSK phone signal is received.
10.2 Setting the alarm
- When the receiver (1) is in place, press the "SET / STORE" button.
→ The settings menu will be displayed.
-
Use the arrow buttons to navigate through the submenu until the display shows "SET 5 ALERT".
-
Press the "SET / STORE" button.
→ The alarm time will be shown on the display in the format "HH-MM" followed by the parameter "ON" (when the alarm is enabled) or "OFF" (when the alarm is disabled).
- Press the "SET / STORE" button again.
→ The set hour will flash on the display.
- Configure the desired hour setting using the arrow buttons, and then confirm your entry by pressing the "SET / STORE" button again.
→ The set minute will flash on the display.
- Configure the desired minute setting using the arrow buttons, and then confirm your entry by pressing the "SET / STORE" button again.
→ The alarm status will flash on the display.
-
Set the desired alarm status using the arrow buttons, and then confirm your entry by pressing the "SET / STORE" button again.
-
Press the "DEL/R" button to exit the settings menu.
Note:
- The alarm will sound at the set time for a duration of 1 minute.
- To switch the alarm off, press any button or briefly remove the receiver and hang it up again.
– The alarm will switch off automatically:
– If the receiver is off the hook.
– If the phone is ringing.
– Within 6 seconds of a missed call.
10.3 Setting the volume of the ringtone
Use the sliding switch on the back of the base station (6) to set the ringtone volume. You can choose from the following settings:
HI: Loud
LO: Quiet
OFF: Ringtone off
10.4 Setting the regional prefix
- When the receiver (1) is in place, press the "SET / STORE" button.
→ The settings menu will be displayed.
- Use the arrow buttons to navigate through the submenu until the display shows "SET 2 CODE".
- Press the "SET / STORE" button.
→ "CODE" will appear on the display, followed by the current prefix.
→ If no prefix has been set, "CODE---" will be displayed.
- Press the "SET / STORE" button again.
→ The first number of the prefix will flash.
- Use the arrow buttons to enter the first digit, and then confirm your entry by pressing the "SET / STORE" button again.
→ The second number of the prefix will flash.
-
Repeat the process to enter the remaining digits of the prefix.
-
Press the "DEL/R" button to exit the settings menu.
10.5 Setting the outgoing prefix
This setting allows you to add a prefix to outgoing calls (e.g. "0"). Follow the steps below to configure the prefix.
- When the receiver (1) is in place, press the "SET / STORE" button.
→ The settings menu will be displayed.
-
Use the arrow buttons to navigate through the submenu until the display shows "SET 3 PCODE".
-
Press the "SET / STORE" button.
→ "PCODE" will appear on the display, followed by the current prefix.
→ If no prefix has been set, "PCODE" will be displayed.
- Press the "SET / STORE" button again.
→ The current prefix setting will flash.
-
Use the arrow buttons to enter the desired digit, and then confirm your entry by pressing the "SET / STORE" button again.
-
Press the "DEL/R" button to exit the settings menu.
Note:
- If an outgoing prefix has been set, it will be added automatically if the dialled number consists of more than 5 digits and the first digit differs from the set prefix.
- This applies to callback calls or newly dialled numbers.
- When you re-dial an outgoing call, the outgoing prefix will not be added again.
- When you select an automatic IP prefix, the outgoing prefix will be selected first, followed by the automatic IP prefix.
10.6 Setting the IP prefix
This setting allows you to set a prefix or configure the required connection information for Voice over Internet Protocol (VoIP) calls. Proceed as follows:
- When the receiver (1) is in place, press the "SET / STORE" button.
→ The settings menu will be displayed.
-
Use the arrow buttons to navigate through the submenu until the display shows "SET 4 AUTO IP".
-
Press the "SET / STORE" button.
→ "AUTO IP OFF" will be displayed.
- Use the arrow keys until "AUTO IP ON" appears, and then confirm your entry by pressing the "SET / STORE" button again.
→ "INPUT CODE" will be displayed.
-
Enter the service number, card number and, if applicable, the password you received from your provider. Confirm your entry by pressing the "SET / STORE" button again.
-
Press the "DEL/R" button to exit the settings menu.
Note:
- If an IP prefix has been set, it will be added automatically if the first digit of the dialled number is "0".
- This applies to callback calls or newly dialled numbers.
10.7 Setting the flash time
This setting allows you to set the time for which the line is interrupted when the "BRT / FLASH" button is pressed, in order to send a control message. Proceed as follows:
- When the receiver (1) is in place, press the "SET / STORE" button.
→ The settings menu will be displayed.
-
Use the arrow buttons to navigate through the submenu until the display shows "SET 6 FLASH".
-
Press the "SET / STORE" button.
→ "FLASH" will be displayed, followed by the assigned group and the flash time in milliseconds.
- Press the "SET / STORE" button again.
→ The set group will flash on the display.
- Set the desired group with the arrow buttons, and then confirm your entry by pressing the "SET / STORE" button again.
→ The set flash time will flash on the display.
-
Configure the desired flash time using the arrow buttons, and then confirm your entry by pressing the "SET / STORE" button again.
-
Press the "DEL/R" button to exit the settings menu.
10.8 Setting the display contrast
-
To set the display contrast, press the "BRT / FLASH" button when the receiver (1) is in place.
-
You can choose from 5 contrast settings. Press the "BRT / FLASH" button repeatedly until the desired contrast is reached.
10.9 Assigning speed dial buttons
You can assign the following quick dial buttons as desired:


Proceed as follows:
- When the receiver (1) is in place, enter the desired phone number using the number keys (2). OR
Select a past incoming or outgoing call (see section "10.13 Viewing past calls").
-
Press the "SET / STORE" button.
-
Press the desired speed dial button.
→ The selected number is now assigned to the speed dial button.
10.10 Making calls
10.10.1 Entering numbers manually
- When the receiver (1) is in place, enter the desired phone number using the number keys (2).
- To dial the number you entered:
- Press the button to make a hands-free call.
OR
– Pick up the receiver (1).
Note:
If you entered the wrong number, you can delete the last digit by pressing "DEL/R".
10.10.2 Dialling a number from the call list
- Select a past incoming or outgoing call (see section "7.1 General information").
-
To dial the number you entered:
-
Press the "RD" button.
OR - Press the button to make a hands-free call.
OR
– Pick up the receiver (1).
10.10.3 Using the quick dial buttons
- Press the button to make a hands-free call, followed by the desired speed dial button.
OR
Remove the receiver (1), and then press the desired speed dial button.
10.11 Answering calls
-
To answer a call:
-
Press the button to answer the call in hands-free mode.
OR
– Pick up the receiver (1). -
To end the call:
- Press the button again.
OR
– Hang up the receiver (1).
Note:
To increase the call volume, press the "BOOST" button.
10.12 Muting the ringtone or calls
- To mute an active ringtone or a caller during a call, press the "MUTE" button.
→ The indicator light (4) will switch on.
- Press the "MUTE" button again to unmute the ringtone/call.
→ The indicator light (4) will switch off.
10.13 Viewing past calls
- Pick up the receiver (1).
- Use the arrow keys to scroll through incoming calls.
- To display outgoing calls, press the "OUT" button.
- To call the selected number again:
- Press the "RD" button.
OR
- Press the button to make a hands-free call.
OR
– Pick up the receiver (1).
Note:
- You can delete the selected call by pressing the "DEL/R" button.
- You can mark calls as "VIP" to prevent them from being deleted. Select the desired call, and then press the "PAUSE / VIP" button.
- "VIP" numbers also have a different ringtone.
- To delete all entries in the respective list (including all VIP numbers), press and hold the "DEL/R" button for 3 seconds.
11 Troubleshooting
| Problem Cause Solution | ||
| No sound, or there is noise or interference on the receiver. | The product is not connected properly. | Make sure that all cables are connected properly. |
| The display backlight does not work. | There are no batteries inserted, or the battery level is low. | Insert new AA batteries. |
| The display contrast is low. A low contrast setting was chosen. Choose a higher contrast setting. | ||
12 Cleaning and maintenance
Important:
- Do not use any aggressive cleaning agents, rubbing alcohol or other chemical solutions. These may damage the housing and can cause the product to malfunction.
-
Do not immerse the product in water.
-
Remove the product from the telephone socket.
- Clean the product with a dry, lint-free cloth.
13 Disposal
13.1 Product
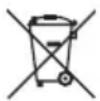
This symbol must appear on any electrical and electronic equipment placed on the EU market. This symbol indicates that this device should not be disposed of as unsorted municipal waste at the end of its service life.
Owners of WEEE (Waste from Electrical and Electronic Equipment) shall dispose of it separately from unsorted municipal waste. Spent batteries and accumulators, which are not enclosed by the WEEE, as well as lamps that can be removed from the WEEE in a non-destructive manner, must be removed by end users from the WEEE in a non-destructive manner before it is handed over to a collection point.
Distributors of electrical and electronic equipment are legally obliged to provide free take-back of waste. Conrad provides the following return options free of charge (more details on our website):
in our Conrad offices
at the Conrad collection points
at the collection points of public waste management authorities or the collection points set up by manufacturers or distributors within the meaning of the ElektroG
End users are responsible for deleting personal data from the WEEE to be disposed of.
It should be noted that different obligations about the return or recycling of WEEE may apply in countries outside of Germany.
13.2 (Rechargeable) batteries
Remove batteries/rechargeable batteries, if any, and dispose of them separately from the product. According to the Battery Directive, end users are legally obliged to return all spent batteries/rechargeable batteries; they must not be disposed of in the normal household waste.
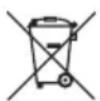
Batteries/rechargeable batteries containing hazardous substances are labelled with this symbol to indicate that disposal in household waste is forbidden. The abbreviations for heavy metals in batteries are: Cd = Cadmium, Hg = Mercury, Pb = Lead (name on (rechargeable) batteries, e.g. below the trash icon on the left).
Used (rechargeable) batteries can be returned to collection points in your municipality, our stores or wherever (rechargeable) batteries are sold. You thus fulfil your statutory obligations and contribute to environmental protection.
Batteries/rechargeable batteries that are disposed of should be protected against short circuit and their exposed terminals should be covered completely with insulating tape before disposal. Even empty batteries/rechargeable batteries can contain residual energy that may cause them to swell, burst, catch fire or explode in the event of a short circuit.
14 Technical data
Telephone type ....Landline
Power supply....3x 1.5 V AA batteries (not included)
Operating / storage conditions....-10 to +85 °C, 10 – 90 % RH
Dimensions (W x H x D) 198 x 67.2 x 154 mm (base station)
198 x 80 x 194 mm (complete telephone)
Length of coiled cord for receiver....40 cm
Length of connecting cable....180 cm
Weight 515 g
France (email) : technique@conrad-france.fr