BEA - Baby bed Kindercraft - Free user manual and instructions
Find the device manual for free BEA Kindercraft in PDF.

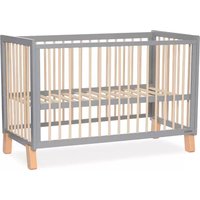
| Product type | Convertible baby cot (with bars, cradle, and bedside sleeper) |
| Brand | Kindercraft |
| Model | BEA |
| Sleeping area dimensions | 76 x 44 cm (length x width) |
| Materials | Metal frame, polyester fabric |
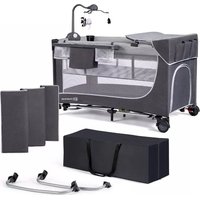
| Adjustable height | 7 positions (push buttons on the feet) |
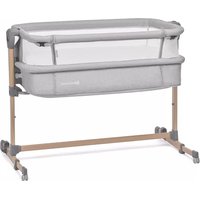
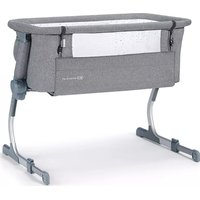
| Main functions | Fixed bed, rocking cradle, bedside sleeper (co-sleeping) |
| Recommended use | From birth until the child can sit, kneel, or stand up |
| Bedside sleeper | Yes, with straps to attach to parent bed; foldable side panel |
| Cradle | Rocking function; do not use in bedside sleeper mode |
| Mattress included | Yes, mattress with board and sheet |
| Frame cleaning | Clean damp cloth |
| Cover and sheet cleaning | Machine wash at 30°C, gentle cycle; do not tumble dry, do not bleach, do not iron |
| Mattress cleaning | Clean damp cloth |
| Safety | Anti-gap fixation, anti-pinch system, max 30 mm gap between mattress and sides |
| Safety standards | Compliant with European safety requirements |
| Legal warranty | 24 months, extendable to 120 months through online registration |
| Repairability | Spare parts available on request from the manufacturer; use of non-approved parts prohibited |
| Provided accessories | Feet (4), connectors, rails, side and central supports, straps (2), mattress, sheet |
Frequently Asked Questions - BEA Kindercraft
User questions about BEA Kindercraft
0 question about this device. Answer the ones you know or ask your own.
Ask a new question about this device
Download the instructions for your Baby bed in PDF format for free! Find your manual BEA - Kindercraft and take your electronic device back in hand. On this page are published all the documents necessary for the use of your device. BEA by Kindercraft.
USER MANUAL BEA Kindercraft
natural_image
Illustration of a baby bathtub with adjustable legs and frame structure (no text or symbols)
kinderkraft.com

/kinderkraftofficial

kinderkraft

@kinderkraftofficial
(AR) سرير أطفال
(CS) DĚTSKÁ POSTÝLKA
(DE) KINDERBETT
(EN) BABY COT
(ES) CAMA INFANTIL
(FR) LIT BÉBÉ
(HU) GYEREKÁGY
(IT) LETTINO PER BAMBINI
الاستخدام دليل
NÁVOD K OBSLUZE
BEDIENUNGSANLEITUNG
USER MANUAL
MANUAL DE USO
GUIDE D'UTILISATION
HASZNÁLATI ÚTMUTATÓ
ISTRUZIONI PER UTENTE
(NL) BABY BED
(PL) ŁÓŻECZKO DZIECIĘCE
(PT) BERÇO INFANTIL
(RO) PĂTUT PENTRU BABELUŞ ŞI COPII
MANUAL DE INSTRUÇÕES
INSTRUCTIUNI DE UTILIZARE
natural_image
Diagram of a mechanical component with two curved rods and a central rod, no text or symbols present1 2


natural_image
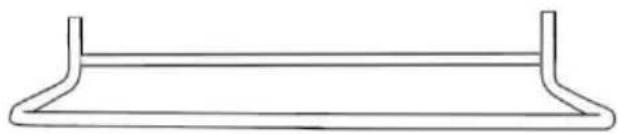
Simple horizontal line drawing with two side rectangles and two circular holes at the top (no text or symbols)3 4A 4
natural_image
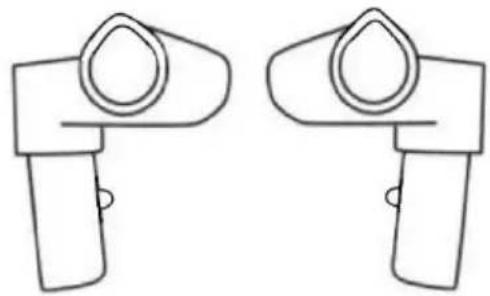
Two identical line drawings of a handheld device with circular ports and handle (no text or symbols)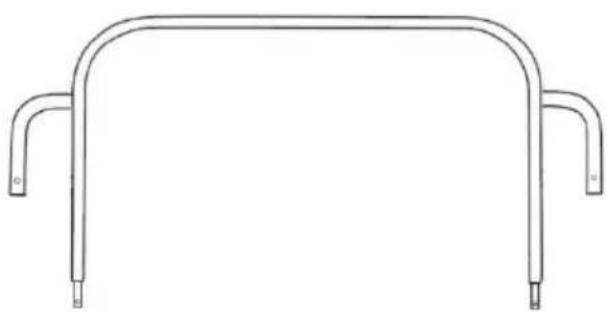
natural_image
Pure technical line drawing of a mechanical bracket or support structure without any text, numbers, or symbols5 6
natural_image
Simple line drawing of a rectangular metal frame with two vertical posts (no text or symbols)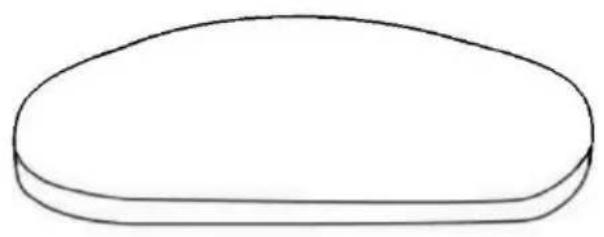
natural_image
Simple line drawing of an oval shape with no text or symbols7 8

natural_image
Symmetrical abstract line drawing with two symmetrical, flower-like shapes (no text or symbols)
natural_image
Four identical line drawings of a women's glove with handles and buttons, arranged horizontally (no text or symbols)9
A
natural_image
3D diagram of a rectangular object with two upward arrows indicating direction, no text or symbols presentB
C
D
E
F
natural_image
Line drawing of a hand holding a medical instrument with two arrows indicating force or movement (no text or symbols present)M N
natural_image
Diagram of a mechanical device with directional arrows indicating movement or force (no text or symbols present)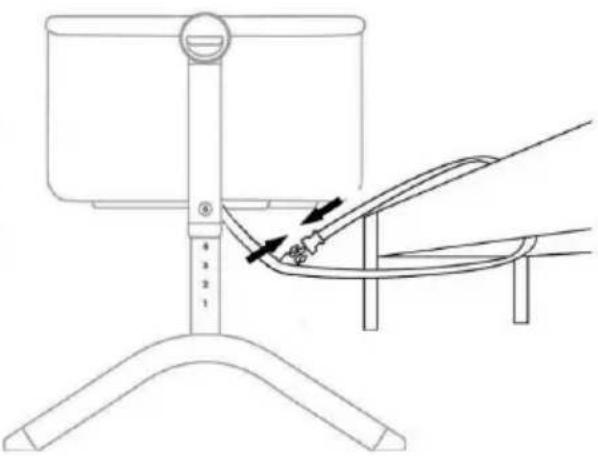
natural_image
Technical line drawing of a mechanical device with a lever and base mount (no text or symbols)0
P
natural_image
Line drawing of a hand holding a tool over a garment piece (no text or symbols)R
Thank you for choosing a product by Kinderkraft. Our designs are child-oriented – safety and quality always comes first, stay comfortable knowing that you have made the best choice.
IMPORTANT, RETAIN FOR FUTURE REFERENCE, READ CAREFULLY
SAFETY INSTRUCTIONS AND PRECAUTIONS WARNING
- Do not use this product without reading the manual first.
- Stop using the product as soon as the child is able to sit, kneel or pull itself up.
- Putting additional items on the product can cause strangulation.
- Do not place the product near another product that could cause strangulation hazard, such as strings, curtain cords, etc.
- Do not use more than one mattress in the scope of the product.
- Place the product on a flat floor.
- Small children should not play unsupervised near the cot.
- The cot should be locked in a fixed position when the child is left unattended.
- All assembly parts should always be properly tightened.
- Ensure that no bolts become loose because the child could come into contact with them or they could become entangled in clothing or objects (e.g. strings, necklaces, dummy ribbons, etc.) which forms a strangulation hazard.
- Be aware of the risk of smoking, keeping an open flame or any other source of heat such as electric heating elements, gas heaters, etc. near the cot.
- The maximum inclination of the bottom should not exceed 2 levels.
- DO NOT use the cot if any parts are missing, damaged or broken. If necessary, contact 4Kraft Sp. z o.o. for spare parts and instructional material. DO NOT use unauthorised substitutes.
-
Use the mattress sold with this cot only. Do not put a second mattress on top of the original mattress. There is a strangulation hazard.
-
In case of sleeping in the cot next to the adult bed, use the straps (8) and fold down the side panel. DO NOT use the cot if any parts are missing, damaged or broken. If necessary, contact 4Kraft Sp. z o.o. for spare parts and instructional material. DO NOT use unauthorised substitutes.
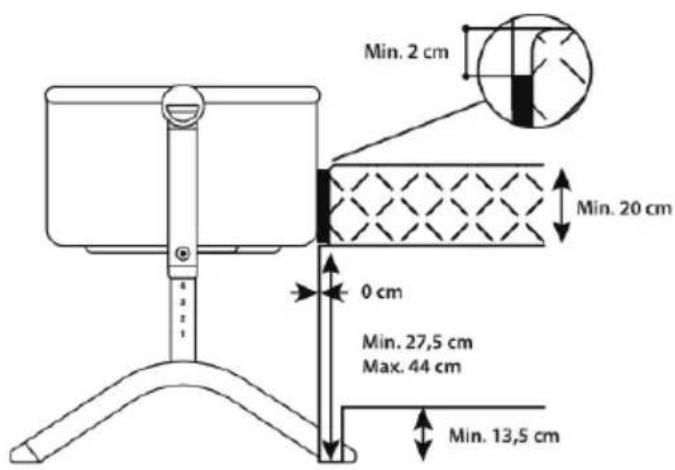
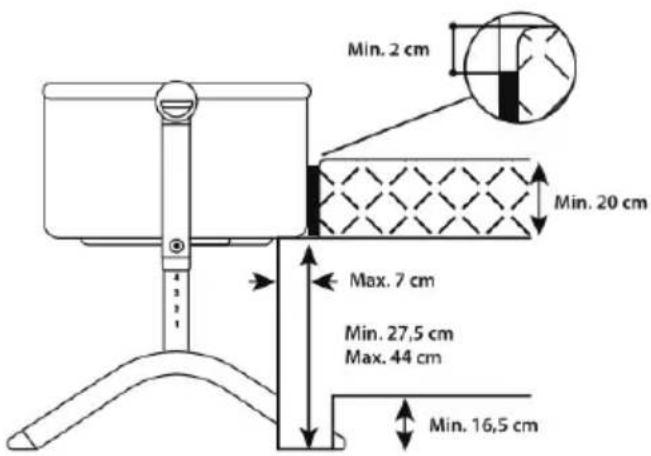
- The distance between the cot and the floor taking into account the adult bed is presented in the P figure.
- The information on the types of adult bed suitable for the cot is presented in the P figure.
- The user cannot use any other attachment system than the one supplied.
- Never place the cot in an inclined position.
- In order to prevent the strangulation hazard due to entrapment, the cot must be properly attached to the adult bed with the attachment system.
- There must be no gap between the low side of the co-sleeper cot and the mattress of the adult bed.
- Check the correct tension of the attachment system before each use by pulling the cot away from the adult bed.
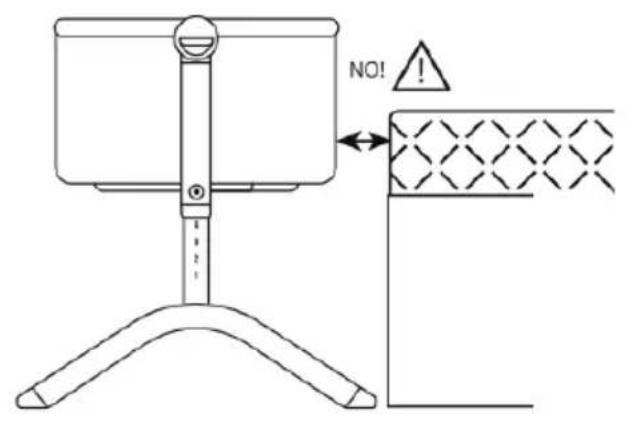
• DO NOT use the product if there is a gap between the cot and the adult bed. - Do not fill the gaps with pillows, blankets or other objects.
- DANGER! - When the co-sleeper cot is not attached to the parents' bed, always lift the drop-side / attach the high side.
- To avoid the hazard associated with the child's neck becoming trapped at the upper edge of the drop-side/high side, this edge must not be above the mattress of the parents' bed.
- To avoid the child strangulation hazard, the cot attachment system to the adult bed must be outside it.
- Dimensions of the cot: 76 x 44 cm. The length and width should be such that the gap between the mattress and the sides and tops does not exceed 30 mm.
- Do not use the rocking function when the cot is attached to the parents' bed. Only a blocked product can be attached to the parents' bed.
-
Do not use the rocking function when the bottom is inclined.
-
List of parts
| 1. | Cot body | 6. | Central support |
| 2. | Upper rail | 7. | Bottom of the cot with mattress and sheet |
| 3. | Lower rail | 8. | Belts x 2 |
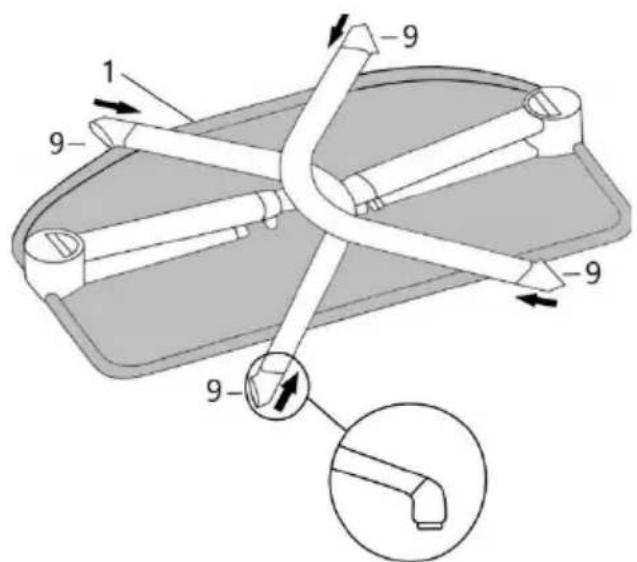
| 4. | Connecting rail | 9. | Legs x4 |
| 4A. | Connecting rail | ||
| 5. | Side support |
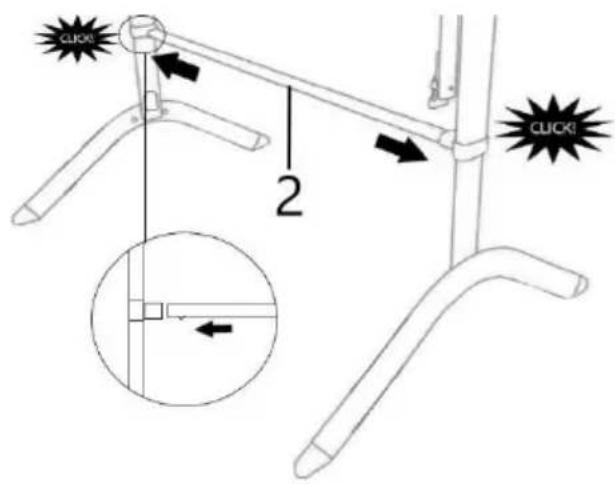
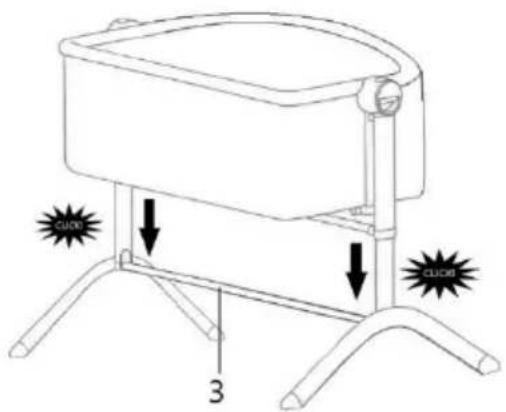
2. Assembly
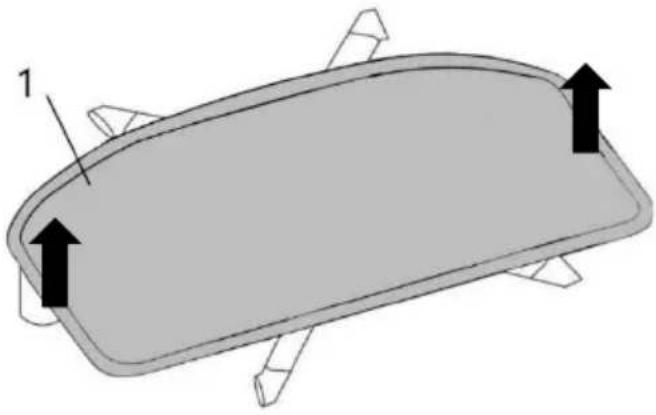
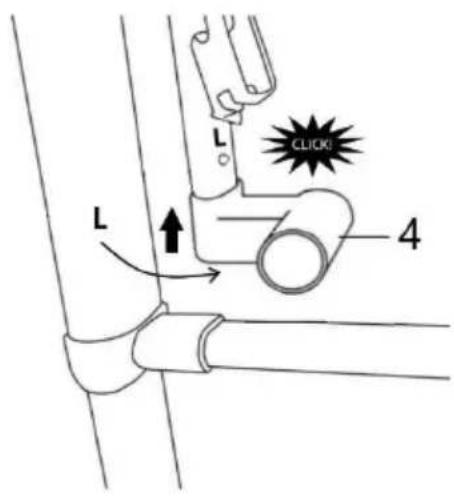
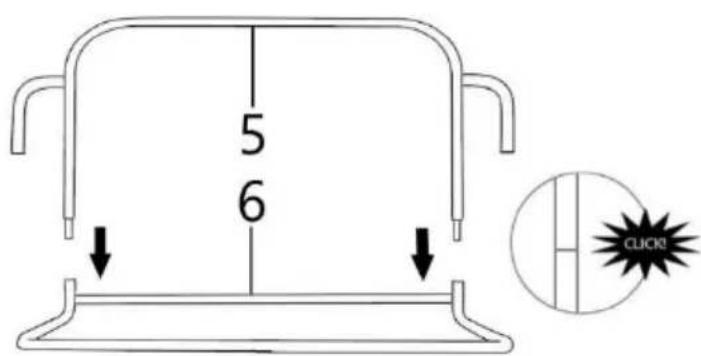
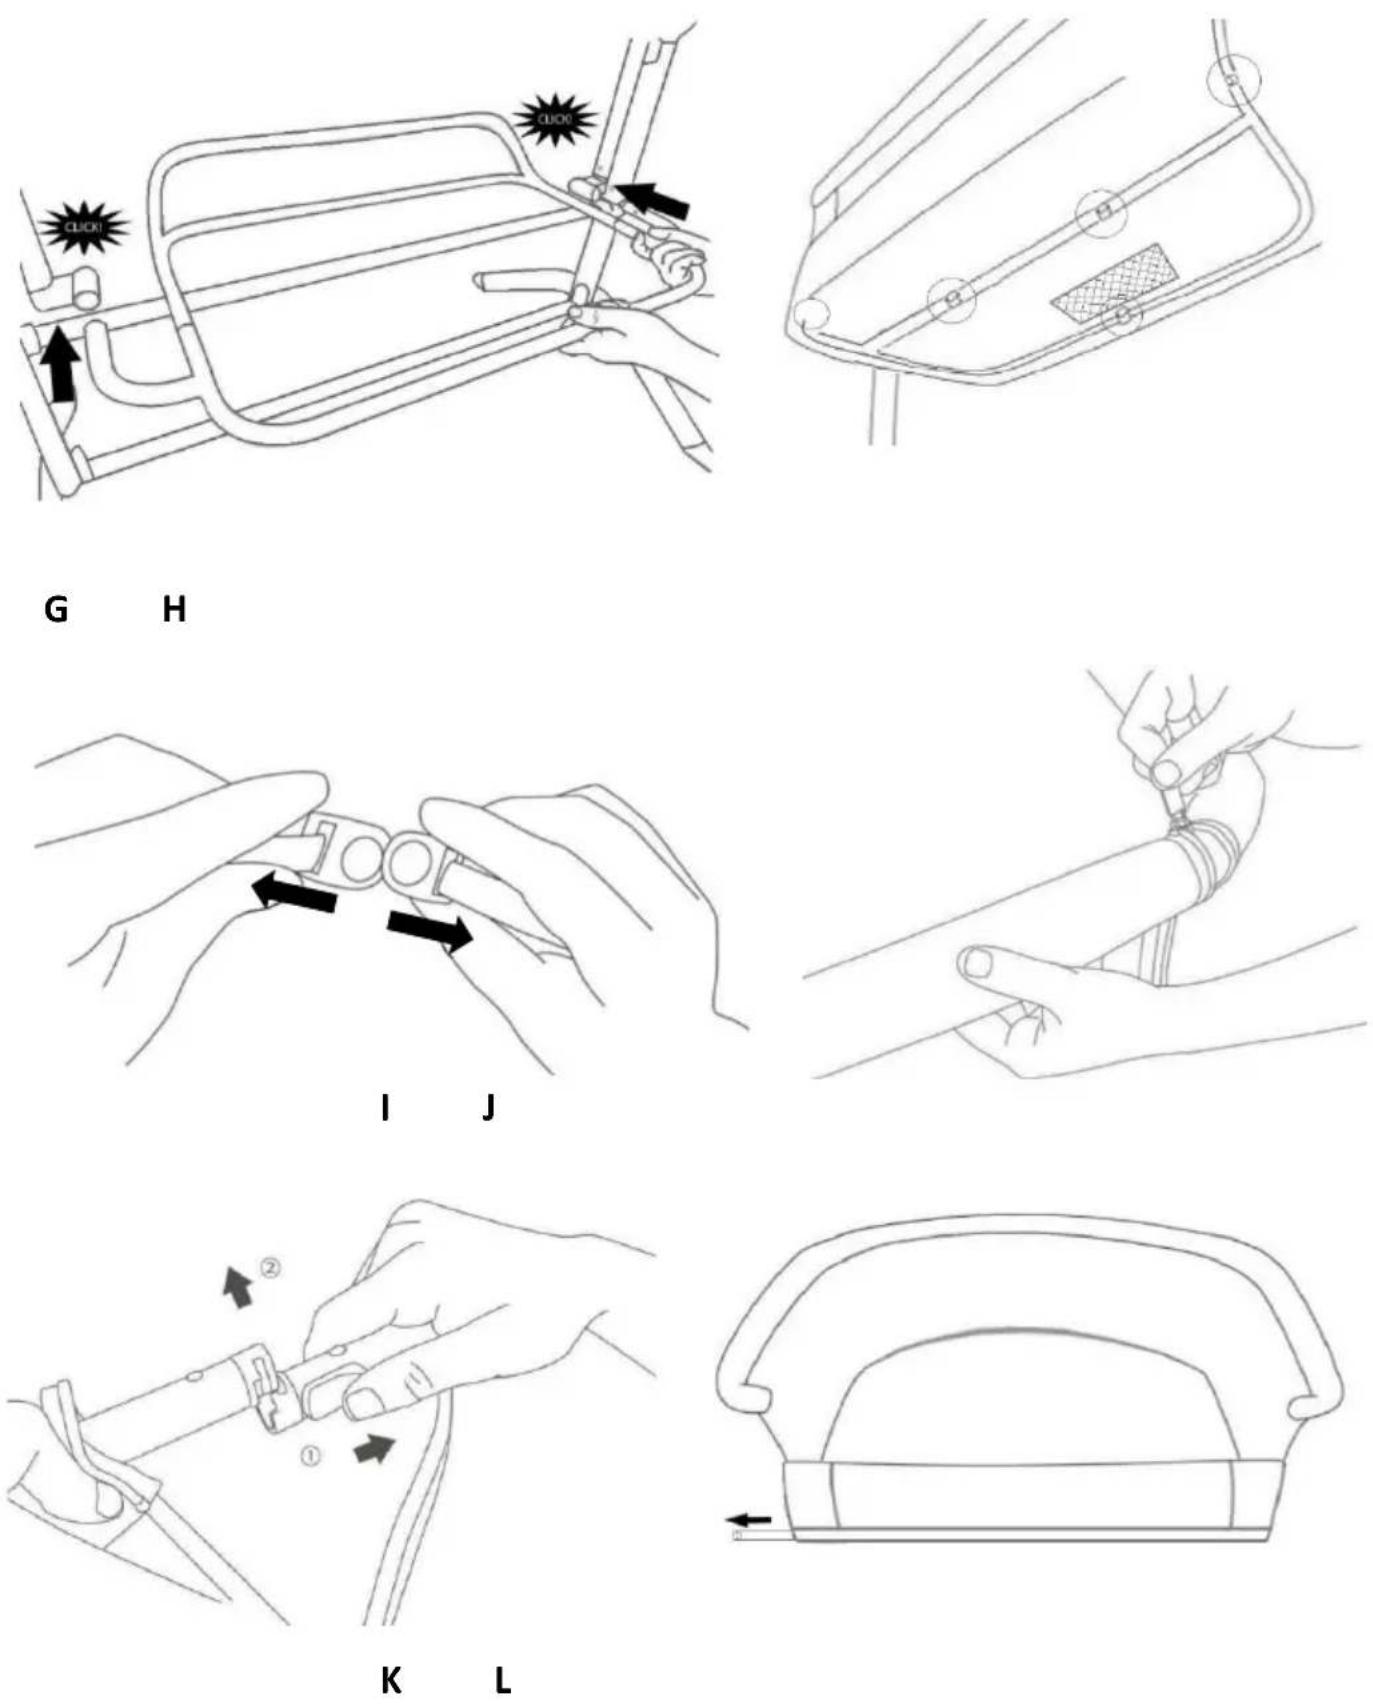
Prepare a suitable surface so as not to damage the product during assembly. Insert the legs (9) into the main tubes of the cot. If the assembly is correct you will hear a characteristic sound (fig. A). Note: The holes for the legs protrusions are located on the inner part of the cot legs. Pull the cot body upwards to put the legs apart (fig. B). Insert the connecting rails (4) (4A) into the tubes between the leg and the fabric of the cot (fig. C). A characteristic sound will indicate correct assembly. Note: The connecting rails as well as the tubes between the legs are marked with the letters R and L. For a correct assembly of elements, the connecting rails and the tube must have the same letter. Put the upper rail (2) between the legs of the cot in the space provided for this purpose in the central part of the legs (fig. D). Stretch the legs to make this possible. Insert the lower rail (3) between the legs of the cot in the bottom part of the legs (fig. E). Connect the central support (5) with the side support (6). A characteristic sound will indicate the correct assembly (fig. F). Connect the frame with the connecting rails already attached to the cot (fig. G). Hide the side support (6) in the fabric pocket of the cot. Wrap the supporter with five hook and loop fasteners on the bottom of the cot and fasten them together. (fig. H) Put the mattress (8) in the cot.
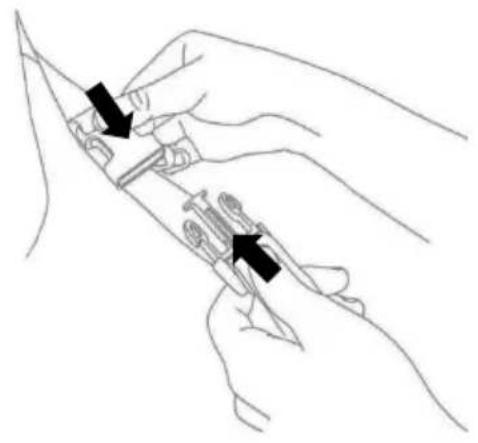
2.1. Adjustment
The cot has 7-step height adjustment. In order to set the desired height press buttons 1 and 2 (fig. M) on both legs. At the same time raise/lower the cot.
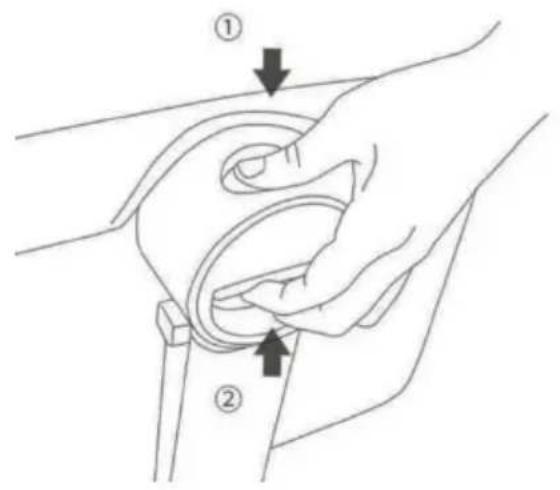
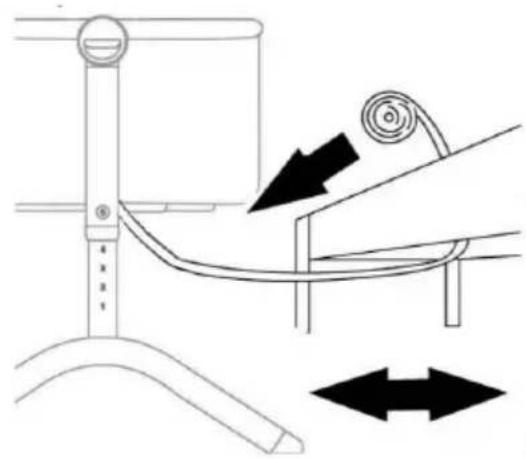
3. Co-sleeper cot assembly
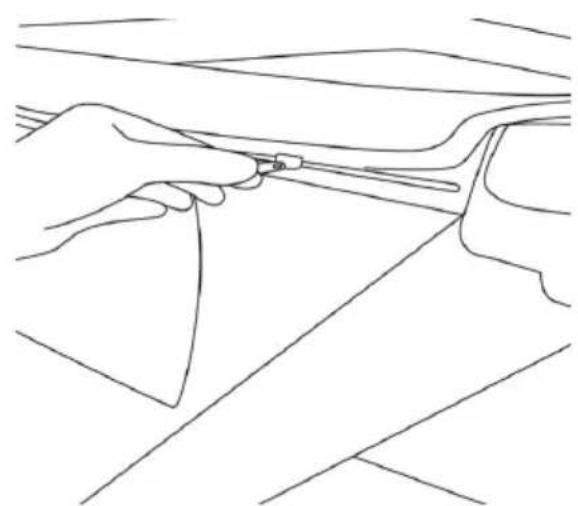
Press the button in the zip fastener protection and pull it apart (fig. I). Undo the zip fasteners on both sides of the cot (fig. J), tuck the zip fastener clasp into the pocket in the central part of the cot. To pull the tube out of the panel push the protective piece under the fabric of the cot and lift the tube (fig. K). Repeat this action on the other side. Pull the tube out of the side panel. The side panel should hang freely (fig. L). In order to set the desired height of the cot see chapter 2.1. Connect buckles at the end of the belt (9) with the buckles on both sides of the cot (fig N). Thread the belt through the bed frame, mattress or across the bed, and fix the belt with the buckle (fig O). Adjust the straps so that the cot is securely fixed to the parent's bed. ATTENTION: The upper railing of the cot must be 2 cm lower than the mattress of the parents' bed! (Fig. P) The cot must adhere to the mattress of your parents' bed! Do not use the cradle function when the cot is used as the co-sleeper!
4. Removing the cover
Take the mattress out of the cot. Undo the zippers on the sides of the side panel, take the tube out of the side panel. Unfasten the hook and loop fasteners connecting the bottom of the cot and the support. Undo the zip fastener under the upper railing of the cot. (fig. R) and pull off the cover.
4.1. Putting on the cover
Put the cover on the support frame of the cot. Zip up the fastener under the upper railing of the cot. Insert the tube into the side panel and connect it with the body of the cot. Wrap the support with the hook and loop fasteners at the bottom of the cot.
5. Cleaning
Do not fold up the product when wet and do not store it in damp places - risk of mould.
Frame – clean with a clean, damp cloth
Cot cover, sheet - wash at 30 degrees Celsius
Mattress with board – clean with a clean, damp cloth
 | Wash at max. 30°C, gentle process. |  | Do not wash. The product can be washed with a slightly damp cloth and a mild detergent. |
 | Do not tumble dry |  | Do not bleach |
 | Do not dry clean |  | Do not iron |
6. Warranty
A. All Kinderkraft products are covered by a 24-month warranty. The warranty period begins on the date of releasing the product to the Buyer.
B. The warranty is valid for products sold in the following countries: France, Spain, Germany, Poland, United Kingdom, Italy.
C. In countries not listed above warranty terms and conditions are determined by the Seller.
D. It is possible to extend the warranty period to 120 months (10 years). Full text of the terms and conditions and warranty extension registration form are available at WWW.KINDERKRAFT.COM
E. The warranty is valid only in the country where the purchase was made.
F. Complaints should be submitted by completing the form available at WWW.RMA.KINDERKRAFT.COM
G. The warranty shall not cover:
a. claims arising from product specifications, as long as they comply with those specified by the manufacturer in the instruction manual or other documents of a legislative nature;
b. product damage caused by improper maintenance or use of inadequate chemicals;
c. colour change (discolouration) when the product has been exposed to direct sunlight against the instructions provided in the instruction manual;
d. tear, wear, crack of fabric/plastic that is the fault of the Customer;
e. reduction in the quality of the product and consumables due to normal wear and tear;
f. products which have not been used according to specifications;
H. The warranty period for accessories attached to the device is 6 months from the date of sale, with the exception of mechanical damage.
I. With regard to Products such as furniture, the Customer is obliged to deliver the Product only at the express request of the Warrantor. In such a case, the Product should be packed in a way that allows for safe transport, i.e., if possible, in the original packaging, or, if there is no original
packaging, in substitute, cubic packaging, which protects the Product against damage in transport. The Guarantor reserves the right not to collect the Product if it is packed in an incorrect way, until the indicated irregularities are removed.
J. The warranty claim for Products such as furniture is considered on the basis of the complaint form available at www.rma.kinderkraft.com and the attached photos. In case the piece of furniture is shipped by the Customer on its own, i.e. before the previous instruction from the Guarantor, referred to in point I above, the Guarantor is not obliged to refund the costs incurred in this way and take any actions resulting from the Guarantee.
K. These guarantee terms and conditions are complementary to the Customer's rights in relation to 4KRAFT sp. z o.o. The warranty shall not exclude, limit or suspend the rights of the Customer arising from the provisions on the warranty for defects in the goods sold.
Full text of Warranty Terms and Conditions is available at WWW.KINDERKRAFT.COM.
All rights to the present document belong entirely to 4Kraft Sp. z o.o. Any unauthorized use of them against their purpose, including in particular: using, copying, reproducing, making available - in whole or in part, without the consent of 4Kraft Sp. z o.o. may result in legal consequences.
ES
¡Estimado Cliente!
(EN) In the interests of our Clients - we are at your disposal! If you have a problem with the product you received, contact us in the most convenient way for you!