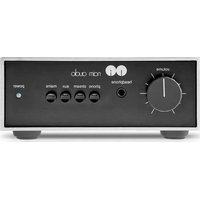
Nait 50 - Receiver NAIM - Free user manual and instructions
Find the device manual for free Nait 50 NAIM in PDF.


| Product type | Stereo integrated amplifier |
| Brand | Naim |
| Model | Nait 50 |
| Dimensions (H x W x D) | 87 x 207 x 321 mm (feet included) |
| Weight | 4.5 kg (amplifier only) |
| Mains power | 110-120 V or 220-240 V, 50/60 Hz |
| Speaker output power | 25 W @ 8 Ω, 40 W @ 4 Ω (0.1% THD+N) |
| Headphone output power | 1.5 W @ 16 Ω (6.35 mm jack) |
| Inputs | 2 x line DIN 5-pin (47 kΩ), 1 x MM phono (RCA) |
| Outputs | Speaker terminals, 6.35 mm headphone jack |
| Frequency response (line) | -3 dB @ 4 Hz - 45 kHz |
| Phono gain | 40 dB (@1 kHz, RIAA) |
| Signal-to-noise ratio (line, ref. 1 W) | 80 dB (A-weighted) |
| Standby power consumption | < 0.5 W (auto standby) |
| Idle power consumption | 20 W (standby) |
| Materials | Black anodized aluminum front/rear panels, black powder-coated chassis |
| Supplied accessories | Power cable, safety manual, speaker connectors |
| Maintenance | Soft cloth only, do not use cleaning products |
| Safety | Unplug during thunderstorms; do not use a severed mains plug |
| Repairs | Only by an authorized Naim service center |
| Operating temperature | 5 to 35 °C |
| Storage temperature | 0 to 50 °C |
Frequently Asked Questions - Nait 50 NAIM
User questions about Nait 50 NAIM
0 question about this device. Answer the ones you know or ask your own.
Ask a new question about this device
Download the instructions for your Receiver in PDF format for free! Find your manual Nait 50 - NAIM and take your electronic device back in hand. On this page are published all the documents necessary for the use of your device. Nait 50 by NAIM.
USER MANUAL Nait 50 NAIM
Note: All safety warnings can be found in the safety manual.
Welcome to your new Naim integrated amplifier. Like all Naim Audio products, the NAIT 50 puts musical performance first. To help it realise its full potential, it is important to follow the simple installation and usage guidelines covered in this manual. We start with some product and set-up essentials, before moving on to more detailed information in Section 4.
1. What's in the Box
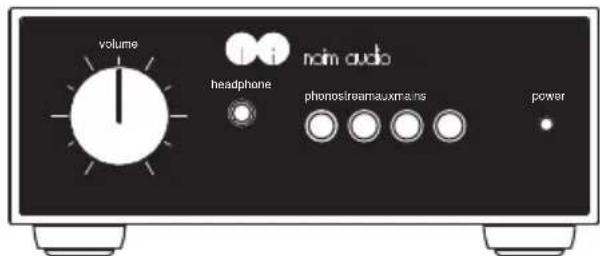
1x NAIT 50
1x Information Booklet
1x Safety Manual
natural_image
Simple line drawing of a plug and bulb (no text or symbols)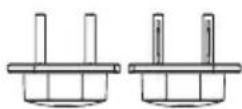
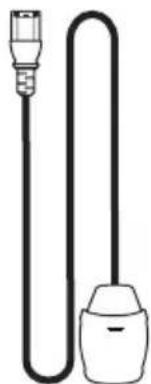
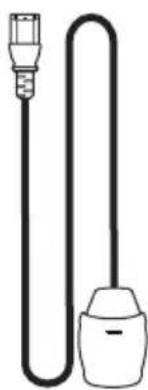
1x Power Cable 2x Speaker Connectors
(pre-installed to unit)
2. The Heritage of Naim's Integrated Amplifiers
Our story begins with one man's passion for music and weaves its way through five decades and a raft of iconic product launches to the present day.
Naim Audio founder Julian Vereker MBE (1945-2000) was a racing car driver, entrepreneur and self-taught engineer with a deep passion for music. Spending his spare time listening to and recording his friends playing live in the 1960s, Julian found that playback on his system at home fell woefully short of the experience he craved.
Not content with second best he decided to design his own amplifiers and loudspeakers, ignoring accepted wisdom and focusing on aspects of performance that made music burst to life. These first designs laid the foundations for a range of iconic and award-winning hi-fi products that still resonate 50 years on.
Designed exclusively for Naim's 50th anniversary and limited to only 1,973 units, at a glance the Nait 50 looks identical to the Nait 1. However, upon closer inspection the front and rear are high quality anodised aluminium, the knob is machined from solid to aid vibration dampening, the balanced control has been swapped for a headphone socket and the LED changed to white.
Internally, the changes truly bring the Nait 50 into its own. The input selection uses fly-by-wire control to significantly reduce the signal path length and the new headphone amplifier has been lifted from the NSC 222. The all-new exclusive discrete transistor MM phono stage honours the famous Nait 1 sound, working alongside the power amplifier that has been lifted from the NAP 250 (2023).
The Nait 50 is a true audiophile integrated amplifier, only in miniature.
For a further dive into the history and heritage of the Nait across Naim's 50 year history, scan the QR code below.

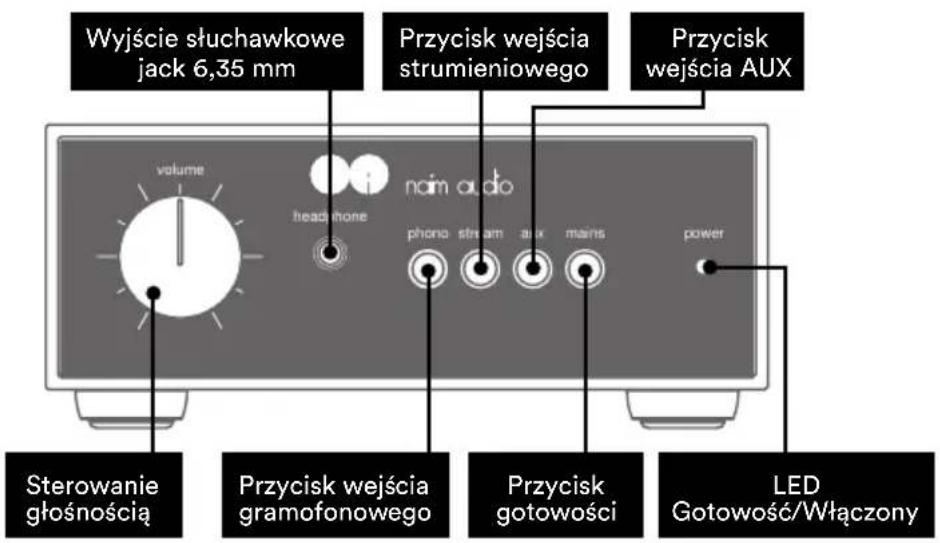
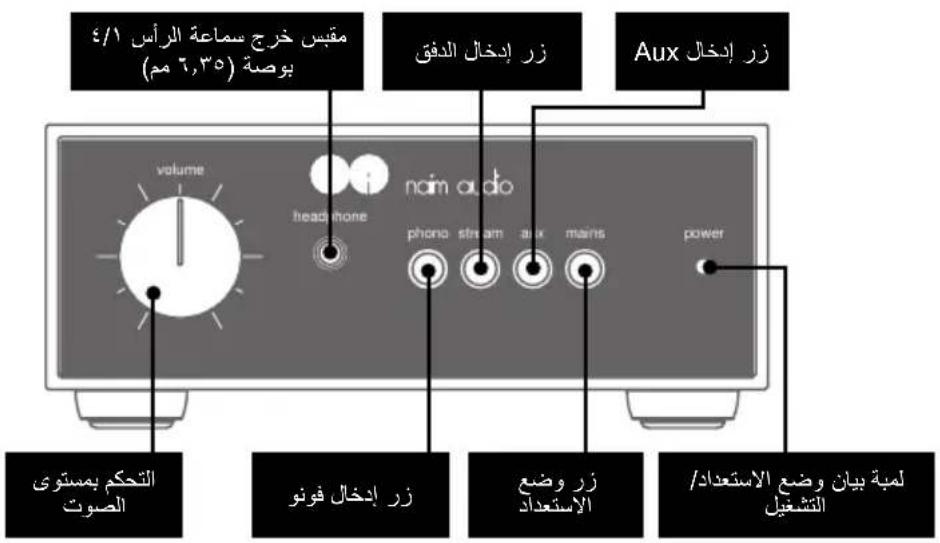
3. Features and Connections
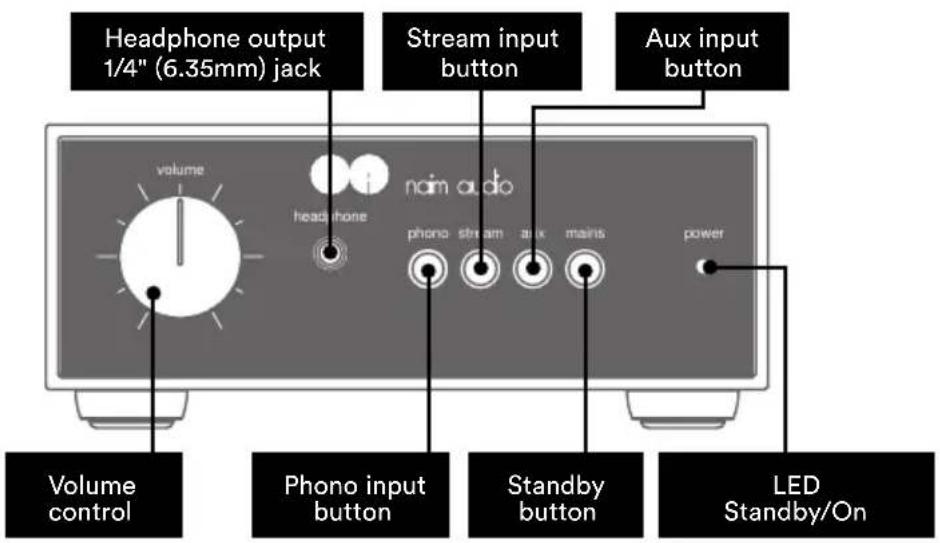
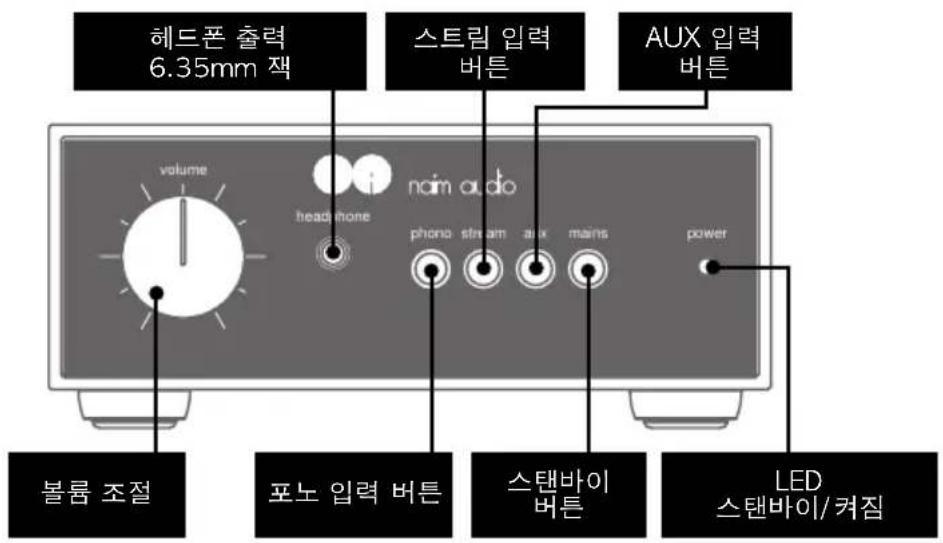
| LED Brightness Specifications | |
| Bright | NAIT 50 active |
| Dim | NAIT 50 in standby |
4. Set-up
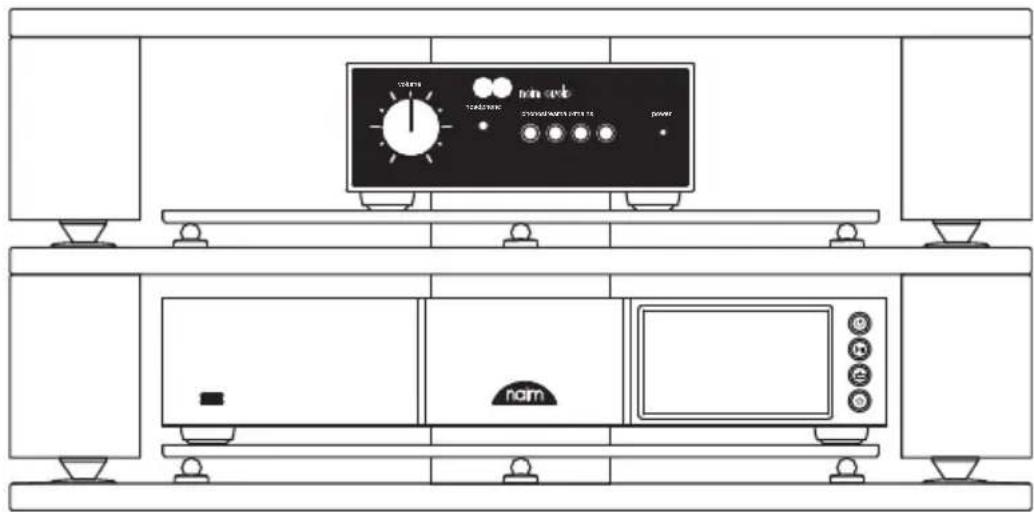
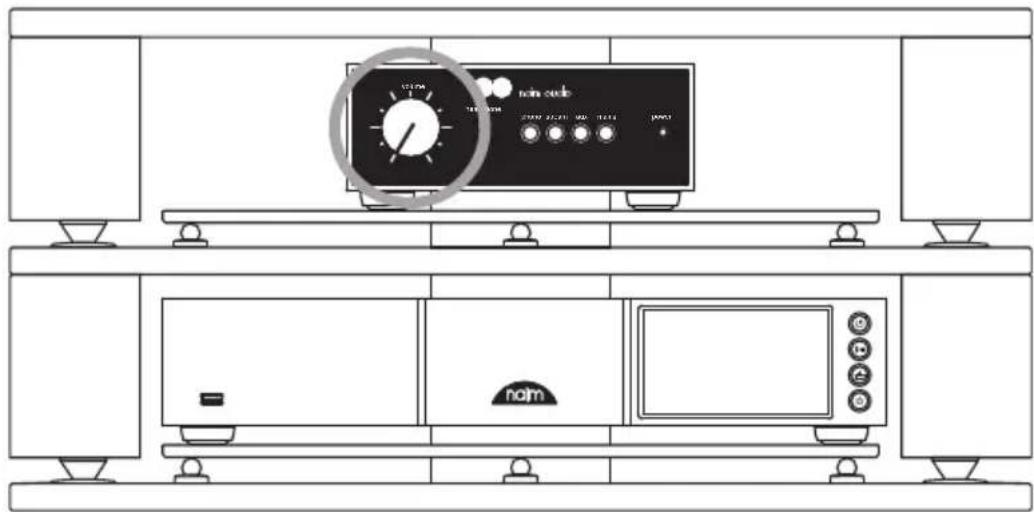
Your NAIT 50 must be connected to a source (such as the NDX2 or your turntable), but before you do, please ensure both components are in their final positions and disconnected from mains power.
For optimum performance, use a dedicated hi-fi support – ideally Naim Fraim – with the NAIT 50 sited above the source, as shown.
For more information, see section 5.1
Ensure all equipment is off before connecting.
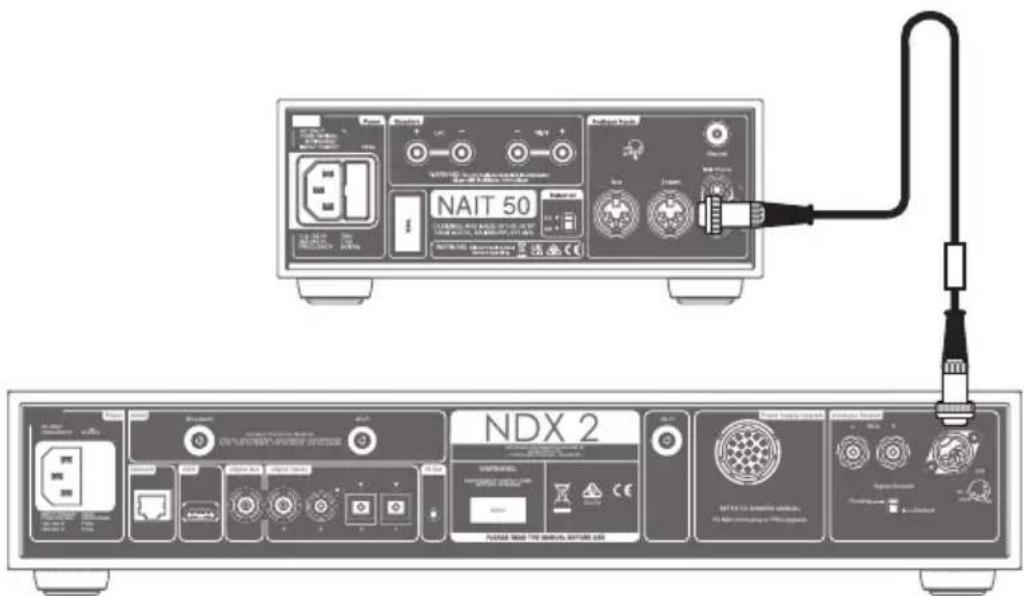
Connect the DIN interconnect cable supplied with the NDX2 to the Stream input of the NAIT 50.
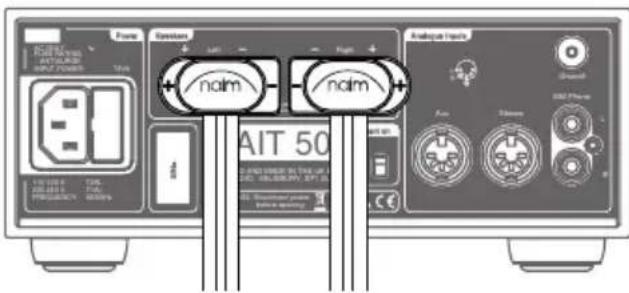
Connect speaker cables to the NAIT 50, ensuring each cable is connected to the correct speaker and both are in phase.
For more information, see section 5.3.
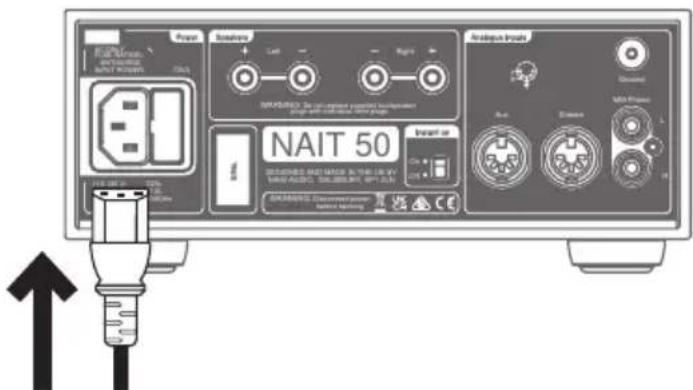
Finally, connect the power cable to the NAIT 50.
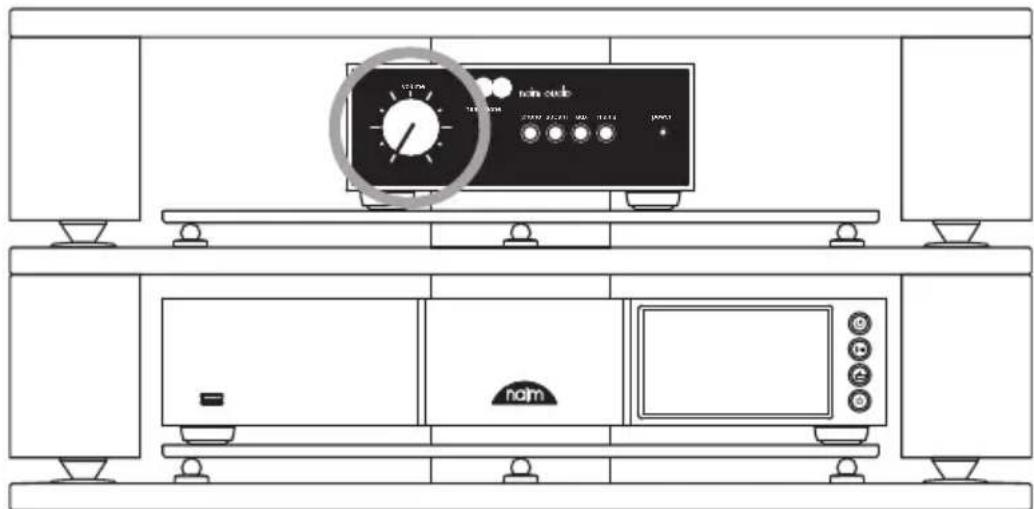
Check that the volume is at minimum, then turn on the source and, lastly, the NAIT 50.
For more information, see section 5.4
5. Tips on Installing and Using your NAIT 50
We know you are eager to enjoy your new NAIT 50, but we promise it will sound even better once you have followed these guidelines, all designed to help you experience your integrated amplifier without compromise.
5.1 Unboxing and Positioning
For optimum performance, use your Naim products on a dedicated hi-fi equipment rack – ideally the Naim Fraim or Fraim Lite – to minimise vibrations that can affect sound.
No room for a rack? Consider placing your NAIT 50 on a Fraim glass shelf on a suitable piece of furniture, to provide solid but discreet support.
Never stack Naim products on top of each other, and if you are placing them side-by-side, please leave some distance between the units. Equally, connected products should not sit too far apart: the maximum separation distance is that allowed by the supplied interconnect lead.
To reduce the risk of audible hum from the loudspeakers do not place power supplies or power amplifiers close to source components.
5.2 Input Connection Details
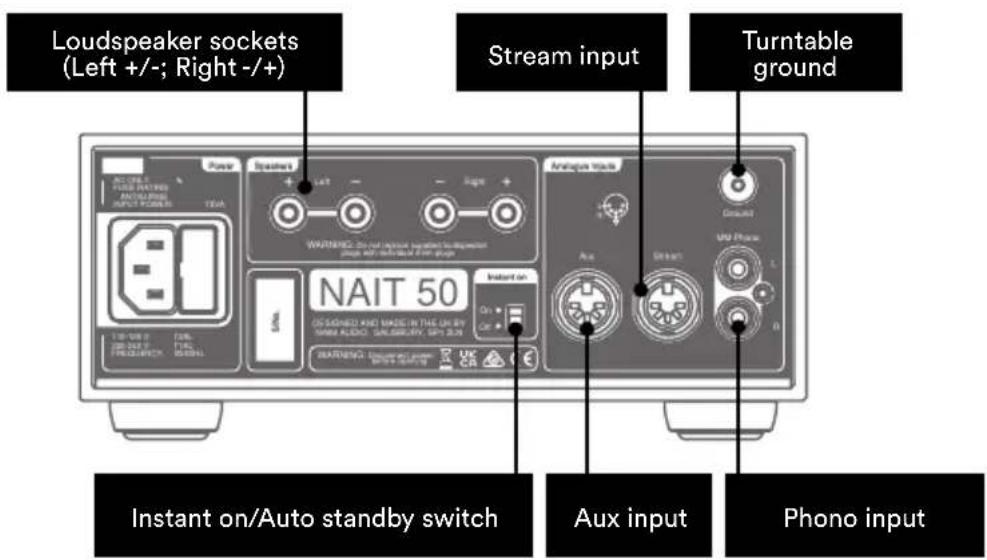
The NAIT 50 has DIN inputs for line level sources and RCA connectors for turntables.

5.3 Loudspeaker Cable and Connectors
For optimum performance, use Naim NAC A5 speaker cable.
Using cables from other manufacturers may hinder performance or even damage the integrated amplifier.
Naim NAC A5 cable is directional and should be connected so that the arrows printed on the insulation point towards the loudspeakers. The Naim loudspeaker connectors supplied comply with European safety regulations and must be used.
It is important that your pair of loudspeaker cables are the same length, with a recommended maximum length of 20m.
Unlike some earlier Naim designs, we do not mandate a minimum speaker cable length, but would still suggest you avoid sub-2m lengths.
Ensure when connecting speakers that they are ‘in phase’ – meaning the amplifier’s positive loudspeaker output is connected to the positive loudspeaker input – and that the left and right outputs go to the correct speaker.
5.4 Powering Up/Down
Once all your input and output connections are made, connect the supplied mains lead to your NAIT 50 and to mains power.
Please note: your source - such as a streamer or CD player - and any associated external power supplies should be switched on before you switch on your NAIT 50.
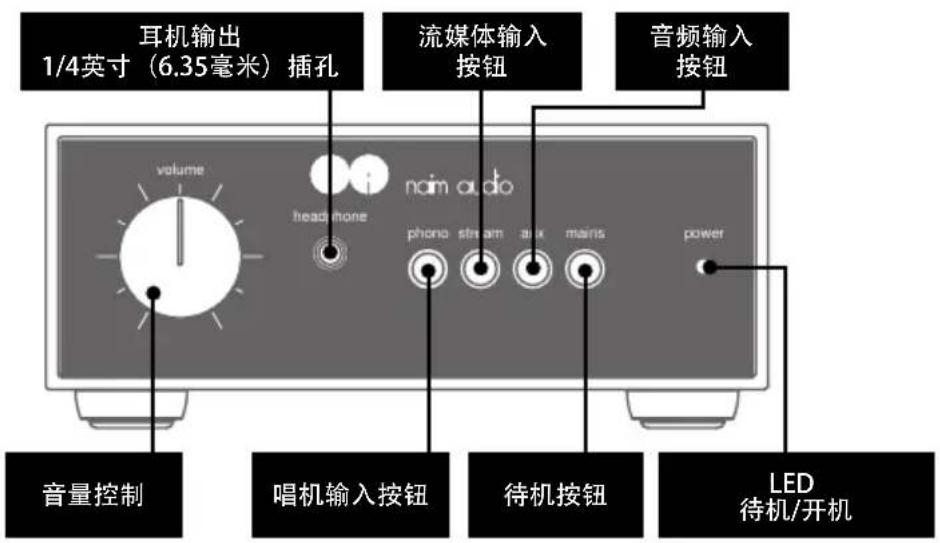
You can now power up the NAIT 50 by simply pressing Standby button on the front panel of the integrated amplifier.
5.5 Standby Power Settings
By default, the NAIT 50 is set to 'Auto Standby' - it automatically enters Standby mode (where it consumes less than 0.5W of power) within 19 minutes of inactivity.
For the optimum sound quality, switch the Standby setting on the rear panel to 'Instant on', which keeps all sensitive audio circuits permanently powered up.
6. Mains Power, Earthing and More
Use only the mains leads and plugs supplied with your NAIT 50, or the upgrade Naim Power-Line mains cable.
Where fused plugs are used, 13 amp fuses should be fitted.
Do not wire voltage dependent resistors or noise suppressors into mains plugs; they degrade the mains supply and the sound.
6.1 Earthing
In order to avoid hum loops, the signal ground of the whole system should be connected to the mains earth in one place. Typically, this is at the primary source.
For example, a Naim streamer has a ground lift switch. Set this to “default” if no other source connects mains earth to signal ground. This setting will give best sound quality.
6.2 Non-rewireable mains plugs
If a non-rewireable mains plug is cut from a mains lead (for whatever purpose) the plug MUST be disposed of in a way to render it totally useless.
Considerable electric shock hazard exists if the cut-off plug is inserted into a mains outlet.
6.3 Mains Circuits and Interference
A hi-fi system usually shares a mains power circuit with other household equipment, some of which can cause distortion that may manifest as mechanical hum from mains transformers, including the transformer in your NAIT 50.
Transformer hum is not transmitted through the speakers and has no effect on the performance of the system; however, careful positioning of your Naim system may reduce it, as may a separate, dedicated mains circuit. Such a dedicated circuit will also generally improve system performance. Only seek advice on the installation of a separate mains circuit from a qualified electrician.
6.4 Lightning Precautions
Your Naim system should be turned off and fully disconnected from mains power when there is a risk of a lightning strike, to protect from potential damage.
7. Further Tips and Advice
Now you have all the essentials sorted, let us move onto a few more things that you can do to optimise the performance of your new NAIT 50.
7.1 Running In
Naim products are hand-crafted from a carefully selected range of high-quality components. Your NAIT 50 will sound superb out of the box, but its performance may improve further still as all these various components power up and interact in their first few weeks of use. Keeping your system powered up will assist this process.
7.2 Cleaning Your Product and Connections
Naim recommends using a soft cloth to lightly dust any product surfaces. Cleaning products may contain ingredients that can adversely affect cosmetic surface treatments and coatings.
Keep interconnect plugs and sockets clean and free from corrosion. The easiest way to achieve this is to fully power off your Naim product (and any connected equipment), unplug all connections from their sockets and firmly push them in again. Contact cleaners and so-called ‘enhancers’ should not be used, as they can leave deposits that can degrade the sound of your system.
8. Support
Consumer protection varies from country to country. In most territories, the retailer you bought your Naim product from should be your primary contact if you are experiencing problems with your unit.
A problem may be due to a fault in the system or its installation, so it is essential to make full use of your dealer's diagnostic skills. You can find a range of support articles for each Naim product online at naimaudio.com
If you are still experiencing an issue with your Naim product, contact us directly for help and advice, at support@naimaudio.com
9. Service and Updates
Any repairs or hardware updates should only be made by an authorised Naim service centre or at the Naim HQ itself. Many components are custom made, tested or matched and appropriate replacements are often unobtainable from other sources.
Please contact your local Naim retailer with any service or repair queries.
10. Specifications
| Audio Specifications | |
| Power Output (Speakers) 25 Watts into 8Ω @0.1% THD+N @ 230VAC | |
| Power Output (Headphones) 1.5W into 16Ω1/4" (6.35mm) Jack | |
| Gain Phono stage: 40dB (@1kHz RIAA) | |
| Inputs 2x Stereo 5 pin DIN, 47k line level | |
| Frequency Response Via line: -3dB @ 4Hz to 45kHz | |
| Hardware Specifications | |
| Dimensions (H x W x D) 87 × 207 × 321mm (including feet) | |
| Weight 4.5kg (amplifier only) | |
| Passive Consumption 20W (idle) | |
| Standby Consumption <0.5W (auto standby with music sensing) | |
| Mains Supply 110V - 120V, 220V - 240V 50/60Hz | |
| Fuse 230V = T1AL (anti-surge) ; 115V = T2AL (anti-surge) | |
| Finish ‘Chrome bumper’ | Front and rear - black aluminium anodisedCover - black powder coat |
| Operating Temperature 5-35°C | |
| Storage Operating Temperature 0-50°C | |
| Extended Specifications | |
| Power Output 40 Watts 4Ω @0.1% THD+N @ 230VAC | |
| Burst Power into 2Ω (1kHz for 20mS, repeat 500mS IHF) | 60 Watts 2Ω @1% THD+N |
| Peak Current into 1Ω (1kHz 1mS) +/- | 5 amps peak (225W peak power) |
| Max Power Consumption 160VA full | power 4Ω 2-channels driven |
| Power Consumption (Loud) 73VA at | 2x 1/8th full power 8R |
| THD+N at 2/3rds Full Power 8Ω@1kHz | 0.015% |
| Input Signal for Clipping (volume at max) | 88mV Line710uV Phono |
| Signal to Noise Ratio Ref 1W 8ΩA-weighted | 80dB Line, 1V input78dB Phono ref 5mV input |
| Signal to Noise Ratio Ref 25W 8ΩA-weighted | 93dB Line, 1V input84dB Phono ref 5mV input |
| Crosstalk 85dB Line 1kHz ref 25W 8Ω | 80dB phono |
| Damping Factor into 8Ω 36 | |
| Control On product only (no remote) | 3 input buttons, standby, auto muteheadphones, auto standby defeat switch on rear |
12. Product Recycling
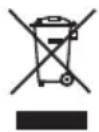
Products that display the crossed-out wheeled bin logo cannot be disposed of as domestic waste. These products must be disposed of at facilities capable of recycling them and appropriately handling any waste by-products.
Contact your local authority for details of the nearest such facility.
Appropriate recycling and waste disposal helps conserve resources and protects the environment from contamination.
Introduction
1x NAIT 50
1x Documentation
natural_image
Simple line drawing of a plug and socket connected in a U-shaped tube (no text or symbols)1x NAIT 50

1Xx Informationsheft
![Safary Mawala® Manual de accerto a tanaharmapmasimo Vatigabasodendringing® Manual de Diananabad Vatigabasodendringing® vaharabasodendringing Rangandir hirci imaterimaging [2017] No. 1-23-23 nam](/content/2026/04/661538/images/858ccbc84f322a6b628d384ee0010a3a635d0d054477a31e36bfc7c39a73c0cd.jpg)
natural_image
Simple line drawing of a plug and bulb connected by a coiled cable (no text or symbols)1x Netzkabel
natural_image
Line drawing of a microwave oven setup with control panel and front-mounted unit (no text or symbols)1x Informatieboekje
natural_image
Simple line drawing of a plug and socket (no text or symbols)1x Voedingskabel
1 NAIT 50
natural_image
Simple line drawing of a plug and plug connector (no text or symbols)1x NAIT 50
1x Libretto informativo
![Safary Manual's Renter in anhara's hormamathimab sylphedrohydrolating a manual in the Anhara's white incusa c mshadapulamathimab, sylphedrohydrolating a manual in the BUTR + BATHR + [2014] 3.1.1.1](/content/2026/04/661538/images/00ea321d20bd97210aec14899ed6404e2a2a6cc9764cb7accfc1833eac68d1b0.jpg)
natural_image
Simple line drawing of a plug and plug connector (no text or symbols)1x NAIT 50
natural_image
Simple line drawing of a plug and socket connected by a coiled cable (no text or symbols)3. Budowa i złącza
1 NAIT 50
natural_image
Simple line drawing of a plug and socket connected by a coiled cable (no text or symbols)1 кабель питания
NAIT 50x1
信息手册x1
安全手册x1
natural_image
Simple line drawing of a plug and bulb (no text or symbols)电源线x1
扬声器连接器x2(预装在装置上)
2. Naim集成式放大器的发展历程
3. 功能和连接
最后,将电源线连接到 NAIT 50。
as domestic waste. 这些产品必须在能够回收利用并适当处理任何废物副产品的机构中进行处理。recycling them and appropriately handling any waste
1 臺NAIT 50
1 本資訊小冊子
1 本安全使用手册
natural_image
Simple line drawing of a plug and bulb (no text or symbols)1條電源線
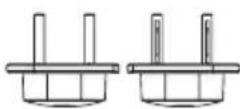
2個揚聲器連接器
(已預先安裝至裝置)
2. Naim 集成放大器的傳承
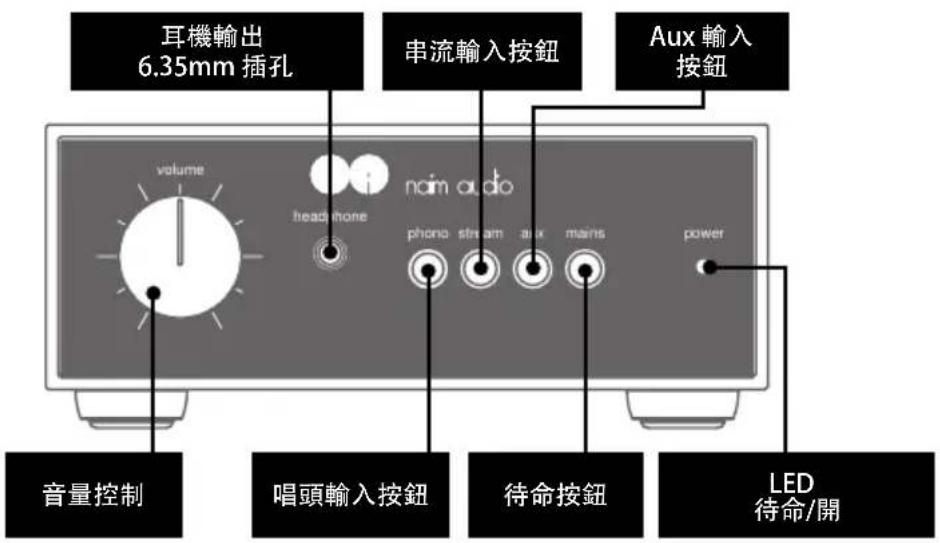
3. 功能與連接
recycling them and appropriately handling any waste by-products.
protects the environment from contamination.
NAIT 50 1개
natural_image
Simple line drawing of a plug and bulb (no text or symbols)전원 케이블 1개
3. 기능과 연결
5.3 스피커 케이블 및 커넥터
1x NAIT 50
natural_image
Simple line drawing of a two-wheeled cable with a plug and connector (no text or symbols)natural_image
Line drawing of a microwave oven setup with control panel and front-mounted unit (no text or symbols)natural_image
Simple line drawing of a plug and bulb connected in a U-shaped tube (no text or symbols)كابل الطاقة × 1

- What's in the Box
- The Heritage of Naim's Integrated Amplifiers
- Features and Connections
- Set-up
- Tips on Installing and Using your NAIT 50
- Unboxing and Positioning
- Input Connection Details
- Loudspeaker Cable and Connectors
- Powering Up/Down
- Standby Power Settings
- Mains Power, Earthing and More
- Earthing
- Non-rewireable mains plugs
- Mains Circuits and Interference
- Lightning Precautions
- Further Tips and Advice
- Running In
- Cleaning Your Product and Connections
- Support
- Service and Updates
- Specifications
- Product Recycling
- Introduction
- Budowa i złącza
- Naim集成式放大器的发展历程
- 功能和连接
- Naim 集成放大器的傳承
- 功能與連接
- 기능과 연결
- 스피커 케이블 및 커넥터
Brand : NAIM
Model : Nait 50
Category : Receiver