Theragun Mini - Massage device THERABODY - Free user manual and instructions
Find the device manual for free Theragun Mini THERABODY in PDF.
| Product type | Massage device |
| Brand | Therabody |
| Model | Theragun Mini |
| Dimensions | Approximately 15 cm in height |
| Weight | Approximately 0.65 kg |
| Power source | Rechargeable lithium-ion battery, charges via USB-C |
| Battery life | Approximately 150 minutes |
| Speed | 1750 to 2400 percussions per minute, 3 levels |
| Included attachments | 3 massage attachments: dampener, standard ball, micro-point |
| Main functions | Percussion massage therapy, variable intensity, integrated biometric sensor, guided routines |
| Care and cleaning | Wipe with a disinfectant wipe; do not immerse in water |
| Safety | Do not use on bones or sensitive areas; stop if pain occurs; do not use while charging |
| Spare parts | Additional attachments available separately |
| General information | Bluetooth connectivity via Therabody app; compatible with iOS and Android |
Frequently Asked Questions - Theragun Mini THERABODY
User questions about Theragun Mini THERABODY
0 question about this device. Answer the ones you know or ask your own.
Ask a new question about this device
Download the instructions for your Massage device in PDF format for free! Find your manual Theragun Mini - THERABODY and take your electronic device back in hand. On this page are published all the documents necessary for the use of your device. Theragun Mini by THERABODY.
USER MANUAL Theragun Mini THERABODY
| 1. Product Overview | EN | 3-9 |
| 2. Download the Therabody app | ES | 10-17 |
| 3. Connect to the Therabody app | FR | 18-25 |
| 4. What's in the Box | IT | 26-33 |
| 5. Getting to Know Your Device | DE | 34-41 |
| 6. Getting Started | RU 42-49 | |
| 7. Using the Device | NL | 50-57 |
| 8. Therapy Benefits | ESMX | 58-65 |
| 9. Using the Device's Biometric Sensor | FRCA 66-73 | |
| 10. Connecting the Attachments | SC | 74-81 |
| 11. Using the Attachments | TC | 82-89 |
| 12. Device After Care and Cleaning | KR | 90-97 |
| 13. Charging | JP | 98-105 |
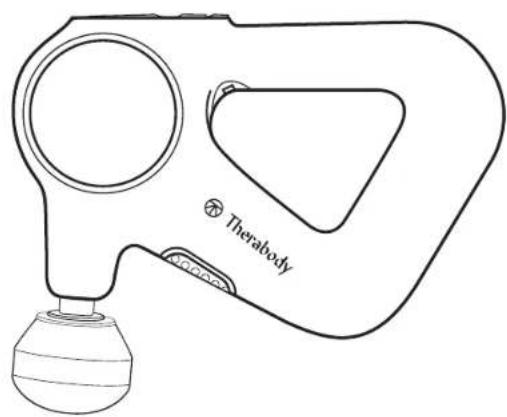
1. Product Overview
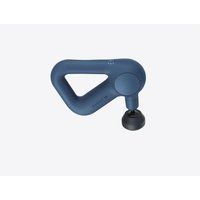
THERAGUN PRO Plus
Your partner for mind & body wellness.
Elevate your performance with the Theragun PRO Plus device, our innovative new multi-therapy device that combines our strongest deep muscle massage with LED light therapy, vibration therapy, heat therapy and cold therapy for faster, more effective recovery.
e sensor, guided breathwork, and step-by-step routines, the Theragun PRO Plus device goes where no massage device has gone before.
2. Download the Therabody app to get the most out of your device.
Connect your Theragun PRO Plus device to the Therabody app to access onboarding and educational content to help you get familiar with your device. With step-by-step guided routines and recommendations, the Therabody app shows you how to get the most out of your Theragun PRO Plus device.


Scan the QR code to get started.
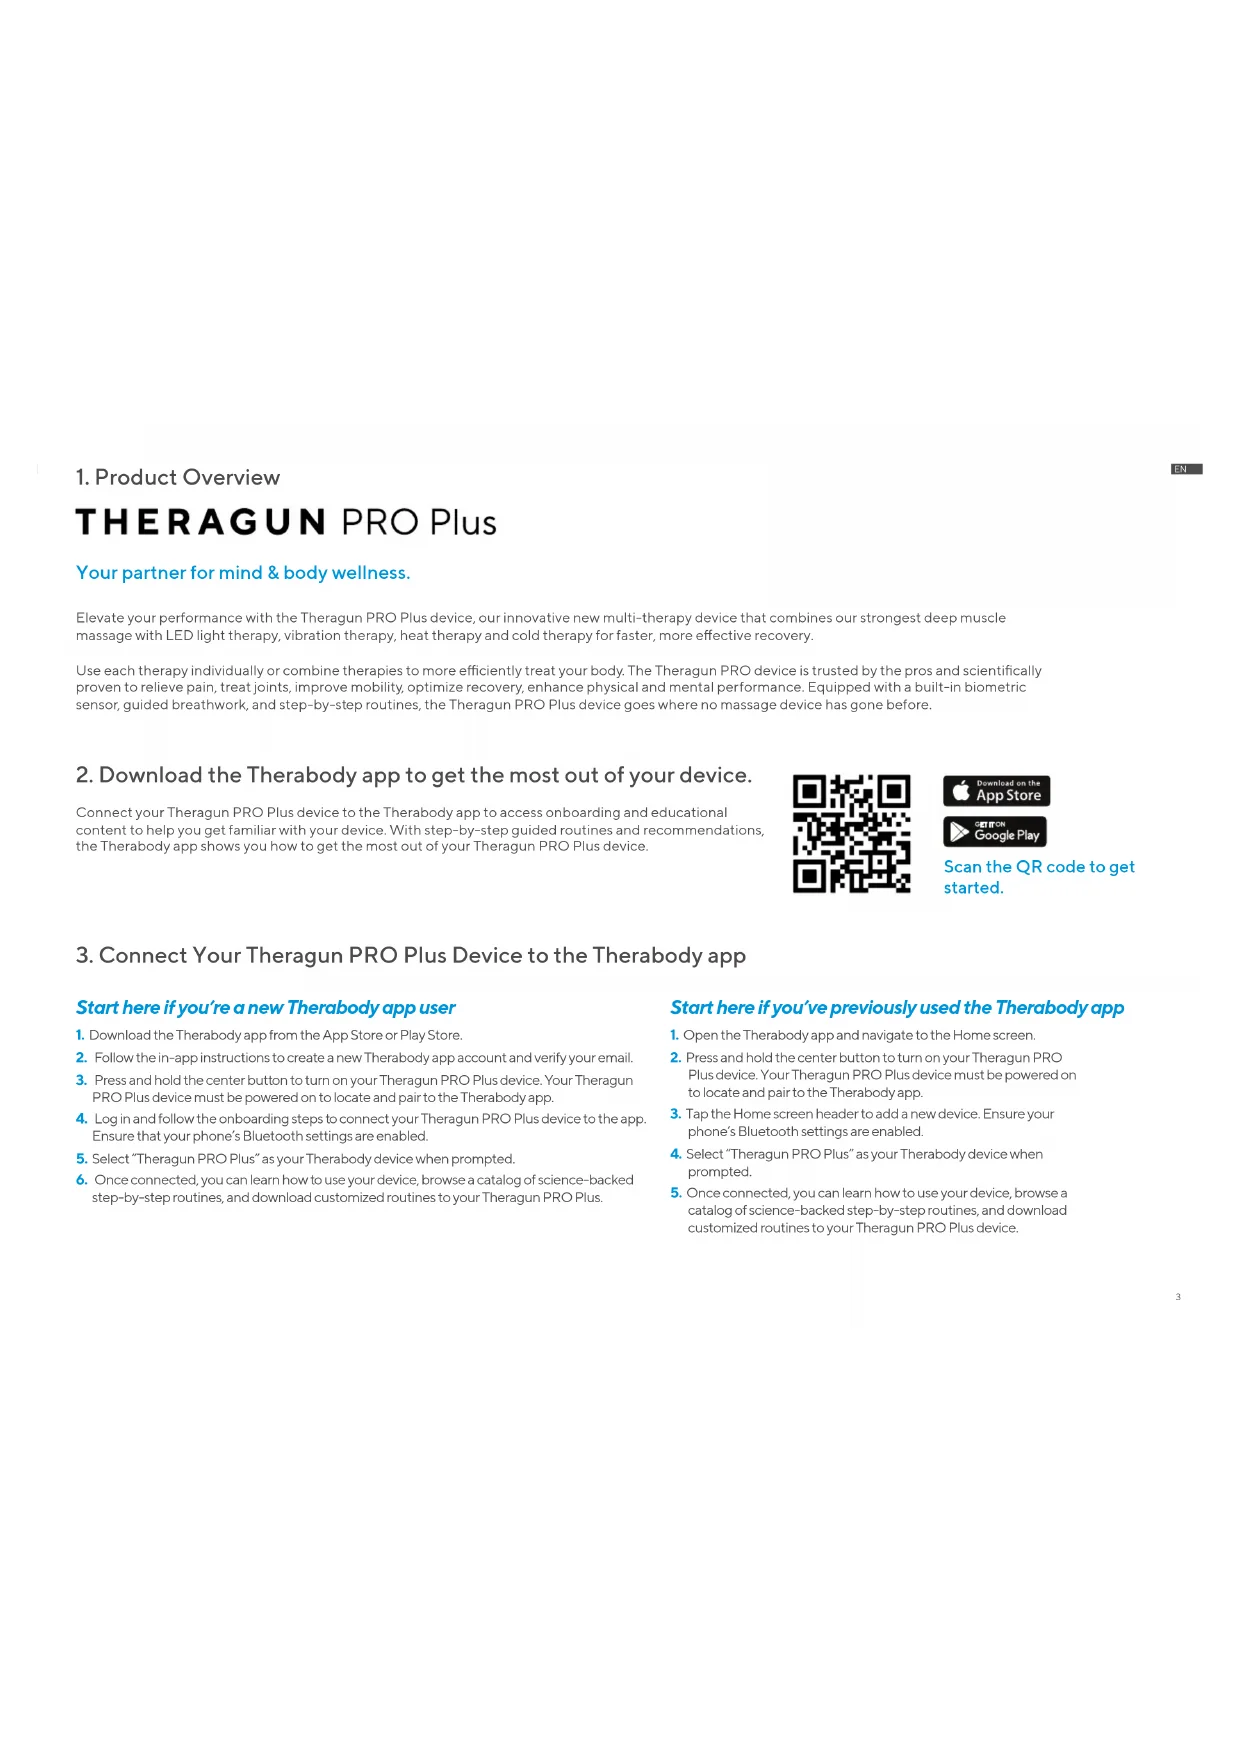
3. Connect Your Theragun PRO Plus Device to the Therabody app
Start here if you're a new Therabody app user
- Download the Therabody app from the App Store or Play Store.
- Follow the in-app instructions to create a new Therabody app account and verify your email.
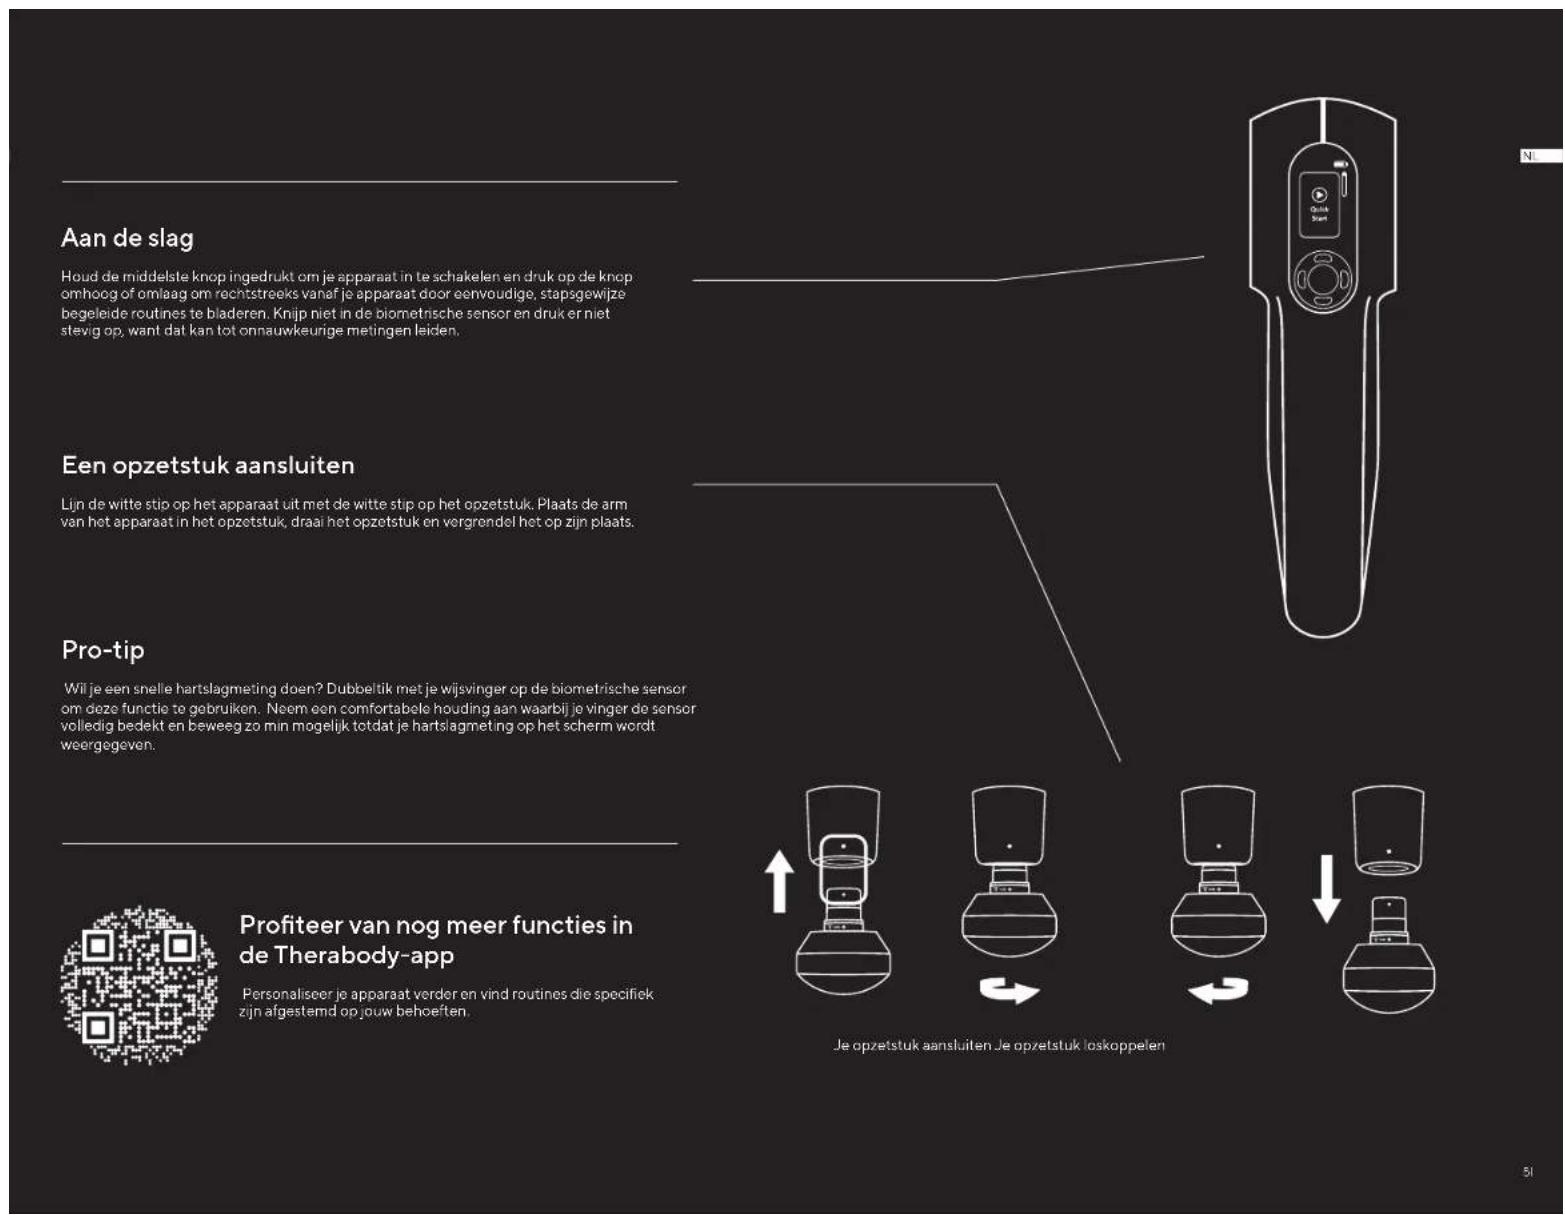
- Press and hold the center button to turn on your Theragun PRO Plus device. Your Ther PRO Plus device must be powered on to locate and pair to the Therabody app.
- Log in and follow the onboarding steps to connect your Theragun PRO Plus device to the app. Ensure that your phone's Bluetooth settings are enabled.
- Select "Theragun PRO Plus" as your Therabody device when prompted.
- Once connected, you can learn how to use your device, browse a catalog of science-backed step-by-step routines, and download customized routines to your Theragun PRO Plus.
Start here if you've previously used the Therabody app
- Open the Therabody app and navigate to the Home screen.
- Press and hold the center button to turn on your Theragun PRO Plus device. Your Theragun PRO Plus device must be powered on to locate and pair to the Therabody app.
- Tap the Home screen header to add a new device. Ensure your phone's Bluetooth settings are enabled.
- Select "Theragun PRO Plus" as your Therabody device when prompted.
- Once connected, you can learn how to use your device, browse a catalog of science-backed step-by-step routines, and download customized routines to your Theragun PRO Plus device.
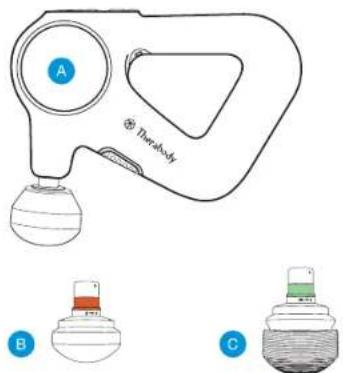
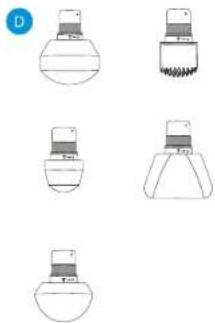
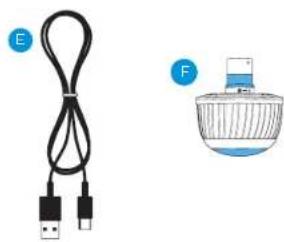
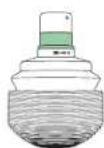
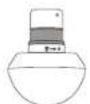
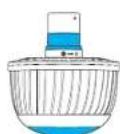
4. What's in the box
A Theragun PRO Plus device
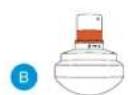
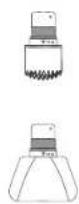
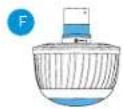
B Heat attachment
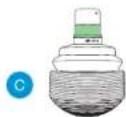
Vibration attachment
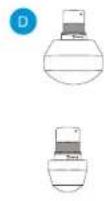
Five percussive attachments (Dampener, Thumb, Standard Bail, Micro-point, Wedge)
E USB-C charging cable
*Cold sold separately
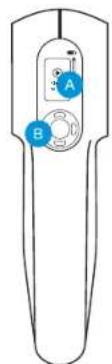
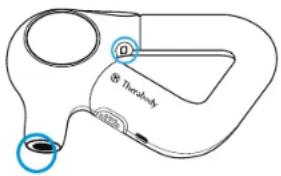
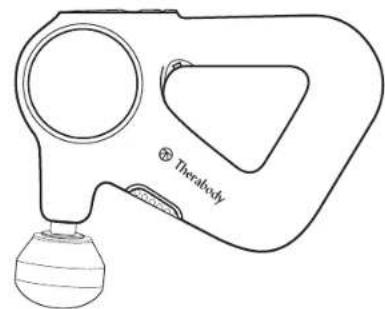
5. Getting To Know Your Theragun Device
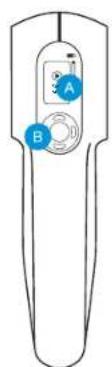
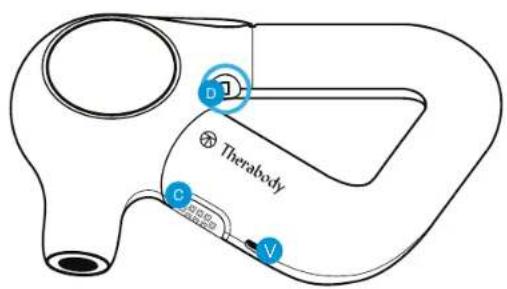
A High-resolution display TFT LCD screen
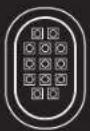
B Button pad
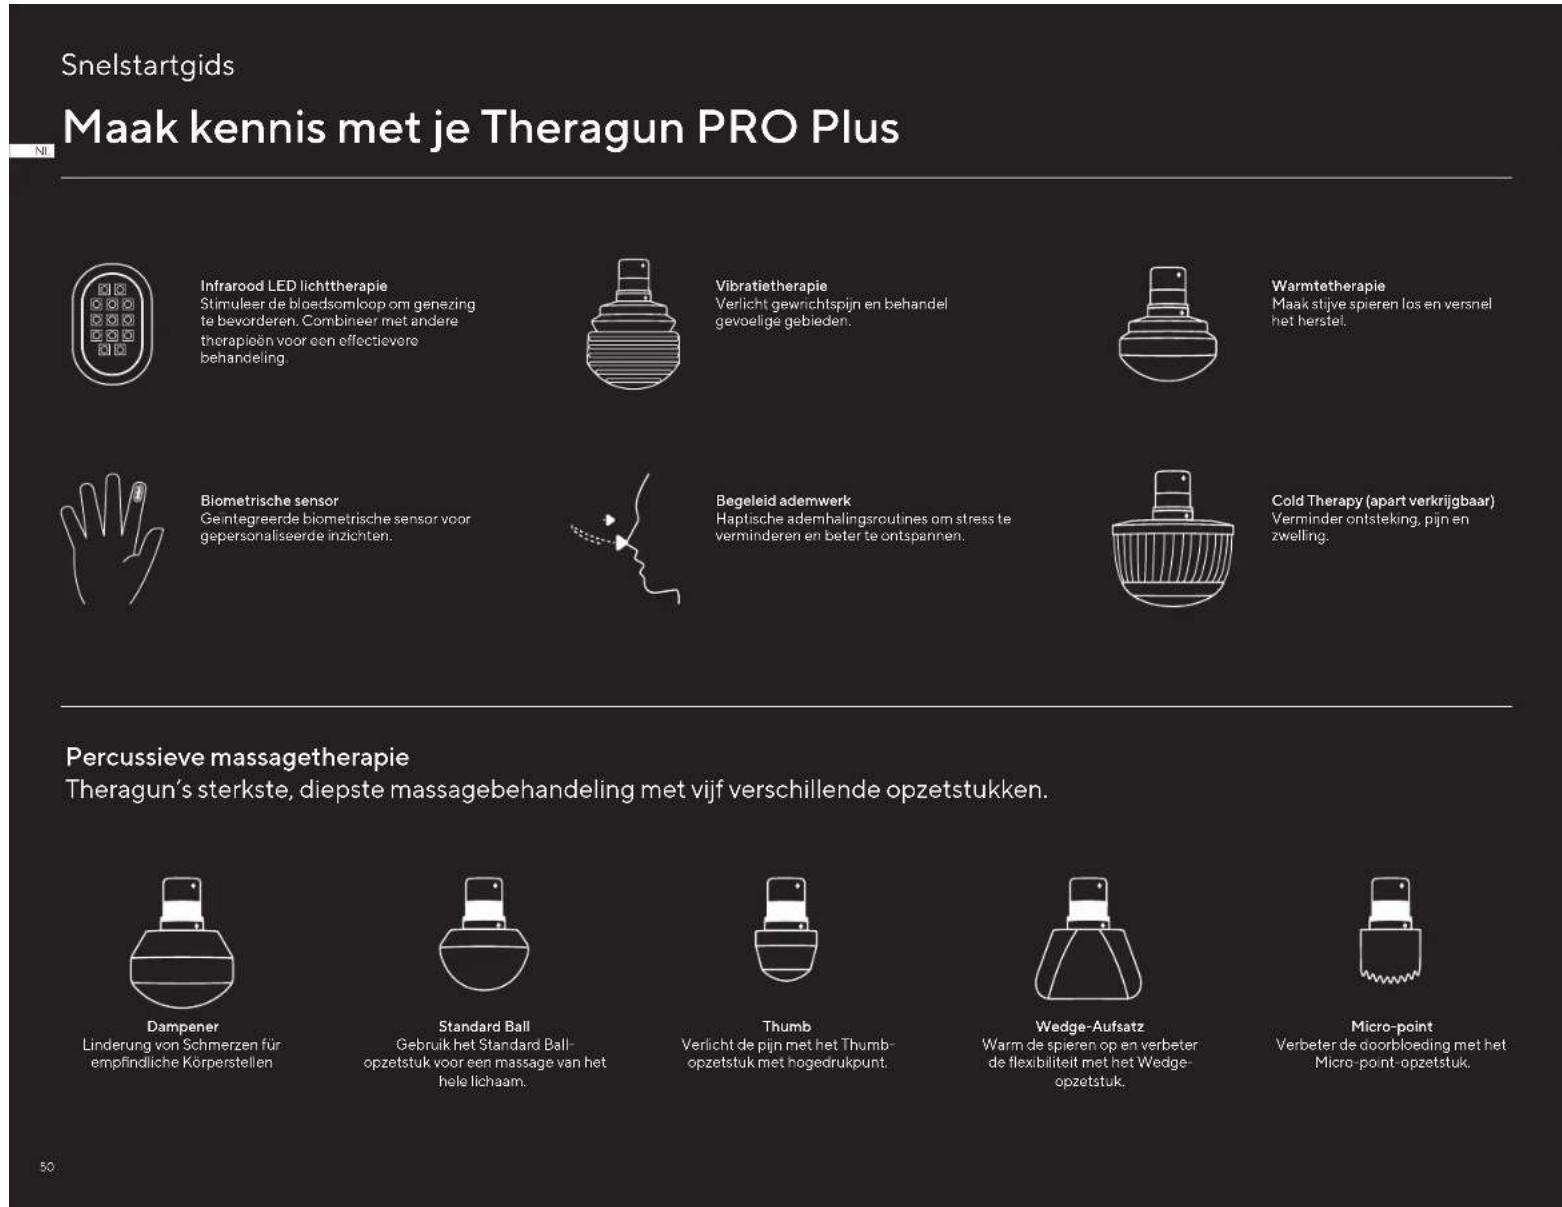
Infrared LED Light Therapy
Biometric sensor
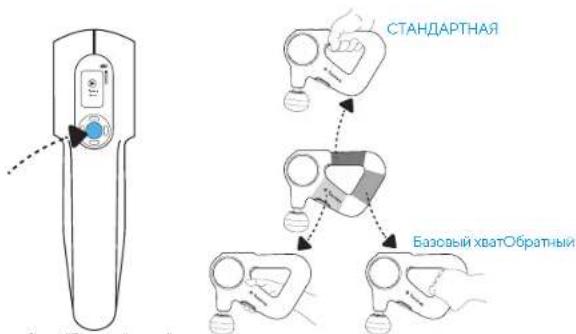
Patented triangle multi-grip handle
F USB-CPort

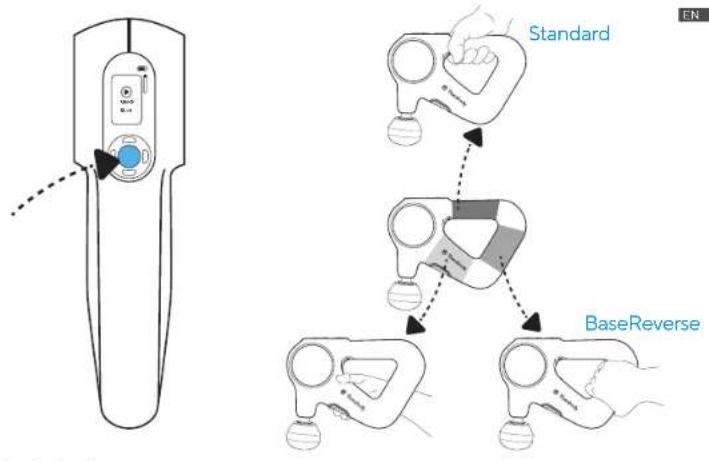
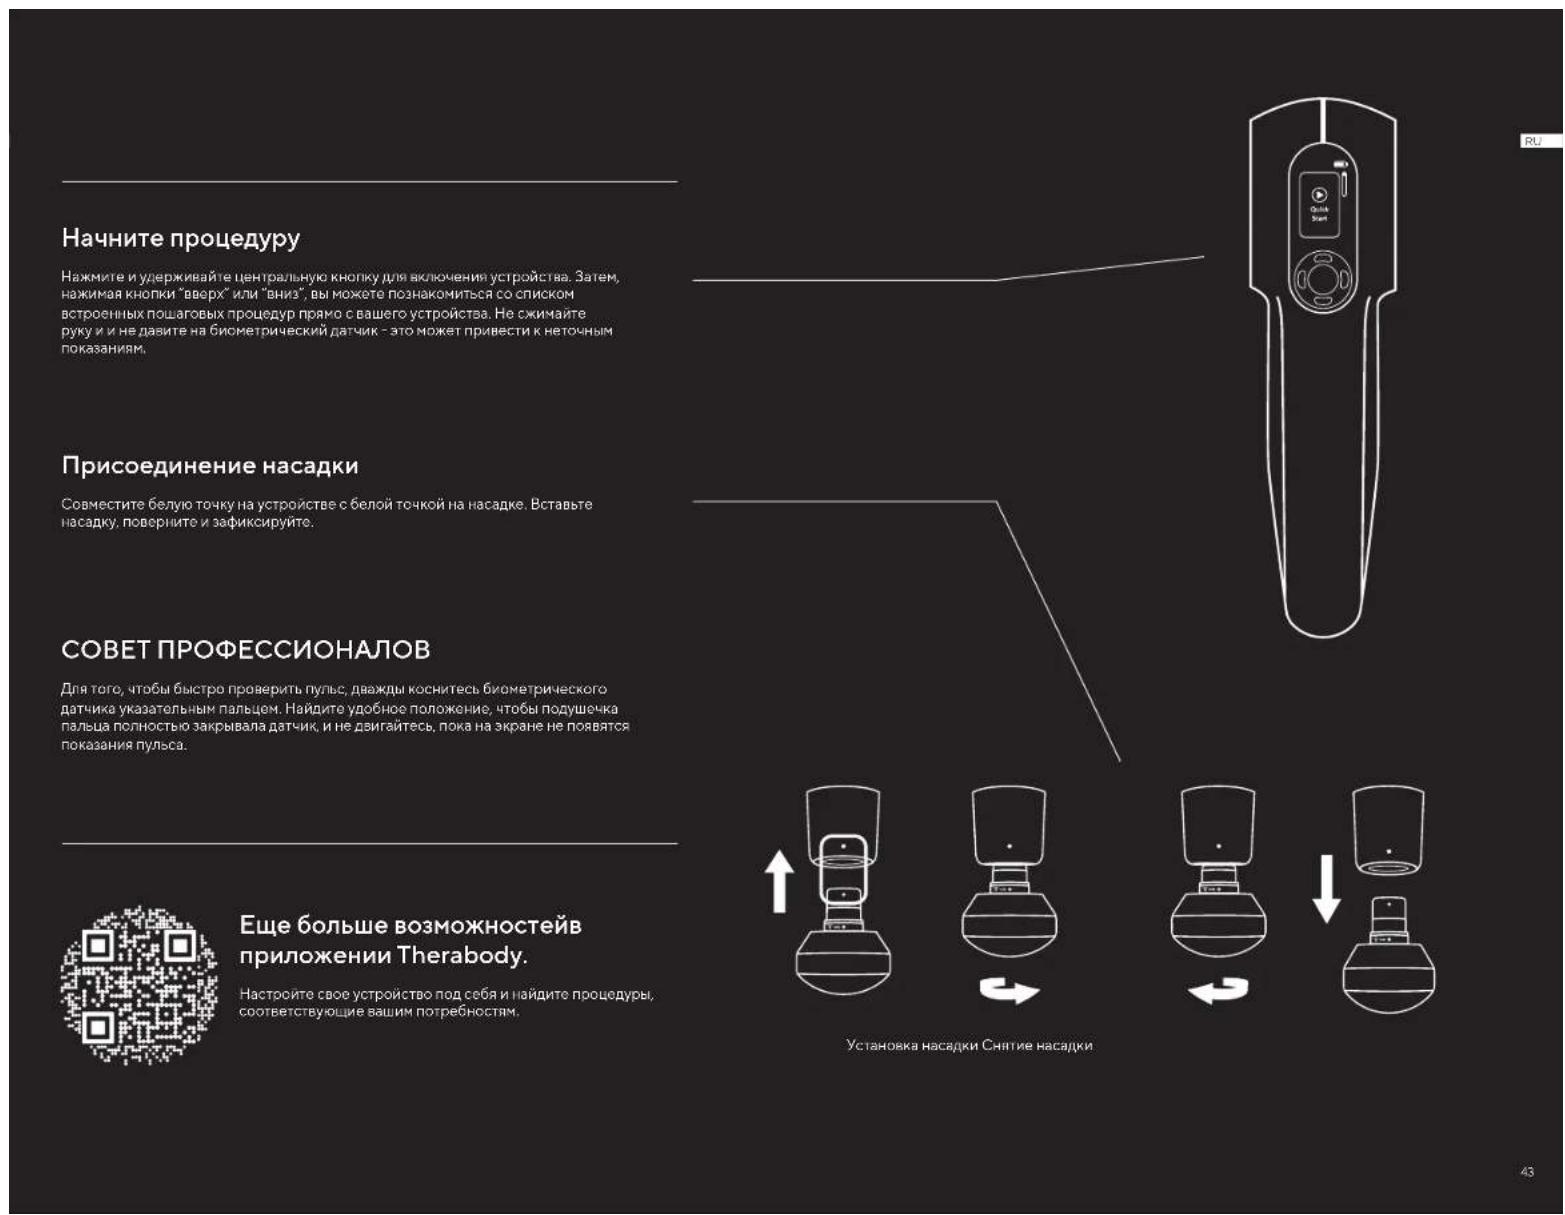
6. Getting started
Powering The Theragun Device On and Off.
To power on your Theragun PRO Plus device, firmly press the center button on the device. Firmly press the same button to power off the device.
Step1
Pick up and hold the device.
Slide your hand into the ergonomically designed Theragun triangle handle. Our patented Theragun triangle multi-grip handle design is three-sided, so you can hold the Theragun PRO Plus device from any side in a variety of ways, making it easier than ever to treat hard-to-reach areas like your back without strain on your hands, wrists, and forearms.
Step2
Turn on and try the device.
Firmly press the center button to turn on the device. The device's TFT LCD screen will light up when the device is on. You can select Quick Start or toggle through a variety of treatment routines using the up and down buttons. Press the center button to select your treatment. Move the Theragun PRO Plus device back and forth over the area you're treating and experiment with different amounts of light-to-moderate pressure on your body. Do not start by putting pressure directly on an area of discomfort. Instead, work slowly around the area to reduce tension.
Step3
Use the Therabody app
Connect your Theragun PRO Plus to the Therabody app to learn more about how to use the device, access step-by-step guided routines that span all therapy types, and receive recommendations based on your personal wellness goals, activities, and concerns. Using the Therabody app, you can also download the guided routines directly to your Theragun PRO Plus device for quick, on-the-go access.
7. Using the Theragun PRO Plus Device
- Select a percussive therapy attachment and connect it to your device.
- Slde your hand into the ergonomically designed Theragun Triangle handle. Fmly press the center button on the front of the device to power on the Theragun PRO Plus device. The device's TFT LCD screen will light up when the device is on.
- Select "Quick Start" to begin using the device without a guided routine, or toggle through preset guided treatment routines and press the center button to select a treatment routine.
- Once your desired treatment is selected, toggle through the five speed options to increase or decrease treatment speed, respectively.
- Move the device across the areas in need of treatment, gradually applying light to moderate pressure as needed. The Force Meter will appear on the TFT LCD display momentarily when pressure is applied from the device to your body.
- Follow the preset treatment as the device guides you to move between muscle groups.
-
To pause, skip, exit, or resume your treatment, toggle to the respective indicator and short press the button.
-
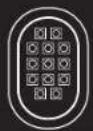
Infrared LED light therapy. The Theragun PRO Plus device is equipped with 13 LED lights to provide infrared LED light therapy. To add infrared LED light therapy to your routine, toggle to the infrared LED light indicator. Short press to turn the infrared LED light therapy on and short press to turn it off. Infrared LED light therapy is most effective when applied directly to the skin. Infrared LED light therapy will be applied to the treatment area simultaneously with percussive, vibration, and heat therapy. To maximize your treatment benefits, use for approximately 90 seconds on each treatment area. Infrared LED light therapy will not turn on during cold treatments.
-
Vibration therapy. To add Vibration Therapy to your routine, connect the Vibration attachment to your device. Proceed to step 2 to use the device with the Vibration attachment.
-
Heat therapy. To add Heat Therapy to your routine, connect the Heat Therapy attachment to your device. Short press the right button to toggle to the heat indicator. Short press the up button to increase the heat temperature and short press the down button to increase the heat temperature. There are three hot temperature settings, low, medium, and high.
a. Low: Use the low temperature setting if you are new to heat therapy.
b. Medium: Use the medium temperature setting for performance.
c. High: Use the high temperature setting over light clothing or while moving quickly across a treatment area.
- Cold therapy. *Cold therapy attachment sold separately. To add Cold Therapy to your routine, connect the Cold Therapy attachment to your device. Short press the right button to toggle to the cold indicator. Short press the up button to make the temperature colder and vice versa. There are three cold temperature settings, low, medium, and high.
a. Low: Use the low temperature setting on sensitive areas and if you are new to cold therapy.
b. Medium: Use the medium temperature setting for full-body recovery and general discomfort.
c. High: Use the high temperature setting for targeted pain relief.
-
Press and hold the center power button to power off the device.
-
Therapy Benefits
| Therapy Mode Therapy Area | Recommended use When and where to use | |
| Percussive Therapy Only Muscles | Use as a daily massage for up to two minutes per muscle to reduce tension and improve flexibility. | |
| Percussive Therapy + Infrared LED Light Therapy | Muscles | Use for up to 60 seconds per muscle to maximize your warm-up by loosening up stiff muscles and helping prevent soreness, allowing you to perform your best. |
| Percussive Therapy + Heat Therapy | Muscles | Use for up to 60 seconds per muscle to accelerate your recovery by reducing soreness, boosting circulation, and stimulating healing. |
| Percussive Therapy + Heat Therapy + Infrared LED Light Therapy | Muscles | Use this highest-intensity massage treatment for up to 60 seconds per muscle to stimulate circulation and reduce pain. |
| Vibration Therapy Only Joints + Muscles | Use for up to 5 minutes on sore and sensitive muscles and joints to increase circulation and reduce pain and stiffness. | |
| Vibration Therapy + Infrared LED Light Therapy | Joints + Muscles | Use for up to 3 minutes on sore and sensitive muscles and joints to stimulate healing, boost circulation, and improve recovery. |
| Cold Therapy (Cold attachment sold separately) | Joints + Muscles Use for 2-5 minutes on muscles and joints to reduce swelling, inflammation, and pain. | |
9. Using The Theragun PRO Plus Device's Biometric Sensor
Access Routines with Biometric Sensor in the Therabody App
Use the Therabody app to access a catalog of breathing routines that utilize a biometric sensor to measure and display your heart rate. Routines that connect to the biometric sensor are labeled with the heart rate icon.
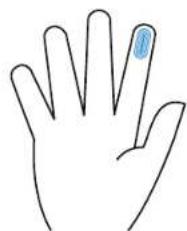
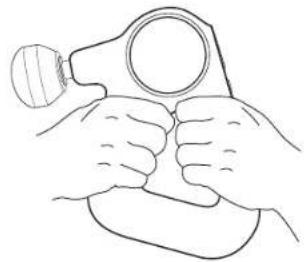
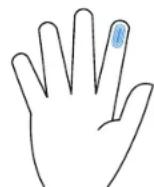
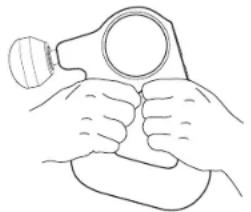
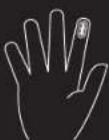
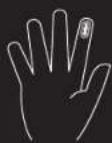
To use the device's biometric sensor, hold the device in the "double-grip" position while keeping the tip of your pointer (index) finger placed on the biometric sensor. Cover the entire sensor with the tip of your finger.

Do not squeeze or firmly press the biometric sensor, as this may lead to inaccurate readings. Support the device's weight with your free hand or rest the device against your body to reduce pressure on the biometric sensor.
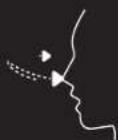
Preset Guided Breathing Routine
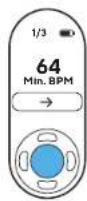
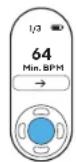
The Theragun PRO Plus device provides a preset science-backed guided breathing routine to help you relax. On the main menu, press the down button to toggle through preset options, landing on the Breathing preset. Hold the device in the "double-grip" position while keeping the tip of your pointer (index) finger placed on the biometric sensor. The device will vibrate at a specific rate to guide you through a calming inhaling and exhaling routine. During this routine, the Theragun PRO Plus device measures your heart rate. Your lowest (minimum) heart rate will be displayed following the treatment as feedback on your level of relaxation during the treatment. The goal is to lower your heart rate.
Scanning Your Heart Rate and Displaying on Device
Determine your current heart rate with the tap of your finger. Turn the device on and double tap the biometric sensor with one finger. Find a comfortable position where the tip of your pointer (index) finger completely covers the biometric sensor. Minimize movement until your current heart rate is displayed on the screen—approximately 15-30 seconds. Minimize movement and do not squeeze or firmly press the biometric sensor, as this may lead to inaccurate readings.
Your biometric information will not be accessible by or otherwise used by Therabody or its affiliates unless you expressly opt-in to share this data with us via the Therabody App, and will only be used in accordance with Therabody's Privacy Policy.

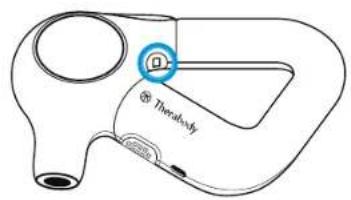
10. Connecting the Attachments
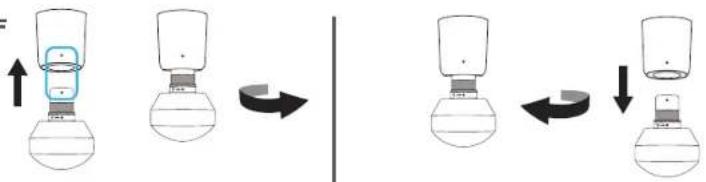
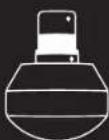
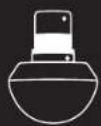
- Ensure that the device is powered off before connecting or removing any attachments.
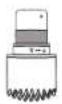
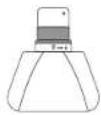
- Line up the white dot on the device with the white dot on the attachment. Insert the attachment into the device arm, twist and lock into place.
- To unlock and remove the attachment, twist in the reverse direction and pull it off.
*Only connect attachments that are included with the Theragun PRO Plus device or the cold attachment that is sold separately. Attachments from other Theragun devices are not compatible with your Theragun PRO Plus device.
Warning: Do not place your finger between the attachment and the end of the arm, as this may cause pinching or injury.
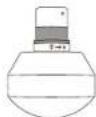
ON OFF
11. Using the Attachments
The Theragun PRO Plus device has eight high-quality attachments designed for a more personalized treatment. The five percussive attachments, the Dampener, Standard Ball, Thumb, Micro-point, and Wedge, and the Vibration, Heat, and *Cold attachments are comfortable and hygienic without absorbing sweat, lotion, or oils.
*Cold attachment sold separately
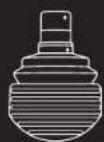
Dampener - Fortender or sensitive areas and overall use.
Use the Dampener attachment for a firm yet softer, soothing full-body massage. The Dampener attachment is specifically designed for general use and a low-impact treatment around tender, sensitive or bony areas. Do not directly contact bones (i.e., spine, knee cap) using this device. Its wide base maximizes surface area for greater, more efficient contact with the body.
Vibration - For joints and and boney areas
Relieve joint pain and treat sensitive areas. Use the Vibration attachment to target joint pain and treat boney areas. The vibration attachment increases circulation to treat sensitive areas.
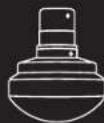
Standard Ball - For large and small muscle groups
Use the Standard Ball attachment for a full-body massage. The Standard Ball attachment is specifically designed for overall use on both large and small muscle groups. With a smaller shape and higher impact level than the Dampener, it is a firmer option for overall use and is your go-to attachment for tension.
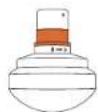
Heat-Form muscles
Loosen up stiff muscles and accelerate recovery. Use the Heat attachment to loosen up stiff muscles before a workout, or after a workout to accelerate muscle recovery.

Thumb - For trigger points and the lower back.
Relieve pain with the high pressure point Thumb attachment. Specifically designed to mimic a human thumb, use this attachment for point therapy on the lower back. Use the Thumb anywhere you may have otherwise used your thumb for pain relief.
Cold (Sold separately) - For joints and muscles
Reduce inflammation, pain, and swelling. Use the Cold attachment to relieve swelling and reduce inflammation.
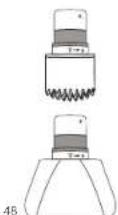
Micro-point - For increased stimulation.
Increase circulation with the Micro-point attachment. The Micropoint attachment delivers a highly targeted treatment and increases stimulation and circulation to each treatment area.
Wedge - For shoulder blades and IT bands.
Warm up muscles and improve flexibility with the Wedge attachment. Uniquely designed for use on shoulder blades and IT bands, the Wedge attachment is used for "scraping" and "flushing" motions, mirroring techniques commonly used in sports massages.
12. The Theragun PRO Plus Device After Care & Cleaning
Device Maintenance
The following maintenance instructions are important to ensure that your device continues to work as it was designed. Failure to follow these instructions may cause your device to stop working.
Care and Cleaning
- The Theragun PRO Plus device is NOT waterproof or machine washable. Do not allow any liquid or water to enter the device or charging port.
- Ensure that the device is powered off before cleaning.
- To clean, wipe the device surface with a disinfectant wipe to remove any residue. Ensure that the biometric sensor is clean for optimal scanning precision.
- Once the device is residue-free, use a clean disinfectant wipe to thoroughly clean the device surface and attachments, wiping in a circular motion.
13. Charging
The device's battery level is continuously displayed on the TFT LCD screen in the top right corner when the device is powered on.
Ensure that the device is powered off before charging; the device will not power on while charging.
The Theragun PRO Plus device is USB-C enabled. To charge the Theragun PRO Plus device, plug one end of the included USB-C cable into the device and the other end into your adapter (not sold with the device).
- When the device is powered off and charging, the device's battery percentage level will be displayed on the TFT LCD screen.
Once the device is fully charged, the battery icon will turn solid green and display a charge level of 100% .
- Unplug the USB-C cable from the Theragun PRO Plus device when charging is complete.
The battery life of the Theragun PRO Plus device is approximately 120 minutes.
**Note: If using an alternative USB-C cable, ensure that it is from a trusted source and has not suffered any structural damage. Do not try to use the device while charging.
Intended Use
Percussive Massage Therapy
Relieve aches and pains, improve performance, enhance recovery, and improve flexibility.
Infrared LED Light Therapy
Stimulate circulation to boost healing.
Combine with other therapies for a more effective treatment.
See Warnings insert for important safety instructions
Vibration Therapy
Relieve joint pain and treat sensitive areas.
Heat Therapy
Loosen up stiff muscles and accelerate recovery.
Biometric Sensor
Built-in biometric sensor for personalized insights.
Guided Breathwork
Haptic-lead breathing routines to reduce stress and improve relaxation.
Cold Therapy (sold separately)
Reduce inflammation, pain, and swelling.
amelierer la relaxation.

L'embout micro-point
Scopri Theragun PRO Plus
Conformata on Privacy Policy dTherabody.
CoqotaiTo CdpyTmN BxDAMn BCdEeCTBna
DnB6Oonee 0f0ekTNbHOr TepaNN.
Bn6paunHna TepnA
ChmkeHHe 60nB CcyTabax npa5ota c
yBCTBnTeNbHbMn 2OHaMM

TepaIIaTeIIO
BocctaHOBREHeN NO8HxHcTn
MbluNyckopeneHne
BOCCTaHOBNOH
BnHometpueckn daTtHK
BcTPOeHHbI 6NoMeTpueckn DaTuNK
dna NepcoHaHn3aun npoceDpy
BbixaTeNbHbIe ynpaxHeHHa
DbixaterbHbEy npaxHeHa cTaxtunbHO
O6paTHoN CBA3bIO DnA CHHXeHNA CTpecca N
ynyuwenHpenakcaunn

TepanxOJODOM(HacaKa npoDaeTc
OTdEInbHo)
YMeHbWeHHeBocnAeHHRA,60nn
OTEKA
PepkyccnoHHa MaccaXHa Tepann
Cama Mouha Hnyboka Maccaxna Tepann Theragun c nmoohb0 5 pa3nuehix HacaOk.
DEmnphiepnaHacaKaYMoHbwoHc
DnCKOMΦOPTa n bOnn dJa HExHbIX
HNNyBCTBHTeNbHbIX3OH
CTaHapTHa WapOBa HacKa
HcnoB3yETcIgMaccKa BceroTeHa
CHRTNMBILWEHHOHANPAKHeH
Hacapka"BoIbwoJnaneu"Ncnonbayetc
HxKHe 4actn CnHBn DnTepaNN
BoneHHbIX TpHrRePhbIX ToeK

KINHOBAHacaKa
ДЯNONATK.ПБТи
06pa6oTKn"ckpe6kOM
3y6uTaHnacda
ycnnBaet
KpOBoOp6paueHne
THMMyNpYe
BOCCCTAHOBREHNE
1.063op npoaykTa
BUTHERAGUN PRO Plus
BaIINHbI NOMOuHNK DnX OPOoWero CaMOUyBCTBna Tena npa3yma.
NoBbAaTe Bauy pabotocnco6HcTb c nOmoIy cTpoHCTBa Theragun PRO Plus - Hauero HOBO rHHOBuaIOHOr MybntepaneBHTeCKoro yctpoHCTBA, KOtope CoHaeT aCebse Hau camh bCmBbRnIgboKmMbHeNb MaCCk CO CEBOTepanH, BIBOPOTepanH, BO3DNECTBEM TENOM I XONQOM DIT 000ee bHcTPO RnAePfKTHOBRO BCCTaOHOBHn
NcnoyntkckbBnD03oCTBNIOOTeBnHcTHMOMKOBHmpyTOHXT06blOoneoofoekthHBOaobHTBCoTone. YcptpctBy Tneragun PRO DopeBHTnppeccMOHBI, HbNO HayuOdozAHO, NTO OHO CHMAEET BOn, HeNTCCTBt, IYyUeWaeNQIDHHCKOHT, OTIMM3PVEBCCTAHOHENE, INHOHAI EINOOHcyMBOyAOBPOCTIOECOHCbT, OChIaENHBI BcPTOBHmBOMeTNPEKDAKAM, BxATEANHBOPOUqPAAM IIIBPOEHMMN NOAERsBMy PekOMHehauAAH, Theragun PRO Plus aedtaet cTAdapT, paane HeoDCNNHMHbe Mnd ydzoHO rACCAHORG yctpoCTBa.
2. 3arpy3nte npnloxene Therabody, yTo6bI noLyuHTb MaKcMymOT BaWero ycTpoiCTBa.
Nnno nnnnne nnnnne nnnnne nnnnne nnnnne nnnnne nnnnne nnnnne nnnnne nnnnne nnnnne nnnnne nnnnne nnnnne nnnnne nnnnne nnnnne nnnnne nnnnne nnnnne nnnnne nnnnne nnnnne nnnnne nnnnne nnnnnee nnnnne nnnnne nnnnne nnnnne nnnnne nnnnne nnnnne nnnnne nnnnne nnnnne nnnnne nnnnne nnnnne nnnnne nnnnne nnnnne nnnnne nnnnne nnnnne nannne nannne nannne nannne nannne nannne nannne nannne nannne nannne nannne nannne nannne nannne nannne nannne nannne nannne nannne nannne nannne nannne nannne nannne nannne nannne nannne nannne nannne nannne nannne nannne nannne nannnee

OTcKaHNPyRe QR-KoD, YTObBu HauBaT.
3.Поdkлючnte cBoe yctpoiCTBO Theragun PRO Plus K npiloxkeHIO
HaHume 3decb,ecnBbI HOBbi nonb3oBamEn npunoXeHua Therabody
- 3arpysntepnpnoxkeHHeTherabody n3 App Store nn PlayStore
- CnEyIe HcTpyKbH B pInIOXeKbH, YTObIa CoaIbTa HObI a KAtyHr TheraBocdy N oNtBepinb Ta bI e-mail.
3.HaKMMTNEyepKMBaHTe CEENTPANbHYKOHNKY,TObSbBkONHbBaATheragun PRO Plus. YcPOCTOBDOJKNHO BkINNOEHO,NToSbIpNOMKHEHHe THArabody MOIOHO HAIIN ERO IN NOXIKONHbCBA KHeHy - Bongynte 8 kayayntn H sbinHnHte otobpaKaenhe ly peKoHHeaun no nokknoHHeHr Theagun PRO Plus K MObniHMy npuioKeHH. Y6eYIeTc, 10t HactpOnu BlutecoH hBaamien TepaoHe BIOOeHb.
5.Пи Воррочприлwxень ob yctpoCTBe Therabody sbepeTte "Theragun PRO Plus". - Tocie nKIOKHOENH Bn CMOKETE yAEB, KAK NIOIIOBAtC9yTPOCTOB, npOcMOTe3KATIAROTOBHb HAYHO OBOCHOBAHbN IOANOBbN pOuOeDpyn SArpykata Ha Theragun PRO Plus bauNCOcbTHHeHue npOIeYpU.
HaHume 3decb, ecnu bbl yke nonb3oBAnucb npwioKeHuem Therabody.
- OkpOte npncKeHne Therabody n nepeynte Ha mABHbI ekpaH.
- Hakimite He dyexokai Bte Hntpahny KhoKHy, T06bi KhoNtHbai Theragun PRO Plus. YcTPOA 1DOKHO Bbte BKOHeOHy, OTObi PtoPkoHeKHerTherAbody MORT haHn Ero N oNDKIOKHTBCK K HEMY
- HyaTbHOMKxPnIeNPOKHeHANKHeMHEBXRPHIOCTPKOYTOBbIOBDOABHTbHOSoyCtPOYCTSO. 8yEaTeTc, YoHACrpoNkBluteoBauRcTeTePOnaBKnIOeHo
- Pnp Bonpoce npnnoxemns o6yctpoctae Therabody bubepnte "Theragun PRO Plus".
- nocne noynnnoe Hb CnoHote yehat bKaKoNtB0BaTaC yTPOCTBO, npOCHATPbAs T KAtanor rotoBx hay hno oocohobnnh x noa cbaux npoeDy n 3arpykata Ha Theragun PRO Plus cbon ccbtebnhe npoeDyb.
4. Komnnektaun
A YctpoactBo Theragun PRO Plus
B CorpeBaIOuaHacAdka
Bn6paOnHnaHaCdaKa
PⅡTbMaccKhBxHacdoK (Dennephera,"BoIbwo naneu”, CthndpTaHnAwaopBa3y6yataa,KnHObaan)
E Ka6eIbIaIaIapIaKINUSB-C
(OxnaaKaHnacKa npoaeTcOTeJIHo)


5.3HaKOMCTBOc Theragun
TFT-3kpanBbockoRaPaeHn
B Khonouhna naheb
HΦpaKpaHcBcTeOAnDHaTepaHn
BnometrpueeckndaTuk
3anaTeHTOaHHaTpeYToHbHa pyKoRbC p3hMnBaPnHaTAMXXBATA
V Iopr USB-C
6. Hauano pa6oTbI
BknoHn HbIKNoHne yctpoCTBa Theragun.
106bI bKIOHJI BAI Theragun PRO Plus, zakmite yuEperkBaIye HTHpaBHy KOHNy HA UcTPOCTBE. 107bI bKIOHJIbY TycPOCTBO, cHOBA zakmite yuEperkBaIye BHTy KHOHNy
War1
Bo3bMHTe yctpoHCTBO Bpykn.
Bosmncb3a pnoonnhy typeynny pyocny Theragun. 3anatneonna Hnnr Tpyornyhna Kooctpykna pykortn Theragun nooBnonen depKth Tberagun PRO Plus c nioob topoHpaNHHM BapnHAMXBA XbaT O nooBnonen neko o6pabaa btpydoocnhytbo 3ohby (Taakke, Ka cnH) Gcn HarypnKn HAKTc, 3nCrtS nnpnneBn
War2
BknouHTe onpo6yTe yCTpOCTBO.
3aHnHnHnHnHnHnHnHnHnHnHnHnHnHnHnHnHnHnHnHnHnHnHnHnHnHnHnHnHnHnHnHnHnHnHnHnHnHnHnHnHnHnHnHnHnHnHnHnHnHnH n Hn Hn Hn Hn Hn Hn Hn Hn Hn Hn Hn Hn Hn Hn Hn Hn Hn Hn Hn Hn Hn Hn Hn Hn Hn Hn Hn Hn Hn Hn Hn Hn Hn Hn Hn Hn Hn Hn Hn Hn Hn Hn Hn Hn Hn Hn Hn Hn Hn Hn H n H n H n H n H n H n H n H n H n H n H n H n H n H n H n H n H n H n H n H n H n H n H n H n H n H n H n H n H n H n H n H n H n H n H n H n H n H n H n H n H n H n H n H n H n H n H n H n H n H n H
War3
IcnonbayyTe npnnoxKeHne Therabody
P 1000000000000000000000000000000000000000000000000000000000000000000000000000000
7.Исповьане устpoистВа Theragun PRO Plus
1.Bb6epnte Hacadyd npckyccnoHHoTepaHn yctahOBte ee HaycpoIcTB0.
203
Bepnpe "Bicpbrn Cnpt" 10bHbHbHbCnBcBcBcBcBcBcBcBcBcBcBcBcBcBcBcBcBcBcBcBcBcBcBcBcBcBcBcBcBcBcBcBcBcBcBcBcBcBcBcBcBcBcBcBcBcBcBc
4. PocneBb6opaupoedpyb1bMokote NoCnepoBaTeNopeKIOHcTaMeKdy nTnBaHaHTaMnCKOPOCTnDnBb6opaxenaeMo
Hnepnepnnney eeypnoe 100000000000000000000000000000000000000000000000000000000000000
6. YcTPOICTBO 6yDcTeOTo6paKaTb HnHCTpyKunNo nepeXoOyOTcHON rpynnMbIuKdpyrO-CneDyITe3TNM peKOMehduaHnM
7. 706bipnOCTAHOBITb, npOnyCTHb.3aOKHHbIMN 3aO3o6HOBHTb npOeDpy, nepeKIOHNTEcBa HA COOTBETCTByIOHACTPOKny N KOPOTKO HAXMMTe Ha KHONky.
8. HnKpKaacnHcBcTeDnHaon Taepna. YcTepaOtaTHaergUN PRO Plus Ochauho 13 CteOpTaOoHbHmNaMaNnIe TApTaee NnHcPbKChCtBcHemN. ToBbIocToBbOaBbOaBcTbMnAIDoBmApTeepaY. HcBcTeDnHaon TaepnN. HcBcTeDnHaon TaepnN. HcBcTeDnHaon TaepnN. HcBcTeDnHaon TaepnN. HcBcTeDnHaon TaepnN. HcBcTeDnHaon TaepnN. HcBcTeDnHaon TaepnN. HcBcTeDnHaon TaepnN.
9. Bn6poepanna. Yto6bIcNtOJIb3OBaBbYb6PoTePapmIO, yCTAHOBHTeHa yCTpOCTBO bH6PoHacAdky. IpeexoJTeKuay 2-ICnoJIb3oBAHne yCTpOCTBa CBI6paUMHOHHOHACdXoJ.
Tepn 10. Tepn 10b10p8a7b3Kraueu type 8o2e37b4teBnTcN, yctahsntbHcytbpocnHcpeBaRkoHgacdAky, KopotkHnaktsnnPnabaaHhcknONpEbnKHeBnCHTBcHaNactpOyTnTnA, KopotkHnakmTeKNkOy
a. Hnka: Vcnohnyte Hnkyio Tempepaty, cnn bIpaee He nncnbaobannorpoeaiouyo Tepanio.
b.CpeHnVicnoBlyTe cpeHIOKOTemNepaTyDnOCHOBHOrpoekmBaO3eJeCTBE.
C. Bicokar: Hcnonb3yIte BicokyoTeMtnepaTpyeocpaDpya PPOOoATCRHepeaONnnnnoonnoonnoonnoonnoonnoonnoonnoonnoonnoonnoonnoonnoonnoonnoonnoonnoonnoonnoonnoonnoonnoonnoonnoonnoonnoonnoonnoonnoonnoonnoonnoonnoonnoonnoonnoonnoonnoon
- Tepanix xionoi. OoKIOHAnHauHaeKaHaIgNIOOIOHOIOIOHOIOHOIOHOIOHOIOHOIOHOIOHOIOHOIOHOIOHOIOHOIOHOIOHOIOHOIOHOIOHOIOHOIOHOIOHOIOHOIOHOIOHOIOHOIOHOIOHOIOHOIOHOIOHOIOHOIOHOIOHOIOHOIOHOIOHOIOHOIOHOIOHOIOHOIOHOIOHOIOHOIOHOIOHOIOHOIOHOIOHOIOHOIOHOIOHOIOHOIO HOIOHOIOHOIOHOIOHOIOHOIOHOIOHOIOHOIOHOIOHOIOHOIOHOIOHOIOHOIOHOIOHOIOHOIOHOIOHOIOHOIOHOIOHOIOHOIOHOIOHOIOHOIOHOIOHOIOHOIOHOIOHOIOHOIOHOIOHOIOHOIOHOIOHOIOHO
I. Cna6oe:Vcnnayte cnaoe oxnxjdeHHe HMyBCTNTbHux yactkTeTae necnnbapeee He mnonlsobaiOnoxnaxdjakouy ToepanIO.
m. CpeHHe:VcnoIb3yIte cpeHHeoxJaXeHHeIgBceroTeNa IINBOCCTaHOBeHnIHNCHITMAo6JeroDnCKOMΦOpaT.
n.CunbHoe:Inonbayte CunbHoe oxnaXeHHneIra ToeHHo BoaJeCTBn Ha 60aneHHbIe yAcCTBcpeCTBaDn CHIXeHHa
12.HaKMaTe HnydeepKmBaTe LeHtpaBHy KOHNky PnTAMHa, TcBoBbIKIOHTyCtpoNCTBO.
8.ПpenMyucesCTBa TepaNN
| Рекомен.daumno no nckolb3obamno Korda r drd nckolb3oabt. | |
| Только megуccnHna.Tepanma Mblu | Исрлбуг� в калoctв ecokdngHOrO MaCCaxJdo du duxMmhyT ha kakdyuMbIeChHy yprny,чтБы Снгь halprjekhenue u lyuyuHInT TlkiKocStb. |
| Мышь | Исрлбуг� до 60 сekyHД ha kakdyuMbIuLly,чтБы МAKCmaJIbHo paoTgptbca,paatmitbtyrUme Mblu In predoTbparTb bOleAnHeNHOCTb,po3BOLR BAM DvlnBaTc pyuJe aФФeTKHbEe. |
| Mblu | Исрлбуг� до 60 cekyHД ha kakdyuMbIuLly,чтБы yckopriB:BoCTAHOBHeHne 3a ChET yMeHbUeHn BoIeZHeHOCSTy,ycIIeHnI KpOBoObpaUeHnI CTMyIByuIz 3aKIIuHbEn. |
| Mblu | Исрлбуг� до 30 Camyo BbycoKOnTeHcINHyko MaccakHyto pOxueIpy do 60 cekyHД ha kakdyu Mblu, yToB StIMyIparBaTb KpOBoObpaUeHnI yMeHbUeHb KpOBoObpaUeHnI yMeHbUeHb |
| Mblu | Исрлбуг� до 5 MInHyt ha BoIeZHeHbIX yCByCTBeTbeLbX MbluLix x CytBaX,чтБы yCByHbITb KpOBoObpaUeHnI yCByHbITb SOKOBAHOCSTb |
| Mblu | Исрлбуг� до 3 MInHyt ha BoIeZHeHbIX yCByCTBeTbeLbX MbluLix x CytBaX,чтБы STIMyIparBaTb 3aKIIuHbEny, yCByHbITb KpOBoObpaUeHnI yUlyuHT BoCCTAHOBHeHnE. |
| Mblu | СуТаВи+Мышь |
Hcnaahty haohyo haohyo haohyo haohyo haohyo haohyo haohyo haohyo haohyo haohyo haohyo haohyo haohyo haohyo haohyo haohyo haohyo haohyo haohyo haohyo haohyo haohyo haohyo haohyo haohyo haohy0h HnHnHnHnHnHnHnHnHnHnHnHnHnHnHnHnHnHnHnHnHnHnHnHnHnHnHnHnHnHnHnHnHnHnHnHnHnHnHnHnHnHnHnHnHnHnHnHnHnHnHn H

HacaKa"BoJbwoi napeu"-IITprrrePbIX TOyek HnXkHeY qactn CnHbI.
Hacaka"BoIbIOW naneu"npedhaueneaI npoueHoro ooe360nBaIOUero BoaTeCTBna H aOtebnHe bOcnaTn. 37aHocadaN CneLbHno Paap6oTanaH MMHTaUN Maccaka 6o5nmm Nnblampyk.NcIb3yIe e nn ToeHIOI TepanNN NOCHMn H aDpyrNx Oobactax, KOTOpbe 8b obbHO MaccpYpe 6oJIbMMn NnIbAmn DnoBceHnn BOni.
3y6yataHacaKa-ⅡnycunenHHKPOBOO6paueHn.
YnyuHKe KpOoB6paueHne CnoHouBo 3y6aHTo HacAdKn. 3y6aTaN HacAdKa oecnueBaKoHJENTPcPOBHOHe TOUeHOE BCaedCTBeV, yCINNBA BbIeHy O cHmynu N y KpOoB6paueHne EcbapablaBaemOn Hee
KJINHOBAHACAka-ⅡIJI nonaTOK,NT npap6oTb"ckpe6kOM".
PaoRpeHte MHIb HnyuHHTe NHEKcBcNoHIOHO KNHOBOHACaHKnHO HapKa cneuaHbHO paa3oHaI a n6nA tnoTOK noNtDOHO HO BNOBIEeBepoTO rTApKa. OHcNoHbTeaTcRApTa PabO bckE0H"V"BxKINAHNAIOHOJHKOHO TnHbU, NOOHO TcEHKAMCnOPTHOBIO MACCACA.
Bn6paunonHna HacaKa -Iy CYCTABOB NIOKCTHBIX OJIaCTeN.
06nhye 60nb Cytabaxh K cokbdoptom npopobotai T ycbTBeNTBHeH3OHy NcnoBsyte BnBpaouKHOhy Hacady k nycTpeAHN60M BcytBxAuN o6baOTKnKCTbXyNACTOB. BnpoaONHAN hcaJyAkyBnVMAEYI LpckpyiHIOK XPOyI JTH 4eKfPbHMTe Tepanry CYbCTBeNTBHeH3OHy
Tepanra Tennom -Mmbu
IopaprrpaccnabneBnckoBaHmMbUaHnYckOpbTe BocTACHOBHeN. HcnoBnyte CorppeBaOnyHacadky, YrO6bl p3MaTb NAKTHINPOBaT MbUaBnPepeTpeHIOBKOHNJINDAYKOCOPHEA BocTACHOBHeN. NocPte TpeHIOBKN.
Tepanxonoom(hacaKa npodaetc oTdeIbHo)-nraCytaBOB Mblu
ymehbinte BocnaneHHe,6oIbN oTeK.1cnoJIa3yTe OxnaJkaDIOUHO HacaykY,HTO6bI CHRTB oTeK N yMehbintb BocnaneHHe.
12. Ynctka n yxo3a ycTpoNCTBOM Theragun PRO Plus
06cnyxmbaHnepn6opa
BANKO bIIOHHTcHcyoHnHnTcHpyKmHnTOxHnHECKOMy yXdy, TcObI npNpOp npOJlan paObaTaHnADJeKAL mOBaOM. HeBIOHOHEHe 3tIXN HnCTpyKmMOKETnpNBeCTN KnOLOMKe pOBoPA.
YXoJIOUOHTKa
- UcpoIcTBo Theragun PRO Plus HE raIaRrTa BOHOHePOHnAeMbIM.Ero HebMaB bNocydoMoEHOH MaIInHe He dOnyckTe NoIaHaBBOdBo HINHOH JxKIOCTn BcTyPoTcBO HINOpT aApRik
- NpeT, KAK nepenKONCTKeYcTpoCTBa, y6eNTecb, cTO OHO BbIKIOHEO.
- Ipotpnte yctpoieCTBO DeHHHnpyIOoe caIepKoi, YTO6bIydaNTb Bce 3aRpaHHeHHa. Y6EaHTeCb, YTO6HOMETPOHcckM daTHMK cHCT dNOr OTTMALbHO TOnHcHt CKaHNPoBaHm.
- Pocne 3TOrO npdyroanpdeKIO npoDe3HnHnnpyTe nOBepxHOCTbTuaTeIbHO npOTpNTeYcTPOCTBO HnHacAaKn KpyTOBbIMnDnKeHHMn
13.Зардка
- YpOBeHb 3apraDa 6aTapeu yctpoiCTBaNoCToRHH OToobpaXaaetcHa TFT KK-3kpaHe 3npabOM BepxHem yrTny, KOrTa yCtpoiCTBOBKnIOHeHO.
Ipeep noaKIOueHMe3apRkyb6eITecyTOYCTPOCTBOBbIKIOeHO.BpEMa3apRkycTOPOCTBOHEBKnIOaETc.
341yKJcYCTPOCTBA Theragun PRO Plus pNOA30HHTC WEPB 43aEN USB-C. 4T6b3ap4nITb Theragun PRO Plus, noDIOKONITE OINN KOHIE; BxOUYIIEBO KOMNIKKT KABEEL USB-C K yCTPOCTBm. aApTpyr - K cdoemy
Korda yctpoaTBOBbIIOHHO3apRkaaETcHnKK-3kpaHe6ydtOTo6pKaTaCbaypeHb3apDaakMyIpyoTaBnPoUeHTax.
PIOIOCTINKHeHNOIINHO3aepJa,3NaOHOKbatapeNCTaHETNIHOCTbO3eHeHIM6yJedOTOBpaKaXbpyoBeHb3apra100% - OtcooHnHte KaobIb USB-C ot yctpoixTba Theragun PRO Plus nocne 3apepeHna 3apRxn.
BpmaabHOHmHpa60byyctpoiCTBaTheragunPROPluscoctabnietnpMepHo120MHyt.
*Pmuehme:ecnblbncno3yeteoc6tbeHHb Ka6b USB-C,y6eDntc,cooHn3rOtoBHe HAdKxHbMnPoTH3BDOTENEM HeMeHTNObpeKeHn. HebTaTBeCb NcTbn30BaYb TpOCTBO BOpEma 3apAa.
PpeNoJaraemoe nCnoJb3ObaHne
PepkyccnoHHaMaCCxHaeTepann
CHIMATE MUYUHNI DKKMOFOPT 60N5, NOBUAJIte pa8OOTOCNO6HOCTC, YUCNUBAIIE TOBCCTAHOBHNIE NUYUJIAJIIE TMBKOCCT.
HΦpaKpaCha CBeToIOHOHaTePAn
CHMnpyKpOoB0paJIeHHe,BlYcKop9aTe BoCCTaHOBHeHHe.
CoHTaeTte CnpyHMn BIDAMn BO3dEChTBn JINBoIeEooFeKtIRBOH
TePAnHn.
Bn6paounHnTepannn
CHNXEHNE 60JI B CYCTaBax npabOta C 4yBCTeBnIbHbIM30HaMM.
Tepanra Tennom
Chatne HanpkaeHHc yctabxMblluN yckopeHHe BocCTaHOBnEHH.
BnOMEtPnueckn DaTunK
BcTpoeHHb6HOMoTePnueckn DaTuK dna nepcoHaJIa3auu npOeDyp.
BbixaTeNbHbIeynpaXHeHHN
DbXaTeMbIeYbIpyXaHKeHcIcTAKTNBHO BApTaHO CBa3bIOJIAN CHINKHeIyCTpeCaE uIyHuJeHcEN peNaCKaHcI.
Tepanxonolom (npdaetcraTdehho)
YMeHbWeHHe BocnAeHHa,60nnnoTEKOB.
mnoa 4mo6b03hakomumcB CBOXHBM UHCmpyKUAMnHexHXKe 6cnacchcm, CM. Bknoky IpeynpexkoEne
1. Productverzicht

THERAGUN PRO Plus
Download on the AppStore
扫描二维码开始。
TeLaKnI FIOLO PSLERs AALABoH
LED RAII 三 T
函默金藏开
D. 開國TtRn的藥期,不曾造用
就合山
中
国
T
云
国
考词查LID
图
L
报号
音音云韵
中
否已工刻和青社
国三电拉印(
中,号,早,
币币币币卡
鉤和強調法的連連連連連連連連連連連連連連連連連連連連連連連連連

F
常音韵
SsD
音韵

-赫利和多普勒自
在和韵自
贝J-
曾和日云内是动中

叶贝三元印业-
回
#
宗备备备备备备备备备备备备备备备备备备备备备备备备备备备备备备备备备备备备备备备备备备备备备备备备备备备备备备备备备备备备备备备备备备备备备备备备备
J
Born in Los Angeles, CA.
Designed for everybody.


@Therabody