EHS 600-59 - Hedge trimmers Grizzly - Free user manual and instructions
Find the device manual for free EHS 600-59 Grizzly in PDF.
| Product Type | Electric Hedge Trimmer |
| Brand and Model | Grizzly EHS 600-59 |
| Power Consumption | 600 W |
| Rated Input Voltage | 230-240 V~, 50 Hz |
| Protection Class | II (double insulation) |
| No-load Speed | 1700 strokes/min |
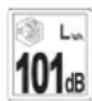
| Blade Length | 590 mm |
| Cutting Length | 550 mm |
| Tooth Spacing | 16 mm |
| Weight | 2.6 kg |
| Guaranteed Sound Power Level | 101 dB(A) |
| Sound Pressure Level | 89.9 dB(A) |
| Vibration (front handle) | 4.38 m/s² |
| Vibration (rear handle) | 3.37 m/s² |
| Protection Type | IP20 |
| Blade Block | Double-edged, safety |
| Safety | Dual switch (on/off + safety switch), hand guard |
| Strain relief | Yes, on handle |
| Maintenance and cleaning | Clean after each use, oil the blade, do not spray with water |
| Warranty | 24 months (domestic use) |
| Delivery contents | Hedge trimmer, hand guard, blade protection, manual |
Frequently Asked Questions - EHS 600-59 Grizzly
User questions about EHS 600-59 Grizzly
0 question about this device. Answer the ones you know or ask your own.
Ask a new question about this device
Download the instructions for your Hedge trimmers in PDF format for free! Find your manual EHS 600-59 - Grizzly and take your electronic device back in hand. On this page are published all the documents necessary for the use of your device. EHS 600-59 by Grizzly.
USER MANUAL EHS 600-59 Grizzly
natural_image
Red and black hair clip with metal chain, isolated on white background (no text or symbols)EHS 600-59

Translation of the original instructions for use
Safety information....59
Symbols in the manual....59
Symbols on the device 59
General Notes on Safety......60
Special safety information......62
Intended Use....63
Function Description......63
Overview.... 64
Assembling instructions......64
Scope of delivery.... 64
Mounting the Hand Protection...... 64
Operation....64
Switching On and Off 65
Working with the Electric Hedge
Trimmer....65
Cutting Techniques......65
Cutting Times 66
Maintenance/Cleaning...... 66
Waste Disposal and Environmental
Protection....67
Spare Parts.... 67
Guarantee....67
Repair Service.... 67
Technical Data 68
Trouble Shooting....69
Translation of the original
EC declaration of conformity .....119
Exploded Drawing 125
Service-Center 126
Safety information
This section deals with the basic safety regulations to. be observed when working with the electric hedge trimmer
Symbols in the manual

Warning symbols with information on damage and injury prevention.

Instruction symbols (the instruction is explained at the place of the exclamation mark) with information on preventing damage.

Help symbols with information on improving tool handling.
Symbols on the device

Caution!

Read through the instruction manual carefully.

Wear safety goggles or a safety mask

Wear ear protection

Wear cut-resistant gloves.

Caution! Risk of injury from blades in operation

Do not use the hedge trimmer in the rain or on wet hedges.

Pull out the power plug immediately if the cable is damaged, has been badly twisted or is completely cut through and in the event that
GB
the device is left unattended for a short time.
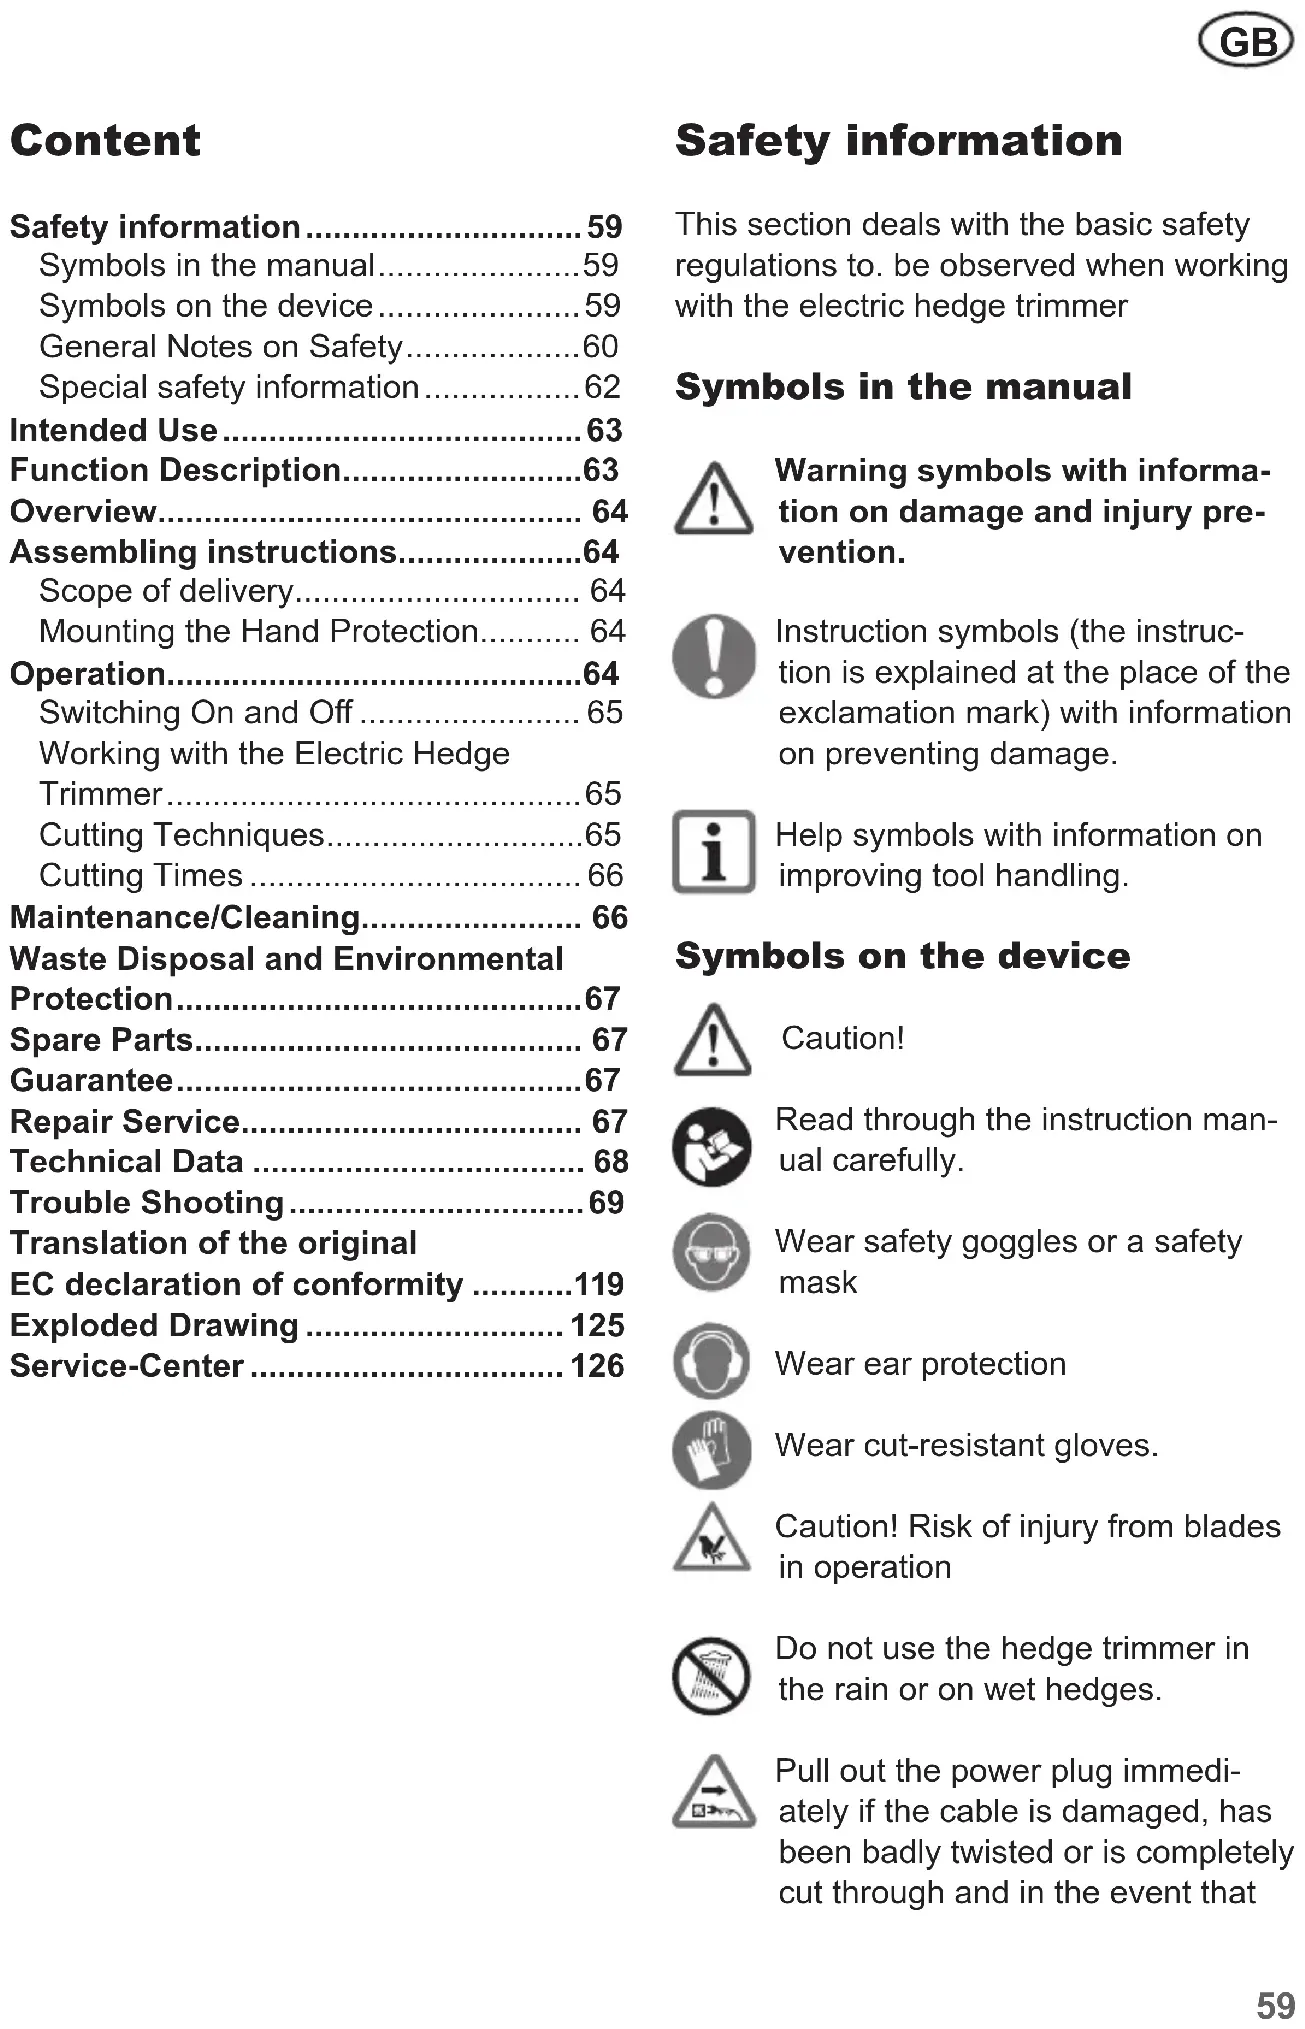
Information of the acoustic power level L_wa in dB.

Machines are not to be place with domestic waste.
Cutting length

Safety class II
General Notes on Safety

Before working with the equipment, familiarise yourself with all operating components. Practice handling the equipment and have the function, operation and working methods explained to you by an experienced user or specialist. Ensure that you can shut off the equipment immediately in an emergency. Inappropriate use of the device may result in serious injury.
Keep all safety information and instructions for future reference.
The term “power tool” used in the safety information refers to mains-powered power tools (with a mains cable) and to battery operated power tools (with no mains cable).
1) WORK AREA SAFETY
a) Keep work area clean and well lit. Cluttered or dark areas invite accidents.
b) Do not operate power tools in explosive atmospheres, such as in
the presence of flammable liquids, gases or dust. Power tools create sparks which may ignite the dust or fumes.
c) Keep children and bystanders away while operating a power tool. Distractions can cause you to lose control.
2) ELECTRICAL SAFETY
a) Power tool plugs must match the outlet. Never modify the plug in any way. Do not use any adapter plugs with earthed (grounded) power tools. Unmodified plugs and matching outlets will reduce risk of electric shock
b) Avoid body contact with earthed or grounded surfaces, such as pipes, radiators, ranges and refrigerators. There is an increased risk of electric shock if your body is earthed or grounded.
c) Do not expose power tools to rain or wet conditions. Water entering a power tool will increase the risk of electric shock.
d) Do not abuse the cord. Never use the cord for carrying, pulling or unplugging the power tool. Keep cord away from heat, oil, sharp edges or moving parts. Damaged or entangled cords increase the risk of electric shock.
e) When operating a power tool outdoors, use an extension cord suitable for outdoor use. Use of a cord suitable for outdoor use reduces the risk of electric shock.
f) If operating a power tool in a damp location is unavoidable, use a residual current device (RCD) protected supply. Use of an RCD reduc-
es the risk of electric shock. Where possible, connect the equipment only to a plug socket with a leakage-current-operated circuit breaker (RCD), with a rated current of not more than 30 mA.
If the power cable for this equipment is damaged, it must be replaced with a special power cable, which is available from the manufacturer or a customer service agent of the same.
3) PERSONAL SAFETY
a) Stay alert, watch what you are doing and use common sense when operating a power tool. Do not use a power tool while you are tired or under the influence of drugs, alcohol or medication. A moment of inattention white operating power tools may result in serious personal injury.
b) Use personal protective equipment. Always wear eye protection. Protective equipment such as dust mask, non-skid safety shoes, hard hat, or hearing protection used for appropriate conditions will reduce personal injuries.
c) Prevent unintentional starting. Ensure the switch is in the off-position before connecting to power source and/or battery pack, picking up or carrying the tool. Carrying power tools with your finger on the switch or energising power tools that have the switch on invites accidents.
d) Remove any adjusting key or wrench before turning the power tool on. A wrench or a key left attached to a rotating part of the power tool may result in personal injury.
e) Do not overreach. Keep proper footing and balance at all times.
This enables better control of the power tool in unexpected situations.
f) Dress properly. Do not wear loose clothing or jewellery. Keep your hair, clothing and gloves away from moving parts. Loose clothes, jewellery or long hair can be caught in moving parts.
g) If devices are provided for the connection of dust extraction and collection facilities, ensure these are connected and properly used. Use of dust collection can reduce dust-related hazards.
4) POWER TOOL USE AND CARE
a) Do not force the power tool. Use the correct power tool for your application. The correct power tool will do the job better and safer at the rate for which it was designed.
b) Do not use the power tool if the switch does not turn it on and off. Any power tool that cannot be controlled with the switch is dangerous and must be repaired.
c) Disconnect the plug from the power source and/or the battery pack from the power tool before making any adjust -ments, changing accessories, or storing power tools. Such preventive safety measures reduce the risk of starting the power tool accidentally.
d) Store idle power tools out of the reach of children and do not allow persons unfamiliar with the power tool or these instructions to operate the power tool. Power tools are dangerous in the hands of untrained users.
e) Maintain power tools. Check for misalignment or binding of moving
GB
parts, breakage of parts and any other condition that may affect the power tool's operation. If damaged, have the power tool repaired before use. Many accidents are caused by poorly maintained power tools.
f) Keep cutting tools sharp and clean. Properly maintained cutting tools with sharp cutting edges are less likely to bind and are easier to control.
g) Use the power tool, accessories and tool bits etc. in accordance with these instructions, taking into account the working conditions and the work to be performed. Use of the power tool for operations different from those intended could result in a hazardous situation.
h) Carefully inspect the area to be cut and remove all wires or other foreign bodies.
5) SERVICE
a) Have your power tool serviced by a qualified repair person using only identical replacement parts. This will ensure that the safety of the power tool is maintained.
b) If the connecting cable to the power tool is damaged, it must be replaced by a specially installed connecting cable, which is available through the customer service organisation.
Special safety information
1) Hedge trimmer safety warnings
a) Keep all parts of the body away from the cutter blade. Do not remove cut material or hold material to be cut when blades are moving.
Make sure the switch is off when clearing jammed material.
A moment of inattention while operating the hedge trimmer may result in serious personal injury.
b) Carry the hedge trimmer by the handle with the cutter blade stopped. When transporting or storing the hedge trimmer always fit the cutting device cover.
Proper handling of the hedge trimmer will reduce possible personal injury from the cutter blades.
c) Keep cable away from cutting area.
During operation the cable may be hidden in shrubs and can be accidentally cut by the blade.
d) Hold the power tool only on the insulated handle surfaces, as the cutting blade may come into contact with concealed power cables.
Contact between the cutting blade and a live cable may render metallic components live and result in an electric shock.
e) Wear suitable clothing and work clothes when working with the equipment. Do not hold the equipment by the cutting blade or lift it on the cutting blade. Contact with the cutting blade can cause injuries.
2) FURTHER SAFETY DIRECTIONS
a) This appliance is not intended for use by persons (including children) with reduced physical, sensory or mental capabilities, or lack of experience and knowledge, unless they have been given supervision or instruction concerning use of the appliance by a person responsible for their safety.
b) Children should be supervised to ensure that they do not play with the appliance.
c) When using the hedge trimmer, please wear gloves, safety goggles, sturdy shoes and long trousers.
d) Before each use, check the power supply lead and the extension cable for damage and ageing. Do not use the equipment if the cable is damaged or worn.
e) Before the work work, search the hedge for concealed objects, e.g. cable etc.
f) Work only in daylight or with good artificial lighting.
g) When working, always hold the equipment firmly in both hands and at a distance from your own body.
h) Lay the connecting cable such that it cannot be caught on twigs or similar whilst working.
i) If the cable is damaged during use, disconnect it immediately from the mains. Do not touch the cable before it is disconnected from the mains.
j) The equipment is intended for cutting hedges. Do not use the equipment for cutting twigs, hard wood or other items.
k) Do not try to release a jammed/ blocked blade before switching off the equipment.
I) Regularly check the blades for wear and have them resharpened. Blunt blades overload the machine. Damage caused as a result is not covered by the guarantee.
m) Always switch off the equipment first and disconnect from the mains
- If leaving the equipment unattended
- Before removing blockages
- Before inspection, maintenance or cleaning work
- If you have come into contact with a foreign body
- Whenever the machines starts to vibrate unusually n) Always ensure that the ventilation holes are free of dirt.
Intended Use
The equipment is specified for use only for the cutting and trimming of hedges, bushes and ornamental shrubs in the domestic environment. Any other use that is not explicitly approved in these instructions may result in damage to the equipment and represent a serious danger to the user.
The equipment is intended for use in the field of DIY. It is not designed for commercial use.
The equipment is designed for use by adults. Adolescents over the age of 16 may use the device only under supervision. Do not use the hedge trimmer in the rain or on wet hedges.
The operator or user is responsible for accidents or damage to other people or their property.
The manufacturer is not liable for damages caused by unspecified use or incorrect operation.

Before use, check that the blades are sharp. Ensure that the blades are sharpened whenever blunt, in order to avoid overstressing of the machine. Damages caused by cutting with blunt blades are not covered by the guarantee.
Function Description
The electric hedge trimmer is driven by an electronic motor. The equipment is double-insulated for safety and does not require earthing.
GB
The hedge trimmer is equipped with a double-sided safety cutter bar. When cutting, the blades move backwards and forwards in linear motion. The impact protection on the tip of the cutter bar prevents unpleasant recoils should the trimmer come into contact with walls, fences and so on.
The unit can only be operated with the deadman switch depressed, in order to protect the operator. In addition, the hand guard protects against branches and briars.
Please note the following descriptions for the function of the operating components.

The illustration how to handle the appliance can be found on page 2.
Overview

1 Power cable
2 Handle
3 ON / OFF switch
4 Strain relief
5 Vents
6 Loop grip with deadman switch
7 Hand protection
8 Safety blade
9 Blade protection
Assembling instructions

Pull out the power plug before carrying out any work on the equipment.
Use only original parts.
Scope of delivery
Carefully unpack the appliance and check that it is complete:
- Hedge trimmer with cutter assembled
- Hand guard + 4 cross-head screws
- Blade guard
- Instruction Manual
Mounting the Hand Protection

Slide the hand protection (7) onto the equipment and affix the side of the unit with the two bolts included in delivery.
Operation

Do not use the equipment without the hand guard. Wear suitable clothing and work gloves when working with the equipment. Ensure that the equipment is functional before each use. The On/Off switch and the safety switch must not be held closed. They must switch off the motor when on is released. Should a switch be damaged, stop working with the equipment. Ensure that the mains voltage value matches the label on the equipment.

Note noise protection and local specifications. The use of the equipment on certain days (e.g. Sundays and national holidays), at certain times of day (lunch times, night time quiet periods) or in special areas (e.g. health resorts, clinics etc.) is restricted or forbidden.

The blades continue to move for a while after the equipment is switched off. Allow the blades to come to a complete standstill. Do not touch the moving blades and do not brake them. Risk of injury!
Switching On and Off

-
For tension relief of the cable, form a loop of the end of the extension cable and bring this through the opening at the handle (2) and suspend in the tension relief at the grip (4).
-
Connect the device to the mains voltage.

Ensure that you are standing in a firm position with both hands gripping the hedge trimmer away from the body. Ensure that the trimmer is in contact with no other objects before switching on.
-
Hold the safety switch on the loop handle (6) and push the On/Off switch on the grip (3) at the same time to switch the unit on. The hedge trimmer will be run at maximum speed.
-
Release one of the two switches to switch the trimmer off.

The braking effect can cause the formation of sparks in the area of the top ventilation slits. This is normal and harmless to the equipment.
Working with the Electric Hedge Trimmer

During cutting work, ensure that no contact is made with objects, e.g. such as wire fencing or main plant stems. This may result in damage to the cutter bar.
- Switch off the equipment immediately in the event that the blades are
blocked by solid objects, pull out the power plug then remove the object.
- Always work away from the mains power outlet. Set the cutting direction before starting work. Ensure that the power cable is kept well away from the working area. Never lay the cable over the hedge, where it could easily be caught up in the trimmer blades.
- Avoid overstraining the equipment during work.

Pull out the power plug immediately if the cable is damaged, badly twisted or has been completely cut through. There is a risk of injury from electric shock.
Cutting Techniques
- Cut thick branches beforehand using a branch clippers.
- The double-sided cutter bar enables cutting in both directions or, with a swinging action, from one side to the other.
- In case of vertical cutting, move the hedge trimmer uniformly forward or up and down in an arc movement.
- In case of horizontal cutting, move the hedge trimmer in a sickle-shaped movement to the edge of the hedge, so that cut branches fall to the ground.
- In order to achieve long straight lines, the placing of tensioned guiding cords is recommended.
Cutting Shaped Hedges:

It is recommended that hedges be cut in a trapezoidal shape, in order to prevent stripping off of the lower branches. This corresponds to the natural plant growth and al-
GB
lows the hedge to thrive optimally. During cutting, only the new annual growths are reduced and thus a dense branching and a good screen will develop.
- Cut the sides of a hedge first. To do this, move the hedge trimmer in the direction of growth from bottom to top. If you cut down from the top, the thinner branches will move out, which may result in some areas having sparse growth or holes.
- Cut the top edge, according to taste, in a flat shape, roof shape or rounded shape
- Trim young plants to the required shape. The main growth should remain undamaged until the hedge has reached the planned height. All other shoots are lopped off to half size.
Care of Free-Growing Hedges:
Free-growing hedges are not shaped when cut, although they must be regularly maintained so the hedge does not become too high.
Cutting Times
Deciduous hedges......June and October Hedges of coniferous wood......April and August
Evergreen conifer hedges ......from May
Maintenance/Cleaning

Pull out the power plug before carrying out any work on the equipment.

Repair and servicing work not described in this manual should always be carried by our Service Centre. Use only original parts.

Wear gloves while handling the blades.
Carry out the following maintenance and cleaning work regularly. This will guarantee a long and reliable service life.

Do not spray the equipment with water or place it in water. Do not use detergents or solvents. These could cause irreparable damage to the equipment. Chemical substances may attack the plastic parts of the equipment.
- Before each use, check the hedge trimmer for obvious defects such as loose, worn or damaged parts. Check the secure seating of the bolts in the cutter bar.
- Do not use the unit if the blades are blunt or worn. This will overstress the motor and gearbox of the machine.
- Check coverings and safety devices for damage and correct seating. Replace these where necessary.
- Keep the ventilation slots and motor housing of the device clean. Use a damp cloth or a brush to do this. Do not wash down the equipment with water, or submerge it in water.
- Clean the cutter bar carefully after each use. Wipe it off with an oily cloth or spray it with a metal protective spray.
- Keep the hedge trimmer dry and covered with the blade protection supplied and out of reach of children.
- Keep the hedge trimmer dry and out of reach of children in the blade guard supplied.
Waste Disposal and Environmental Protection
Be environmentally friendly. Return the tool, accessories and packaging to a recycling centre when you have finished with them.

Electrical machines do not belong in domestic waste.
Take the equipment to a waste disposal site. The plastic and metal parts that are used can be separated out into pure grade, which allows recycling. Ask our Service Centre for details We will dispose of the defective equipment you send in, free of charge.
Spare Parts
Spare parts and accessories can be obtained at www.grizzlytools-service.eu
If you have any other questions, contact the "Service-Center" (see "Service-Center").
Guarantee
This unit has a guarantee period of 24 months. This equipment is not suitable for commercial use. Commercial use will invalidate the guarantee.
The guarantee does not include damages that are attributable to natural wear, overloading or inappropriate use. Certain component parts are subject to normal wear and are excluded from the guarantee. In particular, cutter bars, eccentric drives and carbon brushes are included here, providing the complaints cannot be attributed to material defects.
Furthermore, a condition of the guarantee services is that the maintenance intervals indicated in the operating instructions have been observed and the instructions for cleaning, care and maintenance have been followed. Damages due to material or manufacturer faults will be repaired free of charge by replacement delivery or repair. However, this is conditional upon the unit being returned complete and assembled to our Service Centre, together with proof of purchase and guarantee slip.
Repair Service
Repairs that are not covered by the guarantee can be carried out by our Service Centre for a fee. Our Service Centre will be happy to provide you with a cost estimate. We can deal only with equipment that has been packaged correctly and which has been sent to us with the correct postage paid.
If you have a justified guarantee claim, please contact our Service Centre by telephone, from which you will then be advised on how the claim will be processed. Caution: The sender shall bear the cost of any material damages during transport. In case of complaint or for servicing, please send your equipment cleaned and with an indication of the defect, to our service address.
Equipment sent in with freight collect – by bulk freight, express or with other special freight – are not accepted.
We can dispose of your equipment free of charge.
Technical Data
Electric Hedge Trimmer ..... EHS 600-59
Input voltage rating.....230-240 V\~, 50 Hz Input power.....600 W
Safety class ....
Protection category.... IP20
Knife movements per minutes .. 1700 min ^-1
Weight 2.6 kg
Length of blades....590 mm
Cutting length 550 mm
Cutting capacity....16 mm
Acoustic power level ( L_WA )
measured ..... 98 dB (A); K_WA = 3.27 dB
guaranteed....101 dB (A)
Sound pressure level
(L_pA) 89.9 dB (A); K_pA = 3.0 dB
Vibration ( a_h )
at the handle ....4.38 m/s ^2
at the bow handle....3.37 m/s²
K = 1.5 ~m / s^2
The stated vibration emission value was measured in accordance with a standard testing procedure and may be used to compare one power tool to another.
The stated vibration emission value may also be used for a preliminary exposure assessment.

Warning:
vibration emission value may differ during actual use of the power tool from the stated value depending on the manner in which the power tool is used.
Safety precautions aimed at pro- tecting the user should be based on estimated exposure under actual usage conditions (all parts of the operating cycle are to be considered, including, for example, times during which the power tool is turned off and times when the tool is turned on but is running idle).
Noise and vibration values have been determined according to the standards and regulations mentioned in the declaration of conformity.
Trouble Shooting
| Problem Possible cause Fault correction | ||
| Device does not start | Mains voltage not on | Check plug socket, cable, line and plug, where appropriate, have repaired through electrical specialist |
| On/Off switch (A3) defective | Repair by Service Centre | |
| Worn carbon brushes | ||
| Defective motor | ||
| Device runs with interruptions | Power cable is damaged | Check the cable and have it changed by the Service Centre if necessary |
| Internal loose electrical connection | Repair by Service Centre | |
| On/Off switch (A3) defective | ||
| Blades (A8) become hot | Blades (A8) are blunt | Have the blades (A8) sharpened or replaced (Service Centre) |
| Blades (A8) are notched | Have the blades (A8) checked or replaced (Service Centre) | |
| Too much friction due to lack of lubrication | Oil the blades (A8) | |
Obsah
| GB Translation of the original EC declaration of conformity | |
| We confirm, that the Electric Hedge Trimmer Design Series EHS 600-59 Batch number: B-48454 conforms with the following applicable relevant version of the EU guidelines | |
| 2006/42/EC • 2014/30/EU • 2000/14/EC • 2011/65/EU* | |
| In order to guarantee consistency, the following harmonised standards as well as national standards and stipulations have been applied: | |
| EN 60745-1:2009+A11:2010 • EN 60745-2-15:2009+A1:2010 EN 55014-1: 2017 • EN 55014-2:2015 EN IEC 61000-3-2:2019 • EN 61000-3-3:2013+A1:2019 | |
| The following are also confirmed as complying with Noise Emissions Directive 2000/14/EC: Sound power level: Guaranteed: 101 dB(A) Measured: 98 dB(A) The conformity evaluation procedure employed is compliant with appendix V of 2000/14/EC | |
| This declaration of conformity is issued under the sole responsibility of the manufacturer: | |
 Grizzly Tools GmbH & Co. KG Stockstädter Straße 20 63762 Großostheim Germany 11.03.2021 Grizzly Tools GmbH & Co. KG Stockstädter Straße 20 63762 Großostheim Germany 11.03.2021 |  Christian Frank Documentation Representative Christian Frank Documentation Representative |
* The object of the declaration described above satisfies the provisions of Directive 2011/65/EU of the European Parliament and the Council of 8 June 2011 on limiting the use of certain harmful substances in electrical and electronic appliances
Unit 3, Beldray Park
Beldray Road, Mount Pleasant
Bilston, West Midlands WV14 7NH
Tel.: 0845 683 2672
e-mail: care@novoserv.co.uk