PC-HSM/R 3100 - Lawn mower ProfiCare - Free user manual and instructions
Find the device manual for free PC-HSM/R 3100 ProfiCare in PDF.

| Brand | ProfiCare |
| Model | PC-HSM/R 3100 |
| Product type | Professional hair and beard trimmer |
| Power supply | Rechargeable lithium-ion battery 3.7 V, 2000 mAh |
| Adapter input voltage | 100-240 V ~, 50/60 Hz |
| Adapter output voltage | 5.0 V DC, 1.0 A |
| Charging time | Approximately 2.5 hours |
| Runtime | Up to 2.5 hours |
| Net weight with adapter | Approximately 400 g |
| Cutting lengths with attachments | 3, 6, 9 and 13 mm |
| Functions | Cutting, thinning, contouring and neck shaving |
| LED indicator | Battery level display in percentage |
| Included accessories | 4 attachments (3/6/9/13 mm), oil, cleaning brush, protective cap, power adapter |
| Cleaning | Cleaning brush, damp cloth; do not immerse in water |
| Safety | Automatic shutdown in case of overload, protection class III (device) and II (adapter) |
| Maintenance | Oil the cutting head regularly; replace if damaged |
| Storage | Use the protective cap; hang by the ring; dry, well-ventilated place |
| Usage | Dry hair and beard only |
| Warranty | Complies with EU directives; spare parts available from the manufacturer |
Frequently Asked Questions - PC-HSM/R 3100 ProfiCare
User questions about PC-HSM/R 3100 ProfiCare
0 question about this device. Answer the ones you know or ask your own.
Ask a new question about this device
Download the instructions for your Lawn mower in PDF format for free! Find your manual PC-HSM/R 3100 - ProfiCare and take your electronic device back in hand. On this page are published all the documents necessary for the use of your device. PC-HSM/R 3100 by ProfiCare.
USER MANUAL PC-HSM/R 3100 ProfiCare
natural_image
Close-up of a silver hair styling tool with a digital display and metal clip (no visible text or symbols)Profi-Haar- / Bartschneidemaschine PC-HSM / R 3100
text_image
Technical diagram of a hair cutting tool with numbered parts and labeled diagrams for each part.D
Bedienungsanleitung
⚠ WAARSCHUWING: Risico op letsels!
WAARSCHUWING: Risico op letsels!
WAARSCHUWING: Risico op letsels!
Batteries au lithium-ion rechargeables (Li-ion)
Thank you for choosing our product. We hope you will enjoy using the appliance.
Symbols in this Instruction Manual
Important information for your safety is specially marked. It is essential to comply with these instructions in order to avoid accidents and prevent damage to the appliance:

WARNING:
This warns you of dangers to your health and indicates possible injury risks.

CAUTION:
This refers to possible hazards to the appliance or other objects.

NOTE: This highlights tips and information.
Contents
Overview of the Components 3
General Notes....71
Special Safety Precautions for this Appliance 72
Rechargeable Lithium-Ion Batteries (Li-Ion) 75
Overview of the Components / Scope of Delivery 76
Charging the Battery....76
Using the Appliance 77
Cleaning 78
Storage....79
Technical Data....80
Product Specifications in Accordance with
Regulation (EU) 2019 / 1782 Power Supplies ....81
Disposal....82
General Notes
Read the operating instructions carefully before putting the appliance into operation and keep the instructions including the warranty, the receipt and, if possible, the box with the internal packing. If you give this appliance to other people, please also pass on the operating instructions.
- The appliance is designed exclusively for private use and for the envisaged purpose. This appliance is not fit for commercial use.
- The power adapter is only suitable for use in dry rooms.
- Do not touch the connected power adapter with wet hands!
- Switch off the appliance if not in use, when attaching accessories, during cleaning and when malfunctioning.
- If necessary, disconnect the appliance from the power adapter.
- Ensure that the cable of the power adapter does not become kinked, jammed, driven over or come into contact with heat sources.
- Do not use a damaged power adapter.
- Do not repair the appliance yourself, but visit an authorized specialist.
- The appliance and the mains lead have to be checked regularly for signs of damage. If damage is found the appliance must not be used.
- Use only original spare parts.
- In order to ensure your children's safety, please keep all packaging (plastic bags, boxes, polystyrene etc.) out of their reach.

WARNING:
Do not allow small children to play with the plastic foil. There is a danger of suffocation!
Special Safety Precautions for this Appliance
On the products you will find symbols that indicate warnings or provide information:

Read the instructions!
Only use with “PC-HSM / R 3100” power supply unit! To charge the rechargeable batteries, use only the removable power adapter that comes with this appliance.
- The appliance is intended for use with safety extra-low voltage. Connect only to a power supply according to the specifications on the rating label.
- If the connection cable of this appliance has been damaged, it must be replaced with a special connection cable available from the manufacturer or its customer service.
- This appliance is powered by rechargeable batteries that cannot be replaced.

WARNING of Electrical Shock!
- Keep the appliance dry!
- Keep the power adapter dry.
- Do not charge the appliance in the vicinity of bathtubs, sinks, or other vessels containing water.
- If the appliance accidentally should fall into water, disconnect the power adapter from the wall socket immediately.
- Charge the appliance in a cool and dry location.
- Do not replace any parts. Do not perform any modifications. Risk of electric shock!

WARNING: Risk of Injury!
- Do not use the appliance if the clipper head is damaged.

WARNING: Risk of Injury!
- Never remove an attachment during operation!
- This appliance may be used by children, from the age of 8 and persons with reduced physical, sensory, or mental capabilities, or persons with inadequate experience and lack of knowledge if they are supervised or have been trained and understand the hazards involved concerning the safe use of the appliance.
• Children shall not play with the appliance.
- Cleaning and user maintenance shall not be made by children without supervision.
- Use the appliance only for trimming head hair or beard hair.
Rechargeable Lithium-Ion Batteries (Li-Ion)
The appliance is equipped with rechargeable Li-ion batteries. This results in numerous advantages compared to other batteries and accumulators:
• A high cell voltage (more volts)
- No memory effect
- A low self-discharge
Safe Handling of Rechargeable Lithium-Ion Batteries
In general, Li-ion batteries are considered safe. Nevertheless, hazards may result from mechanical damage, electrical faults and thermal effects.
Mechanical damage may result in the leakage of gaseous or liquid substances that can be highly irritating, flammable or even toxic.
An electrical fault, such as a short circuit, may lead to overheating and cause a fire.
Even the heating of the outer shell of a Li-ion battery, e. g. due to sunlight or a heating element, may lead to fire or an explosion.
However, Li-ion batteries are safe when handled properly. Only if used or stored improperly they may become dangerous. Therefore:
- Avoid temperatures above 40 °C and below 0 °C.
- Do not drop the appliance or the rechargeable battery.
- In case the Li-Ion battery has been dropped and is now damaged, stop using it.
- When storing or disposing of the appliance, mask the terminals to prevent short circuits.
- Dispose of old accumulators properly in collecting containers at the trader or at municipal collection points.
Extending the Life of the Rechargeable Li-Ion Battery
For Li-ion batteries, even more than with other accumulators, their life can be extended by treating them properly. The following simple rules for charging and storing help you keeping the capacity of the battery:
- Temperature: The ideal temperature for these batteries ranges from 10°C–25°C. Temperatures above may lead to premature aging.
- Charging and discharging: During charging cycles, both full charge and deep discharge should be avoided.
When the charging process of the battery is completed, you should disconnect the charger immediately. A charge up to 90 % is considered best.
Conversely, it is also preserving the battery more when it is not discharged to 0 %. If the possibility arises, you should already recharge the battery when it is reaching a charge state of 30 %.
- Storage: Always store batteries in a dry place and at moderate temperatures between 10 °C and 20 °C.
Also consider the effect of self-discharge! When the accumulator is already empty, this effect may lead to a deep discharge resulting in damaging the battery. If you intend to store the battery for an extended period of time, you can counteract this effect. We then recommend charging the battery to approx. 40 % before storage.
You should check the state of charge after not more than a month.
i NOTE:
Even when switched off, the rechargeable battery discharges continuously. If the appliance is out of use for a longer period of time, charge the rechargeable battery at least once every 4 to 6 weeks.
Overview of the Components / Scope of Delivery
1 On / off switch
7 Oil
2 Switch for thinning function
8 Cleaning brush
3 Clipper head
9 Cover cap
4 LED display
10 Power adapter
5 Hanging loop
11 Screws (clipper head)
6 Comb attachments (3, 6, 9 and 13 mm)
Charging the Battery
CAUTION:
Do not charge the rechargeable battery unsupervised.
- Turn the appliance off. The on/off switch (1) is set to the position 0.
- Connect the power adapter (10) to the connection socket at the bottom of the appliance.
-
Plug the power adapter into wall outlet.
-
Prior to the first use, charge the device for approx. 3 hours.

NOTE:
- During the charging process, the LED display (4) shows the current charge status of the battery as a percentage.
-
If the rechargeable battery is empty, the appliance can be operated via mains power. In order to do so, connect the power adapter directly to the appliance. During mains operation, the LED display shows the current charge status of the battery as a percentage.
-
Stop all further charges after approx. 3 hours.

CAUTION:
After charging for approx. 3 hours, always disconnect from the mains power supply.
Using the Appliance
Switching On and Off
Slide the on/off switch (1) to position I to switch on the appliance or to position 0 to switch off the appliance.
Adjust Cutting Length
- Turn off the appliance. The on/off switch (1) is set to the position 0.
- Select a comb attachment (6). Each comb is marked with its cutting length.
- Attach the comb attachment as shown in fig. ⑥ on page 3. Slide the blades of the shaving head (3) into the serrations on the comb attachment. Press the comb attachment firmly onto the shaving head. It must audibly snap into place.
- To remove the comb attachment, press the latching nose out of its lock and pull the comb attachment upwards and off.
Cut Hair and Beard

WARNING: Risk of Injury!
Do not press the shaving head of the appliance too firmly against the skin.

NOTE:
- Only cut dry hair with this appliance.
i NOTE:
- Start by using the biggest comb attachment and cut your hair / beard step by step to the desired length.
- Select the cutting length.
- Switch the appliance on. The on/off switch (1) is set to position I.
The LED display (4) shows the current charge status of the battery as a percentage.
Outlining and Shaving the Neck
- The shaving head (3) allows precise outlining of the beard's shape, even in difficult to reach places, as well as clean shaving of the hair-line at the neck.
- Turn off the appliance. The on/off switch (1) is set to position 0.
- Remove the comb attachment (6) and turn the appliance on again.
- Shave the desired areas directly with the shaving head (without a comb attachment).
Thinning Hair
The appliance has a thinning function.
- Use the appliance with a comb attachment.
- You will achieve different results with different settings of the switch (2).
End of Operation
Switch off the appliance. The on/off switch (1) is set to the position 0.
Cleaning

WARNING:
- Switch off the appliance before cleaning. Disconnect the power adapter from the electrical outlet.
- Do not submerge the appliance in water!

WARNING:
- Do not immerse the power adapter in water!

CAUTION:
- Also do not clean the appliance under running water! The electronics could get damaged.
- Do not use a wire brush or other abrasives.
- Do not use sharp or abrasive cleaning agents.
- Regular cleaning and maintenance ensures optimum results and long lifetime.
- Use the cleaning brush (8) to remove remaining hair after use. Remove the comb attachment (6) for this.
- Clean the casing with a slightly damp cloth, if necessary.
- Clean the power adapter (10) only with a dry cloth.
Attach / Remove Clipper Head
The shearing head (3) is screwed to the housing. To remove the shaving head, see fig. a on page 3.
- Use a Phillips screwdriver to unscrew the 2 screws (11) and remove the shaving head.
- Regularly apply 1 - 2 drops of oil (7) to the shaving head.
- Clean the shaving head with the cleaning brush (8).
- After cleaning, attach the shaving head to the housing again. To do this, press the shaving surface against the housing and screw the 2 screws back in so that the shaving head is firmly seated.
Storage
- Clean the appliance as described and allow it to dry.
- Place the cover cap (9) on the shaving head (3) in the same way as a comb attachment (see chapter entitled “Adjust Cutting Length”).
-
You can use the hanging loop (5) to hang up the appliance on a hook after cleaning.
-
We recommend that you keep the appliance in the original packaging if it will not be used for long periods.
- Always store the appliance out of the reach of children in a dry, well ventilated place.
Technical Data
Model: PC-HSM / R 3100
Net weight incl. power adapter: ....approx. 400 g
Protection class:.... III
Input: DC 5.0V, 1.0A
Power adapter
Protection class:....II
Input: AC 100 – 240 V, 50 / 60 Hz, 0.2 A max.
Output: DC 5.0 V, 1000 mA
Polarity:
Rechargeable battery: 1 × 3.7 V, 2000 mAh, Li-Ion
Run time: 2.5 hours max.
Charging time: ....approx. 2.5 hours
The right to make technical and design modifications in the course of continuous product development remains reserved.
This appliance has been tested according to all relevant current CE guidelines, such as electromagnetic compatibility and low voltage directives, and is manufactured according to the latest safety regulations.
Product Specifications in Accordance with Regulation (EU) 2019 / 1782 Power Supplies
| Information about the power supply used | Value Unit | |
| Clatronic International GmbHCommercial register number HRB 9158Industriering Ost 40, 47906 KempenGermany | ||
| Trade mark ProfiCare | ||
| Model identifier PC-HSM / R 3100 | ||
| Input voltage 100 – 240 V~ | ||
| Input alternating current frequency 50 / 60 Hz | ||
| Output voltage AC / DC 5.0 V DC | ||
| Output current 1.0 A | ||
| Output power 5.0 W | ||
| Average efficiency in operation | 75.69 % | |
| Low load efficiency (10 %) | * % | |
| No-load power consumption | 0.074 W |
* not applicable due to an output power of less than 10 W.
The relevant load conditions are as follows:
Percentage of nameplate output current
| Load condition 1 | 100 % ± 2 % |
| Load condition 2 | 75 % ± 2 % |
| Load condition 3 | 50 % ± 2 % |
| Load condition 4 | 25 % ± 2 % |
| Load condition 5 | 10 % ± 1 % |
| Load condition 6 | 0% (no-load condition) |
Disposal
Dispose of Batteries / Rechargeable Batteries
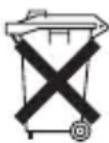
The appliance contains a rechargeable battery. Used batteries / accumulators (rechargeable batteries) do not belong in household waste.
The battery must be removed before the product is recycled. Contact qualified personnel.
Information, where batteries / accumulators are to be disposed of can be obtained from your local or municipal authorities.
Meaning of the "Dustbin" Symbol
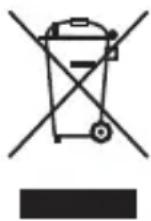
Protect our environment: do not dispose of electrical equipment in the domestic waste.
Please return any electrical equipment that you will no longer use to the collection points provided for their disposal.
This helps avoid the potential effects of incorrect disposal on the environment and human health.
This will contribute to the recycling and other forms of re-utilisation of electrical and electronic equipment.
Information concerning where the equipment can be disposed of can be obtained from your local authority.
Instrukcja obsługi
CTC Clatronic Sp. z o.o
Ul. Brzeska 1
45-960 Opole