
KA3706 - Battery charger KRESS - Free user manual and instructions
Find the device manual for free KA3706 KRESS in PDF.

| Product type | Battery charger |
| Brand | Kress |
| Model | KA3706 |
| Input voltage | 220-240 V ~ 50 Hz |
| Output voltage | 60 V |
| Charging current | 8 A |
| Rated power | 580 W |
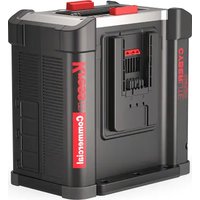
| Compatible battery type | Li-Ion (Kress packs) |
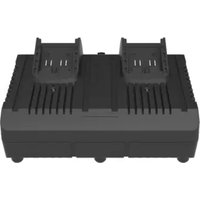
| Number of batteries chargeable simultaneously | 2 |
| Recommended charging temperature | 18-24 °C |
| Thermal protection | Yes (internal fan) |
| Charge indicator | Green LED (charging) / red (fault) |
| Charging time (example 2.0 Ah, 1 pc) | Approximately 25 min |
| Charging time (example 4.0 Ah, 2 pcs) | Approximately 60 min |
| Weight | 2.8 kg |
| Protection class | II |
| Usage | Indoor only |
| Wall mount included | Yes |
| Maintenance | Clean with a dry cloth |
| Repairability | Contact an authorized service center |
Frequently Asked Questions - KA3706 KRESS
User questions about KA3706 KRESS
0 question about this device. Answer the ones you know or ask your own.
Ask a new question about this device
Download the instructions for your Battery charger in PDF format for free! Find your manual KA3706 - KRESS and take your electronic device back in hand. On this page are published all the documents necessary for the use of your device. KA3706 by KRESS.
USER MANUAL KA3706 KRESS
natural_image
Line drawing of a Kress machine component (no text or symbols)| Dual Port Battery Charger | EN | P03 |
| Dual-Port-Batterieladegerät | D | P07 |
| Chargeur De Batterie Double | F | P11 |
| Caricabatterie A Doppia Porta | I | P16 |
| Cargador De Baterías De Dos Puertos | ES | P20 |
| Carregador Da Bateria De Porta Dupla | PT | P25 |
| Dual-Port Acculader | NL | P29 |
| Dual Port Batterioplader | DK | P34 |
| Batterilader Med To Ladeutganger | NOR | P38 |
| Laddare Med Två Portar | SV | P42 |
| Dwuportowa Ładowarka Do Akumulatorów | PL | P46 |
| Φορτιστης μπαταριας δυο θυρων | GR | P50 |
| Két Porttal Rendelkező Akkutöltő | HU | P55 |
| Încărcător De Acumulator Cu Port Dublu | RO | P60 |
| Duální Nabíječka Baterií | CZ | P64 |
| Duálna Nabíjačka Batérií | SK | P69 |
| Dvo-Portni Polnilnik Akumulatorjev | SL | P73 |
Users can view the electronic instructions at https://www.kress.com/.
Original instructions PRODUCT SAFETY GENERAL SAFETY WARNINGS
WARNING Read all safety warnings and all instructions. Failure to follow the warnings and instructions may result in electric shock, fire and/or serious injury.
Save all warnings and instructions for future reference.
This appliance can be used by children aged from 8 years and above and persons with reduced physical, sensory or mental capabilities or lack of experience and knowledge if they have been given supervision or instruction concerning use of the appliance in a safe way and understand the hazards involved. Children shall not play with the appliance. Cleaning and user maintenance shall not be made by children without supervision.
If the supply cord is damaged, it must be replaced by the manufacturer, its service agent or similarly qualified persons in order to avoid a hazard.
ADDITIONAL SAFETY INSTRUCTIONS FOR YOUR BATTERY CHARGER
- Before charging, read the instructions.
- Do not charge a leaking battery.
- Do not use chargers for works other than those for which they are designed.
- Before charging, ensure your charger is matching the local AC supply.
- For indoor use, or do not expose to rain.
- The charging device must be protected from moisture.
- Do not use the charging device outdoors.
- Do not short out the contacts of battery or charger.
- Do not open the unit and keep it out of the reach of children.
- Do not charge the batteries of other manufactures or ill-suited models.
- Ensure that the connection between the battery charger and battery is correctly positioned and is not obstructed by foreign bodies.
- Keep battery charger's
slots free of foreign objects and protect against dirt and humidity. Store in a dry and frost-free place.
- When charging batteries, ensure that the battery charger is in a well-ventilated area and away from inflammable materials. Batteries can get hot during charging. Do not overcharge any batteries. Ensure that batteries and chargers are not left unsupervised during charging.
- Do not recharge non-rechargeable batteries, as they can overheat and break.
- Longer life and better performance can be obtained if the battery pack is charged when the air temperature is between 18°C and 24°C. Do not charge the battery pack in air temperatures below 0°C or above 40°C. This is important as it can prevent serious damage to the battery pack.
- Charge only battery packs of models recommended by Kress.
SYMBOLS
 | Read the operator's manual. |
 | Warning |
 | For indoor use only |
T 10A  | Fuse |
 | Double insulation |
 | Positive terminal |
 | Negative terminal |
 | Waste electrical products must not be disposed of with household waste.Please recycle where facilities exist.Check with your local authorities or retailer for recycling advice. |
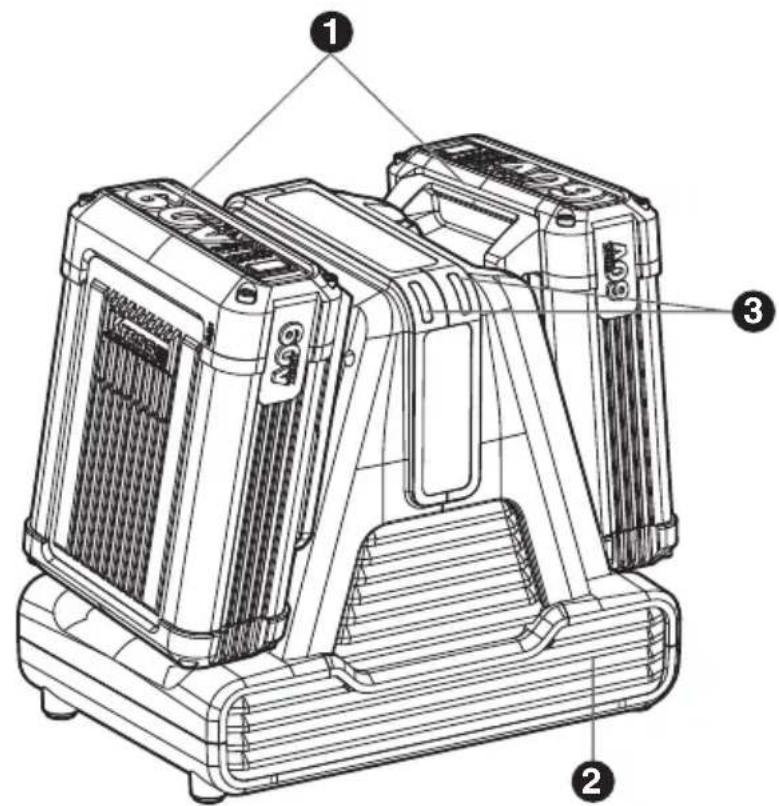
COMPONENT LIST
- BATTERY PACK*
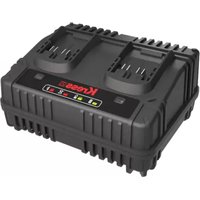
- CHARGER
- CHARGE INDICATOR LIGHT
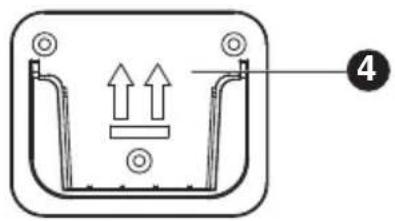
- WALL-MOUNT HOLDER
*Not all the accessories illustrated or described are included in standard delivery.
We recommend that you purchase your accessories listed in the above list from the same store that sold you the tool. Refer to the accessory packaging for further details. Store personnel can assist you and offer advice.
TECHNICAL DATA
| Rated Input voltage 220-240 V~50 Hz | |
| Output voltage 60V | --- |
| Charging current 8 A | |
| Rated Input power 580 W | |
| Charge battery Li-Ion | |
| Charging time (approx.) | |
| Battery pack 2.0 Ah (1pc) Approx. 25 mins | |
| 2.0 Ah (2pcs) | Approx. 30 mins |
| 2.5 Ah (1pc) Approx. 30 mins | |
| 2.5 Ah (2pcs) Approx. 40 mins | |
| 4.0Ah (1pc) Approx. 30 mins | |
| 4.0 Ah (2pcs) Approx. 60 mins | |
| 5.0Ah (1pc) Approx. 40 mins | |
| 5.0 Ah (2pcs) Approx. 75 mins | |
| 8.0 Ah (1pc) Approx. 60 mins | |
| 8.0 Ah (2pcs) Approx. 120 mins | |
| Protection class | ☐/II |
| Machine weight 2.8 kg | |
For the technical data of the types, the number of cells and the rated capacity of the batteries that can be charged, please refer the nameplate of the battery pack supplied by Kress.
CHARGING PROCEDURE

NOTE: Before using the tool, read the instruction book carefully.
You can get the manual through other ways, such as consulting after- sales department.
CHARGING INSTRUCTIONS
1. CHARGING YOUR BATTERY PACK
This charger is designed to charge one or two battery packs together or in a row.

WARNING:
The charger and battery pack are specifically designed to work together so do not attempt to use any other devices to charge. Never insert or allow metallic objects into your charger or battery pack connections because an electrical failure and hazard will occur.
Your battery pack is partly charged and needs to be fully charged before first use.
3. HOW TO CHARGE YOUR BATTERY PACK CHARGING PROCEDURE
1) Plug the charger into an appropriate outlet.
2) Slide one battery pack or two battery packs into the charger. Normally, the relevant indication lights (3) will flash in green color showing the battery is being charged.

WARNING: When battery charge runs out after continuous use or exposure to direct sunlight or heat, allow time for the battery to cool down before re-charging to achieve the full charge.
CHARGING INDICATOR LIGHTS
This charger is a “smart charger” that is designed to provide you information on the status of your battery charge. Indicator lights n the table below will show the charging status. If you receive a defective battery indication light (red on), insert a new battery to determine if the charger is OK..If the new battery pack charges correctly, then the original pack is defective and should be returned to a service center or recycling service center. If the new battery pack displays the same problem as the original battery pack, have the charger tested at an authorized service center.
| Light ON/ flash Status | ||
| Green on | — | Fully Charged |
| Green flash | - - - - - - Charging | |
| Red on | — | Defective Battery |
| Red flash | - - - - - - | Battery Temperature ProtectionThe temperature of battery pack is less than 0°C or more than 60°C. |
DEFECTIVE BATTERY PACKS
This charger will detect a defective battery pack. When a defective battery pack is inserted into the charger, the charger will try to repair it. This process will last about 30mins (the light will be green and flash). If the repair is successful, the charger will automatically begin to charge the battery pack to the highest capacity possible (the light will be green and flash). If the light becomes solid red, then the battery pack is dead, and should be returned to a service center or recycling service center.
NOTE: Repaired battery packs are still usable but should not be expected to perform as much work as new battery packs.
BATTERY TEMPERATURE PROTECTION
This charger has a battery temperature protection feature. When the charger detects a battery pack that is too hot (the light will be red and flash), its internal fan will rapidly cool the battery to the correct temperature. When the charger detects a battery pack that is too cold (the light will be red and flash), it automatically activates the protection circuit, and suspends charging until the battery pack has reached the correct temperature. The charging process will then automatically begin (the light will be green and flash). This feature ensures maximum battery life.
LEAVING THE BATTERY PACK IN THE CHARGER
If a fully charged battery pack is left in the charger, the light will remain green. The battery pack will remain charging with a maintenance trickle current.
NOTE: it is recommended to put out the battery from the charger after fully charged and not store your battery in the charging device for a longer period
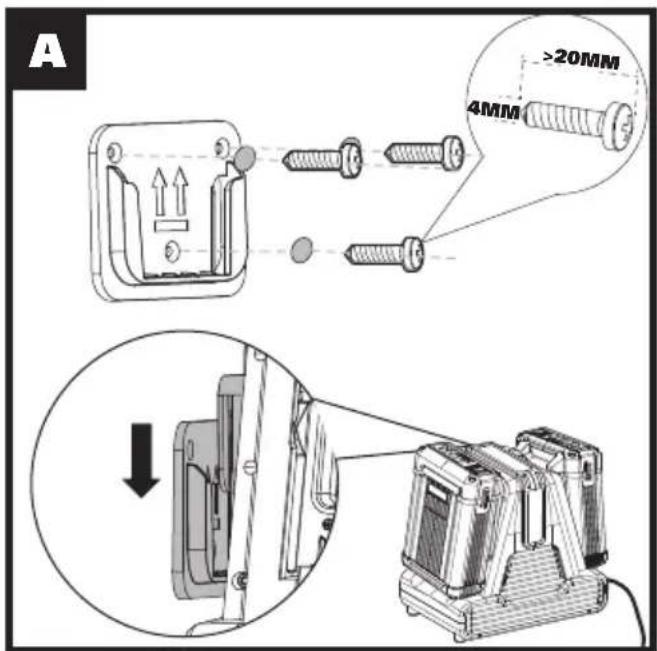
WALL-MOUNT HOLDER
The charger is equipped with the Wall-mount holder for convenient storage. Fix the holder onto the wall tightly enough by screws(not provided) to make sure it can
hold the combined weight of the charger and battery pack. (See.Fig. A)

WARNING: Be careful when insert and pull off the batteries from a hanging charger.
IMPORTANT CHARGING NOTES:
- For a new battery pack or a battery pack that has been in storage for a long period, please recharge it before use. If you want to store the battery pack for a long time, please fully charge the battery pack to ensure maximum battery life.
- Longer life and better performance can be obtained if the battery pack is charged when the air temperature is between 18-24°C. Do not charge the battery pack in air temperatures below 0°C, or above 40°C. This is important as it can prevent serious damage to the battery pack.
- Never freeze your charger or immerse charger in water or any other liquid.
- When the battery pack fails to produce sufficient power on jobs that were previously done easily, please recharge your battery pack, do not continue using it under this condition. You may charge a partially used pack whenever you desire with no adverse effect on the battery pack.
- When charging, it is normal that the charger and battery pack may become gently warm to touch.
- If the battery pack does not charge properly:
a. Check current at power outlet by plugging in another appliance.
b. Plug and unplug to check whether the charger is ok
c. Check whether the battery pack has been damaged
d. Move the charger and battery pack to a location where the surrounding air temperature is approximately 18-24°C.
e. If the charging problem persists, take the tool, battery pack and charger to an authorized service center.
f. Under certain conditions, when the charger is plugged into the power supply, the exposed charging contacts inside the charger can be shorted by foreign material. Foreign materials of a conductive nature such as metallic particles should be kept away from charger cavities. Always unplug the charger from the power supply when there is no battery pack in the charger or before attempting to clean.
PROBLEM SOLUTION
I CANNOT FIT THE BATTERY PACK INTO THE BATTERY CHARGER. WHY?
a) Check if the charger and the battery pack are specifically designed for working together.
b) The battery pack can be inserted into the charger only in one direction. Turn the battery pack around until it can be inserted into the slot, the indicator light should be green and flash when the battery pack is charging.
REASONS FOR DIFFERENT CHARGING TIMES
The charging time can be affected by many reasons which are not defects in your product.
a) If the battery pack is only partly discharged it may be re-charged in less than rated charging time.
b) If the battery pack and ambient temperature are very cold/hot, it may take longer to re-charge. Please find an appropriate environment with proper air temperature to start charging.
c) Batteries of higher Amp Hour rating require more charging time.
MAINTENANCE
Remove the plug from the socket before carrying out any adjustment, servicing or maintenance.
Your battery charger requires no additional lubrication or maintenance. Never use water or chemical cleaners to clean your charger. Wipe clean with a dry cloth. Always store your charger in a dry place.
If the supply cord is damaged, it must be replaced by the manufacturer, its service agent or similarly qualified persons in order to avoid a hazard.
ENVIRONMENTAL PROTECTION
Waste electrical products must not be disposed of with household waste. Please recycle where facilities exist. Check with your local authorities
or retailer for recycling advice.
DECLARATION OF CONFORMITY
We,
Positec Germany GmbH
Postfach 680194, 50704 Cologne, Germany
On behalf of Positec declare that the product
Description Kress Battery Charger
Type KA3706
Complies with the following Directives,
2014/35/EU
2014/30/EU
2011/65/EU&(EU)2015/863
Standards conform to
EN 60335-1
EN IEC 60335-2-29
EN 62233
EN IEC 55014-1
EN IEC 55014-2
EN IEC 61000-3-2
EN 61000-3-3
EN IEC 63000

2024/1/22
Allen Ding
Deputy Chief Engineer Testing & Certification
Positec Technology (China) Co., Ltd
18, Dongwang Road, Suzhou Industrial
Park, Jiangsu 215123, P. R. China
18, Dongwang Road, Suzhou Industrial
Park, Jiangsu 215123, P. R. China
DÉCLARATION DE CONFORMITÉ
Nous,
Positec Germany GmbH
Postfach 680194, 50704 Cologne, Germany
18, Dongwang Road, Suzhou Industrial
Park, Jiangsu 215123, P. R. China
18, Dongwang Road, Suzhou Industrial
Park, Jiangsu 215123, P. R. China
18, Dongwang Road, Suzhou Industrial
Park, Jiangsu 215123, P. R. China
18, Dongwang Road, Suzhou Industrial
Park, Jiangsu 215123, P. R. China
18, Dongwang Road, Suzhou Industrial
Park, Jiangsu 215123, P. R. China
18, Dongwang Road, Suzhou Industrial
Park, Jiangsu 215123, P. R. China
18, Dongwang Road, Suzhou Industrial
Park, Jiangsu 215123, P. R. China
18, Dongwang Road, Suzhou Industrial
Park, Jiangsu 215123, P. R. China
18, Dongwang Road, Suzhou Industrial
Park, Jiangsu 215123, P. R. China
18, Dongwang Road, Suzhou Industrial
Park, Jiangsu 215123, P. R. China
18, Dongwang Road, Suzhou Industrial
Park, Jiangsu 215123, P. R. China
18, Dongwang Road, Suzhou Industrial
Park, Jiangsu 215123, P. R. China
18, Dongwang Road, Suzhou Industrial
Park, Jiangsu 215123, P. R. China
18, Dongwang Road, Suzhou Industrial
Park, Jiangsu 215123, P. R. China
18, Dongwang Road, Suzhou Industrial
Park, Jiangsu 215123, P. R. China

Copyright © 2024 Positec. All Rights Reserved.
AR01548503


- Original instructions PRODUCT SAFETY GENERAL SAFETY WARNINGS
- Save all warnings and instructions for future reference.
- ADDITIONAL SAFETY INSTRUCTIONS FOR YOUR BATTERY CHARGER
- COMPONENT LIST
- CHARGING PROCEDURE
- CHARGING INSTRUCTIONS
- CHARGING YOUR BATTERY PACK
- WARNING:
- HOW TO CHARGE YOUR BATTERY PACK CHARGING PROCEDURE
- DEFECTIVE BATTERY PACKS
- BATTERY TEMPERATURE PROTECTION
- LEAVING THE BATTERY PACK IN THE CHARGER
- WALL-MOUNT HOLDER
- WARNING: Be careful when insert and pull off the batteries from a hanging charger.
- IMPORTANT CHARGING NOTES:
- PROBLEM SOLUTION
- I CANNOT FIT THE BATTERY PACK INTO THE BATTERY CHARGER. WHY?
- REASONS FOR DIFFERENT CHARGING TIMES
- MAINTENANCE
- Remove the plug from the socket before carrying out any adjustment, servicing or maintenance.
- ENVIRONMENTAL PROTECTION
- DECLARATION OF CONFORMITY
- DÉCLARATION DE CONFORMITÉ
Brand : KRESS
Model : KA3706
Category : Battery charger