Clarity Pro - Monitor Alogic - Free user manual and instructions
Find the device manual for free Clarity Pro Alogic in PDF.

| Product type | Monitor |
| Brand | Alogic |
| Model | Clarity Pro |
| Screen size | 27 inches (68.6 cm) |
| Dimensions (with stand) | 624 x 220 x 565 mm (W x D x H) |
| Weight | 7.6 kg |
| Power | AC power adapter 100-240V ~, 50/60 Hz; output DC 19V, 7.89A, 150W max |
| Panel | IPS, QD backlight |
| Native resolution | 3840 x 2160 @ 60Hz (DP/HDMI) |
| Brightness | 400 cd/m² (typ.) |
| Contrast ratio | 1000:1 |
| Colors | 1.07 billion |
| Viewing angle | 178° horizontal / vertical |
| Refresh rate | 60 Hz |
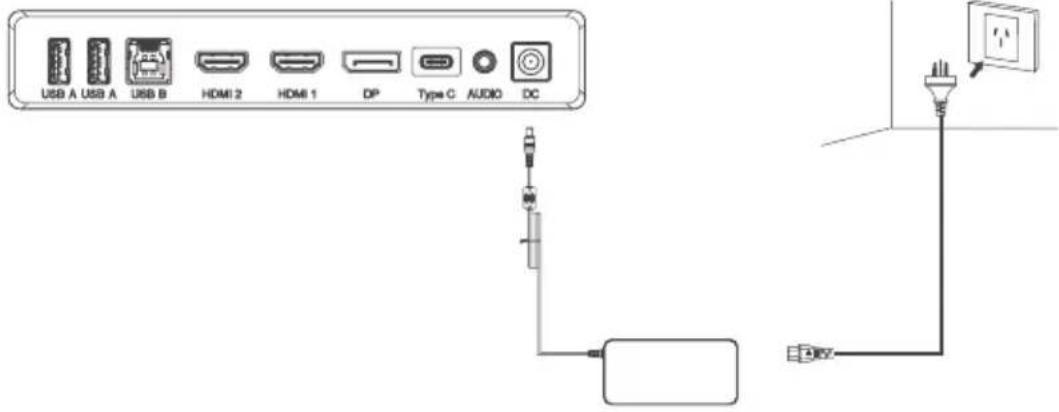
| Connectivity | 1x DisplayPort 1.4, 2x HDMI 2.0, 1x USB-C (PD 65W), 2x USB-A, 1x USB-B, 1x audio output |
| Built-in speakers | 2 x 5W |
| Built-in webcam | 8 MP with 4 microphones |
| Special features | HDR, PIP/PBP, low blue light, flicker-free, gravity sensor |
| VESA mount | 100 x 100 mm |
| Recommended cleaning | Dry microfiber cloth, no chemicals |
| Safety | Use in a dry and ventilated area, do not block vents |
| Repairability | No user-serviceable parts; contact Alogic support |
Frequently Asked Questions - Clarity Pro Alogic
User questions about Clarity Pro Alogic
0 question about this device. Answer the ones you know or ask your own.
Ask a new question about this device
Download the instructions for your Monitor in PDF format for free! Find your manual Clarity Pro - Alogic and take your electronic device back in hand. On this page are published all the documents necessary for the use of your device. Clarity Pro by Alogic.
USER MANUAL Clarity Pro Alogic
natural_image
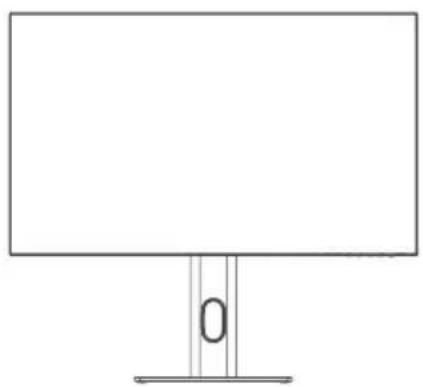
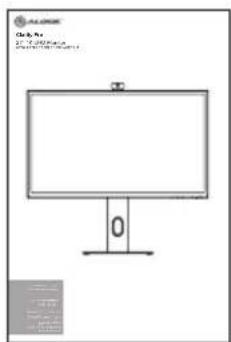
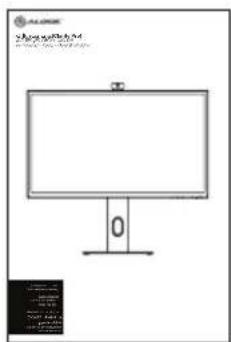
Line drawing of a computer monitor with a stand and top-mounted screen (no text or symbols)Quick Start Guide
natural_image
Technical line drawing of a mechanical assembly with two views (top and side), showing internal components and mounting features (no text or symbols)2
natural_image
Diagram showing a device casing being processed into a housing, with no visible text or symbols.3
natural_image
Simple line drawing of a computer monitor with a stand and vertical lines (no text or symbols)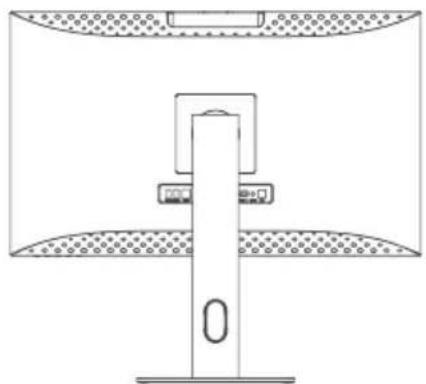
natural_image
Simple line drawing of a mechanical device with a central lever and two curved plates (no text or symbols)
1
natural_image
Technical line drawing of a mechanical assembly with an inset showing a component detail (no text or symbols)2
natural_image
Technical line drawing of a mechanical assembly with two views: top view showing internal components and bottom view showing mounting flanges (no text or symbols)3
natural_image
Technical line drawing of a mechanical housing or enclosure with internal compartments and mounting holes (no text or symbols)
1
text_image
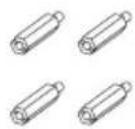
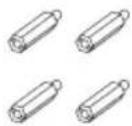
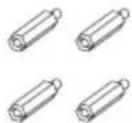
Studs M4 X 43
natural_image
Technical line drawing of a mechanical arm assembly with a fan component and mounting bracket (no text or symbols)2
natural_image
Diagram of a mechanical device with a base and mounting plate, showing force arrows (no text or symbols)
1
text_image
USB A USB A USB B HDMI 2 HDMI 1 DP Type C AUDIO DC2
text_image
USB A USB A USB B HDMI 2 HDMI 1 DP Type C AUDIO DC HDMI™①
natural_image
Empty white rectangle with a thin gray border (no text or symbols)②

natural_image
Technical line drawing of a mechanical bracket or hinge component (no text or symbols)3

natural_image
Simple line drawing of a rectangular frame with mounting holes and a small circular component on top (no text or symbols)4

⑤

natural_image
Line drawing of a U-shaped cable with two connectors (no text or symbols)6
natural_image
Line drawing of a U-shaped cable with two USB port connectors (no text or symbols)7
natural_image
Line drawing of a U-shaped cable with two connectors (no text or symbols)8

⑨

10
natural_image
Simple line drawing of a medical or laboratory device with tubing and connector (no text or symbols)1112

natural_image
Simple line drawing of a monitor with stand (no text or symbols)O

text_image
ASIA Revenue Solar Corporation (ASIA) Report 2015 ASIA 2016 2017 2018 2019 2020 2021 2022 2023 2024 2025 2026 2027 2028 2029 2030 2031 2032 2033 2034 2035 2036 2037 2038 2039 2040 2041 2042 2043 2044 2045 2046 2047 2048 2049 2050 2051 2052 2053 2054 2055 2056 2057 2058 2059 2060 2061 2062 2063 2064 2065 2066 2067 2068 2069 2070 2071 2072 2073 2074 2075 2076 2077 2078 2079 2080 2081 2082 2083 2084 2085 2086 2087 2088 2089 2090 2091 2092 2093 2094 2095 2096 2097 2098 2099 2100Package Contents
| 1 | Clarity 27" UHD 4K Monitor |
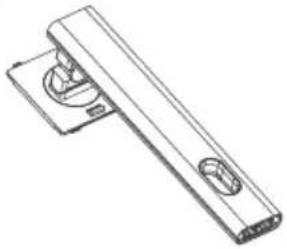
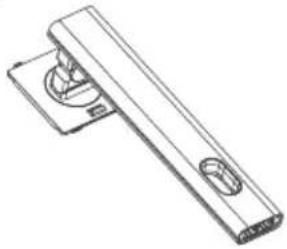
| 2 | Stand Stem |
| 3 | Stand Base |
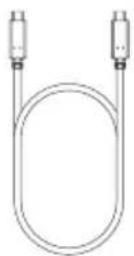
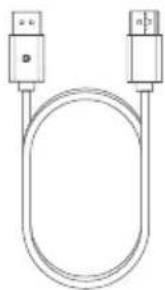
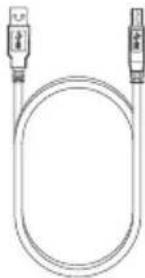
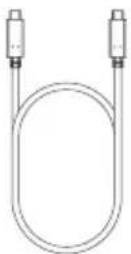
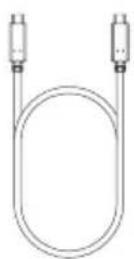
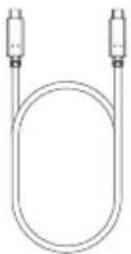
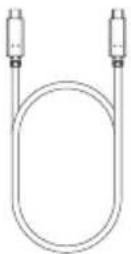
| 4 | 1m USB-C to USB-C Cable (USB3.2 - Gen1) |
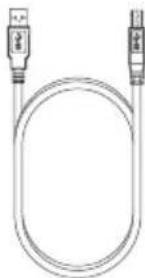
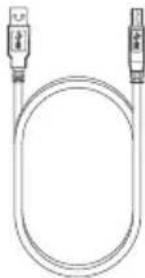
| 5 | 1.5m USB-A to USB-B Cable |
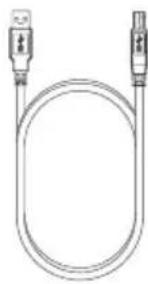
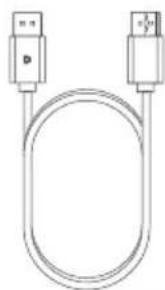
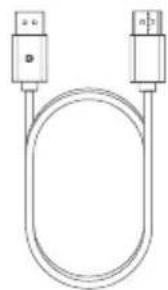
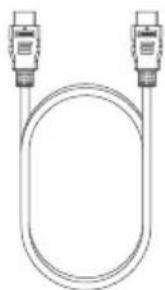
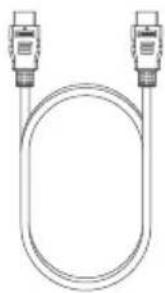
| 6 | 1.5m DisplayPort to DisplayPort Cable |
Specifications
| Model | 27C4KPDW27C4KPDWT |
| Screen Size 27" | |
| Dimensions 624mm x 220mm x 565mm (L x W x H) | |
| Weight 7.6 kgs | |
| Material ABS, Glass, Aluminium | |
| Power Adapter | Input: AC 100-240V~, 50/60HzOutput: DC 19V --- 7.89A, 150W (Max) |
| Aspect Ratio | 16:9 |
| Backlight | QD |
| Brightness | 400cd/m2(Typ.), 350cd/m2(Min.) |
| Panel | IPS |
| Resolution | DP1.4: 3840*2160@60HzHDMI2.0: 3840*2160@60Hz |
| Refresh Rate | 60Hz |
| Viewing Angle 178°(H) / 178°(V) | |
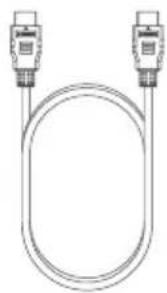
| 7 | 1.5m HDMI to HDMI Cable |
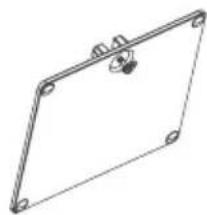
| 8 | Screws x 4 (for Wall Mounting) |
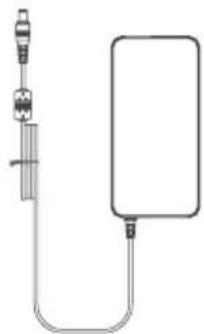
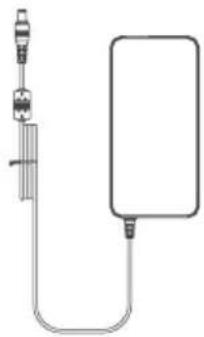
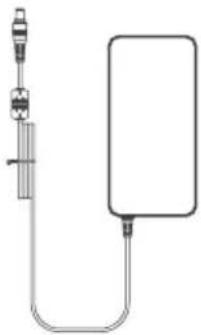
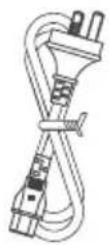
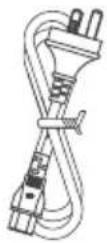
| 9 | Power Cable (AC 100-240V, 50/60Hz) |
| 10 | Power Adapter |
| 11 | User Manual |
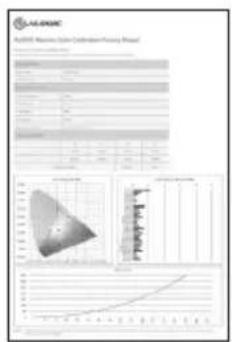
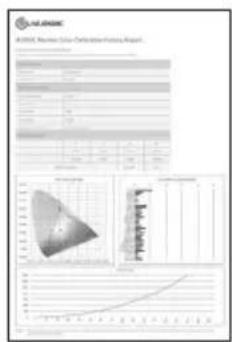
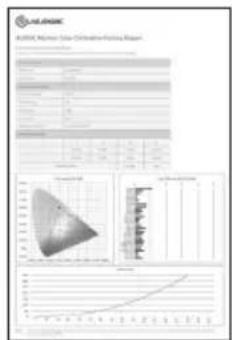
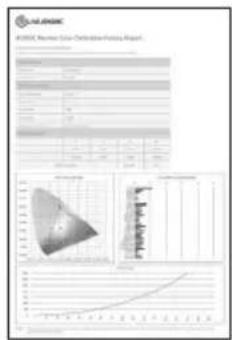
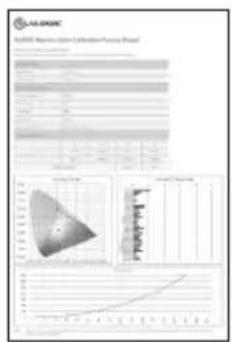
| 12 | Color Delta E Report |
| Contrast Ratio 1000:1 | |
| VESA Mounting 100 x 100mm | |
| Display Colors 1.07B | |
| Interface | 1x DP 1.4, 2x HDMI 2.0, 1x Type-C, 2x USB-A, 1x USB-B, 1x Audio Out |
| Power Input DC 19V | 7.89A |
| Audio | Speakers: 5Wx2Audio Out: Yes |
| Camera 8MP | |
| MIC 4 MIC array | |
| Touch(Optional for 24C4KPDWT) | OGS Touch, supports 10 points |
| Low Blue Light Yes | |
| Flicker Free Yes | |
| USB PD Power Delivery Up to 65W power to host computer | |
text_image
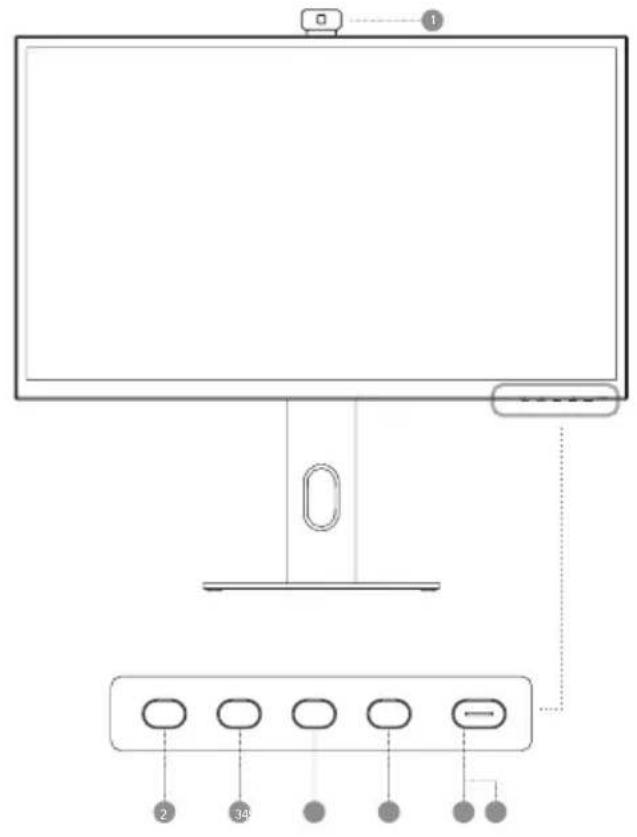
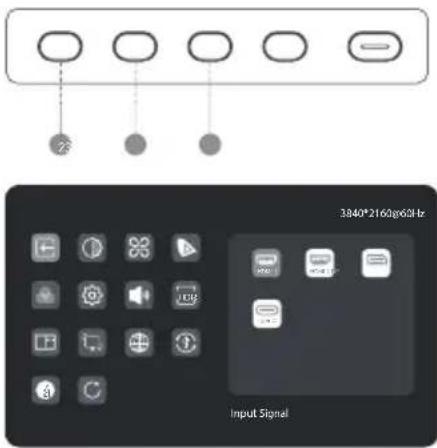
Diagram of a computer monitor with labeled buttons and indicators, showing connections to the screen.
text_image
USB A USB A USB B HDMI 2 HDMI 1 DP Type C AUDIO DC S1Monitor Controls
| 1 | Webcam |
| 2 | Menu: Press to display OSD menu and enter sub-menus |
| 3 | Up/Left: Press to move Up/Left in menus |
| 4 | Down/Right: Press to move Down/Right in menus |
| 5 | Exit: Press to exit OSD menu |
| 6 | Power: Press to turn monitor on/off |
| 7 | LED Indicator and Power Button |
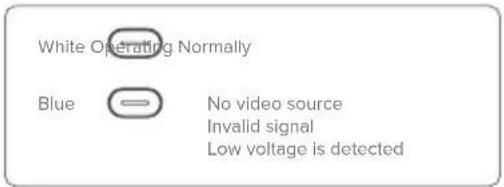
Indicator Light
The indicator light shows steady white to indicate that the power is on and the monitor is operating normally. The steady blue light indicates that there is no video source, an invalid signal, or low voltage is detected. Please make sure that your computer is turned on and all video cables are fully plugged in or connected.
text_image
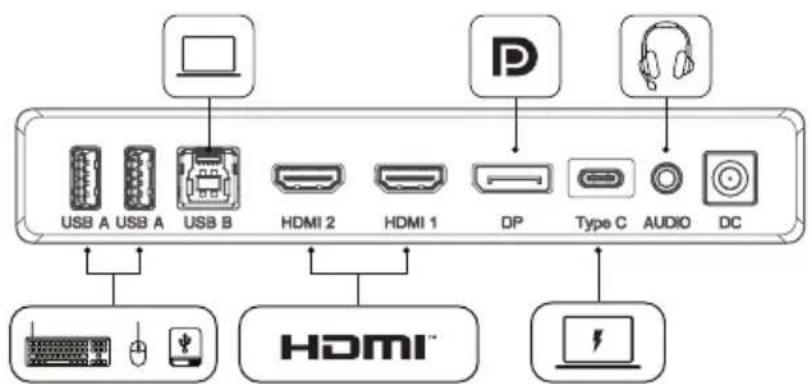
White Operating Normally Blue No video source Invalid signal Low voltage is detectedMonitor Ports
| 8 | USB-A Ports |
| 9 | USB-B Port |
| 10 | HDMI Ports |
| 11 | DisplayPort Port |
| 12 | USB-C Port |
| 13 | Audio Output For Headphones Or Powered Speakers |
| 14 | Power Input |

Unpacking and Assembly
Before unpacking the stand, ensure that the box is placed on a flat, clear surface.
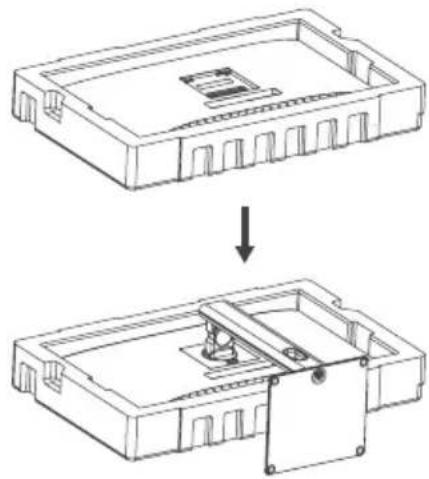
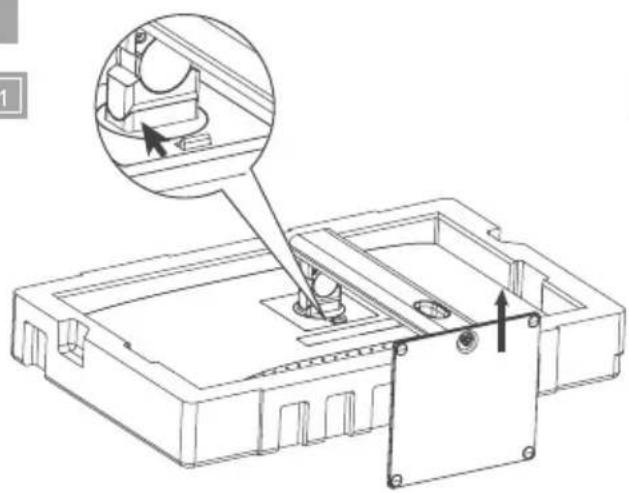
- Open the lid of the monitor box, remove the upper Styrofoam tray containing the stand and place it to one side.
- Open the soft bag that protects the monitor to reveal where the stand attaches to the rear of the monitor. Leave the monitor laying in the Styrofoam tray to avoid damaging it while installing the stand.
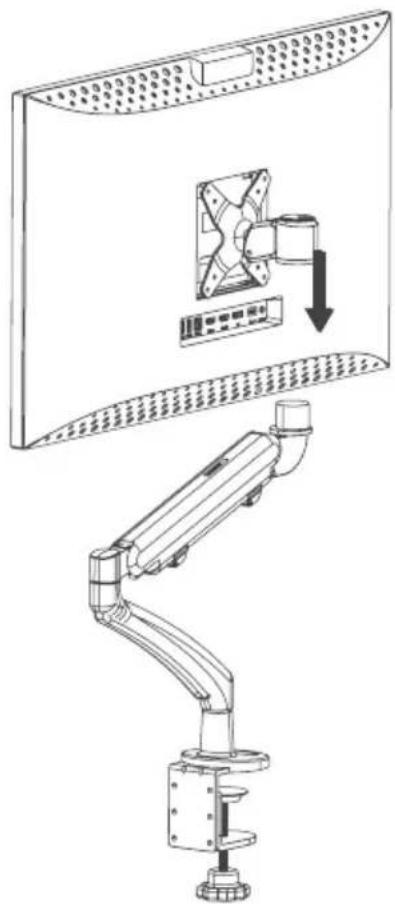
- Insert the top of the monitor stand into the mount on the rear of the monitor and press downwards on the stand until it clicks into place. Do not use excessive force to ensure that the monitor is not damaged.
- Carefully lift the monitor out of the Styrofoam tray and stand it on the desk ready for use.

Warning: Do not put pressure on the display area of the monitor while assembling or moving the monitor. The display screen is fragile - applying force to it will break the display.
Keep the monitor box and Styrofoam packaging for future transportation and storage of the monitor.

Warning: Ensure the stand has clicked into place before lifting the monitor.

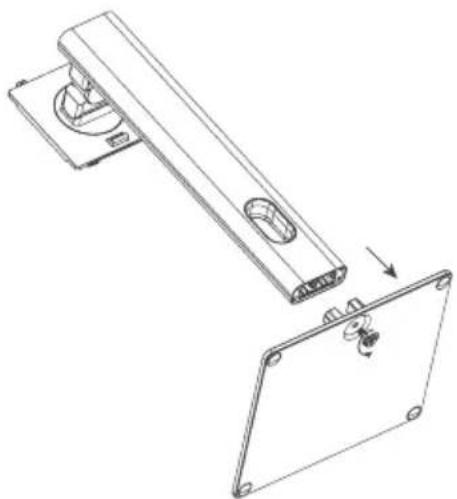
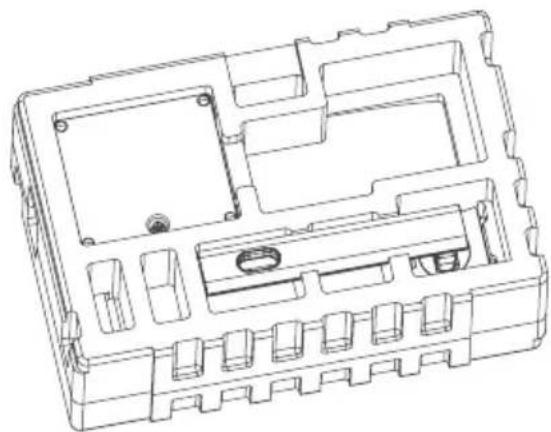
Mounting Options
The monitor has 100 x 100mm spaced mounting holes to allow it to be mounted to any compatible 100mm VESA standard monitor arm or wall mount accessory (not included).
The mounting holes are recessed in the region on the back of the monitor where the stand attaches and are hidden by the stand when it is installed. VESA mounts cannot be used with the monitor while the stand is attached.
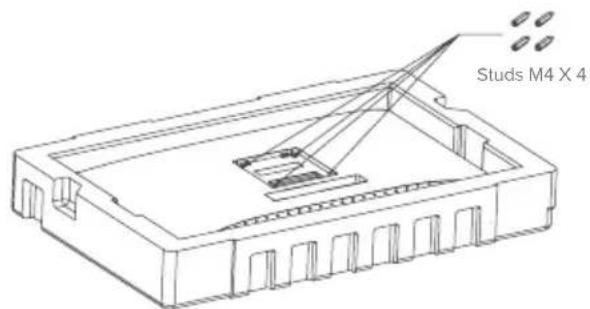
M4 threaded mounting spacers are included with the monitor which must be used when mounting the monitor to a monitor arm or other mount. Mount the monitor to a VESA mounting accessory as follows.
- Lay the monitor face down in its Styrofoam packaging tray.

Do not attempt to lay the screen on any uneven surface including soft surfaces such as carpet and seating while attaching the mounting accessory - damage to the screen may occur.
-
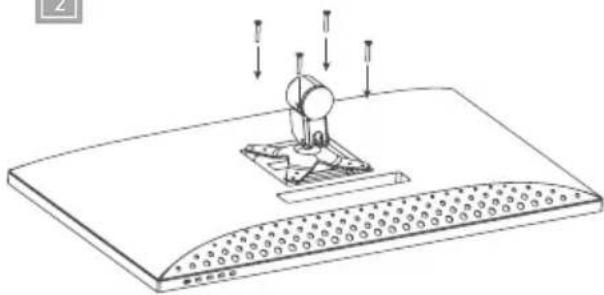
Locate the mounting spacers in the accessory bag that comes with the monitor. With the monitor laying in its Styrofoam tray, screw in the four spacers into the holes in the recess where the stand attaches. Do not over tighten - tightening the spacers too much may cause damage to the monitor.
-
Screw the VESA mounting accessory into the mounting spacers.

Do not apply pressure to the rear of the monitor while fitting the mounting accessory - downwards pressure on the screen may crack or otherwise damage it.
- Carefully lift the monitor and mounting accessory out of the tray and place into position.
Ensure there is 50mm clearance around all sides of the monitor when it is installed to ensure that is does not overheat.
Disassembly and Storage
Before disassembling the monitor, ensure that the box is placed on a flat, clear surface.
- Open the lid of the monitor box, remove the upper Styrofoam tray and place it to one side.
- Place the soft bag over the monitor and lay it in face down in the Styrofoam tray in the box. Ensure that the bag sits flat against the screen of the monitor and is not folded over itself or bunched up. Excessive bunching of the bag under the monitor screen may damage the screen when it is laid in the box.
- Open the bag to reveal where the monitor attaches to the stand. Push the monitor stand latch toward the top edge of the monitor and lift the base of the stand upwards to release the stand from the monitor.
- Close the bag and fold neatly over the rear of the monitor. Place the upper Styrofoam tray on top of the monitor in the box.
- Undo the screw, separating the base from the stand and place both pieces in the upper foam packaging tray.

Connecting the Monitor
Connecting the Power Cable
Connect the included power cable to the power connector, and then plug the other end into a wall outlet.
Connecting a Video Source
The monitor includes four video inputs which can be connected simultaneously. To connect a computer or other source device, plug one of the included HDMI, DisplayPort or USB-C cables into the computer and into a corresponding port on the monitor.
Notes:
- The USB-C connection will provide up to 65W of power to computers which support USB Power Delivery (USB PD). This allows the computer to display video on the monitor while being charged over a single cable. As a result, the USB-C connection type is the best option if your computer has this capability.
- Depending on the capabilities of the computer it may not be able to provide 4K at a full 60Hz refresh rate if connected to the monitor using HDMI. The USB-C or DisplayPort connection should be used as a first preference if the computer supports these connection types.
- Not all USB-C ports on computers support video output and/or charging using USB PD. If your computer does not show video on the monitor or start charging when connected to the monitor using USB-C, check that the USB-C port on the computer supports DisplayPort Alternate Mode video output and USB PD charging.
- Not all USB-C cables support video transfer or charging above 60W. It is recommended that you use the USB-C cable supplied with the monitor to avoid potential issues with cables that have been obtained separately.
Audio Output
The display features inbuilt speakers as well as an audio output jack to allow headphones and external speakers to be connected. When an external audio device is connected, the display's on-board speakers will be disabled.

Connecting Audio Devices Connecting USB Devices
The audio port on the display only supports output devices such as headphones and speakers. It is not possible to connect microphones or other input devices to this port. Headphones with built in microphones can be connected to this port, however the microphone will not function.
To send audio from your computer to the display speakers or connected audio device, select "27C4KPDW" as the audio destination in your computer's sound settings.
The display includes two USB A ports that can be used to attach USB peripherals such as a keyboard, mouse or webcam to the computer.
In order for the computer to see devices attached to these ports, the computer must be connected to either (or both) of the USB-C and/or USB-B ports. Notes:
- If the computer is only connected to the USB-C port on the display the ports will operate at USB 2.0 speeds because video traffic shares the USB-C cable with the USB data. This speed is sufficient for most peripherals such as keyboards, mice and webcams.
- If the computer is connected to the USB-B port on the display, the ports will operate at USB 3.0 speeds. This is preferable if using high speed storage devices such as external hard drives and USB flash drives.
OSD Menu
The OSD (On-Screen Display) lets you adjust the settings on your monitor.
- Press to enter the OSD menu.
-
Press 3 or 4 to browse functions.
-
Highlight the desired function, then press to enter the sub-menu.
- Press or to browse sub-menus, then press to highlight the desired function.
-
Press on to highlight an option, then press to confirm the settings and exit the current screen.
-
Press 1 or 5 to adjust the setting, then press to confirm your changes and exit.
text_image
23 3840*2160g65Hz Input SignalInput Signal
Switches between video inputs.
Picture Settings
Adjust the monitor's Saturation, Sharpness and Gamma.
HDR
Enables the monitor's HDR (High Dynamic Range) mode, for more vivid colours.
Not all devices and programs support HDR input, and may look too bright with this enabled.
Rotation Sensor
When enabled, Clarity Pro will automatically switch between portrait and landscape modes when you rotate the screen.
This is not supported on all computers and configurations. macOS users may have to adjust the screen manually using DisplayLink for portrait mode.
Brightness/Contrast
Adjust the Brightness, Shadow Balance and Contrast.
Colour Temperature
Adjust your monitor's colour temperature between Warm, Cool and User Defined.
Picture in Picture (PIP)
Picture in Picture mode allows Clarity Pro to display video from two sources at once.
Use this menu to select the sources and choose how you would like them to be displayed.
Language
Set OSD language.
Audio
You can mute or adjust the volume of the monitor's speakers.
Video Presets
Choose between picture presets, including Standard, Reading, Movie, Night, Comfort, SRGB and Adobe modes.
OSD Settings
Change the transparency of the OSD menu and how long it stays on the screen.
USB Options
You can upgrade your monitor's firmware via USB, prevent your computer from powering USB devices while in sleep mode, and switch which USB port (C or B) Clarity Pro is using for non-video data.
Reset
Reset your monitor to factory default settings.
Note:
When picture-in-picture is enabled, the rotation sensor will be disabled.
When the rotation sensor is turned on, rotating the monitor will disable picture-in-picture.
Setting up the Webcam
- To use the in-built webcam, the monitor must be connected to your computer via either its USB-C or USB-B port.
- After connecting, navigate to "USB Switch" in the "USB" sub-menu of your monitor's option menu and select either "TYPE-C" or "TYPE-B" depending on which cable you've connected.
- Open any program which uses the webcam, and it will automatically pop-out of the monitor.
a. You may have to switch from your laptop's inbuilt webcam to "27C4KPDW".
Adjusting the Webcam
- Use the scroll wheel on the rear of the webcam to adjust the framing.
- To change picture settings such as brightness and contrast, use your computer's settings menu:
a. Windows: Settings -> Bluetooth & devices -> Cameras -> 27C4KPDW
b. macOS: Picture settings can only be adjusted via third-party applications.
c. ChromeOS: Picture settings can only be adjusted on a per-application basis.
Retracting the Webcam
The webcam will automatically retract when not being used by any program.
a. Do not try to physically push the webcam back into the monitor, you may damage it.
b. If webcam does not retract, try unplugging it and plugging it back in.
| Symptom Solution | |
| My computer isn't recognising my webcam | Try restarting your computerNavigate to USB Options -> Switch Active USB in Clarity Pro's OSD and ensure the selected USB type is the one you're connecting with.Try unplugging/disconnecting/disabling other webcams. |
| My webcam isn't sliding out from my monitor | Check that the webcam named "27C4KPDW" is selected in your computer's settings menu.Restart the application you want to use the webcam with.Ensure you have the correct webcam selected in your video software. |
| My webcam isn't retracting into my monitor | Try unplugging your computer from the monitor.Try opening and closing an application which uses the webcam. |
Using the Touchscreen (27C4KPDWT Only)
- To use the touchscreen, the monitor must be connected to your computer via either its USB-C or USB-B port.
- After connecting, navigate to "USB Switch" in the "USB" sub-menu of your monitor's option menu and select either "TYPE-C" or "TYPE-B" depending on which cable you've connected.
- The touchscreen should be automatically recognised by your computer. If not, consult our troubleshooting section below
| Symptom Solution | |
| My computer isn't reacting to my touch | • Unplug your USB cable from your computer and plug it back in.• Check you've selected the correct USB cable in your monitor's settings.• Restart your computer• Contact ALOGIC support if the above do not resolve your issue. |
Troubleshooting
| Symptom Solution | |
| The power button does not light up when pressed | · Verify that the mains power cord is securely attached to the power adapter, is connected to a power outlet and the power outlet is switched on.· Verify that the power adapter is securely connected to the rear of the monitor. |
| The power button lights up, but nothing is displayed on the screen | · Disconnect the power adapter from the Monitor and reconnect in 2-3 minutes.· Press and hold the power button for 5 seconds to reset the monitor settings.· Contact ALOGIC Support if the points above do not work. |
| Monitor does not show HDMI or DisplayPort video from the computer | · Check that an appropriate video cable is connected between the computer and display and the correct input is selected on the monitor.· Check your computer's settings to verify that it is detecting the monitor and is outputting video to it. |
| Monitor does not show USB-C video from the computer | · Verify that you are using the USB-C cable that came with the monitor.· Check your computer's settings to verify that it is detecting the monitor and is outputting video to it.· Check that the USB-C port on your computer that the monitor is connected to supports video output using DisplayPort Alternate Mode (DP Alt. Mode). |
| Laptop computer does not charge when connected to the monitor using USB-C | · Verify that the USB-C port on your computer supports charging using the USB Power Delivery (USB-PD) standard.· Some laptops require more than 65W of power to charge. These tend to be high end graphics and gaming focused computers.· If necessary, connect the power adapter that came with the computer to your laptop in addition to the USB-C cable that is connected to the monitor. |
Warnings
- Only use the monitor indoors in dry locations. Do not use the monitor in damp places or near water sources such as in bathrooms and kitchens.
- Store and use in a cool, dry, ventilated place. Do not place close to heat sources or in direct sunlight.
- Ensure that the equipment is installed on a flat, stable surface. If placed on an uneven or unsteady surface the monitor may fall and be damaged, cause personal injury or damage other items.
- It is normal for the device to be slightly warm to touch during operation. Provide adequate ventilation and do not cover the device while in operation.
- Do not cover or block the ventilation holes on the rear cover of the monitor. Do not use on a bed, sofa, blanket or similar where the monitor may fall over or become covered.
- The acceptable electrical supply voltage and frequency ranges are indicated on the label on the rear cover of the monitor. Do not connect the monitor to power sources which fall outside these limits.
- If the device will not be used for weeks or months, it is recommended that the power be disconnected to save energy and protect the equipment from damage caused by lightning strike induced power surges if a thunderstorm occurs.
- Do not insert foreign objects into the ventilation holes in the cover of the monitor as damage, fire or electric shock could occur.
- The monitor contains no user serviceable parts. Disassembling or attempting to repair this product yourself will void the warranty and expose you to the risk of electric shock. If you suspect a fault with the device, please contact the seller you purchased the product from or ALOGIC after sales support for assistance.
- Do not use the product if it becomes damaged as this could pose a risk of causing damage to connected devices and expose you to electric shock.
- Do not crush, cut, pull or twist the mains power cord excessively. If the power cord becomes damaged do not use the product until a replacement power cord can be obtained. Using a damaged power cord may result in electric shock.
- Do not spray liquids on the monitor. Do not use chemicals such as solvents on the surface of the monitor. Clean the monitor only by wiping with a clean, dry, soft, scratch-avoiding microfibre cloth.
- Disassembling or failing to properly use and care for your device will void the warranty on the product.
- ALOGIC bears no responsibility for damage to the device or incidental damages arising from improper use or lack of care and is not liable for repair/replacement of the device or other damages in these circumstances.
①
natural_image
Empty white rectangle with a thin gray border (no text or symbols)②
natural_image
Technical line drawing of a mechanical bracket or hinge component (no text or symbols)③

natural_image
Pure technical line drawing of a parallelogram frame with mounting holes and a central knob (no text or symbols)4
⑤
natural_image
Line drawing of a U-shaped cable with two connectors (no text or symbols)6
natural_image
Line drawing of a U-shaped cable with two connectors (no text or symbols)7

natural_image
Line drawing of two U-shaped connectors with ports (no text or symbols)8
⑨

10
natural_image
Simple line drawing of a medical or laboratory device with tubing and a rectangular block (no text or symbols)1112
natural_image
Line drawing of a flat-screen monitor with stand and base (no text or symbols)O
text_image
AUTOMO MUNICOLI COLDEN PXXX PRAY 2017 1984 1985 1986 1987 1988 1989 1990 1991 1992 1993 1994 1995 1996 1997 1998 1999 2000 2001 2002 2003 2004 2005 2006 2007 2008 2009 2010 2011 2012 2013 2014 2015 2016 2017 2018 2019 2020 2021 2022 2023 2024 2025 2026 2027 2028 2029 2030 2031 2032 2033 2034 2035 2036 2037 2038 2039 2040 2041 2042 2043 2044 2045 2046 2047 2048 2049 2050 2051 2052 2053 2054 2055 2056 2057 2058 2059 2060 2061 2062 2063 2064 2065 2066 2067 2068 2069 2070 2071 2072 2073 2074 2075 2076 2077 2078 2079 2080 2081 2082 2083 2084 2085 2086 2087 2088 2089 2090 2091 2092 2093 2094 2095 2096 2097 2098 2099 2100text_image
Diagram of a computer monitor with labeled ports and connectors, showing internal layout and connection points.
text_image
USB A USB A USB B HDMI 2 HDMI 1 DP Type C AUDIO DC S1natural_image
Empty white rectangle with a thin gray border (no text or symbols)②
natural_image
Technical line drawing of a mechanical bracket or hinge component (no text or symbols)3

natural_image
Simple line drawing of a rectangular frame with mounting holes and a small circular component on top (no text or symbols)4

⑤
natural_image
Line drawing of a U-shaped cable with two connectors (no text or symbols)6

natural_image
Line drawing of a U-shaped cable with two USB port connectors (no text or symbols)7

natural_image
Line drawing of a U-shaped cable with two connectors (no text or symbols)8
⑨

10

natural_image
Simple line drawing of a medical or laboratory device with tubing and connector (no text or symbols)1112
natural_image
Simple line drawing of a monitor with stand (no text or symbols)O
text_image
ASIA Revenue Solar Corporation (ASIA) Report 2015 ASIA 2016 2017 2018 2019 2020 2021 2022 2023 2024 2025 2026 2027 2028 2029 2030 2031 2032 2033 2034 2035 2036 2037 2038 2039 2040 2041 2042 2043 2044 2045 2046 2047 2048 2049 2050 2051 2052 2053 2054 2055 2056 2057 2058 2059 2060 2061 2062 2063 2064 2065 2066 2067 2068 2069 2070 2071 2072 2073 2074 2075 2076 2077 2078 2079 2080 2081 2082 2083 2084 2085 2086 2087 2088 2089 2090 2091 2092 2093 2094 2095 2096 2097 2098 2099 2100text_image
Diagram of a computer monitor with labeled buttons and indicators, showing connections to the screen.
text_image
USB A USB A USB B HDMI 2 HDMI 1 DP Type C AUDIO DC S1Controles del monitor
natural_image
Technical line drawing of a mechanical bracket or clamp assembly (no text or symbols)③

natural_image
Pure technical line drawing of a rectangular frame with mounting holes and a small circular component on top (no text or symbols)4
⑤
natural_image
Line drawing of a U-shaped cable with two connectors (no text or symbols)6
natural_image
Line drawing of a U-shaped cable with two connectors (no text or symbols)7

natural_image
Line drawing of a U-shaped cable with two connectors (no text or symbols)8
9

10
natural_image
Simple line drawing of a medical or laboratory device with tubing and connector (no text or symbols)1112
natural_image
Simple line drawing of a blank rectangular board with a vertical stand (no text or symbols)O
text_image
ASL-2006 ASL-2006: Linear Solar Chemicals Reporting Panel 1.1.1 1.1.2 1.1.3 1.1.4 1.1.5 1.1.6 1.1.7 1.1.8 1.1.9 1.2.0 1.2.1 1.2.2 1.2.3 1.2.4 1.2.5 1.2.6 1.2.7 1.2.8 1.2.9 1.3.0 1.3.1 1.3.2 1.3.3 1.3.4 1.3.5 1.3.6 1.3.7 1.3.8 1.3.9 1.4.0 1.4.1 1.4.2 1.4.3 1.4.4 1.4.5 1.4.6 1.4.7 1.4.8 1.4.9 1.5.0 1.5.1 1.5.2 1.5.3 1.5.4 1.5.5 1.5.6 1.5.7 1.5.8 1.5.9 1.6.0 1.6.1 1.6.2 1.6.3 1.6.4 1.6.5 1.6.6 1.6.7 1.6.8 1.6.9 1.7.0 1.7.1 1.7.2 1.7.3 1.7.4 1.7.5 1.7.6 1.7.7 1.7.8 1.7.9 1.8.0 1.8.1 1.8.2 1.8.3 1.8.4 1.8.5 1.8.6 1.8.7 1.8.8 1.8.9 1.9.0 1.9.1 1.9.2 1.9.3 1.9.4 1.9.5 1.9.6 1.9.7 1.9.8 1.9.9 2006/06/06text_image
Diagram of a computer monitor with labeled buttons and indicators, showing connections to the screen.
text_image
USB A USB A USB B HDMI 2 HDMI 1 DP Type C AUDIO DC S1natural_image
Empty white rectangle with a thin gray border (no text or symbols)②

natural_image
Technical line drawing of a mechanical bracket or hinge component (no text or symbols)3

natural_image
Simple line drawing of a rectangular frame with mounting holes and a small circular component on top (no text or symbols)4

⑤

natural_image
Pure diagram of a U-shaped cable with two connectors (no text or symbols)6

natural_image
Line drawing of a U-shaped cable with two USB port connectors (no text or symbols)7

natural_image
Line drawing of a U-shaped cable with two connectors (no text or symbols)8

⑨

10
natural_image
Simple line drawing of a medical or laboratory device with tubing and connector (no text or symbols)1112

natural_image
Simple line drawing of a monitor with stand and base (no text or symbols)O
text_image
AstraZen Software Market Data Distribution Analysis Report Volume 1000000000000000000000000000000000000000000000000000000000000000000000000000000000000000000000000 AstraZen Software Market Data Price Chart Stock Volume 12.5% Volume 13.5% Volume 14.5% Volume 15.5% Volume 16.5% Volume 17.5% Volume 18.5% Volume 19.5% Volume 20.5% Volume 21.5% Volume 22.5% Volume 23.5% Volume 24.5% Volume 25.5% Volume 26.5% Volume 27.5% Volume 28.5% Volume 29.5% Volume 30.5% Volume 31.5% Volume 32.5% Volume 33.5% Volume 34.5% Volume 35.5% Volume 36.5% Volume 37.5% Volume 38.5% Volume 39.5% Volume 40.5% Volume 41.5% Volume 42.5% Volume 43.5% Volume 44.5% Volume 45.5% Volume 46.5% Volume 47.5% Volume 48.5% Volume 49.5% Volume 50.5% Volume 51.5% Volume 52.5% Volume 53.5% Volume 54.5% Volume 55.5% Volume 56.5% Volume 57.5% Volume 58.5% Volume 59.5% Volume 60.5% Volume 61.5% Volume 62.5% Volume 63.5% Volume 64.5% Volume 65.5% Volume 66.5% Volume 67.5% Volume 68.5% Volume 69.5% Volume 70.5% Volume 71.5% Volume 72.5% Volume 73.5% Volume 74.5% Volume 75.5% Volume 76.5% Volume 77.5% Volume 78.5% Volume 79.5% Volume 80.5% Volume 81.5% Volume 82.5% Volume 83.5% Volume 84.5% Volume 85.5% Volume 86.5% Volume 87.5% Volume 88.5% Volume 89.5% Volume 90.5% Volume 91.5% Volume 92.5% Volume 93.5% Volume 94.5% Volume 95.5% Volume 96.5% Volume 97.5% Volume 98.5% Volume 99.5% Volume 100.0%text_image
Diagram of a computer monitor with labeled buttons and indicators, showing connections to the screen.
text_image
USB A USB A USB B HDMI 2 HDMI 1 DP Type C AUDIO DC B1Controlli del monitor
natural_image
Empty white rectangle with a thin gray border (no text or symbols)②

natural_image
Technical line drawing of a mechanical bracket or hinge component (no text or symbols)③

natural_image
Pure technical line drawing of a parallelogram frame with mounting holes and a central knob (no text or symbols)4
⑤

natural_image
Line drawing of a U-shaped cable with two connectors (no text or symbols)6
natural_image
Line drawing of a U-shaped cable with two USB connectors (no text or symbols)7
natural_image
Line drawing of a U-shaped cable with two connectors (no text or symbols)8

9
10

natural_image
Pure diagram of a medical or laboratory setup with tubing and a rectangular device (no text or symbols)1112
natural_image
Simple line drawing of a blank rectangular monitor with a stand at the bottom (no text or symbols)O
text_image
SAGARIC AUGUSTE RESEARCH SYSTEM CHEMISTRY PRESSO PLAN 1.2.10 2.2.10 3.2.10 4.2.10 5.2.10 6.2.10 7.2.10 8.2.10 9.2.10 10.2.10 11.2.10 12.2.10 13.2.10 14.2.10 15.2.10 16.2.10 17.2.10 18.2.10 19.2.10 20.2.10 21.2.10 22.2.10 23.2.10 24.2.10 25.2.10 26.2.10 27.2.10 28.2.10 29.2.10 30.2.10 31.2.10 32.2.10 33.2.10 34.2.10 35.2.10 36.2.10 37.2.10 38.2.10 39.2.10 40.2.10 41.2.10 42.2.10 43.2.10 44.2.10 45.2.10 46.2.10 47.2.10 48.2.10 49.2.10 50.2.10 51.2.10 52.2.10 53.2.10 54.2.10 55.2.10 56.2.10 57.2.10 58.2.10 59.2.10 60.2.10 61.2.10 62.2.10 63.2.10 64.2.10 65.2.10 66.2.10 67.2.10 68.2.10 69.2.10 70.2.10 71.2.10 72.2.10 73.2.10 74.2.10 75.2.10 76.2.10 77.2.10 78.2.10 79.2.10 80.2.10 81.2.10 82.2.10 83.2.10 84.2.10 85.2.10 86.2.10 87.2.10 88.2.10 89.2.10 90.2.10 91.2.10 92.2.10 93.2.10 94.2.10 95.2.10 96.2.10 97.2.10 98.2.10 99.2.10パッケージ内容
text_image
Diagram of a computer monitor with labeled buttons and indicators, showing connections to the screen.
text_image
USB A USB A USB B HDMI 2 HDMI 1 DP Type C AUDIO DC B1モニターコントロール
natural_image
Empty white rectangle with a thin gray border (no text or symbols)②

natural_image
Technical line drawing of a mechanical bracket or hinge component (no text or symbols)3
natural_image
Pure technical line drawing of a rectangular frame with mounting holes and a small circular component on top (no text or symbols)4
⑤

natural_image
Line drawing of a U-shaped cable with two connectors (no text or symbols)6

natural_image
Line drawing of a U-shaped cable with two USB port connectors (no text or symbols)7
natural_image
Line drawing of a U-shaped cable with two connectors (no text or symbols)8
⑨
10

natural_image
Simple line drawing of a medical or laboratory device with tubing and connector (no text or symbols)1112
natural_image
Simple line drawing of a monitor with a stand and a small inset image on the right (no text or symbols)O
text_image
AOSK, Revenue Solar Connection Pricing Report AOSK, 2015 AOSK, 2016 AOSK, 2017 AOSK, 2018 AOSK, 2019 AOSK, 2020 AOSK, 2021 AOSK, 2022 AOSK, 2023 AOSK, 2024 AOSK, 2025 AOSK, 2026 AOSK, 2027 AOSK, 2028 AOSK, 2029 AOSK, 2030 AOSK, 2031 AOSK, 2032 AOSK, 2033 AOSK, 2034 AOSK, 2035 AOSK, 2036 AOSK, 2037 AOSK, 2038 AOSK, 2039 AOSK, 2040 AOSK, 2041 AOSK, 2042 AOSK, 2043 AOSK, 2044 AOSK, 2045 AOSK, 2046 AOSK, 2047 AOSK, 2048 AOSK, 2049 AOSK, 2050 AOSK, 2051 AOSK, 2052 AOSK, 2053 AOSK, 2054 AOSK, 2055 AOSK, 2056 AOSK, 2057 AOSK, 2058 AOSK, 2059 AOSK, 2060 AOSK, 2061 AOSK, 2062 AOSK, 2063 AOSK, 2064 AOSK, 2065 AOSK, 2066 AOSK, 2067 AOSK, 2068 AOSK, 2069 AOSK, 2070 AOSK, 2071 AOSK, 2072 AOSK, 2073 AOSK, 2074 AOSK, 2075 AOSK, 2076 AOSK, 2077 AOSK, 2078 AOSK, 2079 AOSK, 2080 AOSK, 2081 AOSK, 2082 AOSK, 2083 AOSK, 2084 AOSK, 2085 AOSK, 2086 AOSK, 2087 AOSK, 2088 AOSK, 2089 AOSK, 2090 AOSK, 2091 AOSK, 2092 AOSK, 2093 AOSK, 2094 AOSK, 2095 AOSK, 2096 AOSK, 2097 AOSK, 2098 AOSK, 2099 AOSK, 2100محتويات الجزمة
| (Hydro) (HDMI) (HDMI) (HDMI) (HDMI) (HDMI) (HDMI) (HDMI) (HDMI) (HDMI) (HDMI) (HDMI) (HDMI) (HDMI) (HDMI) (HDMI) (HDMI) (HDMI) (HDMI) (HDMI) (HDMI) (HDMI) (HDMI) (HDMI) (HDMI) (HDMI) (HDM) (HDMI) (HDMI) (HDMI) (HDMI) (HDMI) (HDMI) (HDMI) (HDMI) (HDMI) (HDMI) (HDMI) (HDMI) (HDMI) (HDMI) (HDMI) (HDMI) (HDMI) (HDMI) (HDMI) (HDMI) (HDMI) (HDMI) (HDMI) (HDMI) (H |
| 1000:01:00 | نسبة التباين |
| م 100 × 100 (VESA) الم Contemporary (B) | الثبيت من نوع (1.4) (1.4) (1.4) (1.4) (1.4) (1.4) (1.4) (1.4) (1.4) (1.4) (1.4) (1.4) (1.4) (1.4) (1.4) (1.4) (1.4) (1.4) (1.4) (1.4) (1.4, DP) (1.4) (1.4) (1.4) (1.4) (1.4) (1.4) (1.4) (1.4) (1.4) (1.4) (1.4) (1.4) (1.4) (1.4) (1.4) (1.4) (1.4) (1.4) (1.4) (1.5) (1.5) (1.5) (1.5) (1.5) (1.5) (1.5) (1.5) (1.5) (1.5) (1.5) (1.5) (1.5) (1.5) (1.5) (1.5) (1.5) (1.5) (1.5) (1.5) (1.6) (1.6) (1.6) (1.6) (1.6) (1.6) (1.6) (1.6) (1.6) (1.6) (1.6) (1.6) (1.6) (1.6) (1.6) (1.6) (1.6) (1.6) (1.6) (1.6) (1.7) (1.7) (1.7) (1.7) (1.7) (1.7) (1.7) (1.7) (1.7) (1.7) (1.7) (1.7) (1.7) (1.7) (1.7) (1.7) (1.7) (1.7) (1.8) (1.8) (1.8) (1.8) (1.8) (1.8) (1.8) (1.8) (1.8) (1.8) (1.8) (1.8) (1.8) (1.8) (1.8) (1.8) (1.8) (1.8) (1.8) (1.9) (1.9) (1.9) (1.9) (1.9) (1.9) (1.9) (1.9) (1.9) (1.9) (1.9) (1.9) (1.9) (1.9) (1.9) (1.9) (1.9) (1.9) (1.9) (1.9) (1.1) (1.1) (1.1) (1.1) (1.1) (1.1) (1.1) (1.1) (1.1) (1.1) (1.1) (1.1) (1.1) (1.1) (1.1) (1.1) (1.1) (1.1) (1.1) (1.2) (1.2) (1.2) (1.2) (1.2) (1.2) (1.2) (1.2) (1.2) (1.2) (1.2) (1.2) (1.2) (1.2) (1.2) (1.2) (1.2) (1.2) (1.2) (1.2) (1.3) (1.3) (1.3) (1.3) (1.3) (1.3) (1.3) (1.3) (1.3) (1.3) (1.3) (1.3) (1.3) (1.3) (1.3) (1.3) (1.3) (1.3) (1.3) (1.3) (1.4) (1.4) (1.4) (1.4) (1.4) (1.4) (1.4) (1.4) (1.4) (1.4) (1.4) (1.4) (1.4) (1.4) (1.4) (1.4) (1.4) (1.4) (1.4) (1.6) (1.6) (1.6) (1.6) (1.6) (1.6) (1.6) (1.6) (1.6) (1.6) (1.6) (1.6) (1.6) (1.6) (1.6) (1.6) (1.6) (1.6) (1.6) (1.8) (1.8) (1.8) (1.8) (1.8) (1.8) (1.8) (1.8) (1.8) (1.8) (1.8) (1.8) (1.8) (1.8) (1.8) (1.8) (1.8) (1.8) (1.8) (1.8) (1.1) (1.1) (1.1) (1.1) (1.1) (1.1) (1.1) (1.1) (1.1) (1.1) (1.1) (1.1) (1.1) (1.1) (1.1) (1.1) (1.1) (1.1) (1.1) (1.1) (1.3) (1.3) (1.3) (1.3) (1.3) (1.3) (1.3) (1.3) (1.3) (1.3) (1.3) (1.3) (1.3) (1.3) (1.3) (1.3) (1.3) (1.3) (1.3) (1.5) (1.5) (1.5) (1.5) (1.5) (1.5) (1.5) (1.5) (1.5) (1.5) (1.5) (1.5) (1.5) (1.5) (1.5) (1.5) (1.5) (1.5) (1.5) (1.7) (1.7) (1.7) (1.7) (1.7) (1.7) (1.7) (1.7) (1.7) (1.7) (1.7) (1.7) (1.7) (1.7) (1.7) (1.7) (1.7) (1.7) (1.7) (1.8) (1.9) (1.9) (1.9) (1.9) (1.9) (1.9) (1.9) (1.9) (1.9) (1.9) (1.9) (1.9) (1.9) (1.9) (1.9) (1.9) (1.9) (1.9) (1.1) (1.2) (1.2) (1.2) (1.2) (1.2) (1.2) (1.2) (1.2) (1.2) (1.2) (1.2) (1.2) (1.2) (1.2) (1.2) (1.2) (1.2) (1.2) (1.3) (1.4) (1.4) (1.4) (1.4) (1.4) (1.4) (1.4) (1.4) (1.4) (1.4) (1.4) (1.4) (1.4) (1.4) (1.4) (1.4) (1.4) (1.4) (1.5) (1.6) (1.6) (1.6) (1.6) (1.6) (1.6) (1.6) (1.6) (1.6) (1.6) (1.6) (1.6) (1.6) (1.6) (1.6) (1.6) (1.6) (1.7) (1.8) (1.8) (1.8) (1.8) (1.8) (1.8) (1.8) (1.8) (1.8) (1.8) (1.8) (1.8) (1.8) (1.8) (1.8) (1.8) (1.8) (1.8) (1.9) (1.1) (1.2) (1.2) (1.2) (1.2) (1.2) (1.2) (1.2) (1.2) (1.2) (1.2) (1.2) (1.2) (1.2) (1.2) (1.2) (1.2) (1.2) (1.3) (1.3) (1.4) (1.4) (1.4) (1.4) (1.4) (1.4) (1.4) (1.4) (1.4) (1.4) (1.4) (1.4) (1.4) (1.4) (1.4) (1.4) (1.4) (1.5) (1.6) (1.7) (1.7) (1.7) (1.7) (1.7) (1.7) (1.7) (1.7) (1.7) (1.7) (1.7) (1.7) (1.7) (1.7) (1.7) (1.7) (1.8) (1.9) (1.9) (1.8) (1.8) (1.8) (1.8) (1.8) (1.8) (1.8) (1.8) (1.8) (1.8) (1.8) (1.8) (1.8) (1.8) (1.8) (1.9) (2.0) (2.0) (2.0) (2.0) (2.0) (2.0) (2.0) (2.0) (2.0) (2.0) (2.0) (2.0) (2.0) (2.0) (2.0) (2.0) (2.0) (2.0) (2.0) (2.0) (2.1) (2.2) (2.2) (2.2) (2.2) (2.2) (2.2) (2.2) (2.2) (2.2) (2.2) (2.2) (2.2) (2.2) (2.2) (2.2) (2.2) (2.2) (2.2) (2.2) (2.2) (2.3) (2.3) (2.3) (2.3) (2.3) (2.3) (2.3) (2.3) (2.3) (2.3) (2.3) (2.3) (2.3) (2.3) (2.3) (2.3) (2.3) (2.3) (2.3) (2.3) (2.4) (2.4) (2.4) (2.4) (2.4) (2.4) (2.4) (2.4) (2.4) (2.4) (2.4) (2.4) (2.4) (2.4) (2.4) (2.4) (2.4) (2.4) (2.4) (2.5) (2.5) (2.5) (2.5) (2.5) (2.5) (2.5) (2.5) (2.5) (2.5) (2.5) (2.5) (2.5) (2.5) (2.5) (2.5) (2.5) (2.5) (2.5) (2.5) (2.6) (2.6) (2.6) (2.6) (2.6) (2.6) (2.6) (2.6) (2.6) (2.6) (2.6) (2.6) (2.6) (2.6) (2.6) (2.6) (2.6) (2.6) (2.7) (2.7) (2.7) (2.7) (2.7) (2.7) (2.7) (2.7) (2.7) (2.7) (2.7) (2.7) (2.7) (2.7) (2.7) (2.7) (2.7) (2.7) (2.7) (2.7) (2.8) (2.8) (2.8) (2.8) (2.8) (2.8) (2.8) (2.8) (2.8) (2.8) (2.8) (2.8) (2.8) (2.8) (2.8) (2.8) (2.8) (2.8) (2.8) (2.8) (2.9) (2.9) (2.9) (2.9) (2.9) (2.9) (2.9) (2.9) (2.9) (2.9) (2.9) (2.9) (2.9) (2.9) (2.9) (2.9) (2.9) (2.9) (2.9) (2.9) (2.10000000000000000000000000000000000000000000000000000000000000000000000000000000000000000000000000000 |
| شاشة "كلاريتي" بدقة عالية فانقة (4) (UHD) (4K) مقياس 27 بوصة | 1 |
| ساق الق 달امل | 2 |
| qaعدة 달امل | 3 |
| (USB-C)%-إلى يو.إس.بى-سى (USB-C)%-إلى يو.إس.بى-سى (الصيل 1 - USB3.2) | 4 |
| (USB-B)%-إلى يو.إس.بى-بى (USB-A)%-إلى يو.إس.بى-بى (Display Port) "ديسبلى بورت"%-إلى (Display Port)%-إلى (Display Port)%-إلى (Display Port)%-إلى (Display Port)%-إلى (Display Port)%-إلى (Display Port)%-إلى (Display Port)%-إلى (Display Port)%-إلى (Display Port)%-إلى (Display Port)%-إلى (Display Port)%-إلى (Display Port)%-إلى (Display Port)%-إلى (Display Port)%-إلى (Display Port)%- إلى (Display Port)%-إلى (Display Port)%-إلى (Display Port)%-إلى (Display Port)%-إلى (Display Port)%-إلى (Display Port)%-إلى (Display Port)%-إلى (Display Port)%-إلى (Display Port)%-إلى (Display Port)%-إلى (Display Port)%-إلى (Display Port)%-إلى (Display Port)%-إلى (Display Port)%-إلى(Display Port)%"إلى(Display Port)%"إلى(Display Port)%"إلى(Display Port)%"إلى(Display Port)%"إلى(Display Port)%"إلى(Display Port)%"إلى(Display Port)%"إلى(Display Port)%"إلى(Display Port)%"إلى(Display Port)%"إلى(Display Port)%"إلى(Display Port)%"إلى(Display Port)%"إلى(Display Port)%"إ激励(Display Port)%"إ激励(Display Port)%"إ激励(Display Port)%"إ激励(Display Port)%"إ激励(Display Port)%"إ激励(Display Port)%"إ激励(Display Port)%"إ激励(Display Port)%"إ激励(Display Port)%"إ激励(Display Port)%"إ激励(Display Port)%"إ激励(Display Port)%"إ激励(Display Port)%"إ激励(Display Port)%"إ激励( Display Port)%"إ激励(Display Port)%"إ激励(Display Port)%"إ激励(Display Port)%"إ激励(Display Port)%"إ激励(Display Port)%"إ激励(Display Port)%"إ激励(Display Port)%"إ激励(Display Port)%"إ激励(Display Port)%"إ激励(Display Port)%"إ激励(Display Port)%"إ激励(Display Port)%"إ激励(Display Port)%"إ激励(Display Port)-إلى(Display Port)%"إ激励(Display Port)%"إ激励(Display Port)%"إ激励(Display Port)%"إ激励(Display Port)%"إ激励(Display Port)%"إ激励(Display Port)%"إ激励(Display Port)%"إ激励(Display Port)%"إ激励(Display Port)%"إ激励(Display Port)%"إ激励(Display Port)%"إ激励(Display Port)%"إ激励(Display Port)%"إ chocolate(Display Port)%"إ chocolate(Display Port)%"إ chocolate(Display Port)%"إ chocolate(Display Port)%"إ chocolate(Display Port)%"إ chocolate(Display Port)%"إ chocolate(Display Port)%"إ chocolate(Display Port)%"إ chocolate(Display Port)%"إ chocolate(Display Port)%"إ chocolate(Display Port)%"إ chocolate(Display Port)%"إ chocolate(Display Port)%"إ chocolate(Display Port)%"إ chocolate( Display Port)%"إ chocolate(Display Port)%"إ chocolate(Display Port)%"إ chocolate(Display Port)%"إ chocolate(Display Port)%"إ chocolate(Display Port)%"إ chocolate(Display Port)%"إ chocolate(Display Port)%"إ chocolate(Display Port)%"إ chocolate(Display Port)%"إ chocolate(Display Port)%"إ chocolate(Display Port)%"إ chocolate(Display Port)%"إ chocolate(Display Port)%"إ chocolate(Display Port)-إلى(Display Port)%"إ chocolate(Display Port)%"إ chocolate(Display Port)%"إ chocolate(Display Port)%"إ chocolate(Display Port)%"إ chocolate(Display Port)%"إ chocolate(Display Port)%"إ chocolate(Display Port)%"إ chocolate(Display Port)%"إ chocolate(Display Port)%"إ chocolate(Display Port)%"إ chocolate(Display Port)%"إ chocolate(Display Port)%"إ chocolate(Display Port)%"إ chocolate( displaying Port)%"إ chocolate( displaying Port)%"إ chocolate( displaying Port)%"إ chocolate( displaying Port)%"إ chocolate( displaying Port)%"إ chocolate( displaying Port)%"إ chocolate( displaying Port)%"إ chocolate( displaying Port)%"إ chocolate( displaying Port)%"إ chocolate( displaying Port)%"إ chocolate( displaying Port)%"إ chocolate( displaying Port)%"إ chocolate( displaying Port)%"إ chocolate( displaying Port)%"إ chocolate( displaying Port)-إلى(Display Port)%"إ chocolate(Display Port)%"إ chocolate(Display Port)%"إ chocolate(Display Port)%"إ chocolate(Display Port)%"إ chocolate(Display Port)%"إ chocolate(Display Port)%"إ chocolate(Display Port)%"إ chocolate(Display Port)%"إ chocolate(Display Port)%"إ chocolate(Display Port)%"إ chocolate(Display Port)%"إ chocolate(Display Port)%"إ chocolate(Display Port)%",إلى(Display Port)%"إ chocolate(Display Port)%"إ chocolate(Display Port)%"إ chocolate(Display Port)%"إ chocolate(Display Port)%"إ chocolate(Display Port)%"إ chocolate(Display Port)%"إ chocolate(Display Port)%"إ chocolate(Display Port)%"إ chocolate(Display Port)%"إ chocolate(Display Port)%"إ chocolate(Display Port)%"إ chocolate(Display Port)%"إ chocolate(Display Port)%"إ Chocolate(Display Port)%"إ chocolate(Display Port)%"إ chocolate(Display Port)%"إ chocolate(Display Port)%"إ chocolate(Display Port)%"إ chocolate(Display Port)%"إ chocolate(Display Port)%"إ chocolate(Display Port)%"إ chocolate(Display Port)%"إ chocolate(Display Port)%"إ chocolate(Display Port)%"إ chocolate(Display Port)%"إ chocolate(Display Port)%"إ chocolate(Display Port)%"إ chocolate( display Port)%"إ chocolate( display Port)%"إ chocolate( display Port)%"إ chocolate( display Port)%"إ chocolate( display Port)%"إ chocolate( display Port)%"إ chocolate( display Port)%"إ chocolate( display Port)%"إ chocolate( display Port)%"إ chocolate( display Port)%"إ chocolate( display Port)%"إ chocolate( display Port)%"إ chocolate( display Port)%"إ chocolate( display Port)%"إ chocolate( display Port)-إلى(Display Port)%"إ chocolate( display Port)%"إ chocolate( display Port)%"إ chocolate( display Port)%"إ chocolate( display Port)%"إ chocolate( display Port)%"إ chocolate( display Port)%"إ chocolate( display Port)%"إ chocolate( display Port)%"إ chocolate( display Port)%"إ chocolate( display Port)%"إ chocolate( display Port)%"إ chocolate( display Port)%"إ chocolate( display Port)%"إ chocolate( Display Port)%"إ chocolate( Display Port)%"إ chocolate( Display Port)%"إ chocolate( Display Port)%"إ chocolate( Display Port)%"إ chocolate( Display Port)%"إ chocolate( Display Port)%"إ chocolate( Display Port)%"إ chocolate( Display Port)%"إ chocolate( Display Port)%"إ chocolate( Display Port)%"إ chocolate( Display Port)%"إ chocolate( Display Port)%"إ chocolate( Display Port)%"إ chocolate( Display Port)-إلى(Display Port)%"إ chocolate( Display Port)%"إ chocolate( Display Port)%"إ chocolate( Display Port)%"إ chocolate( Display Port)%"إ chocolate( Display Port)%"إ chocolate( Display Port)%"إ chocolate( Display Port)%"إ chocolate( Display Port)%"إ chocolate( Display Port)%"إ chocolate( Display Port)%"إ chocolate( Display Port)%"إ chocolate( Display Port)%"إ chocolate( Display Port)%"إ chocolate( Display Port)+إلى(Display Port)%"إ chocolate( Display Port)%"إ chocolate( Display Port)%"إ chocolate( Display Port)%"إ chocolate( Display Port)%"إ chocolate( Display Port)%"إ chocolate( Display Port)%"إ chocolate( Display Port)%"إ chocolate( Display Port)%"إ chocolate( Display Port)%"إ chocolate( Display Port)%"إ chocolate( Display Port)%"إ chocolate( Display Port)%"إ chocolate( Display Port)%"إ Chocolate( Display Port)%"إ chocolate( Display Port)%"إ chocolate( Display Port)%"إ chocolate( Display Port)%"إ chocolate( Display Port)%"إ chocolate( Display Port)%"إ chocolate( Display Port)%"إ chocolate( Display Port)%"إ chocolate( Display Port)%"إ chocolate( Display Port)%"إ chocolate( Display Port)%"إ chocolate( Display Port)%"إ chocolate( Display Port)%"إ chocolate( Display Port)%"إ chocolate( display Port)%"إ chocolate( display Port)%"إ chocolate( display Port)%"إ chocolate( display Port)%"إ chocolate( display Port)%"إ chocolate( display Port)%"إ chocolate( display Port)%"إ chocolate( display Port)%"إ chocolate( display Port)%"إ chocolate( display Port)%"إ chocolate( display Port)%"إ chocolate( display Port)%"إ chocolate( display Port)%"إ chocolate( display Port)+إلى(Display Port)%"إ chocolate( display Port)%"إ chocolate( display Port)%"إ chocolate( display Port)%"إ chocolate( display Port)%"إ chocolate( display Port)%"إ chocolate( display Port)%"إ chocolate( display Port)%"إ chocolate( display Port)%"إ chocolate( display Port)%"إ chocolate( display Port)%"إ chocolate( display Port)%"إ chocolate( display Port)%"إ chocolate( display Port)%"إ Chocolate( display Port)%"إ chocolate( display Port)%"إ chocolate( display Port)%"إ chocolate( display Port)%"إ chocolate( display Port)%"إ chocolate( display Port)%"إ chocolate( display Port)%"إ chocolate( display Port)%"إ chocolate( display Port)%"إ chocolate( display Port)%"إ chocolate( display Port)%"إ chocolate( display Port)%"إ chocolate( display Port)%"إ chocolate( display Port)%"إ chocolate( Display Port)+إلى(Display Port)%"إ chocolate( display Port)%"إ chocolate( display Port)%"إ chocolate( display Port)%"إ chocolate( display Port)%"إ chocolate( display Port)%"إ chocolate( display Port)%"إ chocolate( display Port)%"إ chocolate( display Port)%"إ chocolate( display Port)%"إ chocolate( display Port)%"إ chocolate( display Port)%"إ chocolate( display Port)%"إ chocolate( display Port)%إ chocolate( display Port)%"إ chocolate( display Port)%"إ chocolate( display Port)%"إ chocolate( display Port)%"إ chocolate( display Port)%"إ chocolate( display Port)%"إ chocolate( display Port)%"إ chocolate( display Port)%"إ chocolate( display Port)%"إ chocolate( display Port)%"إ chocolate( display Port)%"إ chocolate( display Port)%"إ chocolate( display Port)%"إ chocolate( display Port)%"إ Chocolate( display Port)+إلى(Display Port)%"إ chocolate( display Port)%"إ chocolate( display Port)%"إ chocolate( display Port)%"إ chocolate( display Port)%"إ chocolate( display Port)%"إ chocolate( display Port)%"إ chocolate( display Port)%"إ chocolate( display Port)%"إ chocolate( display Port)%"إ chocolate( display Port)%"إ chocolate( display Port)%"إ chocolate( display Port)%"إ chocolate( displayPort)%"إ chocolate( display Port)%"إ chocolate( display Port)%"إ chocolate( display Port)%"إ chocolate( display Port)%"إ chocolate( display Port)%"إ chocolate( display Port)%"إ chocolate( display Port)%"إ chocolate( display Port)%"إ chocolate( display Port)%"إ chocolate( display Port)%"إ chocolate( display Port)%"إ chocolate( display Port)%"إ chocolate( display Port)%"إ chocolate( display Port)%",إلى(Display Port)%"إ chocolate( display Port)%"إ chocolate( display Port)%"إ chocolate( display Port)%"إ chocolate( display Port)%"إ chocolate( display Port)%"إ chocolate( display Port)%"إ chocolate( display Port)%"إ chocolate( display Port)%"إ chocolate( display Port)%"إ chocolate( display Port)%"إ chocolate( display Port)%"إ chocolate( display Port)%"إ chocolate( display Port)%"إ TOTAL( Display Port)%"إ chocolate( Display Port)%"إ chocolate( Display Port)%"إ chocolate( Display Port)%"إ chocolate( Display Port)%"إ chocolate( Display Port)%"إ chocolate( Display Port)%"إ chocolate( Display Port)%"إ chocolate( Display Port)%"إ chocolate( Display Port)%"إ chocolate( Display Port)%"إ chocolate( Display Port)%"إ chocolate( Display Port)%"إ chocolate( Display Port)%"إ chocolate(Display Port)%"إ chocolate( Display Port)%"إ chocolate( Display Port)%"إ chocolate( Display Port)%"إ chocolate( Display Port)%"إ chocolate( Display Port)%"إ chocolate( Display Port)%"إ chocolate( Display Port)%"إ chocolate( Display Port)%"إ chocolate( Display Port)%"إ chocolate( Display Port)%"إ chocolate( Display Port)%"إ chocolate( Display Port)%"إ chocolate( Display Port)%"إ chocolate( display Port)+إلى(Display Port)%"إ chocolate( display Port)%"إ chocolate( display Port)%"إ chocolate( display Port)%"إ chocolate( display Port)%"إ chocolate( display Port)%"إ chocolate( display Port)%"إ chocolate( display Port)%"إ chocolate( display Port)%"إ chocolate( display Port)%"إ chocolate( display Port)%"إ chocolate( display Port)%"إ chocolate( display Port)%",إلى(Display Port)+إلى(Display Port)%"إ chocolate( display Port)%"إ chocolate( display Port)%"إ chocolate( display Port)%"إ chocolate( display Port)%"إ chocolate( display Port)%"إ chocolate( display Port)%"إ chocolate( display Port)%"إ chocolate( display Port)%"إ chocolate( display Port)%"إ chocolate( display Port)%"إ chocolate( display Port)%"إ chocolate( display Port)%"إ chocolate( display Port)%",إلى(Display Port)+إلى(Display Port)%",إلى(Display Port)%",إلى(Display Port)%",إلى(Display Port)%",إلى(Display Port)%"إ chocolate( display Port)%"إ chocolate( display Port)%"إ chocolate( display Port)%"إ chocolate( display Port)%"إ chocolate( display Port)%"إ chocolate( display Port)%"إ chocolate( display Port)%"إ chocolate( display Port)%"إ chocolate( display Port)%"إ chocolate( display Port)%"إ chocolate( display Port)%"إ chocolate( display Port)%"إ chocolate( display Port)+إلى(Display Port)+إلى(Display Port)%"إ chocolate( display Port)%"إ chocolate( display Port)%"إ chocolate( display Port)%"إ chocolate( display Port)%"إ chocolate( display Port)%"إ chocolate( display Port)%"إ chocolate( display Port)%"إ chocolate( display Port)%"إ chocolate( display Port)%"إ chocolate( display Port)%"إ chocolate( display Port)%"إ chocolate( display Port)%"إ chocolate (display Port)%"إ chocolate( display Port)%"إ chocolate( display Port)%"إ chocolate( display Port)%"إ chocolate( display Port)%"إ chocolate( display Port)%"إ chocolate( display Port)%"إ chocolate( display Port)%"إ chocolate( display Port)%"إ chocolate( display Port)%"إ chocolate( display Port)%"إ chocolate( display Port)%"إ chocolate( display Port)%"إ chocolate( display Port)%"إ chocolate( display Port)L%إ chocolate( display Port)%"إ chocolate( display Port)%"إ chocolate( display Port)%"إ chocolate( display Port)%"إ chocolate( display Port)%"إ chocolate( display Port)%"إ chocolate( display Port)%"إ chocolate( display Port)%"إ chocolate( display Port)%"إ chocolate( display Port)%"إ chocolate( display Port)%"إ chocolate( display Port)%"إ chocolate( display Port)%"إ chocolate( display Port)%"ا#الله#الله#الله#الله#الله#الله#الله#الله#الله#الله#الله#الله#الله#الله#الله#الله#الله#الله#الله#الله#الله#الله#الله#الله#الله#الله#الله#الله#الله#الله#الله#الله#الله#الله #الله#الله#الله#الله#الله#الله#الله#الله#الله#الله#الله#الله#الله#الله#الله#الله#الله#الله#الله#الله#الله#الله#الله#الله#الله#الله#الله#الله#الله#الله#الله#الله#الله# |
ال GOODSا Pharmaceuticals
text_image
Diagram of a computer monitor with labeled ports and indicators, showing connections to the front panel.natural_image
Empty white rectangle with a thin gray border (no text or symbols)②

natural_image
Technical line drawing of a mechanical bracket or hinge component (no text or symbols)3

natural_image
Simple line drawing of a rectangular frame with mounting holes and a small circular component on top (no text or symbols)4
⑤
natural_image
Line drawing of a U-shaped cable with two connectors (no text or symbols)6

natural_image
Line drawing of a U-shaped cable with two USB connectors (no text or symbols)7
natural_image
Line drawing of a U-shaped cable with two connectors (no text or symbols)8

⑨

10

natural_image
Simple line drawing of a medical or laboratory device with a vertical tube and tubing, no text or symbols present.1112

natural_image
Simple line drawing of a monitor with stand (no text or symbols)O

text_image
AstraZen Revenue Solar Exchange Trading Report Volume 100000000000000000000000000000000000000000000000000000000000000000000000000000000000000000000000 AstraZen Price Range: 5.56 -7.24 Current Price: 3.89 -5.45 Current Volume: 1,543,428.88 Current Shares: 1,543,428.88 Current Price Range: 3.89 -5.45 Current Shares: 1,543,428.88 Current Price Range: 3.89 -5.45 Current Shares: 1,543,428.88 Current Price Range: 3.89 -5.45 Current Shares: 1,543,428.88 Current Price Range: 3.89 -5.45Содержимое упаковки
text_image
Diagram of a computer monitor with labeled buttons and indicators, showing connections to the screen.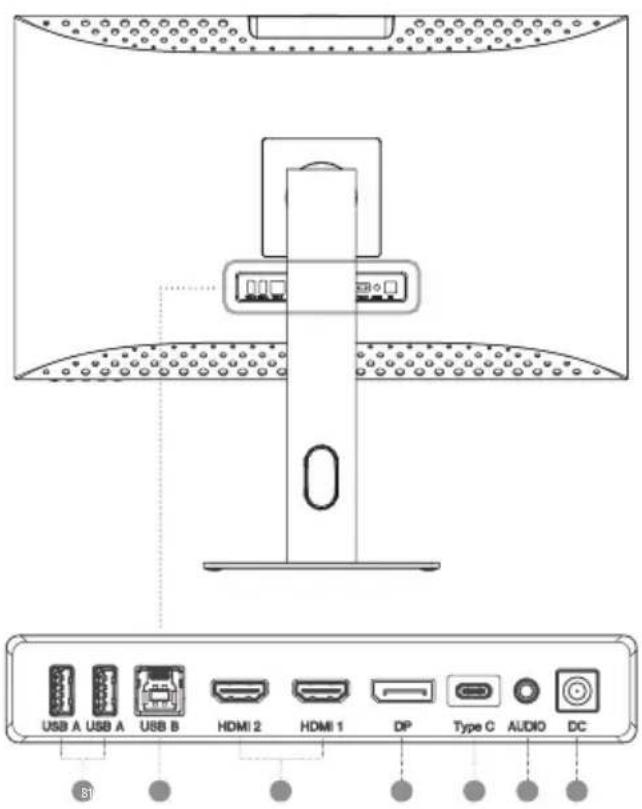
text_image
USB A USB A USB B HDMI 2 HDMI 1 DP Type C AUDIO DC S1FCC Compliance Statement
This device complies with Part 15 of the FCC Rules. Operation is subject to the following two conditions:
(1) this device may not cause harmful interference, and
(2) this device must accept any interference received, including interference that may cause undesired operation.
Changes or modifications not expressly approved by the party responsible for compliance could void the user's authority to operate the equipment.
This equipment has been tested and found to comply with the limits for a Class B digital device, pursuant to Part 15 of the FCC Rules. These limits are designed to provide reasonable protection against harmful interference in a residential installation. This equipment generates, uses and can radiate radio frequency energy and, if not installed and used in accordance with the instructions, may cause harmful interference to radio communications. However, there is no guarantee that interference will not occur in a particular installation.
If this equipment does cause harmful interference to radio or television reception, which can be determined by turning the equipment of and on, the user is encouraged to try to correct the interference by one or more of the following measures:
• Reorient or relocate the receiving antenna.
- Increase the separation between the equipment and receiver.
- Connect the equipment into an outlet on a circuit different from that to which the receiver
is connected.
- Consult the dealer or an experienced radio/TV technician for help.
Responsible Party - U.S. Contact Information
ALOGIC USA LLC
3730 Parish Ave
Fremont CA 94536 USA
EU Declaration of Conformity
Hereby, ALOGIC Corporation declares that this product is in compliance with Directive 2014/53/EU. The full text of the EU declaration of conformity is available at the following internet address by clicking on the Compliance Documentation link at: www.alogic.co