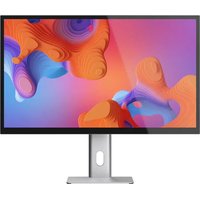
Aspekt 32A4KPDMSLV - Monitor Alogic - Free user manual and instructions
Find the device manual for free Aspekt 32A4KPDMSLV Alogic in PDF.


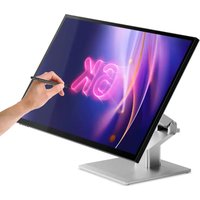
| Product Type | Monitor |
| Brand | Alogic |
| Model | Aspekt 32A4KPDMSLV |
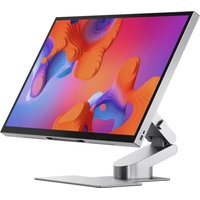
| Screen Size | 32 inches |
| Dimensions (W x D x H) | 624 x 220 x 585 mm |
| Weight (without stand) | 9 kg |
| Materials | Acrylic, glass, aluminum |
| Power Adapter | Input AC 100-240V, 50/60Hz; Output DC 24V == 8A, 192W (Max) |
| Aspect Ratio | 16:9 |
| Backlight | LED |
| Brightness | 400 nits (typical) |
| Panel Type | IPS |
| Maximum Resolution | 3840 x 2160 at 60 Hz (DP/HDMI) |
| Refresh Rate | 60 Hz |
| Viewing Angle | 178° horizontal / 178° vertical |
| Contrast Ratio | 1000:1 |
| VESA Mount | 100 x 100 mm (M4 screws, 10 mm spacers required) |
| Display Colors | 1.07 billion colors (8-bit + FRC) |
| Video Interfaces | 1 DP 1.4 input, 1 DP 1.4 output (MST), 1 HDMI 2.0 input, 1 USB-C host port (DP Alt Mode, 90W PD) |
| USB and Ethernet Ports | 1 USB-C upstream (15W), 1 USB-A upstream (5W), 1 USB-C downstream (30W), 1 USB-A downstream (5W), 1 RJ-45 Gigabit |
| Audio | Speakers 5W x 2, 3.5mm audio output |
| Touch Screen (Touch models) | 10-point multi-touch, compatible with MPP 2.0 stylus |
| Special Features | Reduced blue light, flicker-free, adaptive sync, HDR, standby mode |
| USB PD Power Delivery | Up to 90W for host computer |
| Controls | Rear multi-function joystick, touch OSD (Touch models) |
| Included Accessories | HDMI, USB-C, DisplayPort cables, power cable, power adapter, stand base and neck, guide |
Frequently Asked Questions - Aspekt 32A4KPDMSLV Alogic
User questions about Aspekt 32A4KPDMSLV Alogic
0 question about this device. Answer the ones you know or ask your own.
Ask a new question about this device
Download the instructions for your Monitor in PDF format for free! Find your manual Aspekt 32A4KPDMSLV - Alogic and take your electronic device back in hand. On this page are published all the documents necessary for the use of your device. Aspekt 32A4KPDMSLV by Alogic.
USER MANUAL Aspekt 32A4KPDMSLV Alogic
32" 4K UHD Docking Monitors
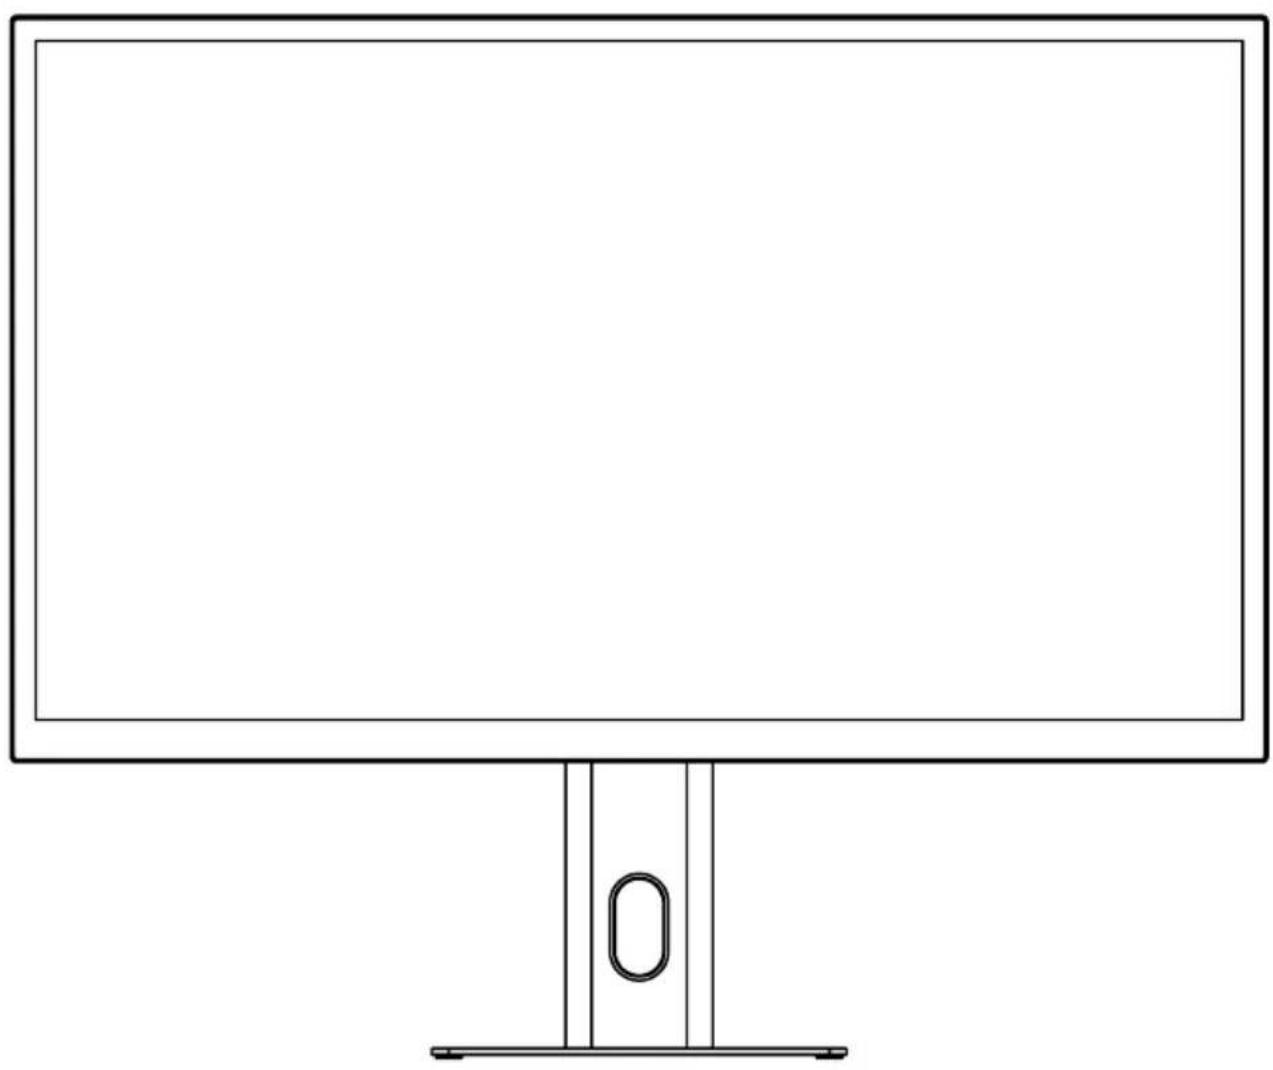
natural_image
Line drawing of a computer monitor with stand and side panel (no text or symbols)Quick Start Guide
Designed in Australia. Manufactured in China

①
natural_image
Empty white rectangle with a thin border (no text or symbols)Package Contents
| 1 | Aspekt 32" Monitor |
| 2 | Stand Stem |
| 3 | Stand Base |
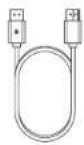
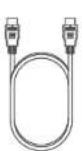
| 4 | HDMI Cable |
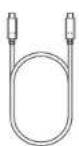
| 5 | USB-C Cable (USB3.2 - Gen 1) |
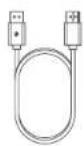
| 6 | DisplayPort Cable |
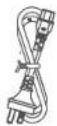
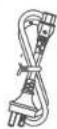
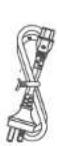
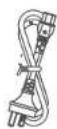
| 7 | Power Cable |
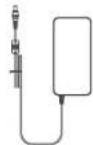
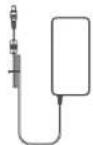
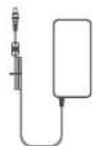
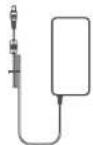
| 8 | Power Adapter |
| 9 | Magnetic Cable Guide (Aspekt Fold/Omni Stand) |
A
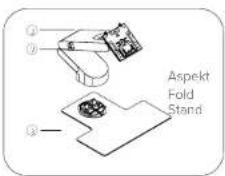
5
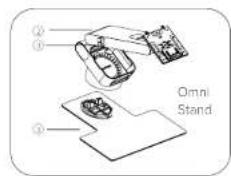
B
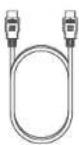
5
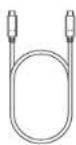
B
[Non-Text]
[Non-Text]
[Non-Text]
①
Specifications
| Model | Aspekt Touch 32A4KPDSGR 32A4KPDSLR 32A4KPDTMSGR 32A4KPDTMSLV | Aspekt: 32A4KPDSGR 32A4KPDSLR 32A4KPDSLR 32A4KPDSLR 32A4KPDSLR |
| Screen Size 32" | ||
| Dimensions 624mm x | 220mm x 555mm (L x W x H) | |
| Weight 5kg (without stand) | ||
| Material Acrylic, Gloss. | Aluminium | |
| Power Adapter | Input: AC 100-240V", 50/60HzOutput: DC 24V = 8A, 192W (Mex) | |
| Aspect Ratio 16:9 | ||
| Backlight | LED | |
| Brightness | 400 nits (Typical) | |
| Panel | IPS | |
| Resolution | DP14: 3840°2160/60HzHDMI2.0: 3840°2160/60Hz | |
| Refresh Rate 60Hz | ||
| Viewing Angle 178°(H) / 178°(V) | |
| Contrast Ratio 100:1 | |
| VE5A Mount 100 x 100mm | |
| Display Colors 8-bit + FRC 1.07B Colors | |
| Interface | 1x DP 1.4 Input, 1x DP 1.4 Output (MST Daisy Chair)1x HDMI 2.0 Input, 1x USB-C Host w/ DP A/L Mode & 90W PD,1x 3.5mm Audio Output.1x RJ45 Go Ethernet,1x USB-C Device Port (Rear, 15W PD)1x USB-A Device Port (Rear, 5W),1x USB-C Device Port (Side, 30W PD)1x USB-A Device Port (Side, 5W) |
| Audio | Speakers: 5Wx2Audio Out: Yes |
| Touchscreen(Aspekt Touch Only) | 10 Point MultikouchSupports MPP 2.0 Styluses |
| Low Blue Light Yes | |
| Flicker Free Yes | |
| USB PD Power Delivery | Up to SOW power to host computer |


natural_image
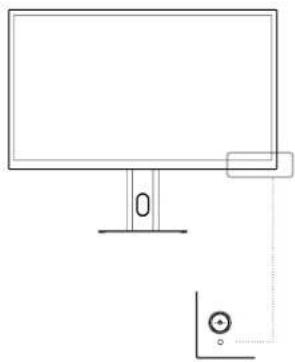
Simple line drawing of a monitor with a stand and a separate corner button (no text or symbols)Monitor Controls
Aspekt features a multi-function joystick on the rear right of the unit. The joystick allows the monitor to be powered on or off, as well as enter and navigate through the On-Screen Display menu system, to adjust monitor settings.
Function
When OSD is not open When OSD is open
| Button Short Times (3 seconds) | Enter OSD | Enter Monium |
| Button Long Times (3 seconds) | Power Toggle Control | Power Toggle OnOff |
| Joystick Left | Change Colour Preset | Left Back in OSD Menu |
| Joystick Right | Change Source Input | Right In OSD Menu |
| Joystick Up | Change Backlight | Up In OSD Menu |
| Joystick Down | Change Volume | Down In OSD Menu |
Indicator Light
The indicator light shows steady white to indicate that the power is on and the monitor is operating normally. If the light is off then no signal is being detected and the monitor is odd. Please make sure that your computer is turned on and all video cables are fully plugged in or connected.
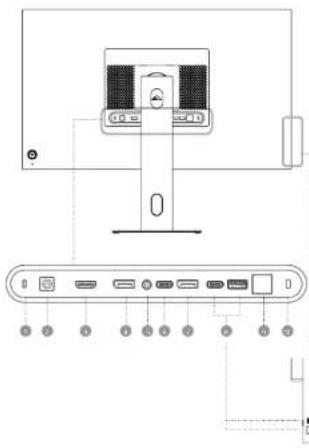
Monitor Ports
| 1 | Kensington Lack Slot Secure your monitor with a Kensington Lock cable |
| 2 | DC Power Connect to provided DC Power supply |
| 3 | HDMI Connects your computer to 4K video |
| 4 | DisplayPort (In) Connects your computer to 4K video |
| 5 | 3.8mm Audio For headphones, speakers |
| 6 | USB-C (Host) Connects your computer to 4K video, 50W charging, Ethernet and Apache's USB ports as well as touch functions [Aspekt touch Only] |
| 7 | DisplayPort (Out) Allows you to connect your computer to a second display button |
| 8 | USB-C & USB-A (Accessware) For connecting your computer to USB accesses. Requires your computer to be connected to Apache's USB-C (Host port) |
| 9 | RJHS (Ethernet) Connects your computer to last, secure networking. Requires your computer to be connected to Apache's USB-C (Display port) |
| 10 | Kensington Lack Slot Secure your monitor with a Kensington Lock cable |


Unpacking and Assembly
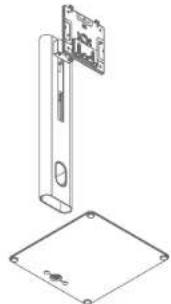
Before unpacking the stand, ensure that the box is placed on a flat, clear surface.
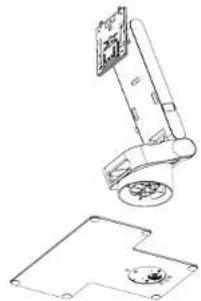
- Remove the monitor stand's base and stem from the packaging. These may be included in the Aspekt box or packaged separately.
natural_image
Technical line drawing of a mechanical assembly with a vertical component and a square base (no text or symbols)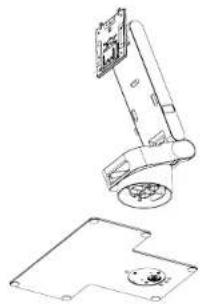
natural_image
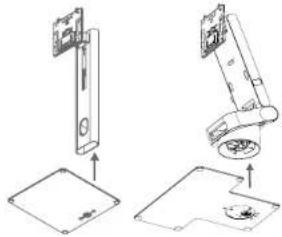
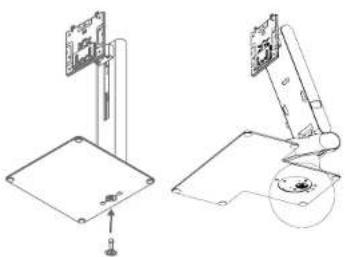
Technical line drawing of a mechanical assembly with exploded view (no text or symbols)- Insert the connectors on monitor stand's base into the bottom of the stem.
natural_image
Technical line drawing of a mechanical assembly with two views (top and side), no text or symbols present.- Tighten the thumbscrew beneath the stand to secure it.
natural_image
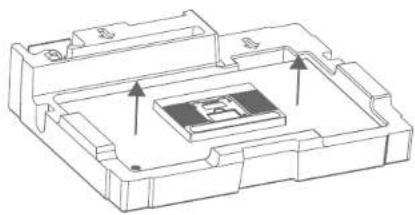
Technical line drawing of a mechanical assembly with two views (top and side), no text or symbols present.- Remove the monitor from the Styrofoam and its protective bag, then place it face down on a flat, stable surface such as a table.
natural_image
Technical line drawing of a mechanical component with internal features and arrows indicating movement (no text or symbols)
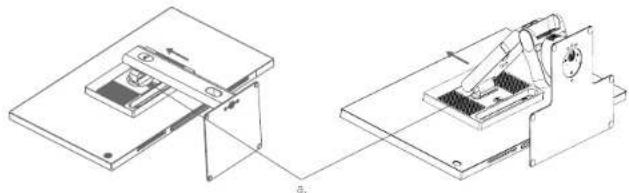
- Insert the stand into the face down monitor and secure it via the quick release VESA mount. Ensure the stand has clicked into place before attempting to lift the monitor. To detach the stand again, simply press the quick release button (a).
natural_image
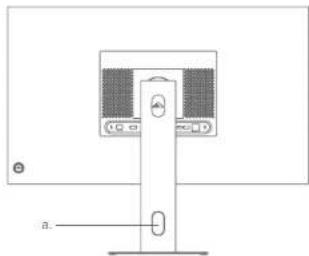
Technical line drawing of a mechanical assembly with two views (top and side), no text or symbols present- Your monitor is now assembled and ready to use. We recommend using the following cable management techniques to keep things tidy:
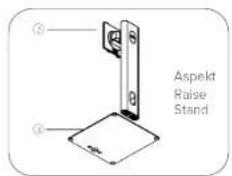
Aspekt Raise Stand
Direct cables through the stand's cable loop (a).
natural_image
Simple line drawing of a computer monitor with two front panels and a stand, no text or symbols present.Aspekt Fold Stand
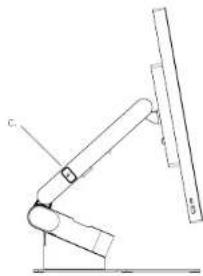
Direct cables along the side of the fold stand, securing them by placing the Magnetic Cable Guide (b) onto the stand's magnetic attachment point (c).

natural_image
Technical line drawing of a mechanical arm with labeled components (no text or symbols)Warning: Do not put pressure on the display area of the monitor while assembling or moving the monitor. The display screen is fragile - applying force to it may break the display.
Keep the monitor box and Styrofoam packaging for future transportation and storage of the monitor.
⚠ Warning: Ensure the stand has clicked into place before lifting it.

Installing Aspekt on a VESA mount
The monitor has 100 x 100mm spaced mounting holes to allow it to be mounted to any compatible 100mm VESA standard monitor arm or wall mount accessory (not included).
The mounting holes are recessed in the region on the back of the monitor where the stand attaches and are hidden by the stand when it is installed. VESA mounts cannot be used with the monitor while the stand is attached.
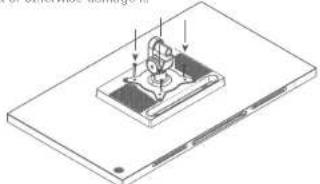
M4 10mm threaded mounting spacers must be used when attaching Aspekt to a third-party monitor arm or wall mount.
- Lay the monitor face down on a flat, stable surface.
Do not attempt to lay the screen on any uneven surface including soft surfaces such as carpet and seating while attaching the mounting accessory - damage to the screen may occur.
2. Align the VESA mount with Aspekt's VESA screw holes, then attach the four screws into the mounting holes in the recess where the stand attaches (alternating between opposing corners as you install).
Do not over tighten the screws. You may damage the monitor.
Do not apply pressure to the rear of the monitor while fitting the mounting accessory - downwards pressure on the screen may crack or otherwise damage it.
natural_image
Isometric technical diagram of a mechanical assembly with no visible text or symbols- Carefully lift the monitor and place into position,
Ensure there is 50mm clearance around all sides of the monitor when it is installed to ensure that it does not overheat.

Connecting the Monitor
Connecting the Power Cable
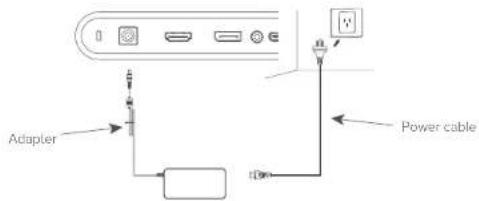
Connect the included power cable to the power connector, and then plug the other end into a wall outlet.
Connecting a Video Source
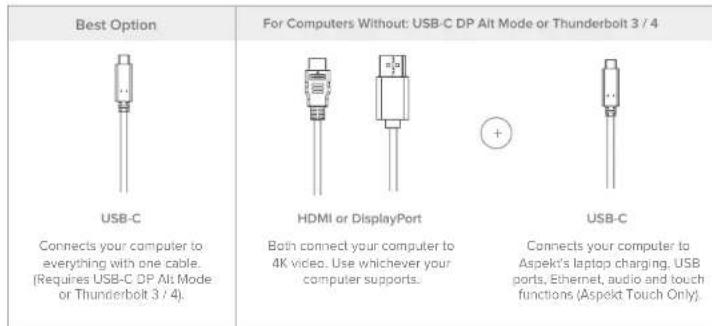
The monitor includes multiple video inputs which can be connected simultaneously. To connect a computer or other source device, plug one of the included HDMI, DisplayPort or USB-C cables into the computer and into a corresponding port on the monitor.
非

How we recommend you connect to Aspekt
Notes:
The USB-C connection will provide up to 90W of power to computers which support USB Power Delivery (USB PD). This allows the computer to display video on the monitor while being charged over a single cable. As a result, the USB-C connection type is the best option if your computer has this capability.
Depending on the capabilities of the computer it may not be able to provide 4K at a full 60Hz refresh rate if connected to the monitor using HDMI. The USB-C or DisplayPort connection should be used as a first preference if the computer supports these connection types.
- Not all USB-C ports on computers support video output and/or charging using USB PD. If your computer does not show video on the monitor or start charging when connected to the monitor using USB-C, check that the USB-C port on the computer supports DisplayPort Alternate Mode video output and USB PD charging.
- Not all USB-C cables support video transfer or charging above 60W. It is recommended that you use the USB-C cable supplied with the monitor to avoid potential issues with cables that have been obtained separately.

Connecting Additional Displays (Daisy Chaining)
- Aspekt supports DisplayPort MST (Multi-Stream Transport), which lets you connect multiple monitors in a chain using just one DisplayPort output from your computer. To set it up, you connect a DisplayPort cable or USB-C cable with DP Alt Mode from your computer to the DP In or USB-C (Host) port on the Aspekt monitor. Then, you connect another DisplayPort cable from the DP Out port on the Aspekt to the DP In port on a second monitor.
- The Aspekt monitor takes the video signal from your computer, displays its own part of the image, and passes the rest through to the next monitor. This means you only need one cable from your computer, and you don't need a docking station with multiple video outputs.
- For Daisy Chaining to work, your computer (the host device) must support DisplayPort 1.2 or newer and MST. For daisy chains involving more than two monitors, all but the last monitor in the chain must also support MST and have a DisplayPort/USB-C (In) and DisplayPort (Out) port. Your DisplayPort connection's bandwidth determines the total monitors supported in the chain - usually 2x 4K or 1x 4K + 2x QHD.
- At this time, Mac computers do not support MST (Multi-Stream Transport), so cannot be used as the host device for a daisy chain with extended (different) displays. Macs can daisy chain to mirrored displays (with identical output on each screen). To do this, "Display Mirroring" must be enabled in Aspekt's menu.

Connecting Audio Devices
The audio port on the display only supports output devices such as headphones and speakers. It is not possible to connect microphones or other input devices to this port. Headphones with built-in microphones can be connected to this port, however the microphone will not function.
To send audio from your computer to the display speakers or connected audio device, select "32A4KPDT" as the audio destination in your computer's sound settings.
合

Connecting USB Devices
The display includes USB ports that can be used to attach USB peripherals such as a keyboard, mouse or webcam to the computer. In order for the computer to see devices attached to these ports, the computer must be connected to Aspekt's USB-C display port.
Notes:
- If the computer is only connected to the USB-C port on the display the ports will operate at USB 2.0 speeds because video traffic shares the USB-C cable with the USB data. This speed is sufficient for most peripherals such as keyboards, mice and webcams.
Understanding Aspekt's Controls
Aspekt's On Screen Display (OSD) menu system allows you to access and modify settings relation to the monitors functions and colour configuration. Using the joystick on the rear of the monitor will allow you to access and navigate this menu.
On Aspekt Touch models, you can activate the OSD by swiping left from the bottom right corner of the monitor with two fingers, and then navigate the menu with touch.
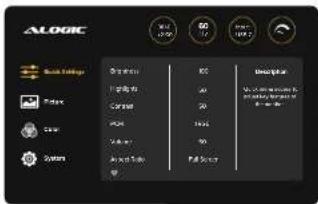
| Menu Sub Menu Options Description | ||
| Quick Settings Quick menu access to adjust key fixtures of the monitor. | Input Source Auto, LSB-C, DP, HDMI Selects which input device is to be displayed on the monitor. | |
| Brightness 0-100 Adjusts the luminosity of the display. | ||
| Highlights 0-100 Adjusts and controls the detail in bright colours. | ||
| Contrast 0-100 Adjusts and controls the detail in dark colours. | ||
| Colour Gamut sRGB, Adobe RGB, DCI-P3, NTSC, DICOM | Selects a colour range for the monitor to reproduce. | |
| Volume 0-100 Adjusts the volume level of the built-in monitor speakers. | ||
| Aspect Ratio Full Screen, 16:9, 4:3, Dot by Dot, 5:4 | Adjusts the display's ratio of width and height. | |
| Blue Light Shift Off, Weak, Medium, Strong | Reduces the blue light strength to reduce strain on eyes. | |
| Adaptive Sync Off, On Turns on or off Adaptive Sync, enabling smoother gameplay. | ||
| Picture Menu to adjust picture settings such as brightness, contrast and sharpness. | Brightness 0-100 Adjusts the luminosity of the display. | |
| Highlights 0-100 Adjusts and controls the detail in bright colours. | ||
| Contrast 0-100 Adjusts and controls the detail in dark colours. | ||
| Colour Gamut sRGB, Adobe RGB, DCI-P3, NTSC, DICOM | Selects a colour range for the monitor to reproduce. | |
| DCR Off, On | Adjusts the contrast of your display dynamically. Please note that user presets will be locked while DCR is on. | |
| Aspect Ratio Full Screen, 16:9, 4:3, Dot by Dot, 5:4 | ||
| Adjusts the display's ratio of width and height. | ||
| Sharpness 0-100 Adjusts picture softness and clarity. | ||
| Overdrive Off, Weak, Medium, Strong | Adjusts overdrive levels, decreasing peel response time at the cost of some visual artfecting. | |
10


| Menu Sub Menu Options Description | |||
| ColourMenu to adjustadvanced coloursettings such asthe temperature,gamma, and tint. | Temperature | Warm - 6500K, Neutral- 7500K, Coul - 9300K,User | Adjusts the Color Temperature of the monitor display. |
| Red | 0-100 | Adjusts the Red colour scale of the monitor display. | |
| Green | 0-100 | Adjusts the Green colour scale of the monitor display. | |
| Blue | 0-100 | Adjusts the Blue colour scale of the monitor display. | |
| Advanced | Red, Green, Blue, Yellow,Magenta, Cyan (0-100) | Adjusts the tint and saturation of the six colours. | |
| Gamma | Default, 1.8, 2, 2.2, 2.4 | Adjusts the Gamma value of the monitor display. | |
| Tint | 0-100 | Adjusts the colour white balance. | |
| Saturation | 0-100 | Adjusts the colour saturation level. | |
| Blue Light Shift | Off, Weak, Medium,Strong | Adjusts the blue light value to reduce strain on eyes. | |
| SystemMenu toadjust monitorsettings such asLanguage, OSDPosition, andSleep Mode. | DP Output Mirror | On, Off | Enables DisplayPort Output to Minor Input signal whenusing Mac. Disable for Windows. |
| USB Dock | On, Off | Disables Aspekt's USB and Ethernet ports. | |
| Sleep Mode | 0-100 | Turns off the monitor if there has been no input signal for thespecified period of time. | |
| Language | English, French, German,Spanish, Chinese | Adjusts the On-Screen Display (OSD) menu language. | |
| OSD Timer | 0-100 | Adjusts the On-Screen Display (OSD) screen time out. | |
| OSDTransparency | Off, Weak, Medium,Strong | Adjusts the opacity of the On-Screen Display (OSD). | |
| Volume | Off, On | Adjusts the volume level of the built-in monitor speakers. | |
| Mute | Off, On | Turns on or off the Mate function, silencing the built-inmonitor speakers. | |
| Touch OSD | Off, On, All TouchOff | Off and On options change the touch OSD function. AllTouch Off disables all touch functions for the screen. | |
| Reset | No, Yes | Resets the monitor to factory default settings. | |
11

Using the Touchscreen
- To use the touchscreen, the monitor must be connected to your computer via its USB-C port.
- If you're using a Mac, download and install our macOS Touch drivers (see QR code on the title page)
- The touchscreen should be automatically recognised by your computer. If not, consult our troubleshooting section below
Symptom Solution
| My computer isn't reacting to my touch | · Unplug your USB cable from your computer and plug it back in. · Restart your computer · Contact ALOGIC support if the above do not resolve your issue. · (Mac Only) install our macOS Touch Drivers (see QR codes on the title page). |
Troubleshooting
Symptom Solution
| The power LED does not light up when power button pressed | · Verify that the means power cord is securely attached to the power adapter, is connected to a power outlet and the power outlet is switched on.· Verify that the power adapter is securely connected to the rear of the monitor. |
| The power LED lights up, but nothing is displayed on the screen | · Disconnect the power adapter from the Monitor and reconnect in 2-3 minutes.· Press and hold the power button for 5 seconds to reset the monitor settings.· Contact ALOGIC Support if the points above do not work. |
| Monitor does not show HDMI or DisplayPort video from the computer | · Check that an appropriate video cable is connected between the computer and display and the correct input is selected on the monitor.· Check your computer's settings to verify that it is detecting the monitor and is outputting video to it. |
| Monitor does not show USB-C video from the computer | · Verify that you are using the USB-C cable that came with the monitor.· Check your computer's settings to verify that it is detecting the monitor and is outputting video to it.· Check that the USB-C port on your computer that the monitor is connected to supports Video output using DisplayPort Alternate Mode (DP Alt Mode). |
| Laptop computer does not charge when connected to the monitor using USB-C | · Verify that the USB-C port on your computer supports charging using the USB Power Delivery (USB PD) standard.· Some laptops require more than 90W of power to change. These tend to be high end graphics and gaming focused computers.· If necessary, cannot the power adapter that come with the computer to your apptop in addition to the USB-C cable that is connected to the monitor. |
Warnings
- Only use the monitor indoors in dry locations. Do not use the monitor in damp places or near water sources such as in bathrooms and kitchens.
- Store and use in a cool, dry ventilated place. Do not place close to heat sources or in direct sunlight.
- Ensure that the equipment is installed on a flat, stable surface. If placed on an uneven or unsteady surface the monitor may fail and be damaged, cause personal injury or damage other hems.
- It is normal for the device to be slightly warm to touch during operation. Provide adequate ventilation and do not cover the device while in operation.
- Do not cover or block the ventilation holes on the rear cover of the monitor. Do not use on a bed, safe, blanket or similar where the monitor may fall over or become covered.
- The acceptable electrical supply voltage and frequency ranges are indicated on the label on the rear cover of the monitor. Do not connect the monitor to power sources which fall outside these limits.
- If the device will not be used for weeks or months, it is recommended that the power be disconnected to save energy and protect the equipment from damage caused by lightning strike induced power surges if a thunderstorm occurs.
- Do not insert foreign objects into the ventilation holes in the cover of the monitor as damage, fire or electric shock could occur.
- The monitor contains no user serviceable parts. Disassembling or attempting to repair this product yourself will void the warranty and expose you to the risk of electric shock. If you suspect a fault with the device, please contact the seller you purchased the product from or ALOGIC after sales support for assistance.
- Do not use the product if it becomes damaged as this could pose a risk of causing damage to connected devices and expose you to electric shock.
- Do not crush, cut, pull or twist the mains power cord excessively. If the power cord becomes damaged do not use the product until a replacement power cord can be obtained. Using a damaged power cord may result in electric shock.
- Do not spray liquids on the monitor. Do not use chemicals such as solvents on the surface of the monitor. Clean the monitor only by wiping with a clean, dry, soft, scratch avoiding microfibre cloth.
- Disassembling or failing to properly use and care for your device will void the warranty on the product.
- ALOGIC bears no responsibility for damage to the device or incidental damages arising from improper use or lack of card and is not liable for repair/replacement of the device or other damages in these circumstances.
END

①

natural_image
Empty white rectangle with a thin border (no text or symbols)Inhalte
①
Spezifikationen
natural_image
Simple line drawing of a monitor with a base and a separate rectangular component connected to a corner (no text or symbols)natural_image
Diagram of a computer monitor setup with ports and connectors (no text or labels)Anschlüsse
Before unpacking the stand, ensure that the box is placed on a flat, clear surface.
natural_image
Technical line drawing of a mechanical assembly with a vertical component and a square base (no text or symbols)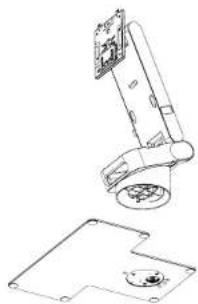
natural_image
Technical line drawing of a mechanical assembly with a base plate and housing (no text or symbols)natural_image
Technical line drawing of a mechanical assembly with two views (top and side), no text or symbols present.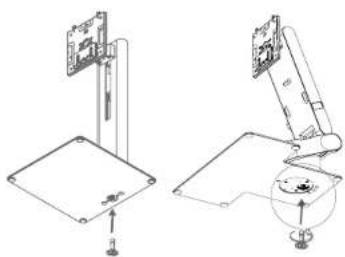
natural_image
Technical line drawing of a mechanical assembly with two views (top: tilted view, bottom: angled view), no text or symbols present.natural_image
Technical line drawing of a mechanical component with no visible text or symbolsnatural_image
Technical line drawing of a mechanical assembly with two views (a and b) showing internal components and alignment lines (no text or symbols)natural_image
Diagram of a computer monitor with labeled ports and a base, no text or symbols presentAspekt Fold Stand
natural_image
Isometric line drawing of a mechanical assembly with a base plate and internal components (no text or symbols)natural_image
Empty white rectangle with a thin gray border (no text or symbols)④
①
①
①
(3)
Presupuesto
natural_image
Simple line drawing of a monitor with a stand and a separate corner button (no text or symbols)Controles del monitor
Monitorear puertos
natural_image
Technical line drawing of a mechanical assembly with a bracket and base plate (no text or symbols)- Insertelosconectoresdelaasedelsoportedel monitor en la parte inferior del vastago.
natural_image
Technical line drawing of a mechanical assembly with a base plate and a component, no text or symbols present.natural_image
Technical line drawing of a mechanical assembly with two views (top and side), no text or symbols present.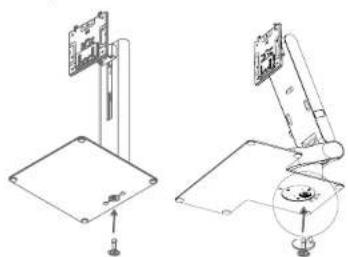
natural_image
Technical line drawing of a mechanical assembly with two views: one showing a bracket and the other showing a base with a circular component (no text or symbols)natural_image
Technical line drawing of a mechanical component with two arrows indicating assembly or movement (no text or symbols present)LS
natural_image
Technical line drawing of a mechanical device with two views (a and b) showing internal components and alignment lines (no text or symbols)natural_image
Diagram of a computer monitor with labeled ports and a base, no text or symbols presentAspekt Fold Stand
natural_image
Isometric diagram of a mechanical assembly with arrows indicating force or movement (no text or symbols)natural_image
Empty white rectangle with a thin border (no text or symbols)Contenu du paquet
①
Caractéristiques
natural_image
Line drawing of a monitor with a base and a separate rectangular component connected to a corner (no text or symbols)natural_image
Diagram of a computer monitor and rear panel with ports and connectors (no text or labels)natural_image
Technical line drawing of a mechanical assembly with a vertical component and a base plate (no text or symbols)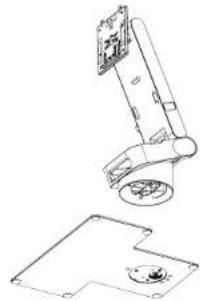
natural_image
Technical line drawing of a mechanical arm with internal components (no text or symbols)natural_image
Technical line drawing of a mechanical assembly with two views (top and side), no text or symbols present.natural_image
Technical line drawing of a mechanical assembly with two views: top shows a mounted device, bottom shows a clamping mechanism (no text or symbols)natural_image
Technical line drawing of a mechanical component with no visible text or symbolsnatural_image
Technical line drawing of a mechanical assembly with two views (top and side), no text or symbols present.natural_image
Diagram of a computer monitor with two front panels and a stand, labeled 'a.' (no text or symbols on the device itself)Aspekt Fold Stand
natural_image
Technical line drawing of a mechanical arm with a vertical rod and base, no text or symbols presentnatural_image
Isometric line drawing of a mechanical assembly with a central component and two downward arrows indicating force or movement (no text or symbols)FCC Compliance Statement
This device complies with Part 15 of the FCC Rules. Operation is subject to the following two conditions:
(1) this device may not cause harmful interference, and
(2) this device must accept any interference received, including interference that may cause undesired operation.
Changes or modifications not expressly approved by the party responsible for compliance could void the user's authority to operate the equipment.
This equipment has been tested and found to comply with the limits for a Class B digital device, pursuant to Part 15 of the FCC Rules. These limits are designed to provide reasonable protection against harmful interference in a residential installation. This equipment generates, uses and can radiate radio frequency energy and, if not installed and used in accordance with the instructions, may cause harmful interference to radio communications. However, there is no guarantee that interference will not occur in a particular installation.
If this equipment does cause harmful interference to radio or television reception, which can be determined by turning the equipment of and on, the user is encouraged to try to correct the interference by one or more of the following measures:
• Reorient or relocate the receiving antenna.
- Increase the separation between the equipment and receiver.
- Connect the equipment into an outlet on a circuit different from that to which the receiver is connected.
- Consult the dealer or an experienced radio/TV technician for help.
Responsible Party - U.S. Contact Information
ALOGIC USA LLC
37524 Marsten Dr,
Newark CA 94560, USA
EU Declaration of Conformity
Hereby, ALOGIC Corporation declares that this product is in compliance with Directive 2014/53/EU. The full text of the EU declaration of conformity is available at the following internet address by clicking on the Compliance Documentation link at: www.alogic.co
- Monitor Controls
- Indicator Light
- Unpacking and Assembly
- Installing Aspekt on a VESA mount
- Connecting the Monitor
- Connecting the Power Cable
- Connecting a Video Source
- How we recommend you connect to Aspekt
- Notes:
- Connecting Additional Displays (Daisy Chaining)
- Connecting Audio Devices
- Connecting USB Devices
- Understanding Aspekt's Controls
- Using the Touchscreen
- Warnings
- Anschlüsse
- Controles del monitor
- LS
- Aspekt Fold Stand
- FCC Compliance Statement
- EU Declaration of Conformity
Brand : Alogic
Model : Aspekt 32A4KPDMSLV
Category : Monitor