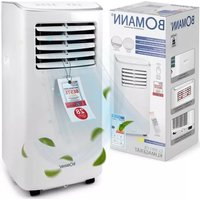
CL 6061 CB - Air Conditioning BOMANN - Free user manual and instructions
Find the device manual for free CL 6061 CB BOMANN in PDF.



| Product type | Mobile air conditioner |
| Brand | Bomann |
| Model | CL 6061 CB |
| Net weight | 19.7 kg |
| Power supply | 220-240 V~, 50 Hz |
| Power consumption | 792 W |
| Cooling capacity | 7000 BTU/h (2.06 kW) |
| Refrigerant | R290 |
| Energy class | A |
| Protection class | I |
| Operating modes | Cooling, Dehumidification, Fan |
| Special functions | Sleep mode, Timer (24h), Remote control |
| Fan speed | 2 speeds (Low/High) |
| Adjustable temperature | 16°C to 31°C |
| Recommended room volume | Up to 70 m³ |
| Water tank | With full level indicator |
| Exhaust hose length | Up to 150 cm |
| Filter cleaning | Every 2 weeks, washable with water |
| Safety | Automatic shut-off when tank full, compressor protection (3 min) |
| Package contents | Air conditioner, remote control, batteries, exhaust hose, window kit, water hose, plugs |
Frequently Asked Questions - CL 6061 CB BOMANN
User questions about CL 6061 CB BOMANN
0 question about this device. Answer the ones you know or ask your own.
Ask a new question about this device
Download the instructions for your Air Conditioning in PDF format for free! Find your manual CL 6061 CB - BOMANN and take your electronic device back in hand. On this page are published all the documents necessary for the use of your device. CL 6061 CB by BOMANN.
USER MANUAL CL 6061 CB BOMANN
WAARSCHUWING: Brandgevaar!
ATTENTION: Risque de surchauffe!
Thank you for choosing our product. We hope you will enjoy using the appliance.
Symbols in this Instruction Manual
Important information for your safety is specially marked. It is essential to comply with these instructions in order to avoid accidents and prevent damage to the appliance:
WARNING:
This warns you of dangers to your health and indicates possible injury risks.
CAUTION:
This refers to possible hazards to the appliance or other objects.
i NOTE:
This highlights tips and information.
Contents
Overview of the Components 3
Overview of Buttons, Icons and Indicator Lights 4
General Notes 40
Special Safety Precautions for this Appliance 40
Handling Batteries 41
Unpacking the Appliance 42
Scope of Delivery 42
Overview of the Components 42
Overview of Buttons, Icons and Indicator Lights 42
Control Panel 42
Remote Control 42
Notes for Use 42
Putting into Service 42
Location 42
Assembly of Exhaust Pipe 42
Inserting Batteries in the Remote Control. 43
Electric Connection 43
Compressor Safety Appliance 43
Using the Appliance 43
Function Buttons 43
Turning Appliance On/Off 43
Setting the Air Outlet 43
Operating Modes 43
Setting the Fan 43
Setting the Temperature 43
"Sleep Mode" 43
Timer (Automatic Timer) 44
Emptying the Water Tank 44
Terminating Operation 44
Cleaning 44
Filter 44
Housing 44
Seasonal Cleaning and Storage 44
Troubleshooting 45
Technical Data 45
Disposal 45
Battery Disposal 45
Meaning of the "Dustbin" Symbol 45
General Notes
Read the operating instructions carefully before putting the appliance into operation and keep the instructions including the warranty, the receipt and, if possible, the box with the internal packing. If you give this appliance to other people, please also pass on the operating instructions.
- The appliance is designed exclusively for private use and for the envisaged purpose. This is not fit for commercial use.
- Do not use it outdoors. Keep it away from sources of heat, direct sunlight, humidity (never dip it into any liquid) and sharp edges. Do not use the appliance with wet hands. If the appliance is humid or wet, unplug it immediately.
- When cleaning or putting it away, switch off the appliance and always pull out the plug from the socket (pull the plug itself, not the lead) if the appliance is not being used and remove the attached accessories.
- The appliance and the mains lead have to be checked regularly for signs of damage. If damage is found the appliance must not be used.
- Use only original spare parts.
- In order to ensure your children's safety, please keep all packaging (plastic bags, boxes, polystyrene etc.) out of their reach.

WARNING:
Do not allow small children to play with the plastic foil. There is a danger of suffocation!
Special Safety Precautions for this Appliance
On the products you will find symbols that indicate warnings or provide information:

Read the instructions!

WARNING: Fire hazard!
The appliance contains a flammable refrigerant!
- Do not use any objects other than those permitted by the manufacturer to accelerate the defrosting process.
- The appliance should only be stored in rooms without a permanent source of ignition (e.g. open flames, an activated gas appliance or electric heater).
- Do not drill or burn the appliance.
- Remember that refrigerants are odourless.
- The appliance must only be operated in rooms larger than 7m^2

The service manual is available at the following web address: www.sli24.de
In the "Downloads" area, please enter the model name CL 6061 CB.
- Any person who is involved with working on or breaking into a refrigerant circuit should hold a current valid certificate from an industry-accredited assessment authority, which authorises their competence to handle refrigerants safely in accordance with an industry recognised assessment specification.
Servicing shall only be performed as recommended by the equipment manufacturer. Maintenance and repair requiring the assistance of other skilled personnel shall be carried out under the supervision of the person competent in the use of flammable refrigerants.

WARNING:
- Do not use and store the appliance at the following locations:
- Near a fire source.
- An area, where water or oil can splash.
- An area exposed to direct sunlight.
- In the bathroom, the laundry room or next to a swimming pool.
- The appliance must be set up, operated and stored in a room with a floor area larger than 7m^2

CAUTION: Risk of overheating!
- Keep the ventilation slots free!
-
Do not cover the appliance!
-
R 290 is a refrigerant that complies with European environmental directives.
- Do not damage the refrigerant circuit.
- The appliance is intended for indoor use only.
- The appliance must be stored in such a way that it does not get damaged.
- Adhere to the national connection regulations.
- In the event of strange noises, smells and / or smoke emissions, unplug the power plug from the socket.
- Only operate or move the appliance in an upright position.
- Ensure a distance of at least 50~cm between the appliance and any walls or other objects to ensure sufficient air circulation during operation.
- Never use the appliance without the filter.
-
Do not leave the appliance unattended for hours at a time. Do not leave your home whilst the appliance is in operation.
-
This appliance has been designed for the air-conditioning of residential rooms and must not be used for other purposes.
- Do not operate the appliance in rooms where gas, fuel, oil or other easily flammable liquids are present. Do not use sprays such as paint, pesticides or other flammable materials in that room.
- Do not insert any objects into the openings of the appliance.
- This appliance shall not be exposed to dripping or splashing water and that no object filled with liquids such as vases shall be placed on apparatus.
- Do not move the appliance when the mains cable is connected to the wall socket.
Always turn off the appliance first using the POWER button before disconnecting the mains plug. - If operation has been interrupted, wait for approx. 3 minutes before restarting the appliance again, in order for the cooling circuit pressure to decrease.
- Do not repair the appliance by yourself. Always contact an authorized technician. If the supply cord is damaged, it must be replaced by the manufacturer, its service agent or similarly qualified persons in order to avoid a hazard.
- Prevent small children from touching the appliance.
- This appliance can be used by children aged from 8 years and above and persons with reduced physical, sensory or mental capabilities or lack of experience and knowledge if they have been given supervision or instruction concerning use of the appliance in a safe way and understand the hazards involved.
Children shall not play with the appliance. - Cleaning and user maintenance shall not be made by children without supervision.
- Please follow the instructions in the chapter "Cleaning".
- Details of type and rating of fuses: T, 250 V AC, 3,15 A
Handling Batteries

WARNING:
- Do not expose batteries to excessive heat such as sunlight, fire or similar. There is a risk of explosion!
- Batteries are not toys. Keep away from children.
- Do not open batteries by force.
- Avoid contact with metal objects (rings, nails, screws, etc.). There is a risk of short circuit!
- A short circuit could cause the battery to heat up excessively or even to catch fire, resulting in injuries.
- For your own safety, cover the battery terminals with adhesive tape during transport.
- In case of battery leakage, make sure not to rub the liquid into your eyes or mucous membranes. In case of contact, wash your hands and rinse your eyes with clear water. Seek medical attention if any discomfort persists.
WARNING:
- Non-rechargeable batteries are not to be recharged.
- Ensure correct polarity when inserting the battery / batteries.
CAUTION:
- When not using the remote control for a long period of time, remove the batteries in order to prevent "leakage" of battery acid.
- Different battery types or new and used batteries must not be used together.
- Do not dispose of batteries along with domestic waste. Return used batteries to the relevant collection facilities or your retailer.
Unpacking the Appliance
- Remove the appliance from its packaging.
- Remove all the packaging material such as plastic bags, filler material, cable ties and cardboard packaging.
- Check that all parts are supplied in the package.
Scope of Delivery
1 Air conditioning appliance
1 Remote control
2 Batteries
1 Flexible exhaust pipe
1 Exhaust pipe adapter (Connection on the appliance)
1 Window kit, 2-piece
1 Adapter for the window exhaust kit
1 Water hose
2 Plugs (spares)
Overview of the Components
1 Control panel with display
2 Air outlet (pivoting flap)
3 Housing
4 Water outlet
5 Handle
6 Exhaust pipe connector
7 Mains cable
8 Water outlet
9 Window kit, 2-piece
10 Remote control
1 Flexible exhaust pipe
2 Adapter for the window exhaust kit
3 Exhaust pipe adapter
14 Grid on the air intake (with built-in filter insert)
Overview of Buttons, Icons and Indicator Lights
Control Panel
1 Indicator light (timer operation enabled)
2 HIGH indicator light (high fan speed)
3 LOW indicator light (low fan speed)
4 Display
5 COOL indicator light (cooling)
6 DRY indicator light (dehumidifying)
7 FAN indicator light (fan)
8 Indicator light (sleep mode)
9 POWER indicator light
10 FULL indicator light (water tank full)
11 POWER button (switch appliance on / off)
12 SLEEP button (set "sleep mode")
13 MODE button (set operating mode)
14 and Buttons (adjust temperature or hour)
15 SPEED button (set fan speed)
16 TIMER button (set timer)
Remote Control
1 MODE button (set operating mode)
2 TIMER button (set timer)
3 POWER button (switch appliance on / off)
4 TEMP+TEMP- buttons (adjust temperature or hour)
5 SLEEP button (set "sleep mode")
6 SPEED button (set fan speed)
Notes for Use
CAUTION: Important for initial operation or after transport! Before initial operation, the appliance must stay in an upright position for at least 3 hours in order for the cooling agent to sink. The compressor will be damaged otherwise.

CAUTION:
- When you interrupt the operation with the POWER button, wait for at least 3 minutes before switching the appliance on again.
-
If you want to move the appliance to another location, first empty the water tank!
-
The appliance operates most effectively with a room size up to 70m^3
- The flexible exhaust hose and the adapter have been manufactured especially for this appliance. In order to avoid incorrect operation, do not replace the pipe with another pipe.
- The exhaust pipe can be extended up to 150~cm . Do not use any extension.
- Ensure free airflow. Make sure not to kink or bend the exhaust pipe. Any blockage can cause the appliance to overheat.
- Close all windows and doors in order to prevent outside air from entering the room and thus allowing a more effective operation of the appliance.
Putting into Service
Location
- When installing the appliance, make sure to keep a distance of at least 50~cm between the appliance and any walls or other objects.
- The surface must be flat and dry.
Assembly of Exhaust Pipe
NOTE:
For sliding windows or external roller blinds you may use the supplied window exhaust air kit in a vertical or horizontal orientation. Adjust the length of the seal plate as desired.
- Connect the adapter to the exhaust hose. Place the exhaust hose in a way that the first fin of the hose lays in the rail. Tighten the adapter by turning it clockwise.
-
Connect the adapter to the connector on the back of the appliance. To do this, push the adapter from the right into the guides until it stops.
-
Extend the pipe to the desired length.
- Screw the window exhaust air kit adapter onto the end of the exhaust air hose.
- If the window does not have a roller shutter and is not a sliding window, then proceed as follows:
a) Stick the open end of the pipe into a window.
b) Close the window as far as possible.
- If the window has a roller shutter or if the window is a sliding window, then proceed as follows:
a) The exhaust air kit for the window is to be installed with the smooth side facing inwards.
i!
During installation with a roller shutter, attach the adapter to the exhaust air kit for the window so that the bulbous portion is facing downwards.
b) Insert the adapter in the exhaust air opening and then push it towards the outside. Fasten it to the exhaust air kit for the window using the enclosed tapping screw.
c) Insert the retaining plate through the hole in the opposite side of the exhaust air opening. Now, push the inner runner over the retaining plate so it fits into the groove. This is to specify the required width for the exhaust air kit for the window. Apply the ring washer and screw the wing nut in by hand until it is tight.
d) Install the exhaust air kit for the window in the window by closing the roller shutter.
Inserting Batteries in the Remote Control
- Open the battery compartment cover on the back of the remote control.
- Insert 2 batteries of type R03 "AAA" 1.5V, observing the correct polarity (see markings on the bottom of the compartment)!
- Close the battery compartment cover.
Electric Connection
- Make sure the mains voltage you want to use corresponds to the voltage of the appliance. Please check the rating label for detailed specifications.
- Connect the appliance to a properly installed grounded socket. A signal will sound indicating that the appliance is ready for use. The appliance is in standby. The display shows the current room temperature.
Compressor Safety Appliance
If operation is interrupted, the safety appliance for the compressor is activated. This prevents operation of the compressor for approx. 3 minutes, in order to relieve the pressure in the cooling circuit. This is not a malfunction of the appliance. Therefore, wait at least 3 minutes, before switching the appliance on again.
Using the Appliance
You can operate the appliance both using the control on the appliance itself or by using the remote control. Identical buttons provide the same function.
The buttons on the control panel are explained below. The indicator lights show your chosen selection.
Function Buttons
The buttons on the appliance are touch keys. Gently touch the buttons with a finger to execute the function. Whenever a button is pressed, it will be confirmed by a beep sound.
Turning Appliance On/Off
- Press the POWER button to turn on the appliance. The appliance is pre-set to "COOL (Kühlen)" mode and the temperature is 22^ . If operation has been stopped without disconnecting the plug, all previously set operating mode and temperature settings will be retained. The control lamps indicate this setting.
- Press the POWER button again to turn off the appliance.
Setting the Air Outlet
You can adjust the direction of the air flow using the horizontal and vertical swivel flaps.
- To direct the air upwards / downwards, adjust the position of the front horizontal swivel flaps.
- You can direct the air to the right / left using the rear swivel flap. You can change the position of the vertical swivel flap when the horizontal ones are folded up. A lever for this purpose is located above the last horizontal swivel flap, to the right.
Operating Modes
Use the MODE button to select one of the following operating modes:
Cooling (COOL)
- Dehumidifying (DRY)
Fan (FAN)
Operating Mode "Cooling" COOL
In this operation mode, you can adjust the fan speed and the temperature as desired.
i NOTE:
To operate the appliance with the compressor, the set temperature must be lower than the current room temperature.
Operating Mode "Fan" FAN
This mode only allows you to set the speed of the fan. The display shows FR.
Operating Mode "Dehumidifying" DRY
This operating mode does not support any further settings. The display shows dh.
- The fan speed is preset to the lowest level LOW.
- The appliance will cool the room and extract the humidity from the air.
- When using the mode "Dehumidifying" over an extended period, we recommend permanently connecting the supplied water hose to the upper water drain. Remove the top plug first. Place the end of the water hose in a container of sufficient size (e.g. a bucket).
Setting the Fan
In "COOL (Cooling)" and "FAN (Fan)" modes you can set the fan speed with 2 different settings. Press the SPEED button accordingly.
LOW (low)
- HIGH (high)
Setting the Temperature
- Use the or buttons in "COOL (Kühlen)" mode to set the temperature.
- Select a temperature between 16^ (61^) and 31^ (88^) . Ex factory items display the temperature in Celsius.
i NOTE:
The changeover from "Celsius to "Fahrenheit can only be performed on the appliance itself. Keep the button pressed down and, at the same time, press the button. The factory setting is selected again by pulling the mains plug.
"Sleep Mode"
- Press the SLEEP button when the appliance is switched on and in the "COOL (Cooling)" operating mode.
- The fan speed is preset to the lowest level LOW. This cannot be changed.
After running for one hour in the "Sleep" mode, the preset temperature will automatically increase by 1^ . This will be repeated one hour later again. This way, a comfortable room temperature will be achieved.
Timer (Automatic Timer)
Use the timer function to set the power-on and power-off times of the appliance. Select a time between 1 and 24 hours.
i NOTE:
- If you want to deactivate the set timer operation, press the TIMER button twice. The (1) indicator light goes off.
- You may also cancel the timer function at any time by pressing the POWER button to turn the appliance on / off.
Using the Timer Function for Automatic Power-On
- Press the POWER button to turn on the appliance.
- Select the operating mode, temperature and fan speed for the appliance to operate in or at when powered on at the pre-set time.
- Press the POWER button to turn off the appliance.
- Press the TIMER button. The number of hours flashes.
- You can set the desired number of hours with the and buttons. The setting mode is automatically exited after approx. 5 seconds. Timer operation is activated and the indicator light (1) illuminates.
i NOTE:
Do not press the TIMER button after setting the hours, as the timer operation will not be saved.
Using the Timer Function for Automatic Power-Off
- Press the POWER button to turn on the appliance.
- Press the TIMER button during operation. The number of hours flashes.
- You can set the desired number of hours with the and buttons. The setting mode is automatically exited after approx. 5 seconds. Timer operation is activated and the indicator light (1) illuminates.
Emptying the Water Tank
The appliance integrates a water tank for collecting condensation. When the water tank is full, the pilot lamp FULL lights up. The appliance switches off.
CAUTION:
Do not transport the appliance while the water tank is full. Water could get into the appliance.
In order to continue operation, you need to empty the water tank. For this, you need a floor cloth, a flat bowl with a capacity for approx. 0.6 litre of water and the water hose supplied with the appliance.
- Disconnect the mains plug from the wall socket.
- Place the floor towel and the flat bowl underneath the water outlet. If possible, set the bowl on a lower level than the appliance.
- Unscrew the swivel nut from the lower plug. Then pull the plug out.
- Connect the water hose to the water outlet of the appliance. Place the end of the hose in the bowl.
- After the water has been discharged, remove the water hose. Use the stopper to close the water drain on the appliance again. Fasten the plug by screwing the swivel nut back on.
Terminating Operation
- Press the POWER button to turn off the appliance.
- Disconnect the mains plug from the wall socket.
Cleaning
WARNING:
Always disconnect the mains plug from the wall socket before cleaning!
- Make sure no water enters the openings of the appliance during cleaning. Otherwise this might result in an electric shock or fire.
CAUTION:
- Do not spray the appliance with cleaning agents.
- Do not use a wire brush or any abrasive items.
- Do not use any acidic or abrasive detergents.
Filter
Clean the filter once every 2 weeks, if the appliance is in daily use. If dust in the filter blocks the ventilation, the efficiency of the appliance is no longer guaranteed.
- On the rear side of the appliance, above the connection for the exhaust air hose, you will find a grille with a built-in filter.
- The grille is secured with a phillips-head screw. Remove this screw using a suitable screwdriver.
- Vacuum the filter with a vacuum cleaner.
- Clean the filter under running water. If necessary, use a mild detergent.
- Leave the filter to dry in the open air in a shady location.
- Only put the grill back in the appliance if the filter is completely dry.
- Fasten the grille again using the screw.
CAUTION:
Do not operate the appliance without filter!
Housing
- Use a vacuum cleaner to clean the ventilation slots.
- Wipe the housing with a slightly damp cloth.
Seasonal Cleaning and Storage
When not using the appliance for a long period of time, proceed as follows:
- Empty the water tank as described above.
- Repeat the steps 2 to 5 from the chapter "Emptying the water tank" with the upper water outlet (top plug).
- Operate the appliance in "FAN (Fan)" mode for 2 hours in order to dry the inside of the appliance.
- Press the POWER button to turn off the appliance. Disconnect the mains plug from the wall socket.
- Disconnect the flexible exhaust pipe from the appliance.
- Leave both water outlets open.
- Clean the filter and the appliance as described above.
- Cover the appliance with foil.
- Always store the appliance out of the reach of children in a dry, well ventilated place.
Troubleshooting
| Problem Possible Cause Solution | ||
| Appliance does not function. No power supply. Check the power connection. | ||
| The ambient temperature is too low or too high. | It is recommended to use the appliance at an ambient temperature of 7 - 35 °C (44 - 95 °F). | |
| The appliance is defect. Contact our service department or a specialist. Please consider the enclosed service manual. | ||
| Appliance does not cool sufficiently. | The appliance is exposed to direct sunshine. | Choose another location or shade the windows. |
| Windows or doors are open. Close any windows | or doors. | |
| There are too many people or other heating sources in the room. | Remove portable heaters or switch them off. | |
| The filter is dirty. Clean the filter. | ||
| The air inlet or air outlet is blocked. Remove the blockage. Keep the ventilation openings free from obstructions. | ||
| Appliance too noisy during operation. | The appliance is not in an upright position. | Place the appliance on a flat surface. Avoid vibrations. |
| The appliance switches off during operation. The indicator light FULL lights up red. | The water tank is full. | Pull the power plug. Empty the water tank via the lower water outlet. Then you can use the appliance again. |
| The remote control does not work. | The distance to the appliance is too far. | Move closer to the appliance. |
| You are not holding the remote control towards the sensor. | Hold the remote control so it points to the sensor. Make sure there are no obstacles between the remote control and the sensor. | |
| The batteries are dead. | Replace the batteries. | |
| Display on the appliance: E1 | Temperature sensor defective. | Contact our customer service or your dealer. |
| Display on the appliance: E2 | ||
Contact our customer service or your dealer if you encounter any problems that are not listed in the table or if the recommended remedy does not work.
Technical Data
Model: CL 6061 CB
Net weight: approx. 19.7 kg
Power supply: 220 - 240 V~, 50 Hz
Power consumption: 792W
Protection class: I
Energy efficiency class: A
Cooling capacity: 7000BTU (2.06kW)
Refrigerant: R290
Maximum permissible operating pressure:
Pressure side: 1.8MPa
Suction side: 0.6MPa
Maximum pressure allowed: 3.0 MPa
The right to make technical and design modifications in the course of continuous product development remains reserved.
This appliance has been tested according to all applicable, current CE directives and built according to the latest safety regulations.
Disposal
Battery Disposal

As a consumer you are obliged by law to return old batteries / accumulators.
Remove the batteries from the remote control before disposing of the appliance.
Return the batteries to a collection facility for the collection of old batteries or hazardous waste. Contact your local authority for more information.
Meaning of the "Dustbin" Symbol
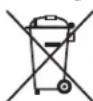
Protect our environment: do not dispose of electrical equipment in the domestic waste.
Please return any electrical equipment that you will no longer use to the collection points provided for their disposal.
This helps avoid the potential effects of incorrect disposal on environment and human health.
This will contribute to the recycling and other forms of re-utilisation of electrical and electronic equipment.
Information concerning where the equipment can be disposed of can be obtained from your local authority. Your dealer and contractual partner is also obliged to take back the old appliance free of charge.
Instrukcja obslugi
Tryb. Wentylator FAN
CIMBOBII pImuMeHReMbI B DAHHOM pyKOBoCTBe NOJIb3OBaTeJIa
Baxhble pekomehdaunn nno oecneeynaBauee 63oanachoctn
063haenbI no ocoehHomy. O6raTeJIbHO cIeNyIte 3TNM pekomehdaunm, YTObI npedotbpaNTb HecactHbI CNyaua IIN NIOJOMky
N3dJIIn:

IPEyIPEXDEHNE:
PpeDynpexKaetobonachOCTnIa3dopoBbN BO3MOxHOM pncKe nOnyuEHn TpaBMbl.

BHIMAHIME:
Yka3bIbaeT Ha BO3MOxHyOOnaHOCtB IJIa N3dEInn I Dpynx OkpyXaHOuNX PpeMeTOB.

ПРИМЕЧАЦА:
DaetcoBtbiHnHΦopMaunHO.
Copepkanie
063op deTanei np6opa. 3
0630p KHOK,IKOHOK INHINKaTOpHBIX nAM. 4
O6uaHnΦopMaun 59
OcobIe yka3aHnNo TeXnKe
6e3oNaChocTn DnA DaHoro yCtpoiCTBa. 59
063op KhoNOK, IKOHOK INHdNKaTOPhIx NaMn
PanaheIynpaBneHn
1 INdikatop (pa6oTa TaImepa OTKIOUeHa)
2 INHdikaTop HIGH (BbICKaA CKOpocTb BEHTINaTopa)
3 INHdkaTop LOW (Hn3kACKOocb BeHTnIaTopa)
4 3KpaH
5 INHdkaTop COOL (oxnackdene)
6 INHdkaTOp DRY (oxnaKeHme)
7 INHINKATOP FAN (BENTINPATOP)
8 INdikatop (cnpaui pexmm)
9 INHdkaTop POWER
10 INdkaTOp FULL (pe3epByap nIy BOblnHbI)
11 KhoIka POWER (BbIKIOuateIb npIbopa BKnIOueH / BbIKIOueH)
12 Khonka SLEEP 乙ctaHOBNTb «CPIIIMpeKMIM»
13 KhoNka MODE (cTaHOBKa pexima pa60Tb)
14 KhoHKn (HaHOBKa TeMnepaTpyb i N yaca)
15 KhoIka SPEED cytaHObKa ckopoCTn BENTINrTopa)
16 KhoNka TIMER (3hacTpoNka TaHmepa)
ДиctанцioHnoe ynpaBneHne
1 KhoNka MODE (ycTaHOBka peKIma pa6oTb)
2 KhoNka TIMER (HacTPOnKa TaMepa)
3 KhoNka POWER (BbIKIOuateIb npmbopa BkIOUeH / BbIKIOueH)
4 KhoNkI TEMP+TEMP- (yctaHOBKa temnepaTpybI uaca)
5 KhoNka SLEEP (ycTaHOBnTB «CnIaIePexIMM)
6 KhoNka SPEED (ycTaHoBbCKOpocTn BeHTnIaTopa)
PpIMeuaHnno nCNoJIb3OBaHn
BHIMAHHE: BaxHo neped nepBbIM BkHoueHem HnNo nocIe TpaHCnopTupOBKn!
IpeepnepBbIM KBNIOUeHHeM npINbOp CneJeYet BbIDepKzTaB He MeHee
3 yacobB BeptnkaIbHOM NIOJOxEHN, YTO6bl XnaIaReHT CTK Bn3.
B npoTnBHOM cnUyae cyuEcTeBye t pNCK NOBpeXJeHnKoMnpeccopa.
BHIMAHINE:
-Пипрьванп pa60тбсnomоьн кнн� POWER npeed NOBtOBHbIM BkIIOUeHmnp6oopa noOxDHTe MeHee 3MHyT.
-Пелд Tem,кakпелмecntlb yctpoiCTBO BДpyroe MecTo,CneIte BOуИЗpe3epByapa ДЯВОвы!
3ΦΦeKTHBHeB Bcero np6op pa60aet B IOMeueHnX pa3MePOM do 70 M³.
Γn6kMnIaHrDnIopabOtaHHOro Bo3dyxa HnepeXOpHnK 6blnnN3roTOBHebCneuaJIbHO nIg 3ToI np6opa.Bo n36eKaHne HeBepHo pa6OtBe He 3aMeHnTe ee Ha dpyruo.
OTBOHnA Tpy6a MoKet BbITrNBaTbCn Ha 150 cm.He nTIOJIb3yIte yDINHHTeN.
- ObecneBte Cbo6OdbHb npITOK Bo3dyxa. He nepeKIMMaTe n He nepeKpyuBaIe Tpy6y. BIOKNPOBka LpKpyLm MOxET PnVBecTn K neperpeBy yctpoCTBa.
3akpoTe BCE OKHa nDbepn BO n36ekaHne npntoka HapyKHorO Bo3- dyxa B KOMHaTy, YTO CHNkaeTcKTHBHOCTb pa0tbl.
Iodrotobka npnbopa K pa6ote
Pa3MeueHne
- Pn yctaHOBke np6o4 co6IIOdaIte pacCTOHaHE He MeHee 50 cm Mekdy np6bOpM n CTehAMn IIN DpyTMM NpeMetamn.
Поверхиностыднхндаьт ровhoи и cyхо.
C60pKa OTBOHOH Tpybbl
IITIPIMEUYAHNA
ДяСКЛБЗЯИХOKHин HAPYKHbIX polIKOBbIX UTOp BblMOKeTe INCNoJIb3OBAtB NOCTaBnREmBI KOMNNEKTДЯ BblIyCKa BO3DyXaYepe3 OKHa C BePTNKaJIbHOH INI rOpIN3OHTaJIbHOH opINEHTaUneI. OTperyIn-pyIte pa3Mep yIINOTHIneJIbHOII PIACTINHbI.
1.Плдкючite adanTep K bblnyckHomy shaHry. ПлорохиTe BblnyckHoi shaHrТak,Чтбы nepBoe pe6po shaHa rna lekaNo Ha HanpaBnIIOuEe. 3atAnITE adanTep, nobepHyB erO no Yacoboi CTpeNke.
2.Плдкючite aadantep K coeMHnTeHIO Ha 3aHHe CTOpOHe np6opa.ДЯ STOrO OTBeIte NepExoHnBnPaBO NO HAnpaBnHouMdo ynpoa.
3. BbITaHHTe Tpy6y Ha HxkyIO dINHy
4.ПикртугеаадптетКOMПЕКТаВынчсьВОЗдухаЧЕЗOKHOODHOMY KOHCUУшангавынчсьВОЗдуха.
5.EcINOKHO HeOBopyoBaHO pONIKOBoI TOpKoN He ABnHecpa3dBnXhBIM, BbINONHITe CneDyIOuee:
a) BbCyHbTe CBO6OHN KOHeTpy6bB OKHO.
b) 3aKpoTe OKHO, HACKOJIbKO BO3MOxHO.
5.EcnoOKHOOBopyoBaHOPONIKOBOWTOpKOINTOpa3DBHXHoe OKHO,BbINOHNHTCneDyOuee:
a) KomnneKt BbInyCa BO3dyXa Chepe 0KHO Heo6xOIMMO yCTaHABnBaTb rJaKO CTOpOH BHyTpB.
I PIPMEUHNA:
Bo Bpem yctaHOBKn polnIKBOBoi uTOpKn npncOeHNHTe nepeXoDNHK K KOMTIKeKTy BbIycka Bo3dyxa Upe3 OKHO TAK, YTO6blero BbIyknna Yactb bJlha HapBaBneHa BH3.
b) BctabBe npexoDnB O TBepcTne Bblnycka BO3dyxa n npoToNkHnte erO hapyky. 3akpeInTe npexoDnK B KOMnIeKeTe dRnBblNycka BO3dyxa Ype3 OKHO C NMOuBIO npinraeMOro cMoHaPe3HOro BNHTa.
c) BCTaBbTe ynpHyo nIaNky B na3 Ha npOTbnOIOxHO CTOpOHe OTBepTnBaIyCKa BO3Dyxa. 3aTe mPnKMMTE BHyTpEHHIO ONOpY K ynpHoo IINAHKe TAK, YTO6bI OHa BOUHa B HApabNIOUe. 3To Heo6XoIMNO DnI OBeCneueHnra TpeSyemO uPnHbI KOMIIeKTA dIg BAlycKa BO3Dyxa Upe3 OKHO. YcTaHOBtE KOJIb-UEByIO WAn6y N 3aTARHtE BpyHyIO bapuKOByIO raKy.
d) YCTaHOBITE KOMIJIeKT IINyBa BbIyCkA Bo3DyXa Yepe3 OKHO BOKHO, 3aKpbIb pOIMKOByIO WToPKy.
Bctabka 6aatapeek Bnylt Dv
- OtkpoTe 6atapeHbI OTCEK CH3y NylbTa DY
- BCTaBbTe 2 6aTapeKm Tnna R03 «AAA» 1,5 B, co6IHOaI nonApHocThc (CMOTpN O6O3HaHeHMa Ha dHe OTceKa)!
3.3akpoTe KpbuKy 6aTaapeHOro OTecka.
3neKtpnueckoe noKnluOeHne
1.Y6eIntecb,yTO npaamTpbbl 3JNEKtpnHecko CETN COOTBETCTBYOT Tpe6oBaHnM K 3JNEKTPoNTaHnIO pIn6opa. O3HaKoMbTeCb C INHΦopMaLHOHHo TaJIuVkoN.
2. PoiKIOHHTe np60p K npaBnIbHO yCTaHOJIeHHo N 3a3eMIIeHHo pO3ETKE. IpO3ByNT 3ykoBOI CnHAn, Yka3bIbAOUm, YTO np6Op roTob K pa6Ote. Pnp6Op HaxOUnTCB B DExkyPOM peXIMe. INcPIeN IOKa3bIbAet EkyUHO TEMpeATpy B KOMHaTe.
PpeoxpaHnteHbHmexaHnM KOMnpeccca
Ecnn pa6oTa npepBaHa, akTbnpyeTc3 3aunThbMexAHmKOMnpecoppa.3To npocTahBnBaet pa6Oy KCMpeccopa npimepHnHa3MHytbl, YTO6bl yMeHbNTb daBHeHne B KOHType OXnJaXdHn.3To He nBnEeTc3 c6oem B pa6Ote H3dEHH. I03tomy, noDoxknte B TeueHne, no KpaHne Mepe, 3 MInyT, nepeT TeM, KaK BKnIOuHTb ERO ChOBa.
Pnpaok pa6oTbI c npu6opom
UnpabTb np6bOp MOXHO C NMOOsbIO naHEnI ynpaBneHna CaMOM ycTpoiCTBe IIN C NMOOsbIO nyIbTa D. VJeHTNHeIe KhoIKN BblONHJOT OINHAKOBYIO FyHKJIIO.
KhONKn naHeJn ynpaBneHn paCCMOpteHb HnKe. NnDnKaToPb 6yDyT noka3bBaT baw BbI6Op.
ФнкионаньпьгКногн
KhONKHa yCTpOCTBe ceHCOPHbIe.ДЯ BbINONHeHMyФyHKm CnERKa KacaiTeCb KhONOK nalbem.KaKdoe HaxKaTne KhONK NDTBepXdaETcR 3BYKObbIM CNIHANOM.
BkJIOueHHe / BbIKJIOueHHe
Haknte KhoNky POWER [DnB BkIIOueHn np6opa. TOBOPoTHa KpbIuKa OTKpbIaBeTcA BOMATneCKn. PpeBaPteJIbHbe Ha-CTpoIKy yCtpoiCTBa: peKIM (COOL (OxnaXdHeNe)), TemepaTypa 22 ^ C . Ecnn pa6ota 6bla octahOBnEHa 63 otKIOUeHn oT cETn, BCE HAcTpoIK pa6toI n TempeaTypb6dyT coXpAHbI. INdnka-Topbl COOTBEcTBYIOJ DAHNBM HAcTPOIKAM.
- HaxMITE KONIKY POWER OBAДЯ BbIKIQUeHnA yCTpOCTBa.
PerynipOBKa Bo3yXHa BbIXOe
IpyerynipOBKn HapnbEnHnTOKa BO3dyxa nCNOb3yOTcR rOpN 3OHTaJIbHbIe I BepTnKaJIbHbIe NOBOPoTHbIe 3aCNoHKn.
- PnypepynpOBKn nToKa Bo3dyxa BBePx HnBn 3nCnObl3yOTc nepeHHe roPn30HTaIbHbIe NOBOPOTbIe 3acLOHKn.
Moxho Hapabntb Bo3dyx BnEBO mNn BnpaBO c NMOuB 3aHnei NobopoTHo 3acNOHKn. PnCNOXeHHbIX rOp3OHTaNbHbIX 3acNOHKax MoXHO n3MeHHTb NOLOXeHHe BEPTNaJIbHbIX NOBOPOTbIX 3acNOHOK. CneuaIbHbI pbHaar pacnoNoXe cnpaBa Hnd nocJeHne rOp3OH TaHbH 3acNOHKO.
Pexmbpa60TbI
IcnoB3yTe KHOJky MODE OnBb6opa Ondoro n3 CneDyoUxpeXMOB:
- OxnaJdHneHe(COOL)
Ocuyenne (DRY) - BeHTnIaTOp (FAN)
Pexum《OxnaKeHue》COOL
B daHOM peKIMpepaObI MOxHO NO Mepe Heo6xoMocTn OTpeynpobatckOpocBT BeHTINrAToPA n TEMnepaTyP.
IIPIMEUYAHIA:
1.HaKMnTe KhoNky POWER 1BbIKHueHn np6opa.
2. OToCoeIMHInTe BnIKy OT pO3EtKc cETN.
UHCTka
PENEYPENKDEHNE:
- Bcerda otknouaTe npnbop ot cetn 3neKtponntaHna neped uNCTko!
CJeIte 3a TeM, yTo6bI B OTBepCTna yCTpOiCTBa BO BpeM qNCTKN He IOnaDana BOJa. 3TO MoKet 6bITb pInuHoi 3JIeKTpUeCKoro Ydapa nn noJxapa.
BHIMAHINE:
- He pa36pb3nBaBte Ha yctpoCTBO uHCTRue cpeCTBA.
He nnoB3yIte npoBOIOHbIe 1ETKn nn Dpyrne capanaoUcne npedmetbl. - He nIcnoJIb3yIte cIbIbIe IINI cIpaIaIOUne UcTЯUne cpeICTBa.
ΦnIbTp
Ecnn yctpoictBO nCnObl3yETcEeKeDHeBHO,OuIaIteΦnIbTp pa3 B2 HeDen. EcnPiNb6IokpyetBeHTnIaIIO,0fpeKTHBHOCTb pa6oTbI np6opApHeB0MoxHo rapaHTnpoBaTb.
- Ha 3aDneH CTOpOHe np60pa Hn n noe CoEHNHeM dIy IuaHa BbIpyCa BO3dyXa paNIOXeHa peWTeK a CCTpoEHbIM mIbTpOM.
- PeuTeKa 3aKpeIeHa BInrTOM C KpeToO6pa3HbIM UJIINcEm. BbIKpyTITe 3OT BnHT C NOMOsbIO NOxODaIeI OTBePTKN.
- Ouchntte fHJIbTp C NOMOUIIOI INIEcoca.
4.ПомоITEФньТРДпрOTHOBODI.PINHeO6xOIMOCTNICNOL3yITMEYKOEYCTAUECEpEDCTBO.
5.ДаиTeФиMbTyВыCOxHyTbHAOTKpbITOMBO3dYXEBTENH. - Nocne nonHoro BbicbIXaHnI nIbTp a yCTaHOBIne peWetky B npN-6op.
7.3akpenitepeweetyc nomoubBInHTa.
BHIMAHINE:
He nCnoNb3yIte yCtpoNCTBO, He yCtahOBnB qInlbTpbl!
Kopnyc
-ПЯЧТКИBEHTNIIAQUHOBIXIeNEIICNOJIb3yITe NJIeNOC.
- PnpotpTe Koprnyc BnajxHoi TkaHbI.
Ce3oHHa YnCTka HxpaHeHne
Ecyn yctpoCTBO He nCnOJB3yeTcB TeueHne dIITeINbHoro cPoka, uNCTky He06xOIMO pnoBODITb CNEduIOUM Oba3OM:
1.CneIte BOy u3 BOdHoro pe3epByapa, kak ONmCaHO Bblie.
2.Повторе onepaun 2-5и psa3deJa «OnyctoeHne pe3epByapa Дявьд»Черпз np6ky Дявьд (BepxHIOI np6ky).
- 3aIyCTTne yctpoiCTBO BpeXmme FAN (BeHTnIaTOp)Ha 2 Yaca, TTO6bI npocuWntb BHyTpENHne Yactn yctpoiCTBa.
- HaxMMTE KONKY POWER, YTO6bI BByIKHOHTb yCTPOINCTBO.OT-KJIOHTeeroOT cETN 3NEKTPoNTaHnR, BItaUNB BNJKY IN3 PO3ETKN.
- OToCoeINHnTe OToYCTpOCTBa Tm6KyIO TOBDoHyTO Ty6y.
6.OctabTe o6a OTBepCTnIy IIN BObl OTKpbITbIMN. - OuCTNTe pINbTp, a TAKKe yCTpoiCTBO ONHcHHbIM Bblwe CTOCO6OM.
- HakpoTe yCTPOIcTBO fONbIOI.
9.BceIgxaHHTe yCTPOINCTBO B CYXOM,XOPOIO BEHTUNIPyEMOM MecTe,HeIOCTYINOM DnI DETeI.
YcTpaHHeHne npo6Jem
Jds Jg Clda Jg aalal 5g gll SlaBaaal clogal Jg gnall
jll jell lolwJllo Jgolg yolol
L
ad Gcambu wunwun
J5du 1,8.
JSCU 0,6
JISLY 3.0.
LJIaI, jaiai jyaii gao aaaagg aaij yai 1
aag aagaaagaaagaaagaaagaaagaaagaaagaaagaaagaaagaaagaaagaaagaaagaaagaaagaaagaaagaaagaaagaaagaaagaaagaaagaaagaaagaaagaaagaaagaaagaaagaaagaaagaaagaaagaaagaaagaaagaaagaaagaaagaaagaa
.
L 100000000000000000000000000000000000000000000000000000000000000000000000000000000
00000000000000000000000000000000000000000000000000000
a
eegd 1 1 1 1 1 1 1 1 1 1 1 1 1 1 1 1 1 1 1 1 1
1
jglall j
jlll wai p a,laaal wai l 8jgall algal all pa 3
agll g jy pgball g. jlgally all iae oolpgsj uogy 4
yo jgal ic olbl yolol palnol oolpgsj all jy g 5
sfo ay jgal algal all yg b jw qall
Jusuui 1
. POWER . 1
#
:yoo
- a 13
+ = 2, · = | | ^2 - 14| | ^2
4
Aabio Jolge y jaoi y. aboI Ogo g1 g1 cLw oLj p aowy. aboI g1 aooa oJgbo g1 pooy.
#
aale 1e 3. aegy yog jgall paaasus 13, yge ggl 5 e 20 g 20 jalal 12
ae 105y jgal lao jlaa uoyu yk jld aygll alaoj jalal Jgs glal
jlda:0gjo 254wdoioo. pdooll ago ggo jalol ggo jgalull jall de .1
#
gcll ciaiily 1111111111111111111111111111111
DRY "C:10000000000000000000
daii jiey 1000000000000000000000000000000
LOW sssssjdeEasggs
a
ED = 1 - 35g + 35g = 2
Jao) quaia aoe eae 3e 100g b y 3b g 3y 2g 3o 1000
40g 1
JnolooololjolaoogolzoeoLbocuOe"(aog,ooL) (yolll)FAN" 1000
(jaa) LOW (jaa) HIGH
y 1 y 1 1 1 1 1 1 1 1 1 1 1 1 1 1 1 1 1 1 1 1 1 1 1 1 1 1 1 1 1 1
:do
baai 1 aai jai jai 1 1 1 1 1 1 1 1 1 1 1 1 1 1 1 1 1 1 1 1
"p8114a0g"
"(s)COOL" 1 5 5 5 5 5 5 5 5 5 5 5 5 5 5 5 5 5 5 5 5 5 5 5 5 5 5 5 5 5 5 5 5 5 5 5 5 5 5 5 5 5 5 5 5 5 5 5 5 5 5 4 S L E E P J I J I J I J I J I J I J I J I J I J I J I J I J I J I J I J I J I J I J I J I J I J I J I J I J I J I J I J I J I J I J I J I J I J I J I J I J I J I J I J I J I J I J I J I J I J I J I J I J I J I JI
()
10g 24 g
:aloo
(1) 100000000000000000000000000000000000000000000000000000000000000000000000000000000
1
.00001000000000000000000000000000000000000000000
jll lgl 133ie g lqle d0gll Jaoai doaay aegy jall ao y
1.12
pall al gao as gaoe u gaiu juaogai a 1jgai
aall aagg gaae eae 0jglg k
polal algo agaoae abj. jolal go adoal poal algo daa Jgabd Jst
a 100
jolpaleol algoa aod jalabil gao gao daol joo
yell llll gao yuuyuuyuuyuuyuuyuuyuuyuuyuuyuuyuuyuuyuuyuuyuuyuuyuuyuuyuuyuuyuuyuuyuuyuuyuuyuuy
Jyj yg aal Jus oJ g oJy jol yol pall gagab gblb
Lgssol
()
.
Jie jieSowiljiejieCuiJIi
a a a a a a a a a a a a a a a a a a a a
3gglgai gll bally jolll jolll jolll jolll gbi
jai jai lii jia jia jia jia jia jia jia jia jia jia jia jia jia jia jia jia jia jia jia jia jia jia jia jia jia jia jia jia jia jia jia jia jia jia jia jia jia jia jia jia jia
jIJIJIJIJIJIJIJIJIJIJIJIJIJIJIJIJIJIJIJIJIJIJIJIJIJIJIJIJIJIJIJIJIJIJIJIJIJIJIJIJIJIJIJIJIJIJIJIJIJIJIJIJIJIJIJIJIJIJIJIJIJIJIJIJIJIJIJIJIJIJIJIJIJIJIJIJIJIJIJIJIJIJIJIJIJIJIJIJIJIJIJIJIJIJIJIJIJIJIJIJIJ
jgljplu
jgl pluwl gl dawj jglil jgo gbl psoill jgl pluwl jglld uus
aaiyaiyaiyaiyaiyaiyaiyaiyaiyaiyaiyaiyaiyaiyaiyaiyaiyaiyaiyaiyaiyaiyaiyaiyaiyaiyaiyaiyaiyaiyaiyaiyaiyaiyaiyaiyaiyaiyaiyaiyaiyaiyaiyaiyaiyaiyaiyaiyaiyaiyai
j661 alg jgojgljjylde aolo oybi
pss 40g
()
(a)gJAL aJLgHIGHLgJLg2
(aogal aiaia 3w) LOW (gall gabg 3
4
()COOL 100
(aagjdl)DRYgol 6
(20g)FAN 7
(gill aag)jll 8
POWER 9
(jL0e1lJj)FULL(yll)eg0 10
(jL1J 1
(g)a@o@b@)SLEEPjj12
(jzai)B0
(aL)gj0j0000000000000014
(dsj)SPEED15
()IMERj16
100 100
()MODEj1
()TIMER2
(aolllg)8yolalldooyoLSTEMPSTEMP+
(aglla20g)SLEEP 5
(a0gbl awnb)SPEEDj6
#
J 100 POWER j J J J J J J J J J
s = 12 · = | | · | |
1yj 1061 jj jj jjj jjj jjj jjj jjj jjj jjj
80 7
y jblaljai jali jaliljlaa a jg bgsj pall ggs
JU
yjg j100 150 gjg jS
g j 15. gj p0e 15. gj pae no 15. d, yj algl j 15.
00gll 4g0w 00j 3 1
uuee eae eee eee eee eee eee eee
jai jia jia jia
J
23 61
gIaIgIgIgIgIgIgIgIgIgIgIgIgIgIgIgIgIgIgIgIgIgIgIgIgIgIgIgIgIgIgIgIgIgIgIgIgIgIgIgIgIgIgIgIg
S = 12L ②
- a < 0. ; b > 0
paalj ggi
ab = 30.
a aal algall agaa gaaal duag aal lglgall g
aill llll Jaa Jg2 Jai 15g2g 5g
jg jai jgi jy jy poal pgbj gao poal pgbj aill jg J.1
aLw yJaa oolj 4yJy aIbll jg jgbl
"abillll Jaa 3a2alglll aolalglil
T,250VAC,3,15A:Jg
Jaiy jay ayjay jay jay jay jay jay
Aablaa aal y g l aallll alal
jaii 1111 jaii 1111 jaii jaii jaii jaii jaii jaii jaii jaii jaii jaii jaii jaii jaii jaii jaii jaii jaii jaii jaii jaii jaii jaii jaii jaii jaii jaii jaii jaii jaii jaii jaii jaii jaii jaii
a01y
jaiy jaiy jaiy jaiy jaiy jaiy
yj/ajjll jsswaaa aahall no sst
:
"wuii iuii jyjai jiyjia jyjai jie jao jia jao jao jao jao jao jao jao
a.1111
aegg gaaag aagaaagaaagaaagaaagaaagaaagaaagaaagaaagaaagaaagaaagaaagaaagaaagaaagaaagaaagaaagaaagaaagaaagaaagaaagaaagaaagaaagaaagaaagaaagaaagaaagaaagaaagaaagaaagaaagaaagaaagaa
gJ 1 aLbIaIaIaIaIaIaIaIaIaIaIaIaIaIaIaIaIaIaIaIaIaIaI
a yolal ayolal gylg l all cis
jgljllgizxoo
45g j0j001
"Downloads" abio j CL 6061 CB jblb
.()
jIgaiu 3 E ay u y jle ojde Jaoy aui 1 de yoo
Joo gill deliall odioa oaae dao no dyloolololo jy
jiaell pail lalolgbog jolb ynll jlge loalil jlae
. deliull
aaiab 25111 joo yogobg ool lly dlll alal 1 pae 0
o oelal blll gll ydy gdlall alaae pai jyag .jglall
30olay giaoy jao aaii cai i jyraio jolai
. JauuW ayalal ayil
山
jglal pluioo giai j J Lulieu olol de ul
pLuswyll cLalj j0j
galln lalldl gailldl gailldl olae clldlc gog a
aai aai g oai jai jai ge hao dai aai jai jai jai piai jai
y jg 11 jll jll jll g jlg aagai g jlgai g jlgai a
a
.1a 1
allo aassull (ailll) lo51 oall bao. yu uillabai ggejgl ae ole 4.
70
70 1
69
69. jgoll Ugjoo
69
69.
68.
68
68 120
68
68.
68
68
68. 以 a1 + a2 + a3 + a4 = 10 ,求 a5 + a6 + a7 + a8 + a9 + a10 + a11 + a12 + a13 + a14 + a_15 +
68
68. 6511 jol jol
68.
68
68.
68. 1200 2.4 米 2.
67
67 20.11 b.
67.
67.
67 (jla)
67
67
67
67
67
66
66
66 2
66
66
66. "alwal (g)io" 90
GARANTIEKARTE
warranty card · garantiekaart · carte de garantie · scheda di garanzia · tarjeta de garantia · cartao de garantia · garantikort · karta gwarancyjna · zaručni list · kartica jamstva · carte de garantie · rapaúnOHNA Kapta · zaručny list · garancijski list · garanciajegy · rapahtiñnHΦopMynp · RapaHTnHBnTALON ·
CL 6061 CB
24 Monate Garantie gemäß Garantieerklarung - 24 months warranty according to warranty declaration - 24 maanden garantie volgens garantieverklaring - 24 mois de garantie selon la déclaration de garantie - 24 mesi di garanzia secondo la dichiarazione di garanzia - 24 meses de garantia de acordo con la déclaration de garantia - 24 meses de garantia, de accordo a déclaration de garantia - 24 mandes garanti i henholdt al garantibetingelsene - 24 misiace gwarancji na podstawie oswiadczenia gwarancjynego - zaruka 24 mescu podle prohlasei o zaruca - 24 mjesnej mo jamtsto u skladu s jamstvenom delaracijom - 24 luni garantie conform declaratiei de garantie - 24 meceua rapaniu B cboTBeTbme C rapaunhoHnata deknapaui - 24-measa nza zaruka podlaVyhlasenia o zaruka - 24-mesecnagarcija, skladno Z garancjskjo izavo - 24 honap garancia a garanciafeltetelekben leirakt szerint - rapaHTNHa 24 mciu bIDNOBIOI 3aII npo rapaHTIO - rapaHTNI 24 mecuca cornacho 3aJIbnENHbIM raptanHbIM pABINAM - 24 mciu
Kaufdatum, Handlsterpmel, Unterschrift: dase of purchase, dealer stamp, signature - aankooipdatum, dealertempel, handeltenking - date d'achat, tampon du concessionaire, signature - dati de acquitiou, limbo r del rivenditre, fimra - fecha de compria, sello del distribuidor, fimra - data de compria, carimbo do distribuidor, assinatura - kipadista, forhandiertempel, signatur - data zakupu, piezec zorstedawy, podips - datum zakupeni, natrki prodekje, podips - datum kupovine, zig trovaca, potpis - data de azchije, stampila fumorizuri, semnatura - Daia na koxmianu, Nezeva na Plopaavaa, Plopa-n - datum nukiu, pečatka obchodniki/ predacju, podips - datum nakupa, zig trovaca, podips - vásárhás latánu, kereskedó begyeðjé, aláris - data prúnydabánu, neçatka plopaavaa, ngnnc - Da tata pnoöpetenhá, ulamn prôpábau, plopa-n-
BOMANN®
www.bomann-germany.de
BOMANN®
C. Bomann GmbH
Internet: www.bomann-germany.de
Made in P.R.C.
- WAARSCHUWING: Brandgevaar!
- ATTENTION: Risque de surchauffe!
- Symbols in this Instruction Manual
- WARNING:
- CAUTION:
- i NOTE:
- Contents
- General Notes
- WARNING:
- Special Safety Precautions for this Appliance
- Read the instructions!
- WARNING: Fire hazard!
- The service manual is available at the following web address: www.sli24.de
- CAUTION: Risk of overheating!
- Handling Batteries
- Unpacking the Appliance
- Scope of Delivery
- Overview of the Components
- Overview of Buttons, Icons and Indicator Lights
- Control Panel
- Remote Control
- Notes for Use
- Putting into Service
- Location
- Assembly of Exhaust Pipe
- NOTE:
- Inserting Batteries in the Remote Control
- Electric Connection
- Compressor Safety Appliance
- Using the Appliance
- Function Buttons
- Turning Appliance On/Off
- Setting the Air Outlet
- Operating Modes
- Operating Mode "Cooling" COOL
- Operating Mode "Fan" FAN
- Operating Mode "Dehumidifying" DRY
- Setting the Fan
- Setting the Temperature
- "Sleep Mode"
- Timer (Automatic Timer)
- Using the Timer Function for Automatic Power-On
- Using the Timer Function for Automatic Power-Off
- Emptying the Water Tank
- Terminating Operation
- Cleaning
- Filter
- Housing
- Seasonal Cleaning and Storage
- Technical Data
- Disposal
- Battery Disposal
- Meaning of the "Dustbin" Symbol
- Instrukcja obslugi
- Tryb. Wentylator FAN
- CIMBOBII pImuMeHReMbI B DAHHOM pyKOBoCTBe NOJIb3OBaTeJIa
- IPEyIPEXDEHNE:
- BHIMAHIME:
- ПРИМЕЧАЦА:
- Copepkanie
- 063op KhoNOK, IKOHOK INHdNKaTOPhIx NaMn
- PanaheIynpaBneHn
- ДиctанцioHnoe ynpaBneHne
- PpIMeuaHnno nCNoJIb3OBaHn
- BHIMAHHE: BaxHo neped nepBbIM BkHoueHem HnNo nocIe TpaHCnopTupOBKn!
- BHIMAHINE:
- Iodrotobka npnbopa K pa6ote
- Pa3MeueHne
- C60pKa OTBOHOH Tpybbl
- IITIPIMEUYAHNA
- I PIPMEUHNA:
- Bctabka 6aatapeek Bnylt Dv
- 3neKtpnueckoe noKnluOeHne
- PpeoxpaHnteHbHmexaHnM KOMnpeccca
- Pnpaok pa6oTbI c npu6opom
- ФнкионаньпьгКногн
- BkJIOueHHe / BbIKJIOueHHe
- PerynipOBKa Bo3yXHa BbIXOe
- Pexmbpa60TbI
- Pexum《OxnaKeHue》COOL
- IIPIMEUYAHIA:
- UHCTka
- PENEYPENKDEHNE:
- ΦnIbTp
- Kopnyc
- Ce3oHHa YnCTka HxpaHeHne
- Jusuui 1
- #
- :yoo
- 4
- DRY "C:10000000000000000000
- 40g 1
- :do
- "p8114a0g"
- ()
- :aloo
- 1
- 1.12
- jgljplu
- j661 alg jgojgljjylde aolo oybi
- J
- ab = 30.
- jgljllgizxoo
- 山
- GARANTIEKARTE
- CL 6061 CB
- BOMANN®
Brand : BOMANN
Model : CL 6061 CB
Category : Air Conditioning