TV 293 - Measuring equipment Testboy - Free user manual and instructions
Find the device manual for free TV 293 Testboy in PDF.
| Product type | IR thermal camera with visual camera |
| Brand | Testboy |
| Model | TV 293 |
| Dimensions (L×W×H) | 140 × 80 × 28 mm |
| Weight | 208 g |
| Power | Integrated lithium-ion battery, charging via micro-USB port |
| Battery life | Approximately 2 hours of continuous operation (estimated) |
| Display | 3.2" TFT color LCD, 320×240 pixels |
| Infrared resolution | 220 × 160 pixels |
| Visible image resolution | 640 × 480 pixels |
| Field of view | 27° × 35° |
| Thermal sensitivity | 0.07 °C |
| Temperature range | -20 °C to 300 °C |
| Accuracy | ±2% or ±2 °C (whichever is greater) |
| Emissivity | Adjustable from 0.01 to 1.0 |
| Frame rate | 9 Hz |
| Spectral range | 8 to 14 μm |
| Focus | Fixed |
| Color palettes | Ironbow, rainbow, high contrast, grayscale (white hot, black hot) |
| Main functions | Spot temperature measurement, thermal and visual image overlay, hot/cold spot marking, image recording to internal memory (3 GB) |
| File formats | .jpg |
| Power saving mode | Auto power off after 5 or 20 minutes of inactivity (adjustable) |
| Operating temperature | 0 °C to 45 °C |
| Storage temperature | -20 °C to 60 °C |
| Relative humidity | ≤ 85% RH |
| Maintenance and cleaning | Clean with a soft, dry cloth. Avoid solvents. Protect from dust and moisture. |
| Safety | Do not point the laser beam at eyes. Follow the five safety rules for electrical installations. Do not use near strong electromagnetic fields. |
| General information | CE certification. Compliant with applicable directives. Warranty void if unauthorized modifications are made. |
Frequently Asked Questions - TV 293 Testboy
User questions about TV 293 Testboy
0 question about this device. Answer the ones you know or ask your own.
Ask a new question about this device
Download the instructions for your Measuring equipment in PDF format for free! Find your manual TV 293 - Testboy and take your electronic device back in hand. On this page are published all the documents necessary for the use of your device. TV 293 by Testboy.
USER MANUAL TV 293 Testboy
natural_image
Line drawing of a mobile phone with leaf-shaped buttons and a central circular button (no text or symbols)Testboy® TV 293
Version 1.3

text_image
2 1 3 4 5 VioHS VioHS® VIOHS® VioHS® VIOHS® CE VIOHSLaden des Akkus
An additional source of danger is posed my mechanical parts which can cause severe personal injury.
Objects can also be damaged (e.g., the instrument itself can be damaged).
WARNING
An electric shock can result in death or severe injury. It can also lead to property damage and damage to this instrument.
WARNING
Never point the laser beam directly or indirectly (on reflective surfaces) towards the eyes. Laser radiation can cause irreparable damage to the eyes. You must first deactivate the laser beam when measuring close to people.
General safety notes

WARNING
Unauthorized changes or modifications of the instrument are forbidden – such changes put the approval (CE) and safety of the instrument at risk. In order to operate the instrument safely, you must always observe the safety instructions, warnings and the information in the "Proper and Intended Use" Chapter.
WARNING
Please observe the following information before using the instrument:
Do not operate the instrument in the proximity of electrical welders, induction heaters and other electromagnetic fields.
After an abrupt temperature fluctuation, the instrument should be allowed to adjust to the new temperature for about 30 minutes before using it. This helps to stabilize the IR sensor.
Do not expose the instrument to high temperatures for a long period of time.
Avoid dusty and humid surroundings.
Measurement instruments and their accessories are not toys. Children should never be allowed access to them!
In industrial institutions, you must follow the accident prevention regulations for electrical facilities and equipment, as established by your employer's liability insurance organization.

Please observe the following five safety rules:
1 Disconnect.
2 Ensure that the instrument cannot be turned back on again.
3 Ensure isolation from the main supply voltage (check that there is no voltage on both poles).
4 Earth and short-circuit.
5 Cover neighbouring parts that are under live electrical load.
Proper and intended use
This instrument is intended for use in applications described in the operation manual only. Any other usage is considered improper and non-approved us-age and can result in accidents or the destruction of the instrument. Any misuse will result in the expiry of all guarantee and warranty claims on the part of the operator against the manufacturer.

Remove the batteries during longer periods of inactivity in order to avoid damaging the instrument.

We assume no liability for damages to property or personal injury caused by improper handling or failure to observe safety instructions. Any warranty claim expires in such cases. An exclamation mark in a triangle indicates safety notices in the operating instructions. Read the instructions completely before beginning the initial commissioning. This instrument is CE approved and thus fulfils the required guidelines.
All rights reserved to alter specifications without prior notice
© 2020 Testboy GmbH, Germany.
Disclaimer and exclusion of liability

The warranty claim expires in cases of damages caused by failure to observe the instruction! We assume no liability for any resulting damage!
Testboy is not responsible for damage resulting from:
failure to observe the instructions,
changes in the product that have not been approved by Testboy,
the use of replacement parts that have not been approved or manufactured by Testboy,
the use of alcohol, drugs or medication.
Correctness of the operating instructions
These operating instructions have been created with due care and attention. No claim is made nor guarantee given that the data, illustrations and drawings are complete or correct. All rights are reserved in regards to changes, print failures and errors.
Disposal
For Testboy customers: Purchasing our product gives you the opportunity to return the instrument to collection points for waste electrical equipment at the end of its lifespan.
The WEEE directive regulates the return and recycling of electrical appliances. Manufacturers of electrical appliances are obliged to take back and recycle all electrical appliances free of charge. Electrical devices may then no longer be disposed of through conventional waste disposal channels. Electrical appliances must be recycled and disposed of separately. All equipment subject to this directive is marked with this logo.
Disposing of used batteries

As an end user, you are legally obliged (by the relevant laws concerning battery disposal) to return all used batteries. Disposal with normal household waste is prohibited!
Contaminant-laden batteries are labelled with the adjacent symbol which indicates the prohibition of disposal with normal household waste.
The abbreviations used for heavy metals are:
Cd = Cadmium, Hg = mercury, Pb = lead.
You can return your used batteries for no charge to collection points in your community or everywhere where batteries are sold!
Certificate of quality
All aspects of the activities carried out by Testboy GmbH relating to quality during the manufacturing process are monitored permanently within the framework of a Quality Management System. Furthermore, Testboy GmbH confirms that the testing equipment and instruments used during the calibration process are subject to a permanent inspection process.
Declaration of Conformity
The product conforms to the present directives. For more detailed information, go to www.testboy.de
Introduction
The product is an IR Thermal Imager which links the mean temperature measurement to a digital image superimposed on a heatmap.
The heatmap function makes complex measurements of individual components superfluous, as is required by the classical point thermometers (radiometers). Scan a wide section in order to be able to display as a mixed digital figure with superimposed presentation of the heatmap and, thus, to find the temperature problems to investigate more precisely within a short time.
For better identification of problem zones, the instrument has a visual camera. Thus, it can be changed from the heatmap to visual presentation. Heatmaps and visual images can be saved on an internal memory card in order to create measurement areas or to print the image recording.
The product has been designed to be very user-friendly. You only have to switch it on and, after only a few seconds, an image is displayed. The product is particularly suitable for the maintenance of electrical installations, heating, ventilation and air-conditioning systems and other equipment and enables quick identification of problem zones.
Operation
Characteristics
- TFT colour LCD display
- Adjustable emissivity improves the measurement accuracy on partially reflecting surfaces
- Identification of hot and cold locations, so that the user can detect the areas with the highest and lowest temperatures in the infra-red heatmap
- Selectable colour palette
- Alignment of the visual and heatmap presentation
- Recording and saving of the image on a 3 GB internal memory card.
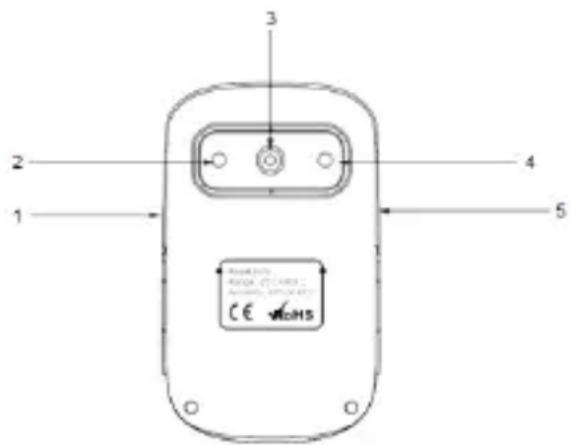
Design of the camera
1 Micro-USB port
2 Camera
3 Infra-red sensor
4 LED light
5 Trigger for image recording
6 MENU (ON/OFF) button
7 Arrow buttons "up", "down" "left" and "right"
8 SELECT/ENTER button
text_image
2 1 3 4 5 CE ###S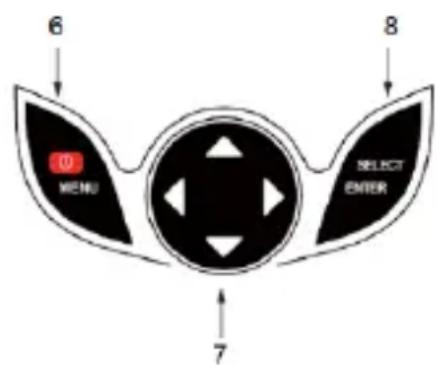
text_image
6 MENU SELECT ENTER 7 8Charging the battery
The instrument contains an integrated lithium-ion battery. When the battery status is low, an empty battery symbol is displayed on the top right at the display edge. When this status is displayed, the instrument should be recharged. The instrument is charged via the micro-USB port. When the instrument is fully charged, the charging cable should be removed.
To achieve the best possible battery performance, the instrument should not be connected to a charger for more than 24 hours. The longest battery service life can be guaranteed if the instrument is charged at least every 3 months for 2 hours. The battery should not be charged in extremely cold environments.
Basic functions
To switch the instrument on and off, press the button ON/ OFF/ MENU button and keep it pressed for 3 seconds.
Once the instrument is switched on, press the MENU button for 1 second in order to call up the display that sets up the basic functions. The selection options of "Image Registration", "Images", "Colour Palette", "Emissivity" and "Settings" are now displayed. To display the other menu options, press the arrow buttons. Press MENU to return to the normal measuring mode.
After activating the MENU button in the basic function mode, press the SELECT/ENTER button in order to execute the settings of the basic functions. Using the arrow buttons select the desired value for the respective setting.
Once the desired settings have been executed, press the MENU button to exit the Settings mode. On the main display the lowest row (MIN/MAX and Time) is faded out by pressing on the "Up" arrow button.
Measurement
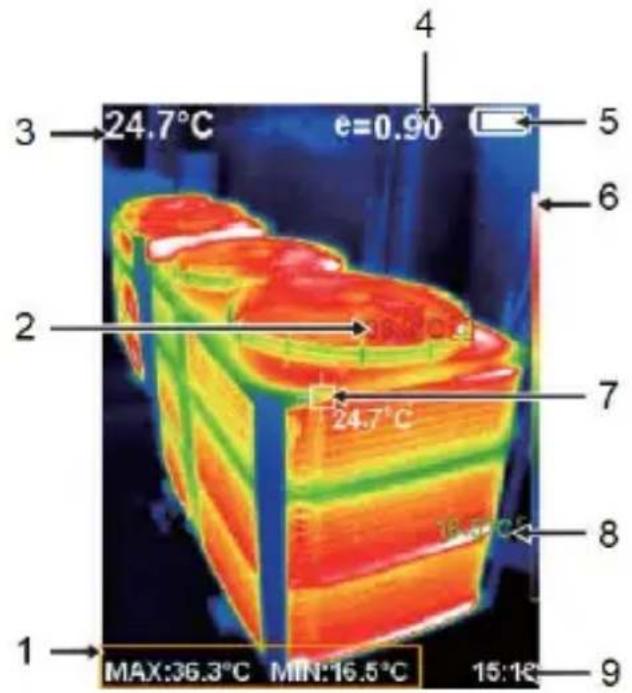
The temperature measured in the central area is indicated on the top of the display. The degree of emission set is also indicated on the top of the display. If the hot and cold marks are activated, move the instrument until the hot or cold location is in the central measurement area.
Align the instrument to an object that is probably hotter or colder than the surroundings in order to attain an optimum result.
text_image
1 2 3 4 5 6 7 8 9 MAX:36.3°C MIN:16.5°C 15:1R 24.7°C e=0.901 MAX and MIN value
2 MAX value
3 Average value
4 Emission value
5 Battery charge status
6 Colour scale
7 Central measuring point
8 MIN value
9 Clock/time stamp
Image registration
After calling up the Main Menu with the arrow buttons select the Option "Image Registration and press the SELECT/ENTER button to adjust the image overlay. Use the arrow buttons to select the overlay level and then press SELECT/ENTER to exit the editing mode.
It no buttons are pressed after 6 seconds the instrument automatically exits from the menu.

Display and management of the saved images
In the second menu item “Images” 📁 you will find all previously taken images and you can manage them here. Press the MENU button to access the Main Menu. Now select the second menu item “Images” 📁 and then press the right arrow button to switch to the Images list. You should now see the following displayed on the screen:
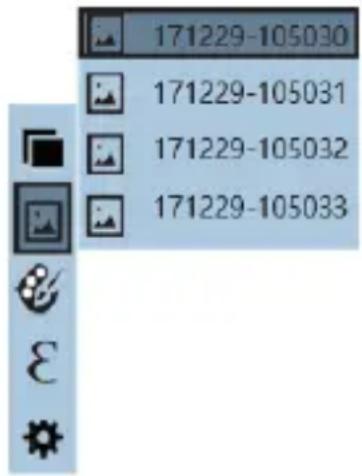
text_image
171229-105030 171229-105031 171229-105032 171229-105033Use the “up” and “down” arrow buttons to navigate through the individual images. Press the SELECT/ENTER button to display the selected image. In the Images view you can use the “right” and “left” arrow buttons to scroll through the previous and subsequent images. You can use the “up” arrow key to delete the image currently being viewed. To do this, the option YES must be selected and the input confirmed with the MENU button or declined or cancelled with SELECT/ENTER. The Images view is also closed with the SELECT/ENTER button and pressing the MENU button exits the menu.
Colour palette
Using the colour palette menu, incorrect colour presentations of the infra-red images displayed or recorded can be changed. Different colour palettes are available for selection. Some palettes are better suitable for specific applications than others and are set as required.
1: Grey scales offer a uniform, linear presentation of the colours for the best possible presentation of the details.
2: The colour palette, High contrast, presents colours with appropriate emphasis. This colour palette is suitable for heavily pronounced temperature differences that can be presented as amplified contrast in the colour scheme between high and low temperatures.
3: The colour palettes Ironbow and Rainbow are a combination of the high contrast and grey scales palette.
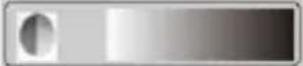 Grey scales (white hot) Grey scales (white hot) | 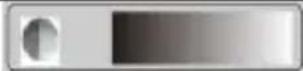 Grey scales (black hot) Grey scales (black hot) |
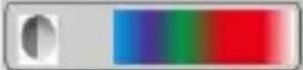 Rainbow Rainbow | 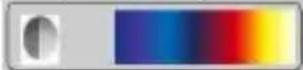 High contrast High contrast |
 Ironbow Ironbow |
To change the colour palette, select the third option "Colour Palette" from the Main Menu, use the "right" arrow button to switch to the sub-menu and navigate through the options with the "up" and "down" arrow buttons. The selection is confirmed with the SELECT/ENTER" button and the MENU button exits from the menu again.
Recording and Saving Images
In measuring mode, press on the trigger. You are subsequently asked whether the photos should be saved or not. The MENU button confirms this question with "Yes". Press SELECT/ENTER to decline the selection with "No" and the image is then discarded. Images can be downloaded in the same way as from every usual flash memory medium (e.g. USB-stick).
Emissivity
Load the Main Menu with the MENU button and use the arrow buttons to select the fourth menu item "Emissivity". Access the sub-menu by pressing the "right" arrow button. Navigate through the possible degrees of emission with the "up" and "down" arrow buttons. The selection is confirmed with the SELECT/ENTER button. Exit the sub-menu by using the "left" arrow button.

text_image
Emissivity Matte (e=0.95) Semi- matte (e=0.85) Semi-glossy (e=0.60) Custo 0.01If the “Individual” degree of emission is selected, press the SELECT/ENTER button to input the value manually. To do this use the “right” and “left” arrow buttons to select the figures and the “up” and “down” arrow buttons to define the respective value. When the input is complete, you must press SELECT/ENTER again to save the input.
Information
Infra-red energy is radiated from all objects. How much energy is radiated depends on the actual surface temperature and the degree of emission at the surface. The measuring instrument records the infra-red energy radiated from the surface and, based on this data, calculates an approximate temperature value. Many objects and materials frequently occurring, for example, painted metal, wood, water, skin and fabric, radiates energy very good and readily enables very good measurements. For surfaces that feature good radiation characteristics (a high degree of emission), the degree of emission is ≥ 90% (0.90). Shiny surfaces or unpainted metals only have a degree of emission of < 60% (0.60). These materials do not have good radiation characteristics and, thus, only a low emissivity. In order to be able to measure materials with low emissivity more accurately, the degree of emission must be corrected accordingly. By adapting the degree of emission, the actual temperature can normally be calculated more accurately.
Degree of Emission Table
| Material | Degree of heat emission | Material | Degree of heat emission |
| Aluminium | 0.30 | Glass | 0.90 to 0.95 |
| Asphalt | 0.90 to 0.98 | Iron oxide | 0.78 to 0.82 |
| Concrete | 0.95 | Paint | 0.80 to 0.95 |
| Leather | 0.95 | Synthetic material | 0.85 to 0.95 |
| Ceramic | 0.90 to 0.95 | Paper | 0.70 to 0.94 |
| Copper | 0.50 | Sand | 0.90 |
| Tile | 0.90 | Rubber | 0.95 |
| Carbon | 0.85 | Wood | 0.94 |
| Sealing agent, containing grease | 0.94 | Textiles | 0.94 |
| Frozen foods | 0.90 | Lead | 0.50 |
| Warm food | 0.93 | Marble | 0.94 |
| Ice | 0.96 to 0.98 | Fabric (black) | 0.98 |
| Snow | 0.83 | Mortar | 0.8 to 0.90 |
| Human skin | 0.98 | Water | 0.92 to 0.96 |
Settings
To access Settings, the fifth option of the Main Menu, select "Settings" and then press on the "right" arrow button.
Auto Power Off
When you are in the "Settings" menu you can set the "Auto Power Off" function.
The function can be completely switched off but a time period of 5 or 20 minutes can also be selected. As usual the setting is selected via the "right" arrow button and navigation is via the "up" and "down" arrow buttons. The relevant selection is saved with the SELECT/ENTER button.
Brightness (Intensity)
The second option on the “Settings” menu sets the “Brightness”. The options “low”, “medium” and “high” can be set here. As usual the setting is selected via the “right” arrow button and navigation is via the “up” and “down” arrow buttons. The relevant selection is saved with the SELECT/ENTER button.
Language
The third option on the “Settings” menu sets the “Language” The following languages are available: English, Chinese, Italian and German. As usual the setting is selected via the “right” arrow button and navigation is via the “up” and “down” arrow buttons. The relevant selection is saved with the SELECT/ENTER button.
Unit
The fourth option on the “Settings” menu sets the “Units 0. The settings of °C and °F can be selected. As usual the setting is selected via the “right” arrow button and navigation is via the “up” and “down” arrow buttons. The relevant selection is saved with the SELECT/ENTER button.
Time format
The fifth option on the "Settings" menu sets the "Time Format". The settings of 12 hours and 24 hours can be selected. As usual the setting is selected via the "right" arrow button and navigation is via the "up" and "down" arrow buttons. The relevant selection is saved with the SELECT/ENTER button.
Time setting
The sixth option on the "Settings" menu sets the "Time Setting ☐Use the "right" arrow button to switch to this sub-menu where you can now set the date and time. The following view is displayed:

text_image
Set time Year 2016 Month 9 Day 9 Hour 11 Minute 33 Second 33Navigate with the "up" and "down" arrow buttons through the possible input fields. Press on the SELECT/ENTER button to edit the field. Use the "right" and "left" arrow buttons to highlight the desired figure which can then be changed with the "up" and "down" arrow buttons. Press on SELECT/ENTER again to save the settings for this field. When all the settings are complete the sub-menu can be exited with the "left" arrow button.
Switching the highest and lowest temperatures on/off
The seventh option of the "Settings" menu sets the "Highest/Lowest Temperature Display". The settings of "On" and "Off" can be selected. As usual the setting is selected via the "right" arrow button and navigation is via the "up" and "down" arrow buttons. The relevant selection is saved with the SELECT/ENTER button.
Technical data
| Display | 3.2" colour LCD display (320 x 240 pixels) |
| IR resolution | 220 x 160 pixels |
| Image resolution for visible light | 640 x 480 pixels |
| Field of view | 27° x 35° |
| Thermal sensitivity | 0.07 °C |
| Temperature range | -20 to 300°C |
| Accuracy | ±2 % or measurement value ±2 °C |
| Emissivity | Can be set between 0.01 and 1.0 |
| Image frequency | 9 Hz |
| Spectral band | 8-14 μm |
| Focus | non-adjustable |
| Colour palette | Ironbow, rainbow, rainbow higher contrast, grey scales (white hot) and grey scales (black hot) |
| Display options | Fading the visual images using the infra-red image can be set in increments of 25% between complete infra-red image and clear visual presentation |
| File format | .jpg |
| Image storage | Internal memory card (3 GB) |
| Display of saved content | Scroll list with all images saved that can be displayed on the screen |
| Energy-saving mode | The instrument automatically switches off if it has not been used for 5 / 20 minutes (with Auto Power Off active) |
| Operating temperature | 0 to 45°C |
| Storage temperature | -20 to 60°C |
| Relative air humidity | <85% RH |
| Power supply | Integrated battery |
| Weight | 208 g |
| Size | 140 × 80 × 28 mm |
Cd = cadmium, Hg = mercure, Pb = plomb.
Cd = cadmium, Hg = kwik, Pb = lood.
flowchart
graph TD
    A["MENU"] -->|6| B["Select ENTER"]
    B -->|7| C["Arrow to left"]
    B -->|8| D["Arrow to right"]
text_image
Testboy® GmbH, Germans Stands For Quality Since 1953Testboy GmbH Tel: 0049 (0)4441 / 89112-10
Germany info@testboy.de