CasaTherm S2000 Gold FB - Heating CasaFan - Free user manual and instructions
Find the device manual for free CasaTherm S2000 Gold FB CasaFan in PDF.

User questions about CasaTherm S2000 Gold FB CasaFan
0 question about this device. Answer the ones you know or ask your own.
Ask a new question about this device
Download the instructions for your Heating in PDF format for free! Find your manual CasaTherm S2000 Gold FB - CasaFan and take your electronic device back in hand. On this page are published all the documents necessary for the use of your device. CasaTherm S2000 Gold FB by CasaFan.
USER MANUAL CasaTherm S2000 Gold FB CasaFan
natural_image
Technical line drawing of a hexagonal grid structure with side panels and a small inset view (no text or symbols)HALOGEN-INFRAROTHEIZSTRAHLER
HALOGEN INFRARED HEATER
RÉCHAUFFEUR À RAYONS INFRAROUGES AVEC LAMPES HALOGÈNES
RISCALDATORE A RAGGI INFRAROSSI CON LAMPADE ALOGENE
CasaTherm® S2000 FB Gold
CE
IP65
71017v1.0
GB Table of Contents:
Content of Packing 4
Notice of Assembly/Installation 5
Installation/Assembly 6
Operation 7
Technical Data 11
Important Safety Advices 12
Advices for Operation 12
Cleaning/Maintenance 13
Storage 13
Help with Faults 13
Accessories (optional) 22
IT Indice:
GB Content of packing
natural_image
Technical line drawing of a hexagonal grid structure with side panels and a small inset view (no text or symbols)1
text_image
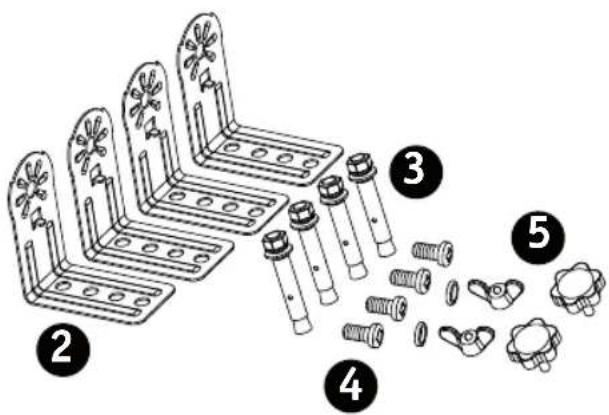
Technical diagram showing exploded view of mechanical components with numbered parts labeled 2 through 5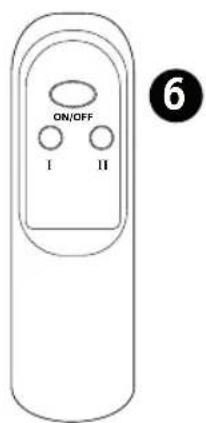
text_image
ON/OFF I II 6DE
GB
FR
IT
| 1. Strahler mit Gehäuse | 1. Heater | 1. Radiateur | 1. Riscaldatore |
| 2. Wandhalterungen (4x) | 2. Wall fixing accessory (4x) | 2. Support de montage mural (4x) | 2. Supp. per installaz. a muro (4x) |
| 3. Schraube mit Dübel (4x) | 3. Screw/anchor bolt (4x) | 3. Vis avec cheville (2x) | 3. Vite/caviglia (2x) |
| 4. Schraube (4x) | 4. Screw (4x) | 4. Vis (4x) | 4. Vite (4x) |
| 5. Rändelschraube (2 x) | 5. Knurled screw (2x) | 5. Vis moletée (2x) | 5. Vite a testa zigrinata (2x) |
| 6. Infrarot-Fernbedienung | 6. Infrared remote control | 6. Télécmd. à infrarouges | 6. Telecomando a distanza |
DE Installation
FR Installation
GB Installation
IT Installazione
text_image
Diagram illustrating a mechanical assembly or assembly process with labeled components and a checkmark indicating completion.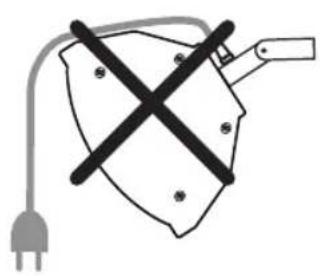
natural_image
Simple line drawing of a shield with a cross mark and plug, no text or symbols present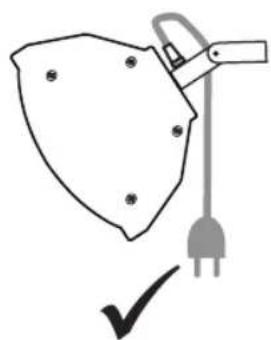
natural_image
Simple line drawing of a shield-shaped object with a plug and checkmark below (no text or symbols)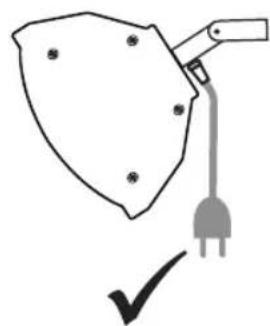
natural_image
Simple line drawing of a shield with a plug and checkmark, no text or symbols present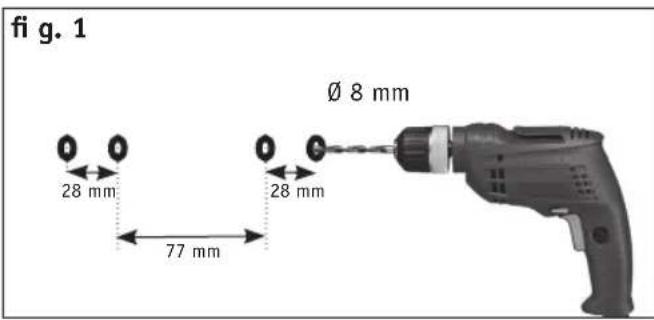
text_image
fi g. 1 Ø 8 mm 28 mm 28 mm 77 mm
text_image
fi g. 2 ② ③ 2 x ③ 2 x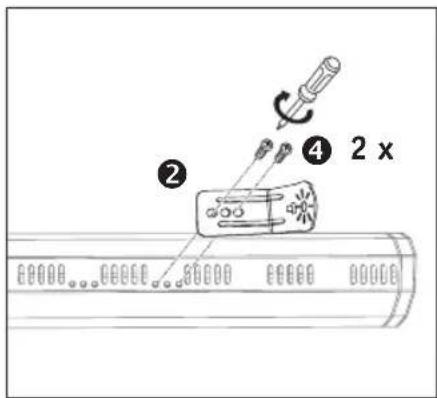
text_image
Diagram showing a device with labeled parts and a 2x multiplier indicator, likely illustrating a mechanical or electrical setup.
text_image
fi g. 4fi g. 3 ⑤ ⑤
natural_image
Technical line drawing of a heat exchanger or cooling unit with mesh structure and mounting bracket (no text or symbols)DE Während des Betriebs und 5 Minuten nach dem Ausschalten - SEHR HEISSE OBERFLÄCHE!!!
GB During operation and 5 minutes after switching off - VERY HOT SURFACE!!!
FR Pendant le fonctionnement et 5 minutes après la mise hors tension - TRÈS CHAUD SURFACE!!!
IT Durante il funzionamento e 5 minuti dopo l'interruzione - SUPERFICIE MOLTO CALDO!!!
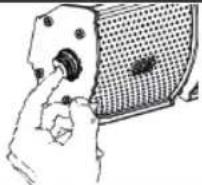
text_image
Safety warning illustration showing a hand using a tool to press through a heat exchanger tube with warning symbolDE Bedienung GB Operation FR Foctionnement IT Funzionamento
| DE FR Taste Bouton GB IT Button Tasto | DE FR Funktion L'action GB IT Function Funzione | |
 | ||
 I I | DE Standby einGB Standby onFR Standby allumerIT Standby accendere | |
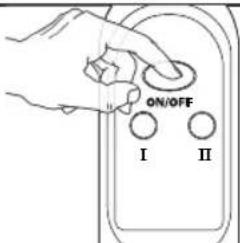 | DE EinschaltenGB Switch onFR AllumerIT Accendere | |
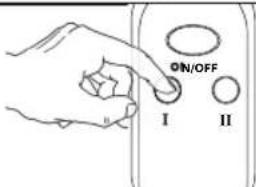 | DE Leistungsstufe 1GB Power level 1FR Power Stage 1IT Stadio di potenza 1 | |
 | DE Leistungsstufe 2GB Power level 2FR Power Stage 2IT Stadio di potenza 2 | |
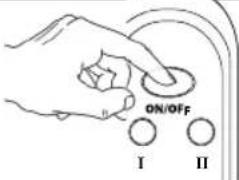 | DE StandbyGB StandbyFR StandbyIT Standby | |
 0 0 | DE AusGB OffFR ÉteintIT Spento | |
 | [42K2] | |
DE

About this operating instructions
Before using the CasaFan heater, read the operating instructions carefully. Keep the operating instructions within reach. Never pass the heater onto another person without the operating instructions.
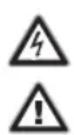
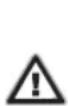
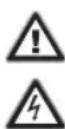
| Explanation of symbols: | |
| Dangerous electric voltage | Careful |
| Warn the user of the dangers caused by electricity | Particular note for the user. |
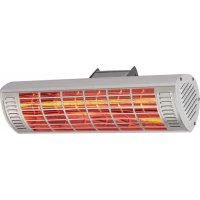
| Describing the CasaFan Halogen Infrared HeaterThe heater is concepted as an addition heater. The use in machines which are outside and unprotected, in garages or rooms in danger of fire or explosion, is not permitted. By IP65 degree of protection it can be used in humid areas and outside. | ||
| Technical data: | ||
| CasaTherm S2000 FB Gold | ||
| Mains voltage: 220 - 240 V | ~50 Hz | |
| Power: 2,000 Watt (2 power settings) | ||
| Protection clas: I / IP65 | ||
| Dimensions ∅ x H (mm) 65 | 5 x 110 x 75 | |
| Weight (kg): 1,5 | ||

Caution! Only operate the unit when completely assembled!
| - Unpack the CasaFan Halogen Infrared Heater, check if everything is present (see Figure on page 4) and for visible signs of damage. | ||
| 1. Heater 2. Wall fixing | accessory 3. Screw with bolt | (4x) |
| 4. Screw (4x) 5. Knurled screw | (2x) 6. Infrared remote control | |

- Dispose of packaging taking the environment into account and keep out of the reach of children.
Assembly
Please proceed as per figure 1 - 5 on page 6 of these operating instructions. Please pay attention to the safety advices for installation on page 5 and 11 - 13.
When dealing with electricity and heater products, just conforming to all the safety and precautionary measures can not describe every danger situation. They do not replace sensible procedures and care, which you have to take into account when first initiating and then running your halogen infrared heater.
Assembly and place of installation
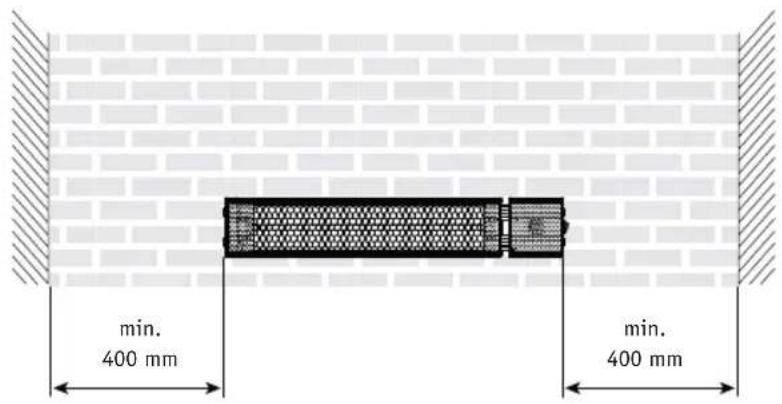
- Never install the Halogen Infrared Heater (HIH) near to or facing towards inflammable surfaces. HIH must be positioned at a distance of not less than 2 m from objects made of flammable materials, such as cardboard or fabric, and from glass doors and windows. The heater must never be mounted in such a way that it points directly towards a wall or ceiling. When the appliance is installed in environments (e.g. workshops or car parks) containing flammable or combustible substances (paints, solvents, etc.), HIH must be positioned at a
GB
distance of not less than 4 m from the source of danger. The minimum distance to flammable ceilings is 60 cm.
!
- Do not use the appliance where flammable vapours are present (spirit, insecticides, petrol, etc.).
- HIH is not indicated for installation in extremely dusty environments, in which the bulb might be damaged.
- In order to avoid creating a fire hazard, the appliance must never be installed with the radiating elements close to or facing towards curtains, beds or other objects or materials that are liable to burn easily; always ensure that these objects are at a suitable minimum distance, to avoid any risk of fire or heat damage.
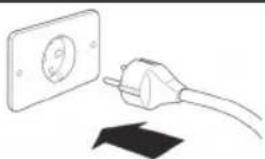
- WARNING: never position HIH directly under a power socket.
- The appliance becomes very hot during use. Avoid all contact between your skin and the hot surfaces of the appliance. Switch the appliance off and wait at least 5 minutes for it to cool down before performing any work on it
- Do not cover or block the front heat irradiation grille.
- Do not cover or block the appliance during use.
- Keep the front grille clean.
- The appliance must always be mounted horizontally.
- Never wrap the power supply cord on the unit.
- The unit must be handled with care, and avoid of vibration or hitting.
- Don't use this unit as a cloth or towel dryer or for drying anything else.
- Don't use this unit as a sauna heater or as a room heater of heating storing.
- Don't use this unit in place of animal propagating and raising.
When using any electric units, several basic rules have to always followed, as detailed below:
General
- The voltage details on the nameplate are to conform with the available mains voltage.
- The house fuse installed may resist at least 2000 W, a 16 A non fast acting fuse should be preferred.
- The building mains must be earthed!
- Only operate the unit when completely assembled!
Operation
- If mounted on a stand, the unit is to be operated on a level, stable base.
- Position the mains cable such that no danger of tripping is possible in order to avoid throwing, or pulling the unit over.
- Do no push objects through the guard.
- The units are never be touched when having wet or moist hands.
- The units are never be used if you are barefooted.
- Never connected to an extension cord unless it's approved for at least 10 A.
- The units are never be used in a the bathroom or shower unless you take exceptional care.
- Do not pull on the cable or unit in order to separate the plug from the socket.
- Do not subject the unit to detrimental environmental influences (strong sunlight etc).
- Never allow unsupervised children, or incapable persons, to use it.
- Never immerse an electrical device in water.
- Check regularly, but most definitely before every use, the mains cable and mains plug for damage.
- If any damage is visible, then further use of the unit must not be made.
- If any damage and/or reduced functioning occurs, switch off and do not manipulate the unit.
- If, in such as event, a repair is necessary, contact an authorised by the manufacturer custo-12

mer service point.
- Always take note of the general safety rules when using electrical equipment.

Maintenance/cleaning notes
- Before carrying out any cleaning or maintenance work, remove the plug or switch off the electrical equipment!
- Clean the surface of the housing and the guard with a dry cleaning cloth and a damp brush.
- Do not use petrol or any similar light flammable cleaning material.
Storage
- If the fan is not to be used for some time, then store it in a dry room.
- In addition, you could put a cover on your unit to protect it from dust or dirt deposits.
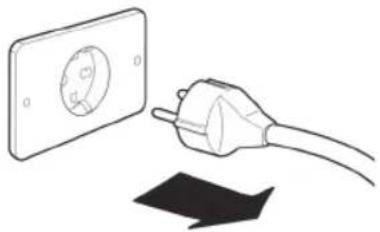
Disposal

- Remove mains plug
- Cut through the mains cable at the plug
- Dispose of the unit in a proper manner.

Help with faults
| Problem Suggestions for rectification | |
| The heater does not work. 1- Check main | and ancillary fuses. It should be an non-fast acting fuse dimensioned for the maximum power of your heater.2- Check heater for correct connection to the power socket.3- Check the both switch settings (Standby and On/Off) at the heater. |
| If the above information does not fix the problem, unplug the heater by removing the plug from the wall socket.In the case of a damage or breakdown, please leave the heater with a qualified electrician to fix the problem.If the power cord on the unit is damaged it may only be replaced by a repair facility authorised by the manufacturer. Replacement of the power cord requires special tools. | |
| Attention: Any repairs including replacing the halogen heating lamp should only be carried out by a qualified electrician or by a recommended service center! | |


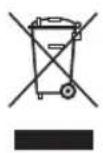
This product conforms to EU Directive 2002/96/EC. This appliance bears the symbol of the barred waste bin. This indicates that, at the end of its useful life, it must not be disposed of as domestic waste, but must be taken to a collection centre for waste electrical and electronic equipment, or returned to a retailer on purchase of a replacement.
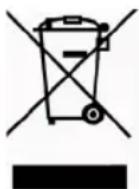
It is the user's responsibility to dispose of this appliance trough the appropriate channels at the end of its useful life. Failure to do so may incur the penalties established by laws governing waste disposal. Proper differential collection, and the subsequent recycling, processing and environmentally compatible disposal of waste equipment avoids unnecessary damage to the environment and possible related health risks, and also promotes recycling of the materials used in the appliance. For further information on waste collection and disposal, contact your local waste disposal service, or the shop from which you purchased the appliance. Manufacturers and importers fulfil their responsibilities for recycling, processing and environmentally compatible disposal either directly or by participating in collective systems.
FR
ATTENTION
natural_image
Line drawing of a pole-mounted stand with a handle and base (no text or symbols)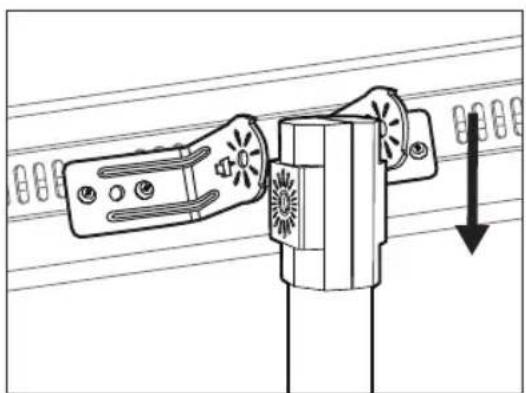
natural_image
Technical line drawing of a mechanical component with no visible text or symbols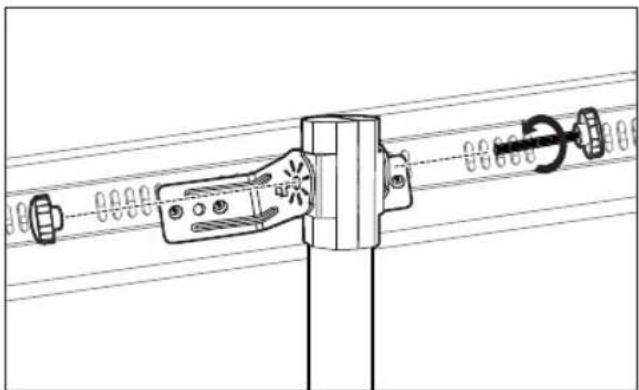
natural_image
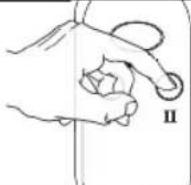
Technical line drawing of a mechanical clamp or bracket assembly with no visible text or symbolsGB Exchange of the infrared lamp
IT Sostituire la lampada a infrarossi

text_image
Exploded view diagram of a mechanical assembly with numbered components for identificationGB WARNING: The exchange of the infrared lamp may only be carried out by a qualified electrician!
Sequence of dismantling:①→②→③→④→⑤
CasaFan reserves the right to make improving changes on products on sale.