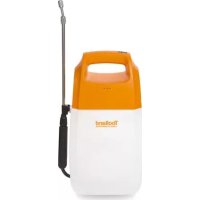
DT20016 - Pressure washer Toolland - Free user manual and instructions
Find the device manual for free DT20016 Toolland in PDF.

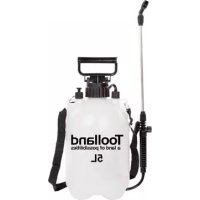
| Product type | Manual backpack sprayer |
| Brand | Toolland |
| Model | DT20016 |
| Tank capacity | 16 L |
| Pressure | Manual pressure system with pump lever |
| Included nozzles | 3 adjustable nozzles |
| Usage | Water-based solutions, insecticides, fungicides, herbicides |
| Spraying | Intermittent (trigger) or continuous (lock) |
| Configuration | For right-handed or left-handed (reversed assembly) |
| Carrying strap | Yes, included |
| Materials | Various plastics |
| Maintenance | Clean and rinse after each use; grease moving parts every 50 hours |
| Nozzle cleaning | Once a year |
| Safety | Wear protective clothing, goggles, mask, and gloves; do not spray towards people or animals |
| Chemical compatibility | Do not use solvents (mineral spirits); very diluted solutions in water |
| Warranty | Velleman warranty (see manual) |
| Repairability | Seals and hose replaceable; spare parts available through dealer |
| Minimum age of use | 8 years with supervision |
Frequently Asked Questions - DT20016 Toolland
User questions about DT20016 Toolland
0 question about this device. Answer the ones you know or ask your own.
Ask a new question about this device
Download the instructions for your Pressure washer in PDF format for free! Find your manual DT20016 - Toolland and take your electronic device back in hand. On this page are published all the documents necessary for the use of your device. DT20016 by Toolland.
USER MANUAL DT20016 Toolland
To all residents of the European Union
Important environmental information about this product

This symbol on the device or the package indicates that disposal of the device after its lifecycle could harm the environment. Do not dispose of the unit (or batteries) as unsorted municipal waste; it should be taken to a specialized company for recycling. This device should be returned to your distributor or to a local recycling service. Respect the local environmental rules.
If in doubt, contact your local waste disposal authorities.
Thank you for choosing Toolland. Please read the manual thoroughly before bringing this device into service. If the device was damaged in transit, do not install or use it and contact your dealer.
2. General Guidelines
Refer to the Velleman® Service and Quality Warranty on the last pages of this manual.
| Keep this device away from children and unauthorized users. | |
| This device can be used by children aged from 8 years and above, and persons with reduced physical, sensory or mental capabilities or lack of experience and knowledge if they have been given supervision or instruction concerning the use of the device in a safe way and understand the hazards involved. Children shall not play with the device. Cleaning and user maintenance shall not be made by children without supervision. | |
| Wear protective clothing, mask, gloves, boots and glasses when spraying substances which could be harmful. Avoid inhaling the sprayed substances and stand with the wind in the back. Never spray in the direction of other people or pets. Never use the pressure sprayer with substances such as acids, alkali and highly toxic pesticides. |
- Damage caused by disregard of certain guidelines in this manual is not covered by the warranty and the dealer will not accept responsibility for any ensuing defects or problems.
Note that damage caused by user modifications to the device is not covered by the warranty. - Keep the device away from children and unauthorised users.
- Do not operate the pump lever continuously without spraying. Too much pressure can damage the pressure sprayer.
- Clean and rinse the pressure sprayer thoroughly after each use by spraying 1 to 2 litres of clear water. Do not dispose of your clean-up water into the sewer system but spray onto the treated crops.
- Lubricate the moving mechanic parts such as the suction tube inside the pump with some petroleum jelly.
3. Features
- pump system with handle
- comes with harness and 3 nozzles
4. Overview
Refer to the illustrations on page 2 of this manual.
| 1 pump cap 5 control valve |
| 2 pump with piston |
| 3 pump lever |
| 4 pump rod |
| 6 | lance |
| 7 | nozzle |
5. Mounting the Tank
5.1 Right-Handed Operation
- Remove the pump cap, pull out the complete pump system and fix the mixer with the clip. Reassemble.
- Slide the pump lever into the opening on the bottom side, at the same side as the pump's. Turn the lever until the hole appears. Fix the lever with the large plastic clip, making sure the pin of the clip clicks into the hole.
- Fix the second large gasket onto the visible part of the rod. Fix the rod using a large gasket and split pin.
- Slide the upper end of the pump rod into the connection of the pump. Fix with a gasket and a split pin.
- Slide the lower end of the pump rod into the connection on the pump lever. Fix with a small gasket and a split pin.
- Fix the harness onto the tank. Make sure to hand-tighten both the pump cap and filling cap.
5.2 Left-Handed Operation
The pump can also be mounted for left-handed use. Simply reverse the position of the pump and hose connection, follow the mounting instructions as per above and fix the harness to the front of the tank.
6. Mounting the Lance
- Slide a nut and little gasket onto both ends of the lance tube.
- Connect the required nozzle onto one end of the lance tube. Connect the other end to the control valve.
- Slide the filter inside the control valve and connect to the hose. Connect the other end of the hose to the hose connection on the tank.
7. Operation
- Ensure that the backpack sprayer is correctly mounted. Fill the tank with the required liquid and hand-tighten the filling cap.
- Operate the pump lever to pressurize the tank.
-
To spray:
-
Intermittent operation: Depress the trigger on the control valve to operate and release it to stop spraying.
Continuous operation: Depress the trigger and lock it on the control valve. Pump to re-pressurize the tank. Unlock and release the trigger to stop spraying.
8. Spraying Chemicals
This sprayer is intended for use with water-based solutions of proprietary insecticides, fungicides and weed killers. Always follow the chemical supplier's on-pack instructions as well as the instructions listed below.
- Wear protective clothing, goggles, facemask, boots and gloves.
- Avoid inhaling spray mist.
- Avoid skin contact with chemicals.
Work in a well-ventilated area.
Take care to protect children, pets and fish from exposure to chemicals. - Wash hands thoroughly after use and especially before eating.
- Wash any contaminated clothing.
- Seek medical attention if spray gets in your eyes or if you develop any symptoms after spraying.
- Do not spray near food or food preparation areas. When spraying crops, pay particular attention to the chemical manufacturer's advice on time before crops can be eaten, etc.
- Do not spray any solvent-based material e.g. white spirit.
Spray only thin watery solutions, thicker mixtures will clog the nozzle. -
Powdered chemicals can be sprayed successfully if they are not completely soluble and the solution tends to settle, spraying can still be successful so long as the mixture continually agitated.
-
If the material to be sprayed contains sediment, strain the liquid into the sprayer bottle.
- Do not over-pressurize the bottle, or tamper with the pressure release valve.
- After use pay particular attention to the paragraph on cleaning.
- Your sprayer is manufactured from many different types of plastic material, and although the liquid you wish to use may be packed in a plastic container, this is no guarantee that it will not damage the sprayer. If you are in any doubt about any chemical you intend to spray we recommend that you contact the consumer service department at the address given the check its suitability.
9. Troubleshooting
-
Too much pressure when operating the pump lever.
-
Broken or loose rubber washer. Inspect every washer and replace/re-install if necessary.
Clogged filter or nozzle. Clean the filter/nozzle. -
Low pressure when operating the pump lever.
o Dirty rubber washers. Clean all rubber washers with fresh water.
-
No pressure when operating the pump lever.
-
Rubber washer is missing. Place a rubber washer.
-
Jammed pump lever.
The pump is filled with liquid. Remove the pump, empty from the liquid and re-install.
10. Cleaning and Maintenance
- Lubricate all moving parts regularly and replace all worn gaskets.
-
Lubricate the pump after every 50 hours of use. To do so:
-
Release the pressure by using the pump lever.
- Remove the pins and gaskets above and below the pump rod. Remove the pump rod.
-
Hold the pump lever steady. Loosen the pump cap but do not remove. Pull the pump by pulling the plunger out of its cylinder. Move the plunger to one side to uncover the three gaskets. Lubricate with silicone oil and proceed in the reverse order to reassemble the pump system.
-
Clean the nozzle once a year. Let excess spray fluids drip from the nozzle after each use.
- The lance handle can be disassembled to clean or lubricate the filter. To do so, loosen the back part of the handle making sure not to lose the inner spring.
- Replace a damaged or worn hose immediately.
- To ensure proper working, make sure the ventilation openings in the filling cap are free at all times. If a one-way valve gets damaged, please contact your dealer.
11. Technical Specifications
capacity 16 L
Use this device with original accessories only. Velleman nv cannot be held responsible in the event of damage or injury resulting from (incorrect) use of this device. For more info concerning this product and the latest version of this manual, please visit our website www.toolland.eu. The information in this manual is subject to change without prior notice.
© COPYRIGHT NOTICE
The copyright to this manual is owned by Velleman nv. All worldwide rights reserved. No part of this manual may be copied, reproduced, translated or reduced to any electronic medium or otherwise without the prior written consent of the copyright holder.