04318 - Massage device VitalMaxx - Free user manual and instructions
Find the device manual for free 04318 VitalMaxx in PDF.
| Product type | Intermittent pneumatic compression (IPC) device for legs |
| Brand | VitalMaxx |
| Model | 04318 (VENENWALKER® PRC²) |
| Power supply | 230 V~, 50 Hz, 25 W |
| Maximum pressure | 120 mmHg |
| Timer | 0-60 minutes adjustable |
| Dimensions (control unit) | 230 mm (L) × 225 mm (W) × 90 mm (H) |
| Weight (control unit) | 1700 g |
| Leg sleeves (pair) | Length 85 cm, for thighs up to 70 cm circumference |
| Connection hoses | 160 cm each |
| Main functions | Sequential pneumatic compression, automatic inflation/deflation, air cushion massage, mode with or without timer |
| Protection class | II (double insulation) |
| Liquid protection | IP21 |
| Applied part type | Type BF |
| Fuse | T3.15 A 250 V |
| Operating temperature | 15 °C to 40 °C |
| Storage temperature | 0 °C to 40 °C |
| Operating humidity | 30-75 % |
| Service life | 5 years |
| Care and cleaning | Clean the leg sleeves with a damp cloth and mild detergent; disinfect after each use if shared. Do not immerse the control unit. |
| Safety | Self-releasing zippers in case of overpressure; automatic stop with timer; do not use if medical contraindications exist. |
| Spare parts and accessories | Leg sleeve extensions, short leg sleeves, arm cuffs available as options. |
| Repairability | Do not open the control unit; contact customer service for any repairs. |
| General information | Domestic use; CE certified and MDR compliant; manufacturer: GlobalMIND GmbH. |
Frequently Asked Questions - 04318 VitalMaxx
User questions about 04318 VitalMaxx
0 question about this device. Answer the ones you know or ask your own.
Ask a new question about this device
Download the instructions for your Massage device in PDF format for free! Find your manual 04318 - VitalMaxx and take your electronic device back in hand. On this page are published all the documents necessary for the use of your device. 04318 by VitalMaxx.
USER MANUAL 04318 VitalMaxx
Operating instructions
Mode d'emploi
Gebruiksaanwijzing
Instrukcja obsługi
https://www.venenwalker.com/downloads/
Lieferumfang

text_image
VENEN WALKER PRO A D C BA Manschetten (2 x)
B Steuergerät (1 x)
natural_image
Black triangular object with white trim, possibly a stylized pen or tool (no text or symbols visible)natural_image
Close-up of a zip-up jacket with zipper, shown from two angles (no text or symbols visible)natural_image
Close-up of gloved hands holding a white cable or wire against a textured surface (no visible text or symbols)natural_image
Close-up of a white and gray jacket with zipper, partially flat against dark fabric background (no visible text or symbols)natural_image
Close-up of a Venen Walker Pro control panel with buttons and a connector (no readable text or symbols beyond branding)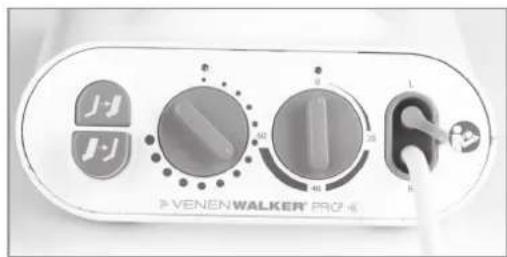
natural_image
Front view of a Venen Walker Pro device control panel with buttons and dials (no readable text or symbols beyond branding)natural_image
Close-up of a metallic ring attached to a zipper, with no visible text or symbolsnatural_image
Close-up of a hand holding a zipper with visible mesh texture, against a dark fabric background (no text or symbols)natural_image
Close-up of a finger pressing a small electronic device with a screen icon (no visible text or symbols)natural_image
Close-up of a white electronic device with a control panel and indicator lights (no visible text or symbols)natural_image
Close-up of a hand pressing down on a white device with control knobs and buttons (no visible text or symbols)natural_image
Close-up of a white KERI® PROJ 4 air conditioner with hand pressing down the dial (no visible text or symbols on main body)natural_image
Close-up of a white electronic device labeled 'VENEN WALKER PRO 4' with a finger pointing to its control knob (no readable text beyond branding)natural_image
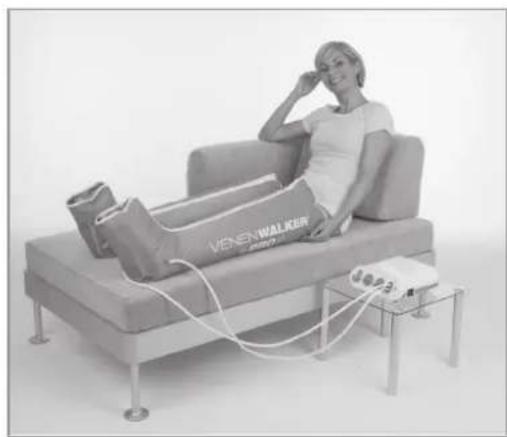
Woman sitting on a sofa with a medical device labeled 'VENENWALKER' and a small stand nearby (no readable text or symbols in the image)natural_image
Close-up of a white portable kitchen appliance with a hand adjusting its control knob (no visible text or symbols)
natural_image
Close-up of a small electronic component with a square button and an arrow pointing to it, no visible text or symbols.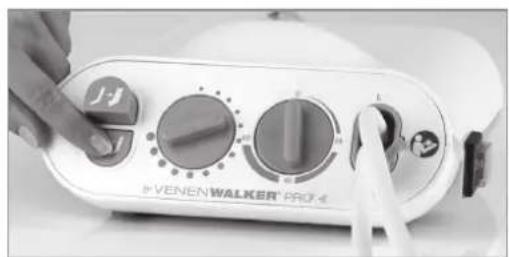
natural_image
Close-up of a VENEN WALKER PRO 4 electronic device with a hand adjusting its control knob (no visible text or symbols on the device itself)natural_image
Close-up of a finger pressing a button on a device (no visible text or symbols)natural_image
Close-up of a white industrial device with multiple rotary dials and a hand adjusting the dial (no visible text or symbols)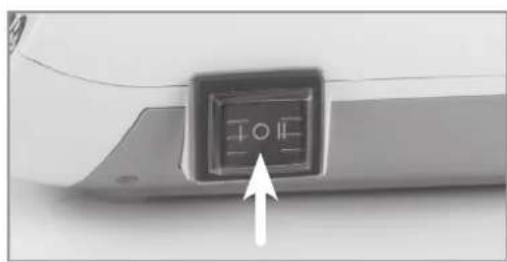
natural_image
Close-up of a car's front panel with a circular button and an arrow pointing to it (no visible text or symbols)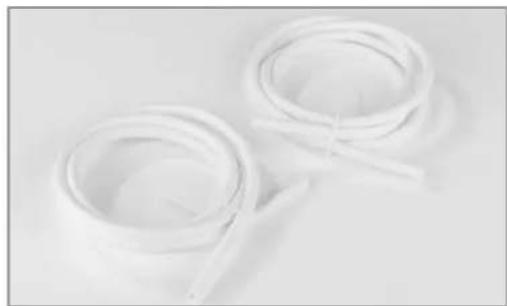
natural_image
Two white plastic film strips with a straw, placed on a plain surface (no text or symbols visible)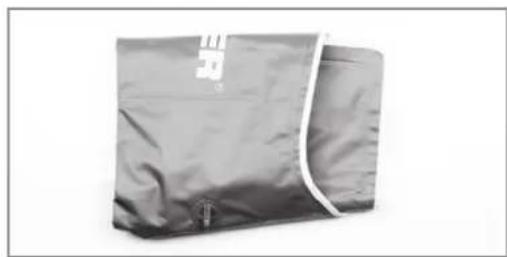
natural_image
Gray fabric bag with white trim and a small inset detail (no visible text or symbols)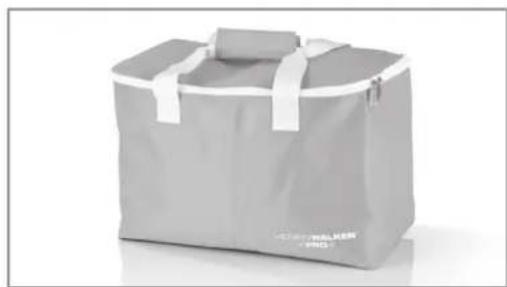
natural_image
Gray plastic bag with white straps and a small lid, no visible text or symbolsSafety instructions 34
Items supplied 37
Control unit at a glance 37
Use 38
Cleaning, care and storage 45
Troubleshooting 46
Technical specifications 48
Permitted accessories 49
Disposal 49
Customer service 49

IMPORTANT NOTICES! PLEASE KEEP FOR REFERENCE!
Before using the device for the first time, please read through these operating instructions carefully and keep them for future reference and other users. They form an integral part of the device.
The manufacturer and importer do not accept any liability if the information in these operating instructions is not complied with.
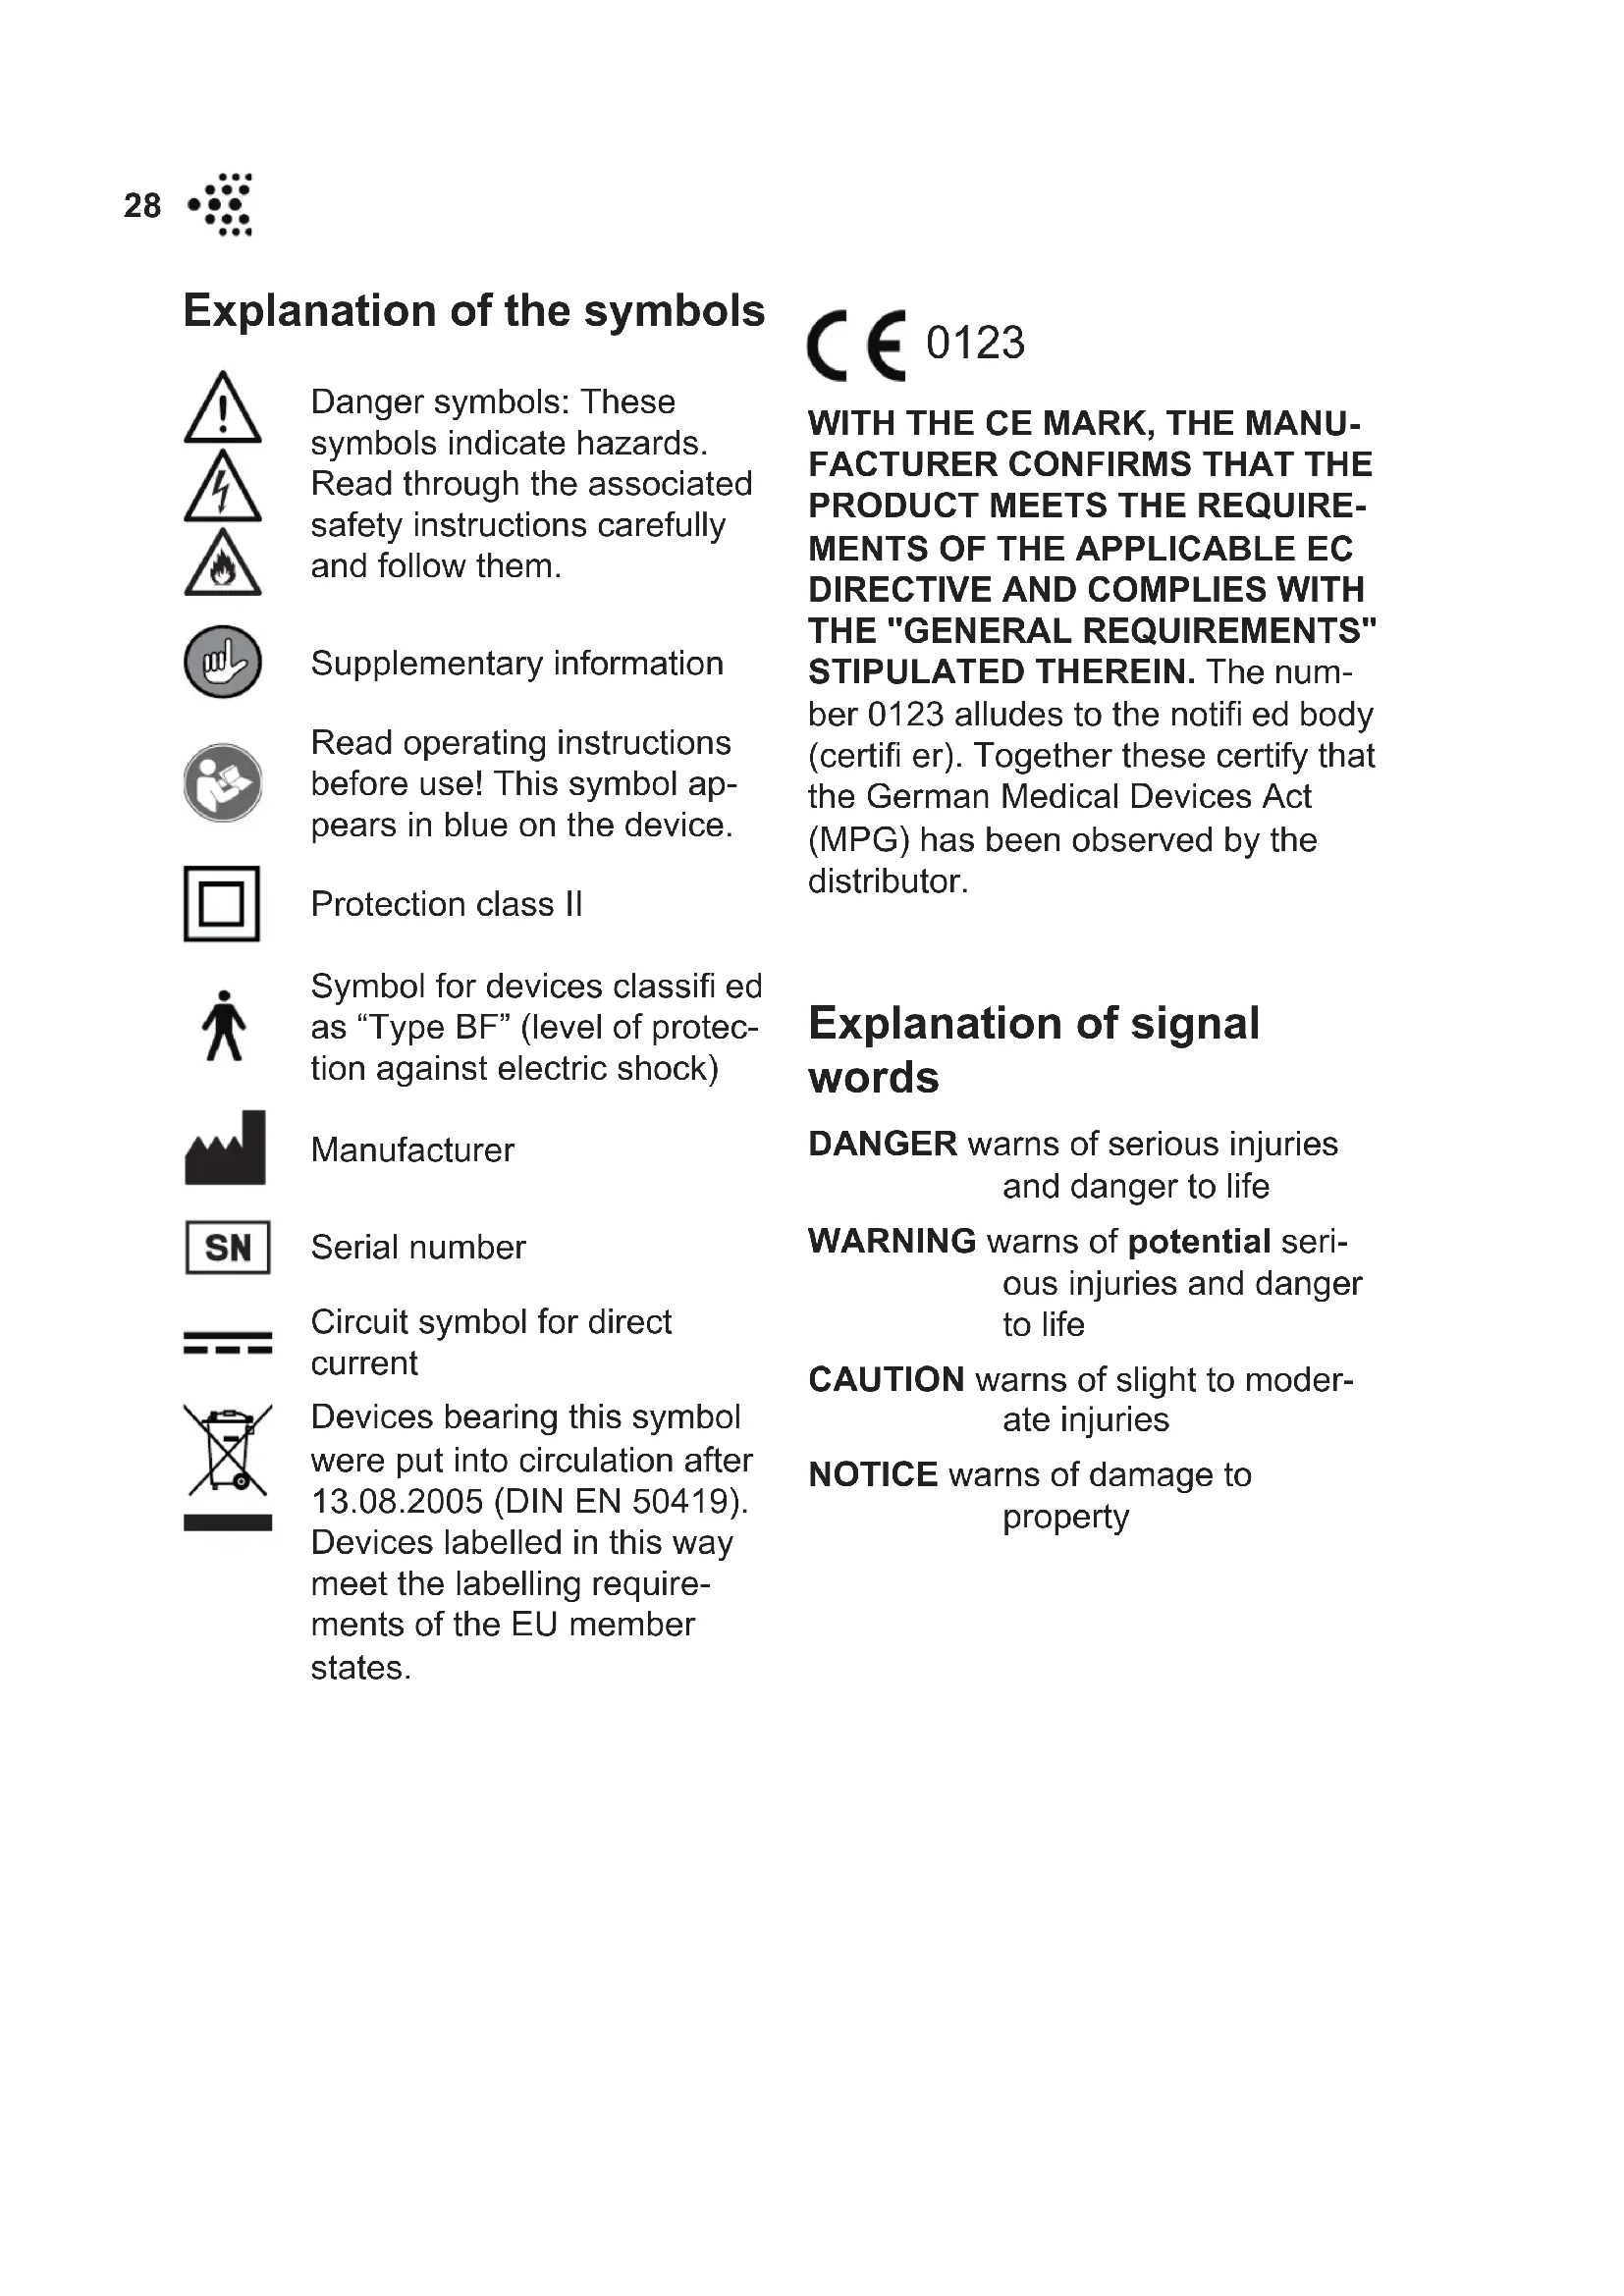
Explanation of the symbols


Danger symbols: These symbols indicate hazards. Read through the associated safety instructions carefully and follow them.
Supplementary information
Read operating instructions before use! This symbol appears in blue on the device.
Protection class II
Symbol for devices classified as "Type BF" (level of protection against electric shock)
Manufacturer
Serial number
Circuit symbol for direct current
Devices bearing this symbol were put into circulation after 13.08.2005 (DIN EN 50419). Devices labelled in this way meet the labelling requirements of the EU member states.
CE 0123
WITH THE CE MARK, THE MANUFACTURER CONFIRMS THAT THE PRODUCT MEETS THE REQUIREMENTS OF THE APPLICABLE EC DIRECTIVE AND COMPLIES WITH THE "GENERAL REQUIREMENTS" STIPULATED THEREIN. The number 0123 alludes to the notifi ed body (certifi er). Together these certify that the German Medical Devices Act (MPG) has been observed by the distributor.
Explanation of signal words
DANGER warns of serious injuries and danger to life
WARNING warns of potential serious injuries and danger to life
CAUTION warns of slight to moderate injuries
NOTICE warns of damage to property
Dear Customer,
We are delighted that you have opted for this VENENWALKER® PRC². This device will help you prevent venous diseases as well as reducing the risk of spider veins and varicose veins. If you have a medical indication, please consult your doctor before use.
The VENENWALKER® PRC² is a medical product certified according to DIN EN ISO 13485:2012 and meets the necessary safety and performance requirements according to MDR:2017: (Appendix I)
- DIN EN 60601-1:2013-12; VDE 0750-1:2013-12 - Part 1: IEC 60601-1:2005 + Cor. :2006 +Cor. :2007 + A1:2012; German version EN 60601-1:2006 +Cor. :2010 + A1:2013
- DIN EN 60601-1-1:2002-08; VDE 0750-1-1:2002-08 - Part 1-1: IEC 60601-1-1:2000 German version EN 60601-1-1:2001
– DIN EN 60601-1-2:2016-05; VDE 0750-1-2:2016-05- Part 1-2: IEC 60601-1-2:2014 German version EN 60601-1-2:2015 - DIN EN 60601-1-6:2016-02; VDE 0750-1-6:2016-02- Part 1-6: IEC 60601-1-6:2010 + A1:2013; German version EN 60601-1-6:2010 + A1:2015
– DIN EN 60601-1-11:2016-04; VDE 0750-1-11:2016-04 Part 1-11: IEC 60601-1-11:2015; German version EN 60601-1-11:2015; –REACH EG 1907/2006; EU 2011/65/EU (RoHS II); –EN ISO 10993-1
If you have any questions about the device or about spare parts / accessories, please contact the customer service department via our website:
www.venenwalker.com or by phone on +49 (0) 38851 314337*
(Mon – Fri, 8 am – 12 midday) ^*
All the very best with the VENENWALKER® PRC² Yours sincerely,
GlobalMIND!

The illustrations in these instructions may differ slightly from the actual device.
Introduction
Too much sitting, too much standing, the wrong diet: according to consistent estimates, 20 % of all Europeans suffer from venous leg complaints and more than half are affected by advanced vein problems.
This global lifestyle disease starts off harmlessly with a tingling sensation in the legs. The legs then become heavy, swollen and tired, and spider veins and varicose veins begin to appear.
How does a venous disorder occur? Veins collect the used blood in the body's tissue and transport it back to the heart. Leg muscles and venous valves tense up and relax, thus acting like a pump to transport the blood in the veins upwards to the heart. However, if a person stands or sits for a long time, or if excess strain due to surplus weight or genetic predisposition leads to congestion, the blood cannot flow away properly and the venous walls become overstretched. Swollen legs are the result: these can form an oedema due to the fact that liquid and protein pass through the slackened venous wall and into the tissue. A doctor should be consulted as a matter of urgency when such venous congestion becomes a continual complaint.
Special devices for alternating compression of the extremities have proved highly effective and time-saving in treating venous problems, as well as in combating lipoedema.
The VENENWALKER ^® PRC ^2 is such a device. It has been developed in close collaboration with medical specialists (phlebologists) and is easy to handle.
The legs are lightly massaged by the VENENWALKER® PRC² using an inflating and deflating air cushion which simulates the pumping effect of the leg muscles experienced during walking exercises. Venous reflux is improved so that accumulated fluid is mobilised and can be flushed out.
The IPC principle
Intermittent (alternating) compression which is not generated through manual massage but rather by a device, is known in medicine as intermittent pneumatic compression, or IPC. It uses the principle of pneumatic alternating pressures. It is prescribed by doctors for the treatment of venous or lymphatic diseases. When used to prevent thrombosis or for sports injuries, it does not involve the risks found in medication-based treatment.
The IPC simulates the function of the natural muscle pumps found in the human body. Air is pumped with alternating pressure into double-walled leg cuffs for example. The pressure is increased and decreased at defined intervals. It should be possible to adjust the pressure level to suit the user and the pressure must never exceed 120 mmHg. When used for cosmetic purposes, treatment duration and frequency depend on the person's condition; in the case of medical
application, the doctor's recommendation should be followed. The treatment should last for at least 20 minutes, however. Any medical use should, of course, be supervised by a doctor.
The shape and type of cuff used is important. Due to the proven importance of the draining of the vein network in the sole, the cuff should cover both the entire leg and the foot.
The rhythmic increase and decrease in pressure on the tissue leads to water and protein being pumped out of the interstitial tissue.
If the patient has a medical indication, a compression dressing should be applied or a surgical stocking should be worn after using the IPC as the residual protein causes blood serum to flow from the capillaries into the tissue after an IPC treatment session. This measure prevents this flow occurring. Alternatively, it is possible to remain in a lying position so as to prevent this subsequent flow of blood serum. So when using the equipment at home, it makes sense to perform the treatment before bedtime.
Brief description
The VIS ENSTEWALKER® PRC control unit and two
double-walled leg cuffs with three interior chambers which also cover the feet and soles. Optional cuff extensions can be used in order to enlarge the circumference of the cuffs.
The control unit feeds air into the chambers of the leg cuffs via connection tubes. This enables controlled pressure to be applied so as to pump up the cuffs gently and/or massage the legs.
Purpose
The VrayENyWALKER® Recongestion of the
extremities. If you have a medical indication, please consult your doctor before use!
The VENENWALKER ^® PRC ^2 is designed for private use at home.
Only use it as described in the operating instructions. Any other use is deemed to be improper.
The following are excluded from the warranty: all defects caused by improper handling, damage or unauthorised attempts at repair. The same applies to normal wear and tear.
Use
The V designWALKER way that the user does not require any special knowledge or skills.
The VENENWALKER ^® PRC ^2 may be used up to 3 x per day for 20 to 40 minutes on each occasion. The system is suitable for long-term use.
The indications and contraindications listed below are taken from the current guideline for apparative intermittent compression (AIC or IPC) issued by the German Society of Phlebology. For more detailed information, please consult the “S1 Guideline 037-007, Intermittent Pneumatic Compression (IPC, AIC)” version 20.06.2017 incl. editorial revision SR 11.01.2018, published by AWMF online – the scientific medical platform.
Indications
Apparative intermittent compression (AIC) is designed for the treatment of the following symptoms:
- Leg swelling caused by lack of movement, for example due to standing for long periods of time in the case of sales personnel, due to sitting for extended periods when doing offi ce work or due to long-haul travel
- Swollen legs due to being bedridden or as a result of pregnancy **
- Swollen legs following a medical diagnosis
- Venous diseases such as varicose veins and spider veins
- Lipoedemas
• Prevention of embolisms due to being bedridden
• Lymphatic system swelling (lymphoedema) - Lower-leg ulcers caused by a venous circulation disorder
- Congestion due to joint injury or overexertion, e.g. haematoma and sore muscles in the event of sport injuries
• Swelling following a pulled muscle or sprain
• To assist the wound healing process after an operation
• Peripheral arterial occlusive disease, with certain indications **
Contraindications
Please do not use the VENENWALKER® PRC² in the following instances, or only after consultation with your doctor:
• Decompensated cardiac insufficiency
- Extended thrombophlebitis, thrombosis or suspicion of thrombosis
- Acute erysipelas
- Severe, unmanaged hypertension
- Pronounced neuropathy of the extremities
- Acute phlegmons
• Compartment syndrome
- Extended or open soft-tissue trauma of the extremities
- Occluding processes in the lymph drainage area where AIC has caused congestion in the groin and genital area
- Blistering dermatoses
If you are not sure whether you suffer from one of the above illnesses, consult a doctor before using the system!
Precautionary measures
The VISIENUMALKER® Per patients with the following symptoms or states:
• Peripheral neuropathy, pain or numbness of the limbs
- Undiagnosed, untreated or infected wounds, inflamed skin, transplantations or dermatological conditions which are exacerbated by the cuff
- Extremely deformed limbs which prevent the correct application of the cuff in practice
Please report to the manufacturer all severe incidents that occur in connection with the system.
Safety instructions
This system is not designed to be used by individuals (including children) with limited sensory or mental abilities or those without sufficient experience and / or knowledge, unless they are supervised by someone responsible for their safety or have received instructions from them on how to use the system.
■ Children must not play with the device.
- Cleaning and user maintenance may not be carried out by children without supervision.
■ Children under 8 years of age and animals must be supervised near the system.
■ Always check the system for damage and wear before putting it into operation. It may only be used if it is undamaged and does not display any signs of wear and tear.
- Electrical and medical devices can be dangerous if used improperly. The control unit does not have any parts which can be serviced by the user. The casing of the control unit may only be opened by authorised technical personnel. Under no circumstances may the control unit be modified!
If components of systems are damaged, they must be replaced by the manufacturer, aftersales service or authorised technical personnel or else repaired in order to avoid hazards.
- The socket where the control unit is plugged in must be readily accessible so that it can be quickly disconnected from the mains.
- The control unit is not designed to be operated with an external timer or a separate remote control system.
- The control unit may only be used with accessories approved by the manufacturer, and the accessories may not be used with other compressors. Otherwise it is not possible to guarantee that the system will work correctly, and all guarantee and warranty claims will be invalid.

DANGER – risk of electric shock
■ Use and store the system only in closed rooms. Do not operate the system in rooms with high humidity.
■ Never immerse the system and its mains cable in water or other liquids and ensure that they cannot fall into water or become wet.
- Should the control unit fall into water, switch off the power supply immediately. Do not attempt to pull the control unit out of the water while it is still connected to the mains power! Have the control unit checked in a specialist workshop before using it again.
- Never touch the control unit or its cable with wet hands when these components are connected to the mains power supply.

WARNING – risk of injury
- Danger of suffocation! Keep plastic film and bags well away from children and animals.
- Risk of strangulation! Make sure that the mains cable is always kept out of the reach of small children and animals.
- Danger of tripping! Take care to ensure that the mains cable and connection tubes do not create a trip hazard.
■ Sleeping or unconscious people may not be treated with the system.
■ Treatment should be interrupted immediately if pain, a tingling sensation or numbness occurs in the limbs during or after treatment.
In the event of a power cut or disruption in which the cuff remains inflated, disconnect the connection tubes so as to let the air out of the cuff(s) and remove the cuff(s) from the limbs.
WARNING – danger of fi re
- Do not use the system in rooms containing easily ignitable or explosive substances.
- Do not operate the control unit in the vicinity of combustible material. Do not place any combustible materials (e.g. cardboard, paper or plastic) on the control unit.
- Do not cover the control unit during operation in order to prevent it from catching fire. Do not insert anything into the ventilation openings of the control unit and make sure that these do not become clogged.
NOTICE – risk of damage to material and property
- Keep the cuffs and connection tubes away from sharp objects. Do not insert safety pins or other pins or sharp objects into the cuffs.
- Only plug the control unit into properly installed sockets where the mains voltage corresponds to the voltage specifications on the rating plate of the control unit. Only use appropriate extension cables which comply with the technical specifications of the control unit.
■ Unwind the mains cable fully before connecting the control unit.
■ Make sure that the mains cable and connection tubes are not crushed, bent or laid over sharp edges and do not come into contact with hot surfaces. - The control unit must be switched off when inserting the mains plug in the socket or removing it.
- Remove the mains plug if a fault occurs during operation or before a thunderstorm.
- When removing the mains plug from the plug socket, always pull on the mains plug and never the mains cable. Do not pull or carry the device by the mains cable.
- Do not use the control unit if it has malfunctioned, fallen or been dropped in water. Have it checked in a specialist workshop before using it again.
■ Always place the control unit on a dry, even and firm surface. Do not place on cushions or other soft surfaces in order to prevent the control unit from overheating. - Do not place the system on or next to heat sources such as hobs or ovens. Keep the system away from open fire such as candles or cigarettes.
- Do not expose the system to extreme temperatures, persistent moisture, direct sunlight or impacts. Please refer to the chapter entitled “Technical specifications” for details.
■ Never place heavy objects on the system.
Electromagnetic Compatibility (EMC)
For details, please refer to the back-up documentation or https://www.venenwalker.com/downloads/
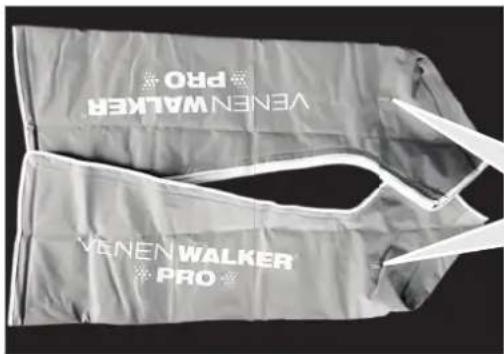
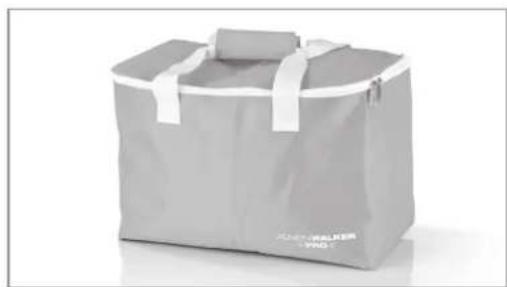
Items supplied
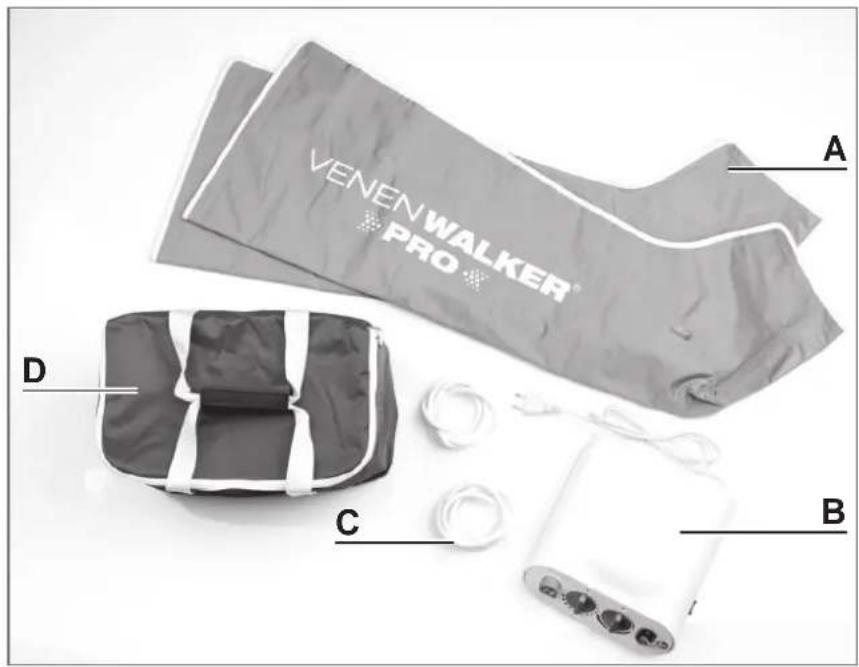
text_image
VENEN WALKER PRO A D C BA Cuffs (2 x)
B Control unit (1 x)
C Connection tubes (2x)
D Storage bag
- Operating instructions (1 x)
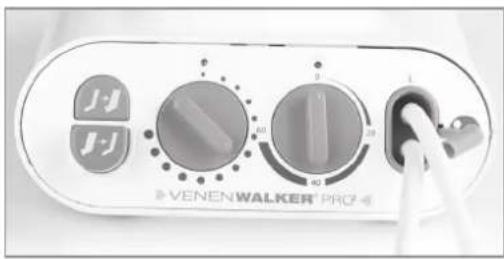
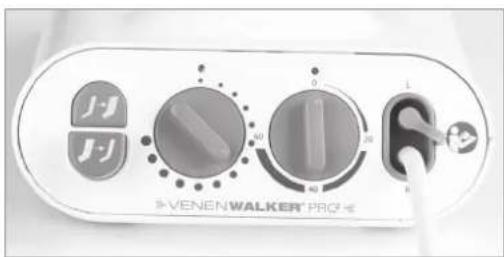
Control unit at a glance

text_image
VENEN WALKER® PRO 1 2 3 4 5 6 7 8 9 0 L R 40 60 201 Seal plug for tube connectors (here: in L tube connector for left leg)
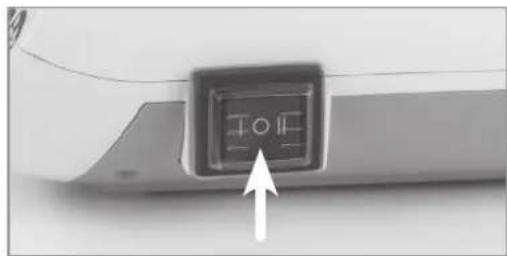
2 I O II Main switch
3 R Tube connector for right leg
4 Rotary knob: Timer
5 Rotary knob: Pressure regulator
6 Button: Extraction
7 Button: Pump
8 Green operating lamp
9 Blue timer lamp
Use

PLEASE NOTE!
In the event of medical indication, ask your doctor whether and how often you are allowed to use the VENENWALKER® PRC ^2 .
If use of the system is unpleasant, reduce the pressure or terminate treatment.
If an increased pulse rate or breathing difficulties occur in pregnant women, use of the system must be interrupted. If this happens, please contact your doctor.
- Do not walk or stand while wearing the cuffs!
Take care to ensure that the cuffs and connecting tubes are not bent or twisted so as to avoid impairing the system and damaging the air chambers!
- Do not open the cuffs while using the system in order to avoid damaging the cuffs.
Take care to ensure that the control unit is free-standing and not covered with a blanket or other objects.
■ Make sure the system is clean and dry prior to storage or use.
Mode of operation
The Works-Based waker®-RRC3 intermittent com-
pression (AIC). Your legs are massaged by the rhythmic, alternating inflation and deflation of the air cushions. The cuffs exert a regularly interrupted pressure from outside on the capillary pump in the calf muscles and feet. This allows venous blood to be pumped towards the heart. Furthermore, water inside the tissue and the metabolic particles dissolved in it can be flushed out and eliminated from the body.
Notices
- Your legs should be horizontal or raised when using the system so as to allow the blood to circulate unhindered.
• We recommend using the VENENWALKER® PRG² every day for approx. 20 to 30 minutes in the morning and evening. - Never use the ENENWALKER® PRG ^2 for long periods without interruption since excessive massage can be strenuous. When you use the system for the first time, limit yourself to 20 minutes. If you are comfortable with a period of 20 minutes, you can extend subsequent treatments to approx. 30 minutes.
- In the event of medical indication, apply a compression bandage or compression stocking immediately after using the system or remain lying down
for a while in order to prevent blood serum from subsequently flowing from the capillaries into the tissue as far as possible.
- To make it easier to put on compression stockings, it can be easier to use the VENENWALKER® PRC ^2 beforehand.
- In the event of overload, the zips on the cuffs open so as to prevent a blockade of the arteries.
- If the circumference of your thighs is greater than approx. 70 cm or that of your lower leg is greater than approx. 40 cm, you will require cuff extensions. These are available at www.venenwalker.com.
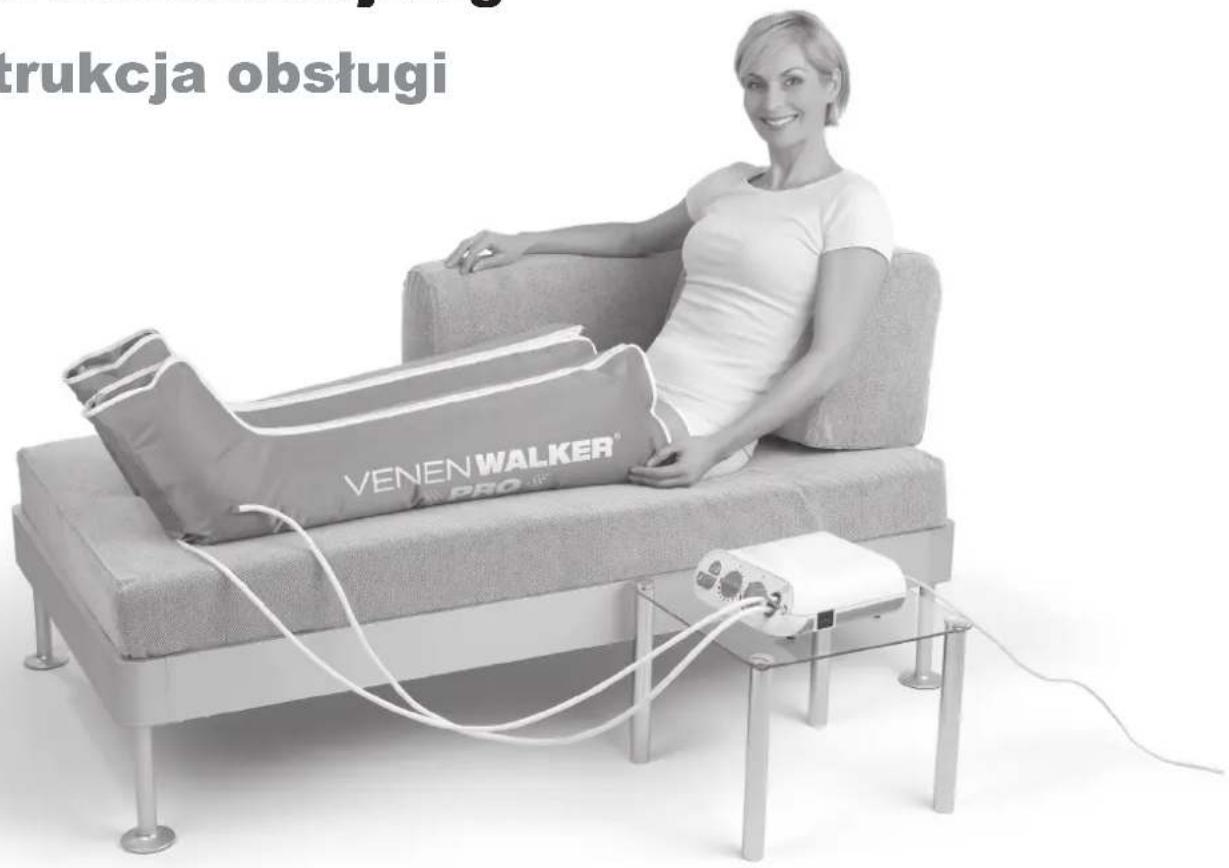
A) Setting up the control unit
- Choose a place where you can sit comfortably while putting up and stretching your legs, e.g. on a sofa, bed or armchair with a footrest.
- In order to be able to operate the control unit sitting down, place it next to you on a side table or chair.
- Insert the mains plug of the control unit into an easily accessible socket. If there isn't one nearby, use an extension cable.
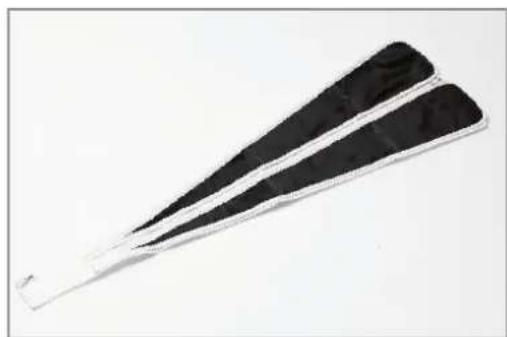
B) Applying cuff extensions
A cuff extension is 10 cm wide at the widest point (thigh). If this is not enough, you can connect several cuff extensions to one another.
natural_image
Black triangular object with white border, possibly a tool or device (no visible text or symbols)Connecting cuff extensions to one another: Join the zip halves at the narrow ends of the cuff extensions and close the zip.

natural_image
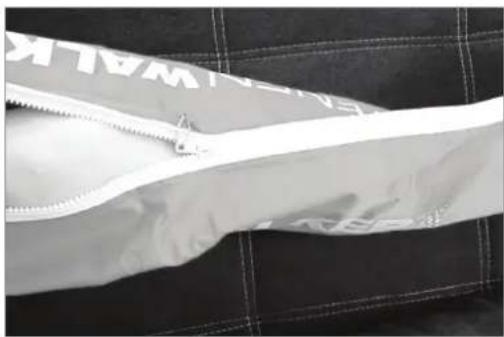
Close-up of a dark jacket with white trim and zipper, shown from two different angles (no text or symbols visible)Attaching cuff extensions to the cuff:
- Open the zip of the cuff.
- Join the zip halves of the cuff and the cuff extension and close the zip.
C) Connect the cuffs to the control unit and apply

The VcanNasd WALKER® applying one cuff to one leg.
If you are wearing trousers, take them off before applying the cuffs so as to ensure the treatment is effective and not unpleasant. If you are wearing tights or compression stockings, you can keep these on.
text_image
VENEN WALKER PRO VENEN WALKER PRO- Spread out the cuffs at the point where the treatment is to be carried out.

natural_image
Close-up of a gloved hand holding a white cable with a small object near it, against a dark surface (no text or symbols visible)- Pick up the connection tubes. Attach the tube ends to the tube contacts on the cuffs.
natural_image
Close-up of a white zip-up jacket with 'WALK' branding, partially laid on dark fabric (no readable text beyond logo)-
Open the zips of the cuffs.
-
Sit down and place your legs in the cuffs.
-
Close the zips of the cuffs. If you have problems, read the tips below about how to put on the cuffs.
natural_image
Close-up of a Venen Walker Pro control panel with dials and buttons (no readable text beyond branding)- Put the right-hand connection tube on the control unit tube connector marked R and put the left-hand connection tube on the control unit tube connector marked L. Make sure the tubes are firmly attached to the tube connectors.
text_image
J-J J-J 0 30 40 R VENEWALKER PROIf you are only using one cuff, close the unused control unit tube connector with the seal plug.

Tip for putting on the cuffs
If the cuffs are already tight around your legs before they are pumped up be sure to use cuff extensions. Otherwise the cuffs and zips might be damaged. Several cuff extensions can be used at the same time in order to achieve the necessary circumference. For details, read Section B) of this chapter: "Applying cuff extensions".
natural_image
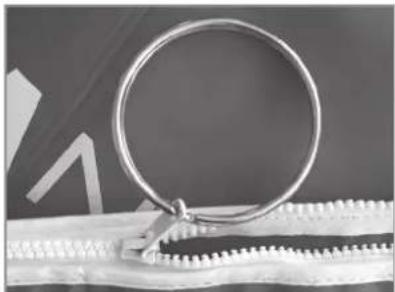
Close-up of a metallic ring attached to a zipper, with no visible text or symbolsIf you find it difficult or impossible to hold the zip slider we recommend attaching a (key) ring (see picture).
If you cannot lean forward enough to close the cuffs, try the following:
- Ask a second person to help. Since the cuffs can be fully opened and unfolded, a second person can easily position them under your legs and close the zips.
- Before applying the cuffs, close the zips up to approx. the middle of the cuffs (or as far as necessary). Then sit down, slip into the cuffs and close the zips completely.
natural_image
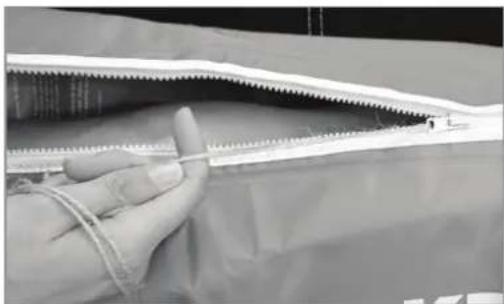
Close-up of a hand holding a zipper with coiled straps, against a dark background (no visible text or symbols)- If it is still too diffi cult, you can attach a piece of string to the zip slider and close the zip by pulling the string.
D) Switching on the control unit to start massaging
The VrstageWALKER®PNCated after approx.
20 – 30 minutes. You can either switch off the control unit manually or activate the time function prior to switching on. In the latter case, the control unit switches off automatically after the set period of time.
We recommend using the timer function. This means you do not have to watch the time and can relax completely during the treatment.
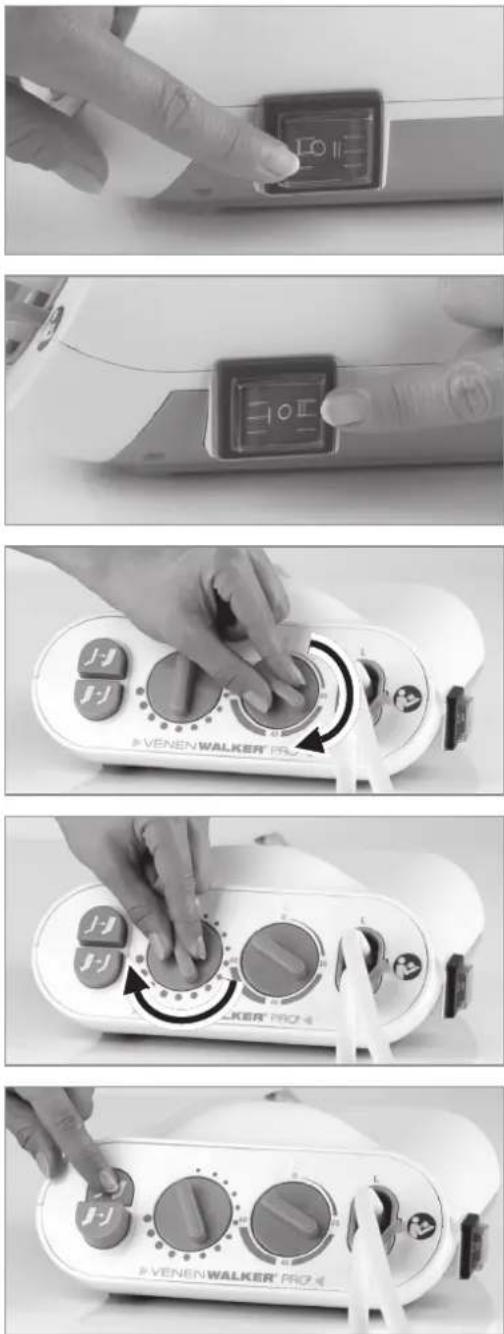
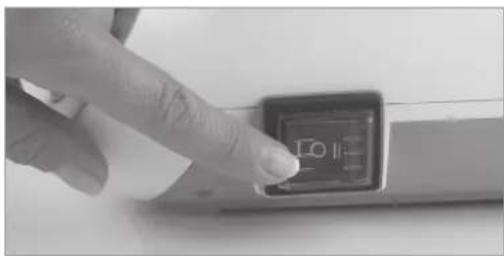
1a. Switching on WITHOUT timer:
Press the main switch to position I – the green operating lamp goes on.
1b. Switching on WITH timer:
Press the main switch to position II – the blue timer lamp goes on.
Use the rotary knob of the timer to set the required period (between 0 and 60 minutes).
- Turn the pressure regulator clockwise to the highest level so that the pumping process does not last longer than 10 minutes.
- Press the 🍒 button to pump up the cuffs. The control unit begins to fill the cuffs alternately with air. The legs are then massaged by the inflating and deflating air cushions.

Please note that the cuffs are not activated simultaneously but consecutively. The pressure is built up in one cuff first and then in the other.
natural_image
Woman sitting on a modern sofa with a Vener-Walker logo, no visible text or symbols on the device or background.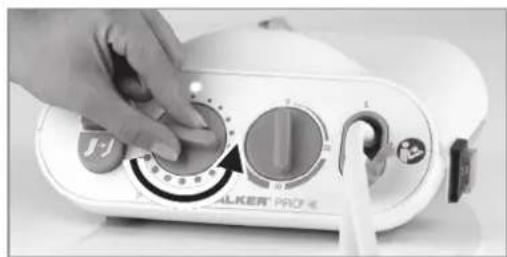
natural_image
Close-up of a white walker's pro interface with hand and rotary knob (no visible text or symbols)- Stretch your legs and take up a comfortable position.
In order to ensure the blood can circulate unhindered, it is essential to ensure that the leg in the cuff is stretched out during treatment!
- If the pressure exerted on your legs is too powerful or unpleasant, simply turn down the pressure regulator until the pressure is reduced. The ideal pressure on your legs should be powerful but not unpleasant.

It is natural for your legs to sweat in the cuffs. This is not a cause for concern: in fact it is an intended effect which stimulates metabolism in the legs.
E) Finishing the treatment
natural_image
Close-up of a small electronic component with a square button and an arrow pointing to it, no visible text or symbols.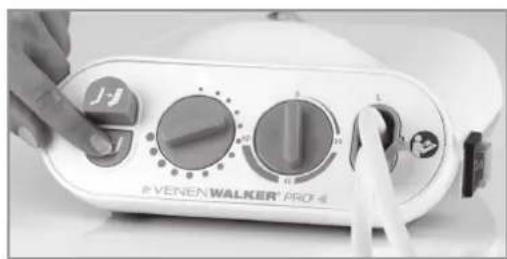
natural_image
Close-up of a Venen Walker Pro® air conditioner with hand and probe (no visible text or symbols)- Switch the control unit off after 20 to 30 minutes. For this purpose, press the main switch to the central position O.
If the timer has been activated, the control unit switches off automatically after the set period. After this, press the main switch to the central position O.
- Wait until the cuffs have loosened. You can then open the zips and remove your legs from the cuffs.

OR: Press the main switch to position I after treatment and press the J-J extraction switch. This starts air extraction from the cuffs. For details, read the following section "After treatment".
F) After treatment
You can leave the VwHelenWALKERxPReat-
ment. Be sure to remove the mains plug from the socket, however.
If you have been sweating, clean the cuffs (see the "Cleaning, care and storage" chapter).
If you wish to place the VENENWALKER® PRC² in the storage bag ...
natural_image
Close-up of a finger pressing a small electronic device with a logo (no visible text or symbols)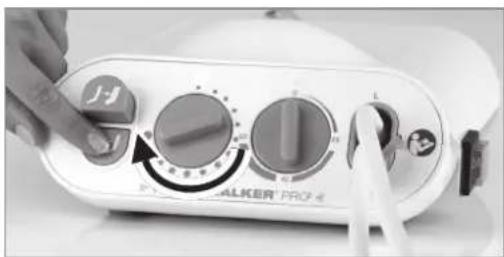
natural_image
Close-up of a Walker Pro. air conditioner control panel with hand and dial indicator (no readable text or symbols)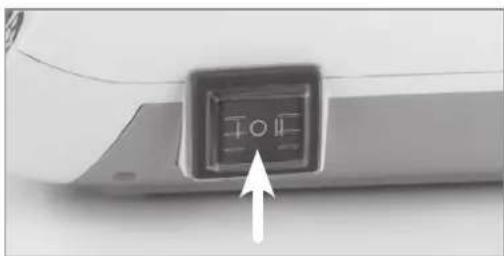
natural_image
Close-up of a car rear door with a square button and an arrow pointing to the front panel (no visible text or symbols)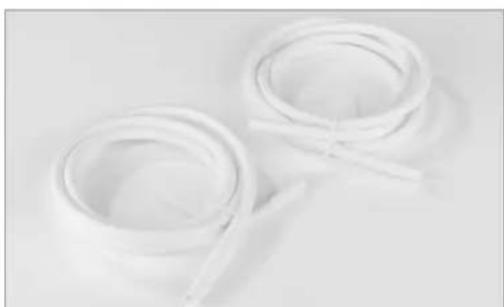
natural_image
Two white plastic film strips with a string, placed on a plain surface (no text or symbols visible)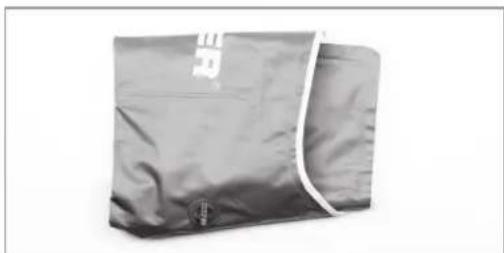
natural_image
Gray fabric bag with white trim and a small circular button at the bottom (no visible text or symbols)-
... press the main switch to position I.
-
Press the J-extraction switch and turn the pressure regulator to the highest level.
-
When the cuffs are completely deflated, press the main switch to the central position O to switch off the control unit.
-
Disconnect the control unit from the mains.
-
Remove the connection tubes from the control unit and the cuffs. Loosely roll up the connection tubes.
-
Carefully fold the cuffs. Avoid sharp bending, otherwise breakage points may appear in the cuffs after frequent use.
natural_image
Gray plastic bag with white straps and 'JADELISHER VAG' branding, no visible text or symbols on the bag itself.- Place all parts in the storage bag.
Cleaning, care and storage

PLEASE NOTE!
Before cleaning, always remove the connection tubes from the cuffs and the control unit.
- Do not use any caustic or abrasive cleaning agents for cleaning. This might damage the surfaces.
It is imperative to ensure that no moisture enters the tube connectors on the cuffs and the control unit.
■ Always remove the mains plug from the socket before cleaning the control unit.
- Allow all parts to dry completely before they are stored away. Allow to dry in the air only or wipe with a cloth. Never use a hair drier or similar for drying purposes!
- Clean the cuffs with a clean, damp cloth and if necessary a mild household cleaning agent.
- If the cuffs are used directly against the skin by more than one person, they should be cleaned using a commonly available disinfectant after use so as to avoid cross-contamination.
- The control unit and connection tubes should only be wiped with a clean, damp cloth if necessary. You can also use a mild household cleaning agent.
- Allow all parts to dry in the air after cleaning or use a cloth.
- Store the VENEN WALKER® PRG ^2 in the storage bag if you will not be using it for a lengthier period of time. Keep the storage bag in a cool, dry place which is protected from direct sunlight and frost; it must be kept out of reach of children and animals.
Do not place anything on top of the storage bag so that it doesn't get crushed and the VENENWALKER® PRC ^2 is not damaged!

After frequent use, the connection tubes may widen at the ends and no longer fi t tightly. In this case we recommend cutting off the ends.
Troubleshooting
If the system stops working properly, check whether you are able to correct the problem yourself based on the tips below. If this is not possible, contact the customer service department.

Do not attempt to repair a defective electrical device yourself!
| Problem Possible cause Fix | ||
| The cuffs do not pump up within 15 minutes. | Air escapes between the connection tubes and tube connectors. | Push the ends of the connection tubes onto the tube connectors of the cuffs and control unit as far as they will go.Check to see if the ends of the connection tubes are firmly attached to the tube connectors or whether they have widened. If they have widened, cut off the widened ends. |
| The pump is not activated. | Press the button to pump up the cuffs. Set the pressure regulator to the highest level. | |
| The air input is obstructed. | Make sure the connection tubes and cuffs are not bent or twisted. | |
| The cuffs do not defl ate completely. | The air extraction function is not activated. | Press the button to extract air from the cuffs. Set the pressure regulator to the highest level. |
| The air flow is obstructed. | Make sure the connection tubes and cuffs are not bent or twisted. | |
| The control unit cannot be switched on. | The timer function is activated but no period of operation is set. | Check the position of the main switch. If it is in position II, the timer function is activated. In order to start the control unit you have to set the rotary knob of the timer to the required period of operation.If you do not wish to use the timer function, press the main switch to position I. |
| The control unit is not connected to the mains. | Insert the mains plug into the socket. | |
| There is no mains voltage. | Try another mains socket.Check the fuse of your mains connection. | |
| The fuse in the control unit has been tripped due to overvoltage (e.g. lightning strike). | Contact the customer service department. | |
| The cuffs open by themselves during use. | In the event of overload, the zips on the cuffs open so as to prevent a blockade of the arteries. | Use cuff extensions. These are available at www.venenwalker.com. |
Technical specifications
Product name: VenenWalker PRO2
Model number: 001-1011-00
Reference article no. for
customer service: 04318
Mains voltage: 230 V \~
Mains frequency: 50 Hz
Current consumption: 0.1 A
Power: 25 W
Cuff pressure: max. 120 mmHg
Weight of control unit: 1700 g
Fuse:T3.15A 250V
Electric shock
protection class: Type B
Fluid ingress protection class: IP21
Protection class: II
Temperature range: Operation: 15 – 40 °C Storage and transportation: 0 – 40 °C
Air humidity: Operation: 30 – 75 % Storage and transportation: 10 – 80 %
Dimensions: Control unit: 230 mm (L) x 225 mm (W) x 90 mm (H)
Cuff pressure: 85 mm (L), thigh circumference approx. 70 cm
Connection tubes: 160 cm
Cuff material: Nylon (outside and inside)
Service life of the system: 5 years
Manual ID: Z 04318 M GM V1 0718
Permitted accessories
VenenWalker PRO leg cuffs, standard pair / red; article no.: 003-1008-32
VenenWalker PRO leg cuffs, short pair / red; article no.: 003-1008-27
VenenWalker PRO cuff extension, standard pair / red; article no.: 003-1008-22
VenenWalker PRO cuff extension, short pair / red; article no.: 003-1008-23
VenenWalker PRO arm cuffs, pair / red; article no.: 003-1008-14
VenenWalker PRO leg cuffs, standard pair / turquoise; article no.: 002-1008-11
VenenWalker PRO cuff extension, pair / turquoise; article no.: 002-1008-10
Disposal
Dispose of the control unit in an environmentally friendly manner at a recycling centre for used electrical and electronic devices.
Customer service
If you have any questions on the V,Contact WAIbKER® PRC ^2
our website www.venenwalker.com or by telephone on +49 (0) 38851 314337*
(Mon – Fri, 8 am – 12 midday)
*Cost will be incurred for German landline calls. The rates vary according to the provider.
Manufacturer under the Medical Devices Act
GlobalMIND GmbH
https://www.venenwalker.com/downloads/
natural_image
Black triangular object with white trim, possibly a stylized pen or tool (no text or symbols visible)natural_image
Close-up of a black athletic jacket with white trim, showing front and side views (no text or symbols)natural_image
Close-up of gloved hands holding a white cable with a small object near its tip (no visible text or symbols)natural_image
Close-up of a white zip-up jacket with 'WALUK' branding, partially laid on dark fabric (no other text or symbols visible)natural_image
Close-up of a Venen Walker Pro device control panel with rotary dials and buttons (no readable text beyond branding)
text_image
J-J J-J 50 40 30 L VENE WALKER PROnatural_image
Close-up of a metallic ring attached to a zipper, with no visible text or symbols.natural_image
Close-up of a gloved hand holding a metallic zipper, with visible mesh texture and no text or symbolsnatural_image
Close-up of a finger pressing a button on a device (no visible text or symbols)natural_image
Close-up of a handheld electronic device with a control panel and indicator lights (no visible text or symbols)natural_image
Close-up of a hand pressing down on a white electronic device with control knobs and a rotary dial (no visible text or symbols)natural_image
Close-up of a white portable electronic device with control knobs and buttons, no visible text or symbols on the device itself.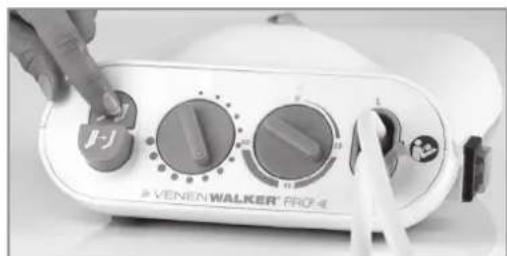
natural_image
Close-up of a white VENEN WALKER PROF 4 electric bread maker with control knobs and a finger pointing to the dial (no visible text or symbols on the device itself)natural_image
Woman sitting on a sofa with a medical device labeled 'VENEN-WALKER' and a small table nearby (no readable text or symbols in the image)
natural_image
Close-up of a hand operating a Walker® PROF-6 air conditioner with control knob (no visible text or symbols)natural_image
Close-up of a computer mouse with a button labeled 'I' and an arrow pointing to it (no readable text or symbols)natural_image
Close-up of a white electronic device with three rotary dials and a hand adjusting its dial (no visible text or symbols)
natural_image
Close-up of a finger pressing a small electronic device with a close button (no visible text or symbols)natural_image
Close-up of a white industrial control panel with rotary dials and a hand adjusting the dial (no visible text or symbols)natural_image
Close-up of a car's front panel with a highlighted button and arrow indicator (no readable text or symbols)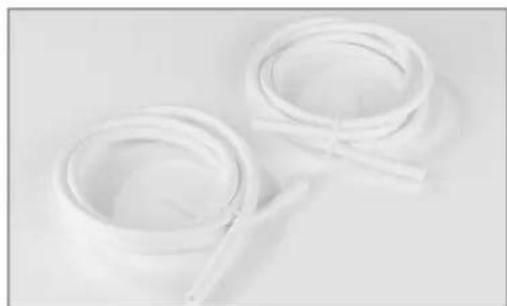
natural_image
Two white plastic coiled cables with a string, placed on a plain surface (no text or symbols visible)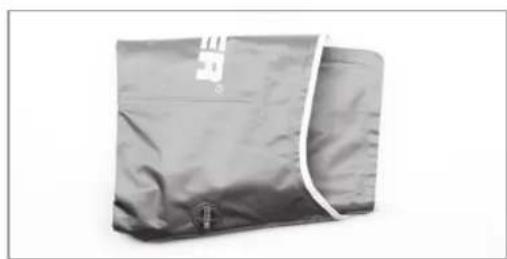
natural_image
Black and white photo of a gray plastic bag with a white collar and small logo (no visible text or symbols)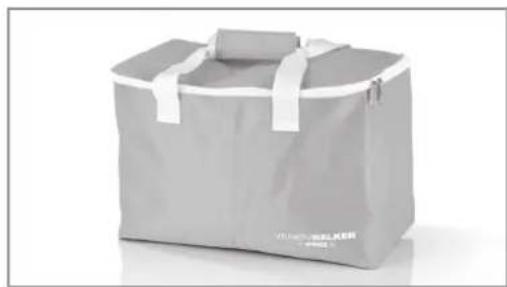
natural_image
Gray rectangular bag with white straps and a small lid, shown against a plain background (no text or symbols visible)WAARSCHUWING – Brandgevaar
https://www.venenwalker.com/downloads/
Leveringsomvang

text_image
VENEN WALKER PRO A D C BA Manchetten (2 x)
B Bedienings-apparaat (1 x)
C Verbindings- slangen (2 x)
D Bewaartas
natural_image
Black triangular object with white trim, possibly a stylized brush or tool (no text or symbols visible)natural_image
Close-up of a black athletic jacket with white trim, shown from front and side views (no text or symbols visible)natural_image
Close-up of a gloved hand holding a white cable or wire against a textured background (no visible text or symbols)natural_image
Close-up of a white zip-up jacket with 'WALAK' branding, partially laid on dark fabric (no readable text beyond logo)natural_image
Close-up of a Venen Walker Pro control panel with three rotary dials and buttons (no readable text beyond branding)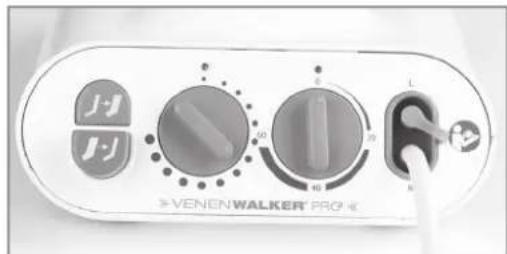
natural_image
Front view of a Venen Walker Pro device control panel with rotary dials and indicator lights (no readable text or symbols beyond branding)natural_image
Close-up of a metal ring attached to a zipper, with no visible text or symbolsnatural_image
Close-up of a hand holding a zipper with visible mesh texture, against a dark fabric background (no text or symbols)natural_image
Close-up of a finger pressing a small electronic device with a logo (no visible text or symbols)1a. Aanschakelen ZONDER timer:
natural_image
Close-up of a white handheld device with a control panel and indicator lights (no visible text or symbols)natural_image
Close-up of a hand pressing down on a Venen Walker PLC controller (no visible text or symbols)natural_image
Close-up of a hand pressing down on a white electronic device with control knobs and buttons (no visible text or symbols)natural_image
Close-up of a white Venen Walker Pro 4 electric bread maker with control knobs and a finger pointing to the dial (no visible text or symbols on the device body)natural_image
Woman sitting on a sofa with a VENEN-WALKER logo, no visible text or symbols on the device or background.natural_image
Close-up of a white industrial machine control panel with rotary dial and handle (no visible text or symbols)natural_image
Close-up of a computer mouse with a square button and an arrow pointing to it (no visible text or symbols)natural_image
Close-up of a white IVENENWALKER PRO electronic device with multiple rotary switches and a hand adjusting the dial (no visible text or symbols on the device itself)
natural_image
Close-up of a finger pressing a button on a device (no visible text or symbols)natural_image
Close-up of a white bread maker's rotary dial with control buttons and a hand adjusting the dial (no visible text or symbols)natural_image
Close-up of a car's front panel with a button labeled 'T10' and an arrow pointing to it (no readable text or symbols beyond the button)
natural_image
Two white plastic coiled cables with a string, placed on a plain surface (no text or symbols visible)
natural_image
Exterior view of a gray plastic bag with white trim and a small circular button at the bottom (no text or symbols visible)
natural_image
Gray plastic bag with white straps and a small lid, shown against a plain background (no text or symbols visible)natural_image
Black triangular object with white trim, possibly a tool or device (no text or symbols visible)natural_image
Close-up of a black athletic jacket with white trim, showing front and side views (no text or symbols)natural_image
Close-up of gloved hands holding a white medical tube against a textured background (no visible text or symbols)natural_image
Close-up of a white zip-up jacket with 'WALK' branding, partially laid on dark fabric (no readable text beyond logo)natural_image
Close-up of a Venen Walker Pro device control panel with rotary dials and buttons (no readable text beyond branding)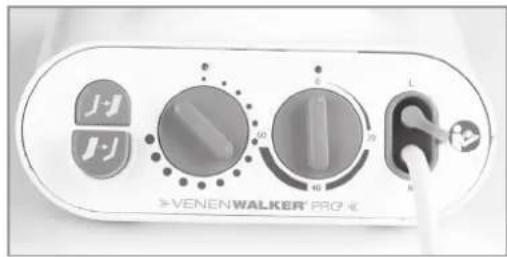
text_image
J-J J-J 50 40 30 L VENEWALKER PROnatural_image
Close-up of a metallic ring attached to a zipper, with no visible text or symbols.natural_image
Close-up of a hand holding a zipper with visible teeth and fabric texture (no text or symbols)natural_image
Close-up of a white electronic device with multiple rotary switches and a finger pointing to the control knob (no visible text or symbols)natural_image
Woman reclining on a modern sofa with a medical device labeled 'VENENWALKER' and a small table nearby (no readable text or symbols in the image)natural_image
Close-up of a white bread maker's rotary dial with control knob and buttons (no visible text or symbols)
natural_image
Close-up of a car rear panel with a square button and a white arrow pointing to it (no visible text or symbols)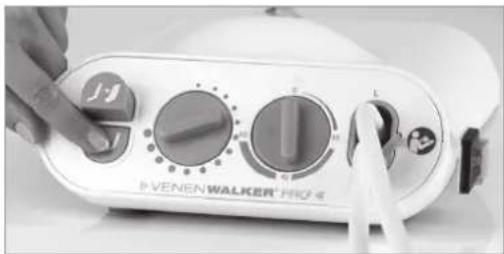
natural_image
Close-up of a white electronic device with three rotary switches and a hand adjusting the button (no visible text or symbols)natural_image
Close-up of a finger pressing a small electronic device with a display screen (no visible text or symbols)natural_image
Close-up of a white industrial control panel with rotary dials and a hand adjusting the dial (no visible text or symbols)natural_image
Close-up of a car's front panel with a button labeled 'T10' and an arrow pointing to it (no readable text or symbols beyond the label)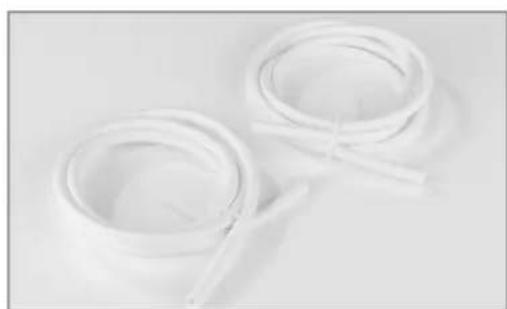
natural_image
Two white plastic coiled cables with a string, placed on a plain surface (no text or symbols visible)
natural_image
Exterior view of a gray plastic bag with white trim and a small circular button at the bottom (no text or symbols visible)