TC84100N - Heating Perel - Free user manual and instructions
Find the device manual for free TC84100N Perel in PDF.
| Brand | Perel |
| Model | TC84100N |
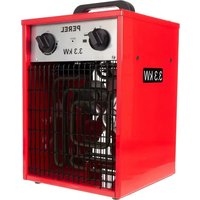
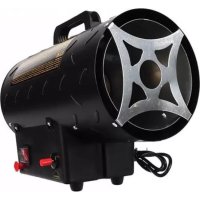
| Product type | Outdoor kerosene heater |
| Power | 2600 W |
| Consumption | 0.25 L/h |
| Runtime | 18 h |
| Weight | 4.3 kg |
| Recommended volume | Up to 18 m³ |
| Ignition | Manual (match) |
| Fuel | Lamp kerosene (BS2869 C1) |
| Usage | Outdoor only |
| Safety distance | 50 cm from walls and flammable materials |
| Maintenance | Regular cleaning, burning off tar residue, wick replacement |
| Storage | Empty tank, dry and well-ventilated place |
| Warranty | 24 months (consumer), Velleman conditions |
Frequently Asked Questions - TC84100N Perel
User questions about TC84100N Perel
0 question about this device. Answer the ones you know or ask your own.
Ask a new question about this device
Download the instructions for your Heating in PDF format for free! Find your manual TC84100N - Perel and take your electronic device back in hand. On this page are published all the documents necessary for the use of your device. TC84100N by Perel.
USER MANUAL TC84100N Perel
natural_image
Red and silver portable lantern with mesh cover and heat sink (no text or symbols visible)USER MANUAL 2
HANDLEIDING 7
MODE D'EMPLOI 12
MANUAL DEL USUARIO 17
EN For outdoor use only
To all residents of the European Union
Important environmental information about this product
This symbol on the device or the package indicates that disposal of the device after its lifecycle could harm the environment. Do not dispose of the unit (or batteries) as unsorted municipal waste; it should be taken to a specialized company for recycling. This device should be returned to your distributor or to a local recycling service. Respect the local environmental rules.
If in doubt, contact your local waste disposal authorities.
Thank you for choosing Perel! Please read the manual thoroughly before bringing this device into service. If the device was damaged in transit, do not install or use it and contact your dealer.
2. Safety Instructions


Appliance intended for outdoor use only (suitable for safe operation outside enclosed spaces).

Read and understand this manual and all safety signs before using this appliance.
- This device can be used by children aged from 8 years and above, and persons with reduced physical, sensory or mental capabilities or lack of experience and knowledge if they have been given supervision or instruction concerning the use of the device in a safe way and understand the hazards involved. Children shall not play with the device. Cleaning and user maintenance shall not be made by children without supervision.
- Heater not intended for cooking.
- Use only fuel free from any impurity in the heater.
- Never use the heater in narrow or lightly closed rooms or areas and near other flammable materials.
- Never place the heater near to a door or passageway.
• Use this heater with white lighting kerosene only (BS2869.C1). Store fuel in a safe place.
- Exercise care not to spill fuel and wipe it up clean when spilled.
- Do not place the heater on a windy direction. Always place the appliance on a stable horizontally level.
- Be sure the flame is completely out when filling or relocating the heater.
- Be sure the flame is completely out when the heater is left alone.
- In case of fire, extinguish the fire with a fire extinguisher or cover it with a extinguish blanket. Afterwards pour water on it.
- Keep children away from the heater and do not leave them alone when the heater is operating in their area.
- Persons under influence of medicals, drugs or alcohol are not allowed to use the heater.
- Only use the appliance in rooms with good ventilation. Proper ventilation air must be provided to support the combustion air requirements of the heater being used.
- Improper combustion can lead to carbon monoxide poisoning leading to serious injury or death. Carbon monoxide is toxic and dangerous for human and animals. The symptoms of
inadequate ventilation are: headache, dizziness, dry mouth and/or throat, burning eyes and nose, nausea...
- Do not operate without guard in place.
- Do not operate below the minimum wick stop.
- Do not place clothing or other combustible articles on top of heater.
- Heater not intended for cooking.
- Do not operate the heater where flammable liquids or vapours may be present.
- Keep the heater at least 50 cm away from walls, furniture, flammables such as gas, alcohol...

text_image
50 cm 50 cm 50 cm3. General Guidelines
Refer to the Velleman® Service and Quality Warranty on the last pages of this manual.
4. Operation
Filling and Refilling the Tank
- Remove the filter cap.
- Fill with lighting kerosene (BS2869.C1) until the fuel gauge indicates [F]. Do not overfill. Also, refill before the gauge indicates [0].
- Replace the filter cap.
Igniting the Heater

WARNING

When igniting the heater for the first time, wait about 10 minutes until the wick is soaked with fuel. If you ignite the wick when it is not soaked, you will burn it and cause heavy smoke. The warranty will not be valid.
- Lift the wick by turning the wick adjusting handle to the right.
- Lift the chimney slightly from the burner.
- Light the wick with a match and reposition the chimney properly on the burner.
Adjusting the Flame
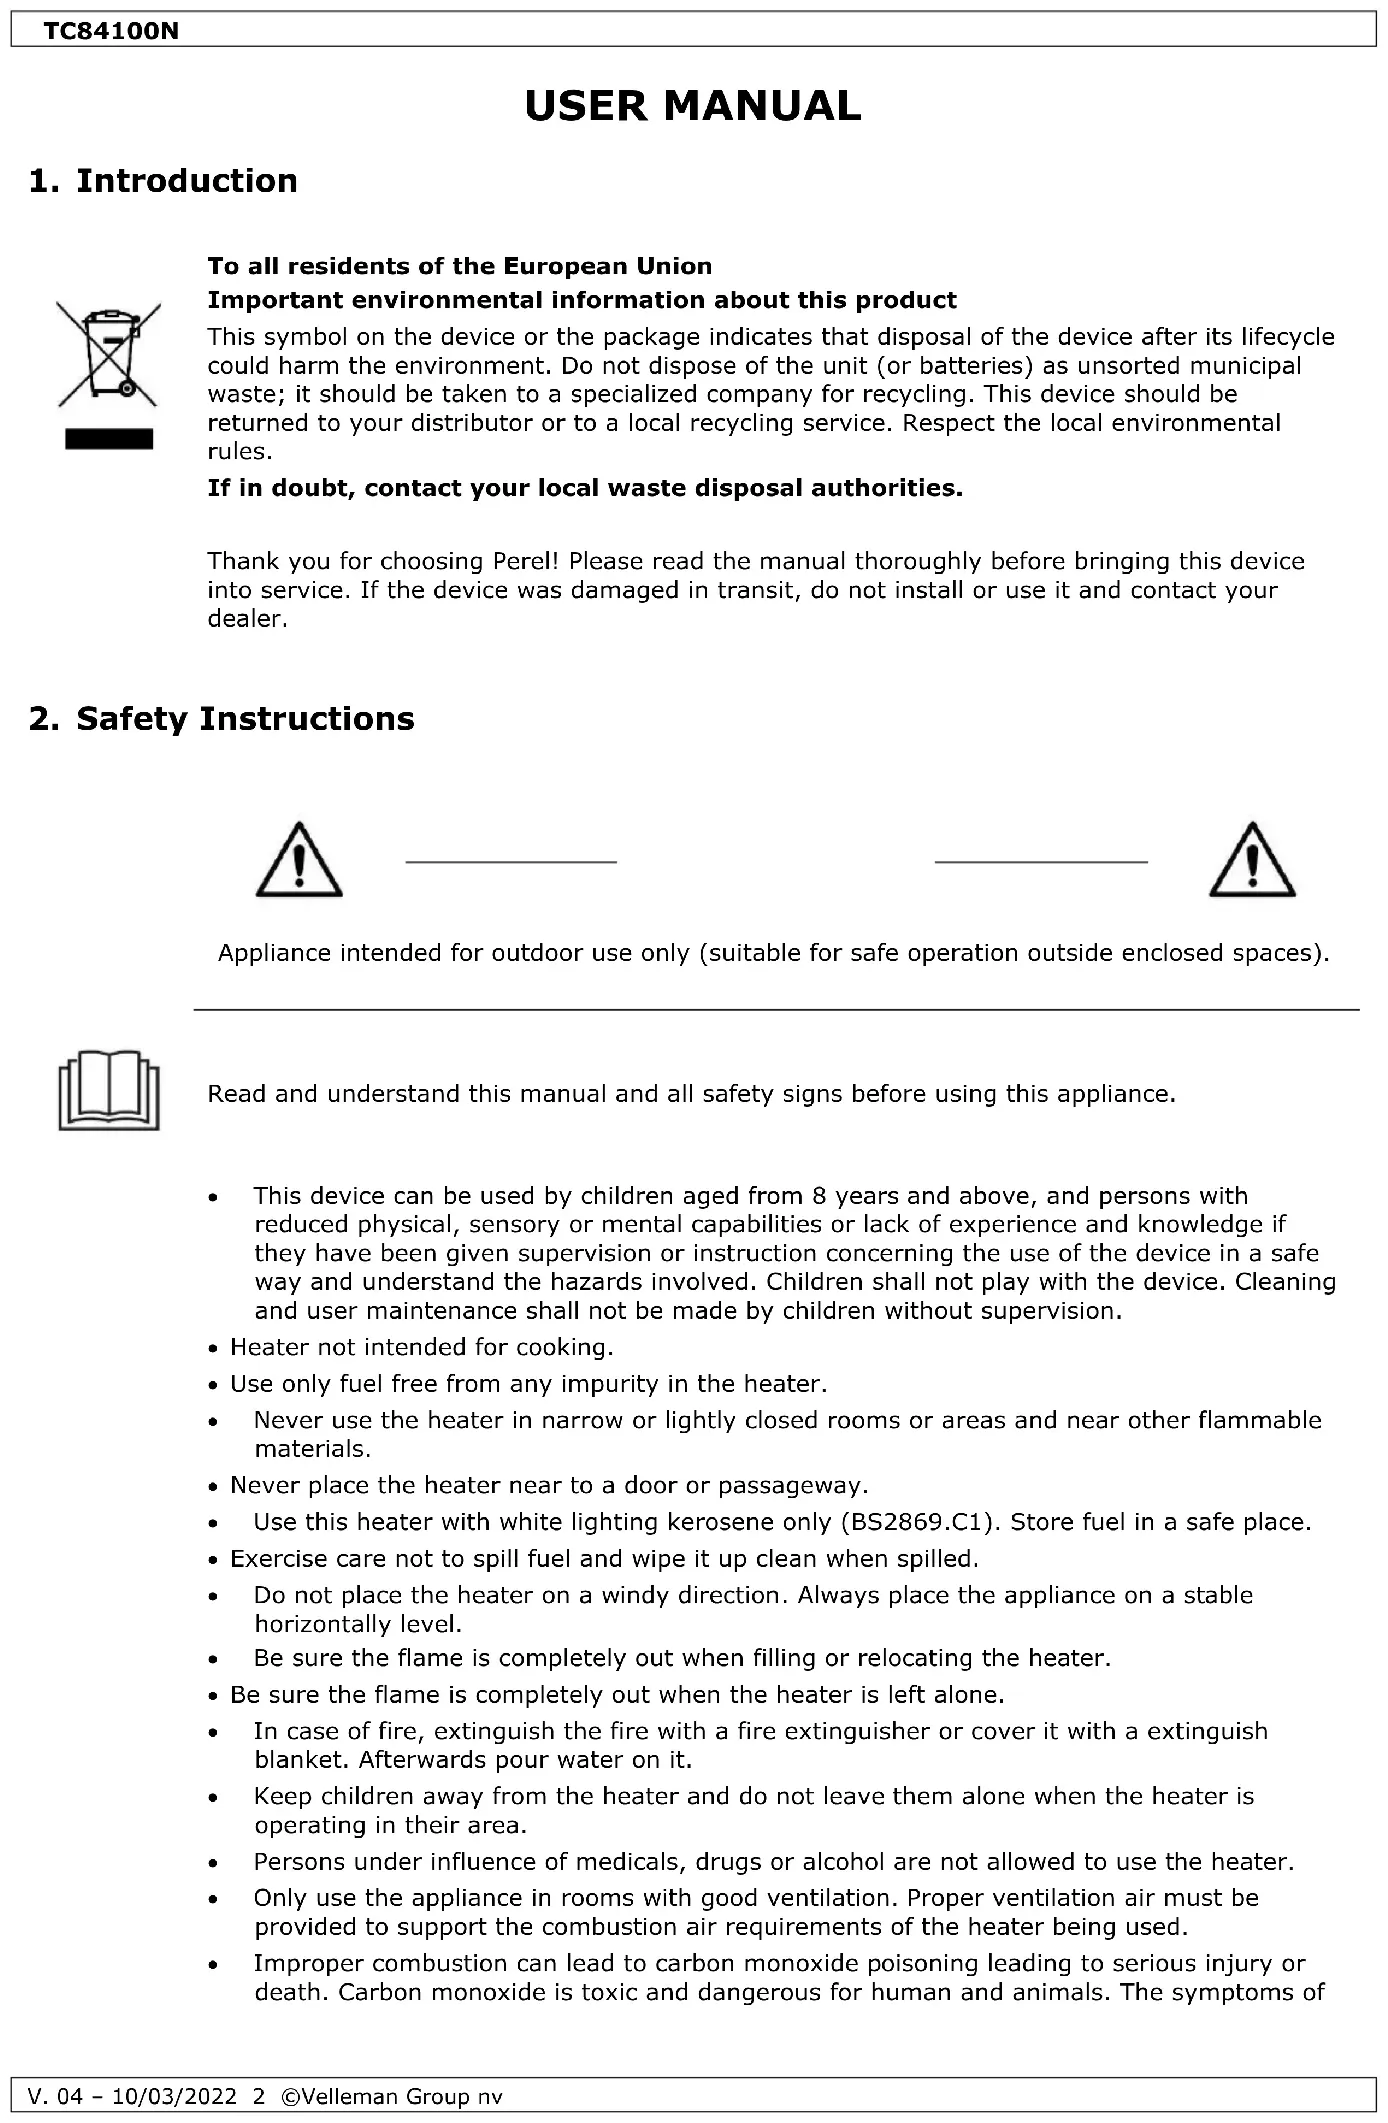
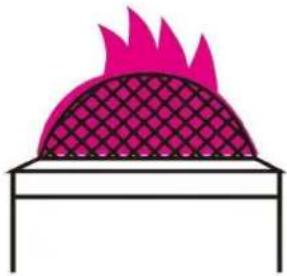
If the wire net on top of the chimney turns red hot, the combustion is correct.

natural_image
Simple line drawing of a pink dome-shaped object placed on a rectangular base (no text or symbols)If the flames flare up over the wire net, the wick is too high. Lower the wick.
natural_image
Simple line drawing of a pink dome-shaped object with flame-like top, placed on a rectangular base (no text or symbols)If the wire net stays dark, the wick or fuel level is too low. Raise the wick or refill with fuel.
natural_image
Simple line drawing of a dome structure with a patterned top surface, no text or symbols present.Extinguishing the Flame
To extinguish the heater, turn the wick adjusting handle to the left. The flame will stop after 3 to 5 minutes. Turn the wick adjusting handle gently. Too excessive a handling can sometimes cause a blow flame. Take care the flame is completely extinct when you fill or replace the heater. Be sure the flame is completely out when the heater is left alone.
5. Care and Maintenance

WARNING

Make sure to empty the tank before transporting or shipping the device.
Storing
- Disassemble and clean the kerosene heater before storing. Empty the tank, turn the tank upside down and clean with cloth imbibed with a lighting kerosene.
- The wick should be kept apart from the wick holder and fuel tank.
- Store the heater in a dry and well-ventilated place.
- In the unlikely event of technical problems or should you need spare parts, please contact your dealer.
Taking Care of the Wick
With use, a tar-like substance may be deposited on the top of the wick. The glass fibre wick does not need to be cut. To remove this substance, burn the wick idle as follows:
- Do not fill the tank with lighting kerosene.
- Light the wick and let it burn until the flame dies. By this time, the tar-like substance will have been consumed.
Do this every time you feel the wick does not suck up enough lighting kerosene.
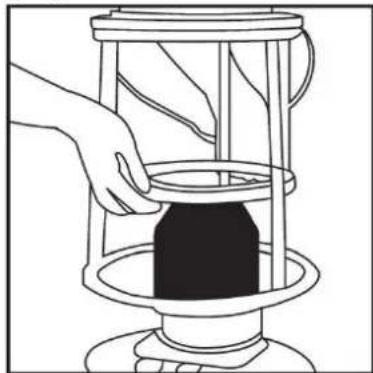
Exchanging Wicks
natural_image
Line drawing of a hand placing a dark object into a cylindrical container on a stand (no text or symbols)- Loosen the three fixing nuts and remove the guard frame. Remove the chimney.
natural_image
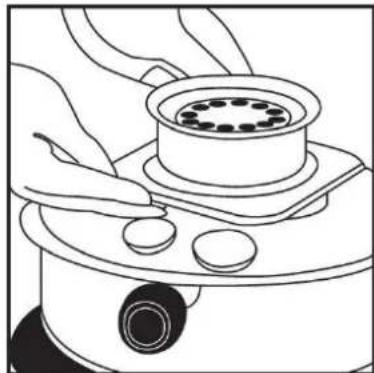
Line drawing of a hand operating a microscope with a circular component on top (no text or symbols)- Loosen the four fixing nuts and remove the wick cover. Make sure not to lose the packing.
natural_image
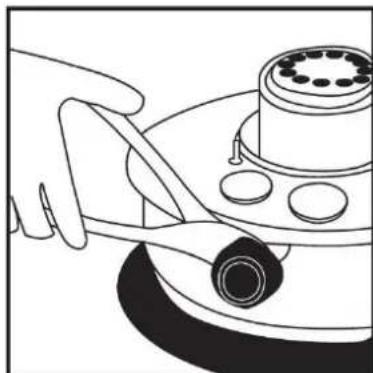
Line drawing of a hand using a tool to press or install a mechanical component (no text or symbols visible)- Loosen the nut for the wick adjusting handle by turning it to the left. Pull the wick adjusting handle towards you.
natural_image
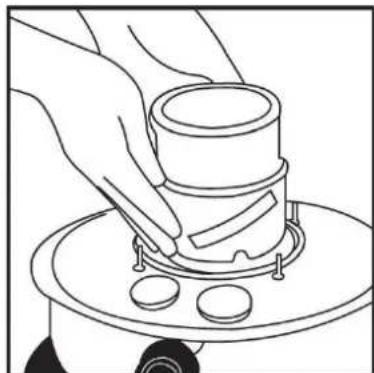
Line drawing of hands operating a cylindrical device on a rotating platform with three circular components (no text or symbols)- Pull up the wick holder together with the wick. Remove the old wick from the wick holder. Clean the wick guide, burner cover, etc.
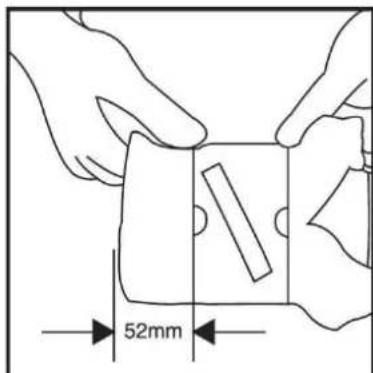
text_image
52mm- Insert a new wick inside the wick holder and fix it with the hooks on the inside of the wick holder. Make sure to expose an even amount of wick on both sides of the wick holder. Slide the wick holder over the wick guide.

natural_image
Illustration of a hand pressing down on a circular component with multiple holes (no text or symbols)- Get the wick holder in gear with the tip of the wick adjusting handle. Turn the wick adjusting handle to the right and lift the wick fully. Make sure not to fasten too tightly. If the top of the wick is not evenly exposed, even out with a scissor. Put the wick cover on the burner. Make sure the gap between the wick cover and the wick guide is even. Test the heater before actually using it.
6. Troubleshooting
The wick is holding water or damaged.
→ Dry or replace the wick.
Water is mixed in the kerosene.
→ Clean up the inside of the tank.
The wick level is too high/low or uneven.
→ Adjust the wick's level.
The wick adjusting handle operates tightly.
→ Slightly loosen the handle or replace the packing.
7. Technical Specifications
heating output....2600 W
consumption 0.25 L/h
autonomy 18 h
weight 4.3 kg
tank capacity 4.6 L
coverage 18 m ^3
ignition....manual
Use this device with original accessories only. Velleman Group nv cannot be held responsible in the event of damage or injury resulting from (incorrect) use of this device. For more info concerning this product and the latest version of this manual, please visit our website www.velleman.eu. The information in this manual is subject to change without prior notice.
© COPYRIGHT NOTICE
The copyright to this manual is owned by Velleman Group nv. All worldwide rights reserved. No part of this manual may be copied, reproduced, translated or reduced to any electronic medium or otherwise without the prior written consent of the copyright holder.
HANDLEIDING
1. Inleiding
natural_image
Simple line drawing of a pink dome-shaped object placed on a rectangular base (no text or symbols)natural_image
Simple line drawing of a pink dome-shaped object with flame-like top, placed on a rectangular base (no text or symbols)natural_image
Simple line drawing of a dome structure with a patterned top layer, no text or symbols present.natural_image
Line drawing of a hand placing a dark object into a cylindrical container on a base (no text or symbols)natural_image
Line drawing of a person using a microscope to adjust a cylindrical object (no text or symbols present)natural_image
Line drawing of a hand using a tool to cut a circular component on a rotating base (no text or symbols)natural_image
Line drawing of hands operating a cylindrical device with three circular components on a base (no text or symbols)natural_image
Line drawing of a hand pressing down on a cylindrical device with circular components (no text or symbols)inhoud reservoir 4.6 L
natural_image
Simple line drawing of a pink semicircular shape on a rectangular base (no text or symbols)natural_image
Simple line drawing of a pink dome-shaped object with a patterned top, placed on a rectangular base (no text or symbols)natural_image
Simple line drawing of a dome structure with a patterned top layer and horizontal base (no text or symbols)Extinction
natural_image
Line drawing of a hand placing a dark object into a cylindrical container on a stand (no text or symbols)natural_image
Line drawing of a hand using a microscope to press a cylindrical component (no text or symbols)natural_image
Line drawing of a hand using a tool to cut a circular component on a rotating base (no text or symbols)natural_image
Line drawing of hands operating a cylindrical device with three circular components on a base (no text or symbols)natural_image
Line drawing of a hand pressing down on a cylindrical device with circular components (no text or symbols)natural_image
Simple line drawing of a pink dome-shaped object placed on a rectangular base (no text or symbols)natural_image
Simple line drawing of a pink dome-shaped object with flame-like top, placed on a rectangular base (no text or symbols)natural_image
Simple line drawing of a dome structure with a patterned top layer, no text or symbols present.Apagar la llama
natural_image
Line drawing of a hand placing a dark object into a cylindrical container on a stand (no text or symbols)natural_image
Line drawing of a hand using a microscope to press a cylindrical component (no text or symbols)natural_image
Line drawing of a hand using a tool to adjust or install a mechanical component (no text or symbols visible)natural_image
Line drawing of hands using a cylindrical tool on a stovetop with three circular components (no text or symbols)natural_image
Illustration of hands operating a portable stove burner with circular components (no text or symbols)natural_image
Simple line drawing of a pink dome-shaped object placed on a rectangular base (no text or symbols)natural_image
Simple line drawing of a pink dome-shaped object with flame-like top, placed on a rectangular base (no text or symbols)natural_image
Simple line drawing of a dome structure with a patterned top layer, no text or symbols present.Löschen
natural_image
Line drawing of a hand placing a dark object into a cylindrical container (no text or symbols)natural_image
Line drawing of a hand using a microscope to press a cylindrical component (no text or symbols)natural_image
Line drawing of a hand using a tool to cut a circular component on a rotating wheel (no text or symbols)natural_image
Line drawing of hands operating a cylindrical device on a rotating platform (no text or symbols)natural_image
Line drawing of a hand pressing down on a cylindrical component with circular holes (no text or symbols)natural_image
Simple line drawing of a pink circular shape on a rectangular base (no text or symbols)natural_image
Simple line drawing of a pink dome-shaped object with flame-like top, placed on a rectangular base (no text or symbols)natural_image
Simple line drawing of a dome structure with a patterned top surface and horizontal base (no text or symbols)Gaszenie płomienia
natural_image
Line drawing of a hand placing a dark object into a cylindrical container on a stand (no text or symbols)natural_image
Line drawing of a hand operating a microscope with a circular component on the base (no text or symbols)natural_image
Line drawing of a hand using a tool to cut a cylindrical component on a curved surface (no text or symbols)natural_image
Line drawing of hands assembling a mechanical component on a rotating platform (no text or symbols)natural_image
Illustration of hands operating a mechanical component with circular parts (no text or symbols)natural_image
Simple line drawing of a pink circular shape on a rectangular base (no text or symbols)natural_image
Simple line drawing of a pink dome-shaped object with flame-like top, placed on a rectangular base (no text or symbols)natural_image
Simple line drawing of a dome structure with a patterned top surface and horizontal base (no text or symbols)Apagar a Chama
natural_image
Line drawing of a hand placing a container into a cylindrical tube (no text or symbols)natural_image
Line drawing of a hand using a microscope to adjust a circular object on a base (no text or symbols)natural_image
Line drawing of a hand using a tool to cut a mechanical component (no text or symbols)natural_image
Line drawing of hands operating a cylindrical device on a rotating platform (no text or symbols)natural_image
Illustration of hands operating a portable stove with circular components (no text or symbols)Velleman® Service and Quality Warranty
Since its foundation in 1972, Velleman® acquired extensive experience in the electronics world and currently distributes its products in over 85 countries.
All our products fulfil strict quality requirements and legal stipulations in the EU. In order to ensure the quality, our products regularly go through an extra quality check, both by an internal quality department and by specialized external organisations. If, all precautionary measures notwithstanding, problems should occur, please make appeal to our warranty (see guarantee conditions).
General Warranty Conditions Concerning Consumer Products (for EU):
- All consumer products are subject to a 24-month warranty on production flaws and defective material as from the original date of purchase.
- Velleman® can decide to replace an article with an equivalent article, or to refund the retail value totally or partially when the complaint is valid and a free repair or replacement of the article is impossible, or if the expenses are out of proportion.
You will be delivered a replacing article or a refund at the value of 100% of the purchase price in case of a flaw occurred in the first year after the date of purchase and delivery, or a replacing article at 50% of the purchase price or a refund at the value of 50% of the retail value in case of a flaw occurred in the second year after the date of purchase and delivery.
- Not covered by warranty:
- all direct or indirect damage caused after delivery to the article (e.g. by oxidation, shocks, falls, dust, dirt, humidity...), and by the article, as well as its contents (e.g. data loss), compensation for loss of profits;
- consumable goods, parts or accessories that are subject to an aging process during normal use, such as batteries (rechargeable, non-rechargeable, built-in or replaceable), lamps, rubber parts, drive belts... (unlimited list);
- flaws resulting from fire, water damage, lightning, accident, natural disaster, etc....;
- flaws caused deliberately, negligently or resulting from improper handling, negligent maintenance, abusive use or use contrary to the manufacturer's instructions;
- damage caused by a commercial, professional or collective use of the article (the warranty validity will be reduced to six (6) months when the article is used professionally);
- damage resulting from an inappropriate packing and shipping of the article;
- all damage caused by modification, repair or alteration performed by a third party without written permission by Velleman®.
- Articles to be repaired must be delivered to your Velleman® dealer, solidly packed (preferably in the original packaging), and be completed with the original receipt of purchase and a clear flaw description.
- Hint: In order to save on cost and time, please reread the manual and check if the flaw is caused by obvious causes prior to presenting the article for repair. Note that returning a non-defective article can also involve handling costs.
- Repairs occurring after warranty expiration are subject to shipping costs.
- The above conditions are without prejudice to all commercial warranties.