FT10CN - Heating Perel - Free user manual and instructions
Find the device manual for free FT10CN Perel in PDF.
| Product type | Gas auxiliary heater (forced convection) |
| Brand | Perel |
| Model | FT10CN |
| Category | I3P |
| Gas type | G31 (propane) |
| Supply pressure | 700 mbar |
| Nominal power | 10 kW |
| Gas consumption | 0.73 kg/h |
| Power supply | 220-240 V~, 50 Hz, 70 W |
| Protection rating | IPX4 |
| Usage | Outdoor or well-ventilated areas |
| Heating mode | Forced convection (fan) |
| Ignition | Piezoelectric with pilot light |
| Safety | Safety valve, thermocouple, overheat protection |
| Gas connection | Flexible hose 1.5 m (included), regulator (included) |
| Compatible gas bottle | ∅ 30 cm, H 55 cm, up to 30 kg |
| Maintenance | Regular cleaning, annual inspection by technician |
| Countries of destination | BE, FR, GB, IE, NL |
| Warranty | 24 months (Velleman conditions) |
Frequently Asked Questions - FT10CN Perel
User questions about FT10CN Perel
0 question about this device. Answer the ones you know or ask your own.
Ask a new question about this device
Download the instructions for your Heating in PDF format for free! Find your manual FT10CN - Perel and take your electronic device back in hand. On this page are published all the documents necessary for the use of your device. FT10CN by Perel.
USER MANUAL FT10CN Perel
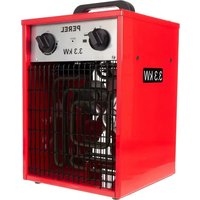
natural_image
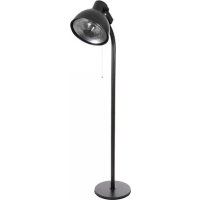
Black industrial lamp with metallic blades and control buttons (no visible text or symbols)FT10CN/FT15CN
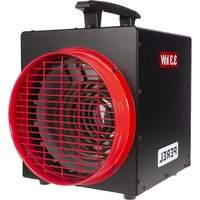
natural_image
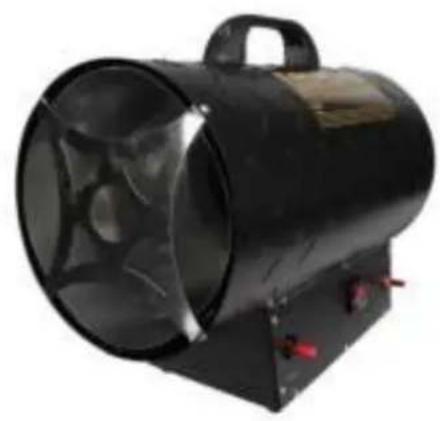
Black industrial fan-shaped device with heat exchanger and handle (no visible text or symbols)FT30CN
USER MANUAL 4
HANDLEIDING 13
MODE D'EMPLOI 22
Appliance intended for outdoor use only (suitable for safe operation outside enclosed spaces).
text_image
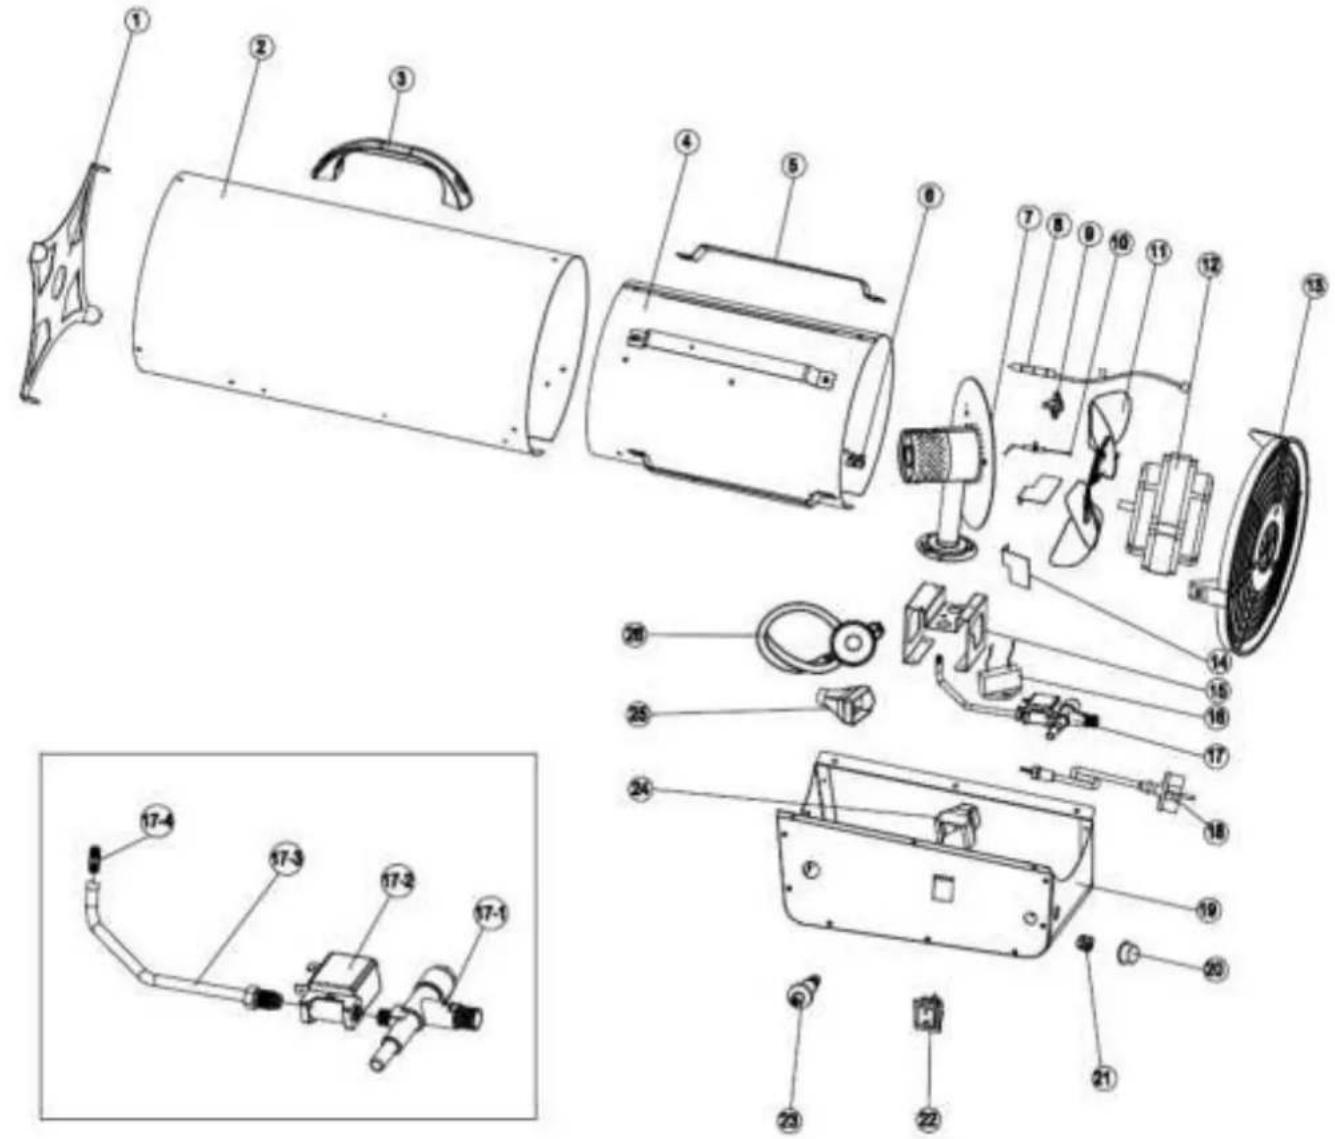
Exploded view diagram of an electrical device with numbered parts and a zoomed-in inset for detail.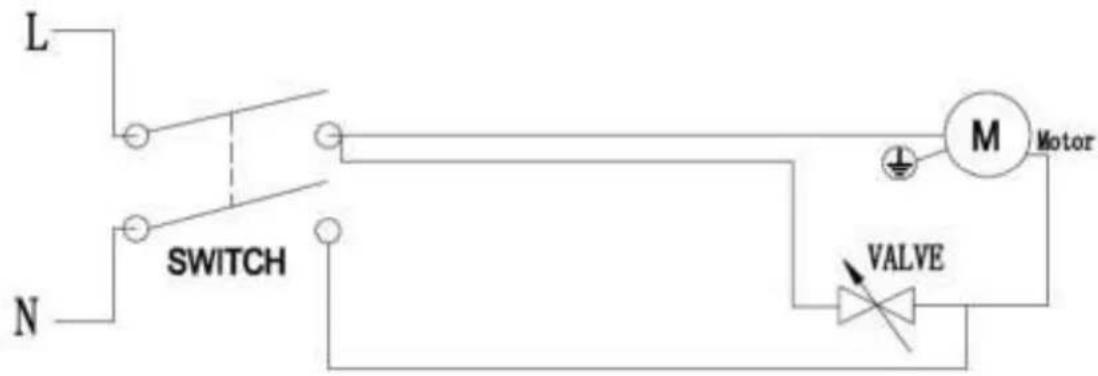
text_image
L N SWITCH M Motor VALVE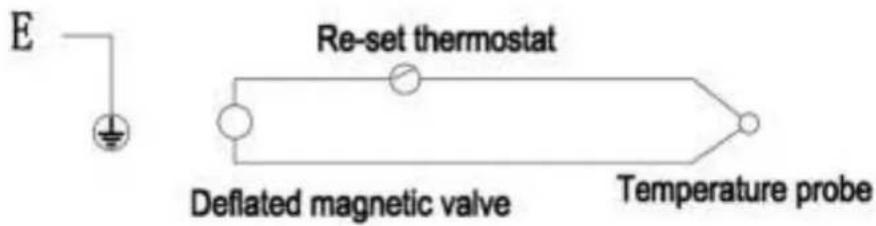
text_image
E Re-set thermostat Deflated magnetic valve Temperature probeFT30CN
text_image
Exploded view diagram of an electronic device with numbered parts and exploded view, including motor, fan, and control unit.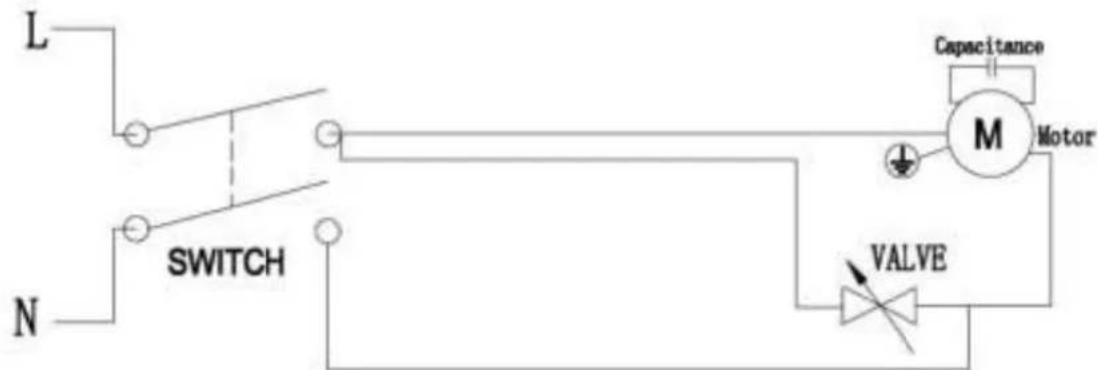
text_image
L N SWITCH Capacitance M Motor VALVE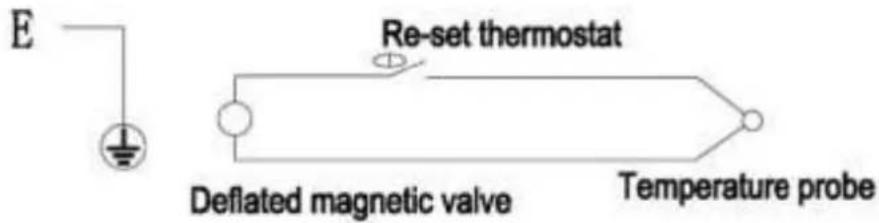
text_image
E Re-set thermostat Deflated magnetic valve Temperature probeUSER MANUAL
1. Introduction
To all residents of the European Union
Important environmental information about this product
This symbol on the device or the package indicates that disposal of the device after its lifecycle could harm the environment. Do not dispose of the unit (or batteries) as unsorted municipal waste; it should be taken to a specialized company for recycling. This device should be returned to your distributor or to a local recycling service. Respect the local environmental rules.
If in doubt, contact your local waste disposal authorities.
Thank you for choosing Perel! Please read the manual thoroughly before bringing this device into service. If the device was damaged in transit, do not install or use it and contact your dealer.
2. Safety Instructions
Read and understand this manual and all safety signs before using this appliance.

The device must be installed according to the local ventilation standards as these can differ from country to country.

Do not use this mobile heater in occupied spaces of residential buildings. Please consult the local rules when prior to using this heater in public buildings.

This heater is not intended for use by persons (including children) with reduced physical, sensory or mental capabilities, or lack of experience and knowledge, unless they have been given supervision or instruction concerning use of the appliance by a person responsible for their safety. Keep this device at a safety distance from animals.

The erroneous use of this heater may result in damage and lead to life-threatening risks such as injuries, burns, explosions, electric shocks or poisoning. The first symptoms of carbon monoxide poisoning may be confused with those of the flu: headache, dizziness and/or nausea. These symptoms may be caused by an improper working of the mobile heater. If you experience one of these symptoms, immediately proceed in the open air. Also, ask a qualified technician to repair the device.

Any cleaning, maintenance or repair activity involving a dangerous component (e.g. replacement of a damaged power cable, repair of the burner) must be done by the manufacturer, its after-sales service or a qualified technician in order to avoid risks, even if the device has been disconnected from the mains.

Velleman nv cannot be held responsible in the event of damage or injury from (incorrect) use of this device.
- Only use this mobile heater with the fuel, an alternating current and the frequency specified on the specifications label.
- The mobile heater must only be used when an adequate air exchange rate can be guaranteed. This device must therefore be used in the open air or in a well-ventilated room only. Install the device following all local regulations, included those with respect to technical standards and the regulations concerning the prevention of accidents and fires.
-
The mobile heater needs an adequate airflow to function properly. In fact, it must only be used in the open air or in a room with sufficient and continuous airflow. Sufficient airflow is guaranteed when the minimum room volume equals 1 m^3 for every 100 W of power. Never must the total volume of the room be less than 100 m^3 . Sufficient ventilation is guaranteed only when the ventilation openings have a total volume of 25 cm^2 for every kW of thermal power for a minimum surface of 250 cm^2 .
-
The mobile heater must be used only as a gas heater or fan, according to the instructions in this user manual.
- Should you smell gas, the mobile heater may be defective or present a gas leak. In this case, immediately switch off the device: close the pressure regulator, disconnect the device from the mains and contact your local dealer.
- The flexible hose should never be crimped, bent or handled with brute force when using or handling the device.
-
Install the gas cylinder so that it is protected. Install it in the back of the mobile heater and never place it in front of the hot air output. Never aim the device at the gas cylinder.
-
Make sure that no object hampers the fan air intake.
- Only connect the mobile heater to an earthed mains.
- Do not hamper, completely or partially, the air intake at the back and/or the air output at the front. Avoid using any type of air canalization toward or from the device.
• The minimum safety distance is 2 m from walls or any other object.
- The mobile heater may only be used on a fireproof surface.
- Connect the mobile heater on a levelled, stable and fireproof surface to avoid fire risks.
- The mobile heater may not be used in rooms where explosive dusts, gases, liquids or any other flammable materials are present (fabrics, wood, paper, petrol, etc.).
- It is recommended to use a fireproof protection if the mobile heater is being used near steps, curtains or other covering materials. A minimum safety distance of 2.5 m between the hot parts of the device and any flammable material (fabrics, wood, paper, petrol, etc.) or from thermolabile materials (included the power cable) must be observed.
- Maintenance and internal cleaning activities may only be commended to a specialised technician appointed by the manufacturer.
- The heater must be disconnected from the mains and from any gas-feeding device if the heater is to be left unattended and if the safety instructions cannot be observed.
- If the heater does not switch on or if it switches on in an abnormal way, disconnect the heater from the mains and from any gas-feeding device. Check the airflow to the heater and make sure it is sufficient before trying to switch on the heater.
- Never move, manipulate or clean a switched-on heater.
- Only replace the gas hose with a similar hose or with a hose which is able to cope with the used gas pressure. Refer to the local regulations. The used gas hose must be 1.5 m long. Do not crimp or bend the gas hose.
- Do not use a gas hose to canalize hot air.
- Disconnect the heater from the mains, cut the gas supply, disconnect the gas hose and close the gas intake inside the heater if it will not be used for a longer period.
- It is recommended to leave the annual maintenance of the heater to a specialized technician.
- Do not use this equipment in basements or premises below ground level.
- This device should only be used together with the hose and regulator provided. If the hose or regulator is damaged, it must be replaced by the original spare part (order code: FT11), which can be ordered from the manufacturer or service agent.
- NOT TO BE USED FOR THE HEATING OF HABITABLE AREAS OF DOMESTIC PREMISES; FOR USE IN PUBLIC BUILDINGS, REFER TO NATIONAL REGULATIONS.
3. Warning

Asphyxiation hazard.
- Do not use in unventilated areas. Lack of proper ventilation will lead to improper combustion. Improper combustion can lead to carbon monoxide poisoning and serious injury or death. Symptoms of carbon monoxide poisoning can include headache, dizziness and difficulty in breathing.
- Never obstruct the front and back of the heater.

GAS ODOUR. Gas has odorants added specifically for gas leak detection. If a gas leak occurs, you should be able to smell gas. Since LP gases are heavier than air, you should smell for the gas odour low to the floor. Any gas odour is your signal to go into immediate action.
- Do not take any action that could ignite the fuel gas. Do not operate any electrical switches. Do not pull any power supply or extension cords. Do not light matches or any other source of flame. Do not use your telephone.
• Get everyone out of the building and away from the area immediately. - Close all gas tank or cylinder supply valves, or the main supply valve located at the meter if you use natural gas.
- Leave the area or building and call your gas supplier and the fire department. Stay out of the area or the building until it is declared safe by the gas supplier and the fire department.
- Let the gas supplier and the fire department check for the gas leak.
4. General Guidelines
Refer to the Velleman
® Service and Quality Warranty on the last pages of this manual.
5. Connecting and Replacing the Gas Cylinder
Only replace the gas cylinder in the open air, far from any open flame or heat source.
Connect the gas cylinder using following accessories:
• 1 flexible hose for liquid gas (incl.)
• 1 pressure regulator for liquid gas (incl.)
Connection
- Connect the gas hose to the heater without forcing.
-
Install the pressure regulator on the gas cylinder.
-
Check if the connection of the pressure regulator is correctly sealed according to the used gas cylinder.
-
Open the valve of the gas cylinder or the pressure regulator if the gas cylinder does not feature a valve.
-
Check if the connection are correctly sealed using soapy water: soap bubbles may point to a gas leak. Never test for gas leaks with an open flame.
The connections may have a left-handed screw thread. Consequently, they are threaded in a anticlockwise direction.
Check if there is a clamp between the pressure regulator and the gas cylinder.
It is allowed to interconnect multiple gas cylinders to increase the fuel autonomy.
The feeding pressure is obtained through the pressure regulator and corresponds to the data on the specifications table.
Only use certified replacement gas hoses.
It is recommended to use gas cylinders of 30 kg providing a thermal power of 30 kW. You are allowed to use larger gas cylinders if more thermal power is needed.
It is recommended to use gas cylinders with an appropriate capacity to avoid problems due to partial fuel gasification. The correct pressure (refer to the specification tag on the heater) is indicated by the included pressure regulator or a similar model.
Make sure the feeding gas hose is in perfect condition. Only use flexible and appropriate models when replacing the gas hose. Always respect the local regulations. Do not crimp the flexible hose.
6. Connecting to the Mains
Before connecting the heater to the mains, check if the used power supply and frequency match the specifications on the specification tag. Always respect the local regulations when connecting the heater to the mains.
Only connect the device to an earthed mains.
Disconnect the device from the mains prior to any maintenance or cleaning activity.

Always make sure that the mains is earthed.
7. Switching On the Heater
- Open the gas valve.
-
Flick the switch to position I.
-
Fully press and hold the gas valve. Operate the ignition several times.
-
The flame burns. Hold the gas valve pressed for 15 seconds to activate the safety mechanism.
-
Release the gas valve. The flame will keep burning.
The safety mechanism will automatically switch off the heater in a few seconds in case of an electric power failure. This mechanism will also switch off the heater in case of a gas shortage. In both cases, follow the explanation above to switch on the heater again.
-
Regulate the gas flow.
-
Avoid operating the ignition for a prolonged period. Check for problems if the heater does not switch on.
8. Checking a Switched-On Heater
Check a switched-on heater by observing the pilot flame at the air exit of the heater. Make sure that the pilot light burns steadily inside the burner.

Be careful when checking the pilot light as the air exiting the heater can be extremely hot. Maintain yourself at a safe distance.
9. Switching Off the Heater
- Close the pressure regulator or disconnect it from the gas cylinder.
-
Leave the heater to cool down for at least 60 seconds after the pilot light has died out.
-
Close the gas cylinder.
- Switch off the heater by flicking the switch to the O position.
- Disconnect from the mains by pulling the plug.
- Disconnect the flexible hose from the heater.
10. Using the Heater near Persons or Animals
The heater can be used in a well-ventilated room where the pollutant percentage does not exceed the allowed levels.
Sufficient ventilation is guaranteed only when the minimum room volume, in m^3 , is 30 times the nominal thermal power (in kW) of all the switched-on devices used in that room, and when the ventilation happens through doors, windows or other openings which have a minimum total volume, in m^3 , of 0.003 times the nominal thermal power (in kW) of all the switched-on devices used in that room.
Do not use the heater to permanently heat stables or other animal housings.
11. Using the Heater far from Persons and Animals
This heater may only be used for heating rooms if the necessary airflow needed for the burning of the fuel can be guaranteed.
The necessary air volume is guaranteed when the minimum room volume, in m^3 , is 10 times the nominal thermal power (in kW) of all the switched-on devices used in that room.
A normal airflow through doors and windows must be guaranteed.
12. Ventilation during the Summer
This heater can also be used as a fan. To do so, disconnect the heater from the gas source, connect to the mains and flick the switch on the I position.

Follow the correct procedure and disconnect the heater from the mains if it has previously been used in heating mode. See chapter Switching Off the Heater.
13. Cleaning and Maintenance Instructions Intended for the User
Any cleaning activity involving a dangerous component (e.g. replacement of a damaged power cable, repair of the burner) must be done by the manufacturer, its after-sales service or a qualified technician in order to avoid risks, even if the device has been disconnected from the mains.
Clean the heater after each use and prior to storing the device.
Regularly clean the burner when using the heater in dusty environments.
Check the flexible gas hose and the mains connection prior to using the heater. Contact a specialised technician if in doubt about the quality of the gas hose.
Never clean a switched-on heater.
Completely disconnect the heater from the mains before any cleaning activity. See chapter Switching Off the Heater.
Cleaning the heater does not require special tools. Always check for gas leaks in the circuit or at the connections, and make sure the pressure is correct after and before each cleaning activity.
Maintenance should be performed at least once a year.
Any repair activity must be performed by qualified personnel only. Never open the appliance yourself!
Disconnect the gas hose and store the appliance in a dry, clean, dust-free and safe place outside the reach of children.
Always close the stop valve of the gas cylinder first when the appliance is not in use.
Use with cylinders of approximately ∅ 30 cm, H 55 cm.
Only use a gas hose in accordance with EN 16436-1:2014+A1 class 2 with a diameter of min. 6.3 mm and a recommended length of 1.5 m.
Only use this appliance together with an EN 16129 compliant regulator (G31:700 mbar).
Troubleshooting
| problem possible cause possible solution | ||
| The fan does not work. | No power voltage. | Check if the heater is connected to the mains and the residual-current device or fuse switch is fine. |
| The fan is locked. Please contact a technician. | ||
| Damaged power cable of switch. | ||
| The piezo igniter does not work. | The electrode is in the wrong position (distance to the burner is too large or too small). | Please contact a technician. |
| The gas cylinder is empty.No gas on the burner. | The gas valve is closed. Open the gas valve. | |
| Replace the gas cylinder as described in chapterConnecting and Replacing the Gas Cylinder. | ||
| Gas connections badly sealed. | Close the gas supply immediately and contact a technician. | |
| Gas leak and/or gas smell. Gas connections badly sealed. | Close the gas supply immediately and contact a technician. | |
| The burner switches on but the flame dies out when releasing the gas valve button. | The thermo-element is insufficiently warmed up or damaged. | Re-ignite and press the gas valve button for at least 30 seconds after ignition.Please contact a technician with recurring problems. |
| Too much incoming gas or too large a flame. | Damaged pressure regulator. | Replace the pressure regulator. |
| The burner dies out. | Insufficient air feeding. | Make sure the fan works perfectly. Assure optimum airflow by removing all objects in front of the air intake and outtake. Respect the prescribed safety distances:- Air intake >2.5 m- Air outtake >3.5 m- Sides >2 m- Above heater >2 m |
| The heater is overheated. | Leave the heater to cool down for 5 minutes before switching on. Please contact a technician with recurring problems. | |
| Insufficient gas feeding volume (empty tank). | Check the gas feeding volume and connect a new/bigger gas cylinder if necessary as described in chapterConnecting and Replacing the Gas Cylinder. | |
14. Servicing Instructions Intended for the Technician
Any maintenance, replace or repair activity involving a dangerous component must be done by the manufacturer, its after-sales service or a qualified technician in order to avoid risks, even if the device has been disconnected from the mains.
Warning - Use only original replacement parts. This heater must use design-specific parts. Do not substitute or use generic parts. Improper replacement parts could cause serious or fatal injuries. This will also protect your warranty coverage for parts replaced under warranty.
The technician must read this user manual prior to start replacement, repair or maintenance activities on the heater. Please contact the manufacturer if technical support, information on spare parts or other information about this heater is needed.
Never operate the heater in a non-authorized manner.
Maintaining, replacing and repairing parts of the heater does not require special tools. Always check for gas leaks in the circuit or at the connections, and make sure the pressure is correct after and before each replacement or reparation.
The appliance can be checked for soundness as below. A gas test gauge and gas leak detector spray is required.
Step 1 - Connect gas test gauge to gas meter.
Connect a zeroed gas test gauge to the testing point of your gas meter.
Step 2 - Open supply valve.
Open the supply valve of the meter until the pressure increases to approximately 10 mbar. Then, close the valve.
Step 3 - Observe gas test gauge.
Wait for 1 minute and observe the gas test gauge. There should not be any perceptible movement of the water in the u-tube. If the pressure rises, it demonstrates that the supply valve is not fully stopping the gas from leaving the meter; it is 'letting-by'. The valve will need to be checked further. You should spray leak detection spray into the valve to double-check if it is letting-by. Gas let-by will be indicated by bubbles forming around the supply valve. If a leak is detected, the supply valve should be repaired or replaced by a qualified gas safe engineer.
Step 4 - Increase pressure.
If, however, there is no let-by, slowly open the supply valve and increase the pressure until the gas test gauge reads 20 mbar. Then, close the valve.
Step 5 - Wait for another minute.
Allow another minute for temperature stabilization. This is a period of time in which the gas expands or contracts and adapts to the temperature environment within the pipework. Following 1 minute, if the pressure has dropped slightly, readjust the pressure to 20 mbar by opening the supply valve.
Step 6 - Observe gas test gauge.
Observe the gas test gauge over the next two minutes. During this time, there should be no pressure drop. If a drop has occurred, close the appliance isolation valves on the meter to confirm that the meter itself is not leaking and the drop is, instead, due to a faulty gas appliance. No drop is allowed in the system pipework if the isolation valves are closed.
Step 7 - Remove gauge and reseal gas test point.
Following a successful test, remove the gas test gauge and reseal the gas test point on the meter.
Re-open the inlet supply valve and apply leak detector spray to the test point and all pipework before the valve to the supply pipe to double check that there is no leak.
Never leave the heater unattended while burning.
Troubleshooting
| problem possible cause possible solution | ||
| The piezo igniter does not work. | Damaged piezo igniter or electrode. | Check the piezo igniter and electrodes, and replace the damaged part if necessary. |
| No or loose connection between electrode and piezo igniter. | Check the connection and repair if necessary. | |
| No gas. | Clogged nozzle. | Carefully clean the nozzle with pressurized air. Never use a needle or similar pointed object. |
| Damaged solenoid valve. Replace the solenoid valve. | ||
| The burner switches on but the flame dies out when releasing the gas valve button. | Damaged thermocouple and/or thermo-element. | Check the thermocouple and thermo-element, and replace the damaged part if necessary. |
Spare Parts
Refer to the illustrations on pages 2 and 3.
| FT10C + FT15C FT30C | ||
| No. | Description # No. | Description |
| 1 | front grill | 1 |
| 2 | outer casing | 1 |
| 3 | handle | 1 |
| 4 | earth wire connection | 1 |
| 5 | inner shell | 1 |
| 6 | insulation shell support | 4 |
| 7 | burner head assembly | 1 |
| 8 | thermal cut-out | 1 |
| 9 | thermocouple | 1 |
| 10 | fan | 1 |
| 11 | motor | 1 |
| 12 | air inlet grill | 1 |
| 13 | valve fixing plate | 1 |
| 14 | power cord | 1 |
| 15 | cable fastener | 1 |
| 16 | regulator | 1 |
| 17 | inlet connection protection cover | 1 |
| 18 | bottom base | 1 |
| 19 | valve filter | 1 |
| 20 | switch | 1 |
| 21 | dual igniter | 1 |
| 22 | waterproof cover | 1 |
| 23 | solenoid valve | 1 |
| 23-1 | gas escape valve | 1 |
| 23-2 | solenoid valve | 1 |
| 23-3 | gas pipe | 1 |
| 23-4 | gas nozzle | 1 |
| 24 | waterproof protective cover | 1 |
| 25 | nozzle support bracket | 1 |
| 26 | ignition needle | 1 |
| 27 | capacitor | 1 |
| # | ||
| 1 | front grill | 1 |
| 2 | outer casing | 1 |
| 3 | handle | 1 |
| 4 | inner shell | 1 |
| 5 | insulation shell support | 4 |
| 6 | earth wire connection | 1 |
| 7 | burner head assembly | 1 |
| 8 | thermocouple | 1 |
| 9 | thermal cut-out | 1 |
| 10 | ignition needle | 1 |
| 11 | fan | 1 |
| 12 | motor | 1 |
| 13 | air inlet grill | 1 |
| 14 | blade for combustion | 2 |
| 15 | nozzle support bracket | 1 |
| 16 | capacitor | 1 |
| 17 | solenoid valve | 1 |
| 17-1 | gas escape valve | 1 |
| 17-2 | solenoid valve | 1 |
| 17-3 | gas pipe | 1 |
| 17-4 | gas nozzle | 1 |
| 18 | power cord | 1 |
| 19 | bottom base | 1 |
| 20 | inlet connection protection cover | 1 |
| 21 | cable fastener | 1 |
| 22 | switch | 1 |
| 23 | dual igniter | 1 |
| 24 | waterproof cover | 1 |
| 25 | waterproof protective cover | 1 |
| 26 | regulator | 1 |
15. Technical Specifications
| Product Portable forced convection direct gas fired air heater(A3) | |
| Trademark Perel | |
| Model number FT10CN | |
| Appliance category I | 3P |
| Reference gas G31 (propane) | |
| Country of destination BE, FR, GB, IE, NL | |
| Supply pressure (mbar) 700 | |
| Nominal heat input (kW) 10 | |
| Gas consumption (kg/h) 0,73 | |
| Electrical input 220-240 V~, 50 Hz, 304 mA, 70 W | |
| IP rating | IPX4 |
| Air delivery temperature classification | Space heating appliances |
| Product Portable forced convection direct gas fired air heater(A3) | |
| Trademark Perel | |
| Model number FT15CN | |
| Appliance category I | 3P |
| Reference gas G31 (propane) | |
| Country of destination BE, FR, GB, IE, NL | |
| Supply pressure (mbar) 700 | |
| Nominal heat input (kW) 15 | |
| Gas consumption (kg/h) 1,09 | |
| Electrical input 220-240 V~, 50 Hz, 304 mA, 70 W | |
| IP rating IPX4 | |
| Air delivery temperature classification Space heating appliances | |
| Product Portable forced convection direct gas fired air heater(A3) | |
| Trademark Perel | |
| Model number FT30CN | |
| Appliance category I | ^3P |
| Reference gas G31 (propane) | |
| Country of destination BE, FR, GB, IE, NL | |
| Supply pressure (mbar) 700 | |
| Nominal heat input (kW) 30 | |
| Gas consumption (kg/h) 2,18 | |
| Electrical input 220-240 V~, 50 Hz, 304 mA, 70 W | |
| IP rating IPX4 | |
| Air delivery temperature classification Space heating appliances | |
Use this device with original accessories only. Velleman nv cannot be held responsible in the event of damage or injury resulting from (incorrect) use of this device. For more info concerning this product and the latest version of this manual, please visit our website www.perel.eu. The information in this manual is subject to change without prior notice.
© COPYRIGHT NOTICE
The copyright to this manual is owned by Velleman nv. All worldwide rights reserved.
No part of this manual may be copied, reproduced, translated or reduced to any electronic medium or otherwise without the prior written consent of the copyright holder.
HANDLEIDING
1. Inleiding
Velleman® Service and Quality Warranty
Since its foundation in 1972, Velleman® acquired extensive experience in the electronics world and currently distributes its products in over 85 countries.
All our products fulfil strict quality requirements and legal stipulations in the EU. In order to ensure the quality, our products regularly go through an extra quality check, both by an internal quality department and by specialized external organisations. If, all precautionary measures notwithstanding, problems should occur, please make appeal to our warranty (see guarantee conditions).
General Warranty Conditions Concerning Consumer Products (for EU):
- All consumer products are subject to a 24-month warranty on production flaws and defective material as from the original date of purchase.
- Velleman® can decide to replace an article with an equivalent article, or to refund the retail value totally or partially when the complaint is valid and a free repair or replacement of the article is impossible, or if the expenses are out of proportion.
You will be delivered a replacing article or a refund at the value of 100% of the purchase price in case of a flaw occurred in the first year after the date of purchase and delivery, or a replacing article at 50% of the purchase price or a refund at the value of 50% of the retail value in case of a flaw occurred in the second year after the date of purchase and delivery.
- Not covered by warranty:
- all direct or indirect damage caused after delivery to the article (e.g. by oxidation, shocks, falls, dust, dirt, humidity...), and by the article, as well as its contents (e.g. data loss), compensation for loss of profits;
- consumable goods, parts or accessories that are subject to an aging process during normal use, such as batteries (rechargeable, non-rechargeable, built-in or replaceable), lamps, rubber parts, drive belts... (unlimited list);
- flaws resulting from fire, water damage, lightning, accident, natural disaster, etc....;
- flaws caused deliberately, negligently or resulting from improper handling, negligent maintenance, abusive use or use contrary to the manufacturer's instructions;
- damage caused by a commercial, professional or collective use of the article (the warranty validity will be reduced to six (6) months when the article is used professionally);
- damage resulting from an inappropriate packing and shipping of the article:
- all damage caused by modification, repair or alteration performed by a third party without written permission by Velleman®.
- Articles to be repaired must be delivered to your Velleman® dealer, solidly packed (preferably in the original packaging), and be completed with the original receipt of purchase and a clear flaw description.
- Hint: In order to save on cost and time, please reread the manual and check if the flaw is caused by obvious causes prior to presenting the article for repair. Note that returning a non-defective article can also involve handling costs.
• Repairs occurring after warranty expiration are subject to shipping costs.
- The above conditions are without prejudice to all commercial warranties.