P5660FR - Thermostat Emos - Free user manual and instructions
Find the device manual for free P5660FR Emos in PDF.

| Product type | Digital thermostat and timer socket |
| Brand | Emos |
| Model | P5660FR |
| Dimensions | 82 × 62 × 146 mm |
| Power supply | 230 V AC, 50 Hz |
| Maximum load | 3680 W (16 A resistive, 4 A inductive) |
| Temperature measurement range | 0 °C to 45 °C (resolution 0.1 °C, accuracy ±1 °C at 20 °C) |
| Temperature setting range | 5 °C to 40 °C in 0.5 °C steps |
| Adjustable hysteresis | 0.2 °C to 2 °C in 0.1 °C steps |
| Time programming resolution | 1 minute |
| Backup power supply | 1 CR2032 3 V battery (included) |
| Number of programs | Up to 6 changes per day in thermostat mode; up to 24 ON/OFF programs in timer mode |
| Main functions | Thermostat mode (heating/cooling), timer mode, manual mode, stop mode, Boost mode, custom programming |
| Maintenance and cleaning | Clean with a soft, dry cloth. Do not use cleaning products or immerse in water. |
| Safety | Use only indoors in dry conditions. Do not overload. Disconnect before maintenance. Operating temperature: 0 °C to 55 °C. |
| Repairability and spare parts | Do not disassemble. In case of malfunction, contact the seller. Backup battery replaceable (CR2032). |
| General information | Manual available in multiple languages. Screen backlight (15 s). Reset possible via RESET button. |
Frequently Asked Questions - P5660FR Emos
User questions about P5660FR Emos
0 question about this device. Answer the ones you know or ask your own.
Ask a new question about this device
Download the instructions for your Thermostat in PDF format for free! Find your manual P5660FR - Emos and take your electronic device back in hand. On this page are published all the documents necessary for the use of your device. P5660FR by Emos.
USER MANUAL P5660FR Emos
GB | Thermostatic and Timer Socket
This digital socket combines a switch socket for timed activation/deactivation of home appliances with a thermostatic socket for automatic regulation of electrical heating and cooling systems (convector heaters, ladder radiators, infrared heating panels, air-conditioning).
Technical Specifications
Power supply: 230V 50 Hz, 16 A max.
IP rating: IP30
Operating temperature: 0^ to 55^
increment for setting time: 1 minute
Switched load: max. 230 V AC, 3,680 W; 16 A for resistive load;
4 A for inductive load
Temperature measurement: 0^ to 45^ with 0.1^ resolution;
accuracy ± 1^ at 20^
Temperature setting: 5^ to 40^ in 0.5^ increments
Temperature differential setting: 0.2^ to 2^ ,
in 0.1^ increments
Back-up power supply: 1 × 3 V CR2032 battery (included)
Dimensions: 82 × 62 × 146 ~mm
Description of Control Elements (See Fig. 1)
1 - socket for connecting an appliance
6 - temperature sensor
7-PROG button
2-BOOST button
8-“+” button
3-“button
9-RESET
4-TIME button
10-MODE button
5 - screen
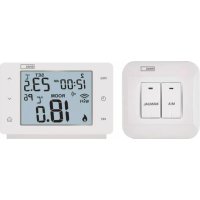
On-Screen Indicators in Thermostatic Mode (See Fig. 2)
1 - time mode
5 - room temperature
2 - programme number
6 - time/set temperature
3-mode icon
7 - back-up battery low
4-day number
On-Screen Indicators in Timer Mode (See Fig. 3)
1 - time mode
4-time
2-mode icon
5 - programme number
3-day number
6 - back-up battery low
Back-Up Battery Replacement
The back-up battery is used to power the socket's memory.
The expected battery life is 2 years.
When appears on the screen, replace the battery.
- Remove the 4 screws on the back and take off the front cover (see fig. 4).
- Remove the drained battery and insert a new one.
- Make sure you observe the correct polarity: + side up.
- Replace the cover and screw it back on.
A) USE IN THERMO-SWITCH SOCKET (THERMOSTAT) MODE
Socket Placement
Choose a spot preferably on an inside wall where air circulates freely and there is no direct sunlight.
The connected heating appliance should be at a sufficient distance from the socket to prevent the devices from influencing each other. Otherwise, the socket may activate the appliance when not needed.
Putting the Device into Operation
Plug the socket into a 230V / 50Hz socket; the screen will activate.
Plug the appliance into the thermostatic socket.
Activating Thermo-Switch Socket (Thermostat) Mode
Long-press the TIME and MODE buttons at the same time to access settings.
Repeatedly press the + and - buttons to select the mode marked
as tHE
Confirm by pressing the TIME button and continue with further settings.
The settings below are only available when in thermostat mode!
Heating or Cooling Mode
Long-press the TIME and MODE buttons at the same time and then press the TIME button 1 ×
Use the + and - buttons to choose between heating or cooling mode.
Confirm by pressing TIME; this will open:
Temperature Differential Setting
Use the + and - buttons to set a value of 0.2^ to 2^ , with 0.1^ resolution.
Confirm by pressing TIME; this will open:
Room Temperature Calibration
Use the + and - buttons to set a value of -3^ to +3^ , with 0.5^ resolution.
Wait 30 seconds or press MODE to save the setting and return to the main screen.
Explanation of functions:
Temperature Differential Setting
The temperature differential (hysteresis) is the difference in temperature required for switching the system on and off.
If, for example, you set the temperature in heating mode to 20^ and differential to 0.2^ , the thermostat activates heating as soon as room temperature drops to 19.8^ and switches heating off when temperature reaches 20.2^ .
Room Temperature Calibration
The temperature sensor in the thermostat is calibrated from production, but additional calibration can be done to optimise the thermostat further, for instance by comparing the measured room temperature with a reference thermometer.
Setting Day and Time
Press the TIME button; the day number will begin flashing.
Use the + and - buttons to set the current day and press TIME to confirm.
The month number will start flashing. Use the + and - buttons to set the current month and press TIME to confirm.
The year will start flashing. Use the + and - buttons to set the current year and press TIME to confirm.
The hour will start flashing. Use the + and - buttons to set the current hour and press TIME to confirm.
The minute will start flashing. Use the + and - buttons to set the current minute and press TIME to confirm.
Wait 30 seconds or press MODE to save the setting and return to the main screen.
Table of Factory Preset Programmes
(Max. 6 Temperature Changes a Day)
| Time Temperature | |||
| Monday-Sunday Monday-Friday Mon/Tue/Wed/Thu/Fri | P1 6:00 | 0 20 °C | |
| P2 8:00 | 0 15 °C | ||
| P3 12:00 | 00 15 °C | ||
| P4 14:00 | 00 15 °C | ||
| P5 17:00 | 00 21 °C | ||
| P6 22:00 | 00 15 °C | ||
| Time Temperature | |||
| Saturday-Sunday Sat/Sun | P1 7:30 | 0 20 °C | |
| P2 9:30 | 0 20 °C | ||
| P3 11:30 | 30 20 °C | ||
| P4 13:30 | 30 20 °C | ||
| P5 16:30 | 30 21 °C | ||
| P6 22:30 | 30 15 °C | ||
Setting Programmes - Automatic Mode
If the factory preset programmes do not suit your needs, you can adjust their timing and temperatures.
The day can be divided into a maximum of 6 time periods = 6 temperature changes.
- Press the PROG button; the day number will begin flashing.
1 to 7 = Monday to Sunday. - Use the + and - buttons to select the days: individual days in the week/workdays - 1, 2, 3, 4, 5/weekend - 6, 7/whole week - 1, 2, 3, 4, 5, 6, 7.
- Confirm by pressing TIME; the time value will start flashing and P1 will appear on the screen (indicating the 1st temperature change in the day).
- Use the + and - buttons to set the time (1 minute resolution) when the 1st temperature change should start and confirm with the TIME button.
- The temperature value will start flashing; use the + and - buttons to set the temperature of choice and confirm with TIME.
- The time value will start flashing and P2 will appear on the screen (indicating the 2nd temperature change in the day).
-
Use the + and - buttons to set the time when the 2nd temperature change should start and confirm with the TIME button.
-
The temperature value will start flashing; use the + and - buttons to set the temperature of choice and confirm with TIME.
- Repeat the process for the remaining temperature changes (P3/4/5/6) in the day.
To end setting, wait 1 minute or press the MODE button.
Note: If you wish to delete a set programme, long-press the TIME button when the time is flashing.
Move forward in settings by pressing the TIME button; pressing the PROG navigates one step back in settings.
Manual Temperature Mode
Press the MODE button until SET and a temperature value appear on the right of the screen.
Use the + and - buttons to set the temperature and wait 5 seconds for the setting to automatically save.
The set temperature will be maintained until you cancel manual mode.
Short-Term Manual Temperature Change
When in automatic mode, where temperature is controlled by the selected programme, it is possible to make a short-term change to the current temperature setting.
While in automatic temperature control mode (AUTO and P - programme number displayed on the left side of the screen) use the + and - buttons to set the new temperature and wait 5 seconds for the setting to automatically save.
P - programme number will disappear from the screen; AUTO will remain.
The manually set temperature will be maintained until the programmed temperature change.
OFF Mode
Press the MODE button until OFF appears on the screen.
The room temperature and clock will be displayed, but current output from the socket will be turned off.
To reactivate the socket, press MODE repeatedly to set the socket to either the automatic or manual temperature control mode.
BOOST Mode
The BOOST feature can be used to heat up a room in a short time.
Press the BOOST button repeatedly to choose the time frame (30 min to 9 hours, 30 min resolution).
Then, use the + and - buttons to choose temperature; the setting will be saved automatically.
The chosen temperature will be valid for the entire set period.
The time and temperature remaining will flash on the screen along with the room temperature and the clock.
Once the time elapses, the system will automatically switch back to the previous temperature mode and the previously set temperature.
To end the BOOST function prematurely, use the MODE button to select a different temperature mode or press the BOOST button repeatedly until the time setting reaches 9 hours; the next press will deactivate the BOOST function.
B) USE IN TIMER SWITCH SOCKET MODE
Activating Timer Switch Socket Mode
Long-press the TIME and MODE buttons at the same time to access settings.
Repeatedly press the + and - buttons to select the mode marked
as "Pr0" P0
Wait 30 seconds or press MODE to automatically save the setting and return to the main screen.
Setting Day and Time
Press the TIME button; the day number will begin flashing.
Use the + and - buttons to set the current day and press TIME to confirm.
The month number will start flashing. Use the + and - buttons to set the current month and press TIME to confirm.
The year will start flashing. Use the + and - buttons to set the current year and press TIME to confirm.
The hour will start flashing. Use the + and - buttons to set the current hour and press TIME to confirm.
The minute will start flashing. Use the + and - buttons to set the current minute and press TIME to confirm.
Wait 30 seconds or press MODE to automatically save the setting and return to the main screen.
Table of Factory Preset Times
| Activation time (ON) | Deactivation time (OFF) | ||
| Monday–Sunday | P1 6:00 | 8:00 | |
| Monday–Friday | |||
| Mon/Tue/Wed/Thu/Fri | P2 12:00 | 14:00 | |
| Saturday–Sunday | |||
| Sat/Sun | P3 17:00 | 22:00 |
Setting Programmes - Automatic Mode
If the factory settings do not suit your needs, you can adjust the timing of the programmes.
You can set a maximum of 24 time programmes.
- Press the PROG button; the day number will begin flashing.
1 to 7 = Monday to Sunday. - Use the + and - buttons to select days:
individual days in the week/workdays - 1, 2, 3, 4, 5/weekend - 6, 7/whole week - 1, 2, 3, 4, 5, 6, 7.
- Confirm with the TIME button; the time value will start flashing and P1 - ON (activation of the 1st programme) will appear on the screen.
- Use the + and - buttons to set the time (1 minute resolution) when the 1st time programme should start and confirm with the TIME button.
- The time value will start flashing and P1 - OFF (deactivation of the 1st programme) will appear on the screen.
-
Use the + and - buttons to set the time when the 1st time programme should turn off; confirm by pressing TIME.
-
The time value will start flashing and P2 - ON (activation of the 2nd programme) will appear on the screen.
- Repeat this process for the other programmes.
To end setting, wait 1 minute or press the MODE button.
While a program is on, the screen will display AUTO ON.
While a program is off, the screen will display AUTO OFF.
Note: If you wish to delete a set programme, long-press the TIME button when the time is flashing.
Move forward in settings by pressing the TIME button; pressing the
PROG navigates one step back in settings.
BOOST Mode (Countdown)
The countdown function enables turning off an appliance after a preset time.
Press the BOOST button repeatedly to choose the time frame (30 min to 9 hours, 30 min resolution).
The countdown from the set time will start automatically.
The time remaining will be flashing on the screen alongside the mode icon (or and clock.
Once the set time elapses, the system will automatically switch to the previous mode.
To end the BOOST function prematurely, use the MODE button to select a different mode or press the BOOST button repeatedly until the time setting reaches 9 hours; the next press then deactivates the BOOST function.
Note: The BOOST function cannot be used in manual mode (ON).
Manual Mode (ON)
Press the MODE button repeatedly until ON and the mode icon (6 or
appear in the left of the screen.
The socket will remain operational.
The set mode will be active until you switch to another one using the MODE button.
OFF Mode
Press the MODE button until OFF appears on the screen.
The clock will remain on the screen but the current output from the socket will be turned off.
To reactivate the socket, press MODE repeatedly to set the socket to either the automatic (AUTO) or manual (ON) temperature control mode.
Screen Illumination
Pressing any button activates screen illumination for 15 seconds.
Factory Reset
If the socket is not working properly, you can reset it to factory settings.
Long-press the PROG button and insert e.g. a straightened paper clip into the RESET hole; you will hear a click.
The screen will display all segments/icons; release the PROG button.
SafetyWarnings
- The device is intended for use in dry, indoor environments only. Do not expose the device to rain, snow or other extreme conditions. Do not use the product outdoors!
-
Do not overload the device.
-
The device must only be connected to and used with 230V AC ()/50Hz electrical wiring fitted with a protective contact in line with valid electrical regulations.
- Pay attention to the data on the type plate of the appliances connected to the device. Maximum input power of all connected electrical appliances must not exceed 3,680 W (max. current 16 A). Max. inductive load: 4 A.
- Any use of the device not listed in the previous sections of the manual will result in damage to the product and could present danger in the form of a short circuit, injury by electric current, etc. The device must not be modified or otherwise restructured! Safety warnings must be followed unconditionally.
- Make sure that the lead-in earth pin is not damaged - a damaged earth pin could endanger the life of the user.
- The recommended operating temperature is from 0^ to +55^ .
- The device must not be used in hostile environments such as environments with flammable gases, vapours or dust.
- Never tamper with the electrical circuits of the device or disassemble it! If the device is damaged or non-functional, contact the seller.
- Only clean the device and the LCD screen using a soft dry cloth. Do not use any cleaning agents or immerse the device in water!
- The device is not intended for use by children or persons whose physical, sensory or mental disability or lack of experience and expertise prevents safe use, unless they are supervised by a person responsible for their safety. Keep the device out of reach of children. Children must be supervised to ensure they do not play with the device.

Do not dispose with domestic waste. Use special collection points for sorted waste. Contact local authorities for information about collection points. If the electronic devices would be
disposed on landfill, dangerous substances may reach groundwater and subsequently food chain, where it could affect human health.
Specifications techniques
Alimentation: 230V 50 Hz, 16 A max. Indice de protection: IP30