USER MANUAL GE3550 Concept
Grătar electric de contact
natural_image
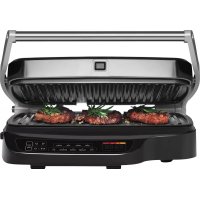
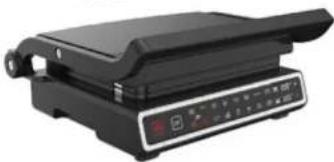
Black concept grater with control panel and keyboard (no visible text or symbols)
natural_image
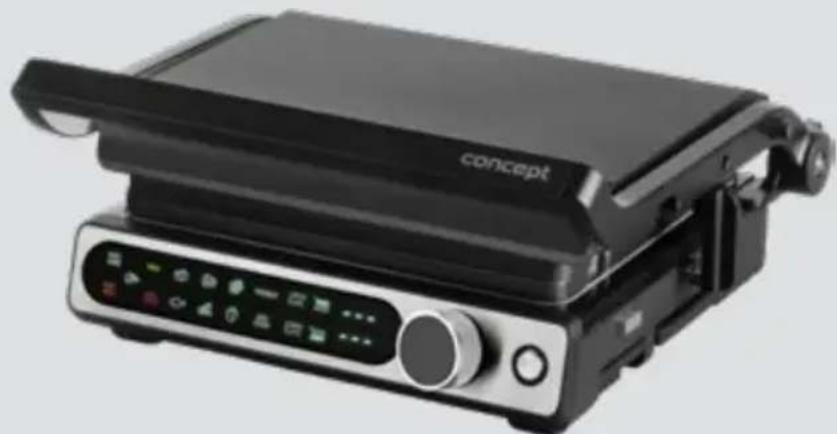
Black concept grating with control panel and display (no visible text or symbols)
GE3500 / GE3550
CZ
HU LV DE FRENSK PL
IT ES
RO
concept
concept
CZ
POTRAVINY A TEPLOTA/ČAS JEJICH PŘÍPRAVY
POTRAVINY A TEPLOTA/ČAS VARENIA
ŻYWNOŚĆ I TEMPERATURA/CZAS GOTOWANIA
ÉLELMISZER ÉS HÖMÉRSÉKLET/FÖZÉSI IDÓ
MAISTAS IR TEMPERATURA / GAMINIMO LAIKAS
FOOD AND COOKING TEMPERATURE/TIME
natural_image
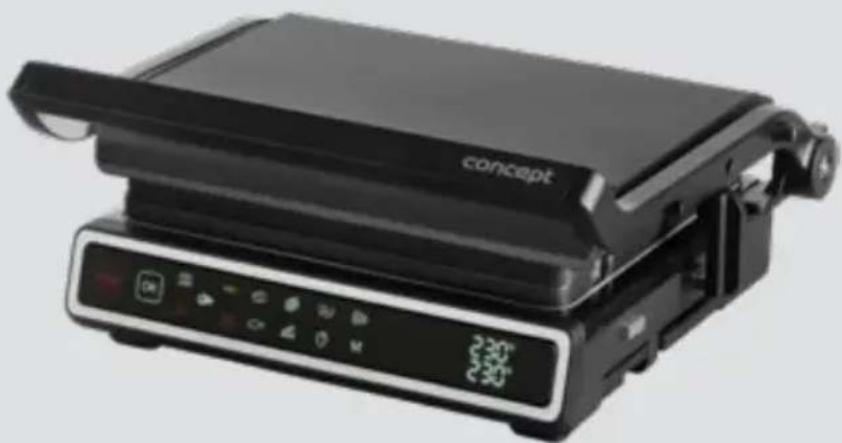
Black frying pan with control panel and indicator lights (no visible text or symbols)
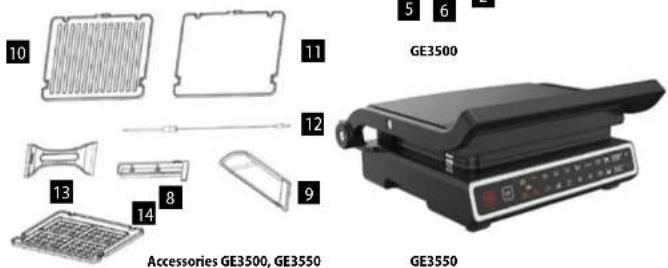
Prislušenstvo GE3500, GE3550
GE3550
SK
concept
concept
SK
NÁVOD NA OBSLUHU
OCHRANA ŽIVOTNĚHO PROSTREDIA
natural_image
Black frying pan with control panel (no visible text or symbols)
GE3550
INSTRUKCJA OBSŁUGI
GE3500
Tartozékok GE3500, GE3550
natural_image
Black frying pan with control panel (no visible text or symbols)
GE3550
HASZNÁLATI ÚTMUTATÓ
GE3500


natural_image
Black frying pan with control panel and indicator lights (no visible text or symbols)
GE3550
LIETOŠANAS INSTRUKCIJA
Ierice ir paredzêta tikai mâjsaimniecibas vajadzibâm. Nenovietojiet ieriči vietä, kuras tuvumä nav üdens, un neizmantojiet to pie baseina. Nepaklaujiet ieriči lietum. Iericei jäbüt pieslėgtai elektrotikla kontaktligzdai. Novietojiet grilu uz plakanas, stabilis un karstumizturigas virsmas.
Thank you for purchasing a Concept product. We wish you much joy with your new appliance every day you use it. Please read the instruction manual carefully before initial use. To refer to this manual any time you need to, we recommend you to keep it in a safe place. And please pass it to any future owner of the appliance.
| Technical specifications |
| Voltage 220–240 V – | 50/60 Hz |
| Input 2000 W | |
IMPORTANT SAFETY PRECAUTIONS
- Do not use the appliance in any other way than as described in this manual.
- Remove all the covering and marketing materials from the appliance before the first use.
- Make sure the mains voltage corresponds to the values on the rating plate of the product.
- The appliance is hot during operation and for some time after switching off.
• Therefore, do not touch hot surfaces.
- Use handles and buttons. There is risk of serious burns!
- Do not clean, store or cover the appliance until it has cooled completely.
- Do not place the appliance on its side during operation.
- Do not leave the appliance unattended when it is switched on or connected to the mains.
- Never carry the appliance during operation or while it is still hot. Do not carry it by the power cord.
- When disconnecting the appliance from the wall outlet, never pull the power cord, grasp the plug end and disconnect it by removing it from the receptacle.
- Do not allow children or unauthorized people to handle the appliance, use it out of their reach.
- Persons with reduced mobility, reduced sensory perception, mental disadvantage or persons not familiar with the operation must use the appliance only under the supervision of responsible person, who is familiar with the instructions.
- Pay extra attention if the appliance is used near children.
34
35
EN
concept
concept
EN
Damages from failure to follow the manufacturer's instructions are not covered by the warranty.
EN
concept
concept
EN
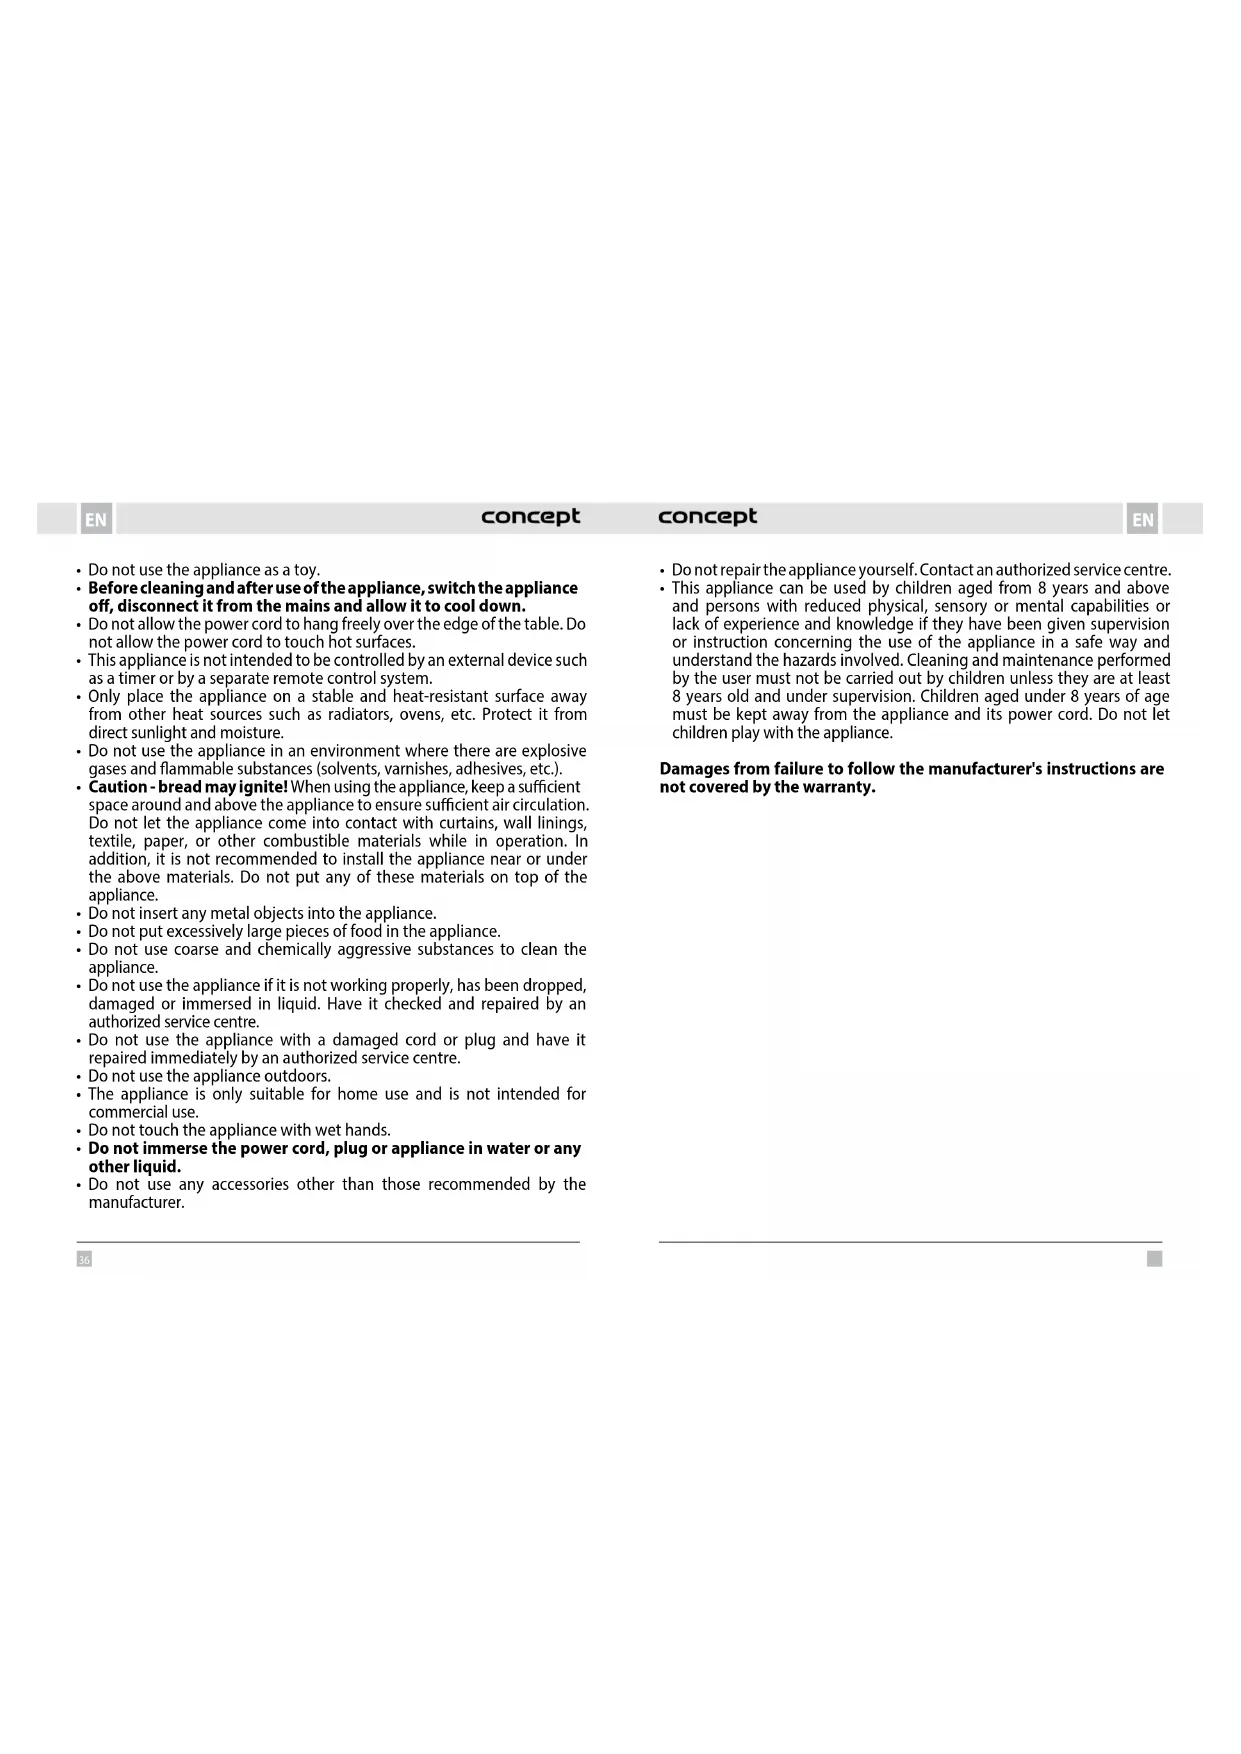
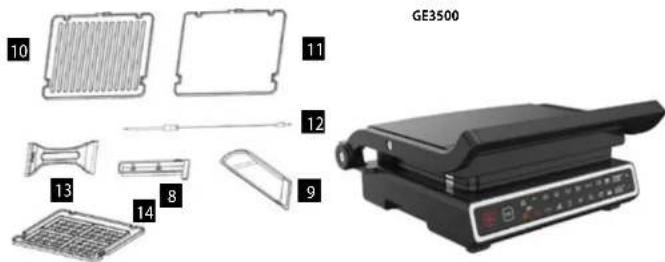
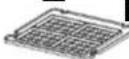
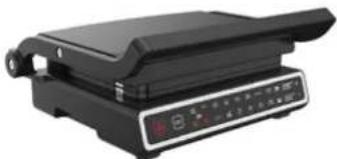
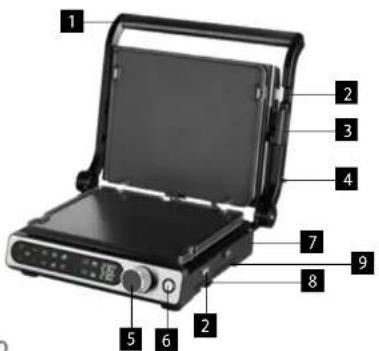
PRODUCT DESCRIPTION
1 Handle
2 Plate lock
3 Grill lock
4 Grill opening button (180°)
5 Confirm Button
6 ON/OFF button
7 Body
8 Space for temperature probe
9 Drip tray
10 Knurled grill plate
11 Flat grill plate
12 Temperature probe
13 Cleaning scraper
14 Waffle backing plate (GE3500 - purchasable)
OPERATING INSTRUCTIONS
The appliance is suitable for home use only. Place the appliance out of reach of water and do not use it near a swimming pool. Do not expose the appliance to rain. The appliance must be plugged in. Place the grill on a flat, stable and heat-resistant surface.
Before first use
Before using for the first time, wipe the body of the appliance and the control panel with a damp cloth. Wash the plates, drip tray and scraper with water.
ASSEMBLY AND USE
Installation of plates
Insert each plate into small metal grooves in the back of the grill base. Then push each desk to fit in place.
Press the plate release button on the side of the grill body. Pull out the plates.
At the end of the preheating time, sound signal for adding the food will be issued and "ADD FOOD" lamp starts flashing. After adding the food, signal lamp "ADD FOOD" goes off and the grilling process starts. After completion of the grilling process, READY signal will be issued.
Knurled / Panini position
Insert knurled plates. Select the required mode using the switch button or select the required temperature in the manual mode.
When the required temperature has been reached, "ADD FOOD" signal lamp will go on. Place the food on the bottom plate and close the grill. The distance between the plates will be automatically adjusted in accordance with the thickness of the food.
Food preparation on the flat plate
Insert flat plates into the device, then push the button on the side of the grip to open 180°.
Select the required grilling mode using the switch button or select the required temperature in the manual mode.
Grilling
Insert knurled plate into the device and open 180° by pulling the button on the side of the grip. Different temperatures can be selected for the upper and lower plates in the manual setting according to the type of food. Select the required grilling mode using the switch button or select the required temperature in the manual mode.
When the required temperature has been reached, "ADD FOOD" signal lamp will go on. Place the food on the grill plate evenly.
Knurled plates:
Knurled surface is ideal for grilling steaks, hamburgers, chicken, vegetables and panini.
Flat plates:
Flat surface is ideal for frying pancakes, eggs, thinly cut meat, fish and shellfish.
SPLIT ZONE function
The grill offers the option of BBQ grilling on an open grill. Thanks to the SPLIT ZONE function, you can independently set the temperature of each grill plate or heat only one plate. You can use this function in manual DIY mode.
GE3500
Same temperature for both plates – Turn the wheel so that the upper and lower plate icons flash simultaneously. Press the control wheel to enter DIY mode. By turning the wheel, you set the temperature in the range of 80–230 °C, in steps of 10 °C. Confirm the setting by pressing the wheel. When the set temperature is reached, an acoustic signal will sound and from this point on, the appliance will automatically heat for 60 minutes.
Different temperature for the upper and lower plates – Turn the wheel so that the upper plate icon flashes. Press the wheel to adjust the temperature of the plate with the flashing icon. Turn the wheel to set the temperature in the range of 80–230 °C, in steps of 10 °C. Press and hold the wheel to select the lower plate and turn the wheel to adjust the temperature (if not set, the plate will not heat up). Confirm the setting by pressing the wheel.
Manual temperature setting for only one plate – Turn the wheel so that the icon of the selected upper/lower plate flashes. Press the wheel and turn the wheel to set the plate temperature, confirm the setting by pressing the wheel.
GE3550:
Same temperature for both plates – Press the M button = manual mode. The M icon, the upper plate icon and the lower plate icon will flash, the display will show “--” for both plates. Use the + and - buttons to set the temperature synchronously, in the range of 80–230 °C, in steps of 10 °C. Confirm the setting by pressing the OK button, the appliance will start heating. When the set temperature is reached, an acoustic signal will sound and from this moment the appliance will automatically heat for 60 minutes.
EN
concept
concept
EN
Different temperature for the upper and lower plate – Press the M button. The M icon, the upper plate icon and the lower plate icon will flash, the display will show “-” for both plates. Press the upper plate button = this selects the plate, the upper plate icon will flash, the lower plate icon will be permanently lit. Use the + and - buttons to set the temperature in the range of 80–230 °C, in steps of 10 °C. Repeat the procedure for setting the lower plate temperature: Lower plate button -> +/- to set the temperature. After setting the temperatures of both plates, press the OK button, the appliance will start heating. When the set temperature is reached, an acoustic signal will sound and from this moment the appliance will automatically heat for 60 minutes.
Manual temperature setting for only one plate - M button -> Upper/lower plate button -> +/- set temperature -> OK.
Temperature probe
- Use the temperature probe when grilling meat to monitor the internal temperature and doneness level.
- It is recommended to use the temperature probe when the grill is closed and both plates are heated at the same time.
- Remove the temperature probe from the box on the right side of the grill, plug into the grill on the right side and insert into the meat.
- Press the button to select between the browning levels of the steak:
Medium Rare - Medium - Medium Well - Well Done, confirm the selection with the "OK" button.
- The display alternates between the probe temperature and the grill temperature. When the probe temperature reaches the desired temperature, the grill automatically switches off.
| Programs Temperature probe temperature (°C) |
| Medium rare 55 | |
| Medium 60 | |
| Medium well 65 | |
| Well done 73 | |
Grill lock
Turn the lock (3) to lock the top and bottom of the grill, e.g. for storage, transferring the grill.
CLEANING AND MAINTENANCE
• Thoroughly clean each part before and after each use of the appliance.
- After cooking, unplug the power cord and allow the appliance to cool down for at least 30 minutes before further handling.
- Clean grease from the drip tray. The drip tray can be washed by hand or in a dishwasher.
- The plates can be washed by hand or in a dishwasher. Do not use metal objects, such as pot scourers or knives, to clean the appliance. This may damage the non-stick coating of the appliance.
- Use only wooden or plastic utensils.
- If you have been cooking seafood, wipe the cooking plate with lemon juice to prevent the seafood flavour from transferring to the next recipe.
- Clean the cover and control knobs only with a soft and dry cloth. Dampen the cloth if there are dried-in spots.
- Never use abrasive cleaning agents.
- Never leave plastic kitchenware in contact with the plates.
- Before storing the appliance, make sure that all its parts are clean and dry.
- Never wrap the cord around the outside of the grill.
- Never immerse plug in water or any other liquid.
SERVICE
Extensive maintenance or repair, which requires access to internal parts of the product, has to be performed by a qualified service centre.
ENVIRONMENTAL CONCERNS
- Packaging materials and old appliances should be recycled.
- Packaging materials may be disposed of as sorted waste.
- Dispose the plastic bags made of polyethylene (PE) of as sorted waste.
Recycling of the appliance at the end of its lifespan

This appliance is labelled in accordance with European Directive 2012/19/EU concerning used electrical and electronic appliances (Waste Electrical and Electronic Equipment - WEEE). The symbol on the product or on its packaging indicates that this product may not be treated as household waste. Instead, it should be taken to the appropriate collection point for the recycling of electrical and electronic equipment. By ensuring this product is disposed of correctly, you will help prevent potential negative consequences for the environment and human health, which could otherwise be caused by inappropriate waste handling of this product. The disposal of such material has to be done according to the recycling regulations. For more detailed information about recycling of this appliance see the authorized local office or service for household waste disposal or the shop, where you purchased the appliance.

The product meets all the necessary requirements of the EU directives applicable to the specific product.
Changes in text, design, and technical specifications are subject to change without notice and we reserve the right to change them.
DE
concept
concept
DE
DANKSAGUNG
10

11
GE3500

12
natural_image
Black frying pan with control panel and indicator lights (no visible text or symbols)
Accessoires GE3500, GE3550
GE3550
MODE D'EMPLOI
natural_image
Black frying pan with control panel and indicator lights (no visible text or symbols)
GE3550
INSTRUCTIUNI DE UTILIZARE