21077 - Compressor Eufab - Free user manual and instructions
Find the device manual for free 21077 Eufab in PDF.
| Product type | Rechargeable multi-function compressor |
| Brand | Eufab |
| Model | 21077 |
| Weight | Approximately 0.5 kg |
| Maximum pressure | 8 bar / 120 PSI |
| Battery capacity | 2200 mAh (Lithium-ion) |
| Hose length | 180 mm |
| Power supply | Plug-in charger (included), charging via charging port |
| Charging time | Approximately 4 hours |
| Main functions | Inflation with programmable automatic shut-off, digital pressure display, USB port for charging devices (smartphones, tablets), LED lamp |
| Pressure units | PSI, BAR, KGF/CM² |
| Included accessories | Air hose, adapter for bicycle valve (Dunlop and Schraeder), adapter for ball, universal adapter for leisure items, frame bag, plug-in charger |
| Intended use | Inflating tires of motorcycles and bicycles, balls, inflatable toys; charging batteries of USB devices |
| Safety instructions | Do not use continuously for more than 5 minutes; let cool for 15 minutes before reuse; do not expose to frost, rain, or temperatures < -30°C / > 30°C; do not use on people or animals |
| Care and cleaning | Clean with a soft, dry cloth; store in a dry, frost-free place; recharge battery every 3 months if unused |
| Warranty and repairability | Repairs exclusively by qualified technician; spare parts not specified |
| General information | Equipped with automatic shut-off when target pressure is reached; indoor use only |
Frequently Asked Questions - 21077 Eufab
- Bicycle valve adapter (Dunlop and Schraeder): screw it onto the valve, then connect the hose.
- Ball adapter: insert it into the hose then into the ball valve.
- Universal adapter for leisure items: insert it into the hose and hold it in place during inflation.
Storage: store in a dry, frost-free place. Battery: recharge every 3 months if the device is not used.
User questions about 21077 Eufab
0 question about this device. Answer the ones you know or ask your own.
Ask a new question about this device
Download the instructions for your Compressor in PDF format for free! Find your manual 21077 - Eufab and take your electronic device back in hand. On this page are published all the documents necessary for the use of your device. 21077 by Eufab.
USER MANUAL 21077 Eufab
natural_image
Product photo of a black electronic device with attached cables and connectors, labeled 'Seite' (no readable text or symbols on main components)Inhalt
text_image
Diagram of a remote control device with numbered parts for identification and assembly reference.GB Multifunctional compressor, chargeable
Item number 21077
Contents
- Proper use of the product 5
- Scope of delivery 5
- Specifications 5
- Safety precautions 6
- Explanation of symbols 6
- Operating instructions 6
6.1 Overview 6
6.2 Charging the power pack 7
6.3 Operating the compressor 7
6.4 Storage case 8
6.5 LED light 8 - Maintenance and care 8
7.1 Maintenance 8
7.2 Care 8 - Notes regarding environmental protection 8
- Contact information 8
WARNING
Read the operating instructions through carefully prior to initial use and observe all of the safety notes! Not observing such may lead to personal injury, damage to the device or to your property!
Store the original packaging, the receipt and these instructions so that they may be consulted at a later date! When passing on the product, please include these operating instructions as well.
Please check the contents of package for integrity and completeness prior to use!
1. Proper use of the product
The chargeable multifunctional compressor can be used for pumping up motorcycle and bicycle tyres, balls and inflatable toys.
Using its programmable power off function you can pump up objects with air without exceeding their optimum working pressure. The digital display can be used to monitor the progress of the pumping process.
The device also has a USB connection for charging mobile telephones, smartphones, tablet computers, MP3 players and similar devices.
This device is not designed to be used by children or persons with limited mental abilities or without experience and/or lack of required specialist knowledge. Keep children away from the device.
The device is not designated for commercial use.
Use according to the intended purpose also includes the observance of all information in these operating instructions, particularly the observance of the safety notes. Any other utilisation is considered to be contrary to the intended purpose and may lead to material damage or personal injuries. EAL GmbH assumes no liability for damage resulting from improper use.
2. Scope of delivery
- 1x Multifunctional compressor
- 1x Plug-in charger
- 1x Air hose
- 3 x Adapters (bicycle outlet, ball, inflatable leisure equipment)
- 1x Pouch
- 1 x Operating instructions
3. Specifications
Maximum pressure: 8 bar / 120 PSI
Dimensions (L x W x H): 270 x 55 x 45 [mm]
Weight: approx. 0.5 kg
Rechargeable battery capacity: 2200 mAh
Length of air hose: 180 mm
4. Safety precautions

- The warning sign indicates all instructions which are important for safety. Always follow these otherwise you could injure yourself or damage the device.
• Children may not play with the device. - Cleaning and user maintenance may not be carried out by children without supervision.
- Do not treat packaging material carelessly. This may become a dangerous plaything for a child!
- Only use this product for its designated purpose.
- Do not manipulate or disassemble the item.
- Do not leave a compressor unattended during operation.
- For the objects to be inflated, do not increase the air pressure beyond the recommendations of the manufacturer.
- If the compressor emits unusual noises or overheats, switch it off immediately and give it at least 15 minutes to cool down.
- Check the compressor before use. Damaged, cracked or broken components should be repaired only be qualified technicians.
- Never expose the compressor to frost, rain or temperatures above 30^ or below -30^ .
- Never use on people or animals.
- Make sure that the hose and cable are not exposed to sharp edges, oil or objects that are too hot.
- For your own safety, only use accessories and spare parts that are stated in these instructions or that are recommended by the manufacturer.
5. Explanation of symbols
Complies with EC Directives
Labelled electrical products may not be disposed of in the household waste
Devices with this symbol may only be operated indoors (dry environment)

Insulated housing (protection class II).

Read the operating instructions
Labelling according to § 17 BattG (German battery laws): The end consumer is obliged to send batteries to the dealer for proper disposal or to hand in at an appropriate collection point.
6. Operating instructions
6.1 Overview
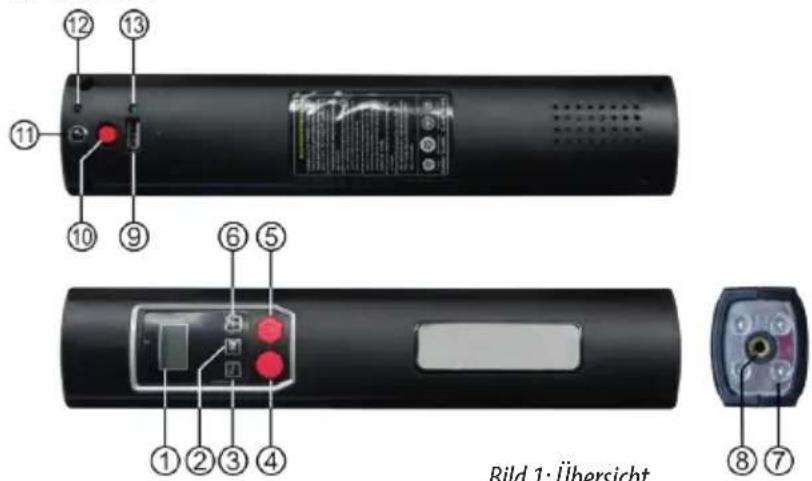
- Display
- Unit selection button
- (-) Button
- ON/OFF button for LED light
- ON/OFF button for compressor
- (+) Button
- LED light
- Connector for the air hose
- USB port
- ON/OFF button for USB connection
- Charging port
- Charging indicator light
- USB port indicator light
text_image
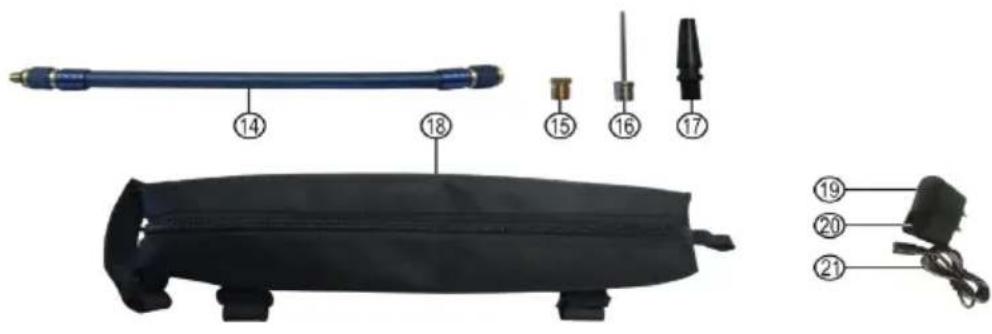
Labeled diagram of a medical or laboratory device with numbered parts including a blue tool, black band, and cable connectors.- Air hose
- Adapter for bicycle valves
- Adapter for balls
- Universal adapter for leisure items
- Storage case
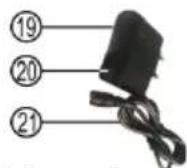
- Plug-in charger
- Charging indicator light
- Charging cable
Figure 2: Overview of accessories
6.2 Charging the power pack
Insert the charging cable (position 21 in the overview) of the plug-in charger (position 19 in the overview) into the charging port of the compressor (position 11 in the overview). Plug the charger into a mains socket. The charging indicator light (position 12 in the overview) will now light up. During the charging process the charging indicator light on the plug-in charger (position 20 in the overview) will be red. When the compressor's battery is fully charged, the indicator light will be green. It takes approximately 4 hours to charge an empty battery.
After charging, first pull the plug-in charger out of the mains socket and separate the compressor from the charging cable. Always maintain this sequence.
Checking the charge status
Press the button for selecting the unit (position 2 in the overview). This will activate the display light. The battery symbol indicates the charge status (empty, 25%, 50%, 75%, 100%).
6.3 Operating the compressor
Setting the target pressure
Press the button for selecting the unit (position 2 in the overview). This will activate the display light. You can set the pressure unit by continuing to press the button:
$$ \mathrm{PSI} - > \mathrm{BAR} - > \mathrm{KGF} / \mathrm{CM} ^ {2} $$
With the (-) and (+) buttons (position 3 and 6 in the overview) you can set the target pressure. After you have set the pressure, press the unit selection button once more, and the display will now show 0.00 again in the chosen unit.
Connecting the air hose
Screw the end of the air hose with the external thread (position 14 in the overview) into the compressor's connector (position 8 in the overview).
Using the adapter
If you would like to fill a tyre with an auto valve (Schrader valve), you will not require an adapter. Screw the end of the air hose with the internal thread onto the valve. Now you can switch on the compressor and fill the bicycle tyre.
Bicycle valve adapter (for Dunlop and Sclaverand valves) (15):
For Sclaverand valves: Undo the knurled screw of the valve piston and push down briefly once.
Screw the valve adapter, using the knurled crown, down onto the bicycle valve.
Screw the end of the air hose with the internal thread onto the adapter. Now you can switch on the compressor and fill the bicycle tyre. After you have finished filling the tyre, detach the air hose and the adapter from the valve.
For Sclaverand valves: Tighten the knurled screw of the valve piston up again.
Adapter for balls (16):
Screw the adapter for balls into the internal thread of the air hose. Insert the adapter into the valve of the ball. Now you can switch on the compressor and fill the ball.
Universal adapter for leisure items (17):
Screw the universal adapter into the internal thread of the air hose. Insert the universal adapter into the filling connection of your leisure equipment. Depending on version, it is possible that the universal adapter will need to be held firmly during the filling process. Now you can switch on the compressor and start the filling process.
Filling process
To start the filling process press the compressor's ON/OFF button (position 5 in the overview).
The compressor will start, during the filling process the pressure will appear on the display.
When the set target pressure has been reached the compressor will switch itself off. Press the ON/OFF button once more.

Only leave the compressor operating uninterrupted for a maximum for 5 minutes.
Allow the compressor to cool down for at least 15 minutes afterwards before using it again.
Switching off:
Press the button for selecting the unit (position 2 in the overview) for 3 seconds, the device will switch off. If no switch is pressed, the device will switch off automatically.
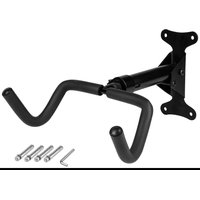
6.4 Storage case
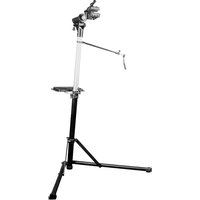
In order to be able to the multifunctional compressor when you are out and about, you can transport it in the storage case. The storage case can be attached to the bicycle frame with the mounting brackets (figures 3 – 6).
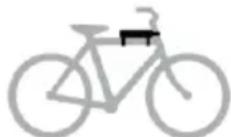
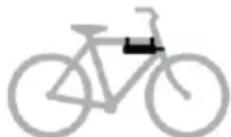
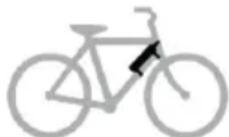
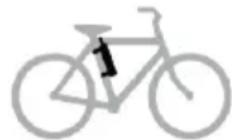
Figure 3: Top tube, on top Figure 4: Top tube, underneath Figure 5: Slanting tube Figure 6: Saddle tube
6.5 LED light
The LED light (position 7 in the overview) can be turned on by pressing the button (position 4 in the overview). By pressing the button again, you can turn the LED light off again.
7. Maintenance and care
7.1 Maintenance
Store the compressor in a dry, frost-free place. If the compressor remains unused for long periods of time, charge the battery every 3 months.
7.2 Care
Switch the multifunctional compressor off before cleaning. Clean the housing with a soft, dry cloth. Do not use any abrasive or solvent-based cleaning agents. Never allow liquids to ingress into the housing.
8. Notes regarding environmental protection

Do not dispose of electrical devices with the household waste! Electronic and electrical devices must be collected separately and sent for environmentally friendly recycling. Please contact your community or city administration regarding disposal options for electrical and electronic scrap.

You are legally obliged to return batteries and battery packs. After use, they may be returned to us, handed in to a communal collection point, or to a local dealer.
9. Contact information
EAL GmbH
Dimensions (L x l x h): 270 x 55 x 45 [mm]
text_image
Labeled diagram of a remote control device showing numbered components for identification and assembly.text_image
Labeled diagram of a medical or electrical device with numbered parts including a pen, screwdriver, and cable.text_image
Labeled diagram of a remote control device showing internal components and terminal labelstext_image
Labeled diagram of a medical or laboratory device with numbered parts including a pen, tubing, and clamps.text_image
Labeled diagram of a remote control device showing numbered components for identification and assembly.text_image
Labeled diagram of a mechanical device with numbered parts including a blue cylindrical rod, black casing, and four terminal connectors.