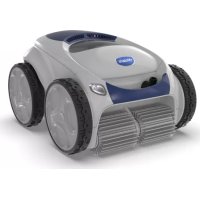
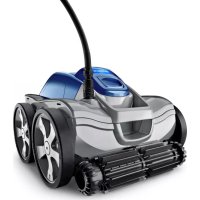
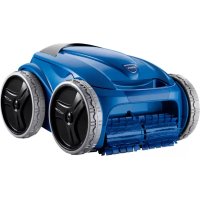
MAXX - Pool POLARIS - Free user manual and instructions
Find the device manual for free MAXX POLARIS in PDF.
User questions about MAXX POLARIS
0 question about this device. Answer the ones you know or ask your own.
Ask a new question about this device
Download the instructions for your Pool in PDF format for free! Find your manual MAXX - POLARIS and take your electronic device back in hand. On this page are published all the documents necessary for the use of your device. MAXX by POLARIS.
USER MANUAL MAXX POLARIS
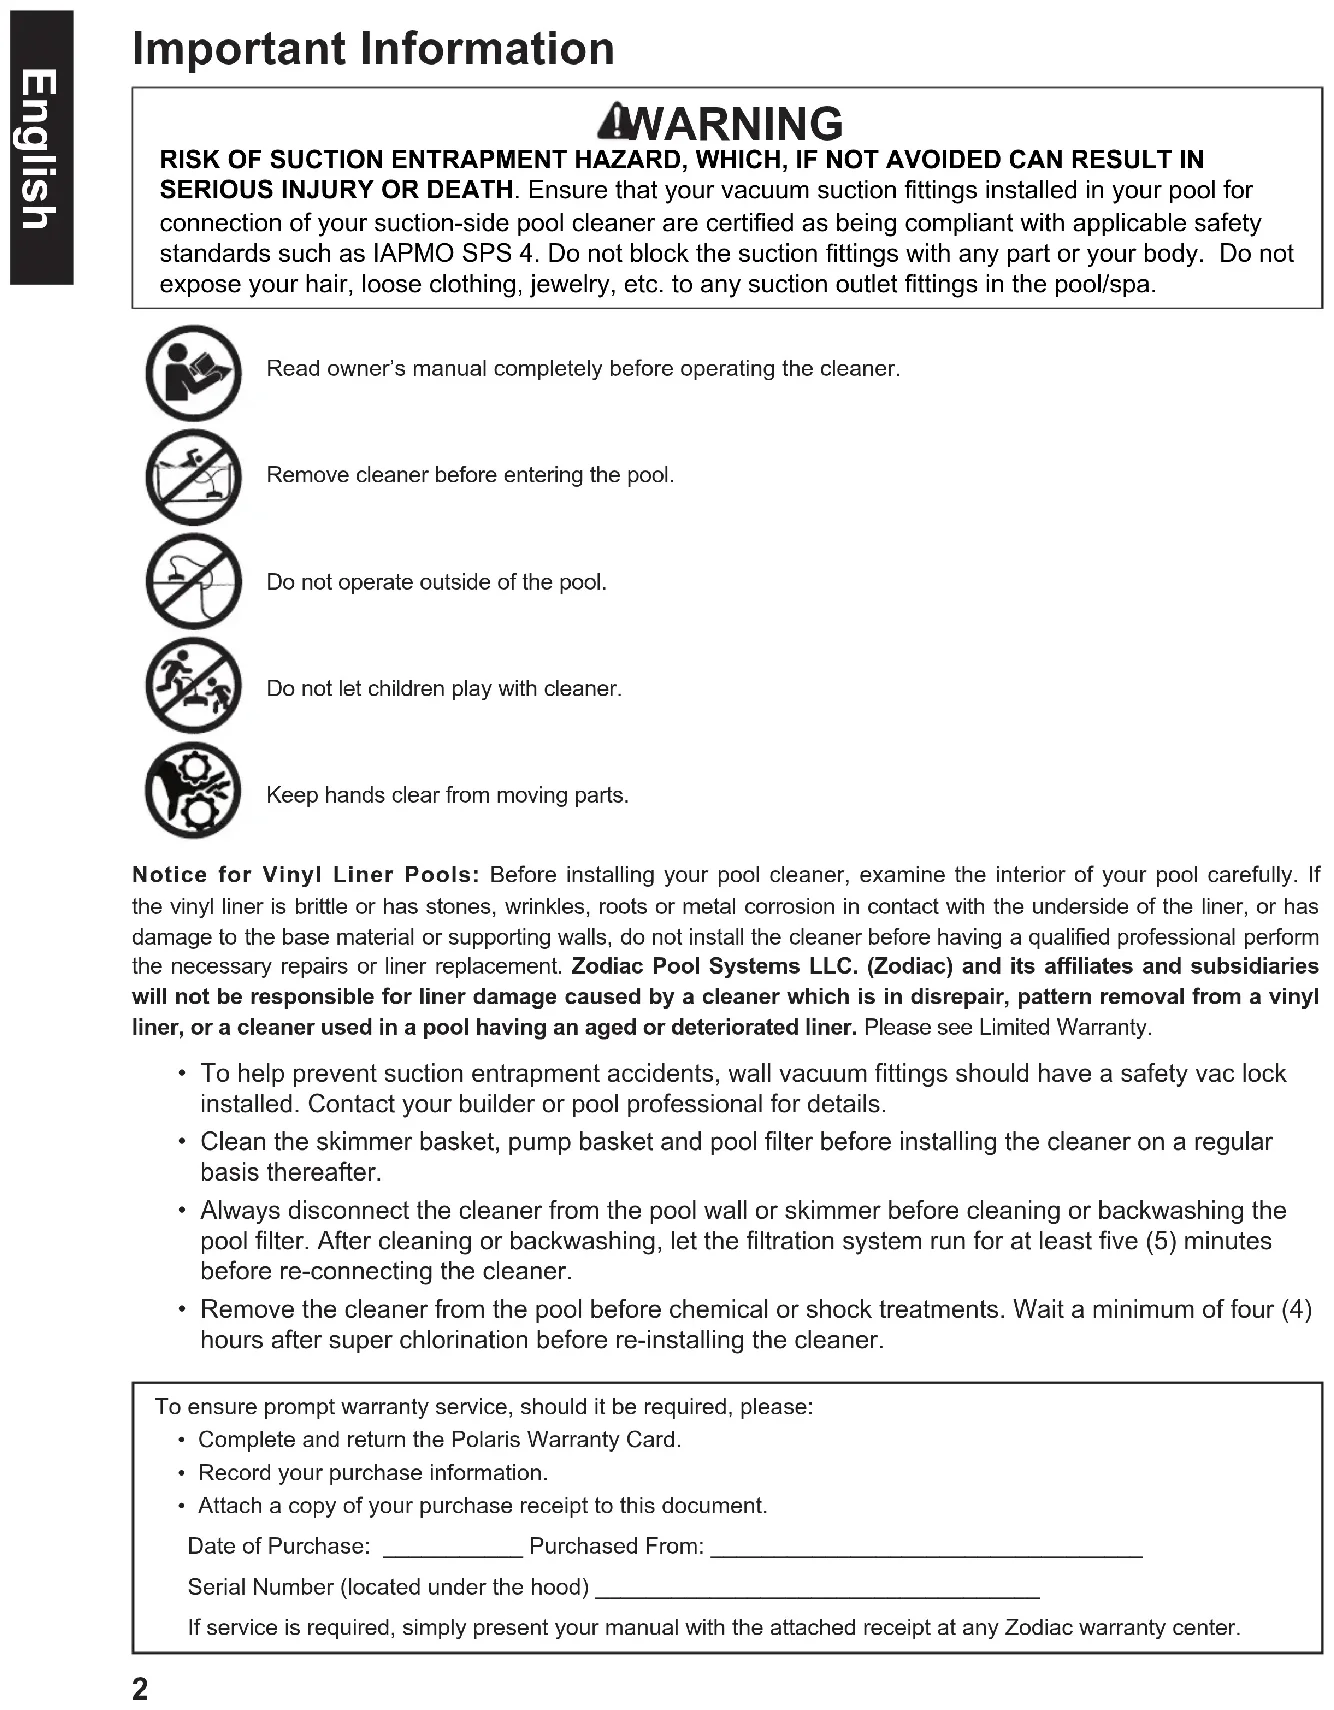
WARNING RISK OF SUCTION ENTRAPMENT HAZARD, WHICH, IF NOT AVOIDED CAN RESULT IN SERIOUS INJURY OR DEATH. Ensure that your vacuum suction ttings installed in your pool for connection of your suction-side pool cleaner are certied as being compliant with applicable safety standards such as IAPMO SPS 4. Do not block the suction ttings with any part or your body. Do not expose your hair, loose clothing, jewelry, etc. to any suction outlet ttings in the pool/spa. To ensure prompt warranty service, should it be required, please:
- Complete and return the Polaris Warranty Card.
- Record your purchase information.
- Attach a copy of your purchase receipt to this document. Date of Purchase: ___________ Purchased From: __________________________________ Serial Number (located under the hood) ___________________________________ If service is required, simply present your manual with the attached receipt at any Zodiac warranty center. Notice for Vinyl Liner Pools: Before installing your pool cleaner, examine the interior of your pool carefully. If the vinyl liner is brittle or has stones, wrinkles, roots or metal corrosion in contact with the underside of the liner, or has damage to the base material or supporting walls, do not install the cleaner before having a qualified professional perform the necessary repairs or liner replacement. Zodiac Pool Systems LLC. (Zodiac) and its affiliates and subsidiaries will not be responsible for liner damage caused by a cleaner which is in disrepair, pattern removal from a vinyl liner, or a cleaner used in a pool having an aged or deteriorated liner. Please see Limited Warranty.
- To help prevent suction entrapment accidents, wall vacuum fittings should have a safety vac lock installed. Contact your builder or pool professional for details.
- Clean the skimmer basket, pump basket and pool filter before installing the cleaner on a regular basis thereafter.
- Always disconnect the cleaner from the pool wall or skimmer before cleaning or backwashing the pool filter. After cleaning or backwashing, let the filtration system run for at least five (5) minutes before re-connecting the cleaner.
- Remove the cleaner from the pool before chemical or shock treatments. Wait a minimum of four (4) hours after super chlorination before re-installing the cleaner. Read owner’s manual completely before operating the cleaner. Remove cleaner before entering the pool. Do not operate outside of the pool. Do not let children play with cleaner. Keep hands clear from moving parts. Important InformationEnglish
Before You Start Congratulations on the purchase of your new cleaner. Before installing your cleaner, please check the box to ensure all parts are included (Figure 1). If any components are missing, contact: Polaris Customer Support 1-800-822-7933 (USA) 1-888-647-4004 (Canada) Always insist on genuine Polaris replacement parts. Non-Polaris parts are not made to our specifications and may have an adverse effect on the operation of your cleaner, or may even damage it. Parts diagrams and list of spare parts can be found at: www.polarispool.com a - Cleaner Body b - Flowkeeper™ Valve c - Leader Hose Section with Hose Float d - Twist-Lock 45 Degree Elbow, Extended e - Flow Regulator Valve (FRV) f - 45 Degree Elbow g - Twist-Lock Hose Section h - Valve Cuff Included in the Box Cleaner Components Shipped in the Box
Read the complete owner’s manual before you begin installation. Installation STEP 1. Prepare the Pool
1. Manually vacuum the pool and make sure the pool filter and pump basket are clean.
2. Turn off the pool filter pump.
3. Close the pool main drain line.
4. Aim the return line fittings down.
WARNING RISK OF SUCTION ENTRAPMENT HAZARD, WHICH, IF NOT AVOIDED CAN RESULT IN SERIOUS INJURY OR DEATH. Ensure that your vacuum suction ttings installed in your pool for connection of your suction-side pool cleaner are certied as being compliant with applicable safety standards such as IAPMO SPS 4. Do not block the suction ttings with any part or your body. Do not expose your hair, loose clothing, jewelry, etc. to any suction outlet ttings or hose ends in the pool/spa. STEP 2. Assemble Hose Sections Push and twist the connector on each hose section (g) until they lock into position with clicking sound (Figure 1). Hose cuffs have three (3) connection positions. Any of the three (3) positions are sufficient for an air-tight seal.
Figure 1. Hose Sections Figure 2. Dedicated Suction Line Connection
STEP 3. Connect to a Dedicated Suction Line
1. Twist-lock the male end of the hose (g) into the large end
of the extended 45° elbow (d).
2. Connect elbow to the installed Safety Vac
wall fitting (sold separately).
3. Angle the elbow toward the water surface (Figure 2).English
Connect to a Skimmer The FlowKeeper™ valve must always be used in single skimmer installations. The valve regulates flow to ensure the pool pump and cleaner run properly.If the pool has more than one skimmer, connect the hose to the skimmer closest to the pump.The parts used to connect the hose and the sequence in which they are installed depends on the type of skimmer (Figure 3).1. Remove the skimmer basket.2. Connect the valve cuff (h), FlowKeeper valve (b) and the 45 degree elbow (f) together. Insert the FlowKeeper valve (b) into the 45 degree elbow with arrow pointing down.3. Push the male end of the twist-lock hose (g) to the end of the 45 degree elbow (f).4. Insert assembly into the skimmer suction port.Figure 3. Skimmer Connection STEP 4. Determine Correct Hose Length for Your Pool 1. Measure enough hose to reach the farthest point of the pool from the skimmer or dedicated suction line. Remove any additional hose sections, as necessary. See (A) in Figure 4, below.
2. Next attach the leader hose (c) to the end where the cleaner head will be connected. See (B) in
Figure 4 below. The extra length allows the cleaner to reach the far point in the pool if a loop forms while in operation.Leader Hose (B)Skimmer or dedicated suction lineFarthest distance across pool (A)
Total Hose Length Required = (A) Farthest distance across pool + (B) Leader Hose Figure 4. Determine Correct Hose Length
STEP 5. Connect the Cleaner 1. Ensure that the flow regulator valve (FRV) (e) is attached to the leader hose (c). The leader hose is the hose section with the foam float pre-attached. (Figure 5).2. Submerge the hose and flood with water (no bubbles visible).3. Submerge the cleaner and flood with water (no bubbles visible). 4. Connect the hose to the cleaner head by pushing the flow regulator valve onto the cleaner.5. Allow the cleaner to sink to the bottom of the pool.Figure 5. Connect Hose and Submerge Cleaner STEP 6. Test for Proper Flow WARNING To avoid serious injury, make sure to turn off the suction pump that is responsible for the pool cleaner operation. Do not expose your hair, loose clothing, jewelry, etc. to the open end of the hose.The flow regulator valve is designed to consistently limit high flow of water through the cleaner. When flow is correct, the cleaner components are less susceptible to damage and the life of the cleaner can be extended. Wheel rotation speed is a good indicator of how much water is flowing through the cleaner. By checking for proper wheel rotation timing, you can verify the cleaner is operating at maximum efficiency. cEnglish
1. Turn on the pool filter pump.
2. Obtain a stopwatch or timer.
3. Leaving the pump on and water flowing through the
cleaner, bring the cleaner to the surface of the water and hold it fully submerged just below the water line.
4. Locate the wheel speed indicator on the
rear right wheel (Figure 6).
5. Note how many seconds it takes to complete 10 rotations.
If the wheels change direction during the rotation count, wait and restart your count. If the count is within 20 - 25 seconds, no adjustment is necessary.
- 20 - 25 seconds --- Optimal Flow Figure 6. Wheel Speed Indicator STEP 7. Adjust Flow to the Cleaner (If Necessary)
1. Adjust the flow if it is not within the optimal wheel speed range.
- 26 - 50 seconds --- Increase Flow (+) --- cleaner moving too slow and needs additional flow
- 10 - 19 seconds --- Decrease Flow (–) --- cleaner moving too fast and could be damaged
2. To increase or decrease flow, adjust flow via one of the following methods:
- Valves at the equipment pad for a dedicated suction line.
- Flowkeeper valve at the skimmer for skimmer installation (Figure 7).
- Pump speed (variable speed pumps only). FlowKeeper Adjustment (+) Increase Flow (–) Decrease Flow Figure 7. Adjust FlowKeeper™ ValveEnglish
Operation and Maintenance Daily Operation The cleaner cycles on/off with the pool filtration pump, vacuuming and cleaning all surfaces randomly throughout the pool. The climbing ability of the cleaner is dependent on the pool’s shape and available water flow. If the cleaner is not climbing pool walls, ensure the flow is correct by checking the wheel speed. Also, ensure the pool surface is not covered in algae as this slippery surface will affect traction. During each coverage pattern cycle, the cleaner travels both forward and backwards, and pivots to the right and left. The turbines underneath the cleaner create down force for climbing and stability as well as directing debris into the cleaner mouth. The scrubbing brushes also make contact with the pool floor to agitate and remove small stuck-on debris. Cleaner Vacuum Modes Your cleaner is designed to operate with two vacuum options:
- Large debris: For vacuuming large debris, such as leaves. It is recommended that you return the cleaner to small debris factory setting after large debris cleaning.
- Small debris (factory setting): For vacuuming smaller and heavy debris, such as sand, silt and small stones. The pool cleaner is sent from the factory in this mode. WARNING To avoid serious injury, make sure that the cleaner is disconnected from the hose and the suction pump used for the cleaner is turned off prior to starting this operation. Convert to large debris cleaning mode:
1. Locate slot on underside of
cleaner. Insert a flat tool into the inlet adapter (Figure 8).
2. Lift up the inlet adapter and
then pull it out of the vacuum inlet. Convert back to small debris cleaning mode:
1. Place the modular inlet adapter in the vacuum inlet
of the pool cleaner.
2. Push down on the modular inlet adapter until it
Routine Maintenance To ensure correct operation and extend the life of your cleaner:
1. Empty the Pump Basket Regularly
For the cleaner to operate at highest efficiency, empty the pump basket regularly. The more debris in the pool, the more often the pump basket should be cleared. NOTE: Polaris offers an in-line leaf canister which maintains flow while catching debris, and reduces debris from reaching the pump filter basket.
2. Remove Debris from Engine
WARNING To avoid serious injury, make sure that the cleaner is disconnected from the hose and the suction pump used for the cleaner is turned off prior to starting this operation.Figure 10. Latch Release ButtonFigure 11. Remove the EngineLatch Release Button Latch Release Button 1. Push the latch release button on the top of the cleaner (Figure 10) to open the cover.2. Open the lid and inspect the engine. Remove any debris.3. If necessary, pull the engine by the engine blades and remove it. No tools required (Figure 11).4. Reinstall the engine. Make sure the engine is positioned with the large wheel on the right side (marked A) when reinstalling.5. Close engine cover and ensure the latch clicks in place.English
Always disconnect the cleaner from the pool wall before cleaning or backwashing the pool filter. After cleaning or backwashing, let the filtration system run for at least five (5) minutes to flush out the suction lines before re-connecting the cleaner.
Remove the cleaner from the pool for at least four (4) hours when adding chemicals.
5. Replace Brushes Regularly
To maintain optimal cleaning, it is recommended to replace scrubbing brushes each season or when significant wear is visible (Figure 12). To remove brushes, squeeze the plastic clip between two fingers and pull out. Type of pool surface may also increase rate of wear to brushes. NEW brush surface WORN brush surface
Never store the cleaner in direct sunlight. Do not coil the hose. Hose may develop a memory which can affect cleaner performance. Store the cleaner on its side or back to avoid damage to turbine (all models) and brushes (Figure 13). Figure 12. Inspect the Brushes Figure 13. Store Cleaner on its Side
Before storing for winter, drain out all the water (freeze damage is not covered by the warranty). Remove all connectors and adapters from the dedicated suction line or skimmer. Disassemble the hoses and lay flat.English
If you experience a problem with your Polaris cleaner, please follow the troubleshooting steps below to restore performance. If further assistance is required, contact Polaris Technical Support at (800) 822-7933. Troubleshooting Problem Solution Cleaner does not move or moves slowly. • Confirm that the main drain is closed.
- Check wheel speed to verify proper flow. Refer to section, "Check for Proper Flow."
- Check to see if any interior teeth of the tracks are worn. If so, contact your dealer for replacement tracks.
- Clean or backwash filter and empty pump basket.
- Check for debris caught in the engine. Refer to section, “Remove Debris from Engine”.
- Switch cleaner to large debris cleaning mode. Refer to section, “Cleaner Vacuum Modes”.
- Check for air in system. If water level in pump basket drops or you see excessive air bubbles in the pump basket or coming from the return lines, there is air in the system. Check hose connections, tighten all fittings at pump and check o-ring at pump basket for wear.
- For skimmer installations, check the Flowkeeper™ to make sure that it can move freely with the water flow. Cleaner pattern does not cover entire pool. • Confirm proper hose length for your pool. Refer to section, “Determine Correct Hose Length."
- Count wheel rotations to verify proper flow. Refer to section, “Check for Proper Flow”. Adjust flow if necessary.
- Ensure return line fittings are directed downward. Add a return diverter if necessary.
- Make sure hose is not kinked or coiled. Lay in sun to straighten if necessary.
- Verify hose float is positioned approximately 9" from cleaner head on the leader hose (c/g).
- Observe cleaner for more than five (5) minutes and ensure that each drive track is periodically reversing direction. If it is not, contact dealer or service center for help. Cleaner gets stuck at steps. • Observe cleaner for more than five (5) minutes and ensure that each drive track is periodically reversing direction. If it is not, contact you dealer or service center for help.
- Ensure the swivel on top of the cleaner rotates freely.
- Count wheel rotations to verify proper flow. Refer to section, “Check for Proper Flow”. Adjust flow if necessary.
- Confirm proper hose length for your pool. Refer to section, “Determine Correct Hose Length." Cleaner won’t climb walls. • Count wheel rotations to verify proper flow. Refer to section, “Check for Proper Flow”. Adjust flow if necessary.
- Verify hose float is positioned approximately 9" from cleaner Cleaner riding on its side. • Verify hose float is positioned approximately 9" from cleaner.Zodiac Pool Systems LLC 2882 Whiptail Loop # 100 Carlsbad, CA 92010
Zodiac Pool Systems Canada, Inc. 2-3365 Mainway, Burlington ON L7M 1A6
Zodiac Pool Systems Canada, Inc. 2-3365 Mainway, Burlington ON L7M 1A6