
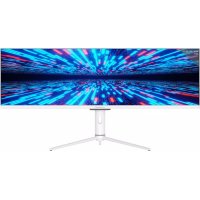
M39QHD165C - Monitor LC-Power - Free user manual and instructions
Find the device manual for free M39QHD165C LC-Power in PDF.

| Product type | Monitor |
| Brand | LC-Power |
| Model | M39QHD165C |
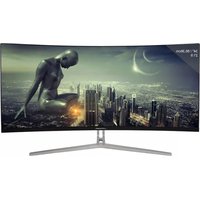
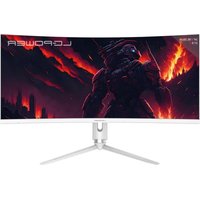
| Screen size | 38.5 inches |
| Resolution | 2560 x 1440 (QHD) |
| Refresh rate | 165 Hz (DP), 144 Hz (HDMI) |
| Response time | 7 ms |
| Panel type | VA |
| Brightness | 350 cd/m² |
| Contrast | 3000:1 |
| Viewing angle | 178° horizontal / 178° vertical |
| Video inputs | 2 x DisplayPort 1.4, 2 x HDMI 2.0 |
| Audio output | 1 x 3.5 mm jack socket |
| FreeSync | Yes (AMD FreeSync) |
| HDR | Yes (HDR mode) |
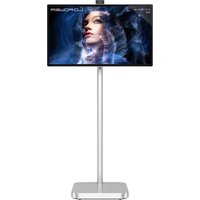
| VESA mounting | 100 x 100 mm |
| Dimensions (with stand) | 879.24 x 286.77 x 645.09 mm |
| Dimensions (without stand) | 879.24 x 83.56 x 514.07 mm |
| Net weight | Approximately 14 kg (estimated) |
| Gross weight | 16 kg |
| Power supply | AC 100-240 V ~ 50/60 Hz, 2.0 A |
| Box contents | Monitor, stand, DisplayPort cable, power cable, mounting screws |
| Main features | Multidirectional OSD, PIP/PBP, GamePlus, LED effects, low blue light, RGB settings |
| Care and cleaning | Disconnect the device, use a soft damp cloth (water only), avoid chemical products |
| Safety | Do not expose to humidity, do not open the casing, avoid heat sources |
| Spare parts and repairability | VESA screws included; no spare parts provided, professional repair recommended |
Frequently Asked Questions - M39QHD165C LC-Power
User questions about M39QHD165C LC-Power
0 question about this device. Answer the ones you know or ask your own.
Ask a new question about this device
Download the instructions for your Monitor in PDF format for free! Find your manual M39QHD165C - LC-Power and take your electronic device back in hand. On this page are published all the documents necessary for the use of your device. M39QHD165C by LC-Power.
USER MANUAL M39QHD165C LC-Power
4.1 —Tasten am Monitor

4.2—Monitoranschlüsse

- Safety Precautions
- Maintenance
- Box Contents
- Product Overview
- Stand Installation
- Wall Mounting
- OSD
- LED Effects System Console
- RGB Ranges and Gameplus Switching
- Picture-in-Picture
- Picture-by-Picture
- Technical Specifications
1. SAFETY PRECAUTIONS
Do not expose the monitor to a humid environment, rain or other liquids. Do not open the monitor housing to avoid any shock due to electrical or mechanical hazards.
Operation:
- Keep the monitor out of direct sunlight or other heat sources like stoves.
- Keep the monitor away from any liquid.
- Remove any object that could fall into the ventilation holes.
- Do not block the ventilation holes to avoid overheating.
- Do not knock or drop the monitor.
2.MAINTENANCE
CAUTION: Unplug the power cable from the outlet before cleaning the monitor.
- To clean your screen, slightly moisten a soft, clean cloth with water.
- Please use a special screen-cleaning tissue if possible.
- Do not use benzene, thinner, ammonia, abrasive cleaners or compressed air.
- Inappropriate cleaning solutions may damage the monitor or leave a milkyfilm on screen or housing.
- Unplug the monitor if you are not going to use it for a longer time period.
- Do not expose the monitor to dust, liquids or a humid environment.
- In case the monitor gets in touch with any liquid, wipe it down immediately using a dry cloth.
- In case any liquid gets spilled into the ventilation holes, do not use the monitor anymore. Please contact a professional service technician.
Legal notice:

HIGH-DEFINITION MULTIMEDIA INTERFACE
The terms HDMI and HDMIII High Definition Multimedia Interface, and the HDMI logo are trademarks or registered trademarks of HDMI Licensing Administrator, Inc. in the USA and other countries.
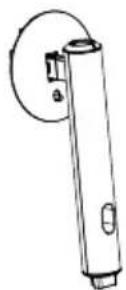
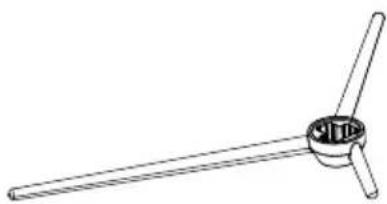
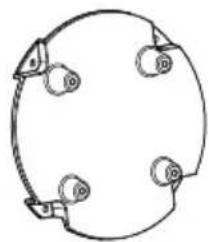
3.Box Contents

Monitor
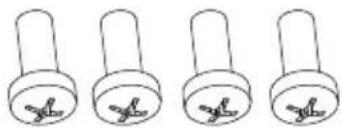
PM5*15 Screw Bolts X4
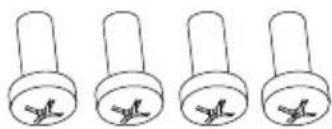
PM4*16 Screw Bolts X4
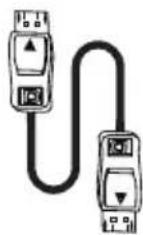
DP Cable

Power Cable (AC 100-240V~50/60Hz)

Stand - Upright Section

Stand - Base
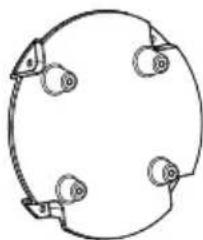
VESA Converter
User Manual

Extra screws may be included as backup.
4. Product Overview
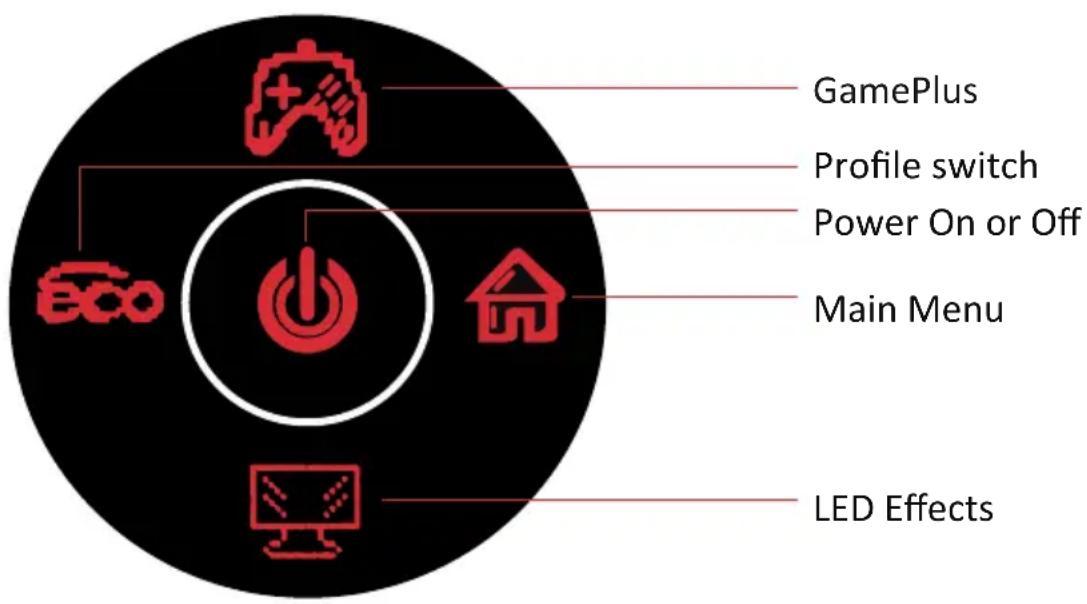
4.1 —Monitor Buttons
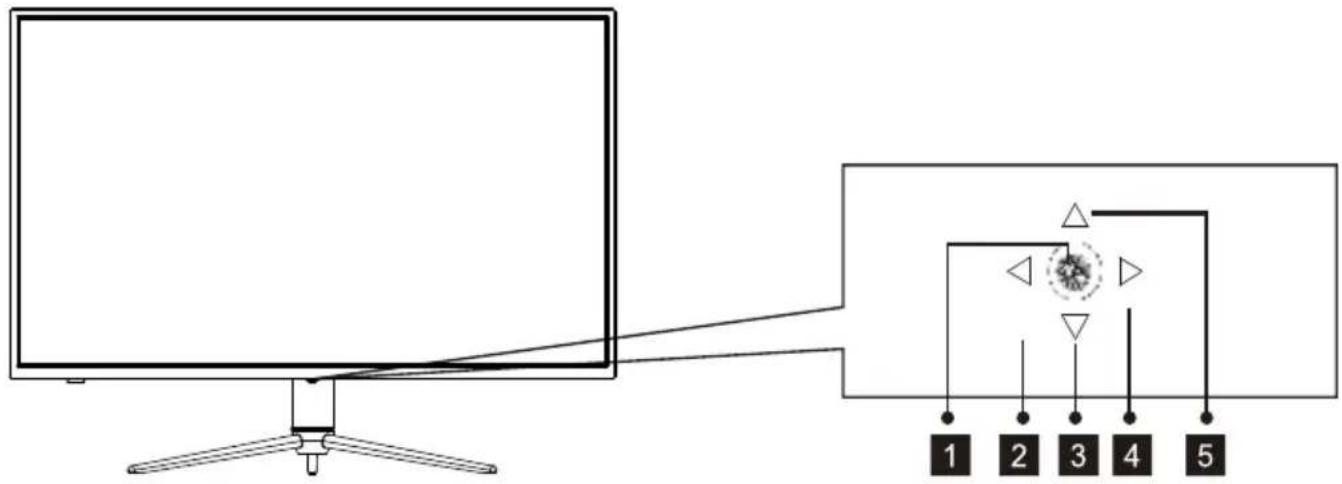
Press rocker to turn the display on/off.
2 Profile switch
3 Rocker backward LED Effects.
4 Rocker right Main Menu.
5 Game Plus
4.2—Monitor Ports
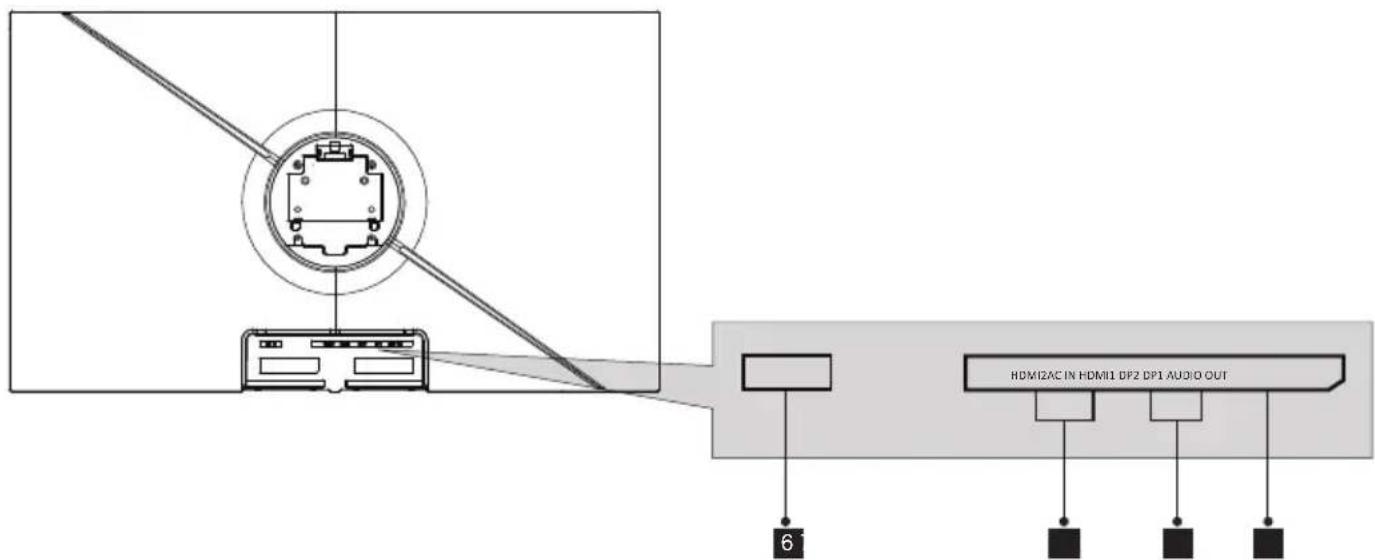
6 Power Connector: Insert the power cable to supply power to the monitor.
7 HDMI Connectors: Insert one end of the HDMI cable into the computer's HDMI output and connect the other end to the monitor's HDMI port.
DP Connectors: Insert one end of the DP cable into the computer's DP output and connect the other end to the monitor's DP port.
Audio Output: Insert the audio cable for output of audio signals.
5. Stand Installation
- Open the package, take out the Styrofoam and place it on a horizontal table.
- Take out the base and upright section, and three PM5*15 screws.
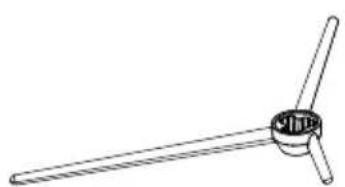
Stand-Base
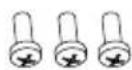
PM5*15 screws X3
Stand-Upright Section
- Fix the bracket with three PM5*15 screws on the boom of the base.
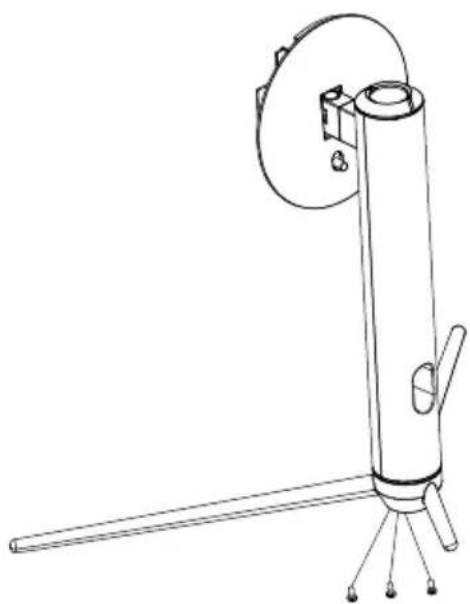
- Use the base bracket assembly assembled in step 3 to align it with the slot of the machine and buckle down (Note: Pull the quick release button up with your finger to remove the base bracket assembly)
- Grab the bracket with your hand and put the machine upright (note: during the process of erecting the machine, the machine is still in the lower Styrofoam without taking it out, do not pinch the screen directly with your hands to prevent the screen from breaking)

Make sure the monitor is laid on a flat surface before removing the stand.
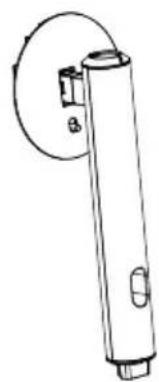
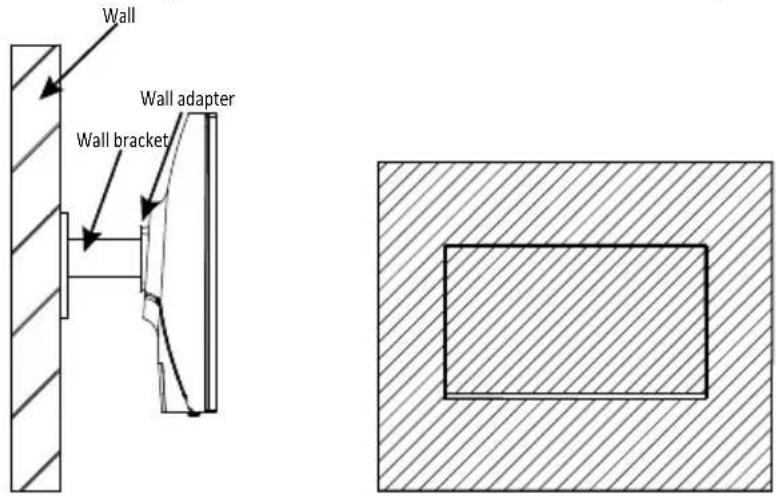
6. Wall Mounting
This monitor only includes screws which may be used when attaching the monitor to a VESA 100*100mm type mount. No VESA mount or mounting accessory is included.
- Take out all the accessories on the styrofoam, and take out the upper styrofoam. (The display screen cannot leave the styrofoam to prevent broken screen)
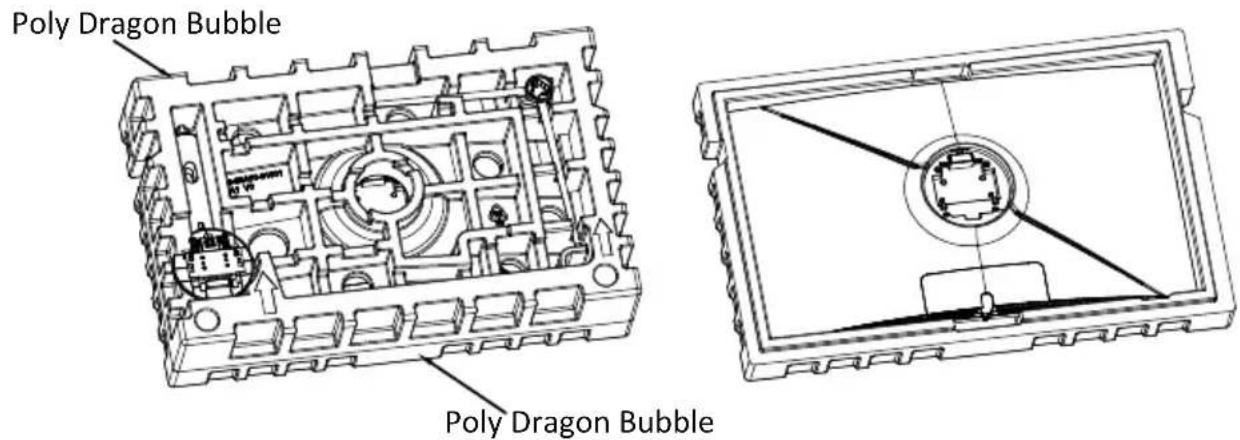
- Take out the wall-mounting adapter from the bubble bag, take out four M4*16mm screws from the accessory bag, and use the screws to lock the wall-mounting adapter to the back shell (the display screen cannot leave the styrofoam to prevent Broken screen)

- Do not pinch the screen directly with your hands during the process of hanging the product to prevent the screen from breaking.
Eng-6
FreeSync
The feature itself is off by default. In order to use this feature, please note you must have hardware with FreeSync capability, an DP cable, and the latest graphic drivers. To use this feature, connect your computer and monitor with an DP cable. After connecting, you may receive a prompt to enable the feature on your computer. If you do not receive the prompt, you may need to enable the function in your graphics card menu. See your graphics card manufacturer's documentation for instructions on how to turn on and or enable FreeSync.
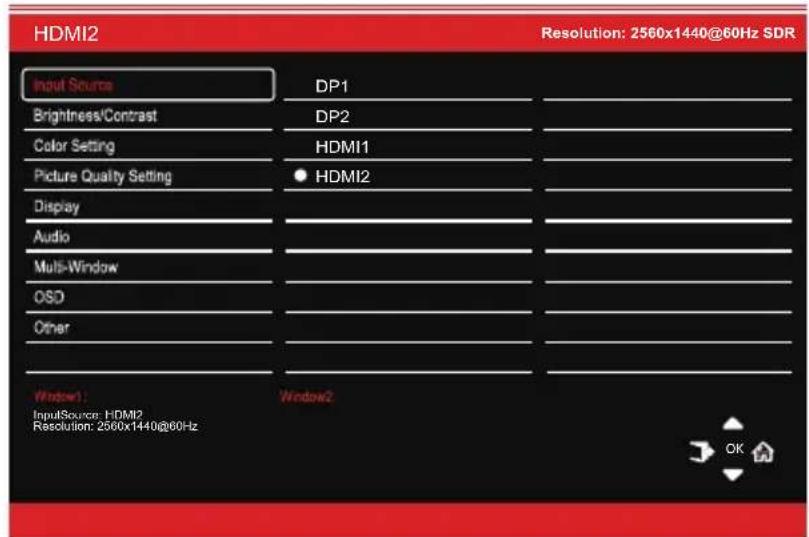
7. OSD
The On-Screen Display (OSD) Menu may be used to adjust your monitor's settings and appears on screen after turning on the monitor and pressing the M button.

When using the monitor for the first time, settings will automatically adjust to optimal settings according to your computer's configuration and parts etc.
- The monitor includes one touch options to access common settings.
- Press (to) to enter the OSD screen.
-
Control pad Up (肉) or After(图) to browse functions.
-
Control pad Left (cc) to exit the current screen.
7.1- OSD Menu Functions
| Main Menu Sub | b-Menu Options | Description | |
| Input Source | DP1 NONE Switch to DP1 signal input | ||
| DP2 | NONE | Switch to DP2 signal input | |
| HDMI1 | NONE | Switch to HDMI1 signal input | |
| HDMI2 | NONE Switch to HD | MI2 signal input | |
| Brightness/Contrast | Brightness 0~100 | Adjust display brightness | |
| Blacklevel 0~100 | Adjust display black level | ||
| Contrast 0~100 | Adjust display contrast | ||
| DCR On Turn on | DCR function | ||
| Off Turn off DCR function | |||
| Color Setting Gamma | Gamma Gamma 1.8 Set Gamma add-in | ||
| Gamma 2.0 | |||
| Gamma 2.2 | |||
| Gamma 2.4 | |||
| Gamma 2.6 | |||
| Picture Mode | Standard, Photo, Movie, Game, FPS, RTS, | Set visual mode according to activity | |
| Color Temperature | Warm, Cool, User | Select color temperature | |
| Low Blue Light | 0~100 | Set blue light filtering level | |
| Hue | 0~100 Adjust hue levels | ||
| Saturation | 0~100 | Adjust saturation levels | |
| RGB Range | RGB Full,RGB limited | Select RGB range mode full and limited | |
| Picture Quality Setting | Sharpness | 0~100 Set display sharpness | |
| Response Time | Off, High, Middle, Low | Adjust response time | |
| Noise Reduction | Off, High, Middle, Low | Reduce the interference of image noise caused by signal source interference | |
| Dynamic Luminous Control | On, Off | Compensate for gray scale display screen and strengthen the expression of gray scale | |
| MPRT | On, Off | Moving Picture Response Time | |
| Display | Aspect Ratio | Wide Screen, 4:3, 1:1, Auto | Select on-screen aspect ratio |
| Audio | Mute On, Off | Turn mute | mode on/off |
| Volume | 0-100 | Adjust audio volume | |
| Audio Source AutoSource, DP1, DP2,HDMI1, HDMI2 | Select audio signal input via HDMI or DP | ||
| Main Menu | Sub-Menu Options | Description | |
| Multi-Window | Multi-Window Off, | PIP Mode, PBP 2Win | Select PIP/PBP modes according to the number of input signals etc. |
| Sub Win2 Input | DP1, DP2, HDMI1, HDMI2 | Select according to input signal for PIP/ PBP mode | |
| PIP Size Small, | Medium, Large | Adjust the PIP/PBP display window size | |
| PIP Position Top | Right, Top Left, Bottom Right, Bottom Left | Adjust the PIP/PBP window position | |
| Swap NONE | Swap the two channel signal source of only the PIP/PBP 2 screens function | ||
| OSD Language | 한국어, Рuples,默认, Estrangers, Deutsch | Set OSD language | |
| OSD H-Position | 0-100 Adjust the OSD's horizontal position | ||
| OSD V-Position | 0-100 Adjust the OSD's vertical position | ||
| OSD Transparency | 0-100 Set the OSD's overall transparency | ||
| OSD Time Out | 5-100 Set how long | the OSD remains open after non-use | |
| OSD Rotation | Normal,90,180,270 | When the user flips the display, thisfunction can also flip the OSD to achieve the best display angle | |
| Other | DP Version | DP1.1, DP1.2, DP1.4 | |
| FreeSync (Adaptive Sync) | On, Off | Turn the FreeSync function on/off | |
| HDR | On, Off; Auto Detect | Turn the HDR mode on/off | |
| Reset | None | Reset monitor configurations | |
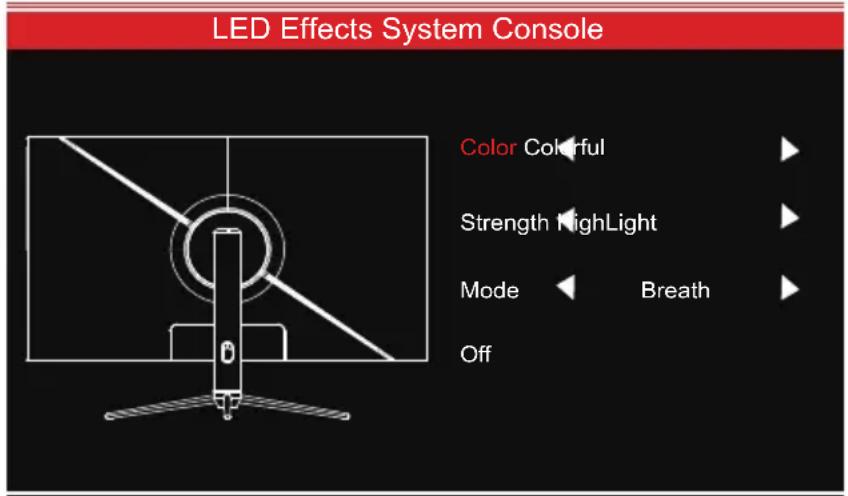
8. LED Effects System Console
The default light effect is colorful, highlight and breath. You can select your favourite light effect as below.
Steps: 1. Press any button to activate OSD guidance.
- Press ( ) to enter LED light effect console.
- There are options for Color,Strength, Mode.
9. RGB Ranges and Gameplus Switching
- Press button to switch Gameplus modes. According to the needs of your game, choose the corresponding game icon. These game icons are primarily designed to optimize your aim during shooting games, though they can be used for other scenarios.

- Press Left (@) button to switch ECO modes. These modes include Standard, Photo, Movie, Game, FPS, and RTS and can be used to optimize settings according to your activity. Standard mode is suitable for most activities.

10. PIP (Picture-in-Picture) Input Information
| Mode Home Screen Input Source | Picture-in-Picture Additional Input Source | Interchange Window | Picture Mode | |
| DP HDMI | ||||
| Mode 1 DP X O O | O | |||
| Mode 2 HDMI O X O | O | |||
Note: "O" means this feature is supported while "X" means it is not supported.
11. PBP (Picture-by-Picture) Resolution
While using this feature and in order to obtain an optimal viewing experience, it is recommended to set both panels to the same resolution.
1
It is recommended to set the first panel to 1280*1440@60Hz resolution.
2
It is recommended to set the second panel to 1280*1440@60Hz resolution.
At this resolution, tearing and visual deformation should be minimized.
12. Technical Specifications
| Model | LC-M39-QHD-165-C |
| Screen Size | 38.5" |
| Aspect Ratio | 16:9 |
| Backlight | LED |
| Brightness | 350cd/m2 |
| Panel | VA |
| Resolution | DP1.4: 2560*1440@165Hz HDMI 2.0: 2560*1440@144Hz |
| Refresh Rate | 165Hz |
| Response Time | 7ms |
| Viewing Angle | ≥ 178°(H) / ≥ 178°(V) |
| Contrast Ratio | 3000:1 |
| VESA Mounting | 100 x 100mm |
| Colours | 16.7M |
| AMD FreeSync | Yes |
| Signal Input | DP 1.4*2, HDMI 2.0*2, AUDIO OUT*1 |
| Power Input | AC 100-240~50/60Hz, 2.0A |
| Audio | |
| Speakers | NO |
| Audio Out | Yes |
| Accessories | |
| Power Cable | Yes |
| Additional Functions | |
| Low Blue Light | Yes |
| Physical Dimensions | |
| Dimensions (w/ Stand) | 879.24*286.77*645.09mm |
| Dimensions (w/o Stand) | 879.24*83.56*514.07mm |
| Net Weight | 11.6kg |
| Gross Weight | 16kg |
TABLE DES MATIÈRES
Support - Section verticale
Support - Base
Convertisseur VESA
Mode d'emploi

12. Specifications techniques
A这对于 me is a great pleasure.
- —Tasten am Monitor
- 4.2—Monitoranschlüsse
- SAFETY PRECAUTIONS
- Operation:
- 2.MAINTENANCE
- 3.Box Contents
- Product Overview
- —Monitor Buttons
- 4.2—Monitor Ports
- Stand Installation
- Wall Mounting
- FreeSync
- OSD
- 7.1- OSD Menu Functions
- LED Effects System Console
- RGB Ranges and Gameplus Switching
- PIP (Picture-in-Picture) Input Information
- PBP (Picture-by-Picture) Resolution
- Technical Specifications
- TABLE DES MATIÈRES
- Specifications techniques
Brand : LC-Power
Model : M39QHD165C
Category : Monitor