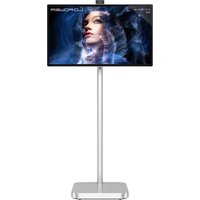
M32S4K - Monitor LC-Power - Free user manual and instructions
Find the device manual for free M32S4K LC-Power in PDF.


| Product Type | Monitor |
| Screen Size | 32 inches |
| Resolution | 3840 x 2160 (4K UHD) |
| Panel Type | VA |
| Refresh Rate | 60 Hz |
| Response Time | 4 ms |
| Brightness | 300 cd/m² |
| Contrast Ratio | 3000:1 |
| Connectivity | HDMI 2.0, DisplayPort 1.2, USB-C (DP Alt Mode) |
| Dimensions (with stand) | 732 x 470 x 200 mm |
| Weight (with stand) | 7.5 kg |
| Power Supply | 100-240V AC, 50/60Hz |
| Power Consumption | 45 W (typical) |
| Special Features | Flicker-free, Low Blue Light, AMD FreeSync |
| Cleaning | Use a soft, dry cloth. Avoid harsh chemicals. |
| Safety | Kensington lock slot for theft prevention |
| Spare Parts | Power cord, HDMI cable included. No separate spare parts available. |
| VESA Mount | 100 x 100 mm |
| Tilt Adjustment | -5° to 15° |
Frequently Asked Questions - M32S4K LC-Power
User questions about M32S4K LC-Power
0 question about this device. Answer the ones you know or ask your own.
Ask a new question about this device
Download the instructions for your Monitor in PDF format for free! Find your manual M32S4K - LC-Power and take your electronic device back in hand. On this page are published all the documents necessary for the use of your device. M32S4K by LC-Power.
USER MANUAL M32S4K LC-Power
natural_image
Empty rectangular frame with black border (no text or symbols)Smart-Display
natural_image
Simple line drawing of two mechanical components with no text or symbolsStandsäule

Standfuß
Bedienungsanleitung

Fernbedienung
natural_image
Technical line drawing of a mechanical assembly with an inset magnified view showing internal components (no text or symbols)natural_image
Line drawing of a smartphone stand with a mounted screen and two sensors, no text or symbols present
natural_image
Simple line drawing of a rectangular frame mounted on a pole, with directional arrows indicating rotation or movement (no text or symbols)Vertikaler Winkel ± 90°
User Manual for the mobile Smart Display

Introduction
Thank you for choosing our product. Please read the manual carefully before you use the product.
Service
If you need technical support, please contact us via support@lc-power.com. If you need after sales service, please contact your retailer.
Contents
Safety Precautions 1
Product Introduction 2
Installation 3
Adjustment 6
Instructions 7
Parameters 8
Update....8
- Keep the display away from water sources or damp places, such as bath rooms, kitchens, basements, and swimming pools. Do not use the device outside if it could rain.
- Make sure the display is placed on a flat surface. If the display falls down, it may cause injury or the device may be damaged.
- Store and use the display in a cool, dry and well ventilated place, and keep it away from heat sources and strong electromagnetic interferences.
- Do not cover or block the vent hole in the rear casing, and do not use the product on a bed, sofa, blanket or similar objects.
- The range of the supply voltage of the display is printed on the label on the rear casing. If it is impossible to determine the supply voltage, please consult the distributor or local power company.
- If the display will not be used for a long period, please turn off the power supply to avoid due to abnormal supply voltage.
- Please use a reliable grounded socket. Do not overload the socket, or it may cause fire or electric shock.
- Do not put foreign matters into the display, or it may cause short circuits resulting in fire or electric shock.
- Do not disassemble or repair this product by yourself to avoid electric shock. If faults occur, please contact the after-sales service directly.
- Do not pull or twist the power cable by forced.
Packing list
- Please check that the package contains all parts. If any part is lost, please contact your retailer.

natural_image
Empty rectangular frame with black border (no text or symbols)Smart display

natural_image
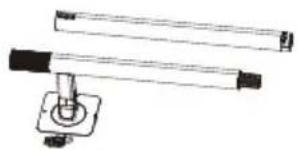
Simple line drawing of a mechanical assembly with two rods and a base (no text or symbols)Pillar

Base
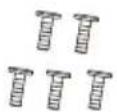
5x screws
(1 pc. as spare part)
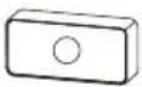
Camera

Screwdriver

Power adapter

Power cable

HDMI cable

USB-C cable

User manual

Remote control
Installation of the stand (base and pillar)
- Open the package, take out the stand stem, connect the two stand stem together in the following operation order, lock them with two stand screws, and align the stand cover with the card slot to fasten it.

- Remove Styrofoam blocks B and C in order and position the base as shown below.

Note: The weight of the chassis is higher than 10 kg, please be careful during assembly.
- See picture, fasten the stand stem and base with 4 screws.

natural_image
Technical line drawing of a mechanical assembly with an inset magnified view showing internal components (no text or symbols)- Hold the stand up, then assemble the display and stand. You could utilize the display "cavity slot" and stand "bracket hook" to hold the display easier. Put the power socket at "left side" position, then you can move the display to the stand bracket until you hear a click sound.


Note: Please make sure to have the power socket on the "left side" position before connecting the display and bracket.
- Insert the power socket into the power slot, you can remove the pearl cotton on the VESA cover, and assemble the VESA cover into the display. (Note: The arrow on the VESA cover faces up after the display is in horizontal position.)

Camera installation
The camera can be attached magnetically to the top or left side of the display.

natural_image
Line drawing of a smartphone stand with a mounted screen and two sensors, no text or symbols presentEng-5

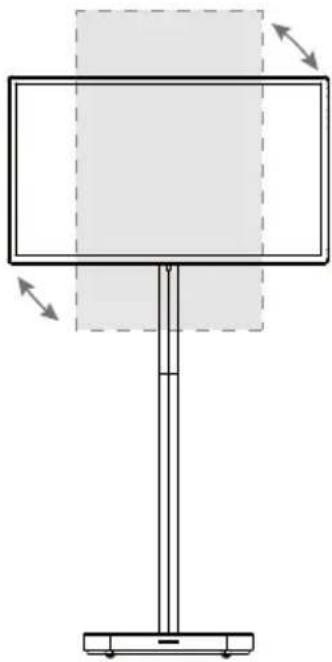
Tilting angle ± 18° (± 2°)

Height adjustment 200 mm (±8 mm)
natural_image
Simple line drawing of a rectangular frame mounted on a stand with directional arrows indicating rotation (no text or symbols)Vertical angle ± 90°
Description of buttons

| 1 | Volume down |
| 2 | Volume up |
| 3 | Power on/ off |
Indicator description
| No light | 1. When the device is turned off and not charged2. Power off charge/Power on charge/ Power on no charge(When the battery power is >95%) |
| Blue | Power off charging/ Power on charging/ Power on without charging (10%< Power ≤ 95%) |
| Red | Power off charging/ Power on charging/ Power on without charging (battery is ≤ 10%) |
Cable connections

flowchart
graph TD
    A["USB C"] --> B["HDIM"]
    B --> C["Mobile phone/tablet/notebooks"]
    C --> D["Notebooks/PC"]
    D --> E["DC in"]
    E --> F["Adapter"]
    F --> G["LED Lighting"]
    style A fill:#f9f,stroke:#333
    style B fill:#ccf,stroke:#333
    style C fill:#cfc,stroke:#333
    style D fill:#fcc,stroke:#333
    style E fill:#cff,stroke:#333
    style F fill:#ffc,stroke:#333
    style G fill:#fcc,stroke:#333
| Product name | Smart Display | |
| Product model | LC-Power 4K Mobile Smart Display | |
| Model code | LC-M32S4K | |
| Screen size | 31.5" | |
| Aspect ratio | 16:9 | |
| Viewing angle | 178° (H) / 178° (V) | |
| Contrast ratio | 3000:1 (typ.) | |
| Colours | 16.7 M | |
| Resolution | 3840 x 2160 pixels | |
| Refresh rate | 60 Hz | |
| Camera | 8 MP | |
| Microphone | 4 mic array | |
| Speaker | 2 x 10 W | |
| Touchscreen | OGM+AF | |
| Operating system | Android 13 | |
| CPU | MT8395 | |
| RAM | 8 GB | |
| Storage | 128 GB eMMC | |
| Power input | 19.0 V---6.32 A | |
| Product dimensions | Without stand | 731.5 x 428.9 x 28.3 mm |
| With stand | 731.5 x 1328.9 x 385 mm | |
| Tilting angle | Forward tilting: -18° ± 2°; backward tilting: 18° ± 2° | |
| Rotation angle | N/A | |
| Height adjustment | 200 mm (± 8 mm) | |
| Vertical angle | ± 90° | |
| Environmental conditions | Action | Temperature: 0 °C ~ 40 °C (32 °F ~ 104 °F) Humidity: 10 % ~ 90 % RH (non-condensing) |
| Storage | Temperature: -20 °C ~ 60 °C (-4 °F ~ 140 °F) Humidity: 5 % ~ 95 % RH (non-condensing) | |
Update
Open the Android settings and choose the last column; choose "Update" to check if your operating system is up to date.
LCPOWER™
Silent Power Electronics GmbH
Formerweg 8
47877 Willich
Germany
www.lc-power.com
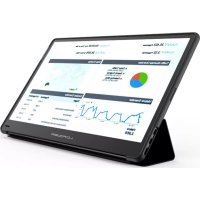
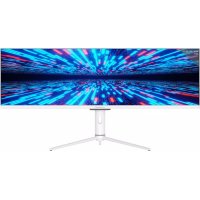
Brand : LC-Power
Model : M32S4K
Category : Monitor