
NZ64B7799FK - Cooker SAMSUNG - Free user manual and instructions
Find the device manual for free NZ64B7799FK SAMSUNG in PDF.
User questions about NZ64B7799FK SAMSUNG
0 question about this device. Answer the ones you know or ask your own.
Ask a new question about this device
Download the instructions for your Cooker in PDF format for free! Find your manual NZ64B7799FK - SAMSUNG and take your electronic device back in hand. On this page are published all the documents necessary for the use of your device. NZ64B7799FK by SAMSUNG.
USER MANUAL NZ64B7799FK SAMSUNG
The following symbols are used in this User Manual: 3
Model name & serial number 3
Safety instructions 3
Disposing of the packaging material 7
Proper disposal of your old appliance 7
Correct Disposal of This Product (Waste Electrical & Electronic Equipment) 7
Installing the hob 8
Safety instructions for the installer 8
Tools you will need 8
Connecting to the mains power supply 8
Installing into the countertop 9
Components 11
Before you start 11
Cooking zones 11
Control panel 12
Induction heating 12
Safety shutoff 13
Residual heat indicator 13
Temperature detection 13
Cookware 14
Using the touch buttons 17
Operating noises 17
Initial cleaning 17
Operation 18
Switching the appliance on 18
Switching the appliance off 18
Selecting cooking zone and power level 18
Max Boost 19
Using the Flex zone (Only for Flex zone applied models) 20
Flex Plus Features 20
Keep Warm 21
Timer 22
Pause/Resume 22
Quick stop 22
Child safety lock 23
Language setting 23
Maximum power limit 23
Sound on/off 24
Connecting the Assist Sensor 24
Using Assist Cook Functions 24
Connect the Easy Setup mobile app 25
Wi-Fi On/Off Settings 25
Hood control 26
Maintaining your appliance 26
Hob 26
Light soiling 26
Stubborn soiling 27
Problem dirt 27
Hob frame (option) 27
To avoid damaging your appliance 27
Troubleshooting and service 28
Troubleshooting 28
Service 30
Using this manual
Please take the time to read this owner's manual, paying particular attention to the safety information contained in the following section, before using your appliance. Keep this manual for future reference.
If transferring ownership of the appliance, please remember to pass the manual on to the new owner.
The following symbols are used in this User Manual:
WARNING
Hazards or unsafe practices that may result in severe personal injury or death.
CAUTION
Hazards or unsafe practices that may result in minor personal injury or property damage.
CAUTION
To reduce the risk of fire, explosion, electric shock, or personal injury when using your hob, follow these basic safety precaution.
NOTE
Useful tips, recommendations, or information that helps users manipulate the product.
Model name & serial number
Both the model name and the serial number are labeled underneath the hob base.
For later use, write down the information or attach the additional product label (located on the top of the product) onto the current page.
Model Name
Serial Number
Safety instructions
The safety aspects of this appliance comply with all accepted technical and safety standards. However, as manufacturers we also believe it is our responsibility to familiarize you with the following safety instructions.
▲ WARNING
This appliance is not intended for use by persons (including children) with reduced physical, sensory or mental capabilities, or lack of experience and knowledge, unless they have been given supervision or instruction concerning use of the appliance by a person responsible for their safety.
Children should be supervised to ensure that they do not play with the appliance.
This appliance can be used by children aged from 8 years and above and persons with reduced physical, sensory or mental capabilities or lack of experience and knowledge if they have been given supervision or instruction concerning use of the appliance in a safe way and understand the hazards involved. Children shall not play with the appliance. Cleaning and user maintenance shall not be made by children without supervision. The means for disconnection must be incorporated in the fixed wiring in accordance with the wiring rules.
Safety instructions
This Appliance should be allowed to disconnection from the supply after installation. The disconnection may be achieved by having the plug accessible or by incorporating a switch in the fied wiring in accordance with the wiring rules.
If the supply cord is damaged, it must be replaced by the manufacturer, its service agent or similarly qualified persons in order to avoid a hazard.
The method of fixing stated is not to depend on the use of adhesives since they are not considered to be a reliable fixing means.
WARNING: If the surface is cracked, switch off the appliance to avoid the possibility of electric shock.
During use the appliance becomes hot. Care should be taken to avoid touching heating elements inside the hob.
WARNING: Accessible parts may become hot during use. Young children should be kept away.
A steam cleaner is not to be used.
Metallic objects such as knives, forks, spoons and lids should not be placed on the hob surface since they can get hot.
After use, switch off the hob element by its control and do not rely on the pan detector.
The appliance is not intended to be operated by means of an external timer or separate remote-control system.
CAUTION: The cooking process has to be supervised. A short term cooking process has to be supervised continuously.
The appliance must not be installed behind a decorative door in order to avoid overheating.
WARNING: The appliance and its accessible parts become hot during use. Care should be taken to avoid touching heating elements. Children less than 8 years of age shall be kept away unless continuously supervised.
WARNING: Unattended cooking on a hob with fat or oil can be dangerous and may result in a fire.
NEVER try to extinguish a fire with water, but switch off the appliance and then cover flame e.g. with a lid or a fire blanket.
WARNING: Danger of fire: Do not store items on the cooking surfaces.
WARNING: Use only hob guards designed by the manufacturer of the cooking appliance or indicated by the manufacturer of the appliance in the instructions for use as suitable or hob guards incorporated in the appliance. The use of inappropriate guards can cause accidents.
The surfaces are liable to get hot during use.
This appliance can be used by children aged from 8 years and above and persons with reduced physical, sensory or mental capabilities or lack of experience and knowledge if they have been given supervision or instruction concerning use of the appliance in a safe way and understand the hazards involved. Children shall not play with the appliance. Cleaning and user maintenance shall not be made by children unless they are older than 8 and supervised. Keep the appliance and its cord out of reach of children less than 8 years.
⚠️ CAUTION
Be sure the appliance is properly installed and grounded by a qualified technician.
The appliance should be serviced only by qualified service personnel. Repairs carried out by unqualified individuals may cause injury or serious malfunction. If your appliance is in need of repair, contact your local service centre. Failure to follow these instructions may result in damage and void the warranty. Flush - mounted appliances may be operated only after they have been installed in cabinets and workplaces that conform to the relevant standards. This ensures sufficient protection against contact for electrical units as required by the essential safety standards.
If your appliance malfunctions or if fractures, cracks or splits appear:
- switch off all cooking zones;
•disconnect the hob from the mains supply; and - contact your local service centre.
If the hob cracks, turn the appliance off to avoid the possibility of electric shock. Do not use your hob until the glass surface has been replaced.
Safety instructions
Do not use the hob to heat aluminium foil, products wrapped in aluminium foil or frozen foods packaged in aluminium cookware.
Liquid between the bottom of the pan and the hob can produce steam pressure. Which may cause the pan to jump.
Always ensure that the hotplate and the base of the pan are kept dry.
The cooking zones will become hot when you cook.
Always keep small children away from the appliance.
Keep all packaging materials well out of the reach of children, as packaging materials can be dangerous to children.
This appliance is to be used only for normal cooking and frying in the home. It is not designed for commercial or industrial use.
Never use the hob for heating the room.
Take care when plugging electrical appliances into mains sockets near the hob. Mains leads must not come into contact with the hob.
Overheated fat and oil can catch fire quickly. Never leave surface units unattended when preparing foods in fat or oil, for example, when cooking chips.
Turn the cooking zones off after use.
Always keep the control panels clean and dry.
Never place combustible items on the hob, it may cause fire.
There is the risk of burns from the appliance if used carelessly.
Cables from electrical appliances must not touch the hot surface of the hob or hot cookware.
Do not use the hob to dry clothes.
Users with Pacemakers and Active Heart Implants must keep their upper body at a minimum distance of 30 cm from induction cooking zones when turned on. If in doubt, you should consult the manufacturer of your device or your doctor. (Induction hob model only)
Do not attempt to repair, disassemble, or modify the appliance yourself.
Always turn the appliance off before cleaning.
Clean the hob in accordance with the cleaning and care instructions contained in this manual.
Keep pets away from the appliance because pets may step on the controls of the appliance, causing an malfunction.
Disposing of the packaging material
WARNING
All materials used to package the appliance are fully recyclable. Sheet and hard foam parts are appropriately marked. Please dispose of packaging materials and old appliances with due regard to safety and the environment.
Proper disposal of your old appliance
WARNING
Before disposing of your old appliance, make it inoperable so that it cannot be a source of danger. To do this, have a qualified technician disconnect the appliance from the mains supply and remove the mains lead.
The appliance may not be disposed of in the household rubbish. Information about collection dates and public refuse disposal sites is available from your local refuse department or council.
Correct Disposal of This Product (Waste Electrical & Electronic Equipment)
(Applicable in countries with separate collection systems) This marking on the product, accessories or literature indicates that the product and its electronic accessories (e.g. charger, headset, USB cable) should not be disposed of with other household waste at the end of their working life. To prevent possible harm to the environment or human health from uncontrolled waste disposal, please separate these items from other types of waste and recycle them responsibly to promote the sustainable reuse of material resources.
Household users should contact either the retailer where they purchased this product, or their local government office, for details of where and how they can take these items for environmentally safe recycling.
Business users should contact their supplier and check the terms and conditions of the purchase contract. This product and its electronic accessories should not be mixed with other commercial wastes for disposal.
For information on Samsung's environmental commitments and product specific regulatory obligations e.g. REACH visit: www.samsung.com/uk/aboutsamsung/sustainability/environment/our-commitment/data/
Installing the hob
WARNING
Be sure the new appliance is installed and grounded only by qualified personnel. Please observe this instruction. The warranty will not cover any damage that may occur as a result of improper installation. Technical data is provided at the end of this manual.
Safety instructions for the installer
- A device must be provided in the electrical installation that allows the appliance to be disconnected from the mains at all poles with a contact opening width of at least 3 mm. Suitable isolation devices include line protecting cut - outs, fuses (screw type fuses are to be removed from the holder), earth leakage trips and contactors.
- With respect to fire protection, this appliance corresponds to EN 60335 - 2 - 6. This type of appliance may be installed with a high cupboard or wall on one side.
•The installation must guarantee shock protection. - The kitchen unit in which the appliance is fitted must satisfy the stability requirements of DIN 68930.
- For protection against moisture, all cut surfaces are to be sealed with a suitable sealant.
- On tiled work surfaces, the joints in the area where the hob sits must be completely filled with grout.
- On natural, artificial stone, or ceramic tops, the snap action springs must be bonded in place with a suitable artificial resin or mixed adhesive.
- Ensure that the seal is correctly seated against the work surface without any gaps. Additional silicon sealant must not be applied; this would make removal more difficult when servicing.
•The hob must be pressed out from below when removed.
•A board can be installed underneath the hob. - The ventilation gap between the worktop and front of the unit underneath it must not be covered.
Tools you will need


Pencil Phillips Head Screwdriver Ruler or Straightedge
Safety Glasses Saber Saw Drill
Connecting to the mains power supply
Before connecting, check that the nominal voltage of the appliance, that is, the voltage stated on the rating plate, corresponds to the available supply voltage. The rating plate is located on the lower casing of the hob.
WARNING
Shut off power to circuit before connecting wires to circuit.
- The heating element voltage is AC 230 V \~. The appliance also works perfectly on networks with AC 220 V\~ or AC 240 V\~. The hob is to be connected to the mains using a device that allows the appliance to be disconnected from the mains at all poles with a contact opening width of at least 3 mm, eg. automatic line protecting cut - out, earth leakage trips or fuse.
- The cable connections must be made in accordance with regulations and the terminal screws tightened securely.
- Once the hob is connected to the mains supply, check that all cooking zones are ready for use by briefly switching each on in turn at the maximum setting with suitable cookware.
WARNING
Pay attention (conformity) to phase and neutral allocation of house connection and appliance (connection schemes); otherwise, components can be damaged. Warranty does not cover damage resulting from improper installation.
WARNING
If the supply cord is damaged, it must be replaced by the manufacturer, its service agent or similarly qualified persons in order to avoid a hazard.
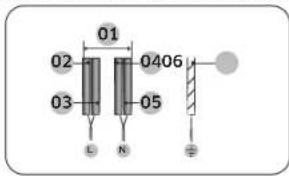
text_image
01 02 03 0406 05 L N1N\~ (32A)
| 01 | 220-240 V~ | 04 | Blue |
| 02 | Black | 05 | Gray |
| 03 | Brown | 06 | Green/Yellow |
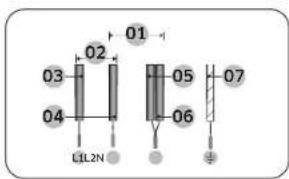
text_image
01 02 03 04 LIL2N 05 06 072N\~ (16A): Separate the 2-phase wires (L1 and L2) before connection.
| 01 | 220-240 V~ | 05 | Blue |
| 02 | 380-415 V~ | 06 | Gray |
| 03 | Black | 07 | Green/Yellow |
| 04 | Brown | ||
text_image
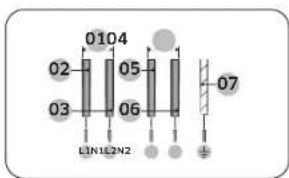
0104 02 05 03 06 L1N1L2N2 072 x 1N\~ (16A): Separate the wires before connection.
| 01 | 220-240 V- | 05 | Brown |
| 02 | Black | 06 | Gray |
| 03 | Blue | 07 | Green/Yellow |
| 04 | 220-240 V- | ||
WARNING
For correct supply connection, follow the wiring diagram attached near the terminals.
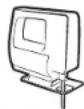
Installing into the countertop
text_image
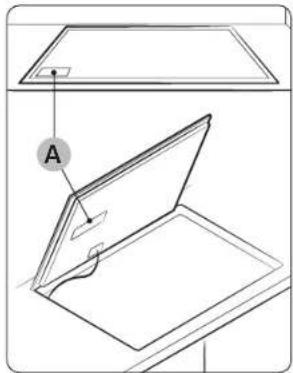
Technical diagram showing a device with labeled component 'A' and a highlighted section viewA. Serial number
NOTE
Make a note of the serial number on the appliance rating label prior to installation. This number will be required in the case of requests for service and is no longer accessible after installation, as it is on the original rating plate on the upperside or underside of the appliance.
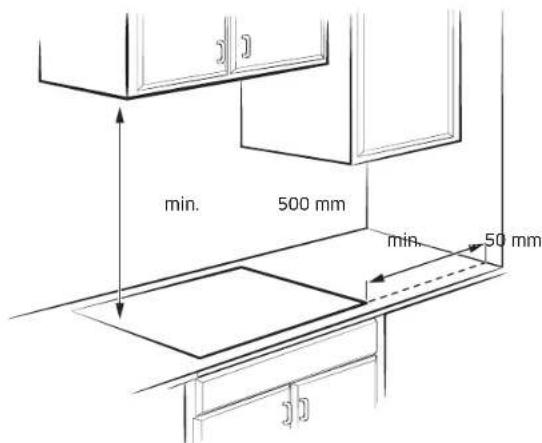
NOTE
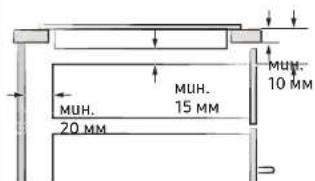
- Pay special attention to the minimum space and clearance requirements. - The bottom of the hob is equipped with a fan. If there is a drawer under the hob it should not be used to store small objects or paper, since they could damage the fan or interfere with the cooling if they are sucked into it.
Installing the hob
Flushed Fit Type (Only NZ6*****FK model can be installed)
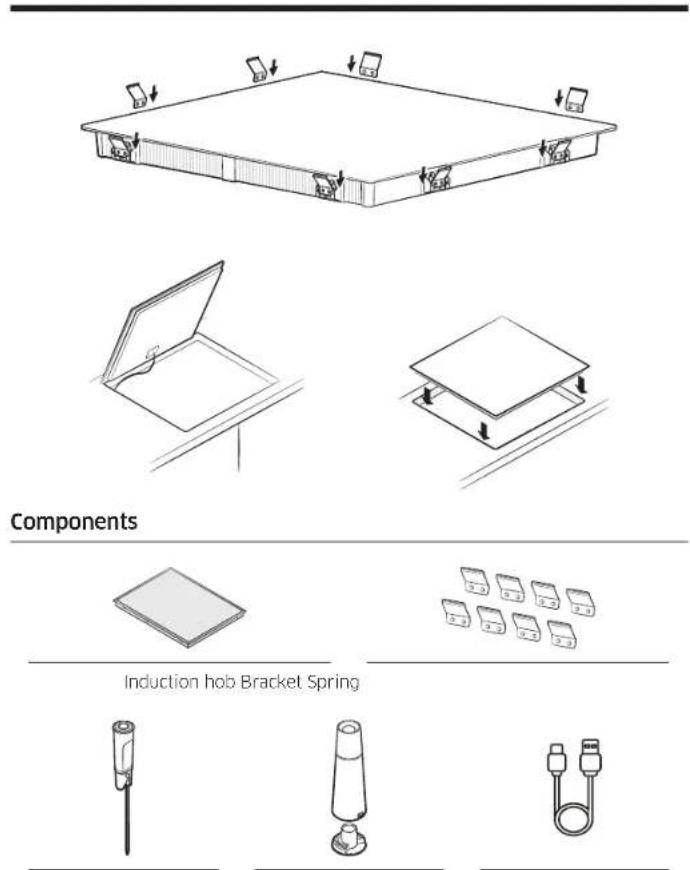
Assist Sensor Wireless charger USB Cable (C-Type)
Before you start
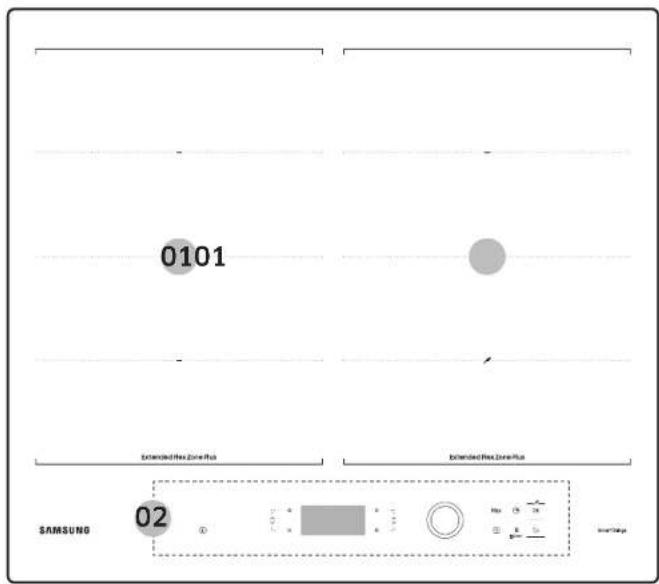
Cooking zones
text_image
0101 Extended Hex Zone Plan Extended Hex Zone Plan SAMSUNG 02 Hex 0.5 Hex 0.4 Hex 0.3 Hex 0.2 Hex 0.1 Hex 0.0 Inner/Inner| 01 | Induction cooking zone |
| 02 | Control panel |
Before you start
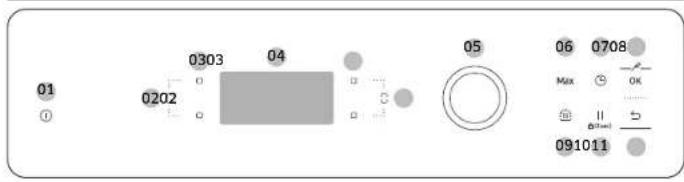
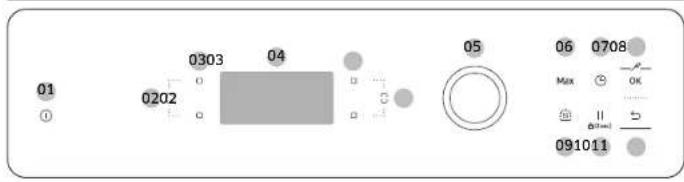
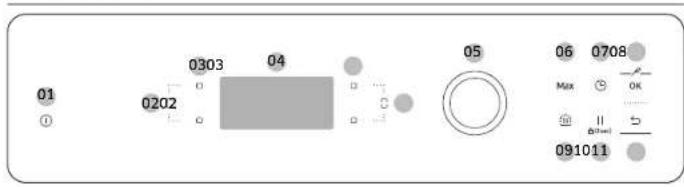
Control panel
text_image
01 0202 0303 04 05 06 0708 Max OK 091011| 01 1 On/Off To activate and deactivate the hob. | |
| 02 ☐ Flex zone To select the flex zone. | |
| 03 ☐ Cooking zone To select the cooking zone. | |
| 04 Display | |
| 05 Control knob | |
| 06 Max Max Boost To activate the function. | |
| 07 ☑ Timer To turn timer on or off and set timer. | |
| 08 ☑ Assist Cook | |
| 09 ☑ Keep warm To keep cooked food warm. | |
| 10 ☑ Pause & Lock | |
| 11 ☑ Backsliding |
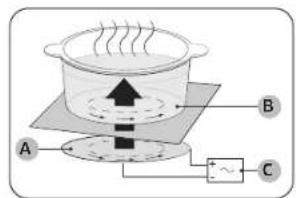
Induction heating
text_image
Diagram of a heating setup with labeled components A, B, and C, showing heat flow from a container to a sensor or measurement device.A. Induction coil
B. Induced currents
c. Electronic circuits
•The Principle of Induction Heating:
When you place your cookware on a cooking zone and you turn it on, the electronic circuits in your induction hob produce "induced currents" in the bottom of the cookware which instantly raise cookware's temperature.
- Greater speed in cooking and frying: As the pan is heated directly and not the glass, the efficiency is greater than in other systems because no heat is lost. Most of the energy absorbed is transformed into heat.
Safety shutoff
If one of the cooking zones is not switched off or the power level is not adjusted after an extended period of time, that particular cooking zone will automatically switch itself off.
The cooking zones switch themselves off at the following times.
| Power level Switch off | |
| 1-3 After 6 hours | |
| 4-6 After 5 hours | |
| 7-9 After 4 hours | |
| 10-15 After 1.5 hours |
NOTE
- If the Hob is overheated because of abnormal operation, C1 will be displayed. And the Hob will be switched off.
- If cookware is unsuitable, too small, or no cookware has been placed on the cooking zone. □ will be displayed. And after 1 minute the corresponding cooking zone will be switched off.
- Should one or more of the cooking zones switch off before the indicated time has elapsed, see the "Troubleshooting".
Other reasons why a cooking zone will switch itself off
All cooking zones will switch themselves off if liquid boils over on the control panel.
The automatic shutoff will also be activated if you place a damp cloth on the control panel. In both of these instances, the appliance will need to be switched on again using the On/Off ^① key after the liquid or the cloth has been removed.
Residual heat indicator
When an individual cooking zone or the hob is turned off, the presence of residual heat is shown with an Heat. Heat in the corresponding cooking zone display. Even after the cooking zone has been switched off, the residual heat indicator goes out only after the cooking zone has cooled.
You can use the residual heat for thawing or keeping food warm.
WARNING
• As long as the residual heat indicator is illuminated, there is a risk of burns.
- If the power supply is interrupted, the Heat. Heat symbol will go out and information about residual heat will no longer be available. However, it may still be possible to burn yourself. This can be avoided by always taking care when near the hob.
Temperature detection
If for any reason the temperatures on any of the cooking zones were to exceed the safety levels, the cooking zone will automatically reduce to a lower power level. When you have finished using the hob, the cooling fan will continue to run until the hob's electronics has cooled down. And the cooling fan switches itself off depending upon the temperature of the electronics.
Before you start
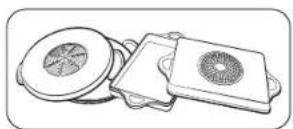
Cookware
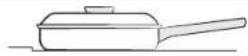
natural_image
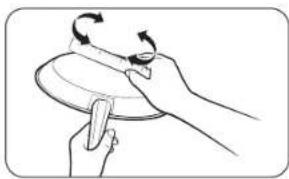
Illustration of a hand holding a plate with a tool, no text or symbols presentUse flat-bottomed cookware that completely contacts the entire cooking zone. Check for flatness by rotating a ruler across the bottom of the cookware. Be sure to follow all the recommendations for using cookware.
• Use cookware made with the correct material for induction cooking.
- Use quality cookware with heavier bottoms for better heat distribution. This gives best cooking results.
- Match the cookware size to the quantity of food being prepared.
- Do not let cookware boil dry. This may cause permanent damage in the form of breakage, fusion, or marring that can affect the ceramic hob. (This type of damage is not covered by your warranty).
- Do not use dirty cookware or cookware with heavy grease buildup. Always use cookware that is easy to clean after cooking.
CAUTION
- The cooking zones may appear cooled down after they have been turned off. However, the glass surface may be hot from residual heat transferred from the cookware. The risk of burns is still present.
- Do not touch hot cookware directly with your hands. Always use oven mitts or pot holders to protect your hands from burns.
- Do not slide cookware across the hob surface. Doing so may permanently damage the hob.
Cookware for induction cooking zones
The induction burner can only be turned on when cookware with a magnetic base is placed on one of the cooking zones. You can use the cookware identified as suitable below.
| Material Suitability | |
| Steel, enameled steel, cast iron Yes | |
| Stainless steel | Yes (If magnet sticks to the bottom of the cockware) |
| Aluminum, copper, brass, glass, ceramic, porcelain | No |

NOTE
• Cookware appropriate for induction cooking is labelled as suitable by the manufacturer.
- Certain cookware can make noises when being used on induction cooking zones.
- These noises do not indicate that the hob is malfunctioning and do not affect its operation in any way.
- Special stainless-steel cookware may not be suitable for induction cooking. Check if the base of the cookware is attracted by a magnet.
Cookware sizes for induction cooking zones
Induction cooking zones adapt automatically to the bottom size of the cookware up to a certain limit. However, the magnetic part of the bottom of the cookware must have a minimum diameter depending upon the size of the cooking zone. For best results, use cookware whose ferromagnetic diameter match that of a burner. If the cookware is not sensed by the burner, try a bigger sized burner.
NOTE
For Cookware diameter, please refer to the model's Cooking zones specifications.
Other induction cookware
Some cookware has thin magnetic material on the bottom to work with an induction heating hob. These cookware has weak magnetism and may not work well. (Weak magnetism means a magnet does not stick firmly or the area where the magnet sticks is small.)
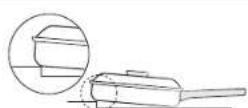
text_image
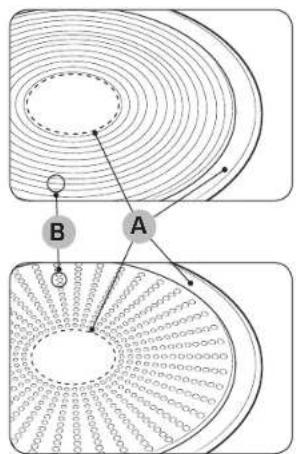
Diagram illustrating magnetic field lines around a circular structure, labeled A and B with directional arrows and circular elements.A. Area where magnet does not stick
B. Area where magnet sticks
Even though cookware are designed for an induction hob, the heating performance could be weak or sometimes the hob may not detect the cookware depending on the size and strength of the magnetic area on the bottom of the cookware.
When using large cookware with a smaller ferromagnetic element, only the ferromagnetic element heats up. Consequently, heat might not be uniformly distributed.
Before you start
Suitability test
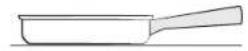
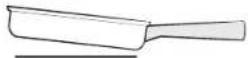
natural_image
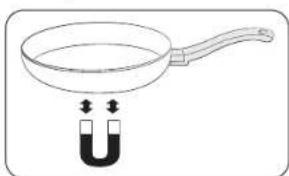
Simple line drawing of a frying pan with a U-shaped magnet above it (no text or symbols)Cookware is suitable for induction cooking if a magnet sticks to the bottom of the cookware and the cookware is labelled as suitable by the cookware manufacturer.
- You can recognise good cookware by their bases. The base is supposed to be as thick and flat as possible.
- When buying new cookware, pay special attention to the diameter of the base. Manufacturers often give only the diameter of the upper rim.
- Do not use cookware which have damaged bases with rough edges or burrs. Damaged cookware can scratch the ceramic hob permanently if you slide them across the surface.
- When cold, cookware bases are normally bowed slightly inwards (concave). They must not be bent outwards (convex).
- If you want to use a special type of cookware, for example, a pressure cooker, a simmering pan, or a wok, please follow the manufacturer's instructions.
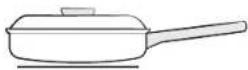
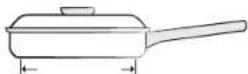
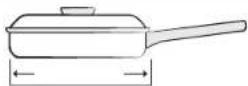
Correct positioning
| Correct Incorrect | |
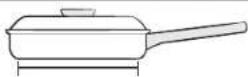 |  |
| Flat-bottomed cookware and straight sides. | Cookware with curved or warped bottoms or sides. |
 |  |
| The cookware meets or exceeds the recommended minimum size for the cooking zone. | The cookware does not meet the minimum size required for the current cooking zone. |
 |  |
| The cookware rests completely on the hob surface. | The cookware rests on the hob trim or does not rest completely on the hob surface. |
 |  |
| The cookware is properly balanced. The | heavy handle causes the cookware to tilt. |
Energy saving tips
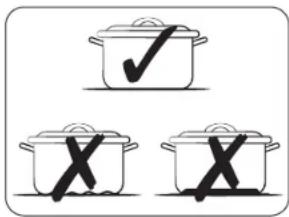
text_image
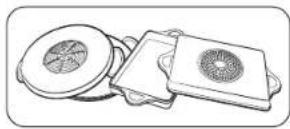
Illustration showing three cooking pots with checkmarks and X marks, likely indicating cooking or cooking process.Follow these tips to save power consumption.
•Always put cookware on a cooking zone before you turn the corresponding burner on.
- Keep the cooking zones and cookware bases clean. Otherwise, more power will be consumed.
- Firmly close the cover of cookware if available. This will reduce power consumption.
- Turn the working burner off before the end of the cooking time. Use the residual heat to keep food warm.
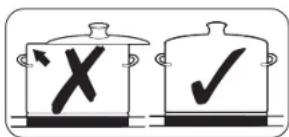
text_image
Diagram showing two cooking pots with checkmarks and an X symbol, likely indicating a cooking or inspection step.Correct positioning
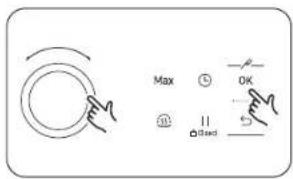
You can test cookware to see if they are suitable for use with the product.
- Press the On/Off ① key for 1-2 seconds to turn on the hob.
- Press the Pause & Lock 12 key for 3 seconds to activate the child safety lock.
- Press the Timer ⏻ key for 3 seconds to activate the cookware suitability test mode.
- Place the cookware on the one of the cooking zones, and then press and hold the Cooking zone key for 3 seconds.
| Display Description | |
| 0 Cookware is unsuitable | |
| 10 ~ 70 % Cookware is suitable, but inefficient | |
| 80 ~ 100 % Cookware is suitable | |
Using the touch buttons
To operate the touch buttons, touch the desired button with the tip of your pointed finger until the relevant displays illuminate or go out, or until the desired function is activated.
Ensure that you are touching only one button when operating the appliance. If your finger is too flat on the button, an adjacent button may be actuated as well.
Operating noises
If you can hear.
• Cracking noise: cookware is made of different materials.
- Whistling: you use more than two cooking zones and the cookware is made of different materials.
• Humming: you use high power levels.
- Clicking: electric switching occurs.
•Hissing, Buzzing: the fan operates.
The noise are normal and do not refer to any defects.
WARNING
Do not use cookware of different size and material.
Using cookware of different sizes or materials may cause noises and vibrations.
NOTE
Using low power levels (1-5) may cause clicking noises.
Initial cleaning
Wipe the ceramic glass surface with a damp cloth and ceramic hob glass cleaner.
WARNING
Do not use caustic or abrasive cleaners. The surface could be damaged.
OperationOperation
Switching the appliance on
The appliance is switched on using the On/Off ① key. Press the On/Off ① key for approximately 1-2 seconds.
NOTE
After the On/Off① key has been actuated to switch on your appliance, a power level must be selected within approximately 20 seconds. Otherwise, the appliance will switch itself off for safety reasons.
Switching the appliance off
To completely switch off the appliance, use the On/Off ① key. Press the On/Off ① key for approximately 1-2 seconds.
NOTE
After switching off a single cooking zone or the entire cooking surface, the presence of residual heat will be indicated in the digital displays of the corresponding cooking zones in the form of an Heat , Heat two steps for "hot". The temperature is lowered, Heat , Heat will be disappeared.
Selecting cooking zone and power level
- For selecting the cooking zone, press the corresponding Cooking zone □key.
- For setting and adjusting the power level, use the Control bar or Control key or Control knob.
| Control Knob | Max |
NOTE
•The default level is set to 15 when selecting the cooking zone.
- If more than one key is pressed for longer than 8 seconds, do will show in the cooking zone display.
Suggested settings for cooking specific foods
The numbers in the table below are guidelines. The power level required for various cooking methods depend on a number of variables, including the quality of the cookware being used and the type and amount of food being cooked.
| Power level Cooking method Examples for Use | ||
| 14-15 | Warming / Sautéing / Frying | Warming large amounts of liquid, boiling noodles, searing meat, browning goulash, braising meat |
| 8-11 Intensive frying | Steak, sirloin, hash browns, sausages, pancakes / griddle cakes | |
| 7-10 Frying | Schnitzel / chops, liver, fish, rissoles, fried eggs | |
| 5-7 Boiling | Cooking up to 1.5 l liquid, potatoes, vegetables | |
| 2-4 | Steaming / Stewing / Boiling | Steaming and stewing of small amounts of vegetables, boiling rice and milk dishes |
| 1-2 Melting | Melting butter, dissolving gelatine, melting chocolate | |

NOTE
You will need to adjust the power level according to specific cookware and foods.
Max Boost
The Max Boost function makes additional power available to the each cooking zones. (example: bring a large volume of water to the boil)
After Max Boost times, the cooking zones automatically sets back to the highest heat setting.

NOTE
- In certain circumstances, the Max Boost function may be deactivated automatically to protect the internal electronic components of the hob. For example, it is impossible to output max power on Flex zone rear and Flex zone front at the same time.
• Refer to your model's Cooking zones specification for Max Boost time.
Power management
The cooking zones have a maximum power available to them. If this power range is exceeded by switching on the Max Boost function, Power Management automatically reduces the power level of cooking zone. The display for this cooking zone alternates for some seconds between the set power level and the maximum possible power level. After then, the display changes from the set power level to maximum possible power level.
Operation
Using the Flex zone (Only for Flex zone applied models)
The Flex function can operate complete left side cooking zone for using large size cookware. (example: oval cookware, fish kettle)
-
Press the Flex zone ☐ key.
-
For setting and adjusting the power level, use the Power level key.
NOTE
- Press the Flex zone ☐ key during operating, Flex zone function will be off.
- If you press the Flex zone ☐ key while each burner operation different level, burner set at a high level.
Flex Plus Features
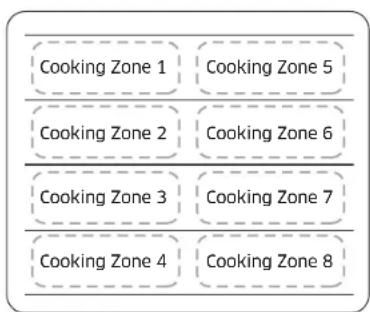
flowchart
graph TD
    A["Cooking Zone 1"] --> B["Cooking Zone 5"]
    C["Cooking Zone 2"] --> D["Cooking Zone 6"]
    E["Cooking Zone 3"] --> F["Cooking Zone 7"]
    G["Cooking Zone 4"] --> H["Cooking Zone 8"]
Flex Zone is a multi-pot, multi-shape, multi-size Customized to cook fans at the same time. It is located on the left/right side of the induction as a cooking area. (Refer to the picture on the left) Each flex zone has four cooking zones. Wherever you put the cooking vessel in the cooking zone, it's convenient because you can use the crater separately.
Flex Plus zones can be used by combining different cooking zones.
See the table below to see how to combine the cooking zones using the crater selection button.
| Cooking zone | Crater 1 | Crater 2 | Crater 3 | Crater | 4 | ||
| 1 | |||||||
| 2 | |||||||
| 3 | |||||||
| 4 | |||||||
NOTE
- When using only one cooking zone, the diameter of the bottom of the cookware must be less than 14 cm.
• The hob may take 5-10 seconds to recognise the position of cookware. - Noises may occur while the hob recognise the cookware.
- Do not remove cookware during cooking. For safety purposes, the hob automatically stops if cookware has been removed for more than 5 seconds.
Using the Flex zone Plus (Only for Flex zone plus applied models)
- Press the Flex zone ☐ key.
- For setting and adjusting the power level, use the Powerlevel key.
NOTE
- If you press the Flex zone ☐ key during operating, Flex zone function will be off.
- If you press the Flex zone □ key while each cooking zone is operating at different levels, it will be automatically adjusted to higher level.
- When moving or adding cookware to a new Flex zone, cancel the current operation, and then press the corresponding Cooking zone □ key to activate the cooking zone.
Keep Warm
- Use this function to keep cooked food warm. Press the corresponding Cooking zone □key.
- Press the Keep warm 🔒 key.
- The cooking zone display will be changed.
- Press the Keep warm 🔒 key again to turn off the cooking zone.
Operation
Timer
Using as the safety shutoff timer
If you set the specific time on the burner, it will automatically switch itself off after the time has passed.
This function is useful when using more than one burner at the same time.
Setting the safety shutoff timer
- Turn on the burner that you are going to apply the safety shutoff timer.
- Press the Timer ( Ⓜ) key on the operating burner.
- Use the knob to set the time.
- You can set the time at 30-second intervals from 30 seconds to 10 minutes, at 1-minute intervals from 10 minutes to 60 minutes, and at 5-minute intervals from 60 minutes to 120 minutes.
- Press and hold the Timer () key to set the time quickly.
NOTE
- You can set the timer up to a maximum of 2 hours.
- Press and hold (for 1 second) the Max Boost (Max) button to immediately set the time to the maximum.
- Use a knob to set the timer in detail.
Disabling the safety shutoff timer
- Select the burner to disable the safety shutoff timer.
- Press and hold the Timer ( Ⓤ) key on the operating burner. The timer is disabled.
Pause/Resume
The Pause/Resume function simultaneously switches all cooking zones that are switched on to the low power setting and then back to the power level that was previously set. This function can be used to briefly interrupt and then continue the cooking process e.g., to take a telephone call.
When the Pause/Resume function is activated, all keys except for the Pause & Lock II and the On/Off keys are disabled.
To resume cooking, press the Pause & Lock ^11 key again.
Quick stop
This option reduces the step and time it takes to stop cooking.
To switch off a cooking zone, press the Cooking zone □key for 2 seconds.
NOTE
The Flex zone □ key does not support quick stop function.
Child safety lock
You can use the child safety lock to safeguard against unintentionally turning on a cooking zone and activating the cooking surface. Also the control panel, with the exception of the On/Off ① key (Only turn off control), can be locked in order to prevent the settings from being changed unintentionally, for example, by wiping over the panel with a cloth.
Switching the child safety lock On/Off
- Press the Pause & Lock _d(n) key for approximately 3 seconds. An acoustic signal will sound as confirmation.
- Press any key. ⚙ will appear in the displays, indicating the child safety lock has been activated.
- For switching the child safety lock off, press the Pause & Lock ^II required key again for 3 seconds. An acoustic signal will sound as confirmation.
NOTE
- Regardless of power on/off, child lock is activated.
- You can set the child safety lock during cooking. To turn off the burner with the child safety lock on, press the On/Off ① key or turn off the child safety lock first and then press the corresponding Cooking zone □ key.
Language setting
- Press the On/Off Ⓐ key for a long time (more than 1 second) to turn on the product.
- Press and hold the OK - 12 key + Pause & Lock ^II key for 3 seconds.
- Select the language using Knob and press the OK -ok key.
Maximum power limit
This function allows you to adjust the maximum power of the unit.
- Keep the power off.
- Press the Pause & Lock 12 key for approximately 3 seconds to turn on the child safety lock.
- Press the left front Cooking zone □key and right front Cooking zone □key at the same time for approximately 3 seconds.
- Press the Timer ⏻ key for approximately 3 seconds. The displays will show Po. and current maximum power.
- You can adjust the power limit using the OK -# key. (4000 W, 7400 W)
- Press the On/Off ① key to set the setting.
NOTE
In low-power (4000 W) mode, the power level will be adjusted automatically.
Operation
Sound on/off
- Press the On/Off ① key for approximately 1-2 seconds.
- Press the Timer ⑨ key for 3 seconds within 10 seconds after the power has turned on.
- Sound will turn off and Sound off will be displayed in the display.
- To change the sound setting, repeat steps 1 and 2. Sound will turn on and Sound on will be displayed in the display.
NOTE
It is not possible to change the sound settings after 10 seconds from turning the power on.
Connecting the Assist Sensor
When cooking a pan/pot using a Assist Sensor, the food temperature can be measured for customized cooking and automatic cooking.
- Press the On/Off ① key for a long time (more than 1 second) to make the product Turn it on, enter and set the Assist Cook menu -/- Please press the key.
- The Assist Sensor Connection screen is displayed on the screen.
- Press the key on the Assist Sensor.
- When the Assist Sensor connection is completed, the completion screen is displayed.
NOTE

Please refer to the Assist Sensor manual for how to operate the Assist Sensor. Scan this with your smartphone.
Using Assist Cook Functions
text_image
Max OK 10 11 30±0.5- Enter the Assist Cook Menu and press the Settings ( ^4 ) button to use the following functions by utilizing the knob.
- Turn the knob to adjust the output power. The adjusted output power is displayed separately depending on the cooking type.
| Assist Cook Menu Assist Cook Menu Details | |
| Sous-vide | Use the assist sensor to keep the food at the desired temperature (35 °C to 100°C).•For this function, the timer can be set up to 9 hours and 59 minutes. Use it for various cooking styles, including sous vide. |
| Thermometer | Use the assist sensor to check the temperature of the current food. |
| Connect to SmartThings To see great recipes | After receiving a recipe from the kitchen service, you can save up to five recipes and use them immediately.•If you do not connect to SmartThings, your recent recipe will not be activated. |
CAUTION
Start the Assist Cook when the hob is cold.
NOTE
- Sous-vide and Thermometer are available for all burners. Connect to SmartThings to see great recipes can only be used in the right front burner.
- If the Assist Sensor is not used for more than 5 minutes after removing it from the charger, it enters Sleep Mode. Press the Assist Sensor button once to reuse.
Connect the Easy Setup mobile app
Search "SmartThings" in the Google Play Store, Galaxy Store, or Apple App Store. Download the SmartThings app, provided by Samsung Electronics, on your smart device. You need a Samsung account to use the app.
text_image
Hand-drawn sketch of a hand cursor pointing at a grid with symbols for '1', '2', and '3' in the top-right corner.
text_image
AP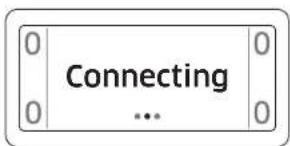
text_image
Connecting ...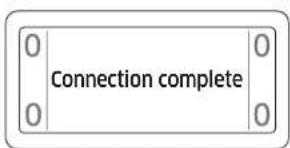
text_image
0 0 Connection complete 0 0-
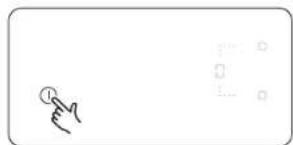
Press and hold (for at least 1 second) the Power (①) button to turn on the product and start up the mobile app (SmartThings).
-
Press and hold the Pause & Lock ( 1Osteo ) key for about 5 seconds. After that, prepare to connect to the mobile app. Proceed with the connection by following the guide displayed on the mobile app.
- Continue holding down the Pause & Lock ( ^II ) key even after the "Lock Settings screen" appears.
-
Once the device is connected to the mobile app, "Connecting" will appear on the screen. (This may take up to a maximum of 5 minutes depending on your usage environment.)
-
Once the connection is complete, "Successfully connected" will appear on the screen. You can now monitor your device's status using the mobile app.
Wi-Fi On/Off Settings

text_image
Handwritten signature with a circular icon and a small letter 'E' inside, next to a grid of symbols.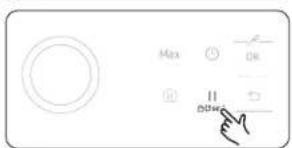
text_image
Max Off Off Off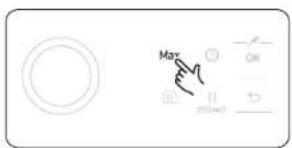
text_image
May OK D n=0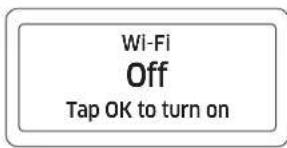
text_image
Wi-Fi Off Tap OK to turn on-
Press and hold (for at least 1 second) the Power (①) button to turn on the product.
-
Within 10 seconds after the product turns on, press and hold the Pause & Lock ( (B_sec) ) key for about 3 seconds.
-
Press and hold the Max Boost (Max) key on the right for about 3 seconds. The product's Wi-Fi is enabled.
-
Press the OK ( -12 ) key to set the Wi-Fi On/Off.
NOTE
While "(### Heat) Residual heat" is displayed on the screen, you are unable to set the Wi-Fi On/Off for safety reasons.
Operation
Hood control
This product features a Bluetooth device that you can use to connect the hob to Samsung hood control models. Through the Bluetooth connection, you can use the hood control function on the SmartThings app. To find out more about Samsung hood control-enabled models, visit www.samsung.com.
To connect to a hood control model
- Download and run the SmartThings app on your smartphone. Then, complete the Smart Connect procedure to connect to the hob.
- Follow the Bluetooth instructions of the hood control model and activate the Bluetooth connection.
- Press and hold the Timer ⏻ and Pause & Lock ^II keys simultaneously to make the Bluetooth connection. When the Bluetooth connection is successfully established, Bluetooth appears on the display.
- Follow the instructions in the user manual of the hood control model and the App guide to use the hood control.
NOTE
- If the Smart Connect connection is not successful, you cannot use the SmartThings app to monitor and control the hood.
- Without a Smart Connect connection to the hob, you can use a Bluetooth connection to pair the hob with the hood and sync them. To do this, follow steps 2 and 3 above.
Maintaining your appliance
Hob
WARNING
Cleaning agents must not come into contact with a heated ceramic glass surface. All cleaning agents must be removed with adequate amounts of clean water after cleaning because they can have a caustic effect when the surface becomes hot. Do not use any aggressive cleaners such as grill or oven sprays, scouring pads or abrasive pan cleaners.
NOTE
Clean the ceramic glass surface after each use when it is still warm to the touch. This will prevent spillage from becoming burnt onto the surface. Remove scales, watermarks, fat drippings and metallic discolouration with the use of a commercially available ceramic glass or stainless steel cleaner.
Light soiling
- Wipe the ceramic glass surface with a damp cloth.
- Rub dry with a clean cloth. Remnants of cleaning agent must not be left on the surface.
- Thoroughly clean the entire ceramic glass cooking surface once a week with a commercially available ceramic glass or stainless steel cleaner.
- Wipe the ceramic glass surface using adequate amounts of clean water and rub dry with a clean lint - free cloth.
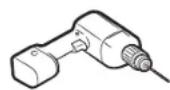
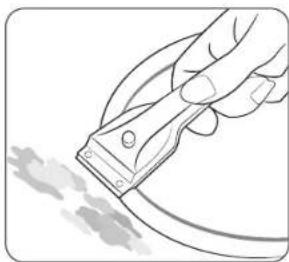
Stubborn soiling
natural_image
Illustration of a hand using a power tool to cut a cable or cable (no text or symbols visible)- To remove food that has boiled over and stubborn splashes, use a glass scraper.
- Place the glass scraper at an angle to the ceramic glass surface.
- Remove soiling by scraping with the blade.
NOTE
Glass scrapers and ceramic glass cleaners are available from specialty retailers.
Problem dirt
natural_image
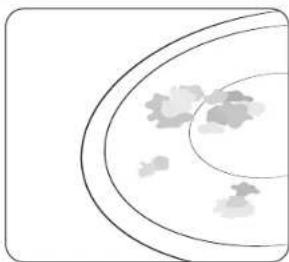
Abstract diagram with curved lines and scattered gray shapes, no text or symbols present- Remove burnt-on sugar, melted plastic, aluminium foil or other materials with a glass scraper immediately and while still hot.
WARNING
There is a risk of burning yourself when the glass scraper is used on a hot cooking zone:
2. Clean the hob as normal when it has cooled down. If the cooking zone on which something has melted has been allowed to cool, warm it up again for cleaning.
NOTE
Scratches or dark blemishes on the ceramic glass surface, caused, for example, by a pan with sharp edges, cannot be removed. However, they do not impair the function of the hob.
Hob frame (option)
WARNING
Do not use vinegar, lemon juice or scale remover on the hob frame; otherwise dull blemishes will appear.
- Wipe the frame with a damp cloth.
- Moisten dried debris with a wet cloth. Wipe and rub dry.
To avoid damaging your appliance
- Do not use the hob as a work surface or for storage.
- Do not operate a cooking zone if there is no pan on the hob or if the pan is empty.
- Ceramic glass is very tough and resistant to temperature shock, but it is not unbreakable. It can be damaged by a particularly sharp or hard object dropping onto the hob.
- Do not place pans on the hob frame. Scratching and damage to the finish may occur.
- Avoid spilling acidic liquids, for example, vinegar, lemon juice and descaling agents, onto the hob frame, since such liquids can cause dull spots.
- If sugar or a preparation containing sugar comes into contact with a hot cooking zone and melts, it should be cleaned off immediately with a kitchen scraper while it is still hot. If allowed to cool, it may damage the surface when removed.
- Keep all items and materials that could melt, for example, plastics, aluminium foil and oven foils, away from the ceramic glass surface. If something of this nature melts onto the hob, it must be removed immediately with a scraper.
Troubleshooting and service
Troubleshooting
A fault may result from a minor information that you can correct yourself with the help of the following instructions. Do not attempt any further repairs if the following instructions do not help in each specific case.
WARNING
Repairs to the appliance are to be performed only by a qualified service technician. Improperly effected repairs may result in considerable risk to the user. If your appliance needs repair, please contact your customer service centre.
| Symptom Confirmation Method of action | ||
| There is no display on the screen. | •Does the power breaker in the house break? | •Check the breaker.•Call the service engineer. |
| It doesn't work even if I press the button. | •Is there any water or wet cloth in the operation unit? | •Keep the manipulator clean. |
| •Did you turn on the power by pressing the power button? | •Press the power button to turn on the power. | |
| •Is the lock function set? | •Turn off the lock function. | |
| • Is the power off? | • If you turn on the power and do not press any button for a certain period of time, the power is automatically turned off. | |
| Symptom Confirmation Method of action | ||
| The operation unit suddenly doesn't work. | • Is the power off? | • Power outages or failsafes may be activated and power may be turned off. You can turn it on again. |
| •Is there any water or wet cloth in the operation unit? | •Keep the manipulator clean. | |
| I turned off the power after using it, but the Heat mark does not appear. | •Did you use the crater only for a short time? | •I don't have a lot of residual heat. It does not show Heat mark. |
| •Is the surface of ceramic glass hot? | •Request service. | |
| The cooling fan keeps running even though the power is off. | •Haven't you turned it off for a long time? | •Even if the power is turned off to cool the inside of the product, the cooling fan for a certain period of time it works. When cooling is complete, the cooling fan action is automatically terminated. |
| Symptom Causes and countermeasures | |
| A2 | •It occurs when the DC Motor cannot operate due to defects of PCB, wiring, or some disturbance on the motor blade. |
| C1 | •If there is a problem with the product due to heating in an empty pot or abnormal operation for a long time, remove the cooking container and cool the product sufficiently before using it. |
| C0, C2 | •If you get the same message even if you take action, please ask the service center.•It is displayed if there is something wrong with the temperature sensor. Please refer it to the service center. |
| d0 | •Check if there are any foreign substances on the operation part, wipe the operation part clean. Try it again.•If you keep pressing the button for more than 8 seconds, a message appears for safety. Try turning it off and then on again.•If the same message appears even if you take action, please ask the service center. |
| F0, F2 | •This message is caused by poor communication of Chips inside the product. Please refer it to the service center. |
| UP | •It is indicated when there is an abnormality in the usage voltage. Please check the outlet. |
| Symptom Causes and countermeasures | |
| •If the cooking container is not suitable for induction or operates without the cooking container.•Use cooking containers suitable for induction.•If the same message appears even if you take action, please ask the service center. | |
| •It is displayed when the lock function is set.•If the same message appears even if you take action, please ask the service center. | |
| Heat, Heat | •It is displayed when there is residual heat on the glass top plate after the power is turned off.• If the product doesn't disappear after it's completely cold, ask the service center. |
Troubleshooting and service
What should I do if the cooking zone will not switch on or off?
This could be due to one of the following possibilities:
• The control panel is partially covered by a damp cloth or liquid.
•The child safety lock is on. and display
What should I do if the do display is illuminated?
Check for the following:
- The control panel is partially covered by a damp cloth or liquid. To reset, press the On/Off ⏻ key.
• If liquid has overflowed on control panel, please wipe the liquid.
What should I do if the €1 display is illuminated?
Check for the following:
•The hob is overheated because of abnormal operation.
• After hob is cooled down, press the On/Off ① key for resetting.
What should I do if the □ display is illuminated?
Check for the following:
- Cookware is unsuitable, too small, or no cookware has been placed on the cooking zone.
• If you use suitable cookware, displayed message will automatically disappear.
What should I do if the cooling fan runs after the hob is turned off?
Check for the following:
- When you have finished using the hob, the cooling fan runs by itself for cooling down.
- After the hob's electronics has cooled down or elapsed max time (10 minutes) the cooling fan will be turned off.
- If you request a service call because of an information made in operating the appliance, the visit from the customer service technician may incur a charge even during the warranty period.
Service
Before calling for assistance or service, please check the section "Troubleshooting".
If you still need help, follow the instructions below.
Is it a technical fault?
If so, please contact your customer service centre.
Always prepare in advance for the discussion. This will ease the process of diagnosing the problem and also make it easier to decide if a customer service visit is necessary.
Please take note of the following information.
•What form does the problem take?
•Under what circumstances does the problem occur?
When calling, please know the model and serial number of your appliance. This information is provided on the rating plate as follows:
- Model description
•S/N code (15 digits)
We recommend that you record the information here for easy reference.
•Model:
- Serial number:
When do you incur costs even during the warranty period?
- If you could have remedied the problem yourself by applying one of the solutions provided in the section "Troubleshooting".
- If the customer service technician has to make several service calls because he was not provided with all of the relevant information before his visit and as a result, for example, has to make additional trips for parts. Preparing for your phone call as described above will save you the cost of these trips.
Memo
QUESTIONS OR COMMENTS?
| COUNTRY CALL OR VISIT US ONLINE AT | ||
| AUSTRIA 0800 72 67 864 (0800-SAMSUNG) www.samsung.com/at/support | ||
| BELGIUM 02 201 24 18 | www.samsung.com/be/support(Dutch)www.samsung.com/be_fr/support(French) | |
| DENMARK 707 019 70 www.samsung.com/dk/support | ||
| FINLAND 030-6227 515 www.samsung.com/fi/support | ||
| FRANCE 01 48 63 00 00 www.samsung.com/fr/support | ||
| GERMANY 061 96 77 555 77 www.samsung.com/dc/support | ||
| ITALIA 800-5 AAMSUNG (800.7267864) www.samsung.com/it/support | ||
| CYPRUS | 8009 4000 only from landline, toll free | www.samsung.com/gr/support |
| GREECE | 80111 SAMSUNG (80111 726 7864)only from land line(+30) 210 6897691 from mobile andland line | www.samsung.com/gr/support |
| LUXEMBURG 261 03 710 www.samsung.com/be_fr/support | ||
| NETHERLANDS | 088 90 90 100 | www.samsung.com/nl/support |
| NORWAY | 21629099 | www.samsung.com/no/support |
| PORTUGAL | 210 608 098Chamada para a rede fixa nacionalDias úteis das 9h às 20h | www.samsung.com/pt/support |
| SPAIN | 91 175 00 15 | www.samsung.com/es/support |
| SWEDEN 077-400 300 www.samsung.com/se/support | ||
| SWITZERLAND | 0800 726 786 | www.samsung.com/ch/support(German)www.samsung.com/ch_fr/support(French) |
| UK | 0333 000 0333 | www.samsung.com/uk/support |
| IRELAND (EIRE) | 0818 717100 www.samsung.com/ie/support | |
| COUNTRY CALL OR VISIT US ONLINE AT | ||
| ALBANIA 045 | 620 202 www.samsung.com/al/support | |
| BOSNIA | 055 233 999 www.samsung.com/ba/support | |
| NORTH MACEDONIA | 023 207 777 www.samsung.com/mk/support | |
| BULGARIA | 0800 11131 - Безплатен за всички оператори *3000 - Цена на один градски разговор или според тарифата на мобильниат оператор 09:00 до 18:00 - Понеделник до Петък | www.samsung.com/bg/support |
| CROATIA | 072 726 786 www.samsung.com/nr/support | |
| CZECH | 800 - SAMSUNG (800-726786) | www.samsung.com/cz/support |
| HUNGARY | 0680SAMSUNG (0680-726-7864) | www.samsung.com/hu/support |
| MONTENEGRO | 020 405 888 | www.samsung.com/support |
| POLAND | 801-172-678" lub +48 22 607-93-33" *(opfata wedlug taryfy operatora) | http://www.samsung.com/pl/support/ |
| ROMANIA | 0800872678 - Apel gratuit *8000 - Apel tarifat in rețea Program Call Center Luni - Vinceri: 9 AM - 6 PM | www.samsung.com/ro/support |
| SERBIA | 011 321 6899 www.samsung.com/rs/support | |
| SLOVAKIA | 0800 - SAMSUNG (0800-726 786) | www.samsung.com/sk/support |
| LITHUANIA 8-8 | 800-77777 www.samsung.com/lt/support | |
| LATVIA | 8000-7267 | www.samsung.com/lv/support |
| ESTONIA | 800-7267 | www.samsung.com/ee/support |
| SLOVENIA | 080 697 267 (brezplačna številka) | www.samsung.com/si/support |
| KOSOVO | 038 40 30 90 | www.samsung.com/support |
text_image
Diagram showing a device with labeled component 'A' and an open panel, likely illustrating a technical or engineering concept.REMARQUE
text_image
0101 Extended Zone Plan Extended Zone Plan SAMSUNG 02 Hue G G G G
text_image
Diagram of a cooking or heating setup with labeled components A, B, and C, showing heat transfer through a pot.natural_image
Illustration of hands performing a circular motion exercise with arrows indicating rotation (no text or symbols)text_image
Diagram illustrating magnetic field lines around a circular structure with labeled points A and Bnatural_image
Simple line drawing of a frying pan with a U-shaped magnet above it (no text or symbols)text_image
Illustration showing three cooking pots with checkmarks and X marks, likely indicating cooking or cooking process.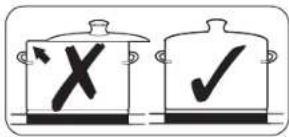
text_image
Illustration showing two cooking pots with checkmarks and an X symbol, likely indicating a cooking or inspection process.Scan this with your smartphone.
text_image
Max OK ±1/2text_image
Hand-drawn sketch of a finger pointing at a circular symbol, alongside a grid of small symbols on the right.text_image
May OK Othernatural_image
Illustration of a hand using a power tool to cut a cable or cable (no text or symbols visible)natural_image
Simple line drawing of a curved surface with scattered small shapes, no text or symbols present.text_image
Diagram showing a device with labeled component 'A' and directional arrows, likely illustrating a mechanical or electrical assembly.A. Seriennummer
HINWEIS
text_image
mind. 500 mm mind. 50 mm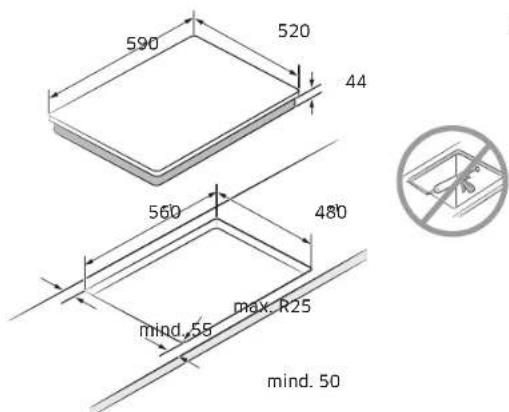
text_image
590 520 44 560 480 mind. 55 max. R25 mind. 50text_image
0101 Extended Zone Zone Plan Extended Zone Zone Plan SAMSUNG 02 Hue G G G G01 Induktionskochzone
02 Bedienfeld
text_image
Diagram of a cooking process showing a pot with heat source, labeled points A, B, and C, and a pressure gauge.natural_image
Illustration of hands performing a circular motion exercise with arrows indicating rotation (no text or symbols)text_image
Diagram illustrating magnetic field lines around a circular structure, labeled A and B with directional arrows and circular elements.natural_image
Simple line drawing of a frying pan with a U-shaped magnet above it (no text or symbols)text_image
Illustration showing three cooking pots with checkmarks and X marks, indicating cooking or storage issues.text_image
Max OK 11 (5mm)text_image
Handwritten signature with a circular mark and a small letter 'E' inside, next to a grid of symbols.text_image
Max OK D (0+1)natural_image
Illustration of a hand using a power tool to cut a cable or cable (no text or symbols visible)natural_image
Simple line drawing of a curved surface with scattered small shapes, no text or symbols present.text_image
Diagram showing a device with labeled component 'A' and directional arrows indicating movement or orientation.A. Numero di serie
NOTA
text_image
0101 Extended Zone Zone Plan Extended Zone Zone Plan SAMSUNG 02 Hue G G G Gtext_image
Diagram of a cooking or heating setup with labeled components A, B, and C showing heat transfer from a pot to a platform.natural_image
Illustration of a hand holding a plate with a knife, showing a circular motion arrow (no text or symbols)text_image
Diagram illustrating magnetic field lines around a circular object, labeled A and B with directional arrows and circular elements.natural_image
Simple line drawing of a frying pan with a U-shaped magnet above it (no text or symbols)text_image
Illustration showing three cooking pots with checkmarks and X marks indicating cooking difficultytext_image
Handwritten signature with a circular mark and partial text 'T' visible on the right side
text_image
AP
text_image
0 0 Connecteindp ... 0
text_image
0 Connessione completata 0 0text_image
Hand-drawn sketch of a hand holding a coin with a number 1, alongside a grid of empty square boxes.
text_image
Max OK Off Off
text_image
May OK ← 01 01vec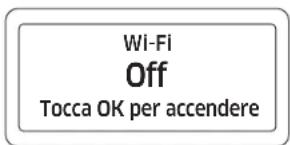
text_image
Wi-Fi Off Tocca OK per accenderenatural_image
Illustration of a hand using a power tool to cut a cable or cable with a mesh texture (no text or symbols)natural_image
Simple line drawing of a bowl with liquid and bubbles inside (no text or symbols)text_image
Technical diagram showing a device with labeled component 'A' and a small inset panel viewA. Serienummer
OPMERKING
text_image
0101 Extended Zone Plan Extended Zone Plan SAMSUNG 02 Hue G G G G01 Inductiekookzone
02 Bedieningspaneel
Voordat u begint
Bedieningspaneel
text_image
01 0202 0303 04 05 06 0708 Max OK 091011text_image
Diagram of a cooking or heating setup with labeled components A, B, and C, showing heat transfer through a pot.A. Inductiespoel
natural_image
Illustration of hands performing a circular motion exercise with arrows indicating rotation (no text or symbols)text_image
Diagram illustrating magnetic field lines around a circular structure, labeled A and B with directional arrows and circular elements.natural_image
Simple line drawing of a frying pan with a U-shaped magnet above it (no text or symbols)text_image
Illustration showing three cooking pots with checkmarks and X marks indicating cooking status or inspectiontext_image
Max OK Δ(3mm)natural_image
Simple line drawing of a stick figure with a small number ① and a dashed-line square on the right (no text or symbols)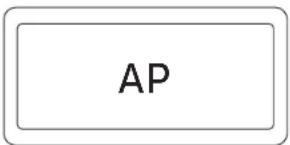
text_image
AP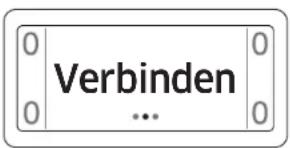
text_image
0 | Verbinden 0 ... 0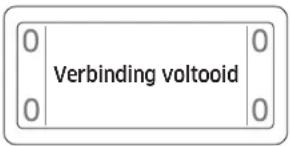
text_image
0 | 0 Verbinding voltooid 0 | 0text_image
Hand-drawn sketch of a hand pointing at a small circle with a number 1, alongside a grid of square markers.
text_image
Max Off Off
text_image
May OK Down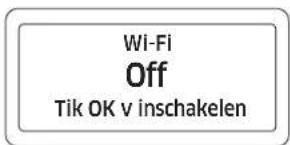
text_image
Wi-Fi Off Tik OK v inschakelennatural_image
Illustration of a hand using a power tool to clean or store items (no text or symbols visible)natural_image
Simple diagram showing a curved boundary with scattered gray shapes inside, no text or symbols present.text_image
0101 Extended Zone Plan Extended Zone Plan SAMSUNG 02 Hue G G G G01 Induktiokeittoalue
02 Ohjauspaneeli
Ennen aloittamista
Ohjauspaneeli
text_image
01 ① 0202 0303 04 05 06 0708 Max OK 091011text_image
Diagram of a heating setup with labeled components A, B, and C, showing heat flow from a pot to a surface.A. Induktiokela
B. Indusoidut virrat
natural_image
Illustration of two hands performing a circular motion exercise with arrows indicating rotation (no text or symbols)text_image
Diagram illustrating magnetic field lines around a circular structure with labeled points A and BA. Alue, johon magneetti ei tartu
B. Alue, johon magncetti tartuu
natural_image
Simple line drawing of a frying pan with a U-shaped magnet above it (no text or symbols)text_image
Illustration showing three cooking pots with checkmarks and X marks, indicating cooking or inspection status.text_image
Diagram showing two cooking pots with checkmarks and an X symbol, likely indicating a cooking or inspection process.text_image
Hand-drawn sketch of a hand holding a coin with a number 1, alongside a grid of empty square boxes.
text_image
Max OK Battery
text_image
May OK 01 01w0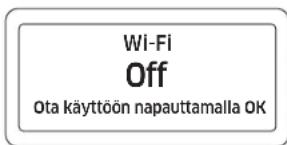
natural_image
Illustration of a hand using a power tool to clean or store items (no text or symbols visible)natural_image
Simple diagram showing a curved boundary with scattered gray shapes inside, no text or symbols present.text_image
Diagram showing a device with labeled component 'A' and an arrow indicating direction or flow
Serienummer
MERK
text_image
0101 Extended Zone Plan Extended Zone Plan SAMSUNG 02 Hue G G G Gtext_image
Diagram of a cooking or heating setup with labeled components A, B, and C showing heat transfer from a pot to a surface.natural_image
Illustration of hands performing a circular motion exercise with arrows indicating rotation (no text or symbols)text_image
Diagram illustrating magnetic field lines around a circular structure, labeled A and B with directional arrows and circular elements.natural_image
Simple line drawing of a frying pan with a U-shaped magnet above it (no text or symbols)text_image
Illustration showing three cooking pots with checkmarks and X marks, indicating cooking or inspection status.text_image
Diagram showing two cooking pots with checkmarks and an X symbol, likely indicating a cooking or inspection process.Riktig plassering
Du kan teste kokekar for å se om de er egnet for bruk med produktet.
Stille inn timer for sikkerhetsavstengning
text_image
Handwritten signature with a small circular mark and partial letter 'E' inside, next to a grid of letters.
text_image
AP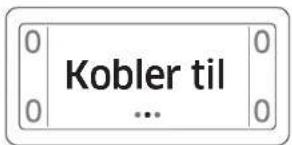
text_image
Hand-drawn sketch of a hand holding a coin with a number 1, alongside a grid of empty square boxes.
text_image
Max OK Off Off
text_image
May OK Delete Other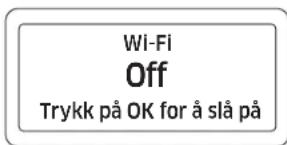
natural_image
Illustration of a hand using a power tool to clean or brush the surface (no text or symbols)natural_image
Simple diagram showing a curved boundary with scattered gray shapes inside, no text or symbols present.- Fjern fastbrent sukker, smeltet plastikk, aluminiumsfolie eller andre materialer med en glasskrape straks, mens det fortsatt er varmt.
ADVARSEL
text_image
0101 Extended Zone Plan Extended Zone Plan SAMSUNG 02 Hue G G G G01 Induktionskogezone
02 Kontrolpanel
Før du går i gang
Kontrolpanel

text_image
01 ① 0202 0303 04 05 06 0708 Max OK 091011text_image
Diagram of a heating setup with labeled components A, B, and C, showing heat flow from a pot to a surface.A. Induktionsspole
B. Inducerede strømme
| Strømindstilling Sluk | |
| 1-3 After 6 timer | |
| 4-6 After 5 timer | |
| 7-9 After 4 timer | |
| 10-15 After 1,5 timer |
BEMÆRK
natural_image
Illustration of a hand holding a plate with a knife, showing a circular motion arrow (no text or symbols)text_image
Diagram illustrating magnetic field lines around a circular structure, labeled A and B with directional arrows and circular patterns.natural_image
Simple line drawing of a frying pan with a U-shaped magnet above it (no text or symbols)text_image
Illustration showing three cooking pots with checkmarks and X marks indicating cooking difficultytext_image
Diagram showing two cooking pots with checkmark symbols: one marked with X and the other with checkmark.text_image
Handwritten signature with a small circular mark and partial letter 'E' inside, likely a signature or note.
text_image
AP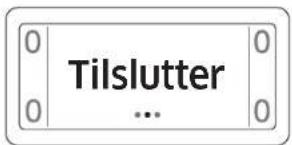
text_image
0 | Tilslutter 0 ... 0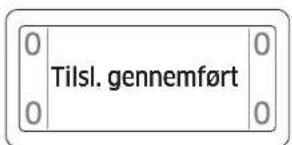
text_image
0 Tilsl. gennemført 0 0text_image
Hand-drawn icon with a cursor pointing at a grid of symbols, possibly indicating a UI element or status.
text_image
Max OK Off 0.124
text_image
May OK Cancel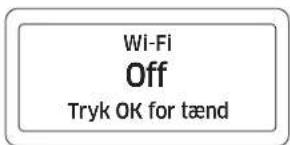
natural_image
Illustration of a hand using a power tool to cut a cable or cable with a mesh texture (no text or symbols)natural_image
Simple diagram showing a curved boundary with scattered gray shapes inside, no text or symbols present.text_image
Technical diagram showing a device with labeled component 'A' and a small inset detail viewA. Serienummer
OBS!
text_image
0101 Extended Zone Plan Extended Zone Plan SAMSUNG 02 Hue G G G G01 Induktionskokzon
02 Manoverpanel
Innan du börjar
Manöverpanel

text_image
01 ① 0202 0303 04 05 06 0708 Max OK 091011text_image
Diagram of a heating setup with labeled components A, B, and C, showing heat flow from a pot to a surface.A. Induktionsspole
B. Inducerade strömmar
natural_image
Illustration of hands performing a circular motion exercise with arrows indicating rotation (no text or symbols)text_image
Diagram illustrating magnetic field lines around a circular structure with labeled points A and B, likely illustrating a field or energy distribution concept.text_image
Illustration showing three cooking pots with checkmarks and X marks, indicating cooking or inspection status.text_image
0 | Ansluter 0 ... 0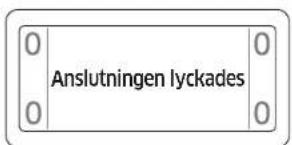
text_image
Hand-drawn sketch of a hand holding a coin next to a grid of dots, possibly indicating a location or data point.
text_image
Max OK Off Off
text_image
May OK 01 01/01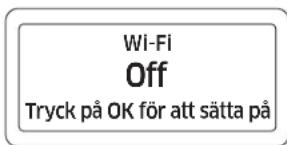
natural_image
Illustration of a hand using a power tool to cut a cable or cable with a mesh texture (no text or symbols)natural_image
Simple diagram showing a curved boundary with scattered gray shapes inside, no text or symbols present.text_image
Diagram showing a device with labeled component 'A' and an arrow pointing to it, likely illustrating a process or assembly.A. Număr de serie
NOTĂ
text_image
0101 Extended Zone Plan Extended Zone Plan SAMSUNG 02 Hue G G G Gtext_image
Diagram of a cooking process showing a pot with heat and a circuit with labeled components A, B, and C.natural_image
Illustration of hands performing a circular motion exercise with arrows indicating rotation (no text or symbols)text_image
Diagram illustrating magnetic field lines around a circular object, labeled A and B with directional arrows and circular patterns.natural_image
Simple line drawing of a frying pan with a U-shaped magnet above it (no text or symbols)text_image
Illustration showing three cooking pots with checkmarks and X marks, indicating cooking or cooking process.natural_image
Simple line drawing of a hand holding a small object, with no text or symbols present.
text_image
AP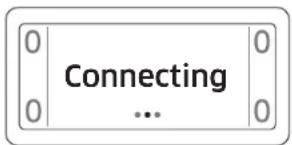
text_image
0 | Connecting ... 0 0 | 0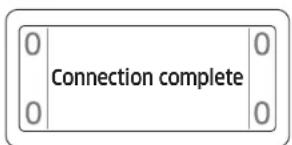
text_image
0 0 Connection complete 0 0text_image
Hand-drawn sketch of a hand pointing at a small circle with a number 1, alongside a grid of squares and dots.
text_image
Max Off Off Off
text_image
Mar OK S###
text_image
Wi-Fi Off Tap OK to turn onnatural_image
Illustration of a hand using a power tool to clean or store items (no text or symbols visible)natural_image
Simple diagram showing a curved boundary with scattered gray shapes inside, no text or symbols present.text_image
Technical diagram showing a device with labeled component 'A' and an inset view of its screen.A. Сервен номер
ЗАБЕЛЕЖКА
natural_image
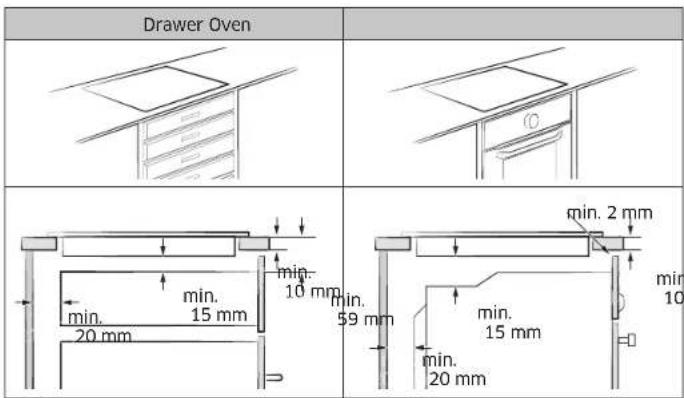
Line drawing of a cabinet with drawers and an open lid (no text or symbols)
text_image
MUH. 10 MM MUH. 15 MM 20 MM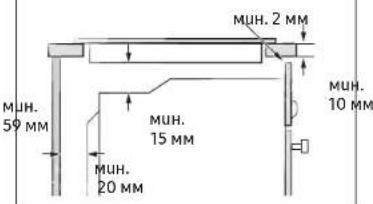
text_image
MUH. 2 MM MUH. 10 MM MUH. 59 MM MUH. 15 MM MUH. 20 MM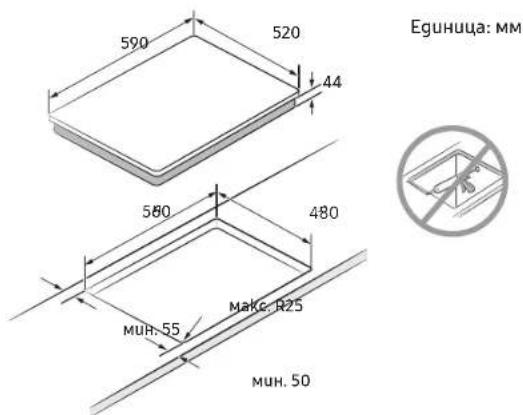
text_image
Diagram of a cooking or heating setup with labeled components A, B, and C showing heat transfer and control elements.natural_image
Illustration of hands performing a circular motion exercise with arrows indicating rotation (no text or symbols)text_image
Diagram illustrating magnetic field lines around a circular structure with labeled points A and B, showing field distribution patterns.natural_image
Simple line drawing of a frying pan with a U-shaped magnet above it (no text or symbols)text_image
Illustration showing three cooking pots with checkmarks and X marks, indicating cooking or inspection status.text_image
Diagram showing two cooking pots with checkmarks and an X symbol, likely indicating a cooking or inspection process.Правилно поставяне
text_image
Handwritten signature with a circular mark and letter 'E' inside, next to a grid of symbols on the right.
text_image
AP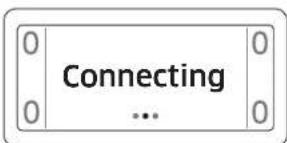
text_image
0 0 Connecting ... 0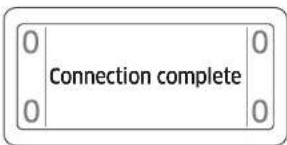
text_image
0 | Connection complete 0 | 0text_image
Hand-drawn sketch with a hand pointing at a circle and a dotted-line box containing three dots, likely indicating a step or location.
text_image
Max OK Off Off
text_image
May 0K 01 11 01w0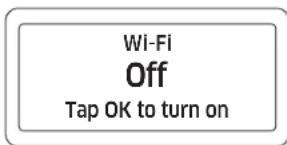
text_image
Wi-Fi Off Tap OK to turn onnatural_image
Illustration of a hand using a power tool to clean or brush the surface (no text or symbols)natural_image
Abstract diagram with curved lines and scattered gray shapes, no text or symbols presenttext_image
Diagram of a cooking process showing a pot with heat source, labeled points A, B, and C, and a circuit symbol.A. Indukciné rité
natural_image
Illustration of hands performing a circular motion exercise with arrows indicating rotation (no text or symbols)text_image
Diagram illustrating magnetic field lines around a circular structure, labeled A and B with directional arrows and circular elements.A. Sritis, kurioje magnetas nelimpa
B. Sritis, kurioje magnelas limpa
natural_image
Simple line drawing of a frying pan with a U-shaped magnet above it (no text or symbols)text_image
Illustration showing three cooking pots with checkmarks and X marks, likely indicating cooking or cooking process.Galite sutaupyti energijos vadovaudamiesi toliau pateikiamais patarimais.
text_image
Illustration showing two cooking pots with checkmarks and an 'X' symbol, likely indicating cancellation or rejection.Tinkama indo padétis
text_image
0 | Connecting ... 0 0 | 0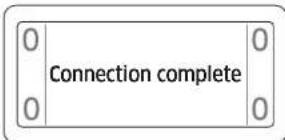
text_image
0 0 Connection complete 0 0text_image
Hand-drawn sketch of a hand pointing at a small circle with a number 1, alongside a grid of squares and dots.
text_image
Max OK Off Off
text_image
May OK Delete Other
text_image
Wi-Fi Off Tap OK to turn onnatural_image
Illustration of a hand using a power tool to remove or brush a white substance from a curved pipe (no text or symbols)natural_image
Simple diagram showing a curved boundary with scattered gray shapes inside, no text or symbols present.text_image
Diagram showing a device with labeled component 'A' and an arrow indicating direction or flowA. Seerianumber
MÄRKUS
text_image
0101 Extended Zone Plan Extended Zone Plan SAMSUNG 02 Hue G G G Gtext_image
Diagram of a cooking process showing a pot with heat source, labeled points A, B, and C, and a circuit symbol.natural_image
Illustration of two hands performing a circular motion exercise with arrows indicating rotation (no text or symbols)text_image
Diagram illustrating magnetic field lines around a circular structure, labeled A and B with directional arrows and circular elements.A. Mittemagnetiline ala
B. Magnetiline ala
natural_image
Simple line drawing of a frying pan with a U-shaped magnet above it (no text or symbols)text_image
Illustration showing three cooking pots with checkmarks and X marks indicating cooking status or failure.text_image
0 0 Connecting ... 0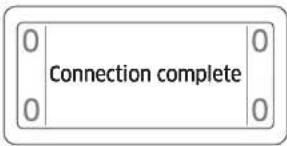
text_image
0 0 0 Connection complete 0 0text_image
Hand-drawn sketch of a hand pointing at a small circle with a number 1, alongside a grid of squares and dots.
text_image
Max Off Off Off
text_image
Mar OK SIN
text_image
Wi-Fi Off Tap OK to turn onnatural_image
Illustration of a hand using a power tool to cut a cable or cable with a magnified view (no text or symbols)natural_image
Simple diagram showing a curved boundary with scattered gray shapes inside, no text or symbols present.text_image
Diagram showing a device with labeled component 'A' and an arrow pointing to a screen screenA. Sērijas numurs
PIEZIME
text_image
0101 Extended Zone Zone Plan Extended Zone Zone Plan SAMSUNG 02 Hue G G G Gtext_image
Diagram of a heating setup with labeled components A, B, and C, showing heat flow from a pot to a power source.A. Indukcijas spole
natural_image
Illustration of a hand holding a plate with a knife, showing a circular motion arrow (no text or symbols)text_image
Diagram illustrating magnetic field lines around a circular structure with labeled points A and B, likely illustrating a field or energy distribution concept.A. Vieta, kur magnets nepielip B. Vieta, kur magnets pielip
natural_image
Simple line drawing of a frying pan with a U-shaped magnet above it (no text or symbols)text_image
Illustration showing three cooking pots with checkmarks and X marks, indicating cooking or cooking process.text_image
0 0 Connecting ... 0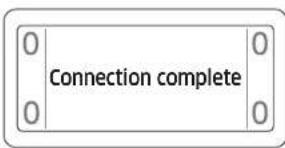
text_image
0 0 0 Connection complete 0 0text_image
Hand-drawn sketch of a hand holding a coin with a number 1, alongside a grid of empty square boxes.
text_image
Max Off Off Off
text_image
May OK ↓ 0.150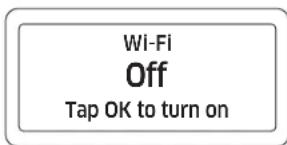
text_image
Wi-Fi Off Tap OK to turn onnatural_image
Illustration of a hand using a power tool to remove or brush a white substance from a curved pipe (no text or symbols)natural_image
Simple diagram showing a curved boundary with scattered gray shapes inside, no text or symbols present.text_image
Diagram showing a device with labeled component 'A' and directional arrows, likely illustrating a process or assembly.A. Numer seryjny

UWAGA
text_image
Diagram of a cooking or heating setup with labeled components A, B, and C showing heat transfer and circuit connection.natural_image
Illustration of a hand holding a plate with a knife, showing a circular motion arrow (no text or symbols)text_image
Diagram illustrating magnetic field lines around a circular structure, labeled A and B with directional arrows and circular patterns.natural_image
Illustration of a frying pan with a U-shaped magnet above it (no text or symbols)text_image
Illustration showing three cooking pots with checkmarks and X marks indicating cooking difficultytext_image
Illustration showing two cooking pots with checkmarks and a cross symbol, likely indicating cancellation or rejection.text_image
Handwritten signature with a small circular mark and partial text 'E' and 'F' visible on the right side.
text_image
AP
text_image
Cateching ...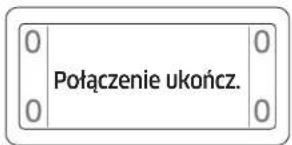
text_image
Hand-drawn sketch of a hand pointing at a small circle with a number 1, alongside a grid of squares and dots.
text_image
Max OK Off
text_image
Mar OK Down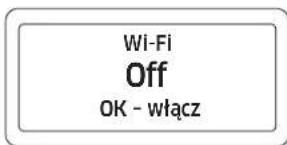
natural_image
Illustration of a hand using a power tool to clean or store items (no text or symbols visible)natural_image
Simple diagram showing a curved boundary with scattered gray shapes inside, no text or symbols present.text_image
Diagram showing a device with labeled component 'A' and an arrow indicating direction or flowA. Serijski broj
NAPOMENA
Prije montiranja zabilježite serijski broj na naljepnici s oznakama na uredaju. Taj će vam broj trebati u slučaju potrebe za servisom i nakon montiranja više neće biti dostupan, budući da se nalazi na jedinstvenoj pločici s oznakama na gornjoj ili donjoj strani uredaja.
NAPOMENA
- Posebno pripazite na zahtjeve za minimalnim prostorom.
- Na dnu ploče za kuhanje nalazi se ventilator. Ako se ispod ploče za kuhanje nalazi ladica, ne smije se koristiti za pohranjivanje malih predmeta ili papira jer bi mogli ošetiti ventilator ili ometati hladenje ako ih ventilator usisa.
Postavljanje ploče za kuhanje
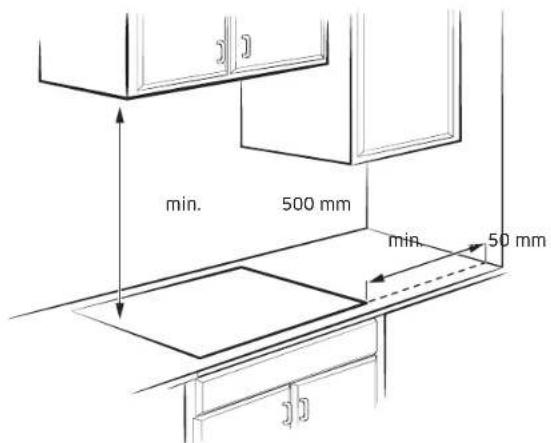
text_image
Diagram of a cooking or heating setup with labeled components A, B, and C showing heat transfer and pressure measurement.A. Indukcijska zavojnica
B. Inducirana struja
C. Elektronički sklopovi
natural_image
Illustration of hands performing a circular motion exercise with arrows indicating rotation (no text or symbols)text_image
Diagram illustrating magnetic field lines around a circular structure with labeled points A and B, likely illustrating a physics or engineering concept.natural_image
Simple line drawing of a frying pan with a U-shaped magnet above it (no text or symbols)text_image
Illustration showing three cooking pots with checkmarks and X marks indicating cooking difficultytext_image
Handwritten signature with a small circular mark and partial text 'E' and 'F' visible on the right side.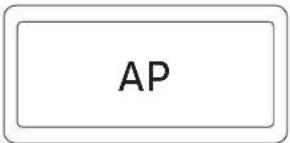
text_image
AP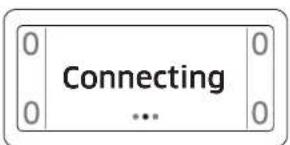
text_image
0 Connecting ... 0 0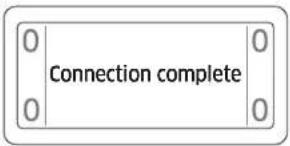
text_image
0 0 Connection complete 0 0- Pritisnite i držite (najmanje jednu sekundu) gumb Napajanje (①) za uključivanje proizvoda i pokretanje mobilne aplikacije (SmartThings).
- Dodirnite i držite gumb Pauza i zaključavanje (nođine) oko5 sekundi. Nakon toga pripremite vezu s mobilnom aplikacijom. Nastavite s povezivanjem slijedeći upute prikazane u mobilnoj aplikaciji.
- Nastavite držati gumb Pauza i zaključavanje (Ⅱ) protisnutim i nakon što se pojavi poruka „Zaslon za zaključavanje postavki”.
- Nakon što je uređaj povezan s mobilnom aplikacijom, na zaslonu će se pojaviti „Connecting (povezivanje)”. (To može potrajati najviše 5 minuta ovisno o okruženju korištenja).
- Nakon što je povezivanje dovršeno, na zaslonu će se pojaviti poruka „Uspješno povezivanje”. Sada s pomoću mobilne aplikacije možete pratiti status svog uređaja.
text_image
Hand-drawn sketch of a hand holding a coin with a number 1, alongside a dotted-line diagram with circles and squares.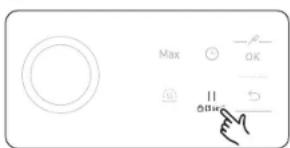
text_image
Max OK Off Off
text_image
May OK 01 02
text_image
Wi-Fi Off Tap OK to turn on- Za uključivanje proizvoda pritisnite i držite najmanje jednu sekundu gumb Napajanje (①).
- Unutar 10 sekundi od uključivanja proizvoda pritisnite i držite oko 3 sekunde gumb Pauza i zaključavanje (II _① Sed).
- Pritisnite i držite oko 3 sekunde gumb Povećanje snage (Max) na desnoj strani. Wi-Fi proizvoda je omogućen.
- Pritisnite gumb OK ( -12 ) za postavljanje opcije Wi/Fi Uključivanje/Isključivanje.
Upravljanje napom
Ovaj proizvod sadrži Bluetooth uredaj koji možete koristiti za povezivanje ploče za kuhanje s modelima napc tvrtke Samsung s upravljanjem. Putem Bluetooth veze možete koristiti funkciju upravljanja napom u aplikaciji SmartThings. Informacije o modelima tvrtke Samsung s mogučnošću upravljanja napom potražite na adresi www.samsung.com.
Povezivanje s modelom nape s upravljanjem
- Preuzmite i otvorite aplikaciju SmartThings na pametnom telefonu. Zatim dovršite postupak funkcije Smart Connect kako biste povezali ploču za kuhanje.
- Slijedite upute za Bluetooth povezivanje modela nape s upravljanjem i aktivirajte Bluetooth vezu.
- Istodobno dodirnite i držite gumbe Mjerač vremena ①i Pauza i zaključavanje II kako biste uspostavili Bluetooth vezu. Kada se Bluetooth veza uspješno uspostavi, na zaslonu će se prikazati Bluetooth.
- Kako biste koristili upravljanje napom, slijedite upute u korisničkom priručniku nape s upravljanjem i vodiču za aplikaciju.
NAPOMENA
- Ako veza funkcije Smart Connect ne uspije, aplikaciju SmartThings ne možete koristiti za praćenje nape i upravljanje njome.
- Bez veze funkcije Smart Connect s pločom za kuhanje možete koristiti Bluetooth vezu za uparivanje ploče za kuhanje s napom i njihovu sinkronizaciju. Za to slijedite gore navedeni 2. i 3. korak.
NAPOMENA
natural_image
Illustration of a hand using a power tool to clean or store items (no text or symbols visible)- Iskipjelu hranu ili zagorjele mrlje uklonite strugaćem za staklo.
- Strugač za staklo držite pod kutom u odnosu na staklokeramičku površinu.
- Mrlju uklonite klizanjem strugača.
NAPOMENA
natural_image
Simple diagram showing a curved boundary with scattered gray shapes inside, no text or symbols present.text_image
0101 Extended Zone Zone Plan Extended Zone Zone Plan SAMSUNG 02 Hue G G G Gtext_image
Diagram of a cooking process showing a pot with heat source, labeled points A, B, and C, and a circuit symbol.natural_image
Illustration of hands performing a circular motion exercise with arrows indicating rotation (no text or symbols)text_image
Diagram illustrating magnetic field lines around a circular structure with labeled points A and B, likely illustrating a field or energy distribution concept.natural_image
Simple line drawing of a frying pan with a U-shaped magnet above it (no text or symbols)text_image
Illustration showing three cooking pots with checkmarks and X marks indicating cooking difficultytext_image
Connecting ...
text_image
0 0 Connection complete 0 0text_image
Hand-drawn sketch of a hand holding a coin with a number 1, alongside a grid of empty square boxes.
text_image
Max OK Off Off
text_image
May OK 01 02
text_image
Wi-Fi Off Tap OK to turn on- Pritisnite in držite (vsaj 1 sekundo) gumb za Vklop (①), da vklopite izdelek.
- V 10 sekundah po vklopu izdelka pritisnite in držite tipko Premor in zaklepanje ( _B(Bw) ) za približno 3 sekunde.
- Pritisnite in držite tipko Najv. moč (Max) na desni za približno 3 sekunde. Wi-Fi izdelka je omogoćen.
- Pritisnite tipko OK (), da nastavite vklop/izklop Wi-Fi.
Nadzor nape
natural_image
Illustration of a hand using a power tool to cut a cable or wire (no text or symbols visible)natural_image
Simple diagram showing a curved boundary with scattered gray shapes inside, no text or symbols present.text_image
Diagram showing a device with labeled component 'A' and an arrow pointing to it, likely illustrating a process or assembly.A. Serijski broj
NAPOMENA
Pre instaliranja zabeležite serijski broj na nalepnici sa karakteristikama aparata. Ovaj broj će biti potreban u slučaju zahteva za servisiranje, a više neće biti dostupan nakon instaliranja jer se nalazi na originalnoj nazivnoj pločici na gornjoj ili donjoj strani aparata.
NAPOMENA
- Posebnu pažnju obratite na zahteve za minimalni prostor i razmak.
- Donji deo grejne ploče opremljen je ventilatorom. Ako se ispod grejne ploče nalazi fioka, u njoj ne bi trebalo držati male predmete ni papir, jer bi mogli da oštete ventilator ili ometaju hladenje ako ih ventilator usisa.
Instaliranje ploče
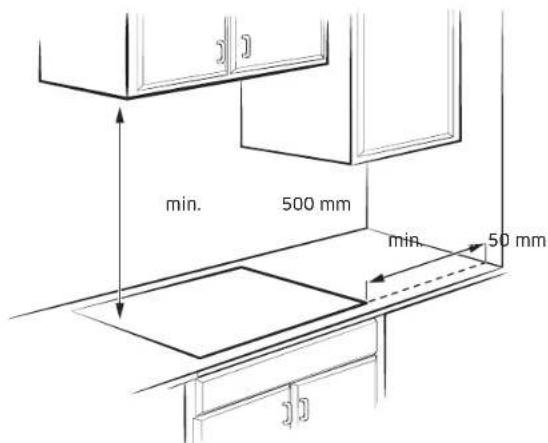
text_image
0101 Extended Zone Zone Plan Extended Zone Zone Plan SAMSUNG 02 Hue G G G Gtext_image
Diagram of a cooking process showing a steaming pot with heat source, labeled points A, B, and C, and a power supply.A. Indukcioni kalem
B. Indukovane struje
C. Elektronska kola
natural_image
Illustration of a hand holding a plate with a knife, showing a circular motion arrow (no text or symbols)text_image
Diagram illustrating magnetic field lines around a circular structure with labeled points A and B, showing field distribution patterns.A. Površina na koju magnet ne prianja
natural_image
Illustration of a frying pan with a U-shaped magnet above it (no text or symbols)text_image
Illustration showing three cooking pots with checkmarks and X marks indicating cooking difficultyPridržavajte se ovih saveta da biste uštedeli energiju.
text_image
Handwritten signature with a small circular mark and partial text 'E' and 'F' visible on the right side.
text_image
AP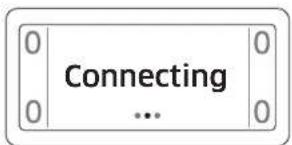
text_image
0 | Connecting ... 0 0 | 0
text_image
0 0 Connection complete 0 0- Pritisnite i zadržite (najmanje 1 sekundu) dugme Uključivanje/isključivanje (①) da biste uključili proizvod i pokrenuli mobilnu aplikaciju (SmartThings).
- Pritisnite i zadržite taster Pauziranje i zaključavanje (eodes) oko 5 sekundi. Nakon toga se pripremite za povezivanje sa mobilnom aplikacijom. Predite na povezivanje i pratite uputstva koja se prikazuju u mobilnoj aplikaciji.
- Nastavite da držite taster Pauziranje i zaključavanje („„), čak i nakon prikazivanja ekrana „Postavke zaključavanja“.
- Kada se uredaj poveže sa mobilnom aplikacijom, na ekranu će se prikazati „Povezivanje (Connecting)". (Ovo može da potraje najviše 5 minuta. u zavisnosti od okruženja u kome se koristi.)
- Kada se povezivanje završi, na ekranu će se prikazati „Successfully connected (Uspešno povezano)“. Sada možete da pratite status svog uređaja preko mobilne aplikacije.
text_image
Hand-drawn sketch of a hand holding a coin with a number 1, alongside a dotted-line diagram with circles and squares.
text_image
Max OK Off Off
text_image
May OK Other
text_image
Wi-Fi Off Tap OK to turn on- Pritisnite i zadržite (najmanje 1 sekundu) dugme Uključivanje/isključivanje (①) da biste uključili proizvod.
- U roku od 10 sekundi nakon uključivanja proizvoda, pritisnite i zadržite taster Pauziranje i zaključavanje ( ^II ) oko 3 sekunde.
- Pritisnite i zadržite taster Maks. pojačana snaga (Max) oko 3 sekunde. Wi-Fi veza proizvoda je omogućena.
- Pritisnite taster OK () džbiste podesili uključivanje/isključivanje Wi-Fi veze.
Kontrola aspiratora
Ovaj proizvod sadrži Bluetooth uredaj koji možete koristiti za povezivanje ploče sa Samsung modelima sa kontrolom aspiratora. Preko Bluetooth veze možete koristiti funkciju za kontrolu aspiratora u aplikaciji SmartThings. Da biste saznali više o Samsung modelima sa funkcijom za kontrolu aspiratora, posetite www.samsung.com.
Povezivanje sa modelom sa kontrolom aspiratora
- Preuzmite i pokrenite aplikaciju SmartThings na pametnom telefonu. Zatim dovršite Smart Connect postupak za povezivanje sa pločom.
- Pratite uputstva za Bluetooth na modelu sa kontrolom aspiratora i aktivirajte Bluetooth vezu.
- Istovremeno pritisnite i zadržite tastere Tajmer 🚙️ Pauziranje i zaključavanje ^II da biste uspostavili Bluetooth vezu. Kada se Bluetooth veza uspešno uspostavi, na ekranu se prikazuje Bluetooth.
- Da biste koristili kontrolu aspiratora, pratite uputstva iz korisničkog priručnika za model sa kontrolom aspiratora i vodič u aplikaciji.
NAPOMENA
- Ako Smart Connect veza nije uspešno uspostavljena, ne možete da koristite aplikaciju SmartThings za praćenje i kontrolu aspiratora.
- Bez Smart Connect veze sa pločom, možete da koristite Bluetooth vezu kako biste uparili ploču sa aspiratorom i sinhronizovali ih. Da biste to uradili, pratite prethodno navedene korake 2 i 3.
NAPOMENA
natural_image
Illustration of a hand using a power tool to cut a cable or cable with a mesh texture (no text or symbols)- Koristite strugač za staklo da biste uklonili skorenu hranu i tvrdokorne mrlje.
- Postavite strugač za staklo pod uglom na keramičku staklenu površinu.
- Uklonite prljavštinu tako što ćete strugati oštricom.
NAPOMENA
Strugači za staklo i sredstva za čišćenje staklo-keramike dostupni su u specijalizovanim prodavnicama.
natural_image
Simple diagram showing a curved boundary with scattered gray shapes inside, no text or symbols present.- Sagoreli šećer, istopljenu plastiku, aluminijumsku foliju i druge materijale uklonite strugačem za staklo odmah, dok je još vruće.
UPOZORENJE
text_image
Diagram showing a device with labeled component 'A' and an arrow indicating direction, likely illustrating a process or assembly.A. Numri i serisë
SHËNIM
text_image
0101 Extended Zone Zone Plan Extended Zone Zone Plan SAMSUNG 02 Hue G G G G01 Zona e gatimit me induksion
02 Paneli i kontrollit
text_image
Diagram of a cooking or heating setup with labeled components A, B, and C showing heat transfer and control elements.A. Spiralja e induksionit
B. Brymat e induktuara
C. Qarqet elektrike
natural_image
Illustration of two hands performing a circular motion exercise with arrows indicating rotation (no text or symbols)text_image
Diagram illustrating magnetic field lines around a circular structure with labeled points A and Bnatural_image
Simple line drawing of a frying pan with a U-shaped magnet above it (no text or symbols)text_image
Illustration showing three cooking pots with checkmarks and X marks indicating cooking difficultyLidhni Assist Sensor
text_image
Handwritten Chinese characters with a circled number ① and a grid-like pattern on the right
text_image
AP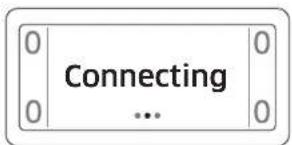
text_image
0 | Connecting ... 0 0 | 0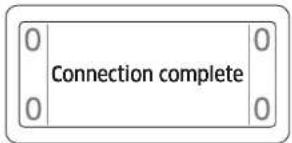
text_image
0 0 Connection complete 0 0text_image
Hand-drawn sketch of a hand holding a coin with a number 1, alongside a grid of empty square boxes.
text_image
Max OK Off Off
text_image
May OK Down Left/Right
text_image
Wi-Fi Off Tap OK to turn onnatural_image
Illustration of a hand using a power tool to cut a cable or cable with a mesh texture (no text or symbols)natural_image
Simple line drawing of a curved surface with scattered gray shapes, no text or symbols present.text_image
Diagram showing a device with labeled component 'A' and an arrow pointing to a screen-like structureA. Sorozatszám
MEGJEGYZÉS
text_image
Diagram of a cooking or heating setup with labeled components A, B, and C showing heat transfer and circuit connections.natural_image
Illustration of two hands performing a circular motion exercise with arrows indicating rotation (no text or symbols)text_image
Diagram illustrating magnetic field lines around a circular structure, labeled A and B with directional arrows and symbols.natural_image
Simple line drawing of a frying pan with a U-shaped magnet above it (no text or symbols)text_image
Illustration showing three cooking pots with checkmarks and X marks indicating cooking status or inspectiontext_image
Max OK B(3max)text_image
Handwritten signature with a circular icon and partial letter-like text above it
text_image
AP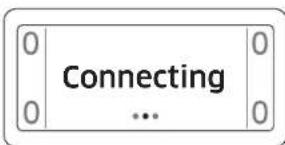
text_image
0 | Connecting ... 0 0 | 0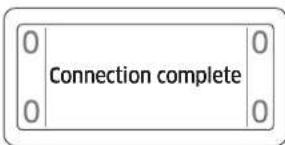
text_image
0 0 Connection complete 0 0text_image
Hand-drawn sketch of a hand pointing at a small circle with a number 1, alongside a grid of square markers.
text_image
Max OK Blue
text_image
Mar OK Cancel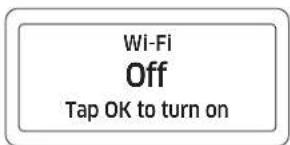
text_image
Wi-Fi Off Tap OK to turn onnatural_image
Illustration of a hand using a power tool to cut a cable or cable with a magnified view (no text or symbols)natural_image
Simple diagram showing a curved boundary with scattered gray shapes inside, no text or symbols present.text_image
Diagram showing a device with labeled component 'A' and directional arrow, likely illustrating a mechanical or electrical assembly.natural_image
Diagram of a rectangular storage or rack with directional arrows indicating movement or force (no text or symbols present)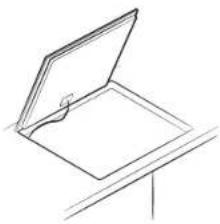
natural_image
Simple line drawing of an open book or document with a bookmark, placed on a stand (no text or symbols)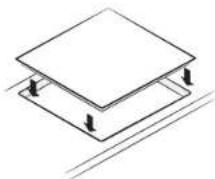
Εξαρτήματα
natural_image
Illustration of hands performing a circular motion exercise with arrows indicating rotation (no text or symbols)text_image
Diagram illustrating magnetic field lines around a circular structure, labeled A and B with directional arrows and circular patterns.natural_image
Illustration of a frying pan with a U-shaped magnet above it, no text or symbols presenttext_image
Illustration showing three cooking pots with checkmarks and X marks, likely indicating cooking or cooking issues.text_image
0 | Connecting ... 0 0 | 0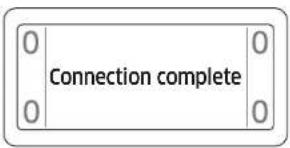
text_image
0 0 Connection complete 0 0text_image
Hand-drawn sketch of a hand holding a coin with a number 1, alongside a grid of dots and symbols.
text_image
Max OK Off Off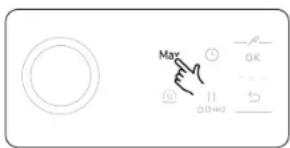
text_image
May 0K 11 (1WD)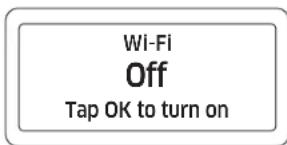
text_image
Wi-Fi Off Tap OK to turn onnatural_image
Illustration of a hand using a power tool to cut a cable or cable with a small smoke or vapor trail (no text or symbols)natural_image
Abstract diagram with curved lines and scattered gray shapes, no text or symbols presenttext_image
Technical diagram showing a 3D object with labeled point A and directional arrow, likely illustrating a mechanical or architectural component.A. Número de serie
NOTA
text_image
Diagram of a cooking process showing a pot with heat and a circuit with labeled components A, B, and C.natural_image
Illustration of a hand holding a plate with a knife, showing a circular motion arrow (no text or symbols)text_image
Diagram illustrating magnetic field lines around a circular object, labeled A and B with directional arrows and circular patterns.natural_image
Illustration of a frying pan with a U-shaped magnet above it (no text or symbols)text_image
Illustration showing three cooking pots with checkmarks and X marks, indicating cooking or inspection status.text_image
Illustration showing two cooking pots with checkmarks and an X symbol, likely indicating a cooking or inspection process.Colocación correcta
text_image
0 0 Conectetridg ... 0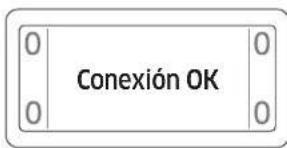
text_image
0 0 0 Conexión OK 0 0text_image
Hand-drawn sketch of a hand holding a coin next to a dotted-line interface with control points
text_image
Max OK Off Off
text_image
May OK Down Down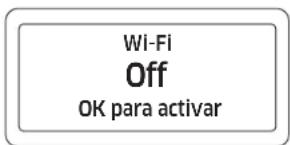
text_image
Wi-Fi Off OK para activarnatural_image
Illustration of a hand using a power tool to remove or brush a white substance from a curved pipe (no text or symbols)natural_image
Simple line drawing of a curved surface with scattered gray shapes, no text or symbols present.text_image
Technical diagram showing a 3D object with labeled point A and directional arrow, likely illustrating a mechanical or architectural component.A. Número de série
NOTA
text_image
0101 Extended Zone Zone Plan Extended Zone Zone Plan SAMSUNG 02 Hue G G G Gtext_image
Diagram of a cooking or heating setup with labeled components A, B, and C showing heat transfer from a pot to a platform.natural_image
Illustration of a hand holding a plate with a tool, showing a circular motion arrow (no text or symbols)text_image
Diagram illustrating magnetic field lines around a circular structure with labeled points A and Bnatural_image
Simple line drawing of a frying pan with a U-shaped magnet above it (no text or symbols)text_image
Illustration showing three cooking pots with checkmarks and X marks, indicating cooking or inspection status.text_image
Max OK Δ(3max)text_image
Connecting ...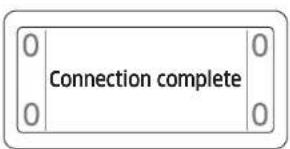
text_image
0 0 Connection complete 0 0text_image
Hand-drawn sketch of a hand holding a coin with a number 1, alongside a grid of empty square boxes.
text_image
Max OK OFF OFF
text_image
May OK 01 01/01
text_image
Wi-Fi Off Tap OK to turn onnatural_image
Illustration of a hand using a power tool to cut a cable or cable with a mesh texture (no text or symbols)natural_image
Simple line drawing of a bowl with liquid and bubbles inside (no text or symbols)text_image
Diagram showing a device with labeled component 'A' and a small inset view of its screen area.A. Сериски број
НАПОМЕНА
text_image
Diagram of a cooking or heating setup with labeled components A, B, and C showing heat transfer and circuit connection.A. Индукциски калем
В. Индуцирани струи
С. Електронски кола
natural_image
Illustration of hands performing a circular motion exercise with arrows indicating rotation (no text or symbols)text_image
Diagram illustrating magnetic field lines around a circular structure with labeled points A and B, showing field distribution patterns.natural_image
Simple line drawing of a frying pan with a U-shaped magnet above it (no text or symbols)text_image
Illustration showing three cooking pots with checkmarks and X marks, likely indicating cooking or cooking issues.text_image
Handwritten signature with a circular mark and letter 'E' inside, next to a grid of symbols on the right.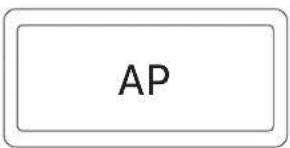
text_image
AP
text_image
0 | Connecting ... 0 0 | 0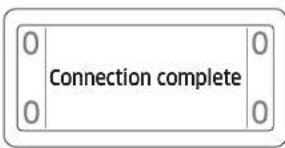
text_image
0 0 Connection complete 0 0text_image
Hand-drawn sketch of a hand holding a coin with a number 1, alongside a grid of dots and symbols.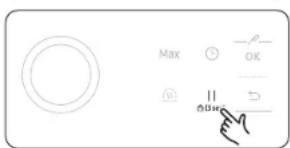
text_image
Max OK Off Off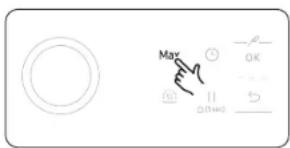
text_image
May 0K 11 (1W)
text_image
Wi-Fi Off Tap OK to turn onnatural_image
Illustration of a hand using a power tool to clean or store items (no text or symbols visible)natural_image
Abstract diagram with curved lines and scattered gray shapes, no text or symbols presenttext_image
0101 Extended Zone Plan Extended Zone Plan SAMSUNG 02 Hue G G G Gtext_image
Diagram of a cooking or heating setup with labeled components A, B, and C, showing heat transfer through a pot.A. Indukční civka
natural_image
Illustration of hands performing a circular motion exercise with arrows indicating rotation (no text or symbols)natural_image
Simple line drawing of a frying pan with a U-shaped magnet above it (no text or symbols)text_image
Illustration showing three cooking pots with checkmarks and X marks, indicating cooking or cooking status.text_image
Diagram showing two cooking pots with checkmark symbols: one marked with X and the other with checkmarkSprávné umístění
text_image
Handwritten Chinese characters with a circled number ① and partial symbols above, likely part of a larger document or form.
text_image
AP
text_image
0 | Connecting ... 0 0 | 0
text_image
0 0 0 Connection complete 0 0text_image
Hand-drawn sketch of a hand holding a coin with a small number ①, alongside a grid of empty square boxes.
text_image
Max OK Off Off
text_image
May OK 01 01/02
text_image
Wi-Fi Off Tap OK to turn onnatural_image
Illustration of a hand using a power tool to cut a cable or cable with a mesh texture (no text or symbols)natural_image
Simple diagram showing a curved boundary with scattered gray shapes inside, no text or symbols present.text_image
Diagram showing a device with labeled component 'A' and directional arrows, likely illustrating a process or assembly.A. Sériové číslo
POZNÁMKA
text_image
0101 Extended Zone Plan Extended Zone Plan SAMSUNG 02 Hue G G G Gtext_image
Diagram of a cooking process showing a steaming pot with heat and a circuit breaker, labeled A, B, and C.natural_image
Illustration of hands performing a circular motion exercise with arrows indicating rotation (no text or symbols)text_image
Diagram illustrating magnetic field lines around a circular structure with labeled points A and B, likely illustrating a magnetic field pattern or resonance.natural_image
Simple line drawing of a frying pan with a U-shaped magnet above it (no text or symbols)text_image
Illustration showing three cooking pots with checkmarks and X marks, likely indicating cooking or cooking process.text_image
Max OK θ(3max)text_image
0 | Connecting ... 0 0 | 0
text_image
0 0 Connection complete 0 0text_image
Hand-drawn sketch of a hand holding a coin with a number 1, alongside a grid of empty square boxes.
text_image
Max OK Off Off
text_image
May OK 01 01wd