QuickCut HC4255 - Lawn mower REMINGTON - Free user manual and instructions
Find the device manual for free QuickCut HC4255 REMINGTON in PDF.

| Product type | Hair clipper |
| Brand | Remington |
| Model | QuickCut HC4255 |
| Power supply | Rechargeable via mains (adapter included) |
| Runtime | Up to 40 minutes |
| Charging time | 4 hours (full charge) |
| Quick charge | 10 minutes for emergency use |
| Number of cutting guides | 9 combs |
| Cutting lengths | 1.5 mm to 15 mm (combs); 1 mm (without comb); 0.5 mm (perpendicular) |
| Blades | Wide blade set |
| Washable | Yes, rinseable under running water (unplugged) |
| Cleaning | Brush and oil included |
| Included accessories | Cleaning brush, oil bottle, adapter, travel case, haircut cape |
| Usage | Cordless and corded |
| Charging indicator | LED (slowly flashing when charging, solid when charged) |
| Safety | On/off button; cord separation before cleaning; use exclusively with included adapter |
| Repairability | Removable battery for recycling (instructions in manual) |
Frequently Asked Questions - QuickCut HC4255 REMINGTON
User questions about QuickCut HC4255 REMINGTON
0 question about this device. Answer the ones you know or ask your own.
Ask a new question about this device
Download the instructions for your Lawn mower in PDF format for free! Find your manual QuickCut HC4255 - REMINGTON and take your electronic device back in hand. On this page are published all the documents necessary for the use of your device. QuickCut HC4255 by REMINGTON.
USER MANUAL QuickCut HC4255 REMINGTON
Official Electrical Styling Partner of Manchester United
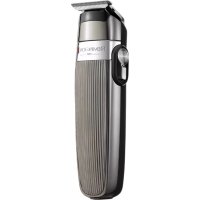
QuickCut Hair Clipper
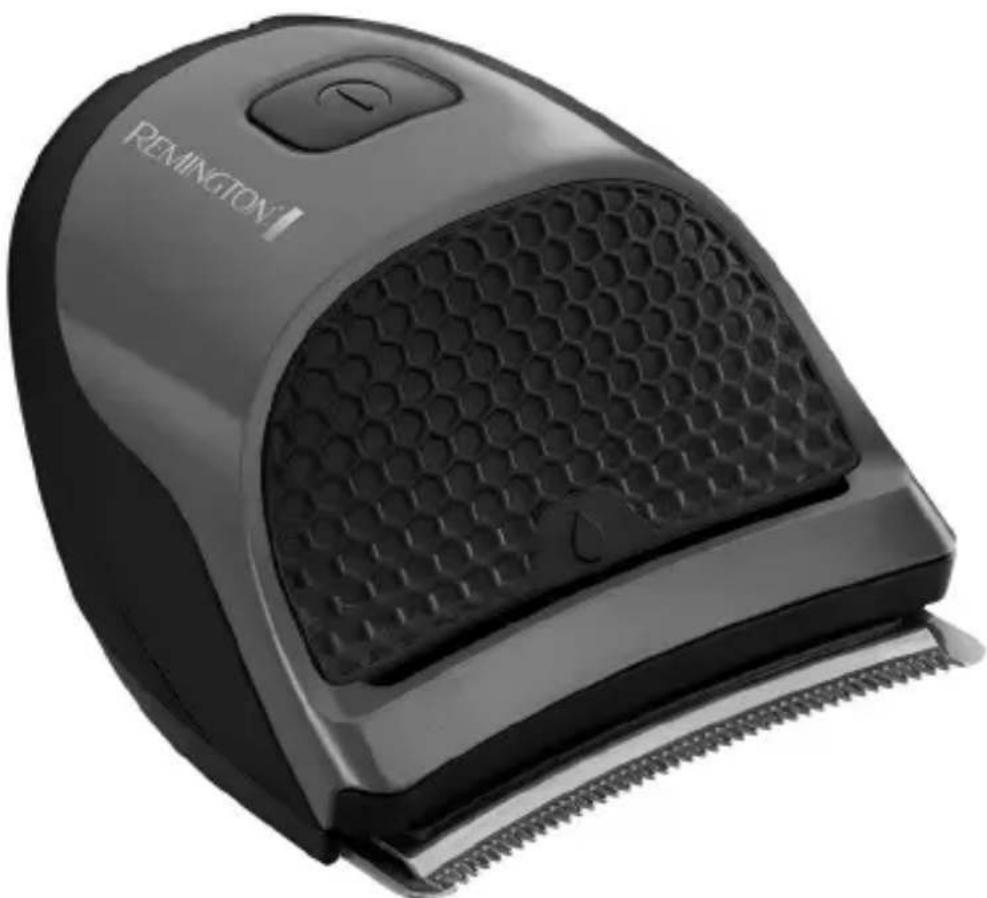
HC4255

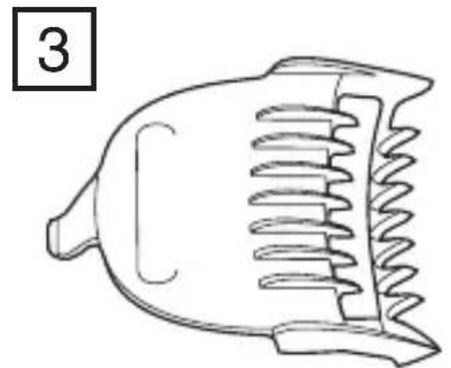
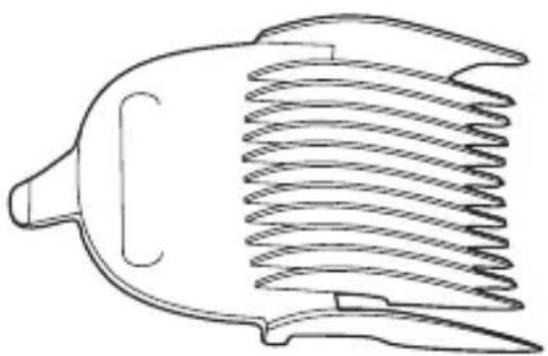

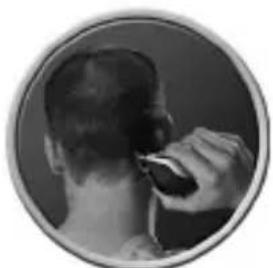
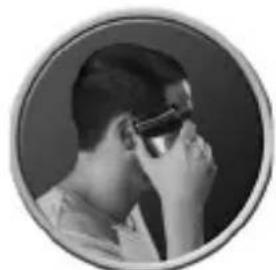

Fig.1 Fig.4Fig.3Fig.2
Thank you for buying your new Remington® product. Please read these instructions carefully and keep them safe. Remove all packaging before use.

IMPORTANT SAFEGUARDS
- This appliance can be used by children aged from 8 years and above and persons with reduced physical, sensory or mental capabilities or lack of experience and knowledge if they have been supervised/instructed and understand the hazards involved. Children shall not play with the appliance. Cleaning and user maintenance shall not be done by children unless they are older than 8 and supervised. Keep the appliance and cable out of reach of children under 8 years.
The device is suitable for cleaning under an open water tap.
- WARNING: Detach the device from the charging adapter before cleaning it in water.
- Do not use the product with a damaged cord. A replacement can be obtained via our International Service Centres.
- This product should only be used with the charging adaptor supplied.
- Do not use attachments other than those we supply.
- The charging adaptor contains a transformer. Do not cut off the adaptor to replace it with another plug, as this causes a hazardous situation.
- Do not use the appliance if it is damaged or malfunctions.
- Do not plug or unplug the appliance with wet hands.
- This appliance is not intended for commercial or salon use.
PARTS
- On/off switch
- Blade set
- 9 attachment guide combs
- Washout port
- Charging indicator
Not shown:
- Cleaning brush
- Oil bottle
Adaptor
Travel pouch
Hair cape
GETTING STARTED
CHARGING YOUR APPLIANCE
Note: It is recommended to fully charge your appliance before using for the first time. Please refer to the charge times shown in this book.
- Connect the product to the adaptor and then to the mains.
- When charging the charge indicator will slowly flash.
CHARGE LEVEL INDICATORS
| Charge Level Indicator | |
| Charging LED blinks | |
| Fully charged LED solid |
- Run time from fully charged is up to 40 minutes.
- Charge time from empty is 4 hours.
Note: To preserve the life of your batteries, let them run out every 6 months then fully charge.
QUICK CHARGE FUNCTION
- 10 minutes charging will give an emergency burst of run time.
INSTRUCTIONS FOR USE
- For corded use connect the product to the adaptor, then to the mains.
CAUTION Extended mains only use will result in the reduction of the battery life.
CORDLESS USE
- When the unit is switched on and fully charged, the product can be used in cordless mode for up to 40 minutes.
- Switch the product on by pressing the on/off switch.
BEFORE STARTING THE CUT
- Inspect the clipper making sure that it is free from hair and dirt.
- Before cutting, always comb the hair so it is tangle free and dry.
| Guide Comb Cutting length | |
| 1 (Grade 0) 1.5mm | |
| 2 2mm | |
| 3 2.5mm | |
| 4 (Grade 1) 3mm | |
| 5 4.5mm | |
| 6 (Grade 2 6mm | |
| 7 (Grade 3) 9mm | |
| 8 (Grade 4) 12mm | |
| 9 (Grade 5) 15mm | |
- Use the clipper without any fixed combs for trimming hair close to the skin.
- This will trim hair to 1mm , holding the clipper so the blades are perpendicular to the skin will trim hair to 0.5mm .
TO ATTACH A COMB
- Hook the front edge of the comb to the front teeth of the wide trimmer blade. Then push the back of the comb down until it snaps in place.
TO REMOVE THE COMB
- Push up the back of the comb until it clicks off the clipper blade.
INSTRUCTIONS FOR CUTTING HAIR
- The QuickCut Clipper's ergonomic design provides many different ways of holding the clipper in use.
- For clipping the top of the head (see fig. 1).
- For clipping the back of the head (see fig. 2).
- For clipping the sides of the head (see fig. 3).
- For detailing (see fig. 4).
- For even cutting, allow the comb attachment/blade to cut its way through the hair. Do not force it through quickly. If you are cutting for the first time, start with the maximum comb attachment.
- For one all over cut length, attach the desired guide comb and slowly guide the clipper through the hair against the direction the hair normally grows.
- Remove the guide comb. To produce a clean straight line at the sideburns and the base of the neck, reverse the hair clipper. Place the reversed clipper at right angles to the head, tips of the blades lightly touching the skin and then work downwards.
The following instructions are for those users who want different trimming lengths on the sides, back and top of the head
STEP 1 - NAPE OF THE NECK
- Set the comb to 3mm or 6mm.
- Hold the clipper with the blade teeth pointing upwards. Begin starting at the centre of the head at the base of the neck.
- Slowly lift the clipper, working upwards and outwards through the hair, trimming just a little at a time.
STEP 2 - BACK OF THE HEAD
- With the comb set at 9mm or 12mm , cut the hair at the back of the head.
STEP 3 - SIDE OF THE HEAD
- With the comb set at 3mm or 6mm, trim sideburns. Then change to the longer 9mm guide comb and continue to cut the top of the head.
STEP 4 - TOP OF THE HEAD
- Use the longer length comb attachment and set it to 12mm or 15mm then cut hair on top of the head against the direction in which the hair normally grows.
- Use the clipper without an attachment comb for close trimming around the base and sides of the neck and around the ears.
- To produce a clean straight line at the sideburns, reverse the hair clipper. Place the reversed clipper at right angles to the head, tips of the blades lightly touching the skin and then work downwards.

CARE FOR YOUR HAIRCLIPPER
To ensure long lasting performance of your clipper, clean the blades and unit regularly.
Always keep the clipper in the provided travel pouch.
- Ensure the appliance is switched off and unplugged from the mains before cleaning.
- Do not use harsh or corrosive cleaners on the unit or blades.
- Cleaning should be done with a soft brush.
After each use - brush the accumulated hair from the blades.
WASHABLE CLEANING
- The QuickCut Clipper is fully washable for easy cleaning.
- Ensure the appliance is switched off and unplugged from the mains.
WASHOUT PORT INSTRUCTIONS
Note: Never rinse, wash or otherwise subject this product to liquid whilst the power cord is connected.
- For best results, keep trimmer running while running it under the tap. Allow water to run through the washout port and over the blades. Recommended to rinse after each use.
- Ensure the clipper is dry after cleaning.
- For more thorough cleaning the blade set can be easily removed to wash any hair trimmings from the blades. To release the blade set, push the blade set release button found on the base of the clipper.
- Ensure the blades are dry after rinsing under the tap. To reattach, align the blade set onto the clipper and push the blade set towards the clipper body until it clicks into place.
- Place a small drop of cutter or sewing machine oil onto the blades at each end and at the middle point of the blades. Turn the unit on for a few seconds to distribute the oil then turn off and wipe off excess oil.
BATTERY REMOVAL
- The battery must be removed from the appliance before it is scrapped.
- The appliance must be disconnected from the supply mains when removing the battery.
- Ensure the clipper is discharged of all power.
- Starting at the seam on either side of the charge indicator lens, pry open seam working back and forth from one side to the other, following the seam until the top shell has been pried apart all the way from the rest of the clipper. Remove the two screws from the inner housing.
Gently pull the inner housing straight up and away to remove the inner housing shell. - Remove the two screws from the inner structure located on each side of the circuit board.
- Gently pull the inner structure containing the battery and circuit board up out of the lower housing structure of the clipper.
- From the under side of this inner structure, cut the red and black wires which lead to the battery.
- With the inner housing structure right side up, pull upward firmly on the circuit board to allow room to remove the battery. Pry the battery out of its holder.
- Dispose of the batteries safely.
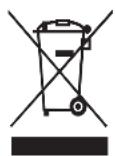
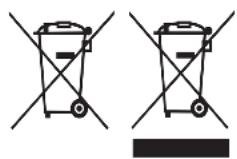
RECYCLING
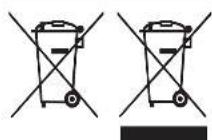
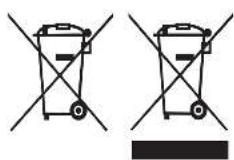
To avoid environmental and health problems due to hazardous substances, appliances and rechargeable and non-rechargeable batteries marked with one of these symbols must not be disposed of with unsorted municipal waste. Always dispose of electrical and electronic products and, where applicable, rechargeable and non-rechargeable batteries, at an appropriate official recycling/collection point.
SNELLE OPLAADFUNCTIE
UW APPARAAT VERZORGEN
INNAN DU BÖRJAR KLIPPA
Ha pucyhke He noka3aHo:
- ΜιεΤΚΑ έληγνισχΤΚ
- Maclo對於ne3Bn
- PēpexoHnK
-Дорожн布局exon - Napukmaxepcka HaKudka
HAUJIO PA6OTbl
3APRAKA YCTPOICTBA
IpimueaHne.IpeepnepBbIM nCnoJb3ObaHnem npnbopa peKomeHdyetc noNHOCTbIO 3apAHTb erO.Cm. 3NaueHnBpeMeHN 3apAKn, npNBedeHHbIe B HAcTOnuem pyKOBOdCTBe.
- PódklouHTe 3apAHyI nepexOHNK Kn3dJIInIO, a 3aTeM - K pO3eTKe.
- Bo Bpem 3apAaKu INHdkaTOp 3apAaKu 6yJeT MeIeHHO MIRaTb.
MHДNKATOPbI YPOBHЯ 3APJKN
HCHCTPyKUIN, KACAIOUNEcRA KAHJIA IJI POMbIBKN
PnmeaHne. Hb Koem clyuae He npombiaute, He nctte He noDBepraTe daHHoe n3dene DeCTBIO KaKoJ-n6o XnKDcOCTn PnnoDKNIOeHHOM hHype nHTAHy.
-Дя пolye_HЯ ONTIMaIbHOrO pe3yIbTaTа Лучse npombiBaTb TrpMMep NOJ KpaHOM BO BKJIIOUeHHOM coCToHn. ПОдставTe np6Op NOB BODy TaK, YTO6bl OHa npoteKaJa Upe3 KaHAN DЯnpombIKN INOBepx Ie3Bn. PekomeHdyetc npombiBaTb np6Op nocne kajdOrO uCNoIb3OBAHnI.
JaTe TpIMMepy OKOHaTeIbHO BbICOXHyTb Nocne OChCTKn.

-Дя 6олee TшаTeьн OчNTKи 6LOK Je3Bn MOxHо JERKO CHaTb, YTO6bl Cmblb BCE OCTaTKI BONOC C ne3Bn. YTO6bl pa36LOkupOBaTb 6LOK Je3Bn, HaxMnte KhoNky ΦNKcaTopa 6LOKa I CdBnHbTe Je3Bn. NO HappaBHeHIO OT TpIMMepa.
-ДаTe JIe3BnM IOCTaTOUHO npOCOXHyTb NocIe IpOMbIKN NOJ KpaHOM. YTo6bl 3aHOBO npNKpeNTb 6NoK Ie3Bn, yCTaHOBHTe erO Ha MaunHKy INOTAHITE 3a 6NoK No HApBaJIeHNU K OCHOBHO JaCTN MaunHKn, nOKa 6NoK He 3aueJIKNHeTc H MaCte.
HaheCHTe He6oJIbIoe KOJIueCTBO MaCna IJRA peKyuIX NII WBeHbIX MaunH C KaXdOrO KOHca Je3Bn, a TAKKe nOcepeDInHe Je3Bn. BkIOUHTe np6Op Ha HeCKoJIbKO cekyHd, YTObI MaCNo paBHomepHO paCnpEeINIOcB no 6NOKy. Pocne 3TOrO BbIKIOUHTe N3DeIe N IpOTpNTe OCTaTKM Macna.
I3BJIeUeHHe BATAPEN
-Передутunnaueнбатаpeю cneуet n3Bleychn3 yctpoctBa.
- Pnp u3BneueHH 6aTapeu ycTpoiCTBO cNe dyET OTKIQUHTb OT JNEKTPoCetN.
- Y6eDntecb, yTO MaunHka nOJNHOCTbIpo pa3pJKeHa.
HaunHae co WBOB cKaJdoi CTOPOhI OKoSHA uHnIKAToPA 3apAKn IODeHbTe WOB, npeMeaacB Bnepei-Ha3ad C OndHO CTOpOHbIK npTepeHHO DBNrAocb NO wBy no HnPaBHeHIO OT OKoSHA uHnIKAToPA K 6blOKy Je3Bv. BepxHra Yactb Kopnyca DoJnxHa Oka3aTbCpNpOdHrToH aBCEMN OCTaBmMnC deTaJIaM MaunHKn.
- Bbikpytnte DaBnHTa n3 BHyTpeneHHe yactn Kopnyca.
Octopoxho npnoHnmtte BHyTpeHHIO uactb Kopnyca npmao BBepx nOT ce6y, yTo6bl CHrTbe ee.
- Bbikpytnte Dba Bnhta, paCnoJoxeHHbIe C 06eHX CTOpOH neaTHO nnAaTbI, n3 BHyTpeneHne KOHCTpyKcnn npnbopa.
Octopokno npnnoHmnte BnytpenHIO KOHcTpyKunIO, coepkauyo 6aTapeu n neaThyio nnaty.
- 06pekxbte kpaehbni uepnbni NOOda, haxoJaunecB HuxHeuactn BHyTppeHHeKOHCTpyKcnn npnbopa n Beyuune K 6aTapee.
PacnoonBnBHTpeHHIO KOHCTpyKuIO KOpnyCa IueBOI CTOPHOI BBepx, NOHMITE neaTHyIO nlaty C He6oJbUIM ycnnmE, TTo6bl ObecneuTb CBO6OJHOe MeTO drr N3BNeeyHg 6aTapei.
-Доctантбатapeюиз epжateя.
- 6atapera noIeXnT 6e3oNaChOn yTuIN3aun.
ПОВТOPHA ПЕPEРБOTKA
Bo n36eKahne Bo3dEiCTBn BpeHbIX BeIeCTB Ha OkpykaOuIyO cpeNy I 3DopOBBe np6Opbl N 6bTapeN OndHopa3OBoro Nnn MHoropa3OBoro NCIOJIb3OBAHNA, NOMEUHHbIe OHNIM N3 3TINX CmMBOJOB, Heo6xOIMO yTNIIIN3UPOBaTB OTdJIbHO OT HecOpTnPOBaHHbIX 6bITOBbIX OTXODOB. O6raTeJIbHO yTNIIIN3UPYte 3NeKTpUcEckne N 3NeKTKPOHbIe N3DeNna, a TAKKe (ecNI 3TO npIMeHMIO) 6bTapeN OndHopa3OBoro Nnn MHoropa3OBoro NcNOJIb3OBAHNA B COOTBeTCTByUOuNX OphiuaJIbHbIX NyHKtax NOBtOPHOI nepepa60TK / c6opa OTXODOB.
PENTRU A INDEPARTA PIEPTENELE
- Impingeti in sus partea din spate a pieptenelui pàna cánd se deblochează printr-un cig de lama masinii de tuns.
INSTRUCTION PENTRU TUNDEREA PÄRULUI
BRIGA O VAŠEM ŠIŠACU ZA KOSU
- Kako biste osigurali dugotrajnu učinkovitost Vaseg šišača, redovito Čistite oštrice i jedinicu.
Cuvajte sisauc predvidenoj kozmetiickoj turbici. - Prije ciścenja osigurajte da je ureżaj iskliućen i iskopćan iz uticnice elektrICIne mreze.
- Nemojte koristiti grube ili korozivne tekovine za ciiscenje po uredaju i ostricama.
Cicscenje treba vrsi siamo mekanom cetkicom. - Nakon svake uporabe - Nemojte uranjati šišac u vodu.
- Kako bistoeocistili jedinicu,vlaznom krpom obrisite uredaj i odmah ga osusite.
MOKRO CISCENJE
IPEED NOYATKOM CTPNXKU
- IpebeipTe MaunHky Ha BiCyTHiCTb 3aunuKIB BOJocca Ta 6pydy.
- IpeqI NOaTOM CTpIXKn CIId PO3ueCaTN BOLOCC TaKIM YINHOM, 106 BOHO 6ylo pO3NpyTaHIM Ta CyXIM.

| Напраима наcadka довки | на строчки |
| 1 (позначка 0) 1.5 мM | |
| 2 2 мM | |
| 3 2.5 мM | |
| 4 (позначka 1) 3 мM | |
| 5 4.5 мM | |
| 6 (позначka 2 6 мM | |
| 7 (позначka 3) 9 мM | |
| 8 (позначka 4) 12 мM | |
| 9 (позначka 5) 15 мM |
IЯстпжкв BONOC6и3bko Do shkpn BnKOpNCTOByTe MaunHky 6e3 6yd-aknx fikcobaHx rpe6iHcEbnx HacaDok. TaKIM YINHom DOBXHa CTpIXKN CTAHOBNTIME 1 MM, a kso TpMaTm MaunHKy ne3amn nepneHdNKyJnRPHo Do shkpn, DOBXHa cTpIXKN CTAHOBNTIME 0,5 MM.
ДЯ ПИКРПЛЕHHHA
3auenitb nepedni kpa rpe6inueboi hacaKn 3a nepedhi 3y6ci le3a wnpokoro Tpimepa. Notim HATNCKaTe Ha 3aHIO uactnHy rpe6inueBOi hacaKn, DOKU BOHa He cTaHe Ha Micce.
IOB3HRTN HACADKU
PiinMaInTe 3aHIO uactHy rpe6iHueBOI HacaKn, DOKN BOHa He Bi'EDHaETbcra BiJ ne3a MaunHKn.
IHCTPYKJIA 3I CTPNJKN BOJIOCC
EproHomiHa KOHCTpyKzia MaunHKn QuickCut hadae 6e3niu MeToDnK TpMaHHa MaunHKn iid yac BnKOpncTahH. Hxue nokaahi peKomeHDoBahi cnoco6n TpMaHHa MaunHKn.
- IJIpi3aHHB OJIOcH Ha BepxHi qactnHrOJOBn (INB.pnc.1).
-ДяпідізАнгьВОLOСьi3аДнбоIчAcTиHnRToJOBu(ДИВ.pIc.2).
- npiipiaHHBoloc36okIB roJOBn (nVB.pnc.3).
-Дяоформлелнгдеталe(nVB.pnc.4)
IJa DoCarrHeHHa PIBHomipHOIO DOBXHn HBOLOcc CnID BcTn rpe6iHcEBy HacadKy a6o ne3o Kpi3b BOLOCCn IO BcII DOBXHNI liHcCTpnXkN. He 3actocobyte cuny, o6 npncopu npouec. RaO Bu Bnepwe 3dInCHIOTe CTpnXkY, noUHaHTe 3 rpe6iHcEOBI HacadKn MAKcMmaHbHOIO DOBXHIO.
Iy HapnMy HacaKy Ta nouHaTe NOBbHO BcTm MaunHky Kpi3b BOnocr npOTn HapnMky Noro 3poCTaHH.
3HIMITb HapmHy hacaKy. IydoocarHeHHa icKoi pibHOi NiHcKPOh i uHcN 3MiHHTn HapmOK MaunHKn dIg CTpNXKBOLOCCHa npOTUNEXHN.
CnpaMyTe o6epHeHy MaunHky iD npaMM KyTom do roNoBn TaK, 06 KInuKn ne3 3nerKa Topkannc shkpN, ta noHHaTe pyx DOHN3y.
Habeeni HnKye iNctpyKui npn3naeHi Ia KOpncTyBaui, aKi 6aKaIoTb OTpMaTu pi3Hi IOBKnHn BnpiBnOBAHHaI BepXhBoiT Ta 3aHbOi YactNH RoIOBu, a TakoK 3 60kIB.
ETAN1-3ADHJYCACTNHA
BCTaHOBITb Hacaiky Ha 3 a6o 6 MM.
TpmaTe MaunHky 3y6zmy le3a Doropn. NounHaTe ctpxKk no ceHtpy rOOBu BID oCHOBu
- NobilbNo niDImaTe MaunHky, npoxoJn Bropy BiD ce6e no ronobi, ta nipBnOuHn HeBeNky dIinHKy BOLOCCs 3a pa3.
ETAN2-NOTINILNCA
KopncTyuOncb HacaIKOIO i3 IOBxHIOIO BiD 9 MM Do 12 MM, nIDCTpuraTe BOLOccHa notnuii.
ETAN3—BOKNTOJIOBN
- Ckponi nipipBnIte hacaKoHa 3 a6o 6 MM. Picna zboRo nepeinDb Ha doBswy HapmHy hacaKy 9 MM Ta npOobKyIte cTpNrtu BepxIBky roNoBn.
ETAN4-BEPXIBKA FOJOBN
3actocynte hacaKy i3 6ilbwoIO IOBxHNO, BCTaHOBBUN II Ha 3NaueHHA 12 MM a6o 15 MM. CtpnKtB BOLOCCHa Bepxibci rONOBn IpOTn HAnpymky HopMaJbHoro POcTy BOLOCCr.
KoJHoro pa3y cnI 3diNCHIOBATn CTpNXKU, cTOnu 33aDu roLOBn.
ETAN5-3ABEPUJIbHI UTPUXU
BukopncobnyTe MaunHky 6e3 rpe6iueBoi HacaKn IJIa 3aBepWeHHN iipribHOBAHN BONOCs HABKOLO OCHOBU Ta 6okIB uii.
IЯ doceHHeHHy icKoi pibhoi niiCKPOHb cnid 3MiHTn HappMOK MaunHKn dIa cTpJxKu BOLOCCHa npotnHexn. Po3auyte o6epHeHy maunHKy iD npamm Kytom Do rOIOBn (TaK, uo6 KInuKuJe3 3nerka Topkannc shkp) ta nouHaite pyx DOHN3y.
NHCTPYKUIM 3A 3APEXDAHE
3a6eJekka: npenopbUba ce da Hapabite nbnHO 3apejdahe Ha ypeJa npedn npbPba ynoTpe6a. BxKTe BpeMeHaTa 3a 3apejdahe B Ta3N KHNJKA C INHCTpyKcun.
Cbbpxte aanterpa 3a 3apekdahe KbmpoynkTa n cneT oBa Kbmeektpnueckata mpeka.
- Pn3apekdahe HndkaTOpbT Mura6abHO.
NHДИКATOPU 3A HNBA HA 3APEXДАНЕ
C rpe6eH, Hactpoeh Ha 9 MM nlln 12 MM, NODCTpIXKeTe Kocata B 3aHaTa Yact Ha rIaBaT.
CTbIIKA 3 - CTPAHHHTA YACT HA ΓIABATA
C rpe6eH, Hactpoeh Ha 3 MM uIN 6 MM, oΦopMeTe 6aKeH6apDHTe. CneT OBa npomeHeTe DO BodeuHa rpe6eH cNo-roJMa dblxInHa ot 9 MM u npOdbNxTe da noCTprBate rohpata qact Ha rnaBata.
CTbIIKA 4 - ΓOPHA YACT HA ΓJIABATA
I3noJ3BaIe rpe6eH 3a no-rolma IbIJIHa Iro HacToPe Ha 12 MM nII 15 MM, cIeT OBa npOCTpIXeTe Kocata B roPHaTa Yact Ha rIaBAtcpeu NocOKaTa, B KOrTO o6nKHObeHo Kocata paCTe.
CTbIIKA5-3ABbPbWBAUNIUPNXN
- I3noI3BaIte MaunHkata 6e3 rpe6eHn 3a 6nn3Ko noCTprirBaHe OKOIO Tnla n CTpaHnHnTe qactn Ha BpTa n OKOIO yuHtE.

3a da noIyUHTe npaba IHHnHa 6aKeH6apDnte, o6bpeTe MaunHKata O6paTHo. NocTabete 06bpHaTATA MaunHka NOI npab bIbn Cnpmao rnaBata, HacOyTe OCTpNETa Taka, Ye Jeko da DOKOCBAT KOKATA IN CIED TOBA pOdbJNKeTe HaOny.
ГРИЖА 3A MAШИнКATA 3A ПОДСТРИГBAHE
3a da rapaHTnpate nbIroTpaH a eKTHBHOCT Ha MaunHKata 3a NOCTpNrBaHe, peoBHO. nouCTBaTe HOXeTaTu ypeHa.
BnHaru npbXkTe MaunHKaTa B IOCTaBeHaTa TOP6uKa 3a nT.
BnHarn npedn da noocmbate ypea, ce ybepeTe, ye en3knouen OT 6ytoHa n ot eJeKtpueeckaT mpeka.
- He n3noJI3BaIte arpeCnBHN nII pa3aJdaIIN noUcTBAIIN npenapATN Bbpxy ypeA IIN HOXOBTe MY.
-Почистваимето ТрбБа Да ce ИЗВьшБС мЕкуЧТК.
- CnED BCAKO n3nOJ3BaHe - NOUcTeTe C YeTka HATpyNaHata Koca OT OCTPnEtata.
Bb3MOXHOCT 3A U3MNBAAHE
MaunHkata QuickCut moKe da ce Mne 3a IecHO NOUHCTBaHe.
- YBepete ce, Ye ypeIbT e n3KJIIOUeH OT 6yTOHa N OT eNEKTPnueckata MpeXa.
MHCTPYKUIN 3A IOPTA 3A U3MUBAHE
3a6eJekka: Hukora He n3pnaKbaiTe, He MmTe nnHe n3laRaTe no dpyr Naunn npOdykTa Ha TeuHocTn, DOKATO 3axpaHbaaui Ka6eI e BkIIOUeH.
3a no-ido6pn pe3yntaTn, noCTabeTe MaunHkata noT Teuaa Boga, dokato pa6otn. OctabeTe BodaTa da npemnaba npes npota 3a n3mmbaHe nHaD octpneTata. IpenopbUba ce n3nnaKbaHe cIed BCko n3noJ3BaHe.
Cnei nouCTBaHe ce yBepTe, Ye MaunHkatae cyxa.
3a NO-uaTeHNO NOnCTBaHe, KOMnJIeKbT HOXOBe MoKe JIeCHO Da 6bJe OTCTpaHeH, 3a Da Ce H3MnRT OCTaTBcHTe OT KOCA OT HOXOBeTe. 3a Da IN3BaJInTe KOMnJIeKtA HOXOBe, HAInCHete 6yToHa 3a OCBO6OxKaDaBaHe B OCHOBaTa Ha MaUnHKaTa IINb3HeTe OCTpueTa daJeU OT MaUnHKaTa.
Cnei n3nkahe noTea a Boa, yBepTe ce, ye HoxOBete ca cyx. 3a da r npKpeNte o6paTHO, NOpRaBHeTe KOMnEKA To HOXOBe Bbpxy MaunHkata N HaTNCHE To HOXOBe KbM TAnOTO Ha MaunHKaTa IOKATO IIpaKHAT Ha MCTO.
IocTabete 3 kankn MaCno 3a HoxKOBe nn MaCNo 3a WEBn Maunn Bbpy OCTpneTata BbB BCEKn KpaN B CpeDa. BKnOyTe ypeDa 3a HAKoNk CekyHn, 3a da ce pa3npednn MacNOTo, cnd ToBa n3KnOyTe n N36bpSeTe n3nHOTo MaCNo.
CBAJIARE HA BATEPURA
BaTepeTt Ta Tpa6Ba Da 6bJe H3BaDeHa, npEe UpeBbTa da ce npEaande 3a cKpAn.
Korato OTCpaHbATE 6aTepeyta, ypeBt Tp8Ba da 6bne N3Klnuoyen OT 3axpaHbauaTa mpeka.
- YBepete ce, ye 6aTepeyrae HnabHno pa3peHa.
3aOnuHHeTe OT CbeDINHBAHeTo HA BCa Ka OT CTpaHnTe Ha leaTa Ha INdkaTopa 3a 3apeXdaHe, OTBOpTe BcKO OT CbeDINHBAHnTa KaTO DnKte NekO HAppeN Ha3aD OT eHaTa CTpaHa KbM npyraTaN CneDbAte CbeDINHBAHnTa OT INDnKaTOPHa Tae Za KbM KOMnEKeTA C HOxYeTa,
BHHMaTeJIHO n3TeIeTBe BbTpEwHnHaKOpNc HArOpe Iro OTCTpaHete.
- OTeTaHeTe IBaTa BnHTa OT BbTpEeHaTa KOHCTpyKcIy, pa3noJoxKeHa OT BCra Ka CTpaHa Ha neaTHaT aNaTka.
BHNMaTeHNO u3TerIe HeHarope BbTpewHaTa KOHCTpyKcua, KOHO JBpXn 6aTepeHra, n PLaTKaTa IOTCTpaHEo OT DOJIHaT aAcT Ha KOHCTpyKuHra Ta Ha MaunHKaTa.
OTBbTpewHaTa cTpaHa Ha Ta3n BbTpewHa KOHcTpyKzna, cpeKeTe uepBeHn u cepen npoBoDnK, KOnTO Bo8rT Do 6aTeepnra.
Kato 06bphete JIcHata CTpaHa Ha BbTpewHaTa KOHCTpyKzHa Harope, n3TeTne Harope nlaTKaTa, 3a da ocNrgpnte npocTpaHCTBO n da OTcpaHnTE 6aTePnra.
- OTeJeTe 6aTePnTa OT HeHnHTe bPkau..
- BaTePunTe Tp86Ba Da ce N3XBbPnT 6e3ONaCHO.
PEUKNJINPAHE

3a da ce n36erHaT ekoloruHn H 3dpaBn npo6lemn nopadn haInuhe Ha onaCHn cy6ctaHcnn, ypeInTe, akymlaTOPHnTe n HeakymyLaTOPHnTe 6bATEpnn, 0603haueHN C eIN OH OT Te3n CmBOJN, He Tp8Ba Da CE n3XBbPnT 3aeHNO C HecoptnpaHn 6OuHcN OToNaDbu. BUnHar n 3XbPnIe EneKtpnueckn n eEKeTPOHH n POndykTN i, KbJeTO e npuNoxIMo, akymlaTOPHn i HeakymyLaTOPHn 6bATEpnn, Ha noDxOJaIO oOuuaHn MAcTo 3a peuKnnpaHe/ cb6npaHe.
Jg 1
.1
aale aie g ciej
8 n Jn jn nn Jn Jn Jn Jn Jn Jn Jn Jn Jn Jn Jn Jn Jn Jn Jn Jn Jn Jn Jn Jn Jn Jn Jn Jn Jn Jn Jn Jn Jn Jn Jn Jn Jn Jn Jn Jn Jn Jn Jn Jn Jn Jn Jn Jn Jn Jn Jn Jn Jn Jn J
8 8
.8JgJg
aegies elgios ciy ailluio

A
a1g
jiai y jaiy Jgall 8. Jgao 10 all g jy .
. Remington 1
12j 1
·
a#
.
.
.
1
四四四
a
中
J
S OBC = S COD + S BOC - S BOC
juii jiaai ci bie
(On/off) 1
2
gao 9 .3
Juweli jia 4
5
Jaeil
jL
J 1
13511 12 a
240 100 j
J 1
.
| اللهassium-ion اللهassium-ion اللهassium-ion اللهassium-ion اللهassium-ion اللهassium-ion اللهassium-ion اللهassium-ion اللهassium-ion اللهassium-ion اللهassium-ion اللهassium-ion اللهassium-ion اللهassium-ion اللهassium-ion اللهassium-ion اللهassium-ion اللهassium-ion اللهassium-ion اللهassium-ion اللهassium-ion | |
| الهaviest الهaviest الهaviest الهaviest الهaviest الهaviest الهaviest الهaviest الهaviest الهaviest الهaviest الهaviest الهaviest الهaviest الهaviest الهaviest الهaviest الهaviest الهaviest الهaviest الهaviest الهaviest الهaviest الهaviest الهaviest الهaviest |
.
40 JolSJnJxJxJx
6 6
10 10
pIi
( 0,12,0,14,0,·s )
a
SxJ1 pJ3y
·
.
.
Jg Jn Jn Jn Jn Jn Jn Jn Jn Jn Jn Jn
J 1 J 1 J 1 J 1 J 1 J 1 J 1 J 1 J 1 J 1 J 1 J 1 J 1 J 1 J 1 J 1 J 1 J 1 J 1 J 1 J 1 J 1 J 1 J 1 J 1 J 1 J 1 J 1 J 1
.
Jiau Jiai jia jia jia jia jia jia jia jia jia jia jia jia jia jia jia jia jia jia jia jia jia jia jia jia jia jia jia jia jia jia jia jia jia jia jia jia jia jia jia jia jia
•
i11 1 i 1 1 j
.
1
.
JyI yIyI yIyI yIyI yIyI yIyI yIyI yIyI yIyI yIyI yIyI yIyI yIyI yIyI yIyI yIyI yIyI yIyI yIyI yIyI yIyI yIyI yIyI yIyI yIyI yIyI y
.
a a a a a a a a a a a a a a
1
•
1
•
a 1
.
J 1
.
1 1
f( x) 定义域为 x x k t2t3 , k z
y 1
AE

i 100000000000000000000000000000000000000000000000000000000000000000000000
aaii iiaai

Ref. No. HC4255
Type No. HC4250
Remington® is a Registered Trade Mark of Spectrum Brands, Inc.,
or one of its subsidiaries
VARTA Consumer Batteries GmbH & Co. KGaA, Alfred-Krupp-Str. 9, 73479 Ellwangen, Germany
www.remington-europe.com