
PIXMA TS6351a - Printer CANON - Free user manual and instructions
Find the device manual for free PIXMA TS6351a CANON in PDF.
| Brand | CANON |
| Model | PIXMA TS6351a |
| Category | Multifunction printer |
| Product type | Color inkjet printer |
| Functions | Print, copy, scan |
| Connectivity | Wi-Fi, wireless connection |
| Power supply | Power cord (100-240 V AC, 50/60 Hz) |
| Paper feed tray | Rear tray (rear receptacle) for plain paper and photo paper |
| Supported paper sizes | A4, Letter, and other common sizes |
| Ink cartridges | Color ink cartridges (black, cyan, magenta, yellow) - specific models not included |
| Display | LCD screen with button navigation |
| Interface languages | French, English, German, Spanish, Italian, Dutch, etc. |
| Computer installation | Download driver from ij.start.canon |
| Smartphone installation | Canon PRINT Inkjet/SELPHY app |
| Copy | Copy on exposure glass with adjustable settings |
| Safety | Watch your fingers, do not touch the moving print head |
| Replacement parts | Replacement ink cartridges |
| Maintenance | Nozzle cleaning via software (not detailed in this manual) |
| Power consumption | Not specified in the manual |
| Dimensions (approx.) | Not specified |
Frequently Asked Questions - PIXMA TS6351a CANON
User questions about PIXMA TS6351a CANON
0 question about this device. Answer the ones you know or ask your own.
Ask a new question about this device
Download the instructions for your Printer in PDF format for free! Find your manual PIXMA TS6351a - CANON and take your electronic device back in hand. On this page are published all the documents necessary for the use of your device. PIXMA TS6351a by CANON.
USER MANUAL PIXMA TS6351a CANON
Read Safety and Important Information (addendum) first.
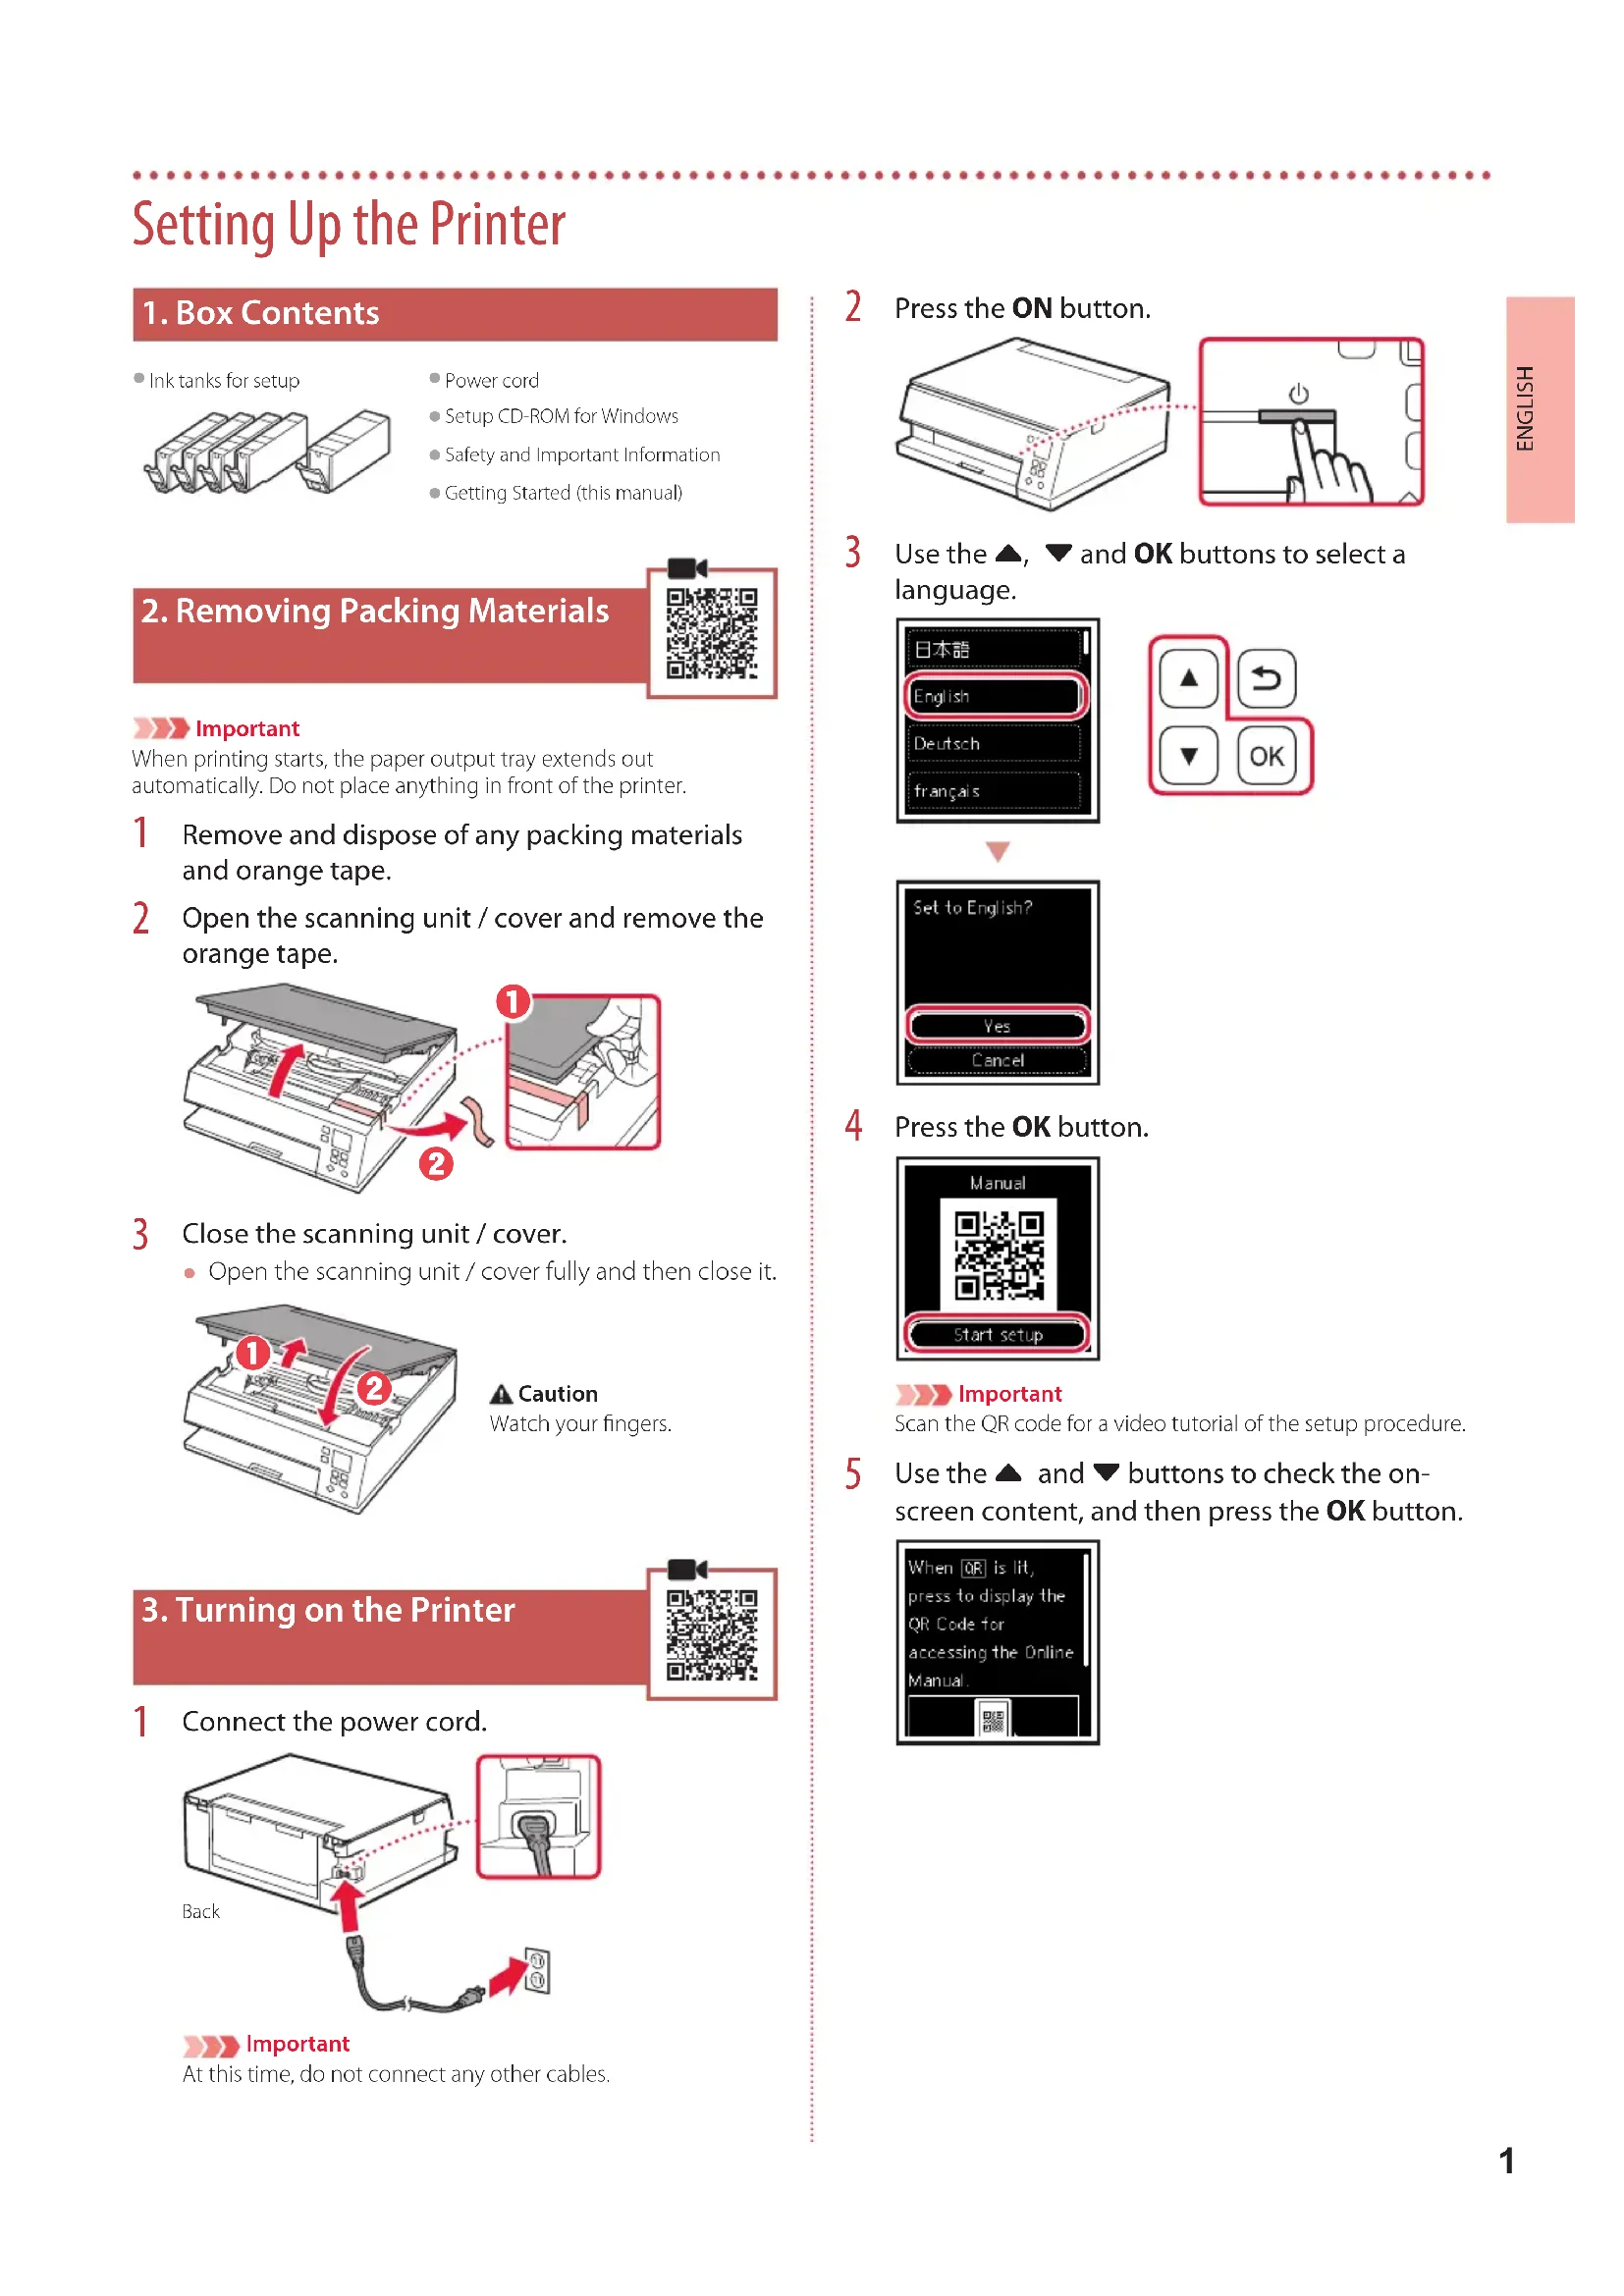
Setting Up the Printer
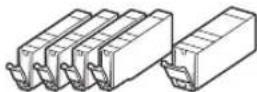
1.Box Contents
- Ink tanks for setup
Power cord
- Setup CD-ROM for Windows
Safety and Important Information
Getting Started (this manual)
2. Removing Packing Materials


Important
When printing starts, the paper output tray extends out automatically. Do not place anything in front of the printer.
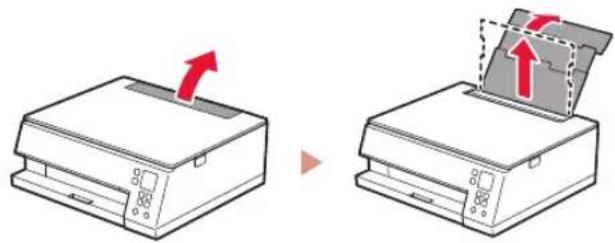
1 Remove and dispose of any packing materials and orange tape.
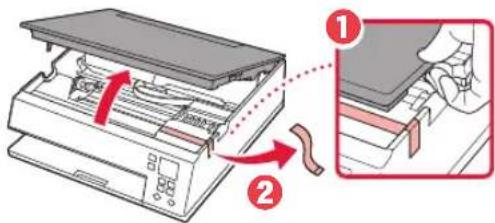
2 Open the scanning unit / cover and remove the orange tape.
3 Close the scanning unit / cover.
- Open the scanning unit / cover fully and then close it.
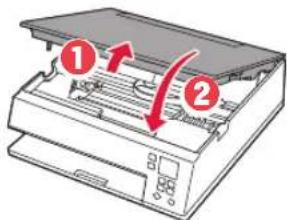
Caution
Watch your fingers.
3. Turning on the Printer

1 Connect the power cord.
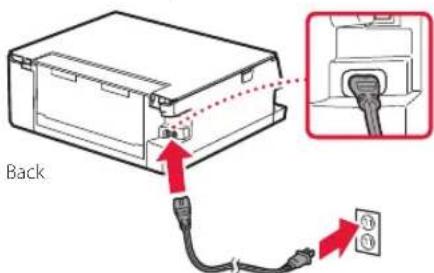

Important
At this time, do not connect any other cables.
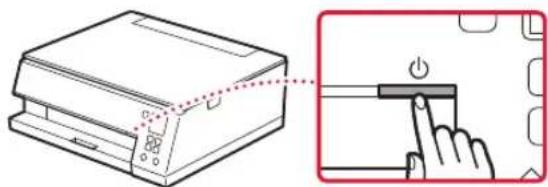
2 Press the ON button.
3 Use the , and OK buttons to select a language.

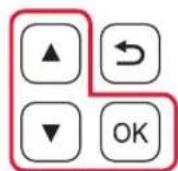
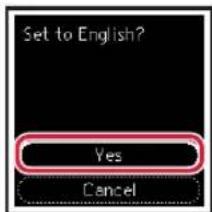
4 Press the OK button.

Important
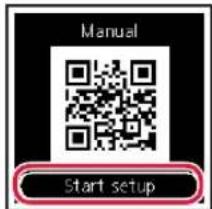
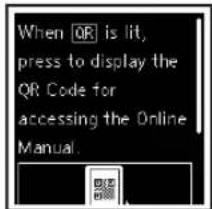
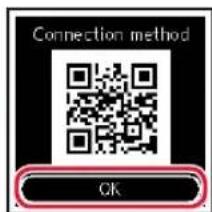
Scan the QR code for a video tutorial of the setup procedure.
Use the and buttons to check the on-screen content, and then press the OK button.
Setting Up the Printer
4. Installing the Ink Tanks

1 Open the scanning unit / cover.

Caution
Do not touch the print head holder until it stops moving.
2 Remove the tape and film on the ink tank.
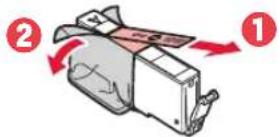
- Check that no tape is left over.
3 Slowly remove the orange cap.
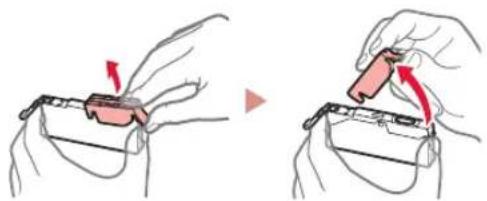
Important
- Do not squeeze the ink tank with the Y-shaped air hole blocked.
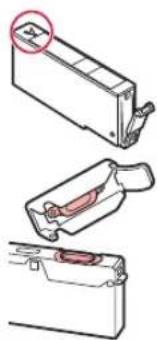
- Do not touch the areas shown in red.
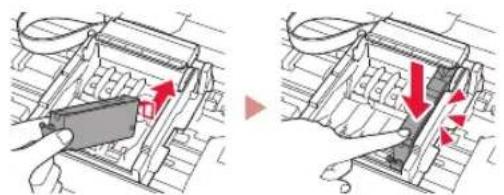
4 Install the ink tank.
- Insert the ink tank into the print head and press down until it clicks.
5 Check that the mark appears on the screen.
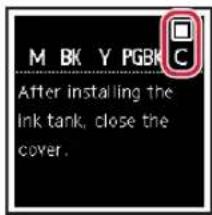
Important
If the mark is not displayed on the screen even though you have installed the ink tank, the color of the ink tank may be wrong or you may have installed an ink tank, such as one with a different model number, that is not supported by this printer. Either install an ink tank for the correct color or use the provided ink tank for setup.
6 Repeat steps 2 through 5 to install all the ink tanks.
- Check that a mark is displayed on the screen for each color.

7 Close the scanning unit / cover.
The printer will start initializing.
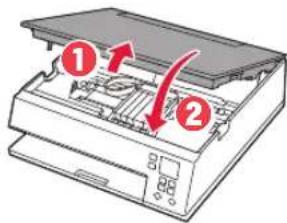
Caution
Watch your fingers.
5. Loading Paper
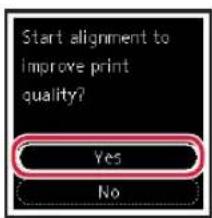
1 Press the OK button.
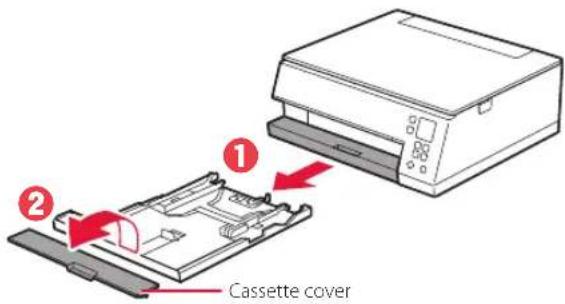
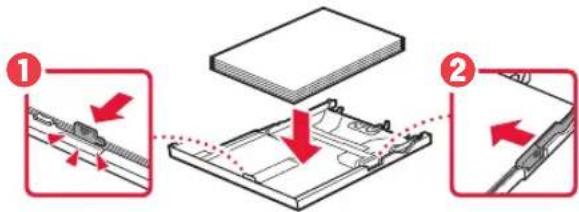
2 Remove the cassette from the printer and remove the cassette cover.
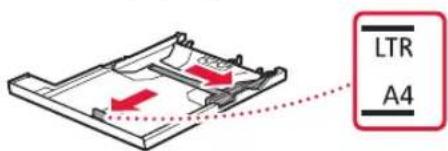
3 Slide apart the paper guides.
- Slide the right paper guide to the right edge. Align the front paper guide with the Letter or A4 mark.
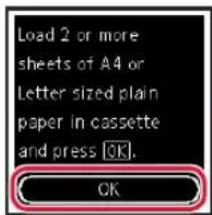
4 Load paper.
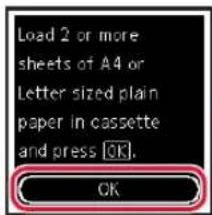
- Load 2 or more sheets of Letter or A4 sized plain paper with the print side facing down.
- Place the paper against the front paper guide, and align the right paper guide to the width of the paper.
5 Attach the cassette cover and replace the cassette.
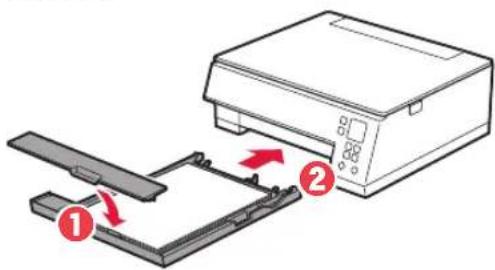
6 Press the OK button.

7 Press the OK button.
Important
Scan the QR code for a video tutorial of the setup procedure.
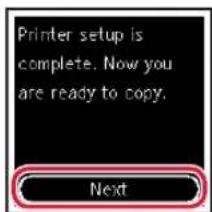
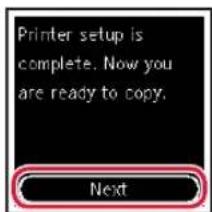
8 Check that the following screen appears.
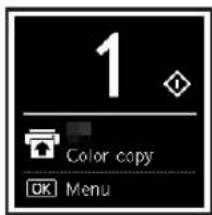
If you will use the printer without connecting any other devices, setup is now complete.
What device are you connecting?
Computer!

Computer and smartphone

6-a
Connecting to a Computer
If you are using multiple computers, perform these steps on each computer.

1 Access the Canon website from a computer.
https://ij.start.canon
2 Select Set Up.
3 Enter your printer's model name and click Go.
4 Click Start.
5 Click If you have already prepared your printer, go to Connect.

Note
The following steps are for Windows (except Windows 10 in S mode) and macOS users. For other operating systems, continue setup by following the on-screen instructions instead.
6 Click Download.
7 Run the downloaded file.
8 Click Start Setup.
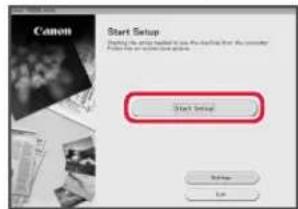
9 Follow the on-screen instructions.
These operations may take some time.
To connect to a smartphone as well, see "6-b. Connecting to a Smartphone" on page 5.
Using the Setup CD-ROM for Windows
Double click EasySetup.exe in the CD-ROM, and then continue from step 3. If you do not have an internet connection, open the win folder in the CD-ROM and double click SETUP.exe. This will install the printer driver.
6-b
Connecting to a Smartphone
If you are using multiple smartphones, perform these steps on each smartphone.

Prepare the following before starting.
1 Enable the Wi-Fi setting on your smartphone.
2 Connect your smartphone to the wireless router (if you have a wireless router). Refer to your smartphone and wireless router manuals for more details.
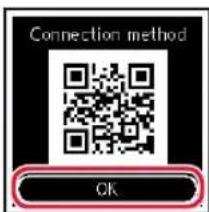
1 Install the "Canon PRINT Inkjet/SELPHY" app on your smartphone.
- Scan the QR code shown on the right to access the Canon website, and then download the app.

2 Open the installed app.
3 Follow the on-screen instructions in the app to add your printer.
Once you have added your printer, you can print from your smartphone.
To print photos, see "Loading Photo Paper" on page 6.
Loading Photo Paper
Photo paper can only be loaded in the rear tray.
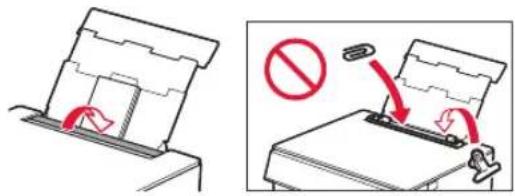
1 Open the rear tray cover and extend the paper support.
2 Open the feed slot cover and slide the right-hand side paper guide to the far right.
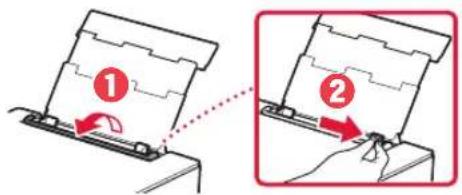
3 Load several sheets of photo paper with the print side facing up and slide the side paper guide against the edge of the paper stack.

4 Close the feed slot cover.
- Follow the on-screen instructions to set information for the loaded paper.
Copying
1 Turn on the printer.
2 Load Letter or A4 sized plain paper.
3 Open the document cover and place the document face down on the platen. Align the document with the alignment mark (
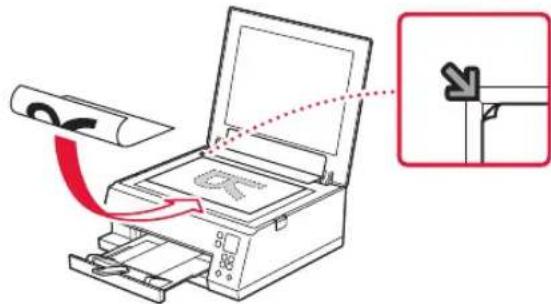
4 Close the document cover.
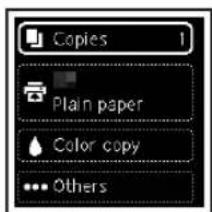
5 Press the OK button.
6 Select Copy settings, and then press the OK button.
7 Specify print settings using the , and OK buttons.
8 Press the Start button.
Configuration de l'imprimante
3 Deslize as guias do papel.
6 NaTHoTe To koumi OK.

7 NaTHoTe To koumi OK.
Σημavτικό
ZapwTeTovKwOkoQyiaVaSeiteEvabivteoueodnyie, OeyikAe Tn diaikociaipuOmuic.
8 Bebaiwtheta otI evarietai n akolouo oovn.

Av npoketai va xpnoumonoioeTe Tov EKTunwnxwpic va ouvdoete aalec ouokeuec, toe n puthetaion exoi oloknpw.
Ttouokeun okoeneuete va ouvdeoet;
YIIOAOYIOITc

YIIOLOVIOIOTNC KAI smartphone

Smartphone