Anna AS20Z - Vacuum Cleaner Zoef Robot - Free user manual and instructions
Find the device manual for free Anna AS20Z Zoef Robot in PDF.
| Product type | Robot vacuum cleaner |
| Brand | Zoef Robot |
| Model | Anna AS20Z |
| Power supply | Rechargeable battery (AC adapter included) |
| Charging time | Approximately 6 hours |
| Cleaning modes | Automatic, spot, edge, manual |
| Suction power adjustment | Yes, via remote control or app |
| Automatic return to charging station | Yes, when battery low or cleaning finished |
| Filtration type | HEPA filter, sponge filter, pre-filter |
| Dustbin capacity | Not specified |
| Included accessories | Charging station, adapter, cleaning brush, side brushes (x2), water tank (optional), mopping cloth (optional), remote control (optional) |
| Safety | Anti-drop floor sensors, front bumper, obstacle detection |
| Regular maintenance | Cleaning dustbin, filters, side and main brush, sensors |
| Spare parts | HEPA filters, side brushes, main brush, battery, water tank |
| Operating conditions | Temperature 0°C to 40°C, hard floors, avoid thick carpets and humidity |
| Certifications | CE, RoHS |
| Warranty | Not specified |
Frequently Asked Questions - Anna AS20Z Zoef Robot
User questions about Anna AS20Z Zoef Robot
0 question about this device. Answer the ones you know or ask your own.
Ask a new question about this device
Download the instructions for your Vacuum Cleaner in PDF format for free! Find your manual Anna AS20Z - Zoef Robot and take your electronic device back in hand. On this page are published all the documents necessary for the use of your device. Anna AS20Z by Zoef Robot.
USER MANUAL Anna AS20Z Zoef Robot
text_image
ZOEF ROBOTAnna
natural_image
Top-down line drawing of a circular robotic vacuum cleaner with control panel and power button (no text or symbols)Handleiding
User Manual
Mode d'emploi
Benutzerhandbuch
Robotstofzuiger, Robot vaccumcleaner, Robot Aspirateur, Roboterstaubsauger
Please read this manual carefully before using the product and keep it safe.
natural_image
Line drawing of a remote control with a curved door handle and a flat blade (no text or symbols)Afstandsbediening Water Tank (Optioneel) Dweil (Optioneel)
natural_image
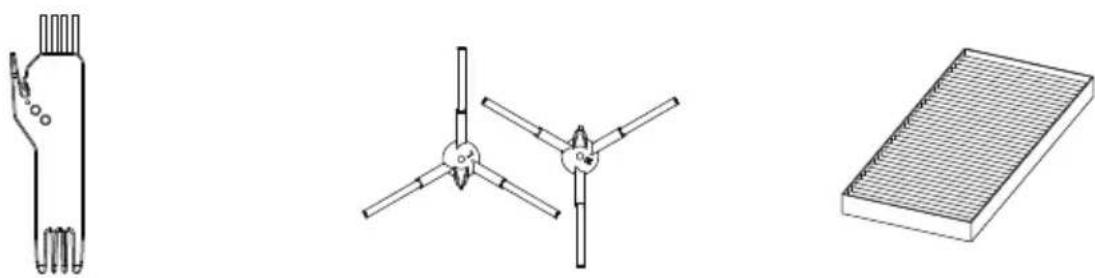
Technical line drawings of three mechanical components: a hand holding a spring, a three-blade tool with a valve, and a grid-patterned base (no text or symbols)text_image
Technical diagram of a mechanical device with numbered components for identification- Stofbak afdekkap
2、Stofbak zijklep
3、HEPA Filter
4、Spons Filter
5、Primair Filter
6、Stofbak Opvangbak
7、Stofbak onderkant
Water Tank

text_image
8 9 10 118、Water vul opening..
9、Water Tank
10 Dweil
11、Knop tbv openen Water Tank
Afstandsbediening

text_image
17 18 19 20 21 15 22 12 13 14 16natural_image
Line drawing of a mechanical component with a hand adjusting a circular base and a downward arrow indicating motion (no text or symbols)natural_image
Top-down schematic of a spacecraft cockpit with propellers and control panels (no text or labels)natural_image
Diagram of a circular device with arrows indicating force or movement, showing hand positioning and directional arrows (no text or symbols)text_image
0.5M 1.5M 0.5Mnatural_image
Line drawing of a circular vacuum cleaner with a finger pointing to the lid (no text or symbols)text_image
Indicatornatural_image
Line drawing of hands using a handheld device to press or install a component (no text or symbols present)natural_image
Technical line drawing of a mechanical component with a circular top and base, showing a hand pressing a button (no text or symbols)natural_image
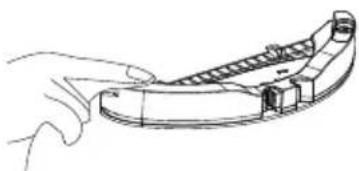
Technical line drawing of a mechanical component with a circular base and a separate housing (no text or symbols)2、Installeer de dweil.
natural_image
Line drawing of a mechanical component with a downward arrow indicating motion (no text or symbols)natural_image
Technical line drawing of a mechanical device with a downward arrow indicating motion (no text or symbols)natural_image
Diagram of a hand pressing a small component on a circular device (no text or symbols)natural_image
Technical line drawing of a circular mechanical component with a right-pointing arrow indicating direction (no text or symbols)- Leeg de stofbak in de afvalbak
natural_image
Illustration of a spacecraft launching particles into a container (no text or symbols)natural_image
Technical line drawing of a multi-tiered mechanical device with no visible text or symbols- Open de stofbak klep
natural_image
Technical line drawing of a mechanical device with a curved arrow indicating rotation (no text or symbols present)natural_image
Line drawing of a mechanical component with an arrow indicating rotational motion (no text or symbols)natural_image
Line drawing of a faucet releasing water into a gridded tray (no text or symbols)natural_image
Line drawing of a hand holding a device with a tray and handle (no text or symbols)natural_image
Line drawing of a sun shining over an open device and three rectangular blocks (no text or symbols)De watertank is optioneel.
natural_image
Line drawing of a circular device with a handle and arrow indicating downward motion (no text or symbols)natural_image
Line drawing of a hand holding a water droplet, with no text or symbols present- Verwijder de dweil.

natural_image
Technical line drawing of a mechanical component with an upward arrow indicator (no text or symbols)natural_image
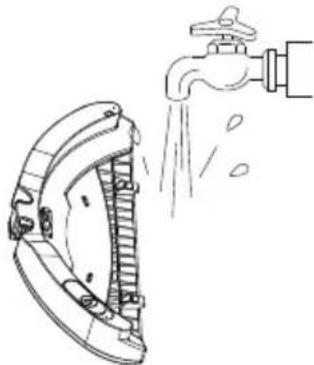
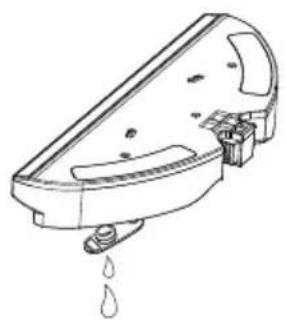
Line drawing of a faucet pouring liquid into a surface, with no text or symbols present.- Maak de watertank schoon. 6. Droog de dweil
natural_image
Line drawing of a faucet spraying water onto a car wheel (no text or symbols)- Droog de watertank.
natural_image
Line drawing of a hand holding a curved mechanical component (no text or symbols)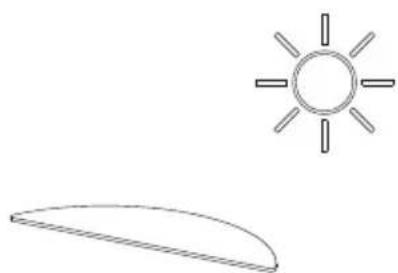
natural_image
Simple line drawing of a sun and a curved shape (no text or symbols)natural_image
Technical line drawing of a circular mechanical device with internal components and a rotation arrow (no text or symbols)natural_image
Technical line drawing of a circular mechanical device with internal components and a hand holding a knob (no text or symbols)natural_image
Technical line drawing of a mechanical assembly with hands operating a tool (no text or symbols present)natural_image
Line drawing of a hand holding a tool with a small object nearby (no text or symbols)natural_image
Line drawing of a hand using a handheld device to press or install a device (no text or symbols present)natural_image
Diagram of a hand inserting a component into a circular device housing (no text or symbols visible)Maak de anti-val sensoren schoon

natural_image
Diagram of a hand installing or adjusting a device on a circular base, showing internal components and wiring (no text or symbols)natural_image
Diagram of a hand inserting a component into a circular device housing (no text or symbols visible)natural_image
Simple line drawing of a circular object with two side handles and a small protrusion (no text or symbols)natural_image
Technical line drawing of a mechanical component with mounting flanges (no text or symbols)Omschrijving Waarde
| Afmeting | 155*150*80mm |
| Spanning In | 19V |
| Spanning Uit | 19V 0.6A |
| Vermogen | 11.4W |
| Frequentie | 50/60Hz |
Executive standard: GB4706.1-2005 GB4706.7-2014
GB4343.1-2009GB17625.1-2012
CE
" CE "marking states that the product is compliant to European Directives.
2014/35/EU Low Voltage Directive.
2014/30/EU EMC Directive.
It is possible to request a full copy of Declaration of compliance to the Distributor.
This product complies with the rules of RoHS Directive(2011/65/EU&2015/863/EU).
This product complies with the rules of Eup Directive(2009/125/CE).

text_image
ZOEF ROBOTAnna

natural_image
Top-down line drawing of a circular robotic vacuum cleaner with control panel and power button (no text or symbols)User Manual
Robot Vacuum Cleaner
Please read this manual carefully before using the product and keep it safe.
Before using this product, please read the following safety instructions and follow all the safety precautions.
Please read the instruction carefully. Please keep this instruction.
Any operation inconsistent with this instruction manual may cause damage to this product.
Attention
1、Only authorized technicians can disassemble this product. Users are not recommended to disassemble this product by themselves.
2、Please use the original power adapter only. Other adapters may caused damage to this product.
3、Do not touch wires, sockets or power adapters when your hands are wet.
4、Do not use cloth curtains or body parts to roll into the product drive wheels.
5、Do not place this product near cigarette butts, lighters and other smoldering fires.
6、Please clean the product after charging.
7、Do not bend wires excessively or place heavy objects and sharp objects on the machine.
8、This product is an indoor household product. Do not use it outdoors.
9、Do not sit on the product.
10、Do not use this product in wet environment (e.g. bathroom).
11、Before using this product, please remove all vulnerable items (e.g. glasses, lamps, etc.) on the ground as well as items (e.g. wires, paper sheets, curtains) that may entangle the side brushes and air suction passages.
12、Do not put this product in a place where it is easy to fall (e.g. on desks and chairs).
13、Please turn off the main power switch on the side of machine during transportation or not use for long time.
14、Please carefully check whether the power adapter is connected to the socket before use, otherwise the battery may be damaged.
15、To prevent tripping, please inform other members of the house when this product works.
16、Please empty the dust box before using this product when the dust box is full.
17、The temperature used for this product is 0 to 40 degrees celsius.
18、Do not use this product in high temperature environment.
19、Please remove the battery from the machine before the product is scrapped.
20、Please make sure that this product is not powered on when removing the battery.
21、Please recycle the discarded batteries safely.
Warning
- Use only the original rechargeable battery and charging station specially equipped by the manufacturer. Non-rechargeable batteries are strictly prohibited, please refer to "product parameters" for battery specification information.
2、It is forbidden to use products in environments with open flames or fragile objects.
3、It is forbidden to use products in extremely hot (above 40 °C ) or extremely cold (below 0 °C ) weather.
4、It is forbidden for human hair, clothes, fingers and other parts to approach the opening and operating parts of the product.
5、It is forbidden to use products on wet or stagnant ground.
6、It is forbidden for products to absorb any articles such as stones and waste paper that may clog products.
7、It is prohibited for the product to absorb any inflammable substances, such as petrol, toner and toner for printers or photocopiers. It is also prohibited to use the product in clean areas with flammable items.
8、It is forbidden for products to absorb any burning articles, such as cigarettes, matches, ashes and other articles that may cause fire.
9、It is forbidden to place articles at the suction port. Do not use the product when the suction port is blocked. Clean up dust, cotton wool, hair etc. at the suction port to ensure smooth air circulation at the suction port. Use the power cord carefully to avoid damage.
10、It is forbidden to use the power cord to drag or pull the products and the product charging station. It is forbidden to use the power cord as a handle. It is forbidden to clamp the power cord in the crack of the door.
11、It is forbidden to pull the power cord at sharp corners and corners.
12、It is forbidden for the product to run on the power cord while the power cord should be far away from the heat source. Do not use damaged charging station. Even if the product has been severely damaged, burning of the product is prohibited, which may lead to explosion of the battery of the product.
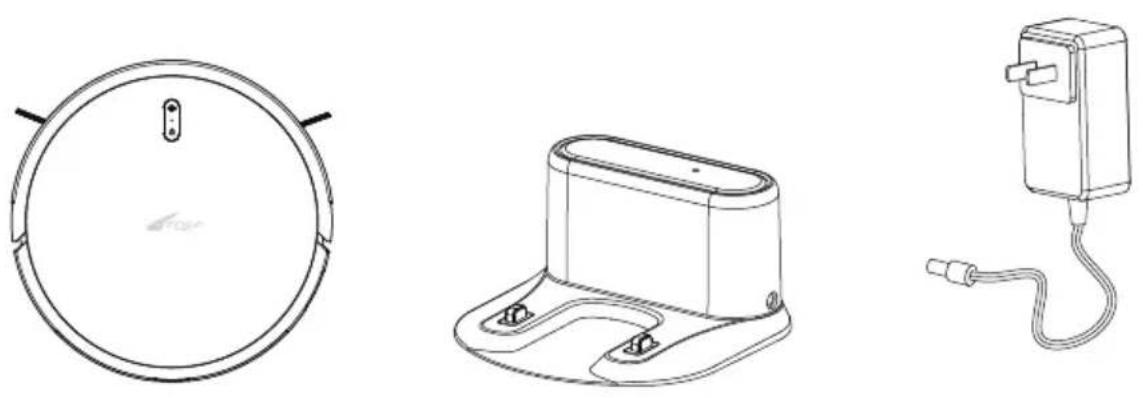
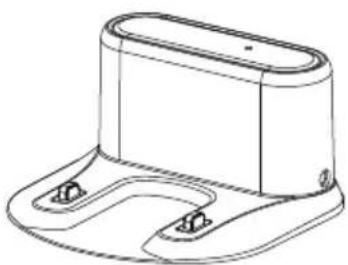
Anna Charging Base Power Adaptor
natural_image
Line drawing of a remote control with circular buttons and play button (no text or symbols)
natural_image
Technical line drawing of a curved mechanical component with internal ladder-like structure (no text or symbols)
Remote Controller (optional) Water Tank(optional) Mop (Optional)
Cleaning Brush Side Brush
natural_image
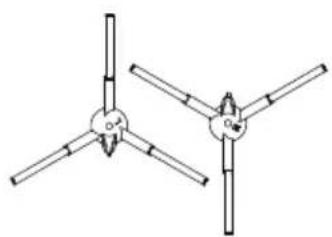
Pure mechanical diagram showing two symmetrical arms with no text or symbols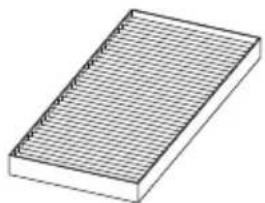
natural_image
Isometric view of a rectangular grid-patterned object with no text or symbolsHEPA
TOP

text_image
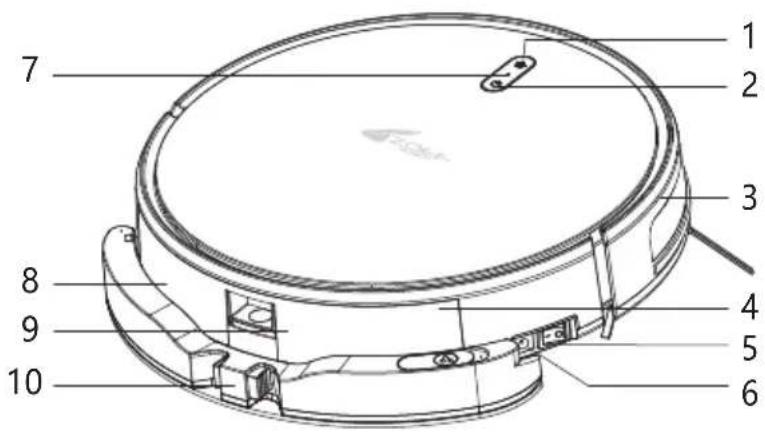
1 2 3 4 5 6 7 8 9 101、Home
2、Start/Pause
3、Front Bumper
4、Dust Bin
5、Power Switch
6、Charge hole
7、WIFI indicator
8、Water Tank
9、Dustbin Release Button
10、Water Tank Release Button
BOTTOM
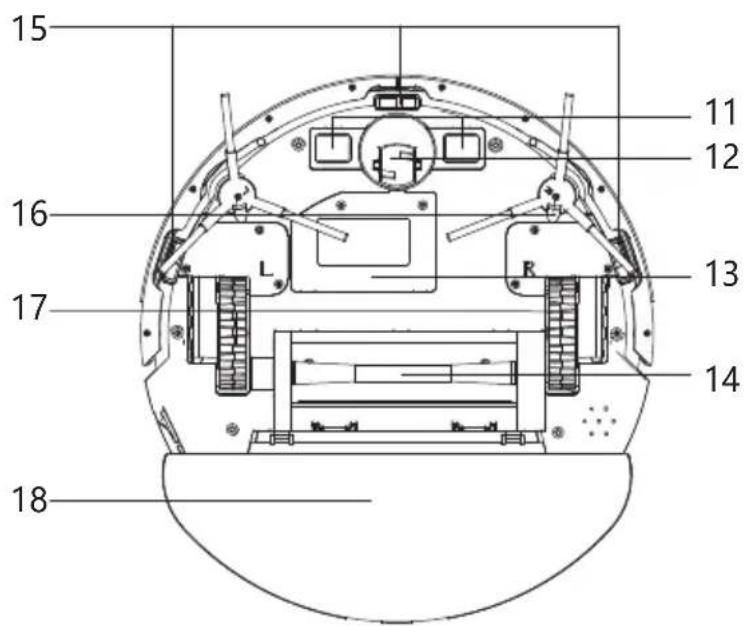
text_image
15 16 17 18 11 12 13 1411、Charge Plate
12、Universal Front Wheel
13、Battery
14、Main Roller Brush
15、Ground Sensors
16、Side Brush
17、Wheel
18、Water Tank
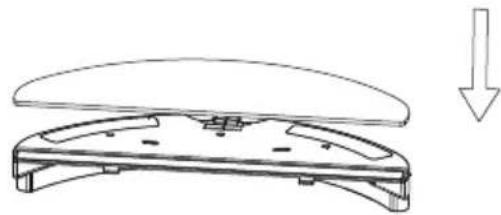
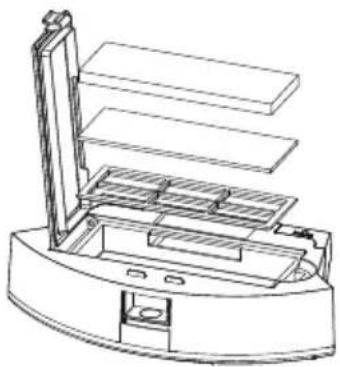
Dust Bin
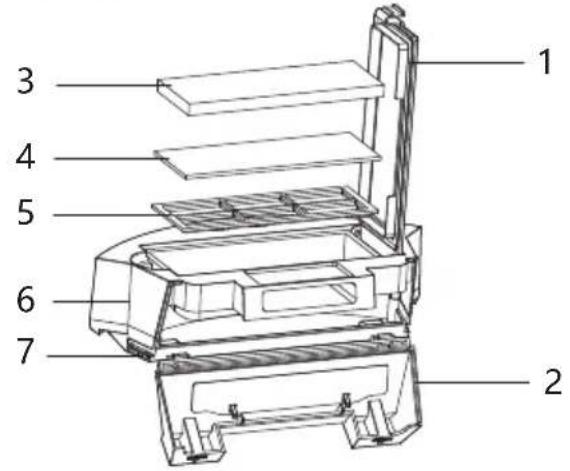
text_image
Technical diagram of a mechanical device with numbered components for identification1、Dust Bin Top Cover
2、Dust Bin Side Cover
3、HEPA Filter
4、Sponge Filter
5、Primary Filter
6、Dust Bin Top Part
7、Dust Bin Bottom part
Water Tank

text_image
8 9 10 118、Water Injection hole
9、Water Tank
10、Mop
11、Water Tank Release Button
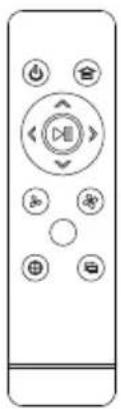
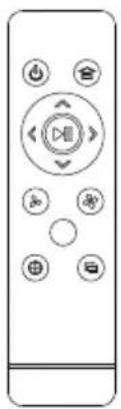
Remote Controller
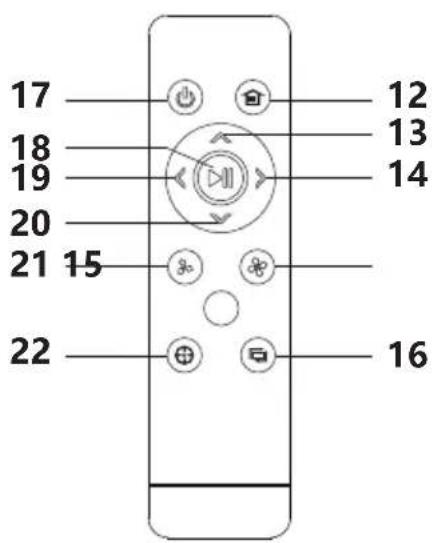
text_image
17 18 19 20 21 15 22 12 13 14 1612、Go Home
13、Forward
14、Turn Right
15、Suction Power Adjustment
16、Along the wall
(valid in specify model)
17、ON/OFF
18、Pause/Start
19、Turn Left
20、Turn Back
21、Suction Power Adjustment
22、Spot Cleaning
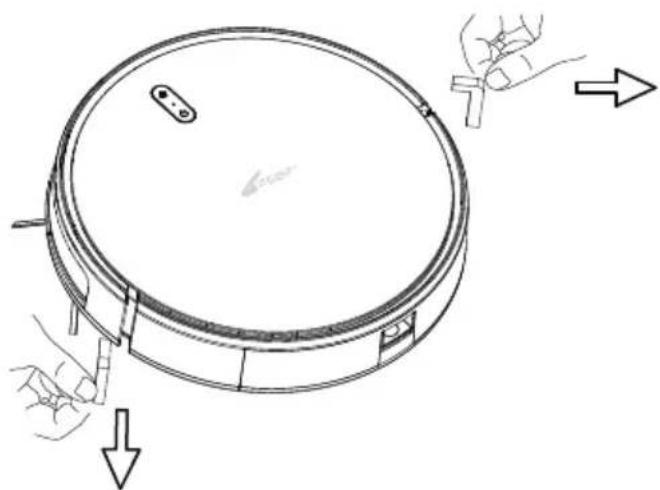
Take out Water Tank
Press the water tank release button then take out water tank.
natural_image
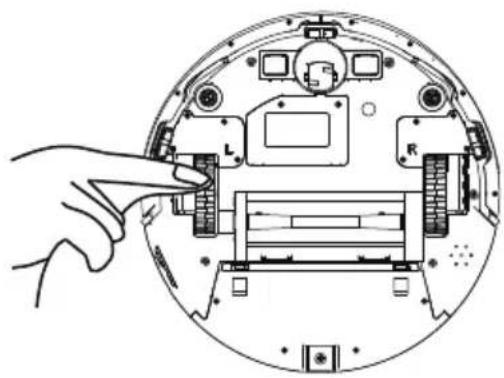
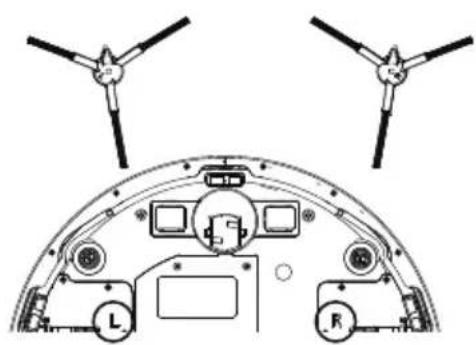
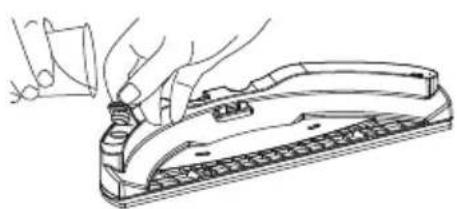
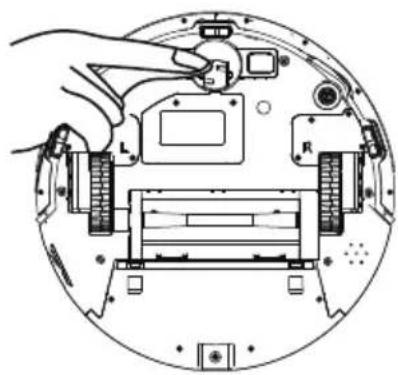
Line drawing of a circular device with a handle and arrow indicating downward motion (no text or symbols)Install Side Brush
Install the side brush according to the left and right (L/R).
natural_image
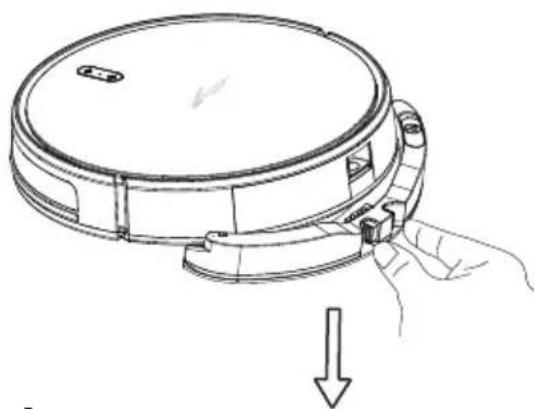
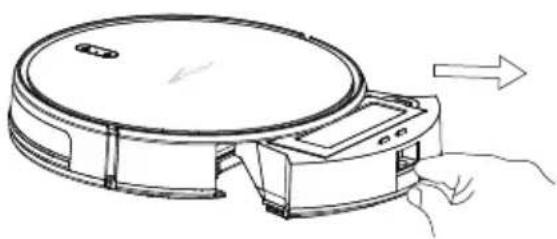
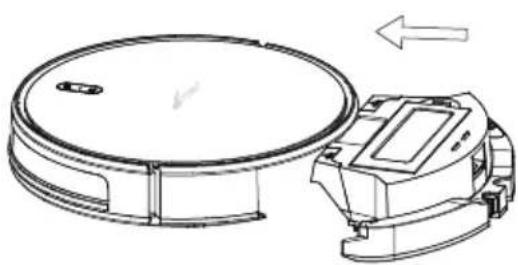
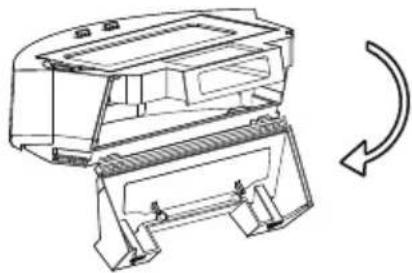
Technical diagram of a spacecraft cockpit with propellers and control panels (no text or labels)Remove the Bumper Protective Strip
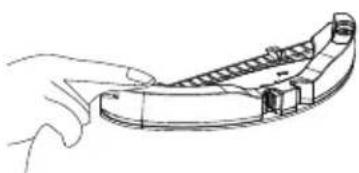
Before using the robot, please remove the protective strip from the robot.
natural_image
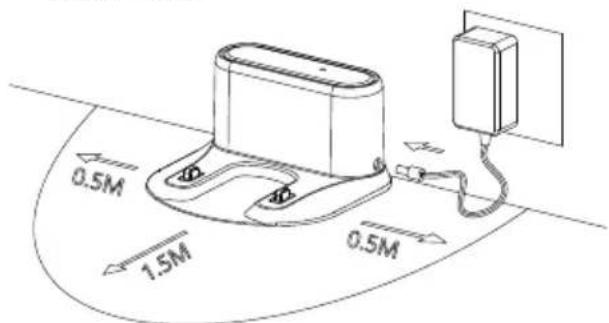
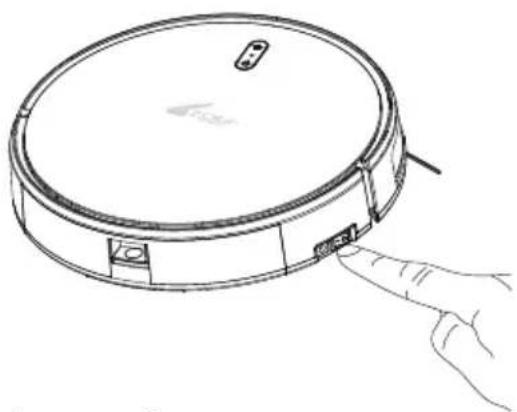
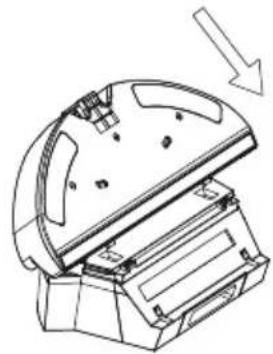
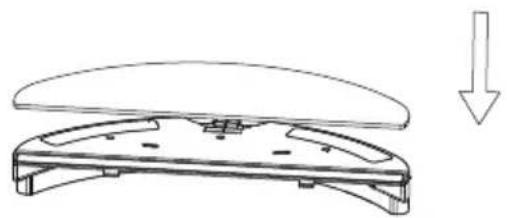
Diagram of a circular device with arrows indicating force or movement, showing hand positioning and directional arrows (no text or symbols)Product Use/Host Charging
1、Place the Charging Base&Connect the Power Supply.
Place the charging station against the wall and on a flat ground. Do not place articles within the range of 0.5m left and right and 1.5m ahead.
text_image
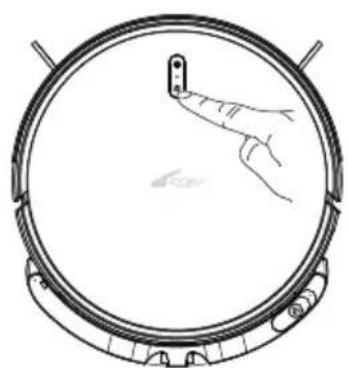
0.5M 1.5M 0.5M2、Turn on the Main Switch Power.
"I means turn on robot, "O" means turn off robot.
natural_image
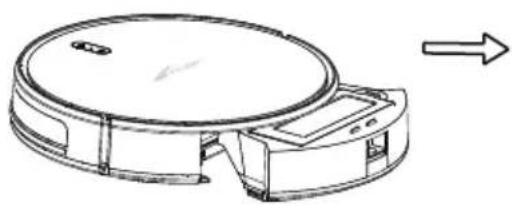
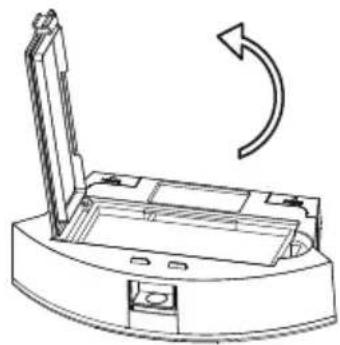
Line drawing of a circular vacuum cleaner with a hand pointing to its lid (no text or symbols)3、Charge the robot: Put the robot on charging base to charge, or use power adaptor to direct charge.
When charging, the indication light flashes(yellow light);
When charging complete, the indication light turn to green once charging complete
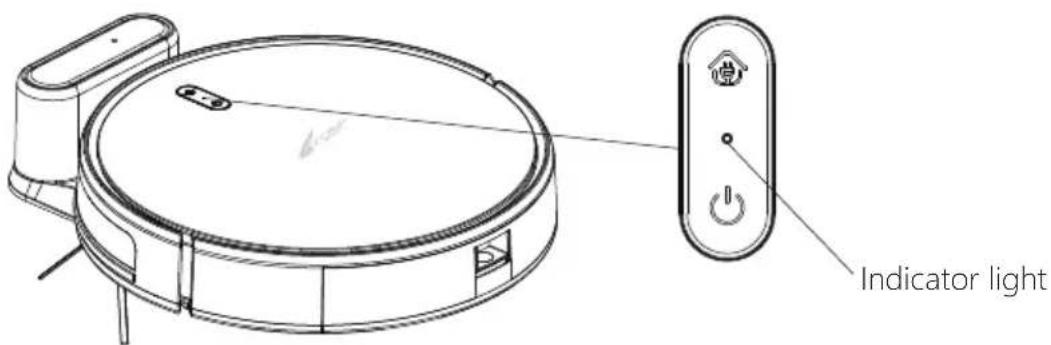
text_image
Indicator lightDuring Cleaning, the robot can sense that its power is insufficient and automatically start the recharging mode to find the charging base to recharge.
You can also command the robot to start the recharging mode by recharging botton on the remote controller/APP.
Charging Attention:
1、The charging station cannot be used in environments with strong reflection such as direct sunlight or nearby mirrors.
2、In order to ensure the normal working hours, please fully charge the robot before use. The charging time is about 6 hours.
3、When charging, please remove the water tank assembly from the robot vacuum, so as to ensure the safety of charging and prevent wet mops from damaging the floor.
4、When Charging, All buttons except start button on the host/remote/APP will make the robot abnormal.
Product Use/Water Tank
Water Tank is an optional function.
1、Open the water injection port of the water tank and plug the water injection cap.
natural_image
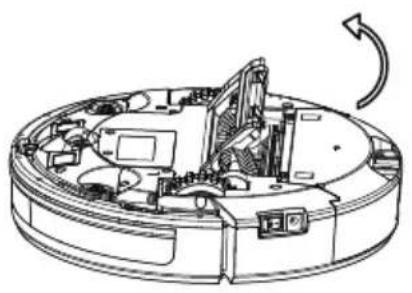
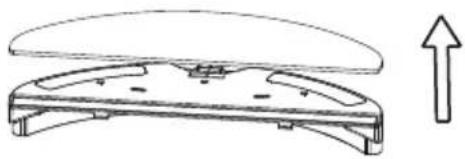
Line drawing of a hand using a tool to press or install a device (no text or symbols present)3、Take out dust bin.
natural_image
Line drawing of a robotic vacuum cleaner with hand and arrow indicating motion (no text or symbols)5、Install the dust bin+ water tank on the host.
natural_image
Technical line drawing of a circular mechanical component with a separate view showing a device and directional arrow (no text or symbols)2、Install the Mop.

natural_image
Line drawing of a mechanical component with a downward arrow indicating motion (no text or symbols)4、Install the water tank into dust bin.
natural_image
Technical line drawing of a mechanical device with a downward arrow indicating motion (no text or symbols present)6、Start mopping the floor.
natural_image
Diagram of a hand pressing a small object on a circular mechanical component (no text or symbols)* Please don't use water tank on the carpet, if your room is with carpet, please use virtual blocker to stop the robot enter carpet.
* Mopping mode completed, please clean the leftover water in the water tank and re-install mop to clean it.
According to different cleaning needs, the product has a variety of cleaning modes to choose from. You can start various cleaning modes through a host, remote control or app.
Auto Cleaning
Applicable Scene: It's the most common cleaning way, the robot makes planned cleaning according to environment surroundings then clean the whole house in a zigzag way. Setting Method: Turn on the main switch, after robot indicate its ready, then press start button on the robot or press ▶ on the remote or start.
Spot Cleaning
Applicable Scene: Suitable for the floor where garbage is concentrated, the robot cleans the floor in "spiral" route, cleaning completed, the robot will return to where it starts then stop cleaning.
Setting Method: Press the button 📋 on the remote or start on APP to start spot cleaning.
Border Cleaning
Applicable Scene: For indoor border cleaning, the robot cleans along the perimeter of fixed objects (such as walls), and returns to the charging station after the border cleaning finished (except remote controller/ APP control).
Setting Method: Press the button 📋 on the remote controller or start on APP to start border cleaning.
Manual Control
Applicable Scene: Suitable for manual control cleaning.
Setting method: Click on the buttons 📄 on the remote controller to move forward and backward and turn right or left.
Suction Power Adjustment
Applicable Scene: Adjust suction power or water seepage according to different floor environments.
Setting Method: In auto cleaning mode, press 🏠/💡 on the remote controller of use APP to control to adjust suction power.
* Attention: Suction power adjustment only effective under auto cleaning mode
Pause:
During the operation of the host, press start button on the host or “ ” button on APP or “ ” button on remote controller to pause the robot.
Wake Up:
If the host stops working for more than 3 minutes, it will automatically enter into sleep mode (all lights on the host are off). You can wake up the host by pressing the host button "start" or any button on the remote controller or "start" button on APP.
Shut Down:
After the host stops working, turn off the main switch, all the lights on the host are all off means the host has been shut down.
* After the host finish working, please keep the robot on and charged for next time work. ( If long time no use, please turn off the main switch )
Component maintenance/dust bin&Filter
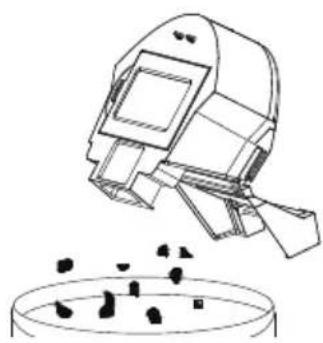
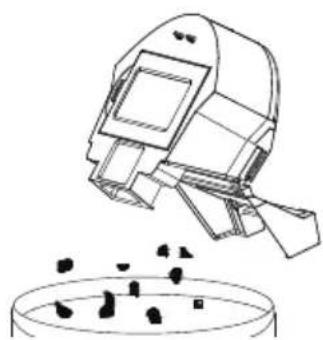
- Press dustbin release button to take out dustbin.
natural_image
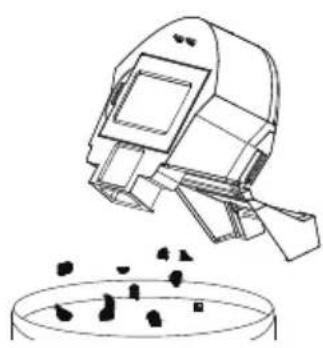
Technical line drawing of a circular mechanical component with a right-pointing arrow indicating direction (no text or symbols)- Dumping the rubbish.

natural_image
Illustration of a robotic arm pouring liquid into a container (no text or symbols)- Take out of HEPA filter, Sponge Filter and primary filter, clean it by mop or brush. Sponge filter/HEPA filter can't be washed.
natural_image
Technical line drawing of a mechanical device with layered components (no text or symbols)- Open the dust bin side cover.
natural_image
Technical line drawing of a mechanical device with a curved arrow indicating rotation (no text or symbols present)- Open the HEPA filter cover.
natural_image
Technical line drawing of a mechanical component with an arrow indicating rotational motion (no text or symbols)- Remove the dust from primary filter and wash, dry it before next time use.
natural_image
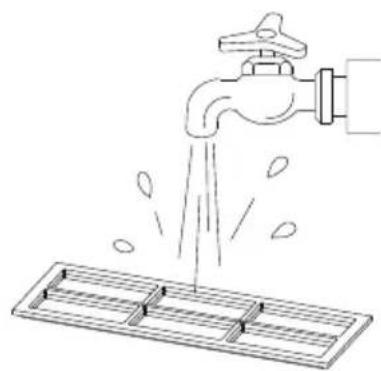
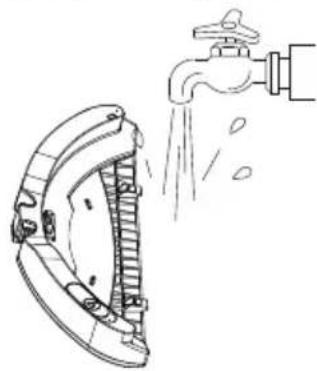
Line drawing of a faucet releasing water into a rack (no text or symbols)- Clean the dust bin by mop or cleaning brush.

natural_image
Line drawing of a hand holding a device with a handle and control panel (no text or symbols)- Dry the dust bin and filters, keep it dry to extend its lifespan.
Attention: Please wash the primary filter every 15-30days,HEPA filter lifespan is about 3month.

natural_image
Line drawing of a sun icon above an open printer, with additional rectangular blocks and a grid on the right (no text or symbols)- Replace the primary filter and the HEPA filter into the dust bin.
Attention: 1、Before installing the filters, please ensure that the HEPA filter and the primary filter are in dry state.
2、Do not expose the HEPA filter and primary filter to the sun.
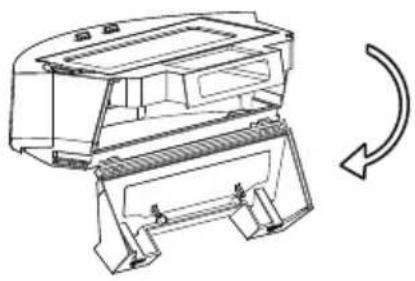
- Close the dust bin cover and install the dust bin into the host.
Omponent maintenance/water tank&mop
Water tank is an optional function.
- take off water tank.

natural_image
Line drawing of a circular device with a handle and arrow indicating downward motion (no text or symbols)- Clear the water. (if long time no use)
natural_image
Line drawing of a hand washing machine with water droplets (no text or symbols)- Clean Water tank. 6. Dry the mop.

natural_image
Illustration of a faucet spraying water onto a car brake door (no text or symbols)- Dry the water tank.

natural_image
Line drawing of a hand holding a curved mechanical component (no text or symbols)- take off mop.

natural_image
Technical line drawing of a mechanical component with an upward arrow indicator (no text or symbols)- Wash the mop.

natural_image
Line drawing of a faucet pouring water from a surface (no text or symbols)
natural_image
Simple line drawing of a sun and a curved shape (no text or symbols)- Open the roller brush cover.

natural_image
Technical line drawing of a mechanical assembly with no visible text or symbols- Take out the roller brush.

natural_image
Technical line drawing of a circular mechanical device with internal components and a hand gesture indicating rotation (no text or symbols)- clean the roller brush by cleaning brush.
natural_image
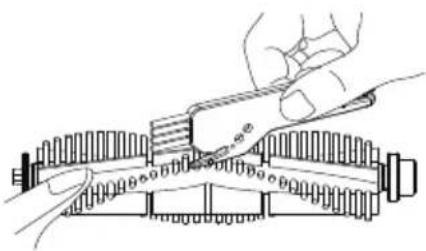
Technical line drawing of a mechanical assembly with hands operating a tool (no text or symbols present)Clean the Side Brush
Take off the side brush, use mop to clean the brush.
natural_image
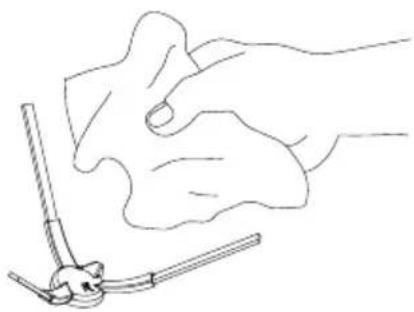
Line drawing of a hand holding a tool, with no visible text or symbolsFriendly Reminder:
The interior of the charging pole pieces, the ground sensors and the front bumper all contain sensitive electronic components. Please use dry mop to clean the above parts and do not use wet mop to prevent damage caused by water inflow.
natural_image
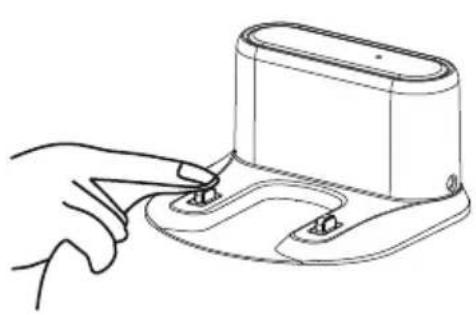
Line drawing of a hand pressing a button on a device (no text or symbols)Clean the charge pole pieces

natural_image
Diagram of a device interior with labeled components and a hand pointing to a component (no text or symbols present)Cleaning the ground sensors
natural_image
Diagram of a hand inserting a component into a circular device housing (no text or symbols visible)Clean the front wheel

natural_image
Diagram of a hand interacting with a circular device showing internal components (no text or symbols)clean the right/left wheel
* If you do not use the product for a long time, please fully charge it before storing. Turn off the host and keep charging power to it every 3 months to prevent the battery from over discharge.
* If the battery is over discharged or is not used for a long time, the product may not be able to be charged. Please contact our company for after-sales maintenance. Do not disassemble it by yourself
* The product drawings and component drawings in this description are for reference only, and the actual product shall prevail.
| Prompt Tone | Cause of Failure | Solution |
| Robot suspended, stop cleaning | Robot suspended | Please put the robot back to the ground and press the start button |
| Robot is not yet ready | Press button when ground or collision detection is effective | Please check whether the font bumper can be bounced normally, and the ground sensors are cleaned |
| Low battery | Low Battery Reminder when charge base can't be detected | Please charge the robot manually |
| Low battery, please charge immediately | Low Battery Reminder when charge base can't be detected | Please charge the robot manually |
| Battery is too low, robot is ready shut down now | Low Battery Reminder when charge base can't be detected | Please charge the robot manually |
| Charge abnormal, please check | Charging station problem | Please check whether the connection between robot and charging pole pieces connected well, or use adaptor to charge directly |
| Main roller brush is entangled, please clean it | Roller Brush get tangle | Please check whether the roller brush is twinned and clean up |
| Left/right wheel jammed, please clean the left/right wheel | Wheel Jammed | Please check whether the wheel is entangled and clean up |
| Side brush jammed, please clean side brush | Side brush jammed | Please check whether the side brushes is twinned and clean up |
| please clean side brush check the collision sensor | Front Bumper problem | Please check whether the font bumper can be bounced normally |
| ground sensor is blocked, please clean ground sensor | Ground sensor problem | Please check whether the sensor get dirtied or be obscured |
| vacuum motor is entangled, please clean vacuum motor | Vacuum motor jammed | Please check whether the dust bin enter is blocked |
If can't troubleshoot according to the above table, you can contact us freely
Anna
natural_image
Simple line drawing of a circular object with a small protrusion and two side handles (no text or symbols)| Description | Parameter |
| Size 320*76mm | |
| Battery Lithium | |
| Weight 2.3kg | |
| Rated Power | 14.8v |
| Rated Power 22W |
Charging Base

natural_image
Technical line drawing of a mechanical bracket or housing component (no text or symbols)Description Parameter
| Size | 155*150*80mm |
| Input | 19V |
| Output | 19V 0.6A |
| Rated Power | 11.4W |
| Rated Frequency | 50/60Hz |
Executive standard: GB4706.1-2005 GB4706.7-2014
GB4343.1-2009GB17625.1-2012
CE
" CE "marking states that the product is compliant to European Directives.
2014/35/EU Low Voltage Directive.
2014/30/EU EMC Directive.
It is possible to request a full copy of Declaration of compliance to the Distributor.
This product complies with the rules of RoHS Directive(2011/65/EU&2015/863/EU).
This product complies with the rules of Eup Directive(2009/125/CE).

text_image
ZOEF ROBOTAnna
natural_image
Top-down line drawing of a circular robotic vacuum cleaner with control panel and power button (no text or symbols)Mode d'emploi
Robot Aspirateur
natural_image
Simple line drawing of a circular device with a central button and two side handles (no text or symbols)
natural_image
Technical line drawing of a mechanical bracket or mounting base (no text or symbols)
natural_image
Line drawing of a rectangular device with a coiled cable and connector (no text or symbols)natural_image
Front view of a remote control with circular buttons and play button (no text or symbols)natural_image
Technical line drawing of a curved mechanical component with internal ladder structure (no text or symbols)natural_image
Pure mechanical diagram showing two symmetrical arms with no text or symbols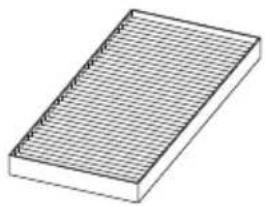
natural_image
Isometric view of a rectangular grid-patterned object with no text or symbolsFiltre HEPA
DESSUS

text_image
1 2 3 4 5 6 7 8 9 10text_image
Technical diagram of a mechanical device with numbered components for identificationnatural_image
Line drawing of a circular device with a handle and arrow indicating downward motion (no text or symbols)natural_image
Technical diagram of a spacecraft cockpit with propellers and control panels (no text or labels)natural_image
Diagram of a circular device with arrows indicating force or movement, showing hands interacting with the lid and base (no text or symbols present)text_image
0.5M 1.5M 0.5Mnatural_image
Line drawing of a circular robotic vacuum cleaner with a hand pointing to its button (no text or symbols)natural_image
Line drawing of a hand using a tool to press or install a device (no text or symbols present)natural_image
Line drawing of a circular device with a handle and arrow indicating motion (no text or symbols)natural_image
Technical line drawing of a circular mechanical component with a separate view showing a device and directional arrow (no text or symbols)2、Placez la serpillière.
natural_image
Line drawing of a mechanical component with a downward arrow indicating compression or disassembly (no text or symbols)natural_image
Diagram of a hand pressing a small object on a circular mechanical component (no text or symbols)natural_image
Technical line drawing of a circular device with internal components and an arrow indicating direction (no text or symbols)- Videz la saleté.
natural_image
Illustration of a robotic arm pouring liquid into a container (no text or symbols)natural_image
Technical line drawing of a mechanical assembly with layered components (no text or symbols)natural_image
Technical line drawing of a mechanical device with a curved arrow indicating rotation (no text or symbols present)natural_image
Technical line drawing of a mechanical component with an arrow indicating rotational motion (no text or symbols)natural_image
Line drawing of a faucet releasing water into a rack (no text or symbols)natural_image
Line drawing of a hand holding a device with a tray and handle (no text or symbols)natural_image
Illustration of a sun shining over an open printer and three rectangular objects (no text or symbols)natural_image
Line drawing of a circular device with a handle and arrow indicating downward motion (no text or symbols)natural_image
Line drawing of a hand cleaning or cleaning device with a water droplet falling (no text or symbols)natural_image
Illustration of a faucet spraying water onto a car tire (no text or symbols)natural_image
Line drawing of a hand holding a curved mechanical component (no text or symbols)- Retirez la serpillière

natural_image
Technical line drawing of a mechanical component with an upward arrow indicating growth (no text or symbols present)natural_image
Line drawing of a faucet pouring water into a surface with droplets (no text or symbols)natural_image
Simple line drawing of a sun and a curved shape (no text or symbols)-
Ouvrez le capot de la brosse rotative.
-
Retirez la brosse rotative.
natural_image
Technical line drawing of a mechanical assembly with no visible text or symbols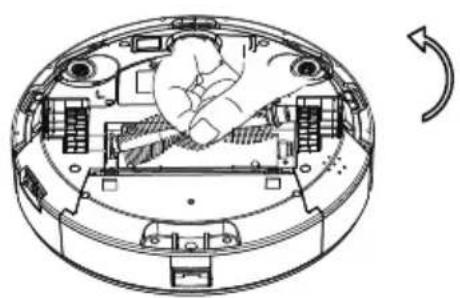
natural_image
Technical line drawing of a circular mechanical device with internal components and a hand operating the center (no text or symbols)natural_image
Technical line drawing of a mechanical assembly with hands operating a tool (no text or symbols present)natural_image
Line drawing of a hand holding a tool, with no visible text or symbolsPetit rappel :
natural_image
Line drawing of a hand using a handheld device to press or install a device (no text or symbols present)natural_image
Diagram of a device interior showing a hand inserting a cable into a circular housing (no text or symbols visible)natural_image
Diagram of a hand installing or adjusting a device on a circular base, showing internal components and wiring (no text or symbols)natural_image
Diagram of a hand inserting a component into a circular device housing (no text or symbols visible)natural_image
Simple line drawing of a circular object with a small protrusion and two side handles (no text or symbols)Description Paramètres
| Dimensions 320*76mm | |
| Batterie Lithium | |
| Poids 2.3kg | |
| Tension nominale | 14.8v |
Puissance nominale 22W
Station de charge
natural_image
Technical line drawing of a mechanical bracket or housing component (no text or symbols)Description Paramètres
| Dimensions | 155*150*80mm |
| Tension d' entrée | 19V |
| Sortie | 19V 0.6A |
| Puissance nominale | 11.4W |
| Fréquence nominale | 50/60Hz |
natural_image
Top-down line drawing of a circular robotic vacuum cleaner with control panel and power button (no text or symbols)Benutzerhandbuch
Roboterstaubsauger
natural_image
Top-down line drawing of a circular mechanical component with a central mounting bracket and two side handles (no text or symbols)
natural_image
Technical line drawing of a mechanical component with two mounting holes (no text or symbols)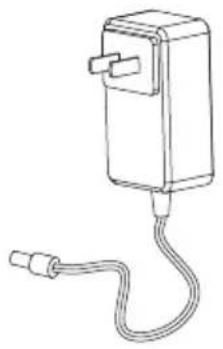
natural_image
Line drawing of a handheld electrical device with a coiled cable (no text or symbols)Anna Ladestation Netzadapter
natural_image
Front view of a remote control with circular buttons and play button (no text or symbols)Fernbedienung (optional)

natural_image
Technical line drawing of a curved mechanical component with internal ladder structure (no text or symbols)Wassertank (optional)
Mopp (optional)
natural_image
Pure mechanical diagram showing two symmetrical arms with rods, no text or symbols present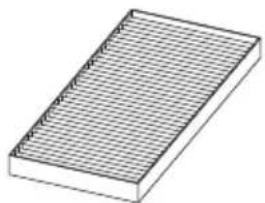
natural_image
Isometric view of a rectangular grid-patterned object with no text or symbolsHEPA
OBEN
text_image
Technical diagram of a mechanical component with numbered parts for identificationtext_image
Technical diagram of a mechanical device with numbered components for identificationnatural_image
Line drawing of a circular device with a handle and arrow indicating downward motion (no text or symbols)natural_image
Technical diagram of a spacecraft cockpit with propellers and control panels (no text or labels)natural_image
Diagram of a circular device with arrows indicating force or movement, showing hand positioning and directional arrows (no text or symbols)text_image
0.5M 1.5M 0.5Mnatural_image
Line drawing of a circular robotic vacuum cleaner with a hand pointing to its side (no text or symbols)natural_image
Line drawing of a hand using a tool to press or install a device (no text or symbols present)natural_image
Line drawing of a robotic vacuum cleaner with hand and arrow indicating motion (no text or symbols)natural_image
Technical line drawing of a circular mechanical component with an arrow indicating direction (no text or symbols)natural_image
Line drawing of a mechanical component with a downward arrow indicating motion (no text or symbols)natural_image
Diagram of a hand pressing a small component on a circular device (no text or symbols)natural_image
Technical line drawing of a circular mechanical component with a right-pointing arrow indicating direction (no text or symbols)- Abfall entsorgen
natural_image
Line drawing of a spacecraft launching from a bowl with particles (no text or symbols)natural_image
Technical line drawing of a mechanical device with layered components (no text or symbols)natural_image
Technical line drawing of a mechanical device with a curved arrow indicating rotation (no text or symbols present)natural_image
Line drawing of a mechanical device with an open lid and curved arrow indicating rotation (no text or symbols)natural_image
Illustration of a faucet releasing water into a drain with leaf drops (no text or symbols)natural_image
Line drawing of a hand holding a device with a tray and handle (no text or symbols)natural_image
Illustration of a solar-powered printer with a sun symbol above it, alongside three rectangular components (no text or symbols)natural_image
Line drawing of a circular device with a handle and arrow indicating downward motion (no text or symbols)natural_image
Line drawing of a hand washing machine with water droplets (no text or symbols)- Wassertank reinigen 6. Mopp trocknen.
natural_image
Illustration of a faucet spraying water onto a car brake door (no text or symbols)- Wassertank trocknen
natural_image
Line drawing of a hand holding a curved mechanical component (no text or symbols)- Mopp abnehmen
natural_image
Technical line drawing of a mechanical component with an upward arrow indicator (no text or symbols)- Mopp auswaschen

natural_image
Line drawing of a faucet pouring water into a surface (no text or symbols)
natural_image
Simple line drawing of a sun and a curved shape (no text or symbols)natural_image
Technical line drawing of a mechanical assembly with no visible text or symbolsnatural_image
Technical line drawing of a circular mechanical device with internal components and a hand gesture indicating rotation (no text or symbols)natural_image
Technical line drawing of a mechanical assembly with hands operating a tool (no text or symbols present)natural_image
Line drawing of a hand holding a tool with a small object nearby (no text or symbols)Hinweis:
natural_image
Line drawing of a hand holding a medical pressure monitor (no text or symbols)natural_image
Diagram of a device interior showing a hand inserting a component into a circular housing (no text or symbols visible)Bodensensoren reinigen

natural_image
Diagram of a hand inserting a component into a circular device with visible circuitry and components (no text or symbols)Vorderrad reinigen