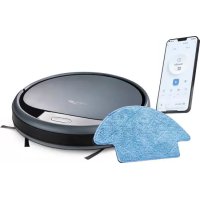
Saar MK007S - Vacuum Cleaner Zoef Robot - Free user manual and instructions
Find the device manual for free Saar MK007S Zoef Robot in PDF.
| Product Type | Intelligent Sterilization Robot |
| Brand | Zoef Robot |
| Model | Saar MK007S |
| Dimensions | 150 × 63 mm |
| Weight | Approximately 485 g |
| Battery Capacity | 4000 mAh |
| Full Charge Time | Approximately 180 minutes |
| Power Supply | 5 V, 2 A |
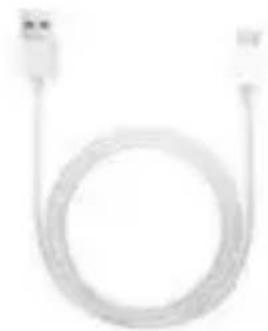
| Charging Connector | USB Type-C |
| Ultrasonic Frequency | 30 kHz ~ 50 kHz |
| Operating Temperature | -10 °C to 60 °C |
| Main Functions | UV-C sterilization, mite elimination, power bank, automatic and manual modes |
| Automatic Modes | Bed cleaning (without obstacle avoidance) and non-bed cleaning (with obstacle avoidance) |
| Manual Mode | Activation with removable cover, manually move to sterilize within 2 cm |
| UV-C Lamp | Four lamps: two upper and two lower |
| Sensors | Anti-fall sensors, cover sensors, ultrasonic modules |
| Maintenance and Cleaning | Keep clean and dry, do not spray liquid, clean sensors |
| Safety | Do not look at UV-C lamps, keep children away, avoid black or transparent surfaces |
| Spare Parts and Repairability | Do not disassemble without authorization, contact info@zoefrobot.nl for support |
| General Information | Main switch with OFF and CLEAN positions, USB output for power bank |
Frequently Asked Questions - Saar MK007S Zoef Robot
User questions about Saar MK007S Zoef Robot
0 question about this device. Answer the ones you know or ask your own.
Ask a new question about this device
Download the instructions for your Vacuum Cleaner in PDF format for free! Find your manual Saar MK007S - Zoef Robot and take your electronic device back in hand. On this page are published all the documents necessary for the use of your device. Saar MK007S by Zoef Robot.
USER MANUAL Saar MK007S Zoef Robot
text_image
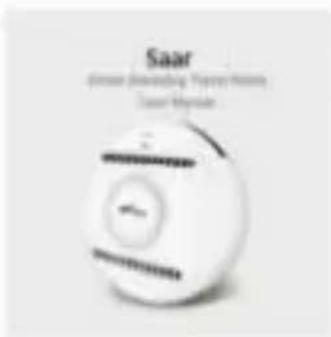
ZOEF ROBOTSAAR
MK007S
Smart Sterilizing Robot Handleiding
natural_image
White spherical electronic device with blue LED indicators and a circular logo, no visible text or symbols on the body.Inhoud
natural_image
Close-up of a white spherical object with a curved black line and dotted lines, no visible text or symbols.
natural_image
White portable electronic device with a black cover and circular top, no visible text or symbols on the device itself.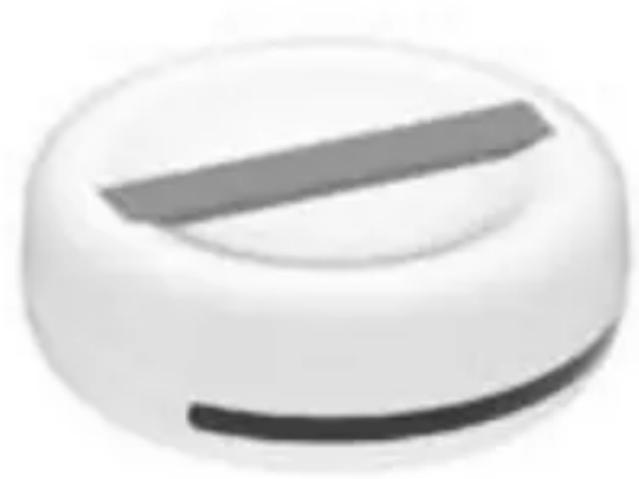
natural_image
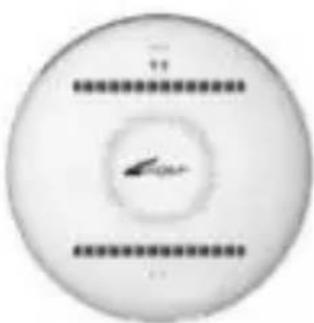
White circular object with a horizontal gray stripe, resembling a stylized button or knob (no text or symbols visible)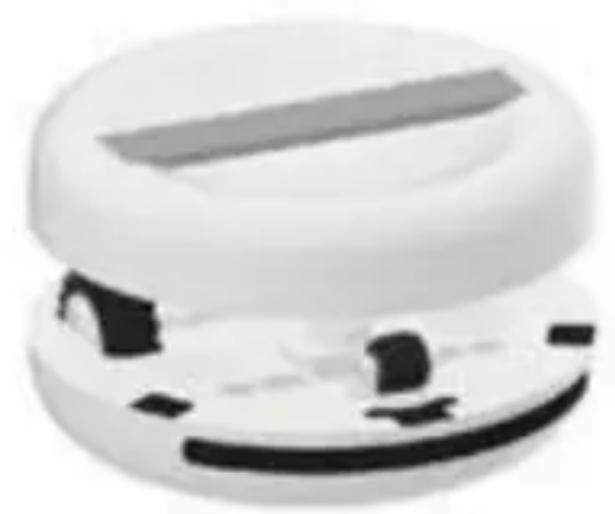
natural_image
Close-up of a white, rounded object with a horizontal bar and abstract black shapes on its surface (no text or symbols visible)Meerdere Functies

natural_image
Coiled white cable with two connectors at top (no text or symbols visible)USB Type-C oplaadkabel 1x
text_image
Saar Smartwatch Pencil Mini Saar MiniHandleiding 1x
Specifications
UV-C Vermogen:
4x2 W
Oplaadtijd:
3 uur
UV-C Golflengte:
254 nm
Gewicht: 485 gr
UV-C Intensiteit:
Afmeting:
(3000x4) W / cm^2
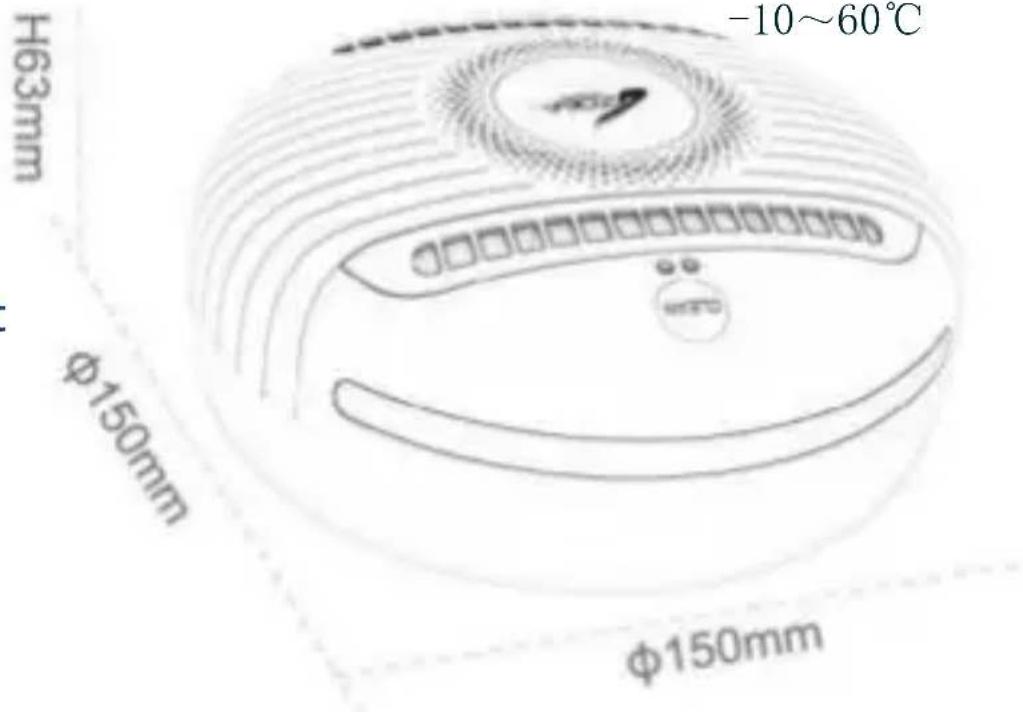
Φ150x63mm
text_image
H63mm φ150mm φ150mmProduct Details

1 'CLEAN' (Schoonmaak) Knop
text_image
Diagram showing a circular device connected to an electrical outlet with labeled components and connection points.text_image
1 Handheld Cover 2 Main Power Switch 3 Short Press(B) Non-bed Clean Modus
text_image
1 Handheld Cover 2 Turn on Main Power Switch 3 Long PressSlimme en Willekeurige Route in de Automatic Modus
text_image
① Turn on Main Power Switch ② Short Press ③text_image
Short Press ① ② ③Power Bank Functie
text_image
Battery Indicator LightsOnderhoud
natural_image
White spherical electronic device with blue LED indicators and a circular logo, no visible text or symbols on the body.Inhalt
Produktübersicht 01
natural_image
Close-up of a white spherical object with a curved black line and dotted lines, no visible text or symbols.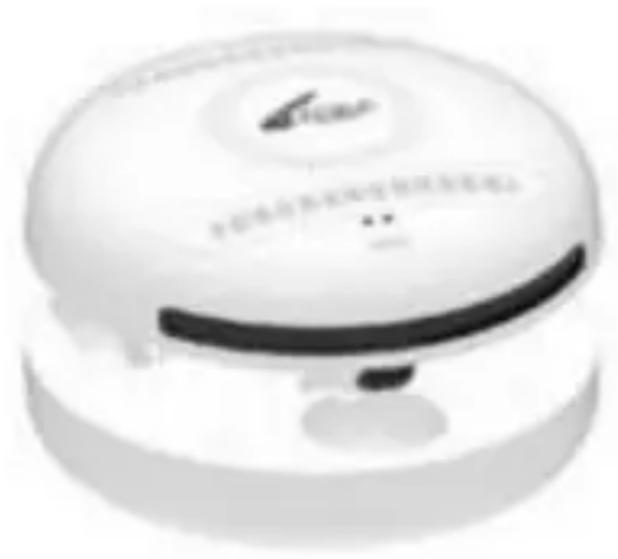
natural_image
White portable electronic device with a black cover and circular top, no visible text or symbols on the device itself.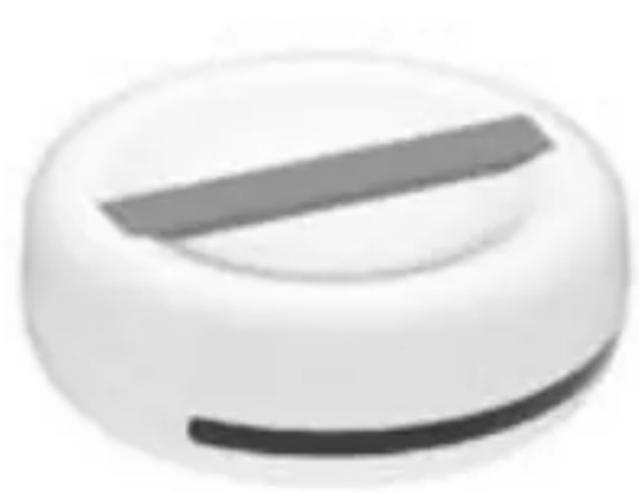
natural_image
Close-up of a white circular object with a dark horizontal bar, resembling a knob or dial (no text or symbols visible)
natural_image
Close-up of a white, dome-shaped object with a horizontal bar and small black components (no visible text or symbols)natural_image
Circular object with a central arrow and horizontal lines, resembling a stylized icon or emblem (no readable text or symbols)SAAR 1x
natural_image
Coiled white cable with two connectors at top (no text or symbols visible)text_image
Diagram showing connections between a circular device with labeled pins and an electrical outlet, including numbered annotations.text_image
1 Handheld Cover 2 Turn on Main Power Switch 3 Short Presstext_image
① Handheld Cover ② Turn on Main Power Switch ④ Long Presstext_image
① Turn on Main Power Switch ② Short Press ③text_image
Short Press ① ② ③Powerbank-Funktion
natural_image
Illustration of a circular device with internal components and a smartphone connected to its cable (no text or symbols visible)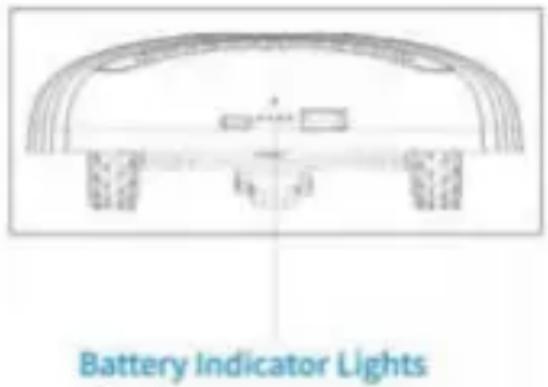
text_image
Battery Indicator LightsWartung
natural_image
White spherical electronic device with blue LED indicators and a circular logo, no visible text or symbols on the body.CONTENTS
Product Overview 01
Multiple Functions, What's included in Package 02
Specifications 03
Product Details 04
Operating the SAAR Charging 06
Sterilizing and Mites Eliminating Function - Automatic Modes 07
Smart Mapping & Random Route in Automatic Mode 09
Sterilizing and Mites Eliminating Function - Manual Mode 10
Power Bank Function, Maintenance 12
Tips 13
Troubleshooting 14
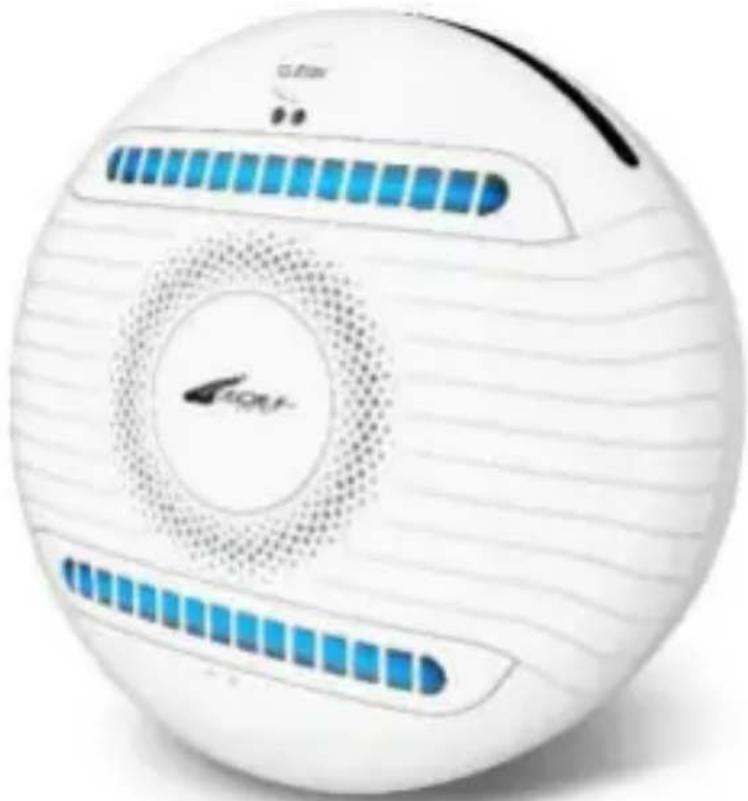
Product Overview
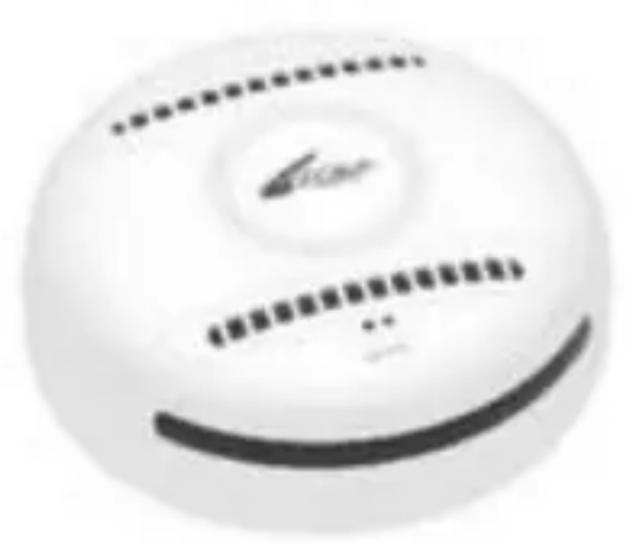
natural_image
Close-up of a white circular object with a curved black line and dotted lines, no visible text or symbols.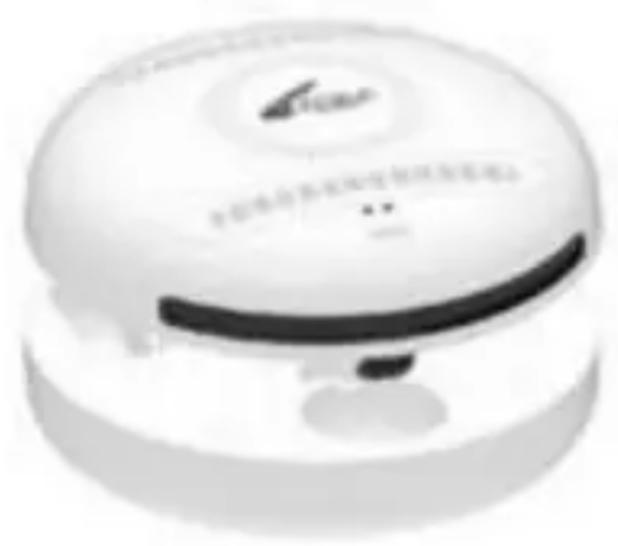
natural_image
White portable electronic device with a black strap and circular top, no visible text or symbols on the device itself.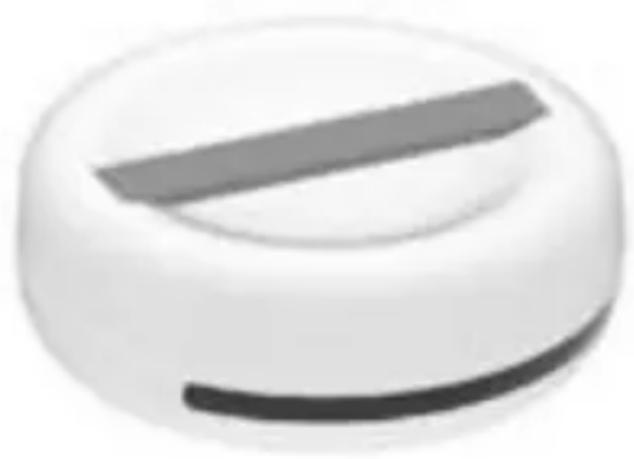
natural_image
Close-up of a white circular object with a dark horizontal bar, resembling a knob or dial (no text or symbols visible)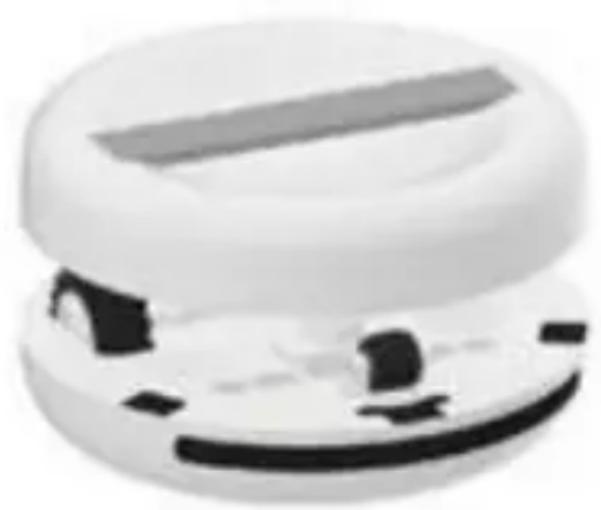
natural_image
Close-up of a white, dome-shaped object with a horizontal bar and black rectangular cutout (no visible text or symbols)Multiple Functions

Sterilizing and Mites Eliminating: SAAR can automatically travel in programmed routes to sterilize your beds/tables etc. (Automatic Mode), or can be hold via handheld cover to sterilize items/surfaces (Manual Mode).

Power Bank: Charge your phone or other devices by connecting to SAAR via USB cable.
What's included in Package
natural_image
Coiled white cable with two connectors (no text or symbols visible)USB Type-C Charging Cable 1x
text_image
Saar dinner purifier. Air purifier Saar HymidUser Manual lx
Specifications
UV-C Power 4x2W
UV-C Wave 254nm
UV-C Intensity (3000x4)μW/cm²
Ultrasonic Frequency 30K\~50KHz
Time for fully charge 3hours
Battery Size 4000mAh
Weight: about 485g
Dimensions 150× 63mm
Working Temperature -10\~60°C
Charging Port USB Type-C
Power Input 5V 2A
text_image
-10~60°C H63mm φ150mm φ150mmProduct Details
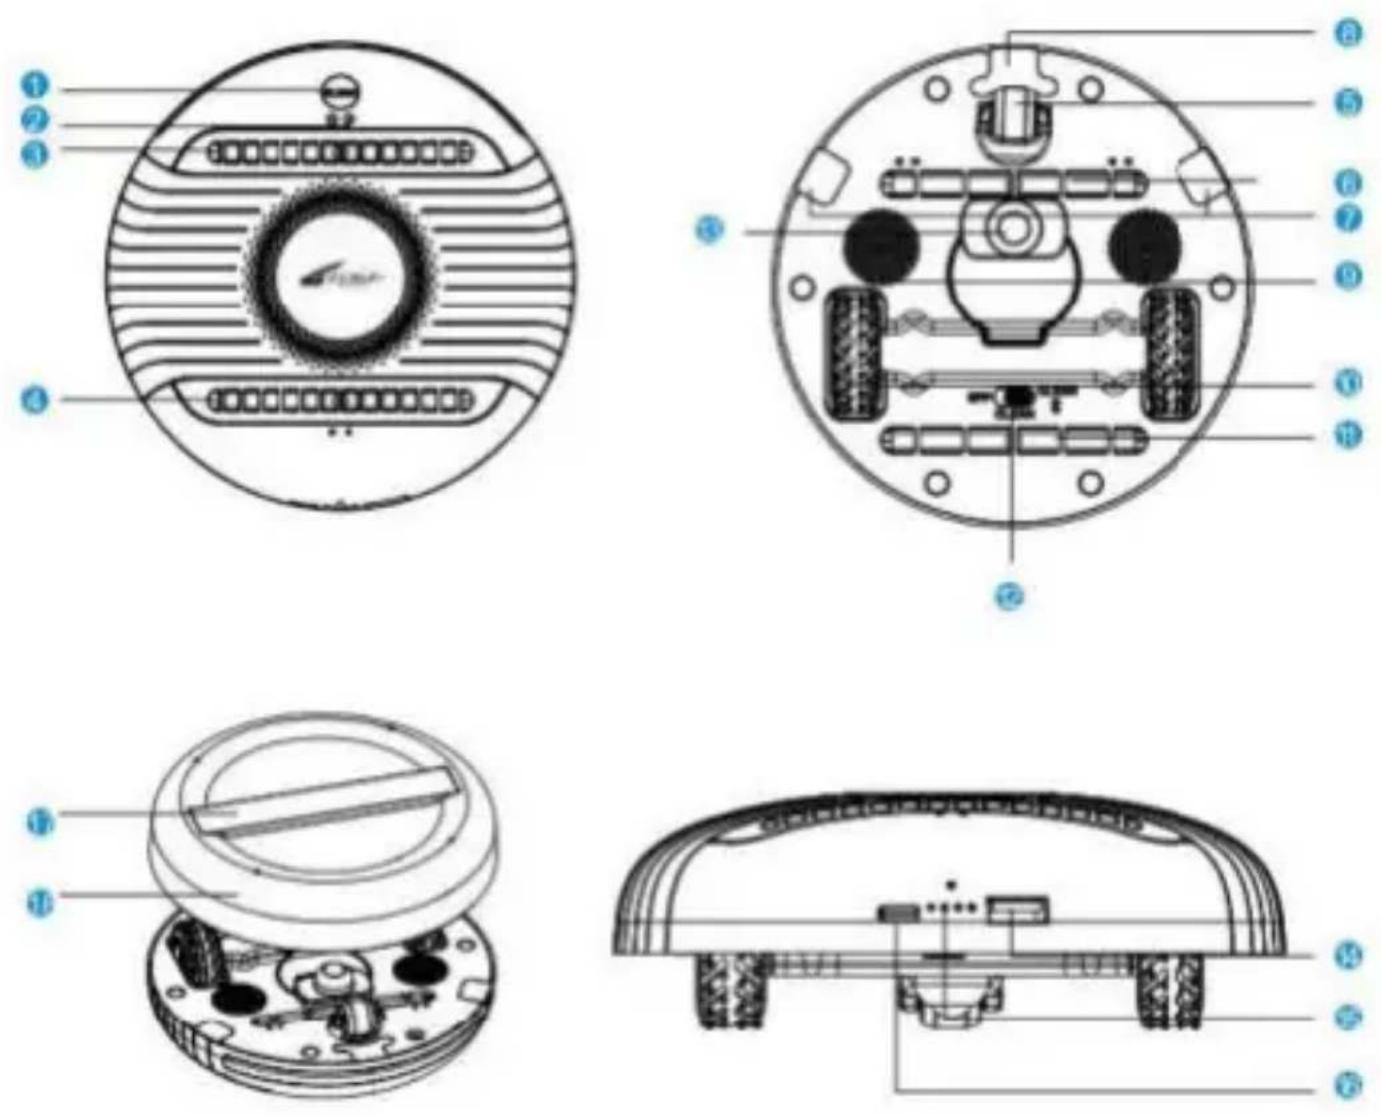
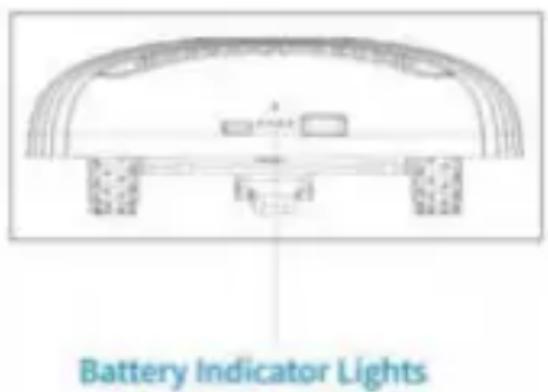
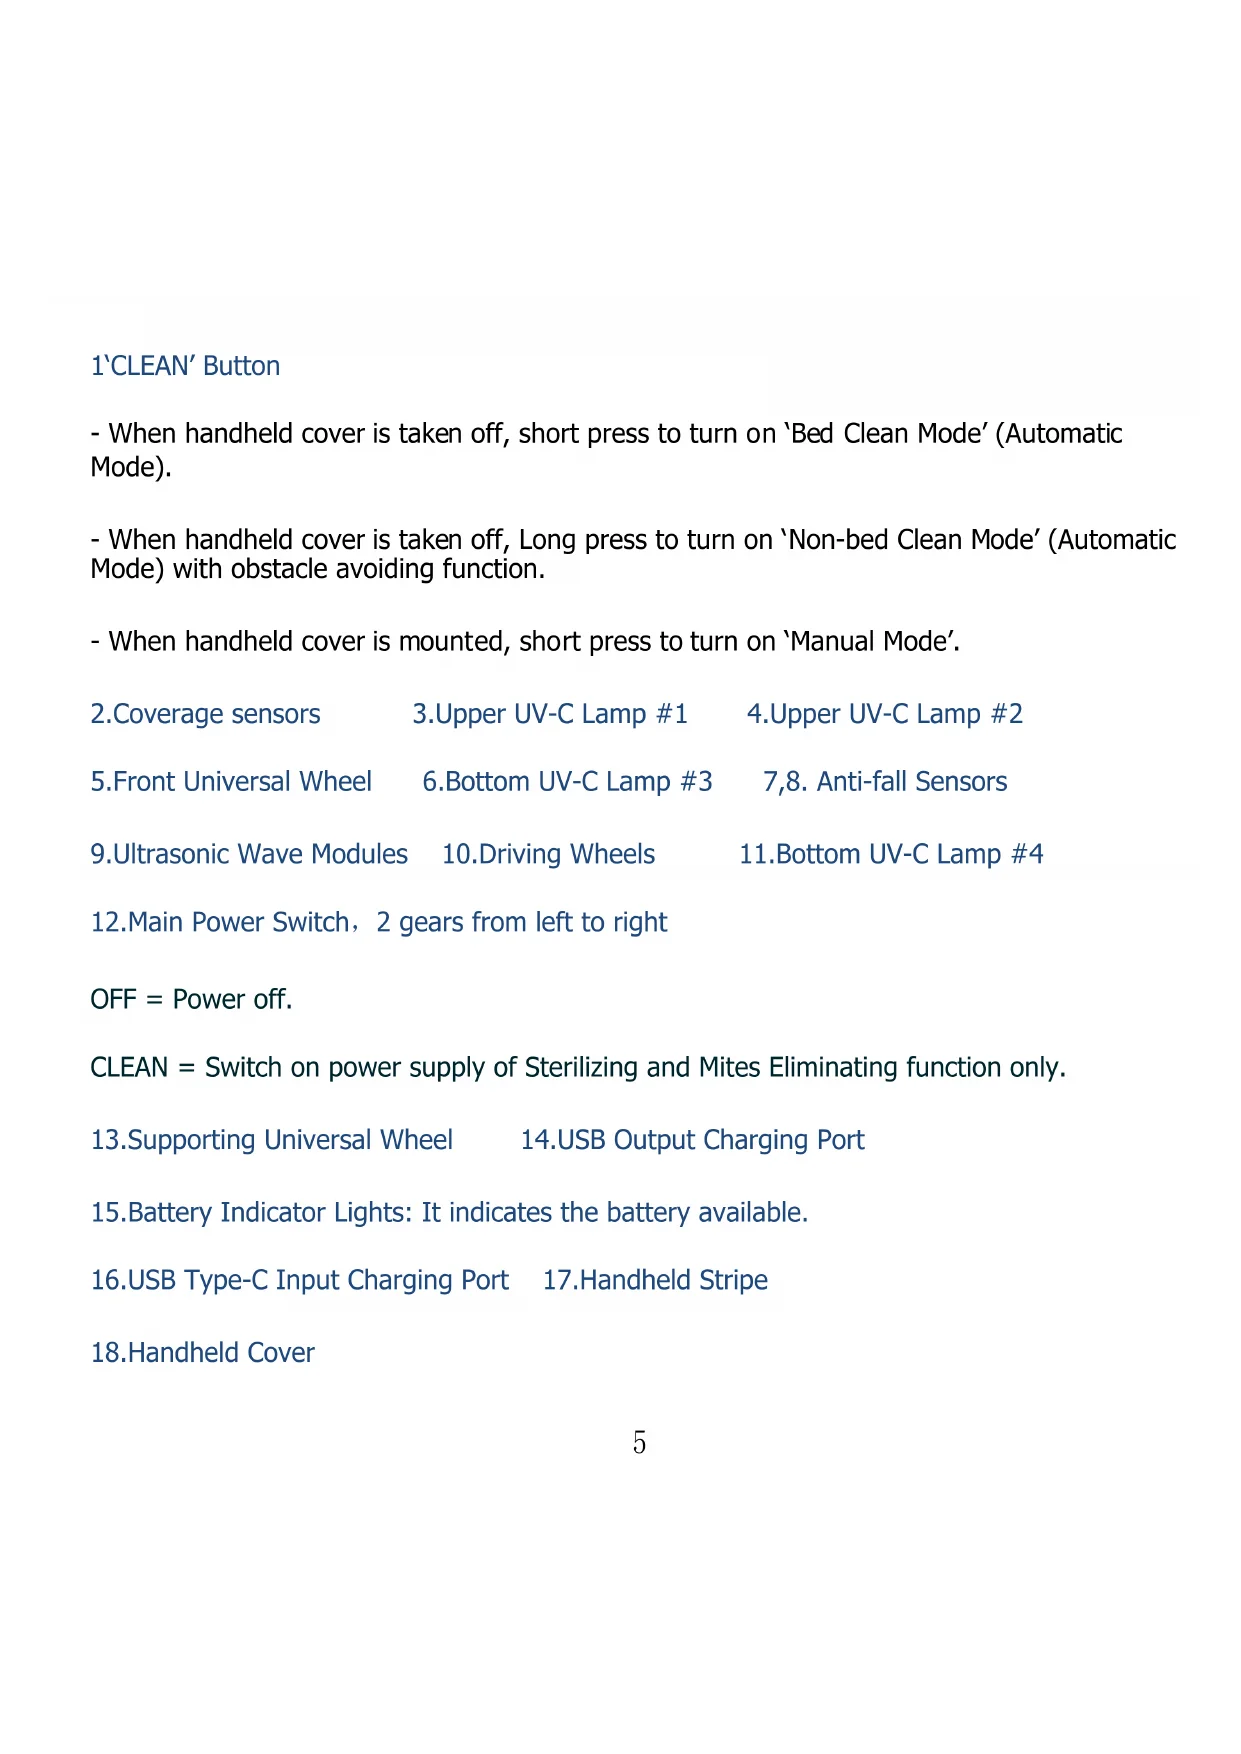
1'CLEAN' Button
- When handheld cover is taken off, short press to turn on 'Bed Clean Mode' (Automatic Mode).
- When handheld cover is taken off, Long press to turn on 'Non-bed Clean Mode' (Automatic Mode) with obstacle avoiding function.
-
When handheld cover is mounted, short press to turn on 'Manual Mode'.
-
Coverage sensors
-
Upper UV-C Lamp #1
-
Upper UV-C Lamp #2
5.Front Universal Wheel
6.Bottom UV-C Lamp #3
7,8. Anti-fall Sensors
-
Ultrasonic Wave Modules
-
Driving Wheels
11.Bottom UV-C Lamp #4
12.Main Power Sv
OFF = Power off.
CLEAN = Switch on power supply of Sterilizing and Mites Eliminating function only.
-
Supporting Universal Wheel
-
USB Output Charging Port
-
Battery Indicator Lights: It indicates the battery available.
-
USB Type-C Input Charging Port
17.Handheld Stripe
- Handheld Cover
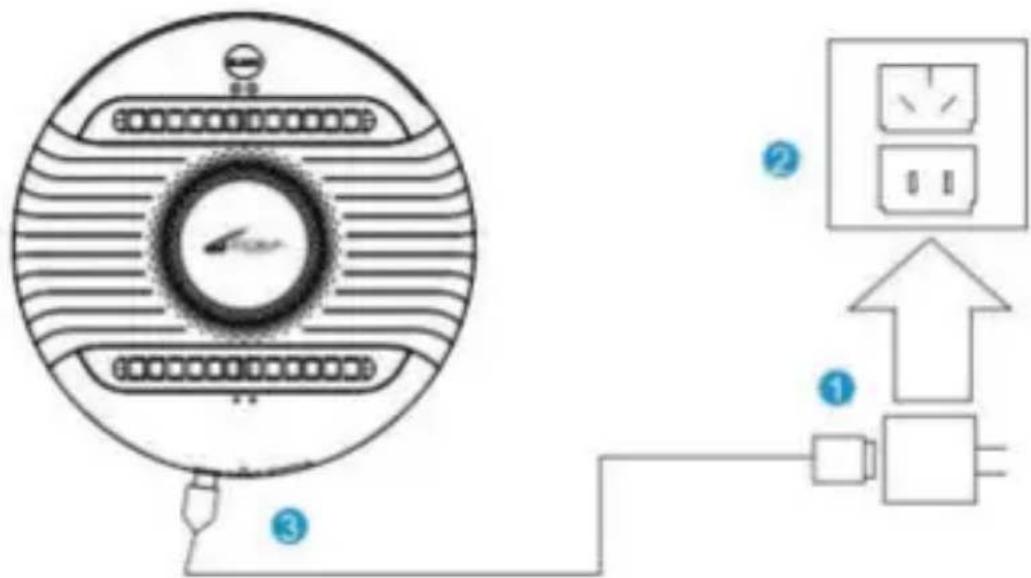
Operating SAAR Charging
Before charging, please make sure that SAAR is not fully charged.
- Connect Type-C cable to the power adapter.
- Plug the power adapter into the power outlet.
- Plug Type-C cable into Type-C charging port of SAAR. The battery Indicator lights flashes which indicates that SAAR is charging.
- When the 4 lights turn on white, SAAR is fully charged.
text_image
Diagram showing connections between a circular device with labeled pins and an electrical outlet, including numbered annotations.Note: It will take about 180 minutes to fully charge SAAR.
Sterilizing and Mites Eliminating Function --- Automatic Modes
There are two automatic modes as below.
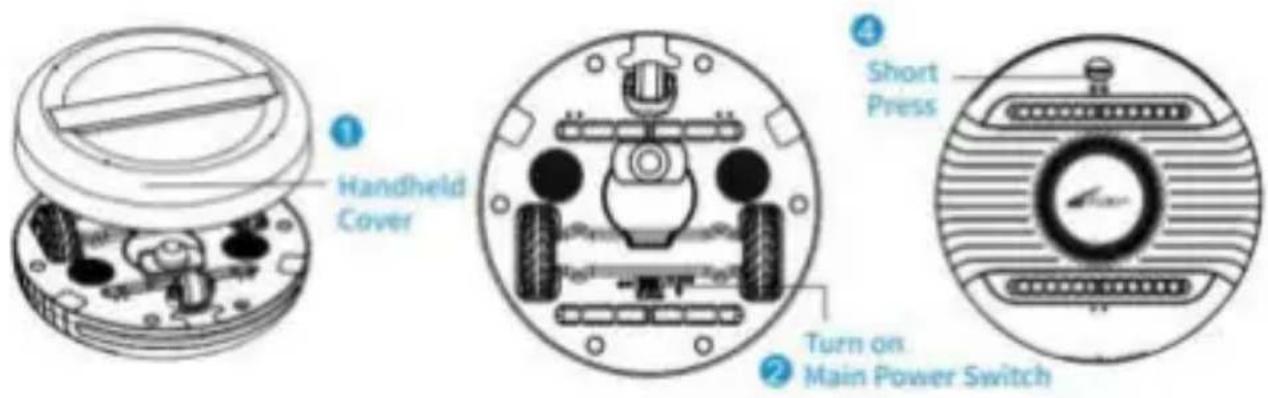
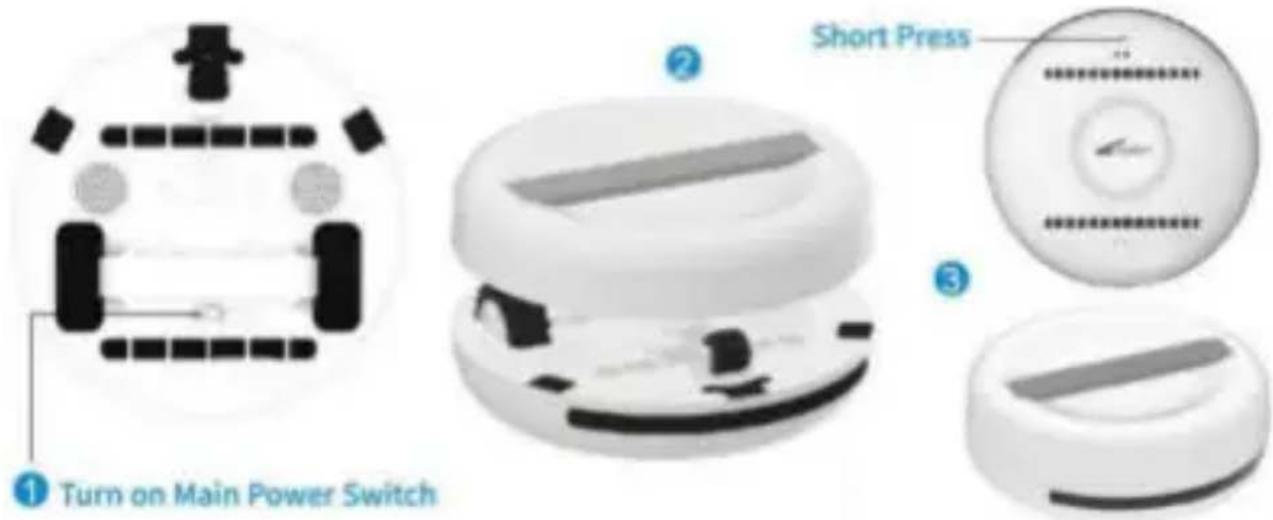
(A) Bed Clean Mode
1.Take off Handheld Cover.
2. Turn on Main Power Switch at bottom surface to 'CLEAN' gear (middle gear).
3. Place SAAR onto the area to be sterilized.
4. Short press 'CLEAN' button at top surface, boot into Bed Clean Mode, in which obstacle avoiding function is off.
5.SAAR will run in 'Bed Clean Mode' until the entire area is sterilized and disinfected, then it will automatically stop.6.When Bed Clean Mode is ongoing, short press 'CLEAN' button to turn it off.
text_image
1 Handheld Cover 2 Main Power Switch 3 Short Press(B) Non-bed Clean Mode
1.Take off Handheld Cover.
2.Turn on Main Power Switch at bottom surface to 'CLEAN' gear (middle gear).
3. Place SAAR onto the area to be sterilized.
4. Long press 'CLEAN' button at top surface, boot into Non-bed Clean Mode, in which obstacle avoiding function is on.
5.SAAR will run in 'Non-bed Clean Mode' until the entire area is sterilized and disinfected, then it will automatically stop.
6. When Non-bed Clean Mode is ongoing, short press 'CLEAN' button to turn it off.

text_image
① Handheld Cover ② Turn on Main Power Switch ④ Long PressSmart Mapping & Random Route in Automatic Mode
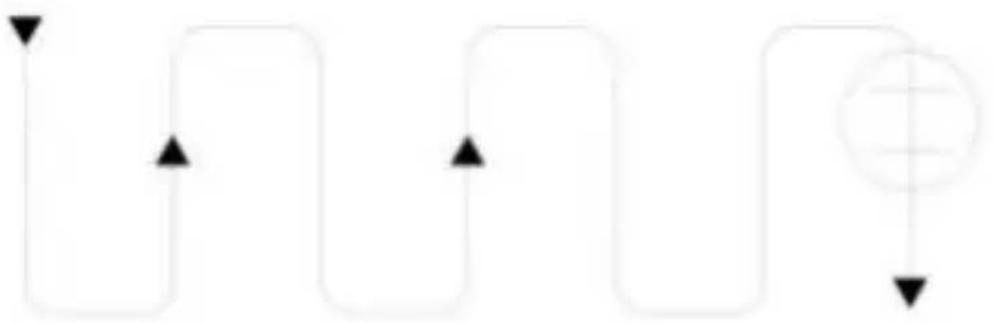
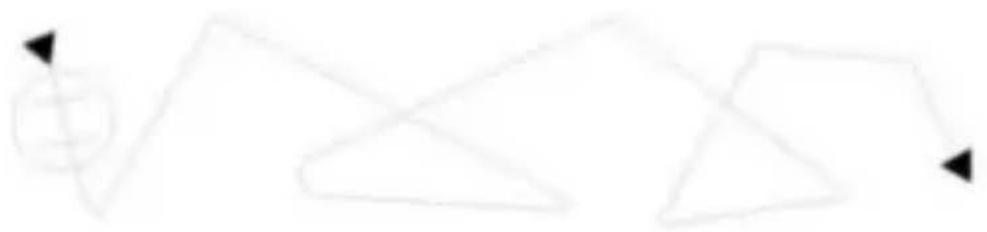
According to the shape and situation of specific area to be sterilized, SAAR will intelligently plan the optimal route. There are two main routes as below.
S-shaped Route
flowchart
graph TD
    A["Start"] --> B{Decision}
    B -->|Yes| C["Process"]
    B -->|No| D["End"]
Random Route
flowchart
graph TD
    A["+"] --> B["△"]
    B --> C["△"]
    C --> D["→"]
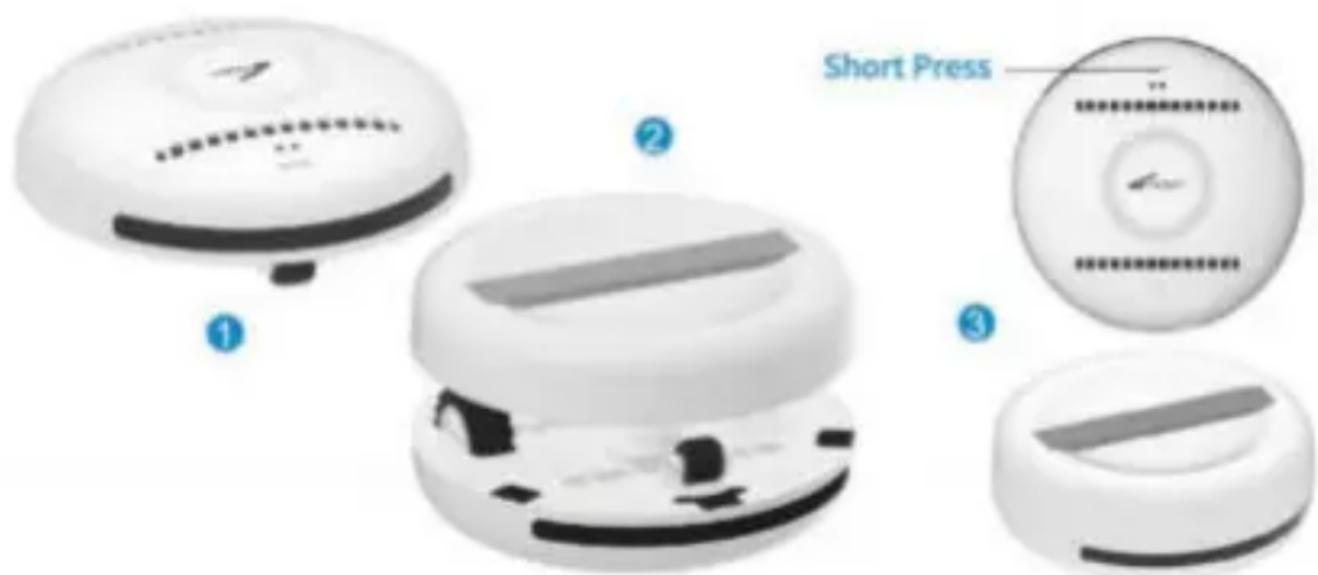
Sterilizing and Mites Eliminating Function -- Manual Mode
There are two cases to turn on Manual Mode as below.
(A) Turn on Manual Mode from OFF state
- Turn on Main Power Switch at bottom surface to 'CLEAN' gear (middle gear).
- Mount Handheld Cover onto the bottom surface.
- Short press 'CLEAN' button. Hold the Handheld Stripe and move SAAR until its top surface faces to the area to be disinfected at a close distance (better within 2cm), two UV-C lamps at the top surface automatically turn on, boot into Manual Mode.
text_image
① Turn on Main Power Switch ② Short Press ③(B) Turn on Manual Mode from Automatic Mode
- When SAAR is running in Automatic Mode, take up SAAR off the surface on which it is running (Note: Do not touch or cover Anti-fall Sensors at the bottom surface when taking SAAR), Automatic Mode turns off and Driving Wheels stop automatically.
- Mount Handheld Cover onto the bottom surface.
- Short press 'CLEAN' button. Hold the Handheld Stripe and move SAAR until its top surface faces to the area to be sterilized at a close distance (better within 2cm), two UV-C lamps at the top surface automatically turn on, boot into Manual Mode.
text_image
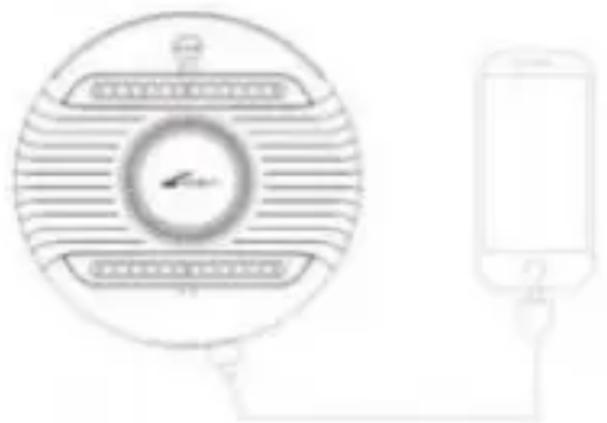
Short Press ① ② ③Power Bank Function
You may charge your mobile phone by plug suitable charging cable into the USB port of SAAR. When the Battery Indicator Lights turn on, it indicates that your phone or other devices is charging.
natural_image
Diagram showing a circular device with internal components and a smartphone connected to its right-side cable (no text or symbols present)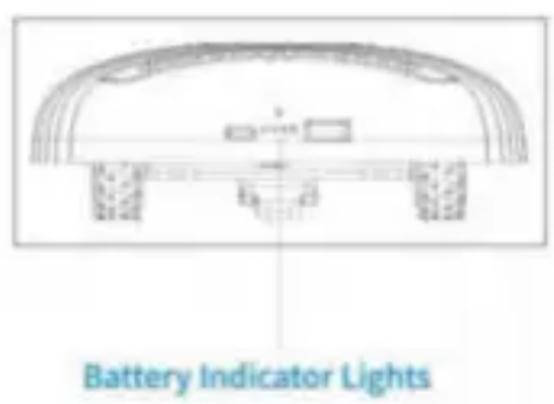
text_image
Battery Indicator LightsMaintenance
- Please always keep the robot clean and dry.
- Do not disassemble this robot without permission, so as not to damage the function.
- Do not treat the robot with any non-original or even harmful devices or methods.
- When not using this robot, please always turn off the Main Power Switch at the bottom (switch to the OFF gear).
- Always turn off the Main Power Switch at the bottom before cleaning the robot.
- Never spray liquid including water, thinner, benzene directly onto the robot.
- Do not turn the driving wheel manually so as not to damage the motors.
- Do not let the wheels get tangled with hair, and make sure the wheels are not tangled with hair or other items before turning on the robot.
Tips
- Keep your eyes away from UV-C lights of the robot.
- Keep your child away from the robot to avoid damages.
- Do not drop, throw or beat the robot to avoid damages.
- The sensors may not work properly when exposed to incandescent, halogen, or sunlight.
- Do not operate the robot on purely black surfaces (such as black sofa) as the sensors may not work properly.
- Do not operate the robot on a completely transparent surfaces (such as: transparent glass, transparent acrylic) as the sensors may not work properly.
- Make sure the sensor is clean and unobstructed so as to ensure the sensors work properly.
- If the charging is unstable, please make sure the power adapter and charging cable are in good connection with SAAR.
- Please always keep this robot away from fire or high temperature environment above 60 °C to avoid damages.
10 Before use, please sort out the area to be sterilized to ensure that the surface is flat and free of debris, and then place the robot horizontally on the area to be sterilized.
Troubleshooting
In case that the robot does not operate at all, please try as below:
-Try to charge SAAR with the charging cable, check its power. If its power is insufficient, continue to charge until it is fully charged.
- Turn off the Main Power Switch, check if there are foreign items tangled on the wheels of the robot, and if yes, remove the foreign items and then restart the robot.
- Please email us at info@zoefrobot.nl for supports and services .

text_image
ZOEF ROBOT

RoHS


Made in China
text_image
ZDEF ROBOTSAAR
MK007S
natural_image
White spherical soccer ball with blue and white patterned buttons and a central logo (no readable text or symbols)TABLE DES MATIÈRES
natural_image
Coiled white cable with two connectors (no text or symbols visible)Câble USB Type-C 1 x

text_image
Saar Air purifier Purifier Air purifierMode d'emploi 1x
Spécifications
Puissance UV-C :
4 × 2 ~W
Longueur d'onde UV-
C : 254 nm
Intensité UV-C :
4 × 3000 W / cm^2
text_image
60 °C φ150mmtext_image
Diagram showing a circular device connected to an electrical outlet with labeled components and connection points.text_image
1 Handheld Cover 2 Turn on Main Power Switch 3 Short Presstext_image
1 Handheld Cover 2 Turn on Main Power Switch 3 Long Pressnatural_image
Abstract geometric line drawing with intersecting triangles and arrows (no text or symbols)text_image
① Turn on Main Power Switch ② Short Press ③text_image
Short Press ① ② ③11
Fonction Power Bank
natural_image
Diagram showing a circular device with internal components and connected to a smartphone (no text or symbols present)