
OC1 - Water filter ASTRALPOOL - Free user manual and instructions
Find the device manual for free OC1 ASTRALPOOL in PDF.
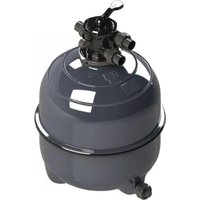
| Product type | Swimming pool water filter |
| Brand | ASTRALPOOL |
| Model | OC1 |
| Filter media | OC-1 (revolutionary, reduces particle speed) |
| Multiport valve positions | Filtration, Backwash, Rinse, Recirculation, Drain, Closed |
| Main function | Pool water filtration through OC-1 media bed |
| Water savings | Backwash once a month instead of once a week |
| Energy savings | Less hydraulic resistance, allows reducing pump speed |
| Media maintenance | Annual cleaning recommended, replacement every 5 years |
| Backwash procedure | Reverse flow to backwash position, pump 30 s, then rinse |
| Installation | On horizontal surface, free space of at least 20 cm around |
| Valve connection | Plastic and Teflon fittings, no iron or hemp |
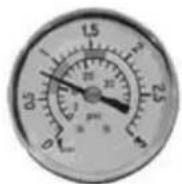
| Air purge | On the pressure gauge tee, to be purged at startup |
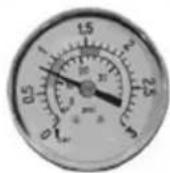
| Pressure gauge | Included for pressure monitoring |
| Winterizing | Drain water, remove cover for ventilation |
| Spare parts | Gaskets, multiport valve, pressure gauge, air purge, rotating diffuser |
| Safety | Do not operate without water; do not use solvents |
Frequently Asked Questions - OC1 ASTRALPOOL
User questions about OC1 ASTRALPOOL
0 question about this device. Answer the ones you know or ask your own.
Ask a new question about this device
Download the instructions for your Water filter in PDF format for free! Find your manual OC1 - ASTRALPOOL and take your electronic device back in hand. On this page are published all the documents necessary for the use of your device. OC1 by ASTRALPOOL.
USER MANUAL OC1 ASTRALPOOL
Residential Filter Instructions
Congratulations on purchasing an OC-1 filter, the revolutionary new filter media that can save you energy and water.
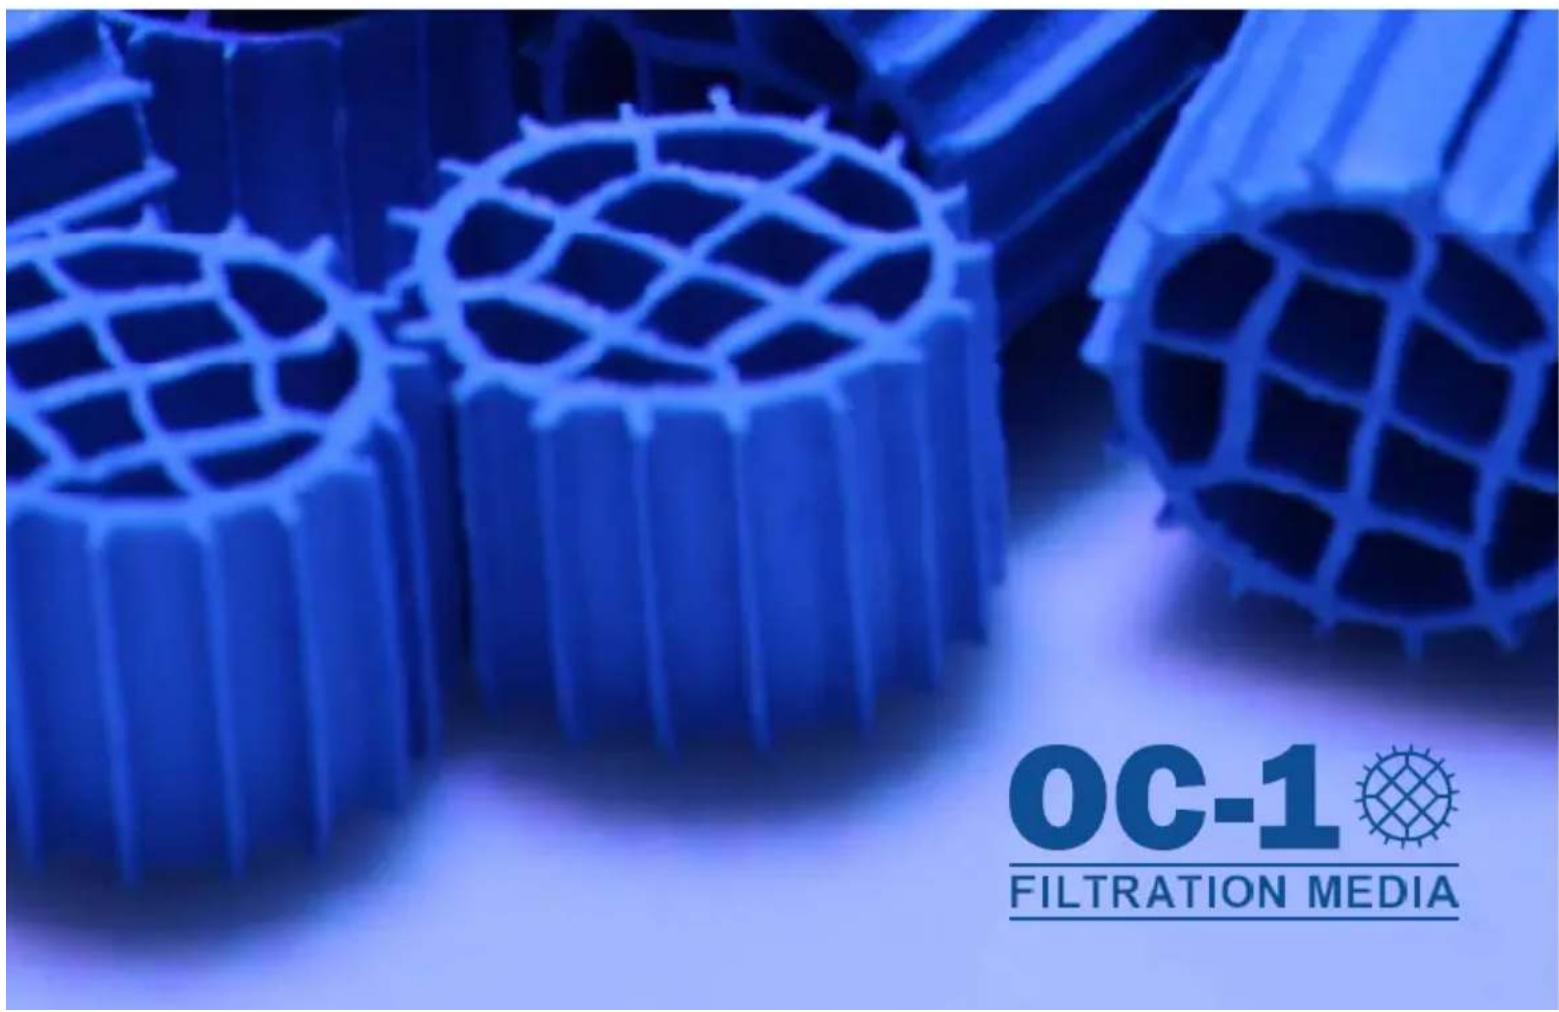
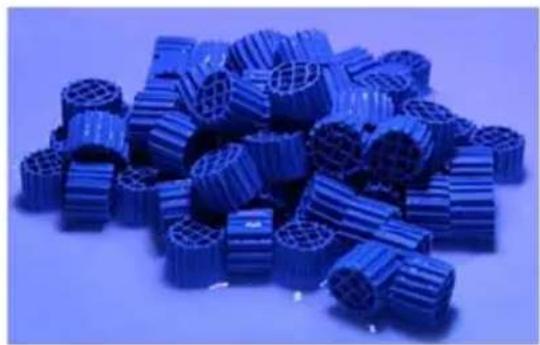
OC-1 Media
OC-1 is not a traditional filter media that relies on trapping dirt between particles, OC-1 works by reducing the velocity of the dirt passing through the bed until it settles out in a quiet void. This difference in the way it works means it will behave differently to what you might be used to with an old-fashioned filter.
Save Water
The pressure will not rise with OC-1 no matter how much debris is in the filter. Therefore, backwashing should be done on a time basis. For a normally used domestic pool this would mean approx. once every month instead of every week, saving water and time.
Save Energy
OC-1 has less resistance than traditional filter medias, so it should be possible to use a smaller pump or reduce the speed with a variable speed pump and maintain the same flow that you would through a traditional media (this is dependent on existing restrictions through your pipework). This will save you electricity and money. For example, if you can reduce the speed of the pump by 20% this will equate to an electrical saving of 48.8% (using the pump affinity law).
This booklet will take you through the basics of filtration, for further information on OC-1 please visit: www.ocmproducts.com
SAVE WATER SAVE ENERGY
What happens to the water in your pool?
This should be a question of prime consideration for all pool owners. In the past some pools did not use filtering systems, the owner was faced with the problem of refilling the pool with clean water when this became necessary. Refilling the pool was laborious, meanwhile the owner had an unsanitary pool with unpleasant bathing owing to the poor clarity of the water. Today pool owners demand absolute hygiene, crystal clear water and economy of effort. These objectives are achieved by effective filtration and chemical treatment of the pool water.
After filling the pool with clean water in the summer, two basic factors will take place, due to the exposure of water to the sun, the air and bathers.
1.-Biological contamination. The water is contaminated by micro-organisms which may be airborne or introduced by bathers. These organisms reproduce rapidly in still, warm water and algae may form giving a green appearance to the pool water.
2.-Rainfall and wind may introduce dust with leaves and seeds which muddy and pollute the pool water.
These two factors generate in a short period of time an unsanitary swimming pool and unpleasant bathing.
Solutions to the problem:
1. "CHEMICAL" TREATMENT
Maintain the correct level of sanitiser (chlorine, bromine, oxygen...) in the water to combat existing microorganisms by its disinfecting action.
As chlorine is the more common method, it will be taken as the reference point.
2. "PHYSICAL" TREATMENT
Provide the pool with a filtration system (filter and pump) to remove suspended particles from the water.
PH LEVEL
The pH level is an indicator of acidity or alkalinity present in the water. The neutral value is 7.0. a pH of 0-7 means levels of acidity whilst 7-14 gives levels of alkalinity.
Why pH is important?
THE IDEAL PH VALUE IN A POOL SHOULD BE BETWEEN 7.2 AND 7.6".
As previously stated, sufficient residual chlorine must exist in the pool to destroy unwanted micro-organisms, in fact the chlorine will only act as a bactericide when the pool water has a pH of between 7.2 and 7.6.
There are other reasons which call for a correct pH level:
Once above 7.6, calcium in the pool will precipitate to a visible cloudy form (accentuated in hard water areas).
This gives a milky appearance to the water, and hinders the filtering, deposits may also appear on the pool walls and fittings.
Once the pH level falls below 7.0 the pool water becomes corrosive causing eye irritation and affecting mucus membranes. There is also a long-term threat to metallic parts in the pool.
The quality of the pool water is highly dependent on maintaining the correct pH level.
CHLORINE
Standards for the amount of residual (free) chlorine in the pool water may vary from country to country, depending on health authority regulations. Typical legal requirements are between 0.2 and 3.0 parts per million, (i.e. 0.2-3.0 milligrams per litre).
What is understood by free or residual chlorine?
Even after the filtering process, certain bacteria remain to be destroyed by the disinfecting action of the chlorine which is usually acting on the bacteria in the form of hypochlorous acid.
A quantity of chlorine that is added to the water (in excess of that needed to destroy bacteria and oxidize organic material) remains free to combat new bacteria introduced by bathers or atmospheric agents.
This chlorine remaining in the water in the form of hypochlorous acid is known as free, residual chlorine.
Filtration
It is essential that the filtration is accompanied by chemical treatment of the pool water. The two processes are complementary to each other.
WORKING PRINCIPLES
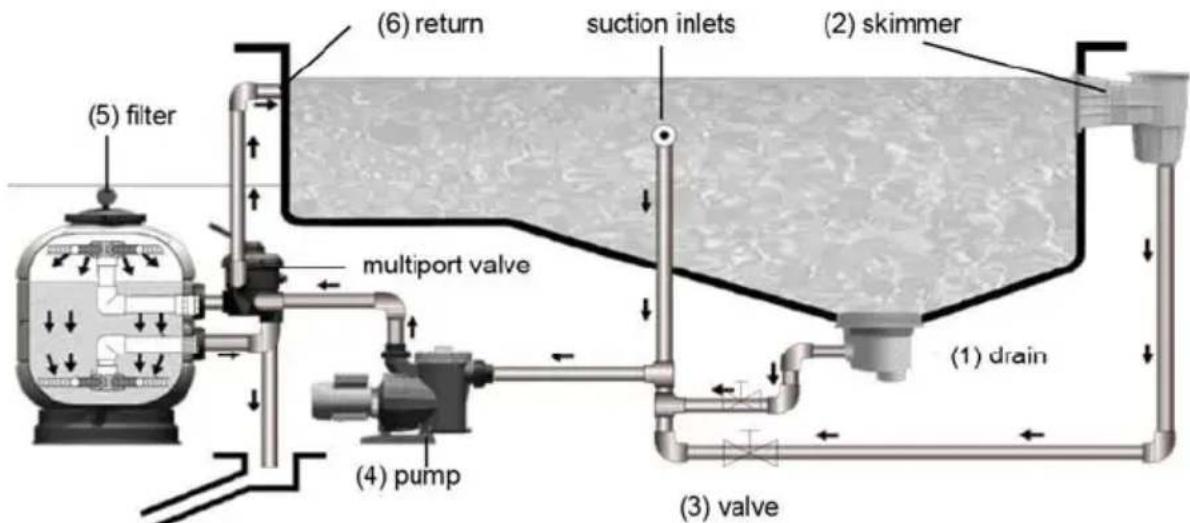
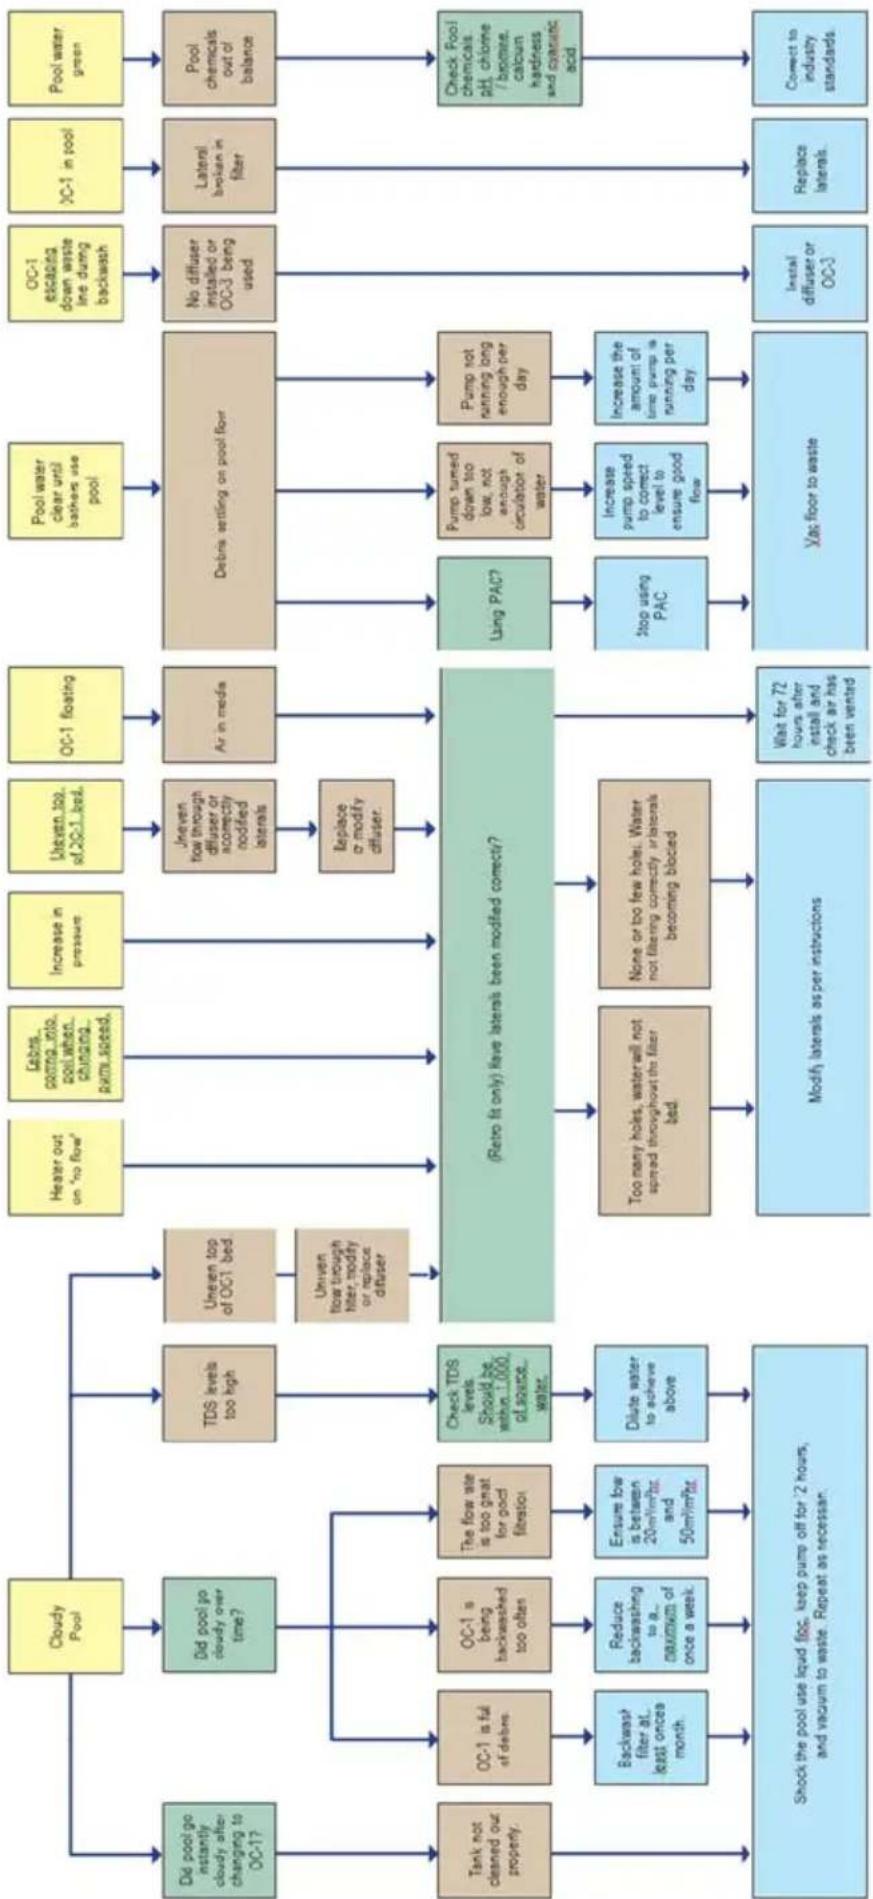
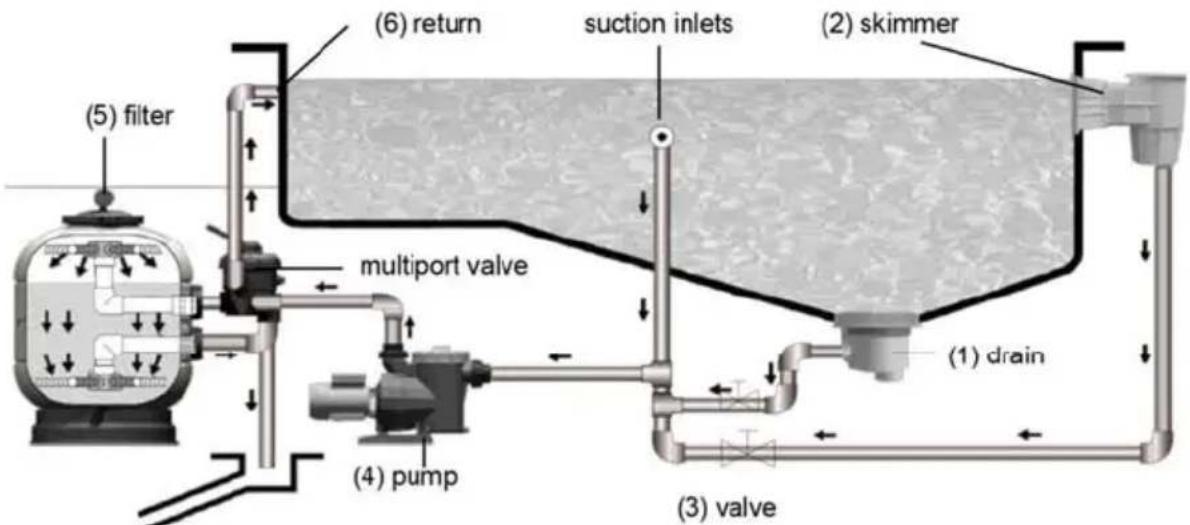
Water is taken from the main drains (1) on the bottom of the pool and the skimmers (2) at the pool surface and fed via separate pipework, with their corresponding valves (3), through the pump (4) to the OC-1 filter (5).
After filtration, the water is returned to the pool via return inlets (6), which are usually installed on the opposite side of the pool to the skimmers and main drains.
Once in the filter, the water is circulated downwards through the OC-1 media and suspended particles are retained.
The OC-1 media needs to be washed at regular intervals to remove the particles it has retained, this is known as backwashing.
Backwashing is achieved by reversing the flow through the filter and directing the water containing the dislodged particles to the drain.
The filter will need backwashing approx once a month in normal domestic usage. If used in a commercial or semi commercial environment, this should be increased to a maximum of once a week.
Bearing these principles in mind, the following installation and operation instructions should not represent any problem.

INSTALLATION
The filter should be installed as close as possible to the swimming pool and preferably at a level of 0.50 meters below the surface of the water in the swimming pool. Make sure there is drainage available to use.
IMPORTANT: Do not use an iron and hemp pipe for the selector valve connection, it is essential to use plastic accessories and TEFLON tape. The pipe size connection on the multiport valve will be either 1.5" or 2" BSP thread.
Always leave enough space round the filter in order to perform the necessary examinations and maintenance during the filter's life. The filter should have a minimum of 20~cm of free space around it for correct working.
ASSEMBLY
Follow the below points to correctly assembly the filter:
1.- Place the filter on a horizontal and clean surface.
2.- Place the filter in its final location.
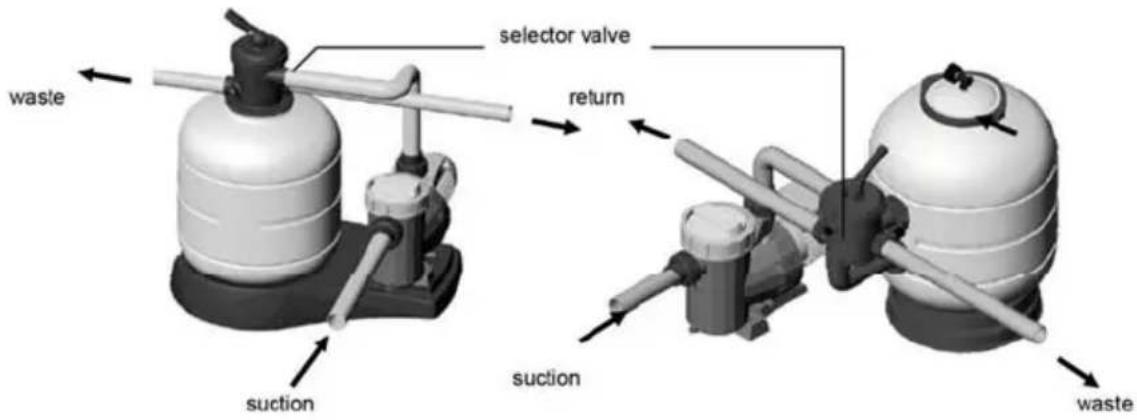
3.- In case of a filter with a side mount valve, install the multiport valve on the filter. Make sure the connections between the valve and the filter are correct.
4.- There are 3 connections to the multiport valve: from the pump, to the waste drain and back to the pool. Each of these three connections are clearly identified on the multiport valve.
5. Install the pressure gauge assembly and air purge (see exploded view). It is not necessary to use teflon tape, as the watertightness is provided in this case by the joint. Do not tighten the T with a tool, as hand tight will be sufficient.
OC-1 LOADING
If OC-1 has not already been installed in your filter, fill the filter with the quantity of OC-1 as detailed on the filter sticker. Procedure as follows:
1.- Fill with OC-1 when the filter is installed in position (See ANNEX I)
2.- Take off the lid (multiport valve if top mount)
3.- Pour the required quantity of OC-1 into the filter.
4.- Fix the filter lid / multiport in place and connect up the pipework as required.
FILTER OPERATION
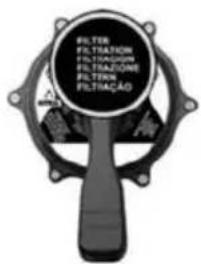
The multiport valve has 6 positions that select the necessary operations to obtain the maximum efficiency from the filter.
IMPORTANT: Always switch off the pump, when changing the position of the multiport valve.
MULTIPORT POSITIONS

0.8 kg/cm² - 11.4 PSI: Normal pressure at the beginning of a filtering cycle.

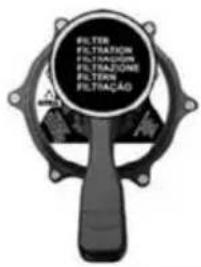
Filtration
This is the position that the multiport valve will be in most of the time. The water is entering the filter at the top of the filter and passing through the OC-1 filtration bed and returns back to the swimming pool.
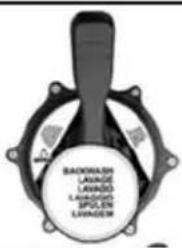
BACKWASH
This position reverses the flow from FILTRATION. The water now enters the filter at the bottom and is removed at the top. This is used as part of the cleaning process of the filter.
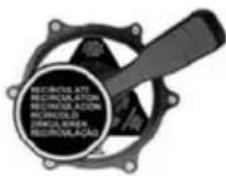
RECIRCULATE
In this position, the selector valve allows the water from the pump to go directly to the swimming pool without passing through the inside of the filter. This is normally used. If there is an issue with the filter or if certain chemical treatments are being used.
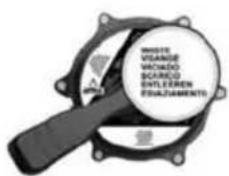
WASTE
If the swimming pool needs to be drained, this can be done using the filter pump. In order to do this, the selector valve should be in the "WASTE" position. The motor is run with the main drain valve fully open, for the pump to have sufficient suction. For the pump to suction, keep the prefilter and the main drain pipes full of water. Before drainage, make sure that the skimmer valves and the bottom cleaner valves are closed.
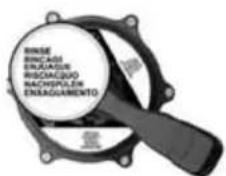
RINSE
In this function the water travels through the filter in the same manner as "Filtration" but instead of returning to the pool the water is now directed to the drain.
CLOSED
As its name indicates, this position is for closing off the water from the filter to the pump and it is used for opening the collector pre-filter of the pump.
START UP
When the filter has been loaded. Proceed as follows:
1.- Place the multiport valve in the RINSE position.
2.- Switch on pump.
3.- As the water enters the filter, open the air bleed on the pressure gauge tee, there will be a lot of air to purge from the filter. Gradually you will see water rise within the filter (if you have a clear lid) when water starts to come out of the air purge, close it.
4.- Stop the pump and move the multiport valve to the FILTERATION position.
5.- Switch on the pump. You are now filtering the water.
Over the next few days, occasionally open this air purge to check if any more air has accumulated and needs purging. On start up some OC-1 will float, this is perfectly normal. Over the course of approx. 3 days it will all sink.
BACKWASH / RINSE PROCEDURE
Periodically, as detailed in this manual earlier, the filter media will require cleaning. The procedure is as follows:
1.- Switch off the pump.
2.- Move the multiport handle to the backwash position.
3.- Open the valve on the backwash / drain line (if there is one)
4.- Switch pump back on for approx. 30 seconds.
5.- Switch pump off and move multiport handle to the rinse position.
6.- Switch the pump on for approx. 30 seconds.
7.- Repeat the procedures 1-6 leaving the pump running for 2 minutes each time.
8.- Close the valve on the backwash / drain line (if there is one)
9.- Move the multiport handle to the filtration position.
10.- Switch pump back on.
MAINTENANCE
Do not use solvents for cleaning the filter, this could damage the filter, especially its finish.
Always replace the joints and pieces that may not be in good condition.
Backwash and rinse when needed, as per the instructions specified in this manual.
Clean the OC-1 every year for a better performance. It's recommended to change the OC-1 inside the filter approximately every 5 years.
WINTER PERIOD:
In order not to damage the filter during the winter period, please follow the instructions below:
Perform a backwash and a rinse as previously detailed.
Remove the water from the filter.
Take off the lid to ventilate the filter in the period of inactivity.
When you need to start up the filter again after a period of inactivity, follow the instructions stated in the paragraph "START UP".
SAFETYWARNINGS:
Never start up the system without water.
Whenever you operate the filter or the selector valve, switch off the pump first.
Never allow children or adults to sit on the system.
Do not connect the filter directly to the water network, as the pressure of the water may be too high and exceed the maximum work pressure allowed by the filter.
Do not clean the lid with solvents, as it may damage its properties (finish, transparency ...).
As all the connections are made with joints, it is not necessary to tighten the nuts excessively therefore avoiding the possibility of breaking any plastic parts.
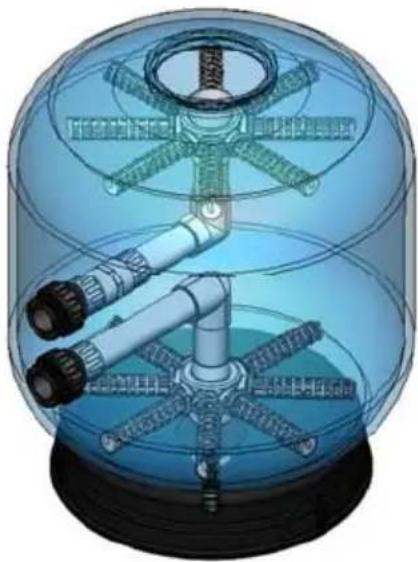
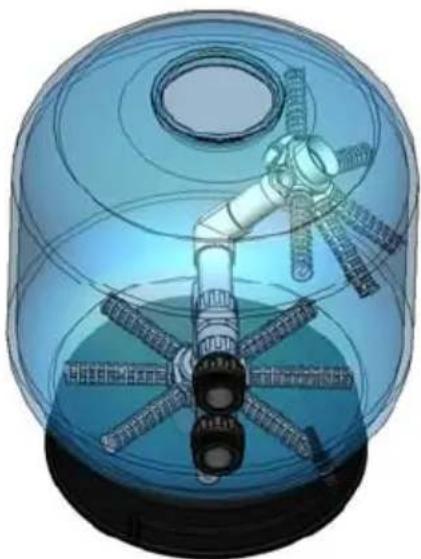
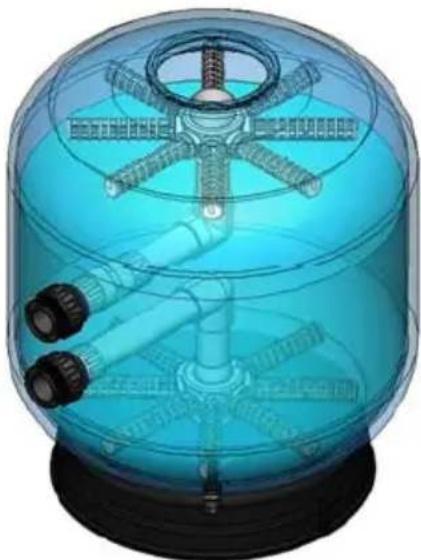
ANNEX I:INSTRUCTIONS ROTATING DIFFUSER
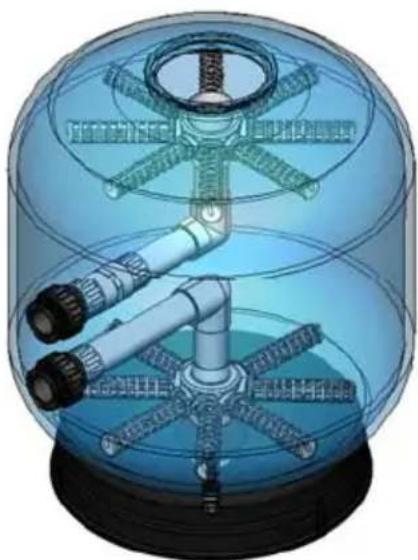
1- Remove the lid.
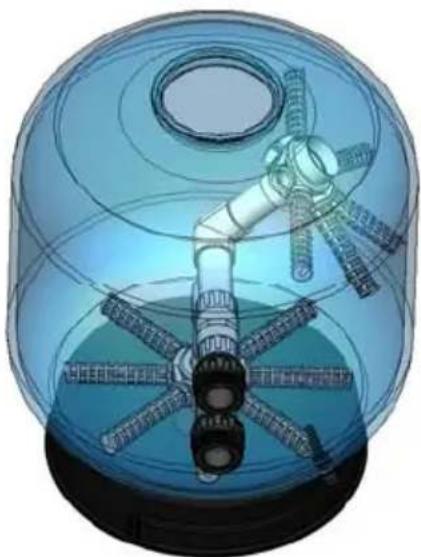
2- Remove the necessary laterals and turn the diffuser to fill the OC-1 media. (check the media weight at the characteristics sticker).
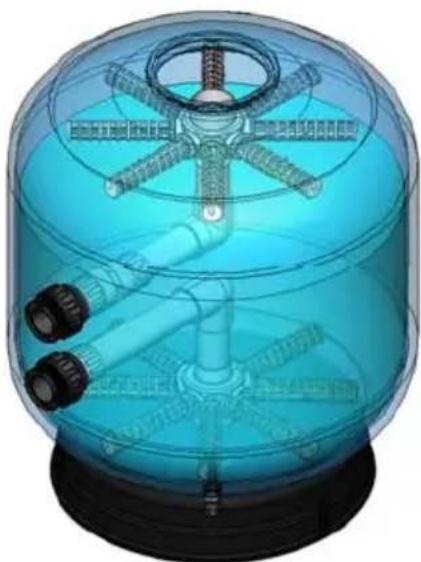
3- When the filter is full of the OC-1 media screw the laterals on to the hub and turn the diffuser in vertical position. (Ensure that the open line looks at the top of the filter).
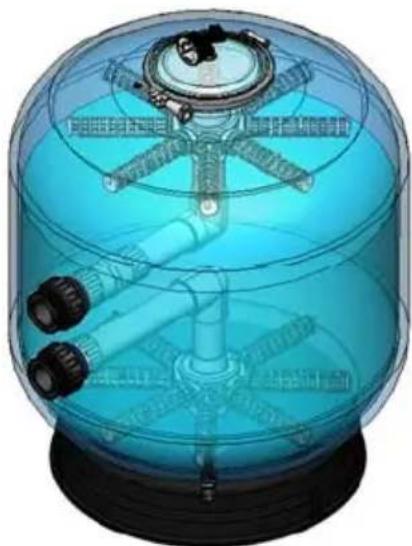
4- Put the lid again, and the filter is ready to work.
0.8 kg/cm² - 11.4 PSI: Normal pressure at the beginning of a filtering cycle.
Filtration

1- Retirez le couvercle.
0.8 kg/cm3 - 11.4 PSI: Normal pressure at the beginning of a filtering cycle.
What happens to the water in your pool?
Do not use solvents for cleaning the filter, this could damage the filter, especially its finish. Per pulire
POSICOs DA VALVULA SELETORA

0,8 kg/cm² - 11,4 PSI: Normal pressure at the beginning of a filtering cycle.
FILTRACAO

0.8 kg/cm² - 11.4 PSI: Normal pressure at the beginning of a filtering cycle.

FILTRELEME
Noemy Baxhen ypoBHeb PH?
IIDEAJIbHbIyPOBEHb PH B BACCEHNE DONKEH BbITb MEKJy 7.2 I 7.6.
XlopdoJKeH npncyTcBOBaB B 6accHe B DOCTaTOHOM KOJIueCTBe, YTObI ppeoTbpaAaTb o6pa3OBaHne pa3NJHbIX MKNpOoPraHH3MOB. Ho DeiCTBnE Xnpa 6ydt 300fekTNBbIM, eCNI ypoeHb PH 6ydt HaxoDHTbc MeKdy 7.2 u 7.6.
Cyuctbye tse HeckoIbKO npuHn, 3-3a KOToPbIX yPoBeHb PH DoJKeH 6bITB HOpMe:
EcInypoBHe PH BbIe noka3aTeTn 7.6,TO Bo3dEcnTBe KaIbIg npBcET K NOMyTHEnIO BObl.
Ecnn ypoBeH naaet Hnke 7.0, BOna MoKeT Bb3BaTb pa3dpaxHeHne Tn3n3nCTbIX o6oJouE, n TakOy ypoBeH PH taKKe HeratNBHO cKa3bIBAeTcH Na MeTAnIIuecknx KOHCTpyKuX 6accenHa.
BnIHe OeBnHO, YTo KaeeCTBO BoDbI B IepByO oupepe3aBnCt OT yPOBn PH.
XJOP
CtaHapTb KoJIueCTBa OCTaOHTHO (CBO6DHorO) XIOPA B BOe 6acceHa MOrTy BapbnpoBtB 3aBNCMOCTn OT CTPaHbI H ee npabIN 3dpaBOoxpAHen. ObuHcYoCTaHOBHeHHie 3aKOHm Tpe6OBAHn PpeDycmATpnBAIoT OT 0,2 Do 3,0 qactnU Ha MNIIIOH (T.e. 0,2 - 3,0 MNIIINrPAMMOB Ha IInTp).
YTo Ha3bIBaEeTc CBO6oDhBIM XJIOPM?
JaKe nocJe Ipocecca FInbTpaunB BOe ocTaetcKaKoe-TO KOnHecTBO 6aKTePn. Jnra daJIbHeJSeI 6Opb6bl C 6aKTePnMn B Ody Do6abJrEeTcX NOp B BVne XIOpHOBaTnCTO KNCLOTbl.
JaKe nocJe npouecca fHbTpauu B Boe ocTaetcKaKoe-TO KOJIueCTBO 6aKTePn. DnA daJIbHeuwe 6Op8bC HOBIM 6aKTePnMn B BOy DoabBnreTc DOONHHTeBHOE KOJIueCTBO XIOpa. IMEHHO 3TO KOJIueCTBO XIOpa Ha3bIbaeTc CBO6OHDhIM XLOpOM.
Xlop, octaBmnc B Boe B Binde XnOpHOBaTnCToK KcNTobl, H3bBAHOT CBO6OHNbIM OCTaTOUHbIM XIOpOM.
ΦNJIbTPAUIN
Oueh BaXHo, YTO6b fHbTpauCnPoBOxJaIacb XIMNHeCKo OUNCKo BObl BaccenHa. PeY uET oDbvX dOnONHJIOuNX dpyr dpyra npoueCCax.
INPHUNIINPABOBtI
Boa BcscbBaetcpe3 dpHaeKbI KOJIeKToP (1), paoIOxKeHHb Ha nhe 6accHeHa, n cKMMep (2) Ha CTeHke 6accHeHa, 3aTeM, yepe3 OTdEINbH ty6oBpOBO C COOTBeTCTByUcIMn KnaHAMn (3), Boa nonaAeT B Hacoc (4) n oCne 3TOrO yke HenocepDCTBeHNO B OINbTp OC-1 (5).
Iocne fbltpaun BOda BO3BpaaaetcB 6aceH ueep3 BO3BpaTHbE BXObl (6),KOTOpbIe obHyHO yCTaHaBnBAOTcH a npTINBOIOJOKHO cKMMpeam m OCHOBHbIM CTOKAM CTopoHE 6accenHa.
BHytpn pfNbTpra BODa npoxoHIT uepe3 HanoHHTeIb OC-1, KOtOpby yapedxmbaet B3BeWeHHbe qactubl.
HanoHnTeB OC-1 Heo6xOIMO peryIpaHO npMbBaTb dna ydaJIeHna 3aepKaHHbIX qactNu. 3Ty npOeDpy Ha3bBAIO6batho npoMbIKoN.
O6paTHa npombIKa npo3BOUNTCyIeM CMeHb HapabHeHnnoTOKA B pInbTpE, B pe3ynbTaTe Yero BOda, coepkaaJ 3arpa3HeHn, HapabJIeTcB DpeHaKhBI KOJIeKTOp.
Pn peryIyIpHOM 6bITOBOM IcNoJIb3OBAHHn PnIbTp Heo6xOJIMo NIOBepraTb ObaTHOH IpomBbKe PnpMepHO pa3 B MeCau.
Pn IcNoJIb3OBAHHn B KOMMpecko INI NOlyKOMMepuecko CpeDe npOMbIKy PnIbTp a Heo6xOJIMo BblIOJHrTa MaKcIMMyM pa3 B HeJeIO.
PnHmMa BO BHMaHMe BCE BbIeCKa3AHoe, INcEpy HNCTpyKcIN pO6nEMbI NO MOHTaxy He DoJKNHb BO3HNKHyTb.
YcTaHOBka
ΦnIbTp dOJIkeH 6bITb yCTaHOBJIeH KAK MOXHO 6JINKe K BaccSEHy I JKeIaTeJIbHO Ha ypOBHe 0.50 MeTPOB HIXe NOBepxHOCTN BObl B 6acceHe. Y6eINTecb HAnuHIOCTyHrO CnBa, KOtOpB MoXHO nCNoJIb3OBAbTb.
BnmaHne: nna coeHHen Hnapana c TpybO uCnoNbayte ToIbKO Tpy6bl PBX n TeFIOHObyIO neHTy. CoeHNHTbHbI naTpy6ok HA MHORONOPTOBOM Klanana He DonKeH NmEt b pe3b6y 1,5"nn 2".
Bokpyf nIbtpa ocTabe cbo6oHoe npocTpaHCTBO doTaTOHoe dnyo6cbTba ero o6cnykBaHn. Ipn paBnBho pa60tby fKnbp a BOKpyr Hero donxho 6bItb, KaMmHmym, 20 cm cbo6oHoro npocTpaHCTBa.
CEOPKAΦNJIbTPA
- NomeCTIte ΦnIbTp Ha UHTyO Trop3oHTaJIbHyIO NOBepxHOCTb.
2.-YCTAHOBHTe 6OKOBOI cEKeKTOHb BEHTINb FJIbTpa.
3.ДифпьрвсбokobbIMКлanaHOM Heo6xOIMO yctahOBHTMHORONpTOBbI KlnanHaФнlbTp.
4.-PpOBepbTe TPN CNeDyUOx CoeINHeHn: CoeINHeHne Tpy6bl Hacoca C BHTUNEM, CNBHOrO OTBepCTN C BHTUNEM, BEHTUNA C o6paTHbIM KnaNaHOM. KaKdoe n3 3TNx CoeINHeHn YeTko 0603HaueHo Ha cAMOM BeHTUNE. - YcTaHOBnTe MaHOMeTp n CnCTeMy npOyBKn BO3DyXom (CM. PncyHok B pa3pe3e). YcTaHOBnTe MaHOMeTp, nIa 3TOrO Bam He NoTpe6yETcra Hn TeΦNoHOBA JneHTa, HN KaKHe-Ni6o DoONHInTeNbHbIe INHCTpyMeHTbl. IpocTo npKpyTnTe MaHOMeTp K pNlBtpy.
3AΓPY3KA HANOLHITIEL OC-1
EcnBauΦnIbTp eue He 3aONHeh OC-1, HanoJIHte ero HyKbIM KOJIyEcTBOM OC-1 B COOTBeTCTBm C yka3aHnMa Ha Ta6NIuKe cnIbTpA. NopdOK DeiCTBn:
- 3arpykaTe OC-1, kOrdaФиNbTp yctaHOBNeHa pa6ooyu no3nUIO.
- CHIMMTE KpbIiKy (MHORONOPTOBBI KJIanaH, ecn OH yCTaHOBNEHaBePxy).
3.HacbInbTe HxKHOe KOINueCTBO OC-1BΦnIbTp. - BepHnTe KpbIuKy / MHOrOpTobBkIaHa H MeCTO I- NIOCoEINHtE Tpy6oPBOB D COOTBeTCTBm CO CXeMoJ.
C
3KCNPLNYATALIN
Iocne toro kak qinbtp 3anolHeh. BbinoJHnTe cJeDyUOune DeiCTBna:
- IomeCTIte MHORONOPTOBbI KIaIaN B IIOJOKeHHe IIOJOCKAHNE.
2.BKJIIOUHTHe HAcOC. - Korga Boda nocTyntB qInbTp, oKpOte Bo3dyXooTBoD Ha naTpy6ke MaHometpa, TaK kAe H3 qInnbtpa 6yTe BblxOuNTb MHO BO3dyxa. Bby yBuINITE, KaB bHyTpN qInbTp a NoCTeNEHNO NobIiAaETcYPOBeHb BOdt (ecn y Bac npo3paHna KpbUka). Korga Boda NaHTet BixOOnTb N3 BO3dyXonPBODa, 3akpoTe erO.
- BbIKIOHTe HACOC IN NpeMeCTIte MHOrONOpTOBbI KJIanaH B NOJoxHeNcΦNJbTPALU
5.BKJIIOUHTe Haoc.Tenepb npoCxoOHT pIbTpaunB OBDI.
Ha npotjxhen CneDyUOxHn HeckoBkN DHei Heo6xoJIMo nepoJIOueckn OTKpbIbA Tb Bo3dyXooTBoD, YTO6bl npOBepntb, HcCKoJIncra Nn BΦnlbTppe Bo3dyu, n pni Heo6xoJIMocTn Bblnyctntb erO. B hauane HeKOtOpoe KOnuYeCTBO OC-1 6ydetPiabTa Ha NoBepxHOCtN, 3TO COBepWeHn HopMaIbHo. PnpmePno uepe 3 dHn BeCb HAnONHITeN b ocAeT Ha dHO.
ПОUEДУРAOOBPATHONПROMMbIKN/ПОЛOCKAHN
Kak yka3bIbaNoc baHHeB DaHHOM pykoOIOCTBe, HAnONHHTeB pHJIbTpA Heo6xOIMo nepnoOnueckn npomBaTb.
BbInOHnTe CneDyIOUne DeIeCTBna:
- BbIKHouHTe HAcOC.
2.ПомсгNTeMHORONOPTOBKIIKNANAHBNOIOXKeHnObpaTHoNpOMbIKM. - OTKpoTe BeHTINb Ha Tpy6e IaIbIpaTHoN IpomBIBKn / cInBa (ecTn TaKOBa IMeETcR).
4.BKJIIOHTe HAcO npIMepHO Ha 30 cekyHd. - BbIKIOHTe HAcOC N IepMeCTte KJanaH B NOJOKeHne IOJOCKAHNE.
- BKJIIOCHTE HaOCI npIMePHO Ha 30 cekyHd.
- NOBTOPUte DeICTBn1-6, KaKdbi pa3 BKNIOHaa HAcOC Ha 2 MInHyTbI.
8.3aKpOte BeHTnJIb Ha Tpy6e dIy o6paTHoN pOMbIKN / cIbBa (ecn TaKOBa NMeETcR). - NomecHTe MHORONOPTOBBI KJanaH B IIOJOKeHne FInbTpauM
- CHOBA BKNIOHHTe Haocc.
XOД 3AФИЛbTPOM
He npMmHnTe cpeCTBa Ha oChOBe pactBOpNTeIy yXoDa 3a qNJIbTpOM, TAK KAK 3TO MoKET
PnBBeCTN K noTepe 6Iecka.
Bcerda BOBpem 3aMeHnTe pa3nHbIe coeHHHe n cactn fNbTpa, BblJeDnne n3 cTpor n6o He OTBeauOuie Tpe6oBaHnM ekCnnyataun.
IIO MEpe Heo6xOaIMocTn BbIOnJIHrTe npOMbIKy fNtpa.
ДяdoctнжehmaKcimmaHbHoN3ФфкгТьHOCtpeKOMeHdyTeT npombyBaTb OC-1OHH pa3BroI.KaJdbIe5JeT peKOMeHdyTeT MeHrTaHANOHNHTeJIb OC-1BΦnblTpE.
YXOD3AΦNJIbTPOMB3IMHNIPEPNOD
K 3mHemy nepoody Heo6xOIMo NOIroTOBnTb qntTp cNeyouuM o6pa30m:
BbINOHNTE o6paTHyIO npOMbIKy i CINB nPOMbIKN B COOTBeTCTBne C BblIePnBeDeHHbIMN INHCTpyKlJMaM.
YdaJInte NOnHocTbIO BCIO BOy I3ФINIbTpA.
CHIMITE KpbIuKy QnIbTpA, YTO6bI OcyuEcTBnIocb npOBETpBaHne QnIbTpA B TeueHne BHe3KcIIyataUHOHHoro nepoJa.
No OKOHaHHN 3HMHeRo nepnoa DnI NOKIOueHna FInbTpHa Heo6xoDmO npOeNaT Bce Heo6xOdMble Warr KaK npn nepBOM BKIOueHn (CM. HcTpykUHO).
MEPbI INPEDOCTOPOXHOCTN:
ΦnIbTp MoXHO BKNIOaT TOJIbKO npH HAIuH N B HEm BOJbHe No3BONJIte DetAM INI B3pocNbIM CaINTBcH aΦnIbTp
He noikkuayane fubtp Hanpmyko BODonpoBody, TAK kak daBneHne BObl B BODonpoBOe MoKet npebbtaMakcmaIbHoe paOohee daBneHne fubnTpa.
He npmeHnTe pactbOpnten nIyOChKKn KpbIuKn FIOBtpa, TAK KaK 3TO MOKeT PnPBecT N K NOtepe 6neCa.
He 3aTnBaIe raIK CNuKOM CnJIbHO, TAK KAK PnactMaCCOBble 3NeMeH6TbI PmryT daTb TpeunHy.
Hnctpykun no npmeHHIO Bpaauozeroc dno
1. CHIMMTE KpbilKy.
2.CHMHTE60KOBbIcHaCTn HIOBepHITe 100dy30p,TOO6bl3aONJIINbEro HAnIOJIINHTeLEM OC-1 (IOCMOTPHe HxHyB BEC HAIOJIINHTeJHa Taabnnke Co CnueuuaKunm)
3. KOrIa HJIbTp 6yJei 3aONIIeH OC-1, PnBnHTHe 6oKOBBe qACTN K IeHTpy H BepHITe IIΦyO3p B EBPHTKaJIbHOe IIOJOKeIIHe. (V6eHITcB, YTO OKPbTb KaHaJ HApBaJIeH K BEPyXuJIke OJIbTPa).

4-Vikonasadtezpt,filtrjepripravenykpraci.

OC-1

- Residential Filter Instructions
- OC-1 Media
- Save Water
- Save Energy
- SAVE WATER SAVE ENERGY
- What happens to the water in your pool?
- "CHEMICAL" TREATMENT
- "PHYSICAL" TREATMENT
- PH LEVEL
- Why pH is important?
- CHLORINE
- What is understood by free or residual chlorine?
- Filtration
- WORKING PRINCIPLES
- INSTALLATION
- ASSEMBLY
- OC-1 LOADING
- FILTER OPERATION
- MULTIPORT POSITIONS
- BACKWASH
- RECIRCULATE
- WASTE
- RINSE
- CLOSED
- START UP
- BACKWASH / RINSE PROCEDURE
- MAINTENANCE
- WINTER PERIOD:
- SAFETYWARNINGS:
- ANNEX I:INSTRUCTIONS ROTATING DIFFUSER
- POSICOs DA VALVULA SELETORA
- FILTRACAO
- FILTRELEME
- Noemy Baxhen ypoBHeb PH?
- XJOP
- YTo Ha3bIBaEeTc CBO6oDhBIM XJIOPM?
- ΦNJIbTPAUIN
- INPHUNIINPABOBtI
- YcTaHOBka
- CEOPKAΦNJIbTPA
- 3AΓPY3KA HANOLHITIEL OC-1
- 3KCNPLNYATALIN
- ПОUEДУРAOOBPATHONПROMMbIKN/ПОЛOCKAHN
- XOД 3AФИЛbTPOM
- YXOD3AΦNJIbTPOMB3IMHNIPEPNOD
- MEPbI INPEDOCTOPOXHOCTN:
- OC-1
Brand : ASTRALPOOL
Model : OC1
Category : Water filter